Happy Tummy Conga Lines

IMG_5705

YOU. GUYS.

I know I have like umpteen zillion banana bread recipes on the blog, but seriously. Ignore the other ones (well, not really–they have their merits too.. just for today!)

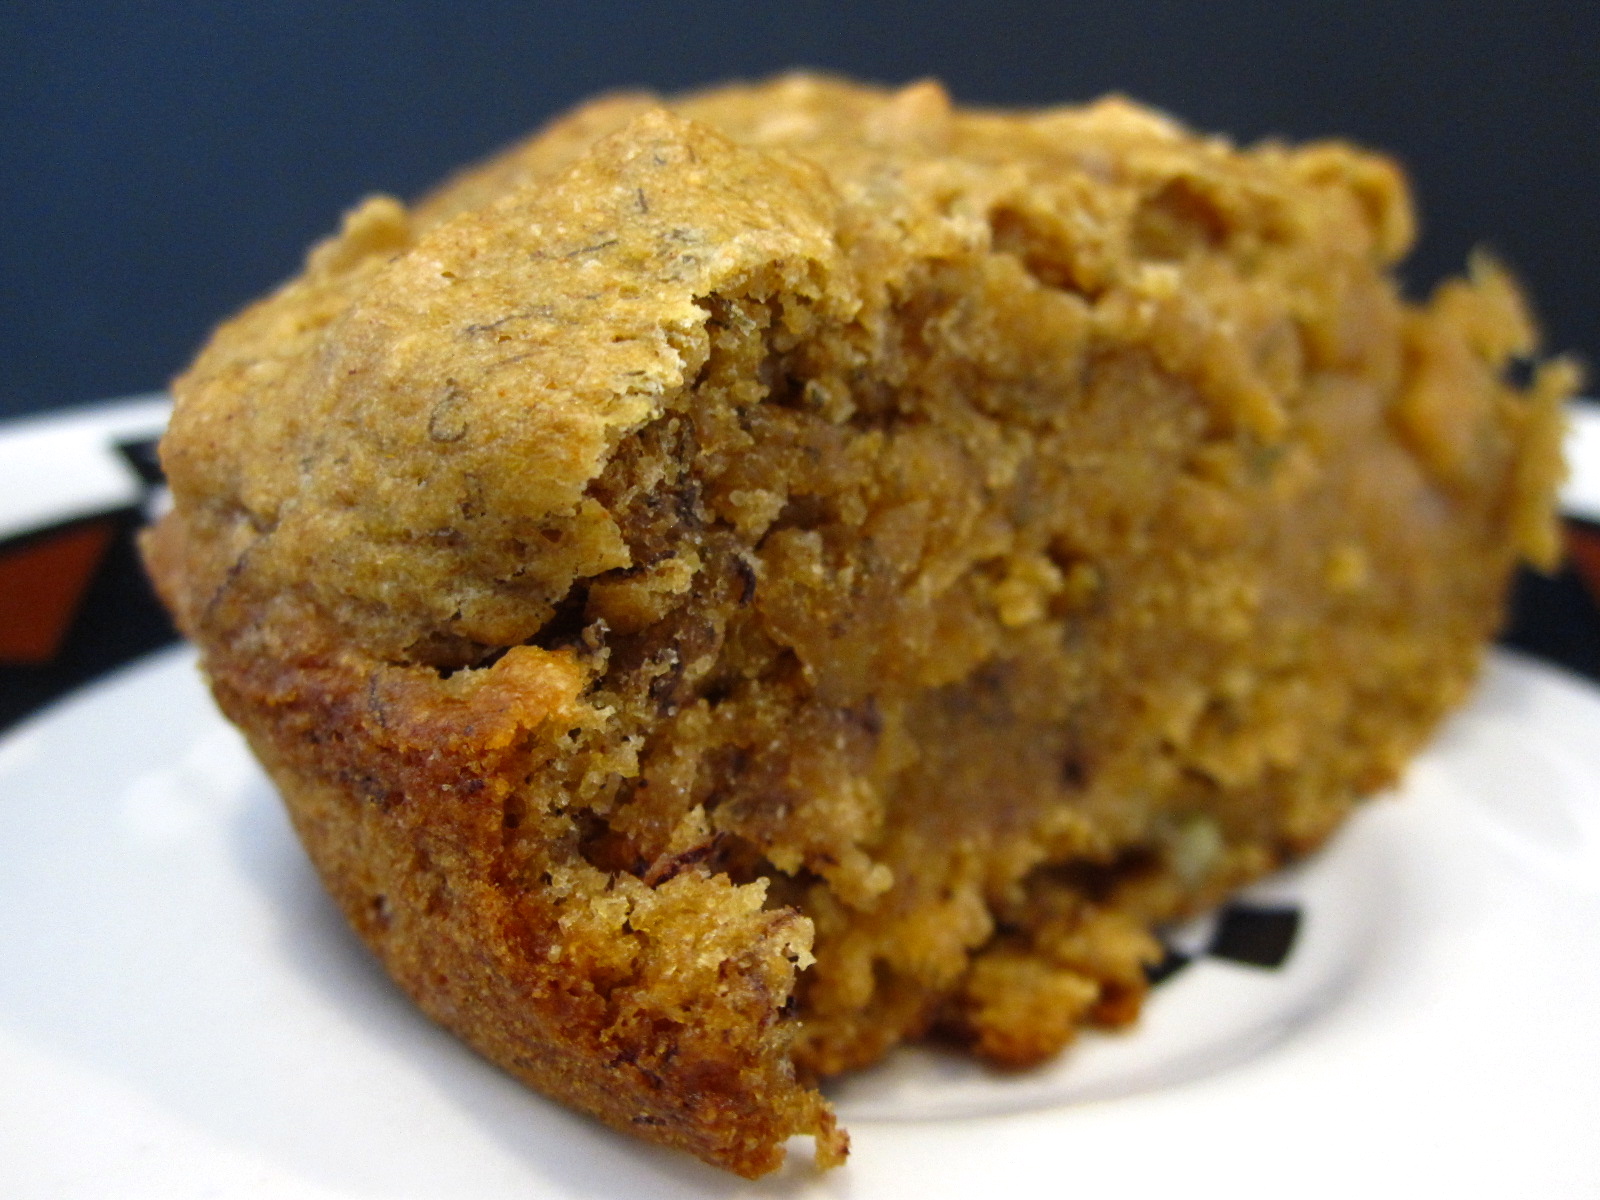
THIS is my favorite. Hands down, I’ve-already-eaten-two-slices-and-am-heading-for-another-one-someone-stop-me kind of bread. Like, half the loaf is gone (I’ve had help, let’s be real here).

IMG_5708

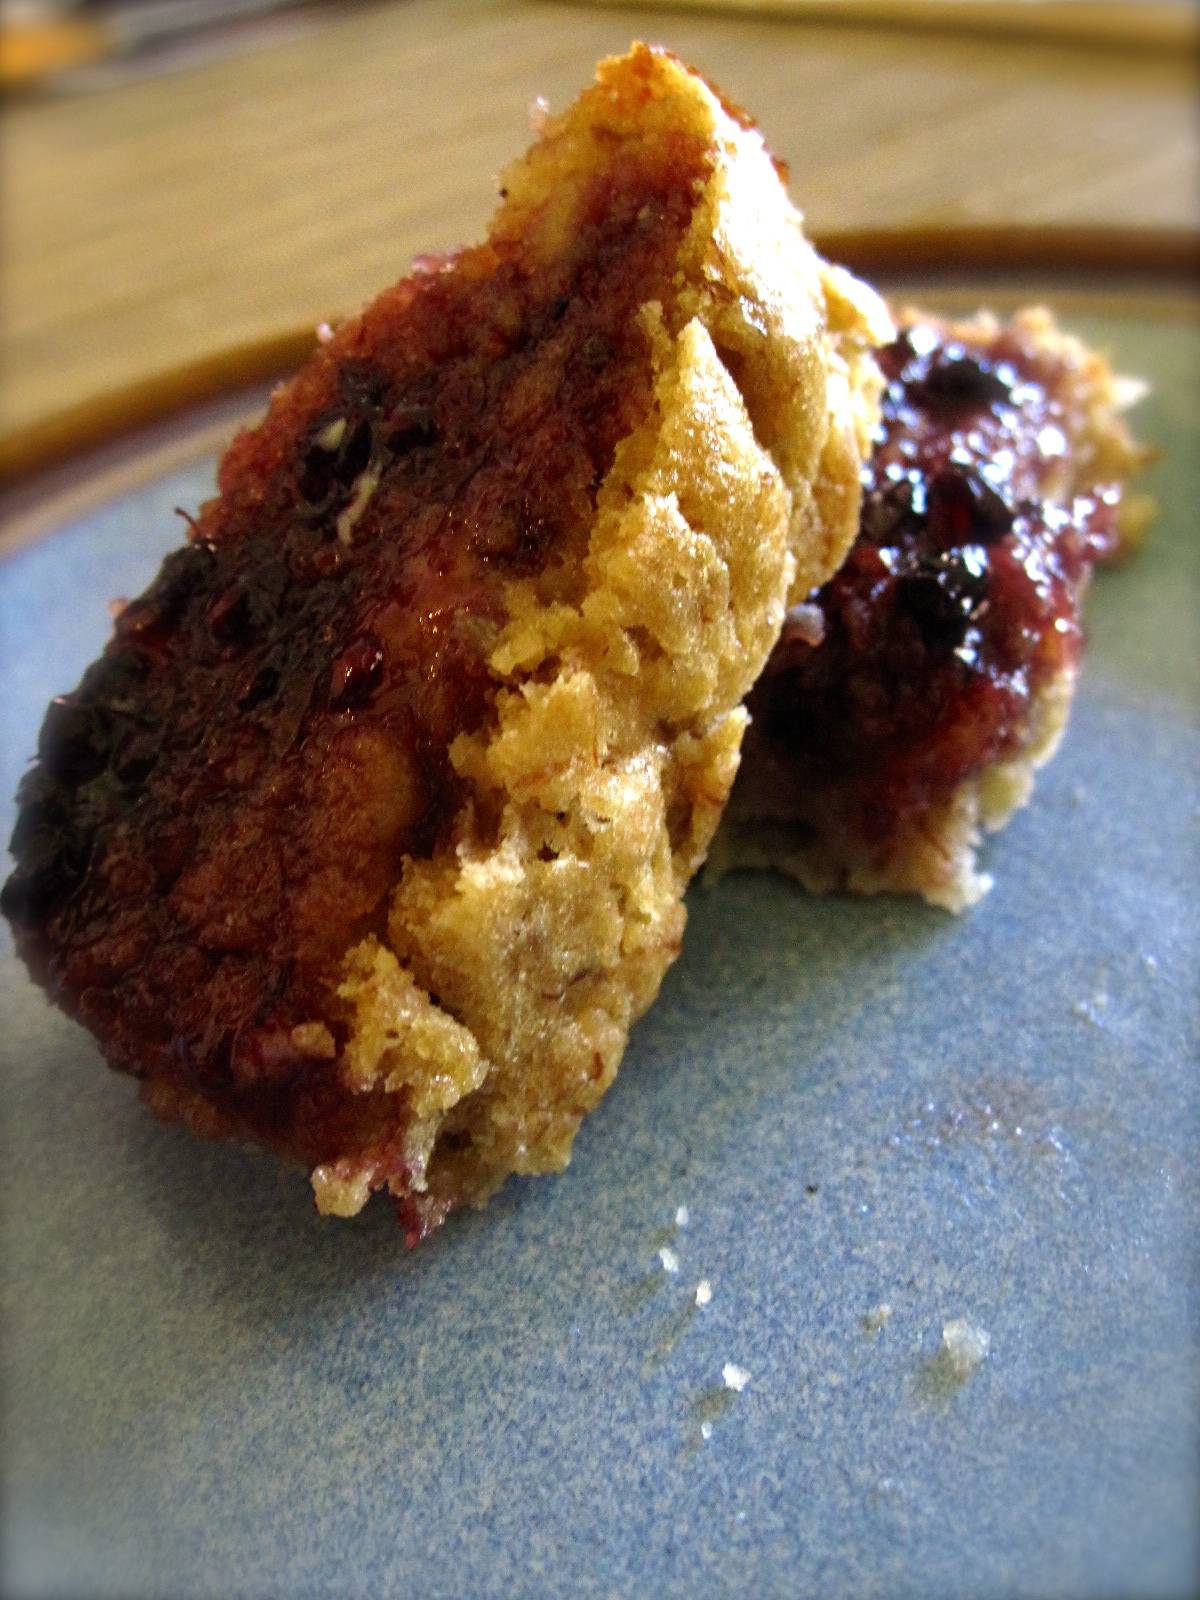
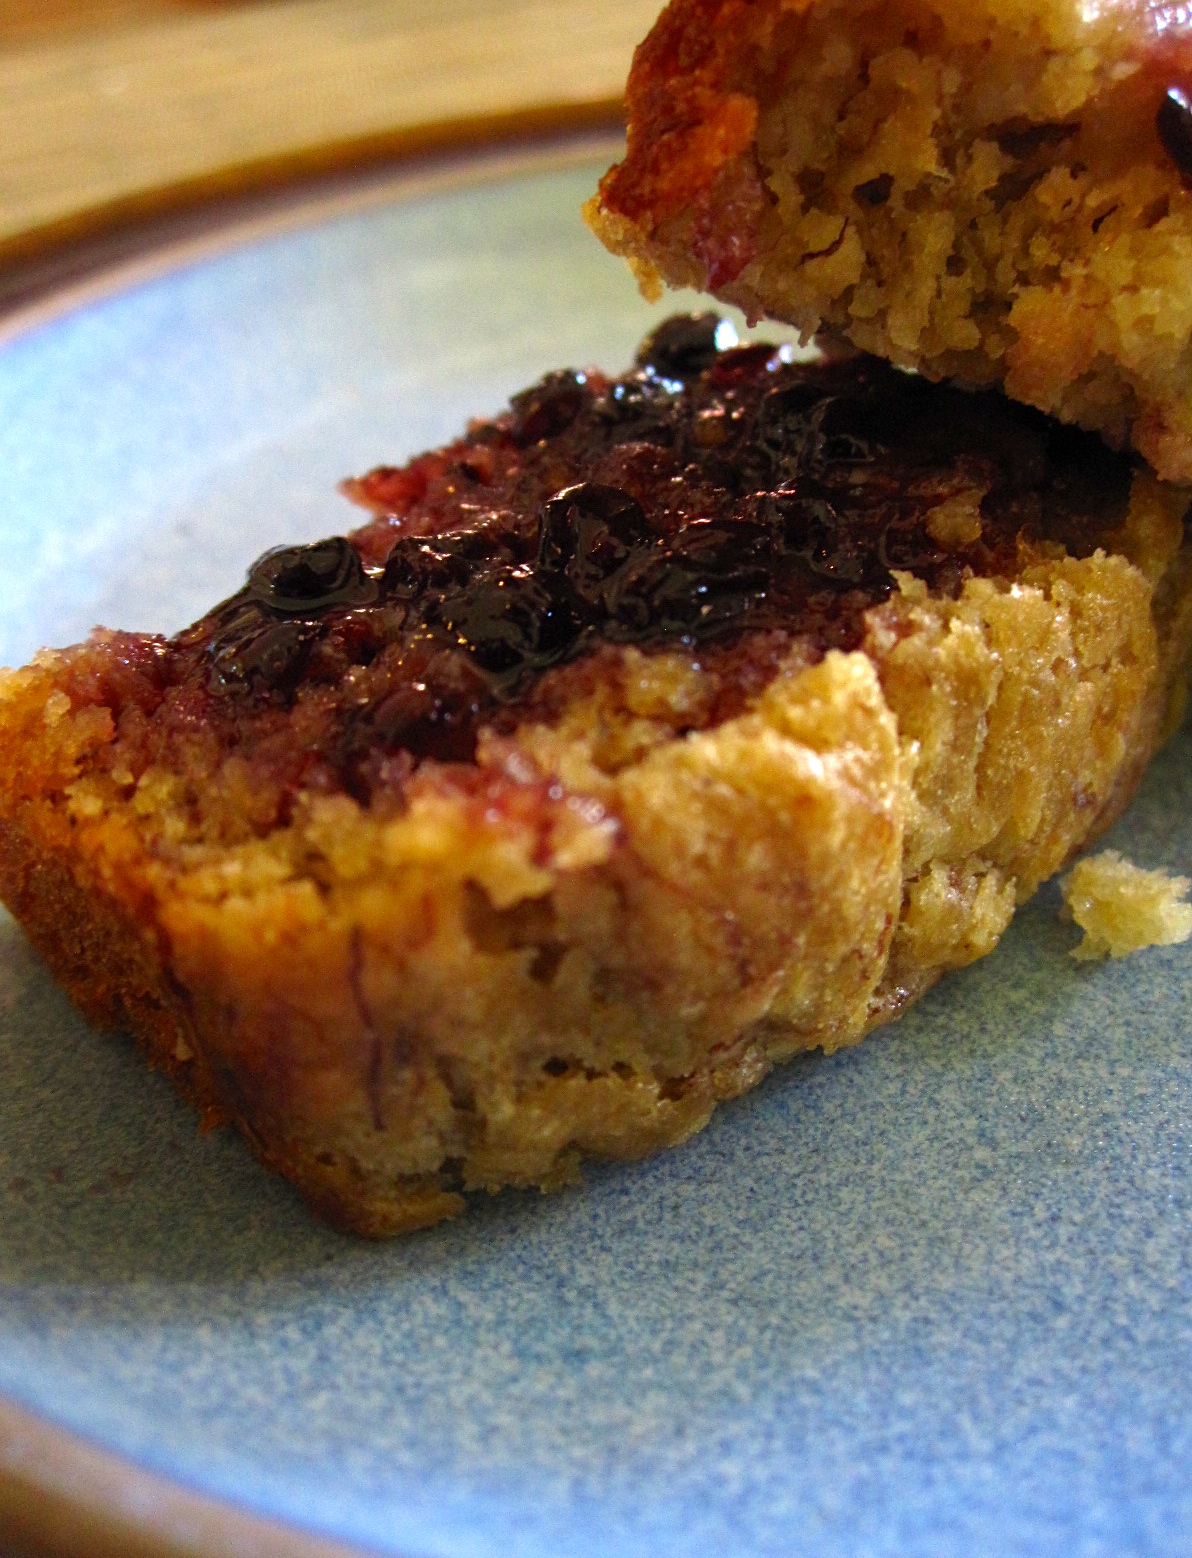
And besides that, it is FAB with blackberry jam. Especially when that jam is handmade and acquired from a lovely local source. I’ve never put jam on banana bread before now but I’m probably not going back. Ever.

IMG_5702

Luckily for me, not only is this one a fast and easy one to whip up, but it’s full of healthy for me things like coconut oil and buunahhnuhhsss and whole grains and honey.  Good thing too that we had literally two bunches of dead bananas spread out between the fridge and the freezer and they were looking so sad and dead and brown… clearly they needed to go into something delicious like this. They’re much happier now, they wanted me to tell you.

Go make your dead bananas happy. Bake them into something that then makes your tummy do a happy dance! Mine is, we could have a tummy conga line. Umm yeah okay this is getting out of hand with talking bananas and gastrointestinal conga lines, but seriously. Make, eat, love!

IMG_5706

Why is it gone?!

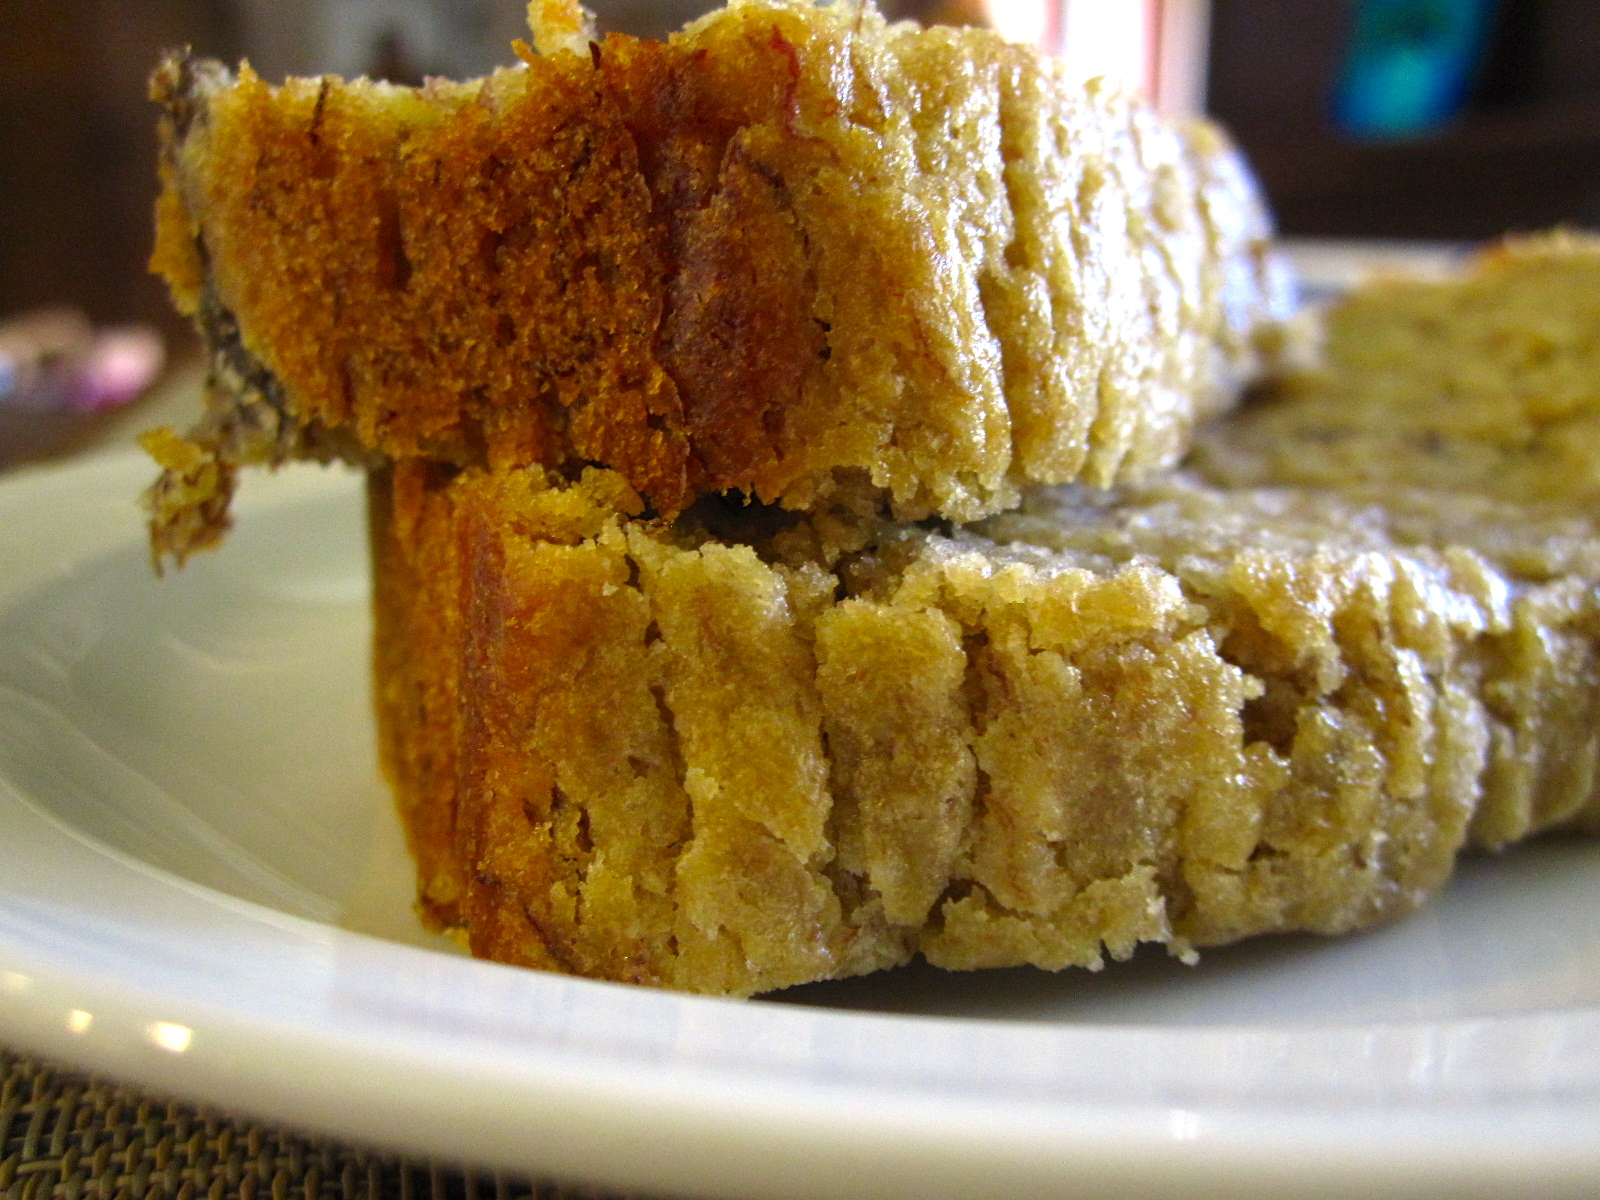
Coconut Oil and Honey Banana Bread

If you’re not a coconut fan, don’t worry! There’s no coconut flavor noticeable in the bread—I used refined coconut oil for baking, as it can take high heat. This bread is SUPER hydrated (remember, we don’t use the m word), but not squishy. It’s the perfect balance between hydrated and dense, with a nice crumb. It only has a 1/4 c of honey added, so make sure your bananas are deady-dead-dead. The deader the bananas, the sweeter the bread! Mine were literally black. So gross…until they aren’t! This makes one loaf, and the recipe is (ever so slightly modified) from Relishing It, here! SO happy I found it.

  • 1/3 c refined coconut oil
  • 1/4 c honey (mine was local, yay!)
  • 2 eggs
  • 1 tsp vanilla
  • 1.5 c mashed, dead bananas (I used about 5)
  • 1.75 c whole wheat pastry flour
  • 2 tsp baking powder
  • 1 tsp sea salt
  • a few sprinkles of chia seeds (can be left out)

IMG_5699

Preheat the oven to 350, and lightly grease a loaf pan (I use more coconut oil).

In a mediumish bowl, whisk together flour, baking powder, sea salt, and chia seeds. In a smaller bowl, have fun mashing up all of your dead bananas and trying not to be too disgusted by how brown they are. Ahem, moving on…

Stir together coconut oil and honey until they’re creamy and mixed. Slightly beat eggs and then stir them in as well, followed by vanilla. Mix lightly until combined, then stir in dead banana mashup. Adding the dry ingredients a bit at a time, stir them in until the dry is just incorporated–don’t over mix! No one wants tough buhhnahhnuhh breadz.

Pour the batter into the prepared loaf pan, and pop it into the oven for just about 45 minutes—mine came out at 45 but probably could have gone for a few more. Let cool in the pan for a bit, then turn out onto a cooling rack to cool completely. I’m sure it stores well, but as mine is rapidly disappearing I’m sure we’ll have no issues on that front…

IMG_5712

Sunday things and pudding.

IMG_5114

Things.

Pictures today, since I’m feeling more visual and less like the chatterbox I usually am. 

This. No words needed.

IMG_5101

 Architecturally glorious, but…  

2013-05-12 10.24.44

Mother Nature always wins! 

IMG_20130512_101456

Look! A barley-rice yin-yang! 

IMG_5108

And now the real subject of this post… pudding!! 

IMG_5111

Mmm, pudding. There has been so much pudding in my life lately, this is a trend I’ll be continuing. This one is barley and brown rice (would have been all barley but I was a little short—a fortuitous happening since barley and brown rice go well together!), made with rice milk and coconut milk. I like it for breakfast with more milk added, or dessert with a chopped date or some raw honey (or maple). Kind of whatever floats your boat, any way you eat it, it’s delicious! Comforting in the tummy, warming, and soothing. 

IMG_5119

IMG_5120

Coconut Barley-Brown Rice Pudding

Recipe lightly adapted from The Gouda Life, here! Makes a fairly good-sized vat… I got maybe 5 servings out of it? They were varying sizes though, some were bigger than others. 

  • 3/4 c purple barley, rinsed
  • 1/2 c brown rice (mine was kashikiri) 
  • 1 c original rice milk
  • 1/2 c water
  • 2 c light coconut milk 
  • 2 tsp cinnamon, plus more to taste
  • 2 tsp cardamom, plus more to taste
  • 3 dates, pitted and chopped
  • 2 tsp vanilla extract
  • shredded unsweetened coconut, for garnish
  • pistachios, for garnish

In a pot, combine barley, brown rice, rice milk, water, cinnamon, and cardamom. Bring to a boil, then turn down and let simmer until most of the liquid is absorbed. Stir in chopped dates. Once the liquid is mostly gone, add coconut milk 1/4 c at a time, stirring frequently (I found it helpful to stand there with a book and stir…it’s kind of like risotto), adding the next batch after the previous has been mostly absorbed. When all of the coconut milk is added, the barley should be mostly cooked (it should be a little chewy when done). Mine needed a little more time, so I added a bit more rice milk and let it cook longer. I tasted it as I went and added more cinnamon/cardamom or vanilla to taste. Let cool a bit, and top with shredded coconut and pistachios to serve. I liked mine with chopped date or raw honey, but maple is good too! 

IMG_5117

IMG_5112

My personality in four words: I eat bird food! Peck peck peck…

IMG_5032

Ahhh, a day off.

And… I have THIS!

IMG_5035

Mmm… birdseed. Peck peck peck.

Not even joking. You know those little seed thingies they put in birdseed mix? Yeah. These things:

IMG_5045

That I just ate for breakfast! And youuu thought I couldn’t get any weirder. HA!

These little birdseeds remind me of being in my grandma’s backyard and blowing bubbles… and feeding the birds! And quite often the squirrels… Anyway. I associate millet with sun-drenched afternoons with my gram, eating ice cream and getting soapy bubble stuff all over the dish towel in my lap. And then probably running through the sprinklers! So obviously I’m naturally inclined to like this seed, besides it being totally delicious.

IMG_5033

But anyway. Millet is an excellent grain substitute: creamy and kind of nutty tasting, high in manganese, magnesium, and phosphorus. So far I’ve only used it as a breakfast/pudding/dessert thingy, but savory biz is coming soon, just wait. I can’t believe I haven’t eaten this before—it’s like rice pudding but a thousand times better! AND it’s good for you, soooo… why not eat it for every meal?! This one has heart healthy fats from coconut milk, natural sweetness from dates (as well as a boatload of other good bennies like vitamins and minerals), and cardamom has the added benefits of (in Ayurveda theory) of being warming, improving blood circulation to the lungs, and balancing the doshas.

IMG_5034

Coconut Millet Pudding

Recipe slightly adapted from Delicious Living, here. As listed below, this one is vegan, gluten free, dairy free, and refined sugar free. Hooray! And… it’s delicious. Obvs. Otherwise I wouldn’t share it with you!

Rustle around and collect the following:

  • 1/2 uncooked millet, rinsed
  • 1 (14oz) can of light coconut milk
  • 3/4 c milk bev (I used Eden Soymilk, which is just soybeans+water)
  • 2 tbsp water
  • 1/4 c medjool dates, chopped
  • 3/4 tsp ground cardamom
  • dash of sea salt
  • 1 tsp vanilla extract
  • optional: pistachios for topping

Combine millet, coconut milk, soymilk, water, chopped dates, cardamom, and sea salt in a saucepan. Bring to a boil (Being careful not to let it boil over, oops no of course I don’t speak from experience…), covered, then turn it down to a simmer and let it cook, covered, until millet is fluffy and most of the liquid is absorbed, about 20-30 minutes (mine was more like 20), stirring frequently. Once millet is cooked, remove from heat and stir in vanilla. Top with pistachios for a garnish if desired! Excellent warm or cool.

IMG_5031

I’m alternative… or awesome? Let’s go with awesome.

IMG_5004

I eat greens in three meals a day.

No joke.

IMG_5009

I even put spinach in my oats. (I can hear you ewwwing, you know, through my computer). NOT cooked, mind you—it only goes in my overnight oats. With a buhhnahhhnuhhh. And then I eat them in lunch. And dinner. And probably a snack, if I could finagle it. You know how in previous posts I’ve mentioned putting spinach where it totally doesn’t belong? Yeah. I suppose oats would be one of those places… as would a banana scramble…? Whatever. I’m kind of  alternative. Or awesome… let’s go with awesome.

Ahem..

Movingggg… on!

IMG_5008

This time, spinach went in a smoothie! That’s at least a little more normal… but why I chose to make and eat this on day when it was cold and raining outside is beyond me. It was delicious but then I was promptly freezing. Whoops. Whatever, worth it!

And then you can do almond butter art on top of your smoothie, if you eat in in a bowl. Which is obviously reason enough to eat in a bowl, right?? Who doesn’t like an excuse to play with their food? Come on, channel your inner Jackson Pollock, you know you want to!

IMG_5006

Almond Coconut Green Smoothie

Gratefully inspired by The Edible Perspective, here! Makes one largeish smoothie bowl. Note that you need to freeze the coconut milk first, so make time for that if you want this later in the day!

  • 1 c light coconut milk
  • 1/2 c milk bev of choice (I used 1% milk)*
  • 2 c fresh spinach
  • 2 tbsp almond butter+more for drizzle
  • 1.5 tbsp unsweetened shredded coconut+garnish
  • 1 medjool date, pitted
  • 1/2 ripe banana
  • 1 tsp vanilla extract

*I would have liked mine thicker, more like a milkshake consistency—next time I won’t add as much extra milk. Up to you!  If you want it drinkable (as opposed to spoon-able), use 1/2-1 c extra milk bev.

Freeze 1 c of coconut milk in ice cube trays. Once it’s frozen, pop them out into your food processor (or blender, if you happen to have a decent one). Add in spinach, almond butter, coconut, date, banana, and vanilla, and blend until combined. Pour into a bowl (because that’s more fun!), and top with almond butter and coconut, and maybe some chia seeds. Preferably eat when it’s not freezing outside…

IMG_5007

Cast iron and being a gore-tex wussie.

IMG_4658

B Bread.

In. A. Skillet!

What is it about baking in cast iron that makes me feel so old school? Not even old school, more like a pioneer…like one of those badasses who trekked across America in wool. Ew. Itchy. I can’t imagine doing something crazy like that with no goretex. Clearly I’m not baller enough for that kind of trek. Besides, a covered wagon sounds all kinds of awful. But really… cast iron! It’s pretty freaking amazing.

IMG_4655

I’d never really considered baking in it before though, as weird as that is… previously to the revelation a skillet was specifically to be used for dutch baby pancakes and browning beef. Maybe naan. Annnddd…. that’s pretty much it. Except for maybe whacking some intruder if I ever had to deal with that kind of thing.

But now! Nowwww I can make banana bread in a skillet, which results in a ridiculously tasty crust and a fun circular shape. This makes me want to procure a baby skillet and make tiny cookies (skillet cookies are BOMB, they’re really more like a pie than a cookie).

IMG_4669

Anyway. This time I made a vegan banana bready thing… kind of like a hybrid between cake and bread, except not bad for you. You could use any recipe you want, just adjust the cook time accordingly as the banana bread will likely be flatter and will cook faster. I made a half recipe to fit my little skillet.

IMG_4665

Banana Skillet Bread

Recipe adapted slightly from A Splash of Something, here! These measurements are for the half recipe that fit in my baby skillet (about 6″). The bread isn’t overly sweet, and is excellent with nut butter (obvs I would say that…)

  • 1 c whole wheat pastry flour
  • 3/4 tsp baking soda
  • 1/4 tsp salt
  • 1/4 tsp cinnamon
  • 2 ripe bananas, mashed
  • 1/8 c organic grade B maple syrup
  • 1/8 c water
  • 3/4 tsp vanilla extract
  • 1 tsp canola oil
  • 2 tbsp unsweetened applesauce

Preheat the oven, and also the skillet, to 350.

In a medium bowl, whisk together flour, baking soda, salt, and cinnamon. In a larger bowl, mash bananas, then add in maple, water, vanilla, oil and applesauce. Stir in flour, until just barely incorporated.

Take the skillet out of the oven (carefully, it’s hot…), and melt a bit of Earth Balance or coconut oil in it, to coat the bottom and sides. Pour in the batter and flatten it out a bit, then bake for about 30 minutes, or until a tester comes out clean.

Once mine was slightly cooler, I brushed the top with a bit more maple syrup. Let cool in the skillet, and store tightly wrapped (I use foil).

IMG_4674

I’m hippie-granola…and apples are pretty freaking awesome.

I told you I was hippie-granola.

I wear leg warmers… and birkenstocks. Sometimes together… possibly more often than I care to admit.

My traveling attire when I went to Oregon was truly something spectacular… the usual leg warmers… and my yoga mat! Wow. People in the airport were REAL jealous, let me tell you.

Not my fault I was raised on tofu and bananas and other sorts of natural-type foods like peanut butter that separates (that no stir stuff has always creeped me out). Born in Berkeley, what can I say. Admit it, it’s part of my charm.

And look… I made granolaaaa!!! Like, real granola. Not like my type of hippie crunchy granola. I figured it would be easy and more cost effective to make my own, not to mention healthier, as I know exactly what goes in it. Not that we eat really sketchy granola, as a rule: Nature’s Path is pretty non sketch and delicious. But still. I wanted to try my hand at making some anyway… and I’m pretty sure it was a success.

Besides, this granola is full o’ the good stuff… like healthy fats from the pepitas and the flaxseed (can you say omegaaaasss!), whole grains (oats), and blood sugar stabilization from cinnamon. Apples are pretty freaking awesome too, since they provide soluble fiber (mostly in the form of pectin) for happy digestion and lower cholesterol levels, AND antioxidants…not to mention vitamin C! I love me some anti-free radial activity. Soooo, basically apples are awesome. You know what they say, about apples and doctors? Yeah. Pretty much true. Or maybe you should just eat some granola instead, nudge nudge wink wink…!

Apple-Cinnamon Granola

The recipe is slightly modified from Sally’s Baking Addiction, here! It made three jars worth of granola (as some of you are aware, I ADORE jars and store nearly everything in them)… which probably amounts to about 3 cups, ish? The recipe comes together quickly, bakes in half an hour, and is great snacking/breakfast/yogurt topping option. Gotta love granola and it’s ridiculous versatility!

  • 2.5 c rolled oats (not quick oats)
  • 3/4 c ground flaxseed
  • 2 tsp cinnamon
  • heaping 1/4 c raw pepitas
  • 1 c dried apples*, diced
  • 1/4 tsp salt
  • 5 tbsp unsweetened applesauce
  • 1/4 c maple syrup

*preferably use dried apples that are just that: apples that have been dried! None of those icky sulphites or sugars. Ew. None of that.

Preheat the oven to 300, and line a rimmed baking sheet with parchment paper.

In a largish bowl, mix together oats, flaxseed, cinnamon, pepitas, and diced apples. In a smaller bowl, whisk together salt, applesauce, and maple. Pour the wet over the dry and stir to combine, making sure that the wet ingredients are evenly distributed. Spread the mix onto the prepared baking sheet. Bake for 30 minutes, stirring slightly at the 15 minute mark. Let cool for at least a half an hour on the stove top (you wouldn’t want soggy granola, would you?!). Store in jars!!

Whoops-a-FAIL and Bailey’s for breakfast

EPIC. FAIL.

Who forgets the SUGAR when making brownies?! I mean, really. SUGAR. Psshhh.

Well, that would be me, apparently.

Whoops.

Not entirely sure where my head was the evening I was making these: perhaps screwed on a wee bit backwards? I realized what had happened (or rather, NOT happened) when the so-called “brownies” were about halfway done in the oven. Out of slight curiosity (and irritation: wasting food, especially baking materials, is like a cardinal sin in my book), I decided to let them finish baking and then taste them. Fully prepared to hate them, I whipped up another batch so that brownies could be had for Mutti’s reunion… and then took the *ahem* REJECTS out of the oven to cool before I attempted to taste them.

mmm

But wait.

Time for the bombshell. You’d think completely sugar-less brownies would be nasty, right?! But… they’re NOT! They turned out like some kind of brownie-bread, or at least that’s what Vati and I thought. So rather than throw them out, we decided to hang on to them for breakfast and dessert purposes. Waste not, want not! Besides, then you can have GUILT-FREE BAILEY’S for breakfast!! If that isn’t awesome, I’m not sure what is. The brownies themselves (properly made) actually aren’t too bad for you—they originally come from a Cooking Light recipe. QED, brownies minus sugar = healthy breakfast. Ha. Winning.

Do yourself a favor: make them, sans sugar. Top them with mascarpone cheese and blueberry jam and cinnamon… and eat them for breakfast.

Epic fail? Absolutely not.

Remind you of anything? Mayan calendar, perhaps??

Bailey’s Brownies

For REAL brownies, use sugar. Obvs. Please don’t leave it out. They’re wonderful brownies: hydrated and fudgy interior, chewy exterior and a crackly top. Perfection. For “brownie bread” (excellent for breakfast and all-purpose snacking), omit sugar and pretend you did it on purpose.

Recipe gratefully borrowed (and slightly adapted) from Gimme Some Oven, here! Makes an 8 by 8 pan of brownies.

  • 1 c whole wheat pastry flour
  • 1/2 c unsweetened cocoa powder
  • 1/4 tsp baking soda
  • 1/4 tsp salt
  • my-cup-runneth-over 1/3 c chocolate chippies
  • 1/4 c butter (1/2 a stick)
  • 2 eggs
  • 3/4 c sugar
  • 1/3 c (slightly overflowing, hehe) Bailey’s Irish cream
  • 1 tsp vanilla extract
breakfast is served..

Preheat the oven to 350, and line an 8 by8 pan with foil (this makes for ridiculously easy removal).

In a medium bowl, whisk together flour, cocoa powder, baking soda, and salt. In a large microwave-safe bowl, melt butter and chocolate chips together, using bursts of about 30 seconds. Let cool. Once cooled, whisk in eggs vigorously for a few seconds. Once incorporated, whisk in sugar, Bailey’s, and vanilla. Add flour mixture and stir until just combined. Pour batter into prepared pan, smoothing out the top a bit.

Bake for 16-18 minutes, or until a tester comes out with a few moist crumbs (don’t overbake, unless you like brownie bricks! I don’t exactly recommend this). Let cool in the pan for a bit, then lift the foil onto a cooling rack to completely cool.

stack o’ rejects

Caped cookie crusaders for breakfast?

jars are always superior storage

The breakfast cookie strikes again!

Sneaky breakfast nutrition packaged into one deceptively small package, complete with whole grains/fiber, potassium, and healthy fats. All it needs is a cape to achieve complete superhero status. Can’t you just imagine this little caped cookie crusader swooping in, shoving your boring (and non-nutritive)  breakfast off your plate, and (standing with fists on hips, cape blowing in the wind… wait. do cookies have hips? Whatever, indulge me) trumpeting: “I am the breakfast cookie, here to save your butt from a boring breakfast! Eaaaat meeeee, you know you want to! I’m tasty and portable, and a COOKIE. Hellooooo, who DOESN’T want to say they’ve had a cookie for breakfast?!”.

demonstrating amazing feats of super-cookieness

And then you eat it, and feel so ridiculously awesome, like you could go off and save the world. Or wear a cape and look bomb. You know, just some minor benefits of eating a proper breakfast (or a legit breakfast cookie, since as I’ve demonstrated, that clearly equates to the same thing). Besides, these cookies are one of the easiest to make: just toss all the ingredients together, stir and chuck onto the cookie sheet in roughly cookie-shaped balls. Bake. Let cool (yeah right). Eat. Done! Go don your cape.

dense cookie complexity up close and personal-like

Banana-Granola Breakfast Cookies

I adapted these ever so slightly from Fannetastic Foods, here! I’ve made them before, but I really wanted granola in this batch somewhere. They’re lightly sweet and nicely hearty, perfect for a capped crusader breakfast. Mine were 2-3″ across fully baked, and I ended up with 14 total.

  • 1 c rolled oats
  • 2/3 c whole wheat pastry flour
  • 1/2 c unsweetened shredded coconut
  • 1 tbsp ground flaxseed
  • 1 tsp whole chia seeds
  • 1/4 tsp baking soda
  • 1/4 tsp cinnamon
  • pinch of salt
  • 2 ridiculously ripe bananas, mashed
  • 1/4 c plain lowfat yogurt (or whatever you have on hand)
  • 1/4 c pure maple syrup
  • 1/2 tsp vanilla extract
  • 1/2 c granola of choice*

*I used 1/4 c Nature’s Path pumpkin flax granola, and 1/4 c Nature’s Path Ancient Grains + Almond granola (a winning combo, I must say)

mmm, coookies

Preheat the oven to 350, and lightly grease a cookie sheet (or two, whatever floats your boat). In a large bowl, whisk together oats, flour, coconut, flaxseed, chia, baking soda, and cinnamon. In a smaller bowl, mash up the bananas, and then add yogurt, maple syrup, and vanilla. Add wet into dry, and fold in granola as you stir them together. Drop by rounded spoonfuls onto the baking sheet. Bake for 13-14 minutes—mine were done at 13. I pulled them off the cookie sheet right away, as I didn’t want them to dry out. Let cool on  a cooling rack. I store cookies with banana in the fridge—I think it improves the consistency and I like them cold, but that’s up to you :)

Eat. Enjoy wearing your cape to work.

//

Confessions of a Hippie-Granola Child

toaster pastriessss!

Okay so. Confession time.

For being such a hippie-granola crunchy type, I had a few less than crunchy incidents in my childhood. Even though I was raised eating lots of mashed up tofu and banana, as I got older, I was allowed to eat significantly more processed food (This was of course before we discovered the evils of hydrogenation and trans fats, at which point my extremely wise mother put the kibosh on eating that kind of junk). Clearly this lapse in taste didn’t affect my gastronomical maturation too much, since after this shortish hiatus I returned to my tofu-eating roots (thank goodness). Anyway. During this small interval of colorful cardboard boxes and “food products”, I developed a liking for… pop tarts. Seriously. What little kid DOESN’T like pop tarts?! Especially the frosted ones with the multicolored sprinkles (we know how I feel about sprinkles!). My favorite were frosted strawberry, but I hated them toasted! Weird, I know… I do realize that they are, in fact, toaster pastries… but for some reason I always liked them cold. I would unwrap that shiny silver package with such anticipation, knowing that I got TWO in one bag. Added bonus. I distinctly remember eating all the way around the edge and saving the middle, since that part was the best: all the filling and frosting!

yum yum yum

Anyway, suffice to say that this infatuation ended sometime during high school, and I decided that kind of processed junk wasn’t worth my taste buds. I occasionally make an exception for the organic, more natural ones, but that’s rare. I much prefer just to make my own! What a concept. They’re really not difficult at all, and I’m sure they freeze wonderfully, which makes them just as convenient as a brand-name toaster pastry. Even better: they’re made with ingredients you can pronounce :) oh yes, and one more thing: they’re beyond delicious! Go appease your inner child and make some toaster pastries for yourself that you can feel good about eating! You can even put sprinkles on them, since you KNOW I would approve of that.

strawberryyyy

Whole Wheat Pop Farts (get it?! Like… fake pop tarts!)

From BabbleFood, here! I’ve made these before but Kira never had, and that was a travesty! They’re deeelicious warm or cold, and are very easy to pull together—the dough is relatively forgiving, in terms of pastry, and you can fill them with whatever floats your boat!

  • 2.25 c whole wheat pastry flour
  • 1/2 tsp salt
  • 1 tbsp sugar (I used turbinado)
  • 1 stick of butter, chilled, cut into 1/2″ cubes
  • 1 egg, lightly whisked
  • 1/3 c cold water
  • fillings of choice! Kira and I used a variety of pumpkin butter, almond paste, jam, and jam + nut butter (which is my favorite)
  • if you want a glaze, powdered sugar and water works well. They’re perfectly good unglazed as well!
up close and personal

Preheat the oven to 375, and line a cookie sheet with either wax or parchment paper.

In a food processor, combine flour, salt, and sugar. Once combined, add in butter chunks, and pulse until crumbly and the mixture resembles a coarse meal. Combine whisked egg and water in a separate bowl, and add into the bowl of the food processor (while running if possible, if not, that’s okay too). Pulse until the dough just comes together.

Toss the dough onto a lightly floured surface, and knead a few times until it sticks together. Roll out to about 1/8″ thick, and cute out your rectangles! I like to make a variety of sizes to accommodate my snacking needs and the whims of the gremlins…Try to match up the sizes of top and bottom, so that the filling stays contained. Put a couple teaspoons’ worth of filling onto the bottom rectangle, wet the edges, and stick down the top. Crimp the edges with a fork for added cuteness.

Bake on the prepared cookie sheet for 12-15 minutes, until lightly browned. If glazing, let them cool a bit, and then brush with a mix of powdered sugar and water…and add sprinkles if your heart desires it!

Eat. Love. Indulge your inner child :)

//

Sixty page thesis beast deserves cookies!

Because, you know, I reeeally like to store things in jars.

I apologize for the blogging delinquency! Between thesising and graduation looming in five weeks (how did THAT happen?!) I’ve been just a little busy… But I’ve been very productive in the thesis realm lately (which is good, since my presentation is two weeks from Tuesday—eeeeep! I’m starting to see Neo-Gothic architecture everyyyywhere, including in movies… and think in architectural terms. This has got to stop!), which needed to happen a little bit more than blogging. But now that my SIXTY PAGE beast of a thesis is edited in entirety, I’m down to just the conclusion! Hooooray, now I have time for some blogging catch up!

SO! Now I can share the tasties I’ve made recently with you. I promise I’ve still been eating (relatively) interesting things lately. Ish. Dinner needs work. But when I get off work and then thesis for a few hours, dinner gets last priority… steamed veggies + protein of choice + quinoa/polenta/oats is usually what happens… delicious, to be sure, but really, I’m getting bored. BUT! In two weeks, I will be DONE WITH THESIS! And therefore have much more free time for the important things (you know, like new active wear Pilates, eating, and cooking).

So. Enough of that… moving ON!

Happy Easter, by the way :) I ate the ears off my dark chocolate bunny, mmm. I’m not sure how to tackle the rest of it, as it’s solid, and I feel kind of mean if I try to stab it with any sharp implements…. Is biting more humane?! Yeesh. Chocolate bunny dilemma.

So besides neo-gothic skyscraper architecture and moral dilemmas regarding humane consumption of chocolate bunnies, I’ve been baking! I promised myself I would share other things besides healthy cookies, but oops. Cookies happened again, and they’re good! Besides, I liked the pictures. So you get cookies again, and THEN I promise something different. Promise! These cookies are lightly sweet and cakey, perfect for breakfast or a snack. The ingredient list is very forgiving, so feel free to substitute with whatever you have on hand.

jars make superior storage devices.

Banana-Yogurt Breakfast Cookies

I made these with Christine (workout and baking buddies! what a great combo, cookies + pilates), and I think we got about 20 smallish cookies. They could easily be made bigger if you want more breakfast-sized cookies. We adapted them from The Hot Plate, here!

Acquire:

  • 1/2 c plain lowfat yogurt
  • 3/4 c mashed ripe bananas (about 2 bananas)
  • 1 tbsp olive oil
  • 1 egg
  • 1 tsp vanilla extract
  • 2 tbsp turbinado sugar (or honey, if you have it)
  • 1.25 c whole wheat pastry flour
  • 3/4 c rolled oats
  • 2 tbsp ground flaxseeds
  • 1 tsp cinnamon
  • 1/2 tsp baking powder
  • 1/2 tsp baking soda
  • 1/2 tsp salt
  • judicious handful of pepitas
  • sprinkling of chocolate chippies (We had minis, yayyy!)
oh no! it's escaping the jar. time to EAT IT.

Preheat the oven to 350, and lightly grease cookie sheet(s). In a medium mixing bowl, combine yogurt, mashed banana, olive oil, egg, vanilla, and sugar. Stir to combine. In another bowl, combine dry ingredients: flour, oats, flaxseed, cinnamon, baking powder and soda, salt, and pepitas/chocolate chips. Add wet into dry, and stir to combine. Drop by the heaping spoonful (or two, if you want massive cookies) onto your prepared cookie sheets, and bake for 10 minutes! Easy peasy cookies to appease your snacking gremlins.

mm.