All things boats, crisps & hikes

IMG_0281

November already!?

fullsizeoutput_1e33

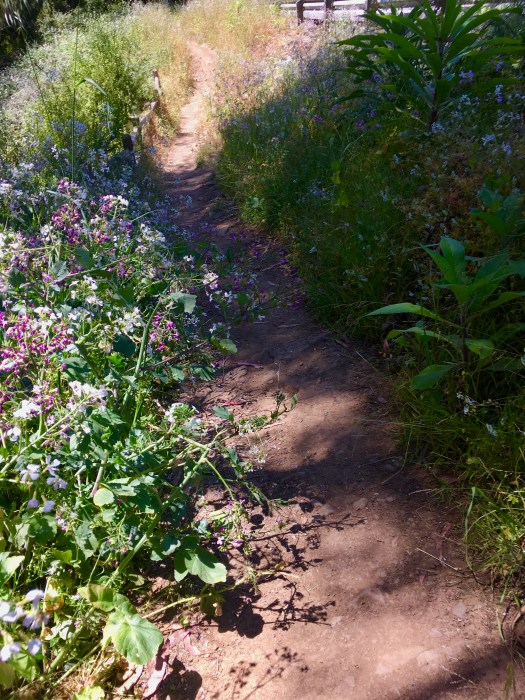
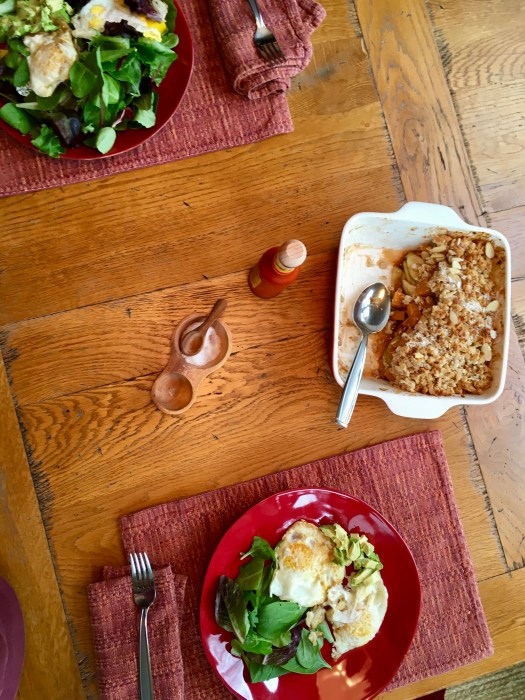
The extra hour this weekend was pretty swell though, I must say. Fave human and I got in a great 6 mile hike this morning before we ate – crisp makes a great post-hike addition to eggs!

fullsizeoutput_1e31

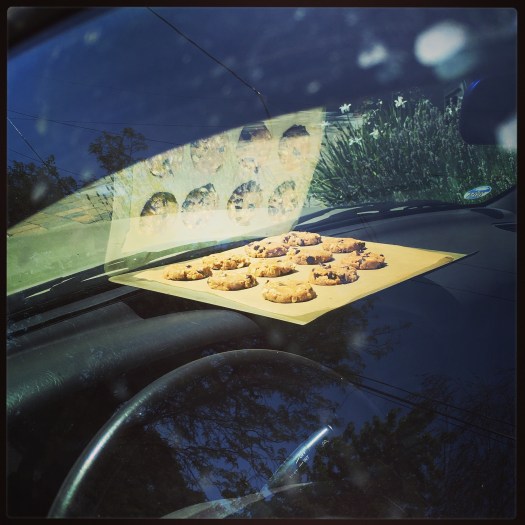
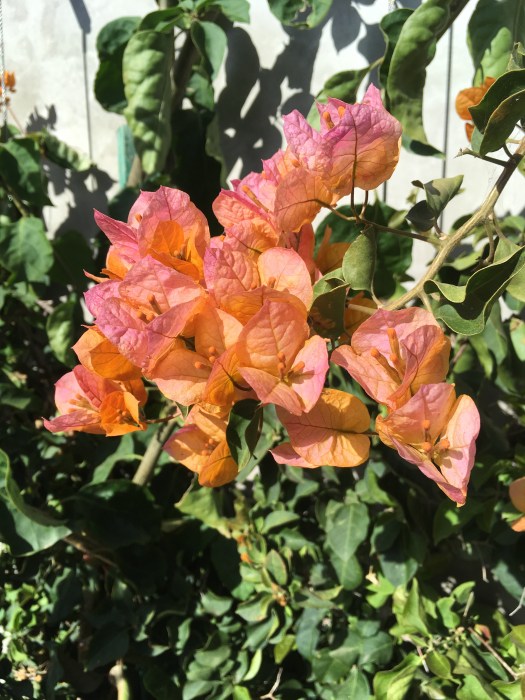
A few photos of life lately – we took a sunset sail this weekend too, which was awesome. The sky was just spectacular; there is no filter on these photos!

fullsizeoutput_1e01.jpeg

fullsizeoutput_1e3c

fullsizeoutput_1e3a

fullsizeoutput_1df3

IMG_0221

As usual, I was my weird self… not sure what’s going on here but it just looks typical… was I summoning the water?!

fullsizeoutput_1e12

fullsizeoutput_1e0a

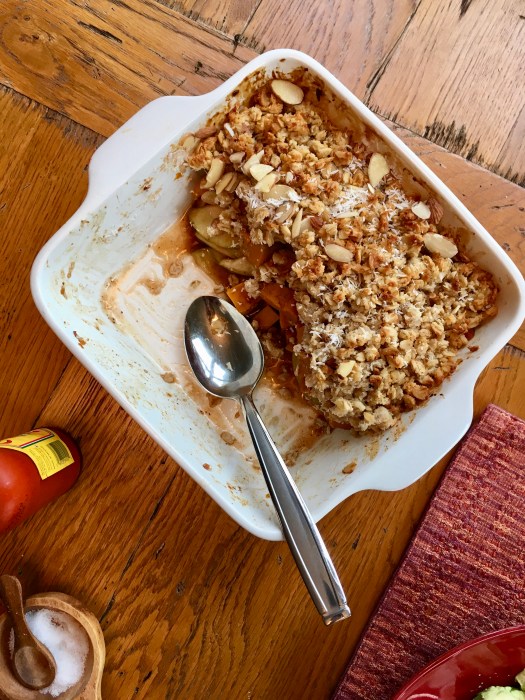
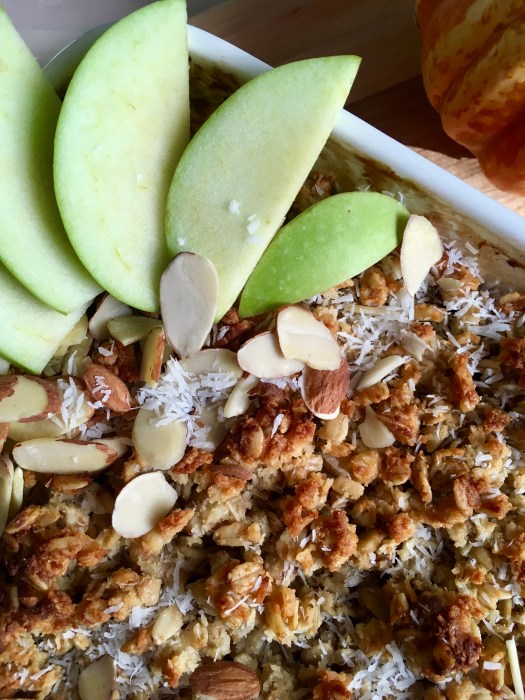
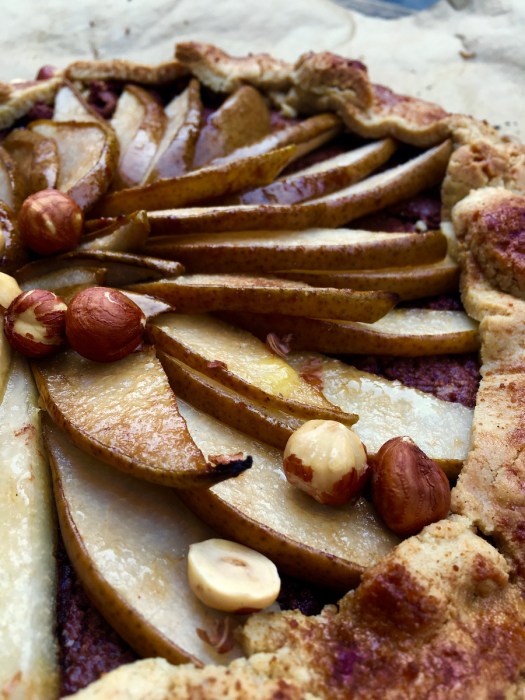
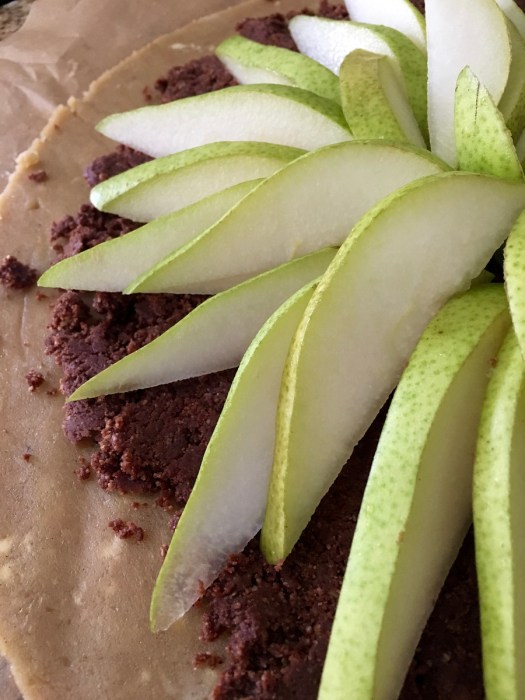
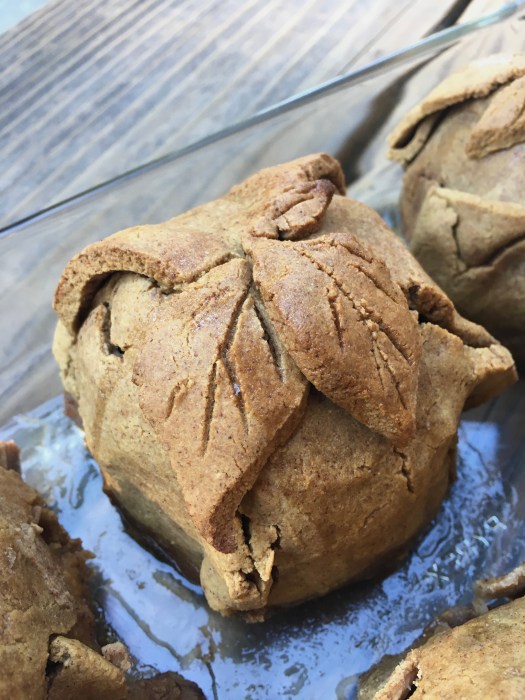
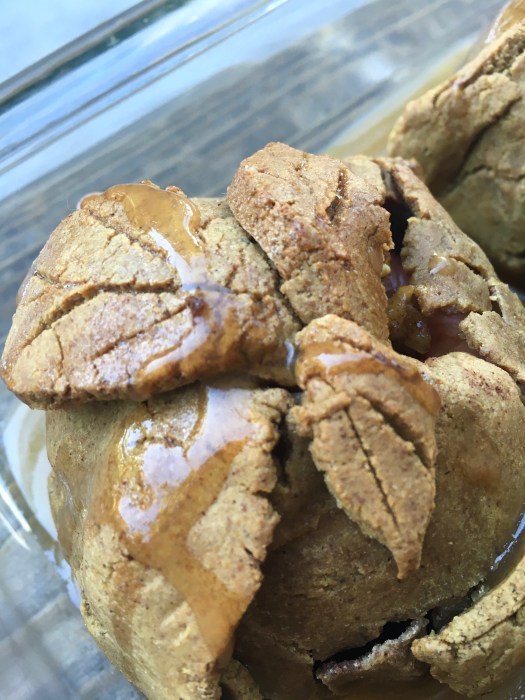
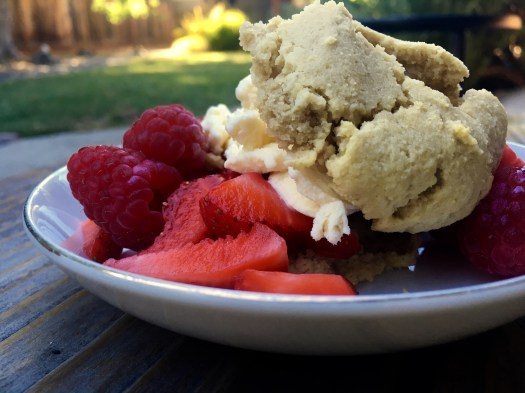
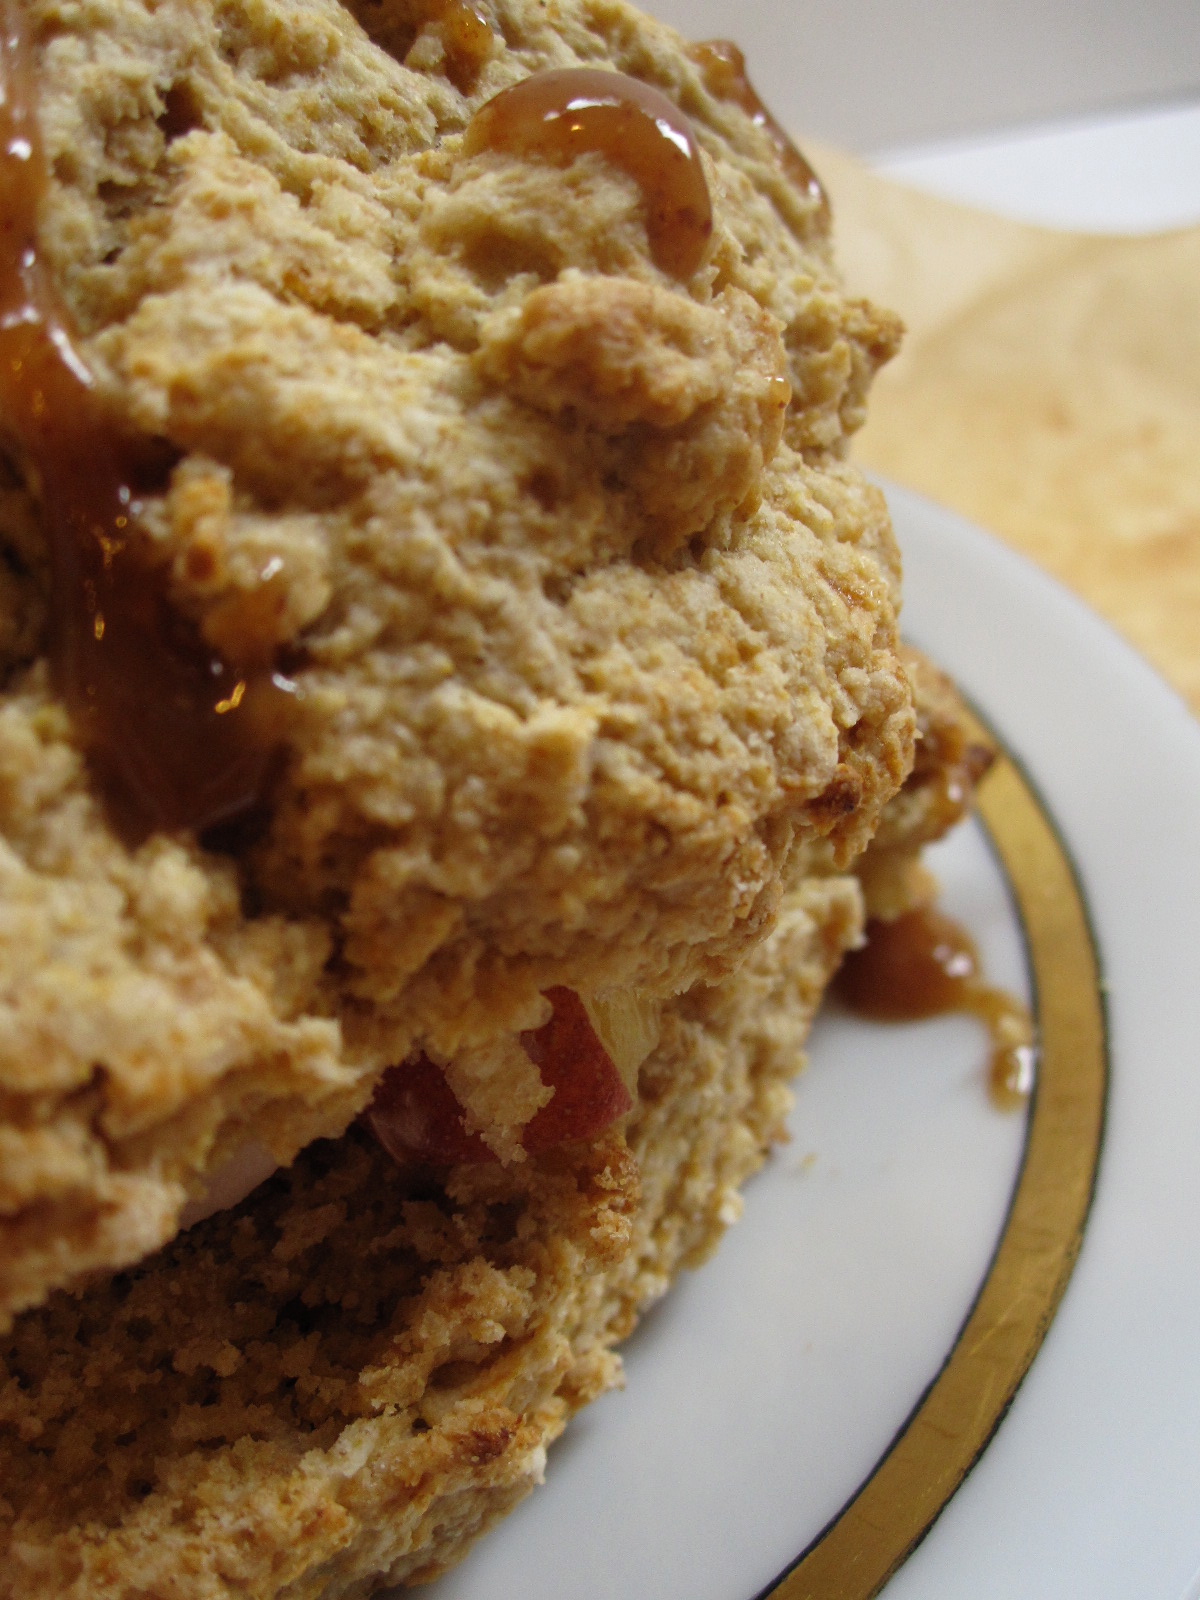
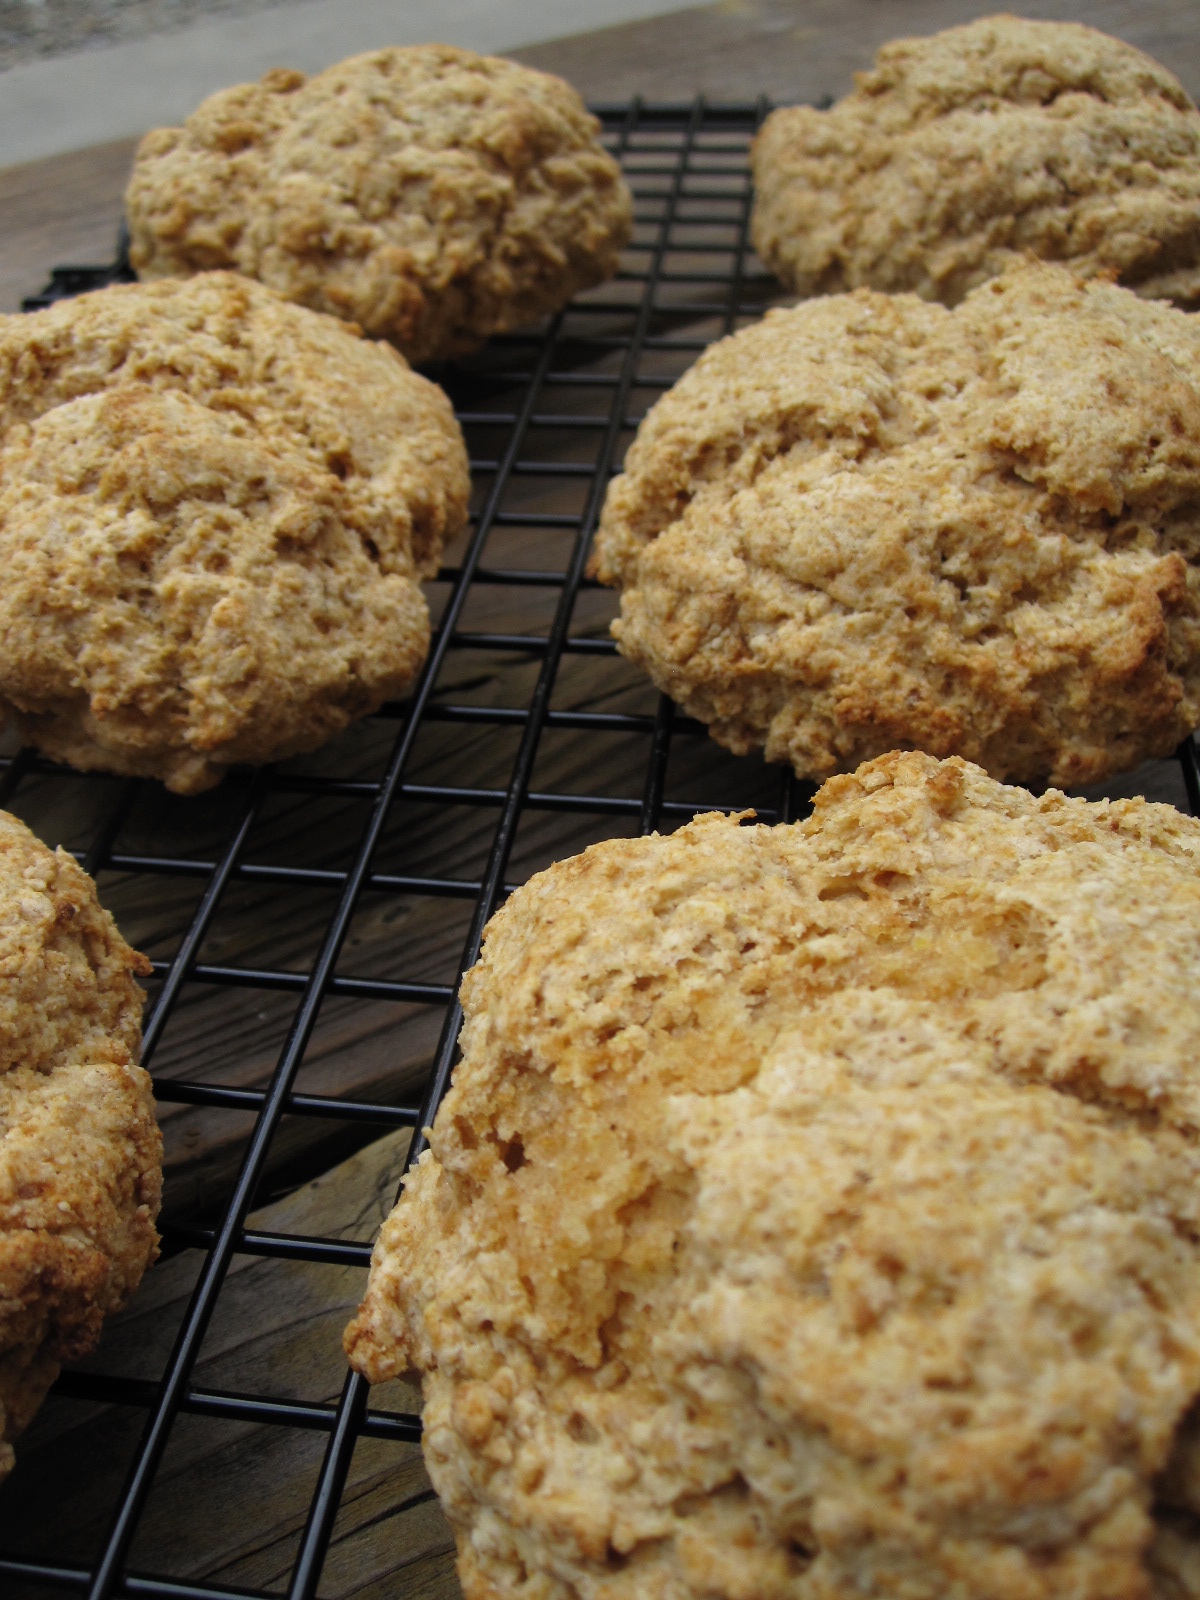
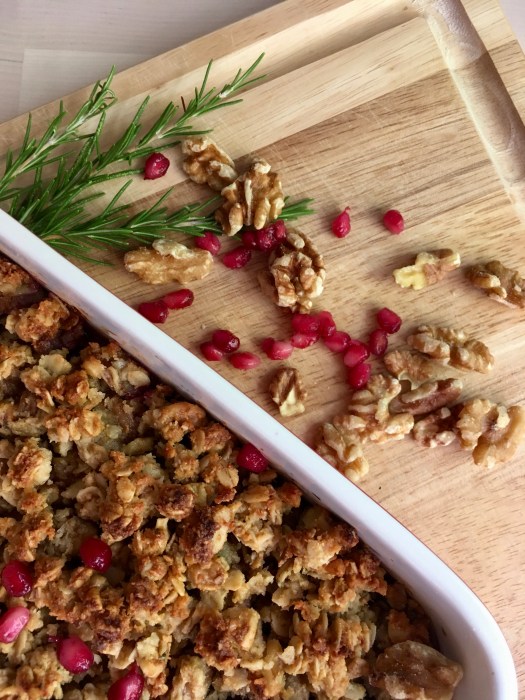
This is the reigning favorite crisp recipe around here – it keeps its structural integrity overnight even when sitting on super juicy fruit, which is a must. It’s chunky in the best way, like a good granola – and it’s perfect for breakfast! Fruit, nuts, oats, yogurt and butter – what more do you need?

Disregard awkward three fingered claw…

fullsizeoutput_1e39

fullsizeoutput_1e23

IMG_0256

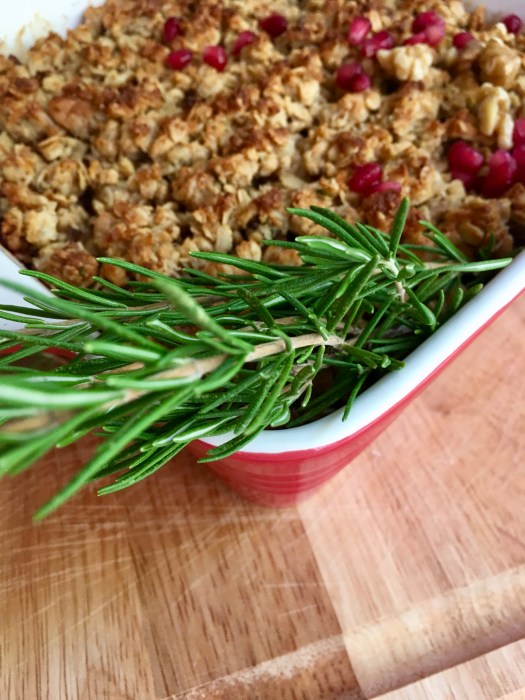
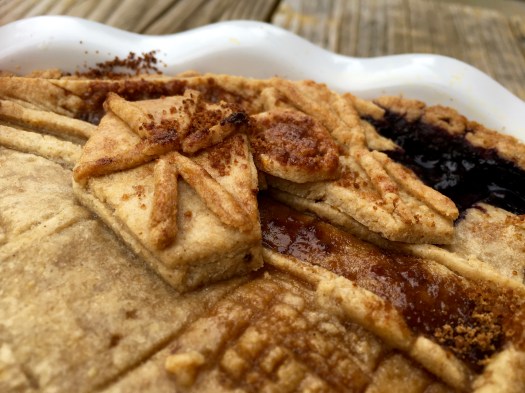
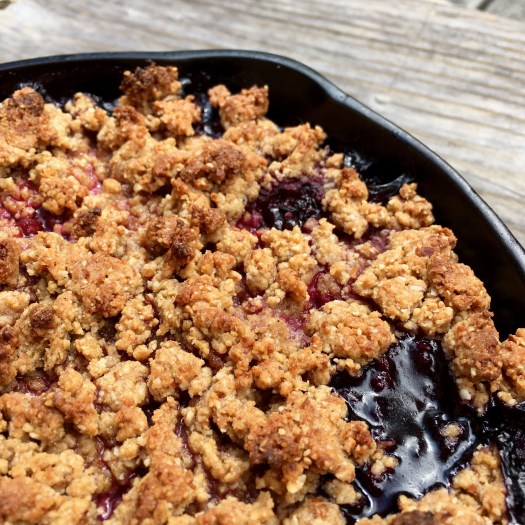
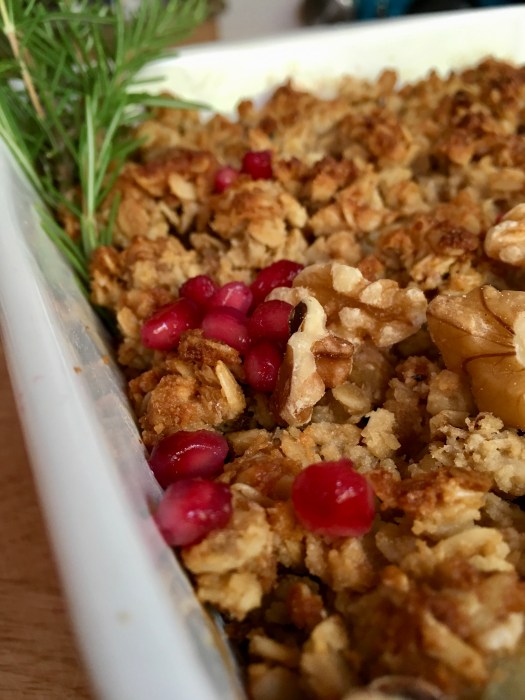
I had frozen some late season peaches awhile back and wanted to use them before they sat too long in the freezer. It goes against my love of seasonal baking, but waste not, want not! Turns out pomegranate and peach go quite well together anyway, and the rosemary keeps it from feeling too overly summer-y of a dessert. It comes together in a snap too, so what’s not to love.

fullsizeoutput_1e2b

I love love love adding rosemary to desserts. It brings just the right amount of savory to whatever dessert it is – and we know I like things on the very much less sweet side. C and I both loved this one – it was disappearing with mildly alarming rapidity, so we’ll see if it makes it though the end of the weekend, ha!

fullsizeoutput_1e28

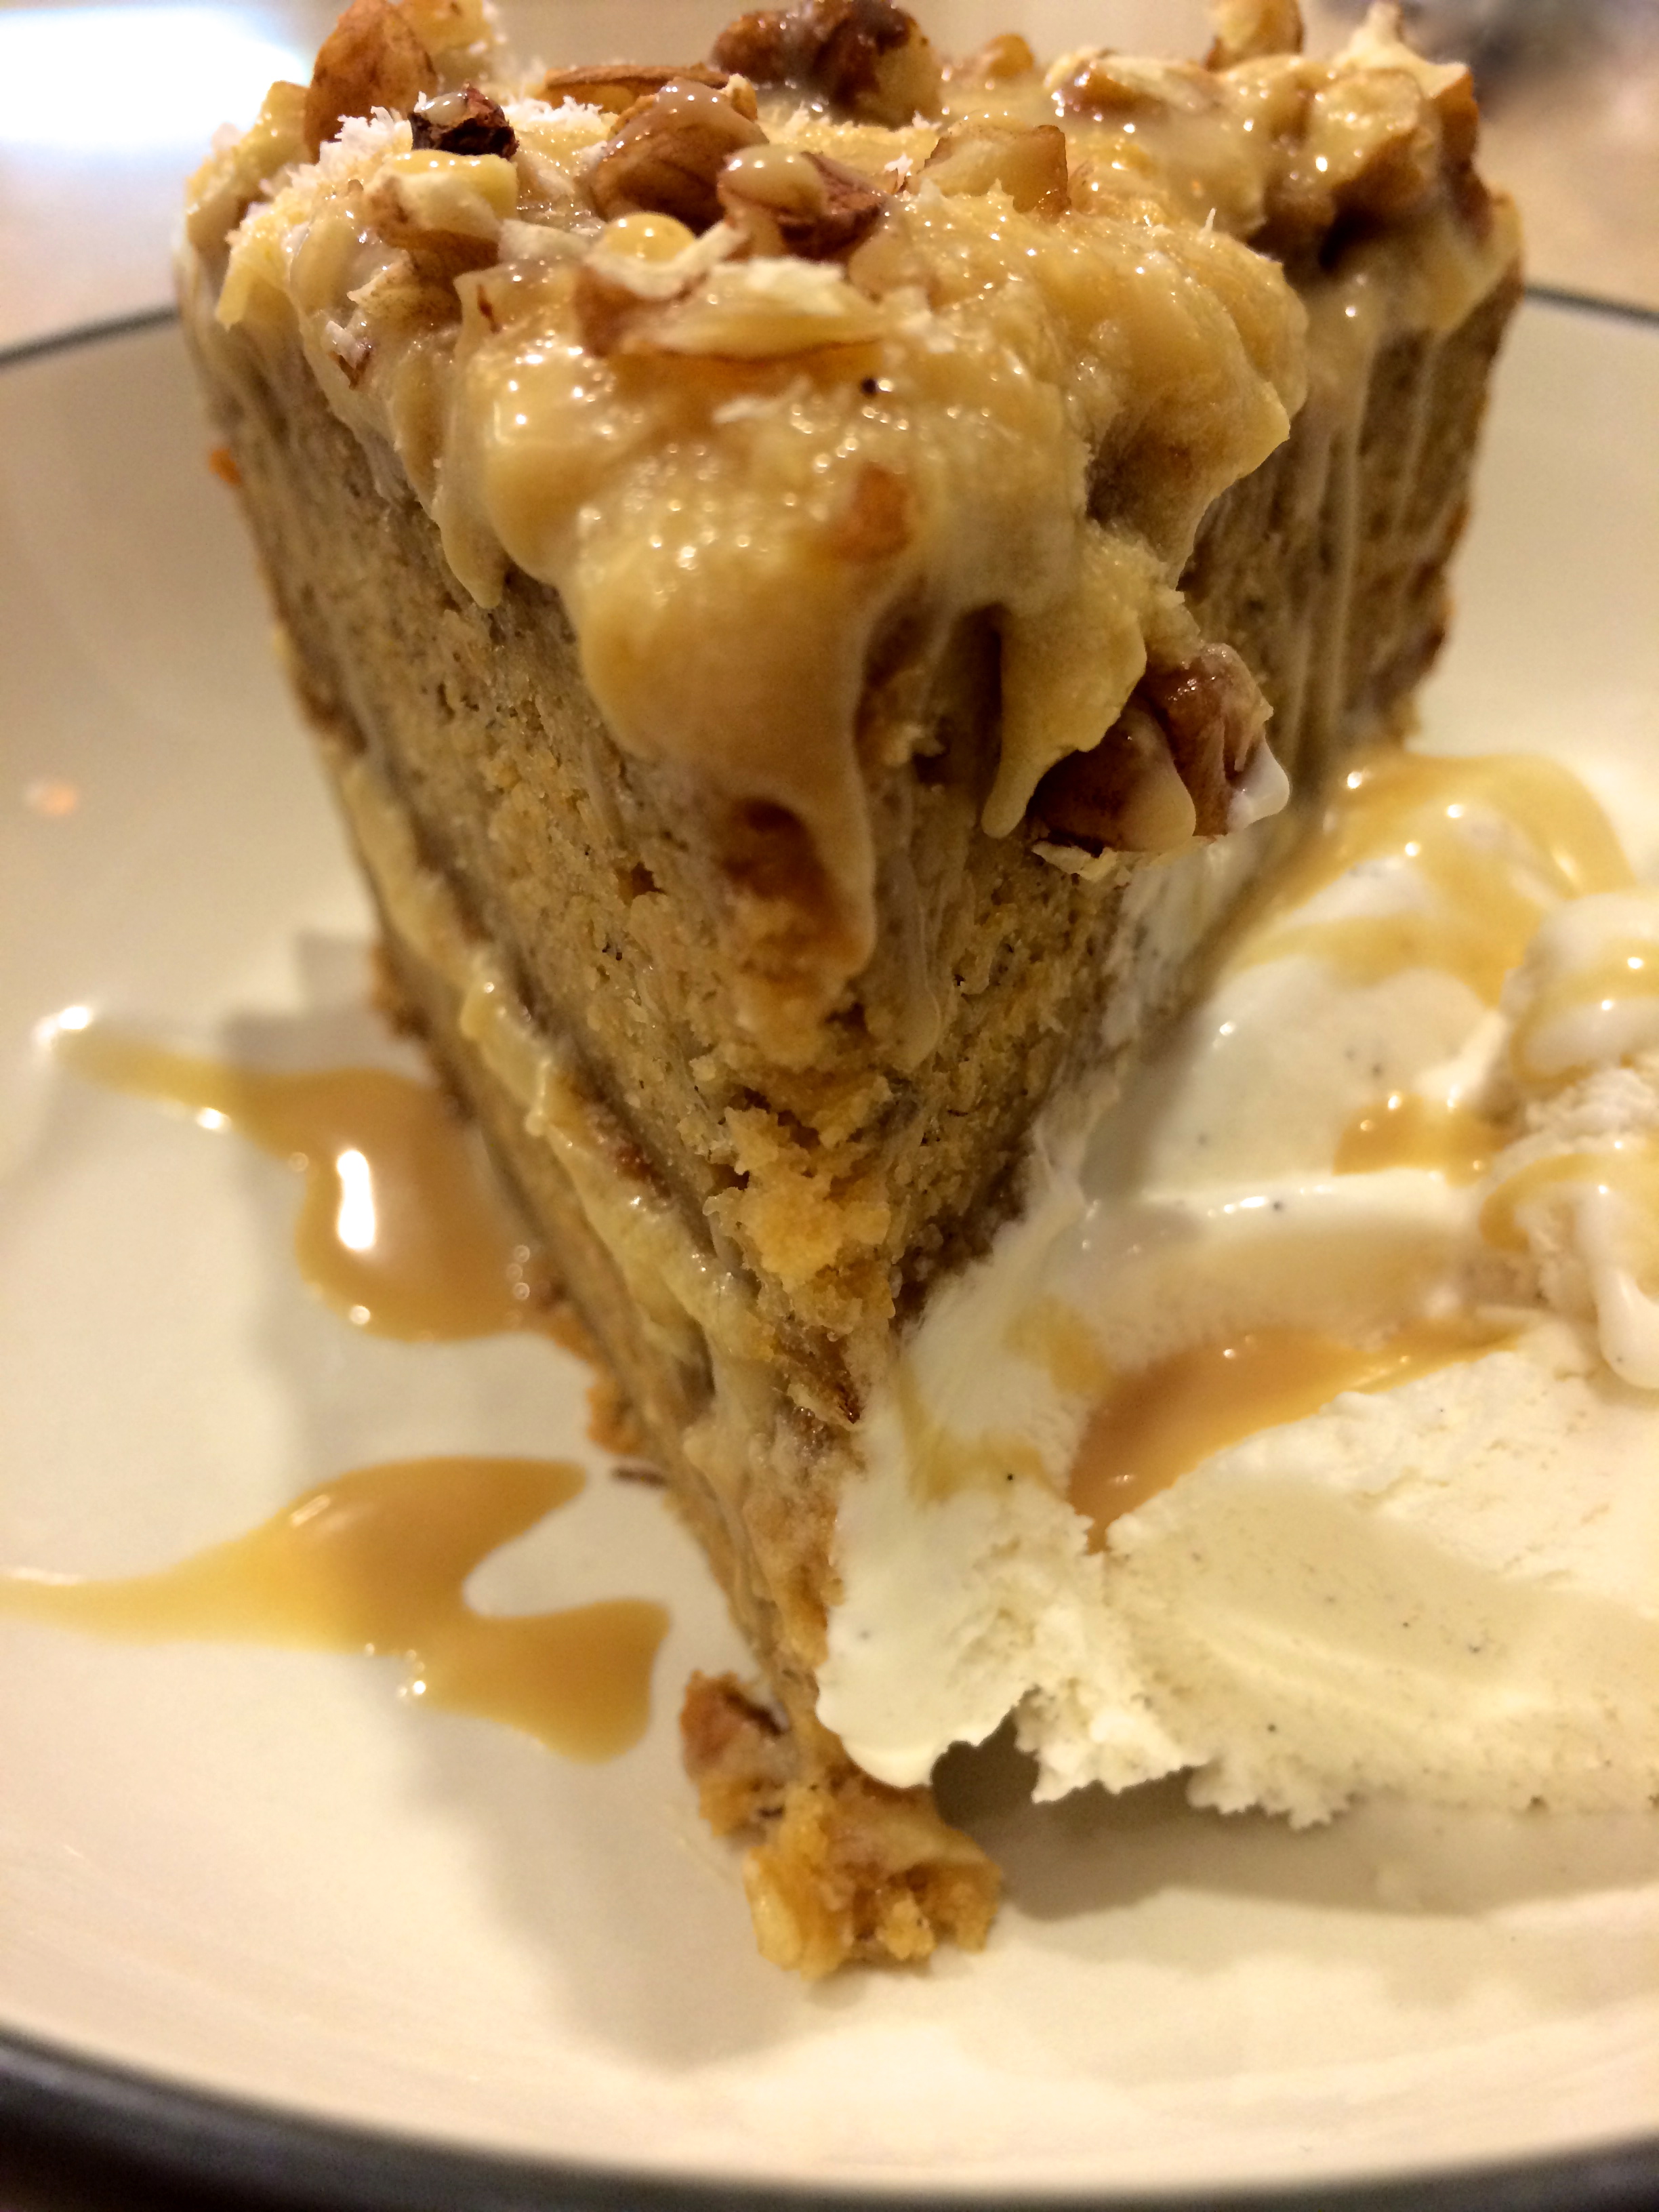
Rosemary Walnut Crisp with Peaches, Blackberries & Pomegranate

An extremely easily adaptable crisp – use whatever fruit needs to be consumed! I had frozen some late season peaches and wanted to use them before they sat too long – they went excellently with blackberries and pomegranate seeds. This minimally sweet crisp is basically breakfast – fruit, nuts, oats and yogurt! Nearly all of its sweetness comes from the fruit, so make sure whatever you’re using is perfectly ripe. Yet another riff on the crisp I’ve made a million zillion times, here. Yield: 1 8×8, 2qt crisp, serves several.

3 c peaches, sliced*
2 c blackberries*
1/3 c pomegranate seeds
2 tbsp c maple syrup
¼ cup water (I used 1/8 c port & 1/8 c water)
Zest and juice of 1 lemon
2 teaspoons arrowroot starch

*I just approximate; I use however many it takes to fill my 2 quart, 8×8 baking dish
*I baked straight from frozen; fresh would also be fine

For the crisp:

1 cup old-fashioned oats (use certified gluten-free oats for a gluten-free crisp)
½ cup firmly packed almond meal
½ cup coarsely chopped walnuts
1/4 c unsweetened shredded coconut
1/8 c coconut sugar
¼ teaspoon fine sea salt
1 tbsp fresh rosemary, finely chopped
2 tsp vanilla extract
5 tablespoons unsalted butter, melted
3 tbsp plain whole milk yogurt

Preheat the oven to 350.
Toss peaches, blackberries, and pomegranate seeds into your baking dish of choice (my dish is 8×8, 2 qt capacity; 9″ square or 9″ deep pie dish would also be fine). In a liquid measuring cup, whisk together the maple, water/port, lemon juice and lemon zest until combined. Add the arrowroot, and whisk to combine. Pour the mixture over the fruit and toss to combine. Bake for 20 minutes.

While the filling is baking, make the crisp. In a mixing bowl, stir together the oats, almond meal, chopped walnuts, shredded coconut, coconut sugar, salt, and rosemary. Mix in the vanilla, melted butter and the yogurt. Stir until everything is mixed thoroughly.

Once the filling has baked for 20 minutes, stir it and and redistribute evenly in the dish. Plop spoonfuls of the crisp topping evenly over the filling – no need to pack it down. Return the dish to the oven and bake for 25 to 30 more minutes, until the filling is bubbling around the edges and the top is golden.
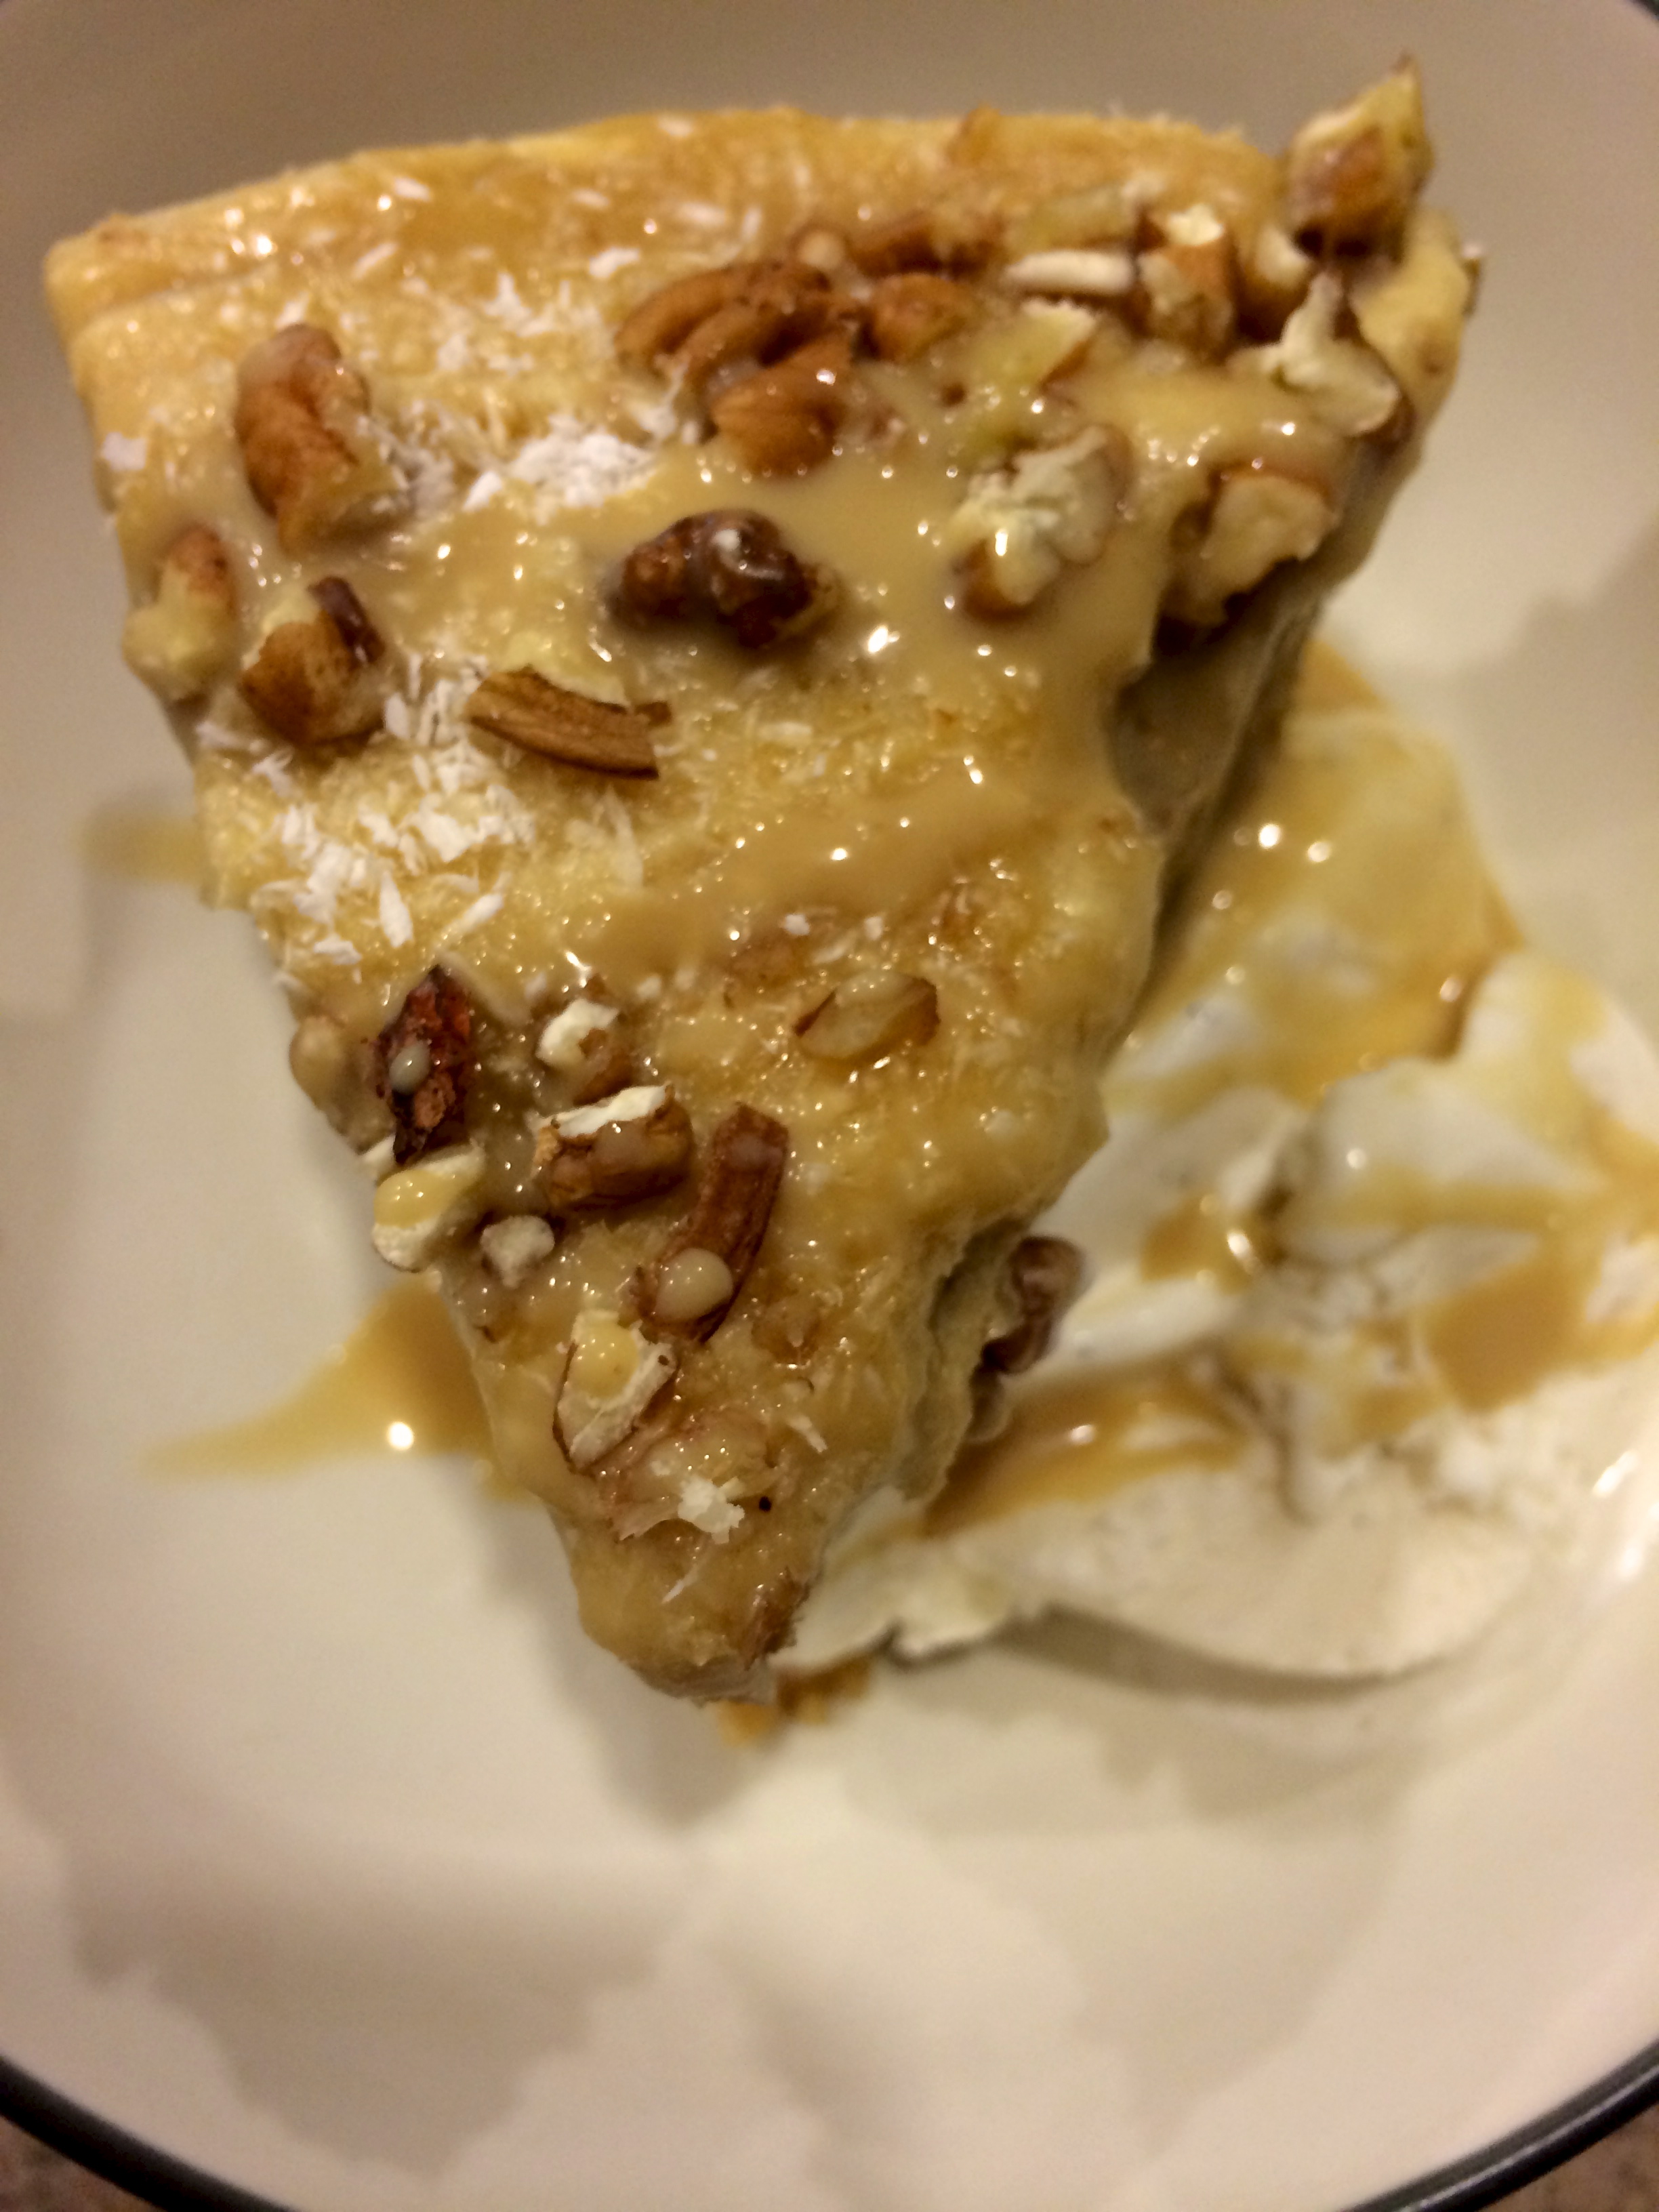
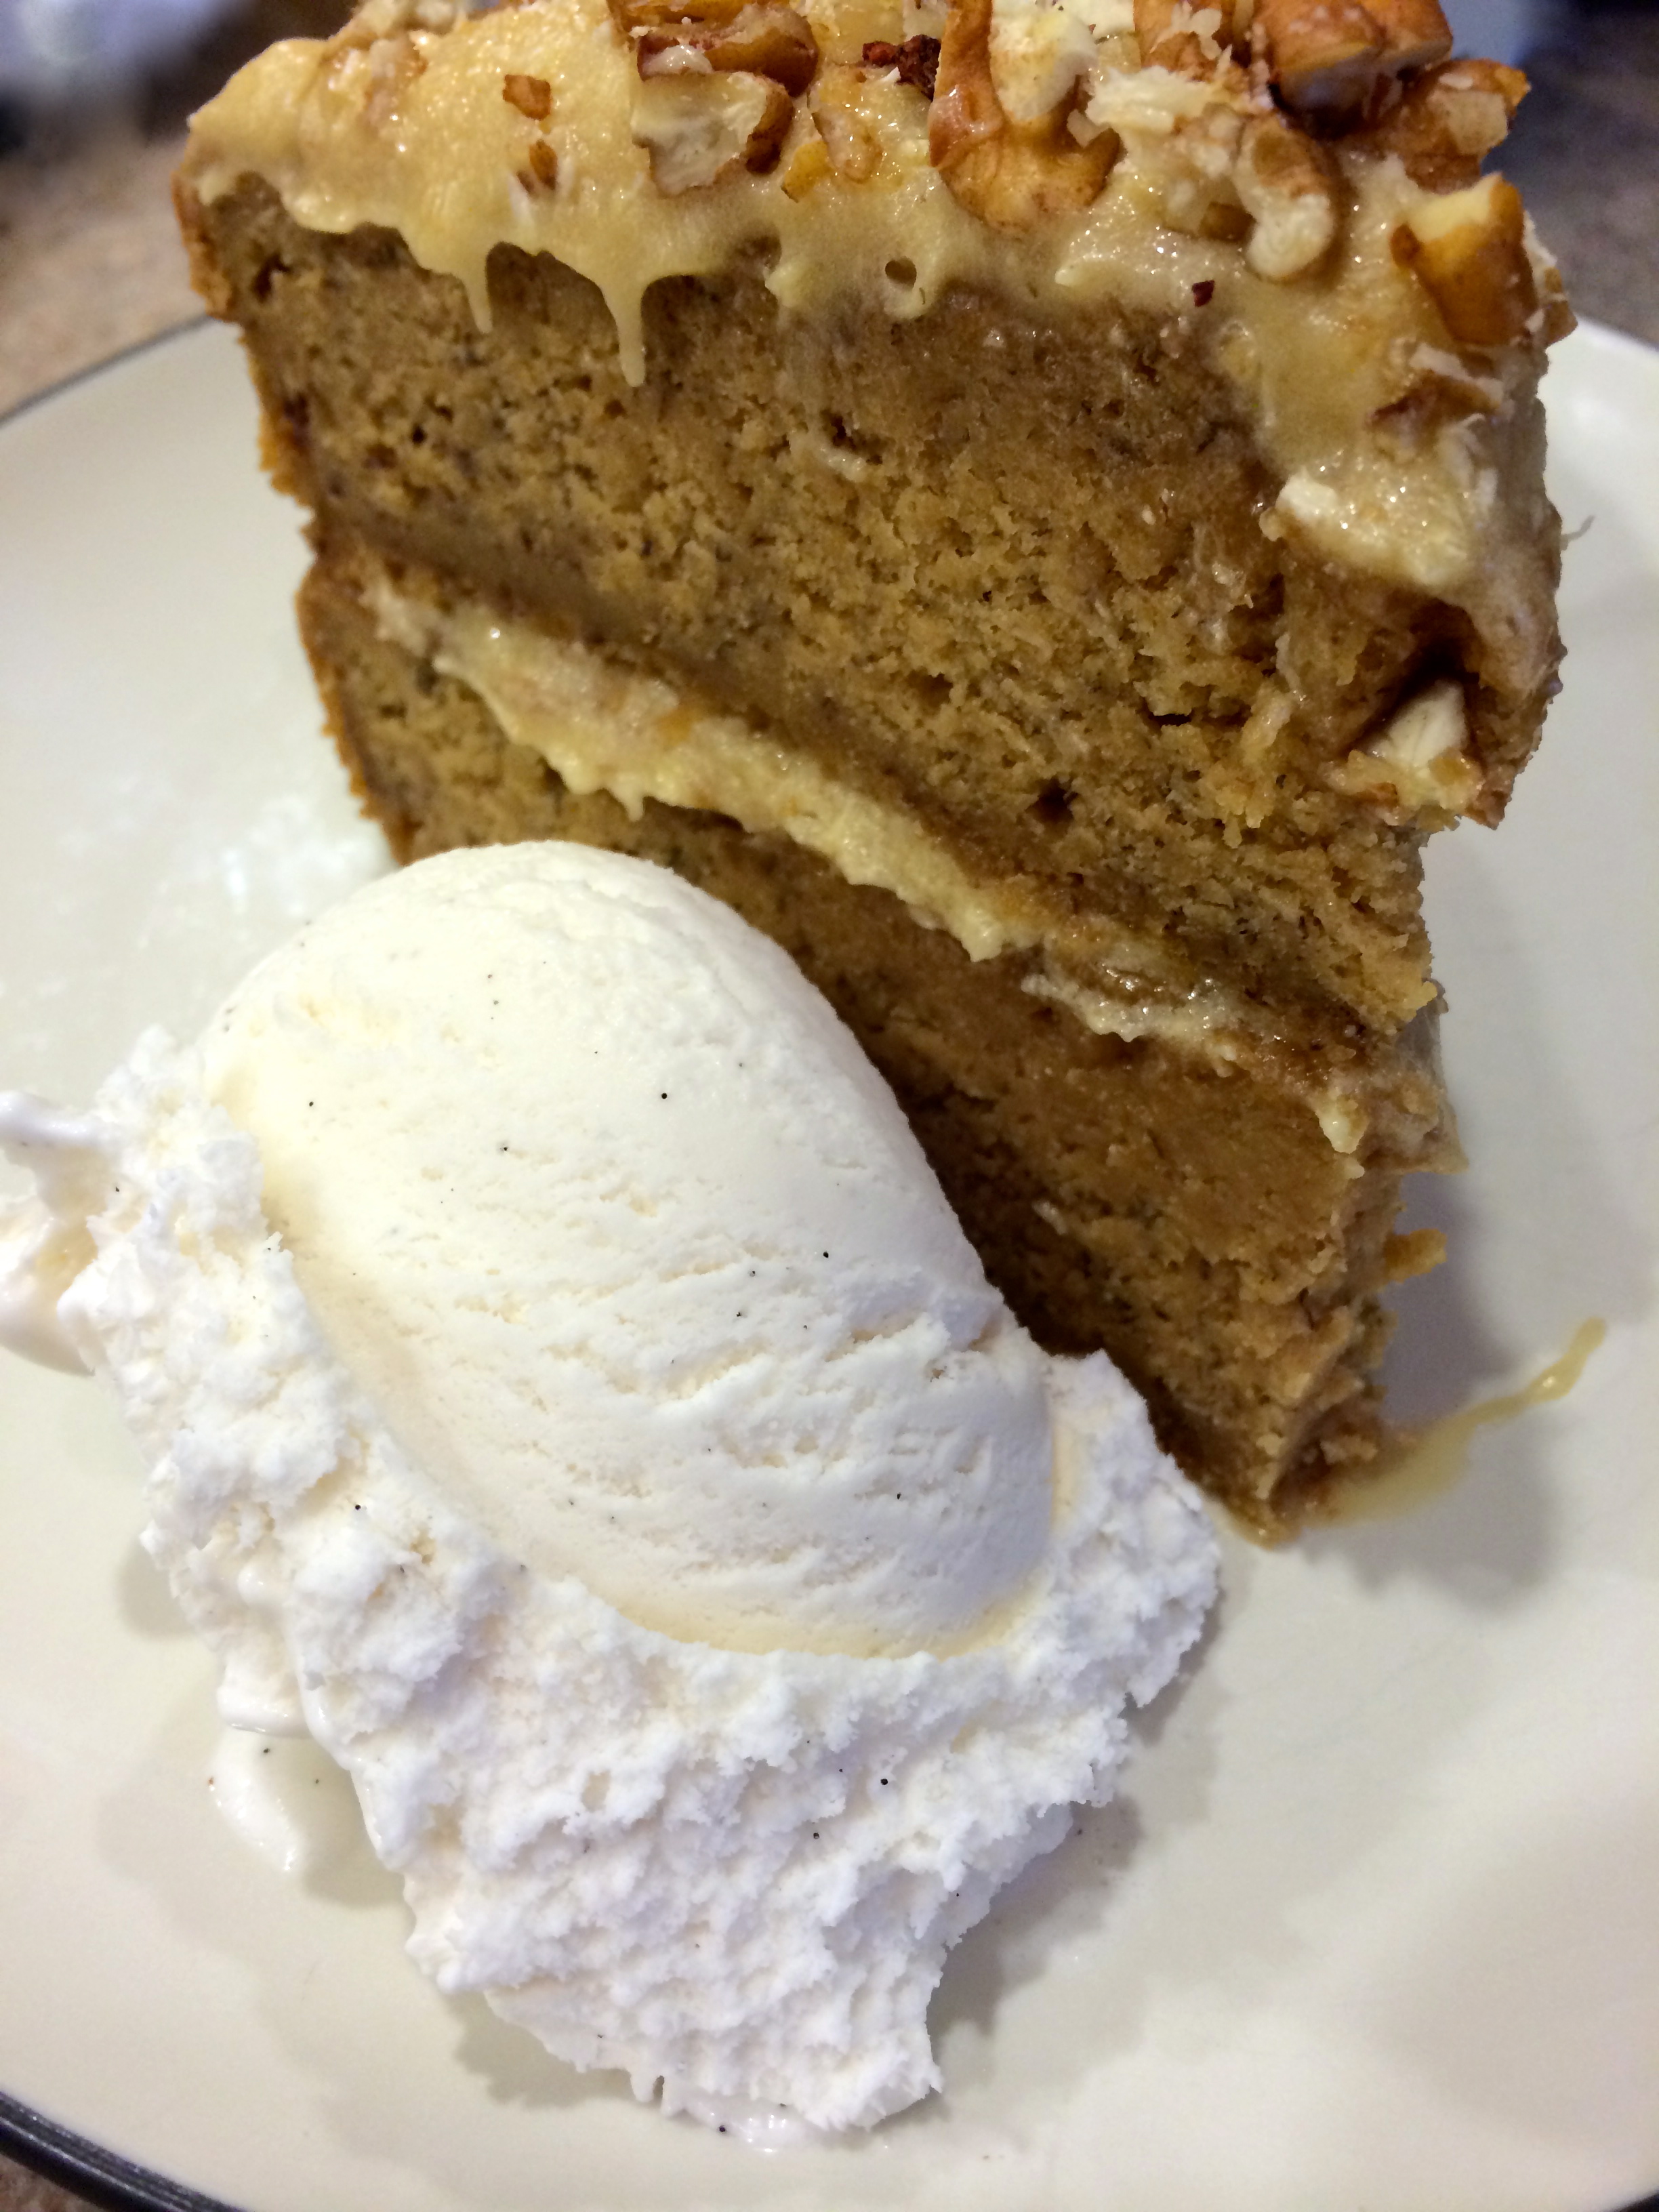
Let the crisp rest for 5 to 10 minutes before serving. Serve with vanilla ice cream, obviously! Keep leftovers, covered, in the fridge for about five days (yeah right. It would take some kind of major feat to make it last that long)

fullsizeoutput_1e35

Holiday weekends require dessert!

IMG_3372

Happy Memorial Day weekend!

fullsizeoutput_175e

This dessert could not be more well timed – of course, holiday weekends call for dessert but more obviously – I inadvertently made a patriotic dessert on Memorial weekend! I love when things like that happen.

fullsizeoutput_1741

Mostly I got lucky – blueberries and strawberries are amazing (and on sale! woohoo!!) right now, so of course I have those sitting in my fridge in spades. I always feel that tarts like this need some embellishment, and BOOM! Helloooo, berries.

fullsizeoutput_175f

This is light and fresh – just what you want for a summer dessert.

fullsizeoutput_1760

We ate it with softly whipped cream for dessert (I haven’t had whipped cream in far too long, I’m glad we fixed that particular travesty) and then again – of course – for our brunch/lunch thing around 1p. Is that lunch? Or could it be brunch since we didn’t eat anything except a bit of chocolate and a banana after sleeping in, before hiking?? Hmm. I think it can still be brunch. Anyway… it tasted especially good the second time around; we’d just finished a great hike up to Twin Peaks – somewhere in the neighborhood of 6 miles and over 1000′ elevation gain in less than two hours. Booyaaah! No wonder we were hungry.

fullsizeoutput_1765

Hike stats! I am a nerd and as such I find these things fascinating. And pictures, of course.

IMG_3371

IMG_3368IMG_3370fullsizeoutput_1766fullsizeoutput_1783

The weather was beautiful, with a really nice breeze off the fog (since my body is still having major issues these days, especially with regulating its temperature, cool breezes are a MUST).

fullsizeoutput_1757

We both loved this tart – it’s delicious on its own, or with whipped cream. Highly recommended – we blew through this thing in two sittings (well, the hike definitely helped the second go-round, ha!) and I think there are about two servings left… although that could have changed since I last assessed the situation.

fullsizeoutput_173f

Happy holiday weekend! Enjoy the extra day and do some baking :)

fullsizeoutput_1761

Lemon Ricotta Berry Tart on a Walnut Coconut Crust

Light, lemony and a perfect for a summer dessert: the lemon ricotta filling is tart and creamy, balanced nicely by the walnut-oat-coconut crust. Fresh berries are a must! Gluten free, refined sugar free and whole grain. For those who like their desserts a little on the tart side ;) Yield: 1 9″ tart, serves… several, or else two really hungry people who just took a long hike! A Wait are those Cookies original.

fullsizeoutput_175b

For the crust:

1 c rolled oats
1 c walnuts
1/4 c shredded unsweetened coconut
1/2 c almond flour
1 tbsp maple syrup
1/4 tsp fine sea salt
6 tbsp unsalted butter or ghee, melted
1 tsp vanilla

Preheat the oven to 350.

Add oats into a food processor and pulse until finely ground (you’re making oat flour). Dump that out into a bowl, and add the walnuts into the processor – pulse these until very finely ground, but be careful you don’t end up with walnut butter! Add walnuts to the bowl, followed by the coconut, almond flour, maple, sea salt, melted butter and vanilla. Stir until everything is incorporated, then press the dough into the bottom and up the sides of a 9″ pie or tart pan with a removable bottom. Bake for 10 minutes, then set aside to cool.

For the filling:

1.25 c (9 oz) full fat ricotta
1/2 c heavy cream
scant 1/4 c maple syrup
2 egg yolks
1 egg
zest of 3 lemons
1 tsp vanilla extract
1 tbsp lemon juice

This is as easy as it gets: toss ricotta into a large bowl, and stir in the rest of the ingredients: cream, maple, egg yolks + egg, lemon zest, and vanilla. Mixing well to prevent any lumps (heaven forbid).

Tart Assembly:
Pour the ricotta filling into the baked and cooled tart shell. Place in the oven at 350 and bake for 35-45 minutes – the center of the tart should be set when done. Let cool completely before serving. Slide the tart pan ring off before serving if you used a pan with a removable bottom like I did.

Top with berries and shredded coconut if desired! Serve with softly whipped cream – I highly recommend it. Keep refrigerated until serving. Keeps well overnight in the fridge, covered loosely in plastic wrap – arguably it’s almost better the next day, of course for breakfast!

fullsizeoutput_174b


Vegetables for dessert? Sure, why not.

fullsizeoutput_11a5

Happy 2018! I hope your new year got off to a good start – mine certainly did, absolutely no complaints over here!

fullsizeoutput_11a8

I’ve always been intrigued by the idea of using a squash other than pumpkin in a dessert.

fullsizeoutput_118f

Don’t be deceived by the cute little dumpling squash hanging out in these pictures – what really went in here is kabocha, one of these guys:

IMG_2199

I like the kabocha here – if you’ve never encountered one, they’re a bit of a cross between pumpkin and butternut squash. I really like it for the earthiness it brings here, which plays nicely against the apples. Side note: after some thought, we gave it mixed reviews – it feels a little vegetabley to be dessert – I almost wonder if it would work as a side dish. That being said, if you like not too sweet things / vegetables, go for it!

fullsizeoutput_117f

Besides, this is my absolute favorite crisp topping – it has a little extra protein from greek yogurt and almond flour, and is just so fun to eat. It stays crispy even after hanging out in the fridge overnight, which makes this excellent breakfast (see exhibit A).

fullsizeoutput_11ac

I also love it for dessert with ice cream (obviously) – the crisp ends up covered in melty ice cream, making it into slightly indulgent granola/muesli.

fullsizeoutput_11ad

fullsizeoutput_118e

In other news, I’ve been museuming and drawing again, which feels great. I let it lag a little too long I think!

fullsizeoutput_1168

IMG_2201

Of course coffee.

IMG_2198

Here’s hoping you’re enjoying the beginning of the new year! I have good feelings for this one. If you’re in the mood for a lightly sweet, perfectly healthy desserty-breakfast, I’ve got you covered! Happy baking :)

fullsizeoutput_1195

fullsizeoutput_11a9

Kabocha Squash and Apple Walnut Crisp

Gluten free, refined sugar free, and whole grain. Full of healthy fats AND fruits & veggies! Feel free to eat this as breakfast, I certainly did. Side note: we gave it mixed reviews – it feels a little vegetabley to be dessert – I almost wonder if it would work as a side dish. That being said, if you like not too sweet things / vegetables, go for it! Adapted from the Raz-Apple crisp I made around Thanksgiving, here. Yield: 1 2-quart baking dish (it’s about 8 by 8 and deep). Serves: 2 for dessert & then breakfast! Or… you know, a normal amount of people.

For the filling:

2-3 largish Granny Smith apples, cored and sliced into thin wedges*
1 small kabocha squash, peeled & cubed*
1/4 cup maple syrup
1/4 c port**
1 tablespoon lemon juice
2 teaspoons arrowroot starch
½ teaspoon ground cinnamon
¼ teaspoon ground allspice

*I just approximate as I slice; I use however many it takes to fill my 2 quart, 8×8 baking dish; for ease of cutting kabocha squash, I recommend slicing it in half, then in wedges and using a knife to carefully peel it. The peel is totally edible, but I didn’t want its texture in the crisp. You’ll still get an arm workout peeling these babies, believe me!

**the port is optional but amazing; if you don’t use it, use 1/4c water instead

For the crisp:

1 cup old-fashioned oats (use certified gluten-free oats for a gluten-free crisp)
½ cup firmly packed almond flour
½ cup chopped walnuts
1/4 c unsweetened shredded coconut
2 tbsp maple sugar
¼ teaspoon fine sea salt
2 tsp vanilla extract
4 tablespoons unsalted butter, melted
¼ cup plain whole milk Greek yogurt

Preheat the oven to 350.
In a veggie steamer (I use a metal steamer inside a pot), steam the kabocha squash for 10-15 minutes, until just barely fork tender.

Slice apples into a deep baking dish, and add steamed kabocha squash (my dish is 8×8, 2 qt capacity; 9″ square or 9″ deep pie dish would also be fine). In a liquid measuring cup, whisk together the maple and water/port until combined. Add the lemon juice, arrowroot, cinnamon and allspice, and whisk to combine. Pour the mixture over the squash and apples and toss to combine. Bake for 15 minutes.

While the filling is baking, make the crisp. In a mixing bowl, stir together the oats, almond meal, walnuts, shredded coconut, maple sugar and salt. Mix in the vanilla, melted butter and the yogurt. Stir until everything is mixed thoroughly.

Once the filling has baked for 15 minutes, stir to redistribute it evenly in the dish. Plop spoonfuls of the crisp topping evenly over the filling – no need to pack it down. Return the dish to the oven and bake for 25 to 30 more minutes, until the filling is bubbling around the edges and the top is golden.

Let the crisp rest at least 5 to 10 minutes before serving; or do like I did and make it earlier in the day, and have it later. Serve with vanilla ice cream, obviously! Keep leftovers, covered, in the fridge for about three days (yeah right. It would take some kind of major feat to make it last that long; ours was gone in just over 1!) Serve cold alongside breakfast because it’s extra awesome that way.

fullsizeoutput_11a5

Come to the Dark Side… I have pie.

img_5622

Pie! Such a perfect food. Especially when it resembles… the Death Star! Because why have plain pie when you could show off your nerdiness to the world? I almost didn’t want to eat this… but I did.

img_5610

Pie crust used to intimidate me, which is pretty stupid given that it’s basically just flour and water and butter… yet I think sometimes the simplest things end up being the trickiest (in life and in baking!). But pie is also a fairly forgiving food, and will love you endlessly if you learn to make it with the confidence it deserves.

img_5611

I think I’m finally at that point — this one felt great! I am quite pleased with the way it came out both in looks and taste… the sci-fi nerd is strong in me ;) I think the key with pie crust is not to let on that it makes you nervous! It can probably sense that, ha! Maybe with its pie crust force powers…

img_5609

Thank goodness pie is so delicious – it makes all the potential crust shenanigans worthwhile.

img_5607

In other news, another drawing for the series!

img_5603

Anndddd…. the first skiing of the season! Wheeeee!!! And what great skiing it was. More to come, that’s for sure.

img_1810-2

img_5593

img_5592

But for now, pie. Because often the simplest things in life are the most enjoyable, especially leftover pie for breakfast in good company! Nothing better.

img_5617

Wild Blueberry Pie with Whole Wheat Dark Side Crust

Refined sugar free and whole wheat! Naturally sweetened with coconut sugar. Crust recipe yields a double crusted pie, enough for a Death Star of your own making if you so choose. Crust recipe lightly adapted from Carolyn McCuaig (thanks Carolyn, if you’re reading this!)

img_5616

For the crust:

  • 2.25 c whole wheat pastry flour
  • 2 tbsp coconut sugar
  • 1/4 tsp fine sea salt
  • 1/2 tsp baking powder
  • zest of one lemon
  • 1/3 c vegetable shortening
  • 1/3 c butter (mine was salted), cut into chunks
  • 5-7 tbsp ice water

For the filling:

  • 4 c wild blueberries, or enough to heapingly fill your pie plate (frozen is fine)
  • juice of one lemon
  • 1/4 c coconut sugar
  • 1/3 c whole wheat pastry flour

For finishing: 1-2 tbsp butter, 1 egg for egg wash

To make the crust: in a large bowl, whisk together pastry flour, coconut sugar, salt, baking powder, and lemon zest. Cut in shortening and butter either with your fingers or a pastry cutter until a coarse mixture forms and the butter chunks are the size of peas. Make a well in the center of the dough and add in the ice water one tablespoon at a time – mix as little as possible when incorporating the water to avoid overworking the dough. Once it will stick together, you’re good to go. Divide it into two even pieces, wrap in plastic wrap and chill for at least 10 minutes and up to an hour.

While the dough is chilling, put together the filling. Toss blueberries, lemon juice, coconut sugar and flour in a large bowl.

Once the dough is chilled, roll it out between two pieces of parchment or on marble, whatever you have – I like parchment for easy removal. Aim for about 1/8″ thickness, and lay the bottom crust into a lightly greased pie dish. Shape it with your fingers, evening out the top as per your pie plate or design you want — this crust will make a double crusted pie, so keep that in mind. Toss in blueberry filling goodness and dot with butter.

If you want to get fancy and do the Death Star…

Cut out templates (thick paper or thin cardboard work nicely) for the Death Star and a TIE fighter. Have egg wash and coconut sugar handy (I use a beaten egg + 1 tbsp water). Use the templates to cut out the top crust shape, then use a chopstick or a knife to make the surface lines. Roll out thin pieces of dough for the details, and brush everything with egg wash to make it stick. Sprinkle coconut sugar where contrast is desired. Once finished, carefully lay top crust over the blueberry filling — there is no real need to seal the edges. Bake at 450 for 10 minutes, then 350 for 35-40 until the filling is bubbling and the crust is golden brown. Remove from the oven when done and let sit to cool for at least an hour, preferably more so that the filling will set. Serve warm or at room temp, and store any leftovers overnight on the counter, loosely covered, or in the fridge for longer (assuming it lasts that long). Pie can be made a day in advance if needed and reheated briefly in a 375 oven to crisp the crust and warm the filling – 10/15 minutes. The pie filling will firm up if stored in the fridge overnight, making slicing easier.

img_5613

Galette for breakfast: guaranteed to improve your election day experience

img_5117

Galette and pears and hazelnuts and dark chocolate and November!

img_5107-x3

I love fall because it means pears are EVERYWHERE and I love pears so this just feels like a win-win situation. Besides that, throw in some dark chocolate hazelnut filling and put all that goodness in a cardamom crust? Sign me up. And then eat it for dessert with ice cream and then for breakfast with (what else) eggs and kale and sourdough toast? Yeeessssss please thanks.

img_5101-x3

Let’s see, what else… today is election day! Did you vote?! I voted absentee ages ago and didn’t get a sticker… they should send stickers with the ballots!

And the time changed, woohooo for not having to get up in the dark anymore! I miss the extra daylight hours but I’d rather not go to work when it’s still dark out… Jessie and I enjoyed our extra hour of snuggles:

img_5089

Pretty skies lately!

img_5111img_5091

Annnnnd I’ve been drawing again, shocker I know. I just read a study that says making art reduces cortisol levels! Which is awesome and I think I subconsciously knew that because drawing always gets me into the flow state, pretty much without fail.

img_5110-x3

But anyway, back to galette!

img_5094-x3

This sounds complicated but totally isn’t. The crust is forgiving and easy to work with, and the filling comes together in a snap. Also, unlike the last time I made galette and crammed a truckload of blueberries into it, this one is far more structurally sound since pears are a little easier to wrangle than blueberries.

img_5097-x3

Give yourself a break from watching those election returns and gaze on this instead. I guarantee it’ll lower your cortisol levels ;) 

img_5109-x3

Pear Galette with Dark Chocolate Hazelnut Filling and Cardamom Crust

Grain free, gluten free, paleo and refined sugar free. Yay! There is butter, though a sub for coconut oil might definitely be possible (if you try it, tell me how it goes!). Yield: 1 galette, serving sizes are up to your discretion ;) A Wait are those Cookies original!

img_5096-x3

For the crust:

  • 1.5 c almond flour
  • 1/2 c tapioca starch
  • 1/4 tsp fine sea salt
  • 1 tbsp coconut sugar
  • 3/4 tsp ground cardamom
  • 1 egg
  • 6 tbsp salted butter, chopped
  • 2 tsp vanilla extract

In a food processor or high-power blender (I used a Vitamix), pulse almond flour, tapioca starch, cardamom, salt, and butter, and pulse to combine until it looks like coarse meal. Add in egg, coconut sugar, and vanilla extract and pulse just until combined. Turn out onto a piece of plastic wrap, shape into a disk and chill in the fridge for at least an hour, or up to overnight.

For the dark chocolate hazelnut filling*:

  • 1 c roasted hazelnuts, skins mostly removed (reserve a few for topping purposes if you want!)
  • 3 tbsp raw cacao powder
  • pinch of sea salt
  • 1.5-2 tbsp pure maple syrup
  • 1 tsp vanilla extract

* measurements are approximate! Adjust as necessary to suit your tastebuds :)

Blend hazelnuts in a vitamix or high power blender / food processor until a nut butter consistency forms (it’s okay for it to be on the chunkier side; mine wasn’t completely smooth). Add cacao powder, sea salt, maple, and vanilla and pulse until combined. This can be made up to a week ahead — just store it in an airtight jar in the fridge!

For the galette:

  • 1 crust
  • most or all of the hazelnut spread
  • 2 pears, thinly sliced (I used d’Anjou; Bosc would also be good) — you can peel them if you want, I chose not to
  • 1 egg, lightly beaten
  • 2 tbsp coconut sugar, divided
  • 1 tbsp salted butter, melted
  • extra hazelnuts for topping, if desired!

Preheat the oven to 375.

Roll out the dough between two pieces of parchment paper, keeping the circle to about 1/4″ thickness. Peel off the top piece of parchment, and slide the rolled out dough on its parchment onto a baking sheet. If you’re feeling extra artistic or motivated, cut some extra dough off the edge of the circle and cut leaf shapes out of it because… I’m an overachiever and it’s FALL! YAY! Anyway… moving on.

Spread the hazelnut paste carefully over the dough circle, leaving about a 2″ border from the edge — I found that the back of a spoon worked nicely for this (Try not to move it around too much, just press it into place so that the bottom dough stays intact). Spread the sliced pears in a fan shape if you’re feeling fancy, or just toss them all in there (I’m definitely not going to judge!). Begin folding up the sides, creasing them together as you go – if the dough is cracking, that’s okay (you can crimp the cracks back together; remember: galettes are forgiving and rustic!); you can use the bottom piece of parchment to help fold up the sides. Stick the leaves on the edges if you went that route. Brush the pears with the melted butter, and top with 1 tbsp of coconut sugar. Brush the dough with the beaten egg (I like a pastry brush for this), and sprinkle with the remaining tablespoon of coconut sugar.

Bake for 35-40 minutes (mine was perfectly done at 35, so check accordingly), until the dough is firm to the touch and golden brown. Let cool on the baking sheet for a few minutes, then slide the whole piece of parchment paper and galette onto a cooling rack to cool completely (or serve immediately!). Eat with some kind of vanilla ice cream thing (dairy or not) because… you should!

Leftovers keep covered at room temp for about… 1 day. Because it will be gone by then anyway so you won’t even have to worry. Promise!

img_5102-x3

Apples and Autumnal Dessert Shenanigans

img_5061

Good morning, invisible internet blog friends!

img_5055

I have apple-y, fall-y dessert for you today! And can someone explain to me how it’s almost November already? That snuck up on me… but whatever, I have baked apples (or at least I did, they’re all gone now, what a shocker) so it’s all good.

img_5045

img_5054

Despite looking and sounding kind of complicated, these apples actually aren’t so bad, they just require some advance planning. But there’s no prolonged dough chilling involved, and the dumpling dough is very forgiving (all good things in my book).

img_5053

I’m keeping it short and sweet today — apples, fall, cooler weather, rain, and caramel sauce. All that’s needed on a lazy October weekend.

img_5056

img_5046

In other news, I’m sitting with my legs wrapped in a blanket because it’s cool this morning and when I just went to get up, I got all tangled up and almost ate it. But I didn’t! I’m basically a mermaid…

img_5065

I don’t think desserts get more autumnal than this: apples stuffed with oats and walnuts, wrapped in pastry dough and baked in a caramel bath. Highly recommended both for dessert (with ice cream, obviously) and for breakfast, alongside eggs and something green. Happy Fall!

img_5059

Quinoa Flour Apple Dumplings with Caramel and Maple Glazed Walnuts

Gluten free, refined sugar free! Can be dairy free with a very easy swap (coconut oil for the butter in both the dough and the caramel); a delicious and quintessentially autumnal dessert. Despite looking tricky, these aren’t especially hard — they just take a little planning. Yield: 6 apple dumplings + sauce + walnuts; we found that 1/2 an apple was totally sufficient in one sitting but this could easily be 6 servings if that was all you were eating! Recipe adapted from The Kitchn, here!

img_5050

For the crust:

  • 3 c quinoa flour, toasted*
  • 2 tbsp coconut sugar
  • 3/4 tsp baking soda
  • large pinch fine sea salt
  • 1 tbsp maple syrup
  • 1 tsp vanilla extract
  • 4.5 tbsp salted butter
  • 1 c unsweetened almond milk

*toasting reduces the natural bitterness of quinoa — I do mine in a skillet over medium heat, stirring frequently for about 3-5 minutes, until the flour is fragrant and the flour is just barely starting to go golden. Let cool before using.

For the filling:

  • 6 small baking apples (I used Gala and Jonagold)
  • cinnamon & coconut sugar to taste
  • heaping 1/8 c rolled oats
  • large pinch of fine sea salt
  • a handful of glazed walnuts (reserve the rest for topping)
  • 2 tbsp salted butter, cut into 6 pieces

Glazed walnuts:

  • 1 c raw walnut pieces
  • 1/4 c pure maple syrup
  • 1 tsp vanilla extract
  • large pinch of fine sea salt

For the caramel sauce:

  • 6 tbsp salted butter
  • scant 2/3 c unsweetened almond milk
  • 1/4 tsp sea salt
  • 1 tsp vanilla
  • 6 tbsp maple syrup
  • 1.5 tsp arrowroot starch

These have a lot of parts, but they’re not very complicated when you break it down! I made the walnuts several days ahead, which I recommend.

Heat a saute pan over medium until warm. Add maple (it should fizz when it hits the pan), walnuts, vanilla, and sea salt. Stir to combine and let cook, stirring frequently, until the maple has caramelized and the liquid is gone. The walnuts will feel soft until they cool, which is fine. Line a baking sheet with parchment paper and spread them out to cool, breaking up any large chunks. Store in an airtight jar for several weeks (but, yeah right. Mine were gone in a day!)

To make the pastry: In a large bowl, stir together toasted quinoa flour, coconut sugar, baking soda, and sea salt. Cut in the butter using a pastry cutter or your fingertips, until the butter pieces resemble small peas. Add in maple, and vanilla. Add milk, 1/4 c at a time, stirring until the dough just comes together (I like using my hands for this, I find it easier than a spoon). Once most of the milk is added, the dough should form a largish shaggy ball. Turn it out onto a floured surface and roll it out to about 1/8″ thick. I found it easier to roll out two sections of dough separately, as my counters are slightly small. Cut a piece of parchment paper into a 6×6″ square, and use it to trace and cut 6 dough squares. Stack them on a plate with pieces of parchment paper in between, and let them chill in the fridge while you prep the apples for the filling.

Peel and core each apple. In a small bowl, mix together oats, cubed butter, cinnamon and a few glazed walnuts — this goodness should be chunky, which is fine since it’ll just be stuffed into the space where the apple core was.

Preheat the oven to 450, and lightly grease a 9×13 baking dish (or large cast iron skillet).

Retrieve the dough squares. Sprinkle a bit of cinnamon and coconut sugar on the bottom of each, put the apple in the center of the dough, stuff some of the filling in the cored space (I used a few walnuts per apple, and filled the rest with the oat/butter blend), and bring the corners of the dough up to meet over the top of the apple. Pinch the sides together to seal the seams. Repeat for all remaining apples, and if you’re an overachiever like me, make little leaves out of the excess dough for decoration.

Place the apples in the prepared baking dish or skillet, about 1″ apart. Bake for 20 minutes, until the crust begins to brown. While the crust is baking, make the caramel: in a small saucepan, melt butter / add almond milk, sea salt, and vanilla over medium, until it comes to a simmer. Stir in maple and arrowroot, and let simmer for a few more minutes until thickened. Remove from heat.

Lower the heat to 350, and bake the apples for 30-40 more minutes**, until the apple is soft when poked with a fork and the dough is browned (quinoa flour is a little delicate, so if your dough cracks after baking, don’t worry! It’s still delicious). Remove from the oven once done, and pour caramel sauce over hot apples, and in and around them in the pan. Let cool for a few before eating — top with sauce and walnuts and ice cream for serving!

These keep well overnight in the fridge, and are delicious for breakfast (as well as for dessert, obiovusly, I can vouch for both). Store in the original pan, loosely covered with foil.

**I have some beef with the original apple dumpling method, which is to pour the caramel over after the initial par baking, and then continue baking for about a half an hour. That’s what I did, but I ran into some soggy dough and had to resort to some interesting pan switching techniques to continue baking them and THEN add the sauce back. SO. I would recommend the above method, which is how I would make them, when I make them again. That being said, they are delicious either way so you really can’t go wrong.

img_5063

Summer = Shortcakes. Forever and always!

IMG_4701

I’ve decided that every summer needs to have at least one shortcake, because summer and shortcake are just made for each other. Gloriously excessive gluts of fresh berries, stone fruit, or both… shortcake is best friends with all of them.

IMG_4705

Shortcake is also fast, simple, and doesn’t heat up the kitchen (too) much; besides, even if it does, it’s worth it.

IMG_4697

These were definitely worth it! Not only were they a delicious very late night snack to accompany a prerecorded watching of the GC time trials from the TDF16 (nerd alert, sorry not sorry), they also made an awesome side to eggs and greens the next morning for breakfast. Nothing better than a versatile shortcake…

IMG_4695

In other news, the world’s most giant zucchini decided to make an appearance in the yard (it was subsequently turned into vegan, gf brownie bars as well as sautéed with kale for the obligatory savory part of dinner).

IMG_4660

I also brought back the dashboard cookie the other day since I really wanted cookies and it was way too hot to even consider turning on the oven. They turned out great as usual, and my car smelled amazing for about five seconds.

IMG_4670

But anyway. Back to shortcakes. The other funny thing is that I seem to always make them right before I leave for camp, which I do on Monday. Maybe summer = camp = shortcakes? Who knows. Whatever though, I’m just happy I made and ate them and sad that they’re gone. These were delicious with only strawberries, and with strawberries+raspberries… despite not really eating dairy these days, these were eaten with ice cream and it was SO worth it. Because sometimes you are reminded that life is short, and should be enjoyed to the fullest.

IMG_4699

That being said, it’s summer! Make shortcakes! These are grain free and paleo, so have at it. Give your summer berries a playdate with their best friends shortcake and ice cream. Your return on investment will be delicious!

IMG_4702

Grain Free Shortcakes with Summer Berries

Gluten free, grain free, refined sugar free, paleo (for those who eat butter). Lightly sweet, slightly vanilla-y. Excellent with any kind of berry (or stone fruit) that you happen to have on hand. I didn’t do anything to the fruit since it was so perfect; just slice and eat. Serve with ice cream, non-dairy, whipped cream, coconut whipped cream… the options are endless. Recipe lightly adapted from The Roasted Root, here! Yield: 7 medium sized shortcakes (go either bigger or smaller for 6 or 8 cakes, up to you!)

IMG_4707

  • 2.5 c almond flour (not almond meal, the consistency is different)
  • 1/2 tsp baking soda
  • 1/4 tsp fine sea salt
  • 3 tbsp salted butter, melted*
  • 2 tbsp unsweetened almond milk
  • 1 tbsp pure maple syrup
  • 1 tsp vanilla extract
  • 2 large eggs
  • 1/4 tsp apple cider vinegar
  • Ice cream or whipped topping of choice for serving
  • Summer berries or stone fruit for serving!

*coconut oil also fine, though I used butter and they were awesome because…. BUTTER.

Preheat the oven to 350, and line a baking sheet with parchment paper.

In a large bowl, whisk together the almond flour, baking soda, and sea salt. In a smaller bowl, whisk together melted butter, almond milk, maple syrup, vanilla, eggs and vinegar until combined. Using a spoon, stir the wet into the dry until incorporated. The dough is moist but should be workable (you can chill it for a few minutes if it’s not). Scoop dough balls in the size of choice and roll them gently in your palms before putting them onto the baking sheet a few inches apart. Flatten them slightly with your fingers or palm.

Bake for about 15 minutes (mine were perfect at 15) until the top is golden and cracked. A tester should come out clean. Eat immediately, or let cool on a rack (I like them room temperature).

Serve with ice cream or whipped topping of choice (mine was vanilla caramel gelato) and fresh strawberries — I love my fruit so much, I didn’t do anything to it, but feel free to doctor your fruit as you see fit.

Store these overnight in the fridge — they’re also great cold for breakfast the next day!

IMG_4690

Even fruit likes to get dressed up sometimes

IMG_4574

I’m on sort of a roll here to see how many desserts I can make in my fave 8″ cast iron skillet… I’ve recently re-embarked on a cast iron love affair, and it is PERFECT for dessert. Points for charm, too, of course. So! This week’s incarnation is cobbler. Or some type of fruit dessert with topping. There are so many different ones: crisp, crumble, cobbler, grunt, slump, pandowdy, buckle.. now that I’ve listed them all, I feel compelled to go look up the differences. Hold that thought…

IMG_4572

Holding?

IMG_4575

Okay. I’m back.

IMG_4573

Woah. Information overload. Apparently grunts, pandowdies and slumps are the New England version of cobbler, whereas cobbler is more traditionally from the Deep South. Huh. Who knew. Anyway, they’re basically the same thing anyway: take some delicious fruit and smother it in a biscuit dough / pie dough incarnation / crispy crumble thing and bake that thang in a skillet. Any way you slice it, they’re obviously delicious, so let’s just leave it at that. Despite the research I’m still not sure if this is *technically* a cobbler, but who cares. Let’s not get technical, it’s the weekend!

IMG_4584

Look at me doing research for fun not even a week out of graduate school! What. Weird. I’m going to stop now, that was quite enough, thank you.

Cobbler! Ahhhh. Summer fruit. Probably one of my favorite eating seasons. For when you have all the fruit and can’t possibly sit and eat it all. And for when you want your fruit to have a crunchy, crumbly delicious topping. Because even fruit likes to get dressed up sometimes.

IMG_4586

Peach, Blackberry and Blueberry Almond Quinoa Cobbler

This could easily be gluten free — just sub the spelt flour for more quinoa flour or any other gluten free flour of choice. Could also be dairy free: sub in melted coconut oil for the butter. Refined sugar free, healthy fats, and full of antioxidants. Perfect summer dessert, and a perfect reason to bust out that smallish skillet of yours. Yield: 1 8″ skillet, serves 2-4 depending on how hungry you are and whether this gets eaten for dessert and then for breakfast…  A Wait are those Cookies original!

For the fruity goodness:

  • 2 c peaches, chopped into 1/2″ chunks
  •  1 c blackberries*
  • 1 c blueberries*
  • 1 tbsp fresh lemon juice
  • 1 tbsp organic cornstarch
  • 2 tbsp date sugar

*mine were previously frozen; if yours are too, just thaw them first

For the cobbler topping:

  • 1/2 c almond meal
  • 1/2 c quinoa flour, toasted**
  • 1/4 c spelt flour
  • 1/4 c date sugar
  • 1 tsp baking powder
  • 1/8 tsp fine sea salt
  • 1/4 tsp cinnamon
  • 1 egg, lightly whisked
  • 1 tbsp maple syrup
  • 1 tsp vanilla extract
  • 4 tbsp salted butter, melted and cooled

**toast the flour over medium heat in a smallish skillet, stirring occasionally until fragrant (less than 5 minutes usually; take it off just before it starts to brown)

Grease an 8″ cast iron skillet, or another 8″ pan of choice with coconut oil. Preheat the oven to 375.

In a large bowl, toss fruit with cornstarch, lemon juice, and date sugar. Set aside. In a smaller bowl, whisk together almond meal, toasted quinoa flour, spelt flour, date sugar, baking powder, sea salt, and cinnamon until combined. Stir in whisked egg, maple, and vanilla, followed by the melted butter. Stir until just incorporated.

Pour the fruit into the prepared skillet, and top with spoonfuls of batter. Bake for 30 minutes, until the topping is lightly browned. Cool for at least 10 minutes before eating.

Highly recommended with your ice cream of choice (in this case it was paleo gelato made from cashews and maple syrup, I’m obsessed). Store any leftovers in the fridge!

IMG_4585

Baking. Because… camp is imminent!

IMG_0786

Welcome to my ritual.

IMG_6594

I ALWAYS bake before I leave for camp. I’m not sure when this started but… it did (shocking, I know… me? Baking?! Weird) and I have no reason to be breaking this delicious trend.

IMG_6595

And I leave tomorrow! This totally snuck up on me but I am so ready for ten days of mountain fun with my camp fambam. Dirt. Hair that could scrub out a pot (yes, I was told I should do that last summer and immediately decided I would shower; as much as I love having steel wool for hair) (my hair does really interesting things when it isn’t washed for a zillion days) (yes I’m too lazy to shower because I just get dusty again and I’m camping and I’m in the lake soooo who cares?!). Enough with the parenthetical rambles. Moving on.

IMG_6601

Campfires where I go to bed smelling like woodsmoke… brownies to die for even though they’re made with a mix, I’m obsessed… eating outdoors, every meal… stars so bright you think your eyes are malfunctioning… singing the most ridiculous songs because you can… yoga on the dock… a complete technology detox… beautiful scenery…friends. My indescribable camp family. So much Two Sentinels love!

But anyway, haven’t left yet, and in between last minute packing, I made these!

IMG_6598

Whole wheat buttermilk biscuit peach shortcakes with vegan caramel sauce and ice cream.

Because fruit.

IMG_6575

Peeeeeaaacheeesssss. My favorite part of summer. Actually that would be a tough call since I love berries equally as much… all the fruit. I want ALL of it!! But besides that, we happened to have an excess of peaches this week so instead of eating them all leaning over the sink with juice going everywhere, I made dessert. Of course.

IMG_6580

And happily fulfilled my pre-camp baking ritual! Happy days. See you on the flip side, let’s hope I get all the dirt off this time (unlike last year.. you know it’s good when there’s still dirt on your face *after* your post-camp shower…)!

IMG_6599

Whole Wheat Peach Shortcakes with Vegan Caramel (And ice cream. Obvs)

I like barely sweet shortcakes, since they highlight the super-sweetness of perfectly in-season summer fruit. Mmmm. These are whole wheat, made with buttermilk for a bit of a tang. Perfectly balanced against the sweet peaches and maple caramel.. and ice cream. Because summer dessert = ice cream. Or whipped cream, also fine, I just went with what I had. Shortcake recipe lightly adapted from Food52, here, and caramel borrowed from Blissful Basil, here! Yield: 6 shortcake/biscuits; I made a half batch of caramel for 4 peeps, so those measurements are listed below. Makes about a cup.

IMG_6602

For the shortcakes (whole wheat is good for youuuu! So is a little butter now and then):

  • 1.75 c whole wheat pastry flour
  • 2 tsp baking powder
  • 1/2 tsp baking soda
  • 1 tsp fine sea salt
  • 1 tbsp coconut sugar
  • 4 tbsp chilled unsalted butter, cut into smallish pieces
  • 3/4 c buttermilk (mine was low fat)

For the filling:

  • An excessive amount of peaches, diced (I leave the skin on mine), tossed in a bit of coconut sugar if yours are less than perfectly ripe
  • ridiculously delicious ice cream of choice

For the caramel (full of healthy fats and good nutrients!! Winning):

  • 1/6 c coconut oil
  • 1/4 c unsalted, creamy almond butter
  • 1/4 c pure maple syrup
  • 1/4 tsp sea salt
  • 1 runneth-over tsp vanilla extract

Preheat the oven to 450, and line a baking sheet with parchment paper.

In a largeish bowl, whisk together flour, baking powder and soda, salt, and sugar. Cut in the butter using your fingertips (my preferred method) or a pastry cutter, until things start looking like coarse cornmeal and the butter is distributed evenlyish. Make a well in the center (look! You get to play with your food!), pour in the buttermilk, then use a spoon or spatula to stir it all together, until just combined (do try not to over mix). Divide the dough into six cute little balls, then flatten slightly and place on the baking sheet. Bake for just about 15 minutes, until the tops are firm and lightly browned. Let cool slightly on a rack before serving.

While the shortcakes are baking, make caramel!

In a small saucepan over medium, heat coconut oil, almond butter, maple, and sea salt over medium until all are melted and incorporated. This shouldn’t take more than a minute or two, which is excellent for instant gratification. Turn off the heat and stir in vanilla. Serve warm or cold, and store leftovers in the fridge!

I could tell you how to assemble your shortcakes but that might insult your intelligence… but I would suggest cutting them in half to get maximum cake square footage to soak up excessive amounts of ice cream and caramel and peach juice…

IMG_6597

Sometimes you just gotta go big

IMG_0575

You know those times.

IMG_6494

For when there’s a dinner party with besties+boys and you’re bringing dessert (because um obviously, why would I bring anything else?!) and really… dinner party desserts = epic. Because on a random week day cookies or a simple sheet cake are all well and good, but a layer cake? I wish. I mean, I could but a) unfortunately don’t have time for that and b) I would be a zillion pounds if I baked like this all the time.

IMG_6501

IMG_6497

BUT. For a dinner party? Absolutely. Keep that in mind, all y’all who want my desserts… invite me to your next din din shenanigans! Ha. I totally break the silly rule allllll the time that says you’re not supposed to try out new recipes on guests (or I suppose hosts) but HELLO if I did that I would never make anything new, so too bad. Luckily enough not only was this not an unmitigated disaster, but it was freaking fantastic. Like maybe the best cake I’ve made and eaten in…. months. At least.

IMG_6504

Mutti said it was the best cake I’d ever made… and I went home with one slice out of an entire two layer, 9″ cake. Hmm… I think I’m picking up on something here… this cake was DAMN good. I know I know, you’re not supposed to say your own food is good but I can’t help it because I want this all over again and it’s gone and what whyyyy?!

IMG_0578

I may have to make this again. Really really really soon. Someone have a dinner party!! Extra points if it’s themed and there’s a costume element… just mentioning…

Don’t wait till your next dinner party to make this. Do yourself a favor, and then have cake for breakfast. Because we all know that’s what you get to do when you’re an adult.

IMG_0576

Banana Caramel Cake with Salted Coconut Caramel and Caramel Buttercream

Besides that this is utterly DELICIOUS, it also happens to be refined sugar free! The caramel is paleo (though the cake isn’t), and the cake is made with whole wheat flour so you get a bit of good fiber and whole grains with your decadence. Cake and buttercream recipes are slightly adapted from the Kitchn, here, and the caramel comes from An Edible Mosaic, here! Makes one two layer, 9″ cake, enough buttercream to fill and top cake, and a generous amount of caramel because OF COURSE you want some left over for drizzle purposes later. I recommend making the caramel a day early, so you can just do cake+buttercream the day you’re eating all the goodness.

IMG_6492

Salted Coconut Caramel

Makes more than enough to drizzle over cake while frosting, plus more for drizzle purposes just prior to eating. AND has enough for leftovers later. Win win win. The yield is somewhere around 2.5 cups of caramel. You’ll use at least 1.5 generous cups for the cake+buttercream, and then at least another 1/2 cup for drizzle.

  • 2 cans full-fat coconut milk
  • 1/2 c pure maple syrup
  • 1/2 c coconut sugar
  • 2 tsp vanilla extract
  • 2 tbsp unsalted butter
  • scant 1 tsp fine sea salt

In a saucepan over medium high heat, combine coconut milk, maple, and coconut sugar. Let it boil, then turn it down so it’s just barely boiling, with the bubbles just breaking the surface. Whisking continuously, cook for 15-20 minutes, until the caramel has thickened slightly (though it will still be a runnier caramel, that’s fine), the liquid has reduced, and the color is darker. I cooked mine for a bit over 20 minutes. Remove from heat and stir in vanilla, butter, and sea salt, and whisk until smooth. Let cool completely in the pan, then store in a sealed jar in the fridge [because we know I store everything in jars anyway].

IMG_0577


Banana Caramel Cake

  • 3/4 c grass-fed, unsalted butter, softened to room temp for an hour
  • 3/4 c coconut sugar
  • 3 eggs
  • 3 c whole wheat pastry flour
  • 1.5 tsp baking soda
  • 1/2 tsp fine sea salt
  • 1.5 c unsweetened almond milk
  • 2 tsp vanilla
  • 1.5 c mashed, ripe bananas (about 4-5 bananas)
  • heaping 1 c of coconut caramel (recipe above)

Preheat the oven to 325, and grease two 9″ baking pans with coconut oil/butter.

in a large bowl, cream together the softened butter and coconut sugar (I used a hand mixer), until fluffy. Add in the eggs, one at a time, beating after each addition until the batter becomes silky looking and slightly lighter in color.

In a smaller bowl, whisk together flour, baking soda, and sea salt. Thoroughly mash bananas in a small bowl, then whisk them together with the almond milk and vanilla. Begin adding flour mixture and banana mix into the butter+eggs bowl, beating after each addition and alternating dry-wet-dry-wet-dry until incorporated. Pour batter into prepared pans. Pour a heaping 1/2 cup of caramel over each pan, and use a knife to swirl the liquid into the cake batter (it’s best if it isn’t completely incorporated, leave some caramelly pockets).

Bake for 45-50 minutes, when a tester should come out clean. Let cool in the pans for a few minutes, then run a knife around the edges and turn them out onto cooling racks. Let cool completely before frosting.

IMG_6487

Caramel Buttercream

  • 1/2 c grass fed, unsalted butter
  • 1/2 c caramel sauce (recipe above)
  • 1 tsp vanilla
  • 1/4 tsp fine sea salt
  • 1.5 c powdered sugar

In a largeish bowl, use a hand mixer to beat together butter, caramel sauce, vanilla, and sea salt until mostly incorporated and smooth(don’t worry if at first it looks a little grainy, mine smoothed right out after I beat in the sugar). Pour in powdered sugar, and beat until a silky frosting forms.

Once cake is completely cool, flip the bottom layer carefully onto your cake plate of choice, frost the middle, then flip the other layer on top. Frost that, using as much buttercream as humanly possible. Be a little careful, as this frosting tends to slip a little bit (don’t make any radical maneuvers with your cake whilst transporting or anything). Top with more drizzled caramel (obvi), and some unsweetened shredded coconut+chopped pecans if that floats your boat (it very much floated mine and my dinner companions). It’s also especially awesome with good vanilla ice cream…

Store the cake in the fridge prior to serving, as well as any leftovers (ha, I dare you).

IMG_6496

IMG_0570