Yuzu da bomb (see what I did there?!)

fullsizeoutput_2772

Hi friends!

fullsizeoutput_2768

Hey, we made it through Monday! Not sure about you, but I’ve been counting the hours till I could get back in bed, starting when I got out of bed this morning. Lucky for me, that time is nearly upon me.

fullsizeoutput_2784

At least I got to wake up to some rain this morning! SF got a bit of heavy drizzle / real rain, and it smelled soooo good. More of that please! I might be in the minority there but I love the rain, unashamedly.

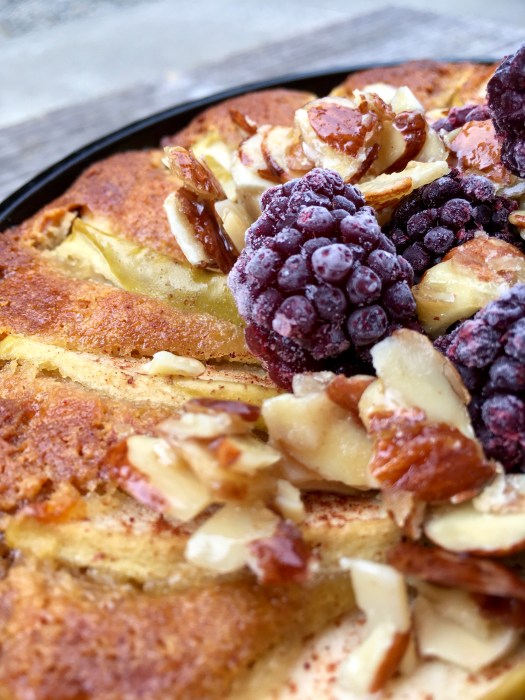
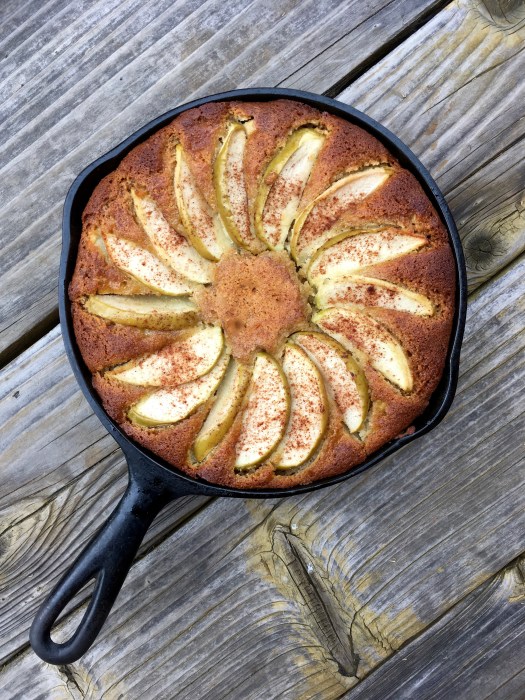
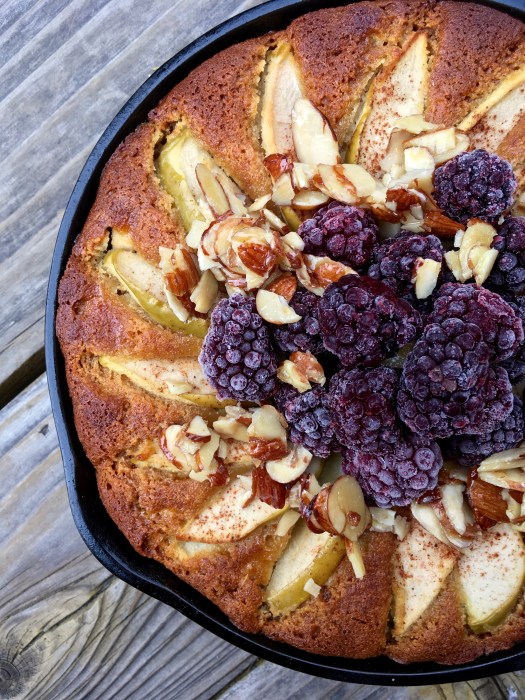
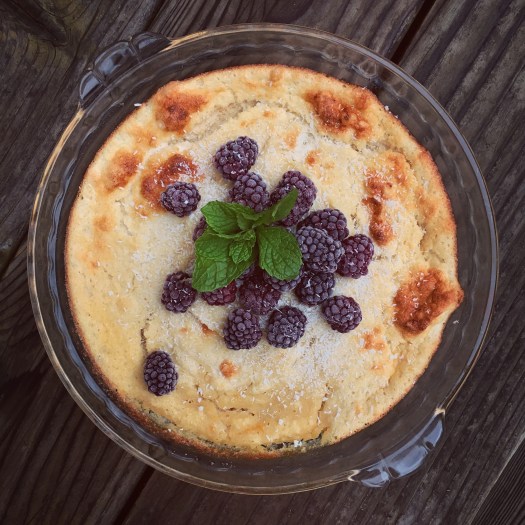
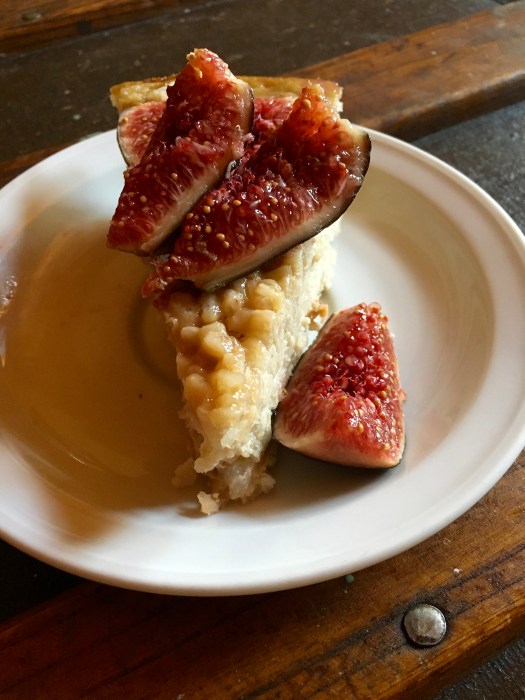
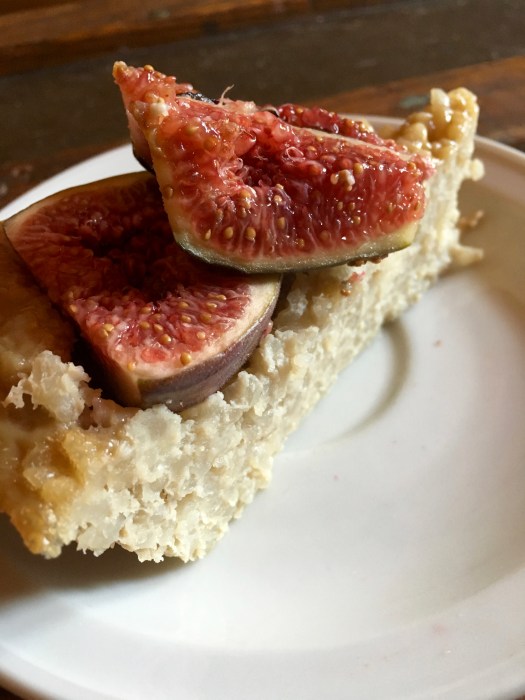
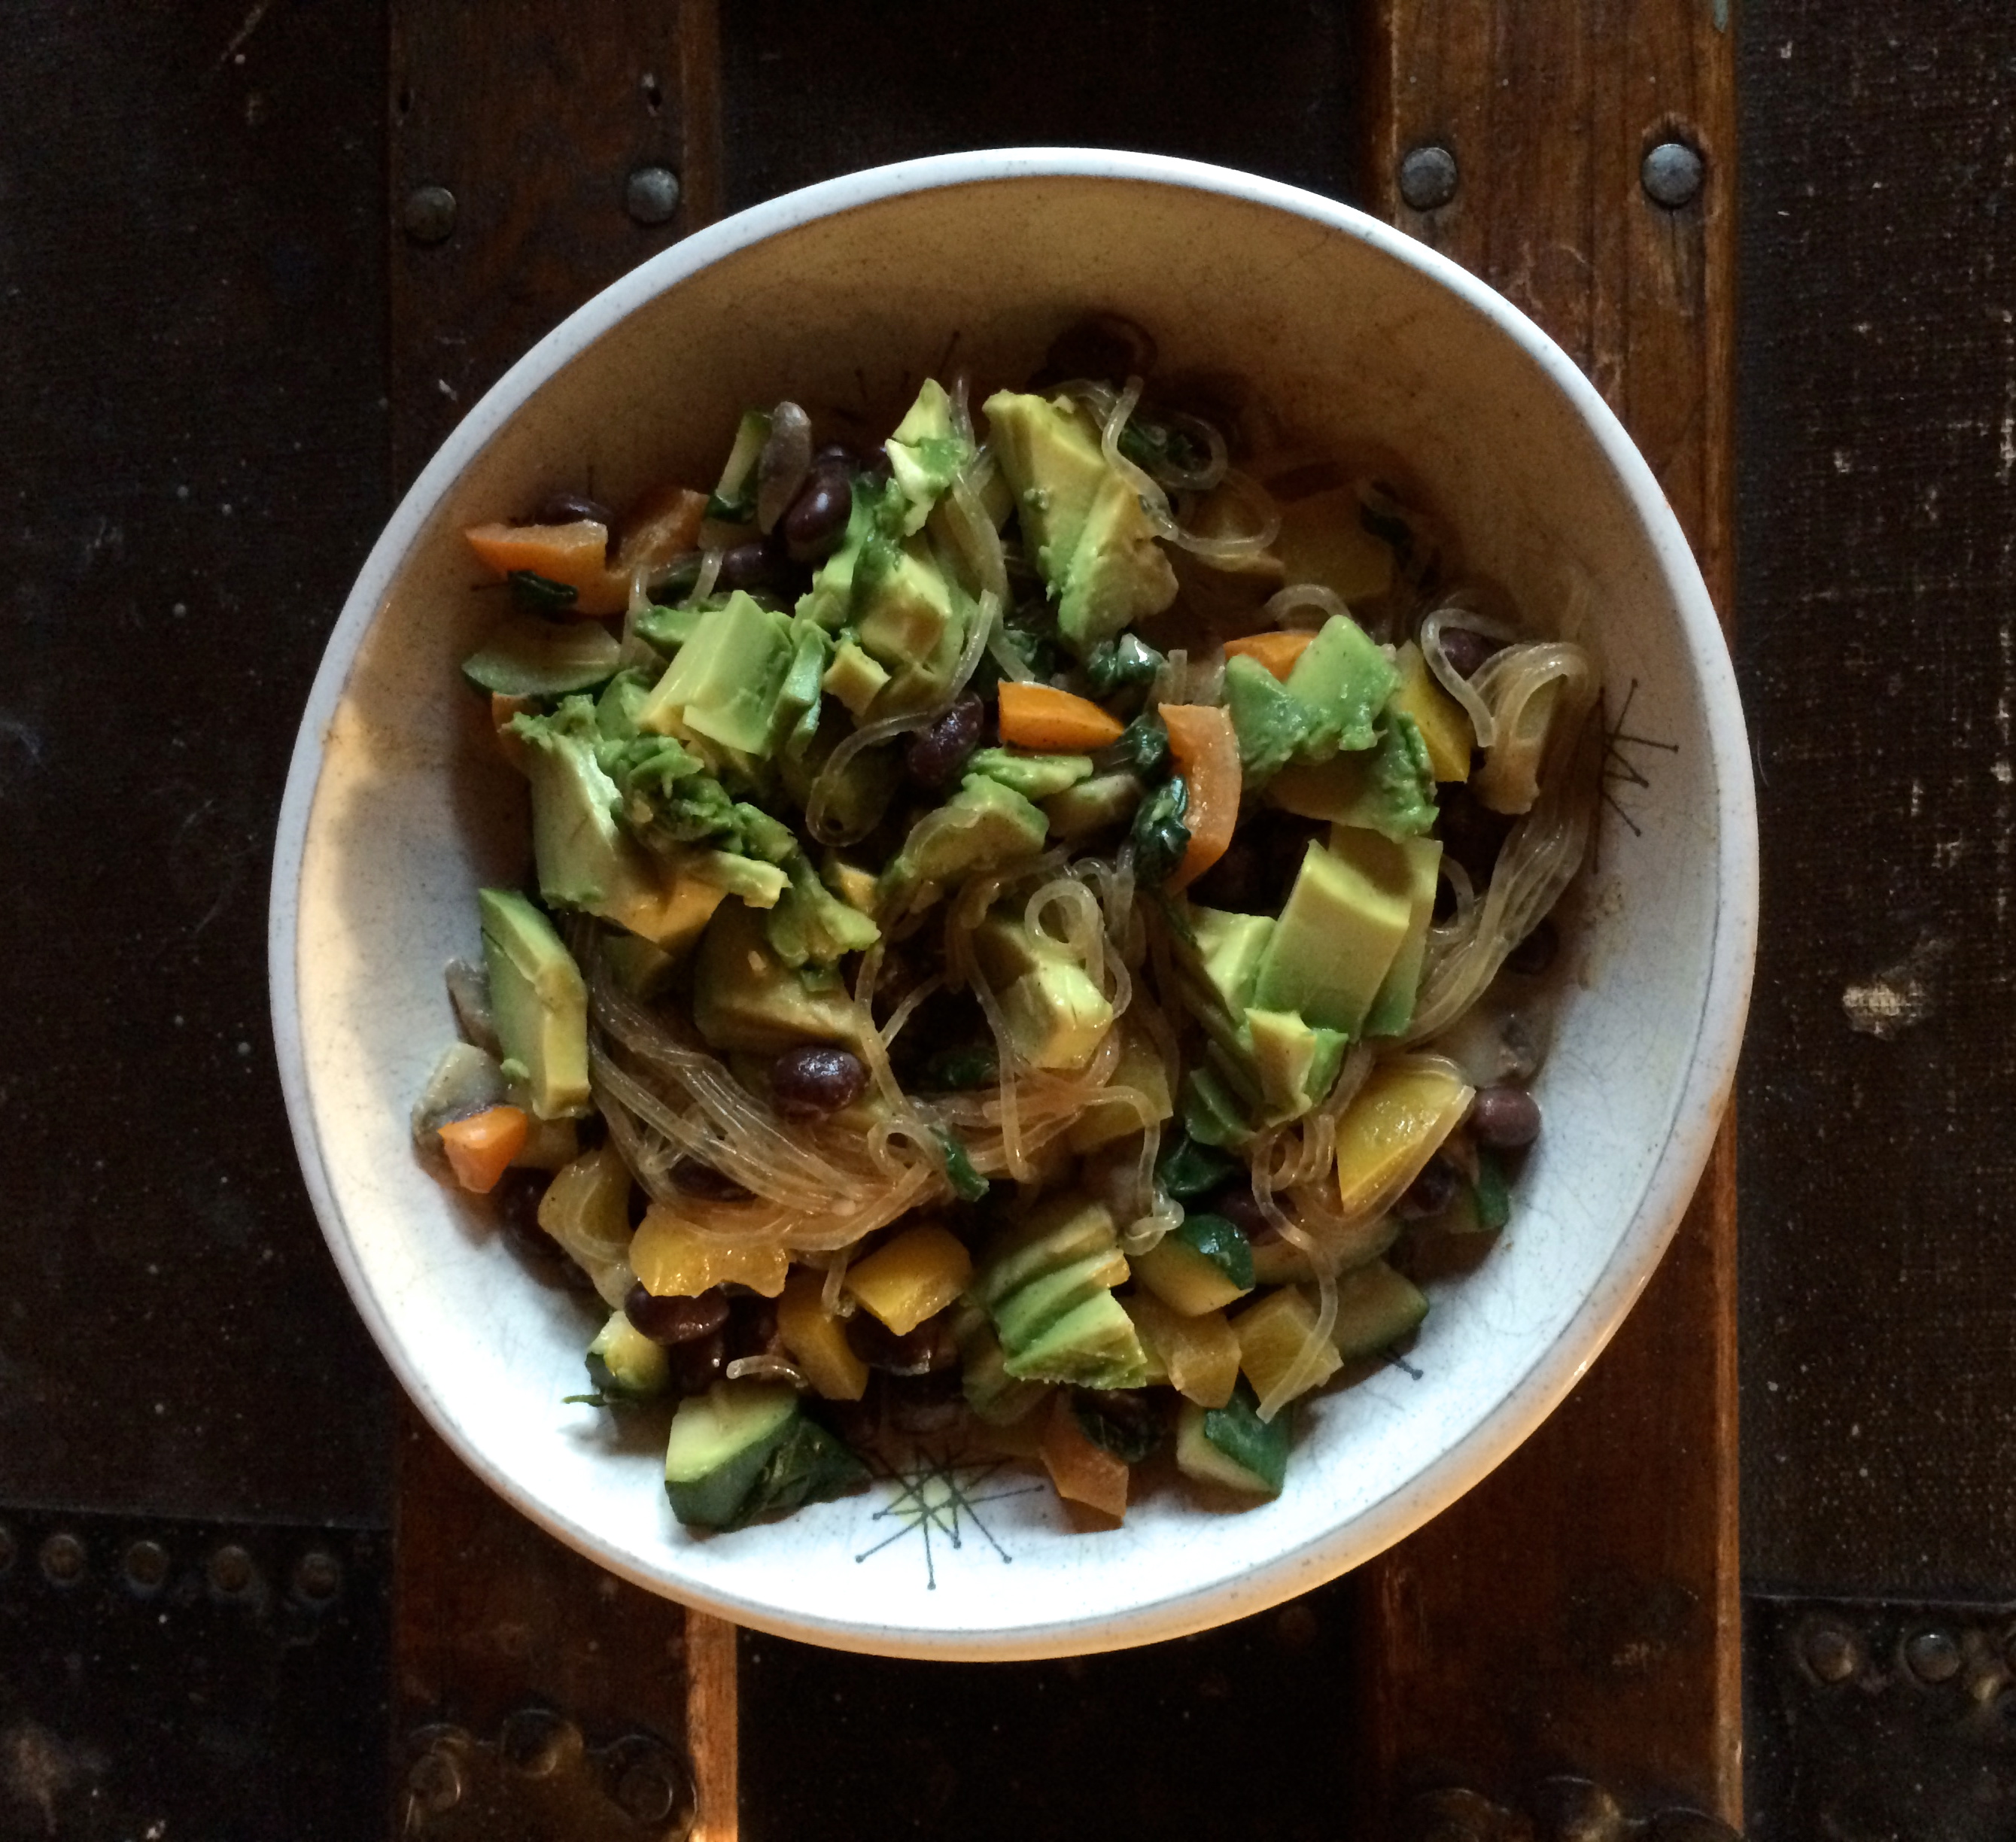
I had a really delightful day yesterday being super productive with all my usual weekly cleaning / laundry / market shopping / exercise / etc but also made some nice me-time for myself: brunch (pictured below), a long walk, my book, and a sun puddle. Fave human dropped by in the evening to share yuzu tart with me, so all in all a really solid day.

fullsizeoutput_276c

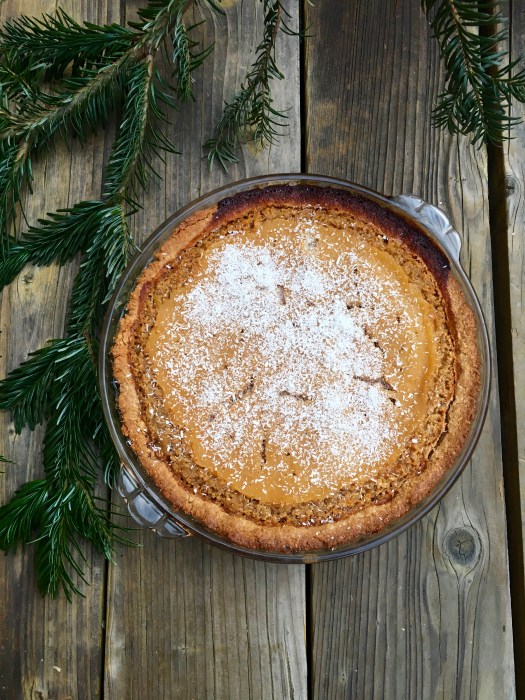
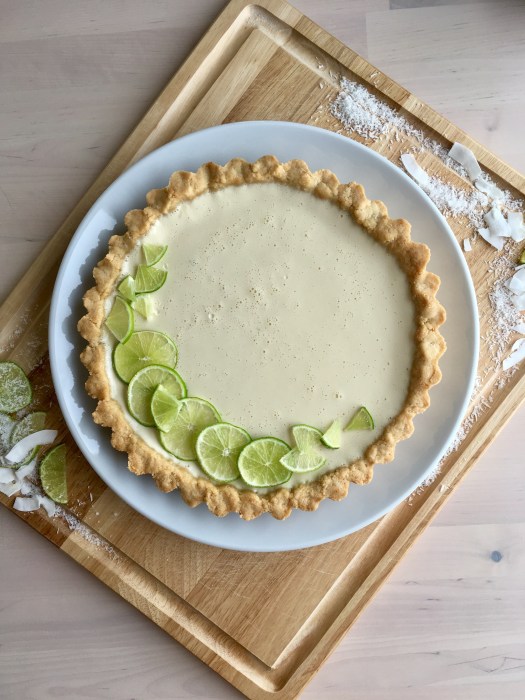
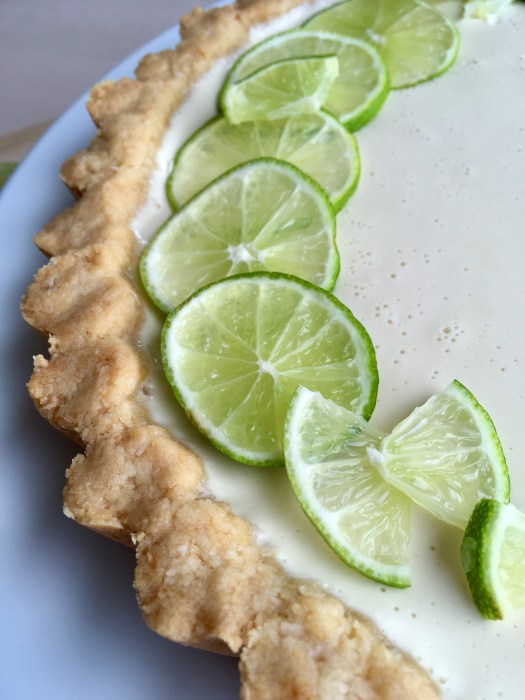
I have yuzu tart for you today! Yuzu is a citrus fruit commonly found in Japanese and Korean cooking – I happen to live right across from Japantown, which makes sourcing yuzu juice exceptionally easy. Happy days! I love yuzu. Well actually, it would be factually more accurate to say that I love all things citrus, but yuzu is fun because it reminds me quite a bit of key lime. I hardly ever (maybe never?!) do anything with key limes since it seems like they’re hard to find out here, but yuzu makes an arguably better substitute.

fullsizeoutput_2780

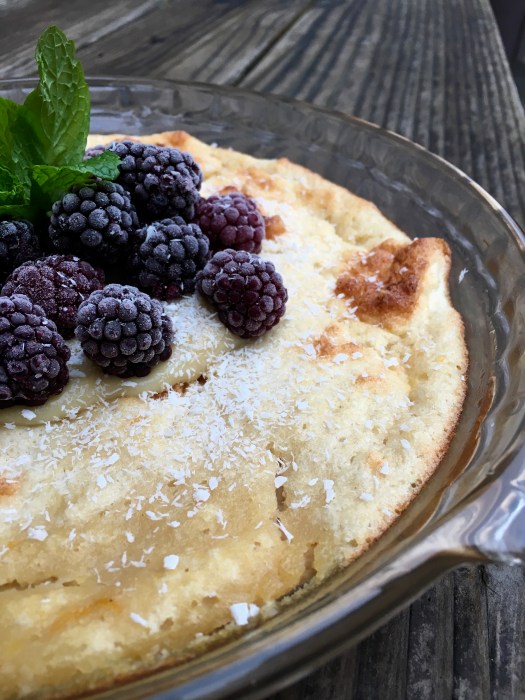
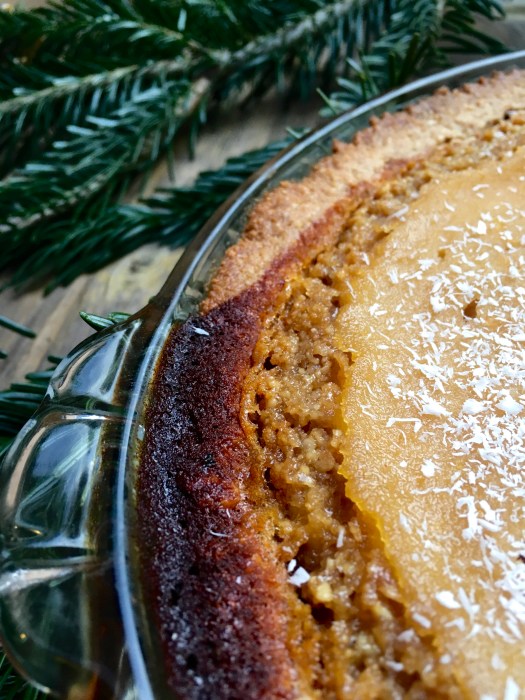
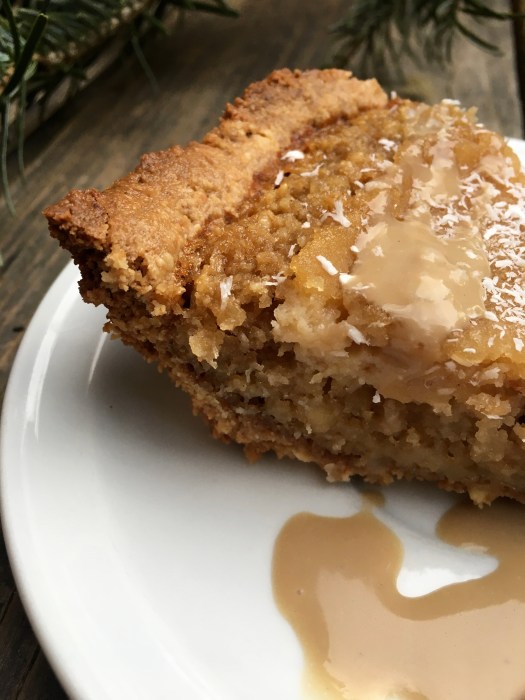
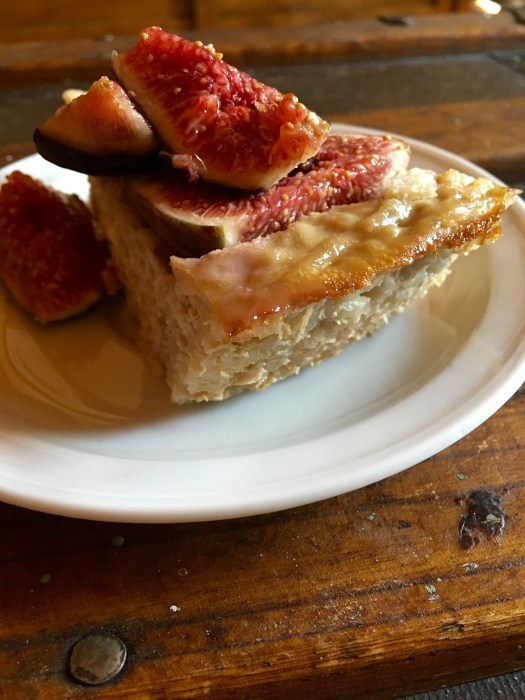
The cream-based filling of this tart is silky smooth – it’s light, but satisfying. The citrus keeps it from feeling overwhelming or heavy, and it plays extraordinarily well with the salty almond crust.

fullsizeoutput_276e

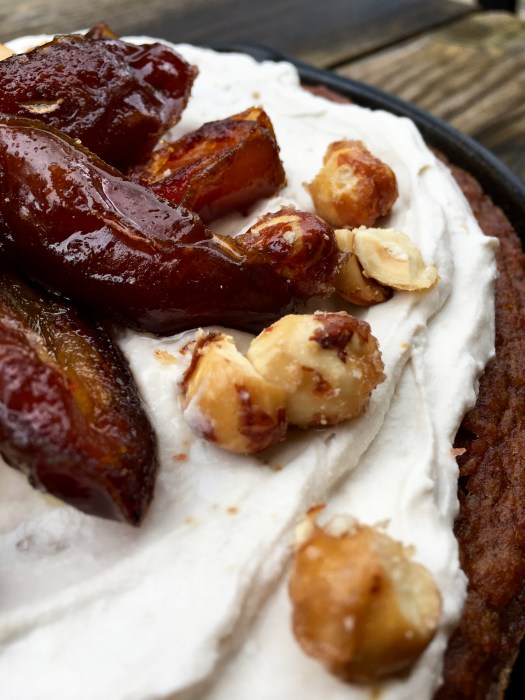
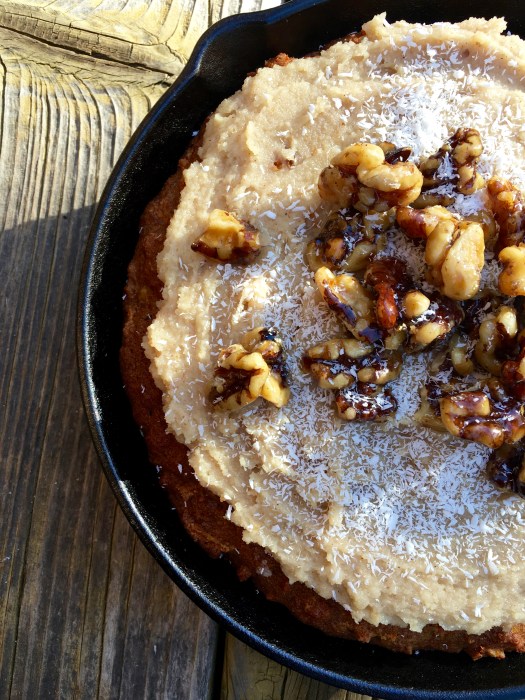
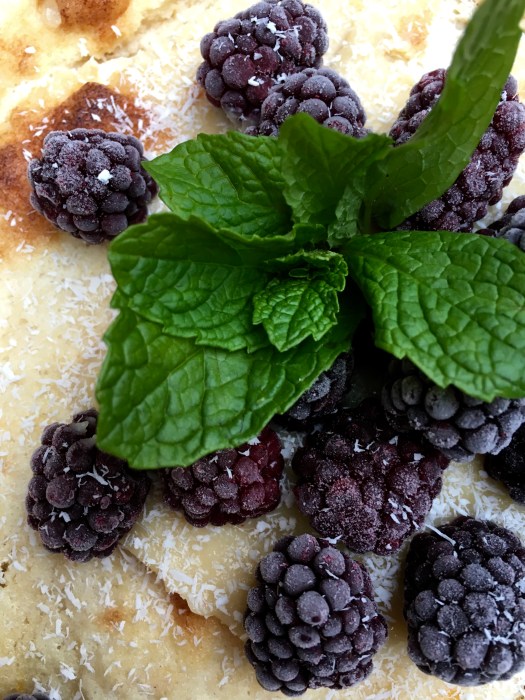
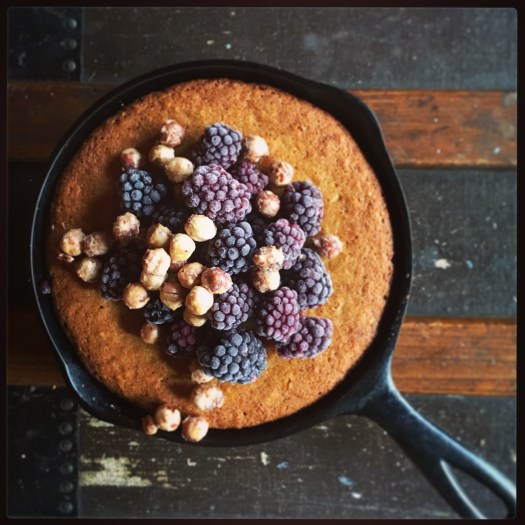
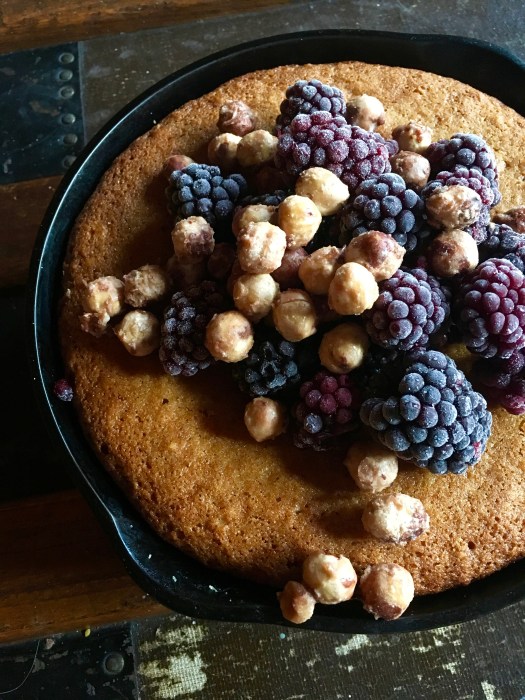
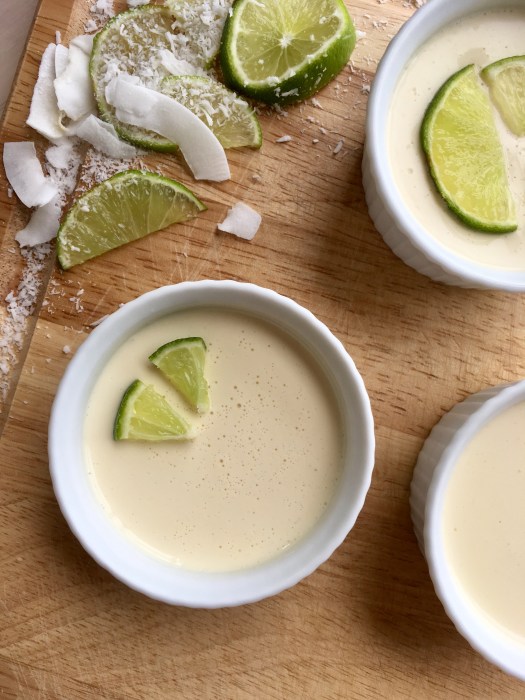
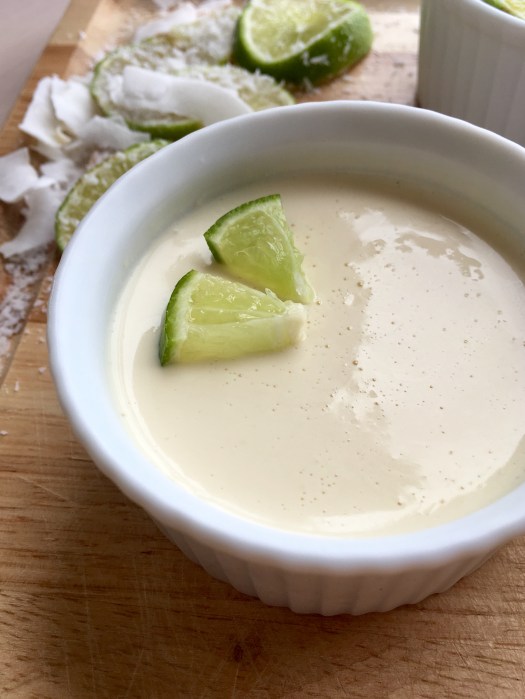
I had some leftover filling that I tossed into tiny ramekins, and then couldn’t resist decorating. Of course. You’re shocked, I know.

fullsizeoutput_2775

fullsizeoutput_2785

fullsizeoutput_2763

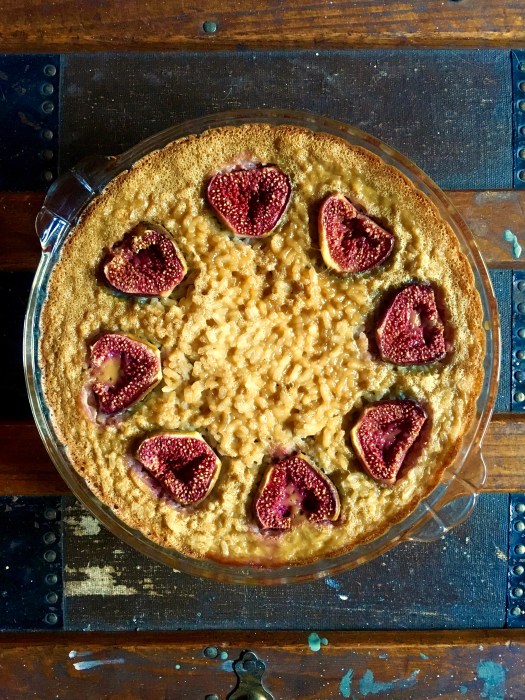
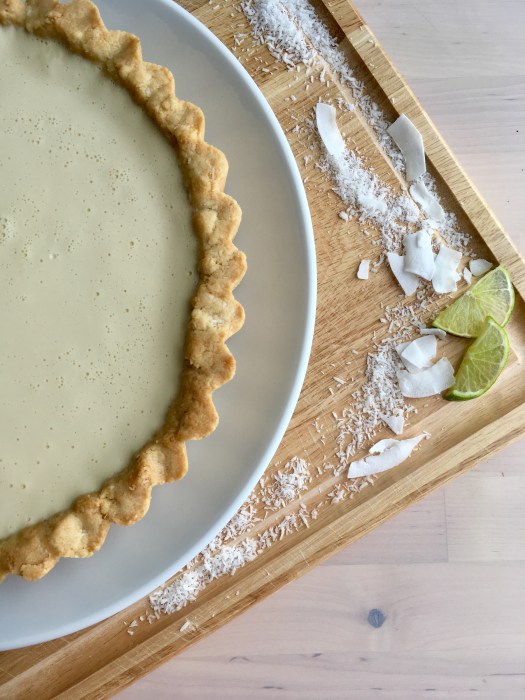
I’ve never made a tart with a boiled cream filling – the texture is much softer than a panna cotta, and so easy! ALSO, there aren’t any eggs in it, so if you’re baking for any allergies, it’s ideal. I am definitely adding this to the rotation. Simply boil cream, let cool, and pour into the crust: it sets in about 2 hours in the fridge (though I’d say chill it at least 4 before serving). I will say that because it’s a softer tart, it doesn’t slice as cleanly, so if presentation is your ultimate endgame, you might want to go the panna cotta route.

fullsizeoutput_2770

Either way, it’s delicious and I’m so glad that a) I made it and b) that I have leftover yuzu juice. Stay tuned! More yuzu shenanigans are coming your way.

Have a great week!

fullsizeoutput_2764

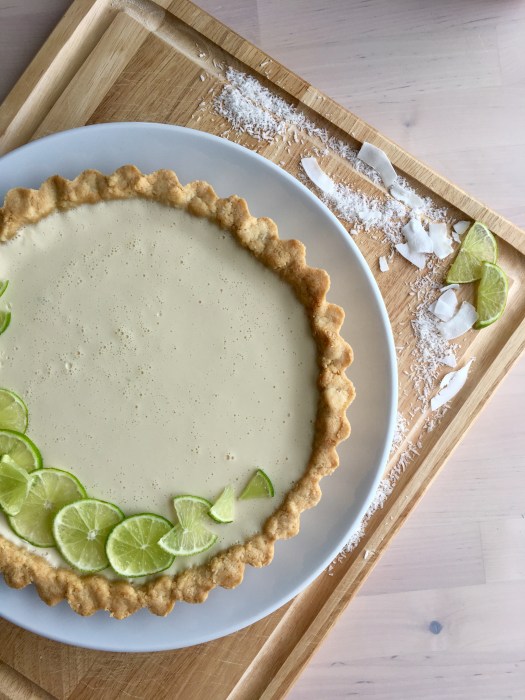
Yuzu Cream Tart on a Salted Almond Crust

Creamy, citrusy & fresh – the best of all worlds. Yuzu reminds me of key lime, so the creamy filling of the tart plays really well against the salty-ish almond crust. Gluten, grain and refined sugar free. Could be dairy free – just use coconut cream (minus the water) instead of heavy cream. Yield: 1 9″ tart, serves several. Tart filling & method inspired by / modified from Half Baked Harvest, here! Crust is a Wait are Those Cookies original.

For the crust

1.75c almond flour
1/2 c shredded unsweetened coconut
1/2 tsp baking powder
Scant 1/2 tsp sea salt
1 tbsp vanilla extract
2 tbsp maple syrup
6 tbsp coconut oil, melted

In a large bowl, stir together almond flour, shredded coconut, sea salt, and baking soda. Add in vanilla, maple, and melted coconut oil, and stir until completely combined. You’ll be able to press the dough together with your fingers.

Preheat the oven to 350, and lightly grease a 9″ tart pan (w/ removable bottom) with coconut oil. Press the crust into the plate and up the sides with a spoon or your fingers, creating a smooth edge (or not, your call!). Poke the bottom with a fork a few times, and bake for 15 minutes. Remove and let cool for a few minutes.

For the filling

3.5 c heavy cream
1/4 c raw honey
Zest of 2 limes (or fresh yuzu, if you can find it)
1/3 c yuzu juice
Pinch of salt
1 tbsp vanilla extract

Combine heavy cream, honey, and lime zest in a large pot (cream tends to boil over, so use something bigger than you high is necessary!) Bring to a boil over high heat, stirring occasionally. Boil for 5 minutes, stirring occasionally, and then remove from the heat. Whisk in the yuzu juice, vanilla, and salt. Let cool for at least 10 minutes (mine probably cooled for more like 20 min), then carefully pour the cream into the baked tart shell. Let set in the refrigerator at least 4 hours before serving.

Keep leftovers covered in the fridge!

fullsizeoutput_2788

Wait… no citrus?!

IMG_0103

Hold the phone. NOT CITRUS?!

Surely you must be joking.

IMG_0084

Don’t worry, my love affair with all things citrus hasn’t ended, it’s just taking a week off so I can give apples some love. Apples haven’t really featured heavily in my desserts of late, so this is a nice change. Besides, apples, honey and almonds all pair so nicely together.

IMG_0088

This cake is a riff on the honey cake with blackberries & hazelnuts I made back in the fall, and this one once again reminds me of something you’d eat in the Shire – skillet and all, it’s very Tolkeinesque. Which of course appeals to my extraordinarily nerdy nature…

IMG_0071

Besides that, it’s light, delicious and comes together in a snap. I used a combination of apples since I love the tartness of Granny Smith but wanted a more complex flavor – Fujis are in here too.

IMG_0092

Excellent for dessert with some ice cream, and of course for breakfast alongside eggs & kale. Cake for breakfast? Sure, why not – it’s a great source of Vitamin E and healthy fats, plus it’s grain free, gluten free, refined sugar free and dairy free so everyone wins.

IMG_0086

Besides cake, a few snaps of what’s been occupying my time lately:

More SF series, of course.

IMG_0050

IMG_0066

No filter on this next one — I couldn’t believe how bright it was!

IMG_0100

IMG_0101

Enjoy your cake! It tastes best in good company :)

FullSizeRender 6

Apple Honey Cake with Blackberries and Maple Almonds

Gluten free, grain free, refined sugar free, dairy free, paleo depending on your definition. Light almond honey cake studded with apples and topped with blackberries (mo’ fruit!) and mapled almonds. Yield: 1 8″ skillet cake; serves 2-8. Recipe is a riff on the honey cake with hazelnuts & blackberries, here. Note: I’ve adapted this recipe over time to fit my 8″ cast iron skillet perfectly, hence the odd measurements. Feel free to make this in a 9″ cake pan or skillet, just keep in mind the bake time will be less & you’ll have a slightly shorter cake.

IMG_0094

For the cake:

  • 1.5 c almond flour
  • 3/4 tsp baking powder
  • 1/4 tsp baking soda
  • heaping 1/4 tsp sea salt
  • 2 eggs
  • 1/3 c honey (I use raw usually) – runny and thick honey are both fine
  • 1/8 + 1/16 c coconut oil, melted
  • 1.5 tsp vanilla extract
  • 2 apples, peeled, cored and chopped into 1/2″ pieces (I used a mix of Fuji & Granny Smith)
  • 1 apple for topping, sliced into 1/4″ thick wedges + 1 tbsp coconut oil, melted
  • Cinnamon for topping

Peel, core and chop 2 apples, and set aside. Lightly grease your skillet or pan of choice with coconut oil and set aside. Preheat oven to 325.

In a large bowl, whisk together almond flour, baking powder, baking soda, and sea salt. Add in eggs, honey, coconut oil, and vanilla extract, and stir until all ingredients are just incorporated. Stir in 2 chopped apples. Pour the batter into the prepared pan and set aside momentarily. Cut up the last apple, slicing it into 1/4″ wedges and toss it with the tbsp of melted coconut oil. Fan these out across the top (this is totally optional of course), and sprinkle a little cinnamon on them. Bake for 60-65 minutes (if you left the apples off the very top of the cake, your bake time will be slightly less – check at 45), until the top of the cake is lightly browned, firm, and a tester in the center comes out clean. You can cover the cake with foil during the last 15 minutes of baking if the cake is browning too fast. Remove and let cool before topping & serving.

For the maple almonds

  • 1 c slivered almonds
  • 1/4 c pure maple syrup
  • pinch of sea salt

Heat an empty saute pan (not nonstick) over medium heat; once heated, add maple (it will bubble and fizz) and hazelnuts. Cook for about 3-5 minutes, stirring continuously until the maple has caramelized. The nuts will feel a little soft, which is fine. Spread parchment paper on a baking sheet, pour out the nuts and spread them out a bit. They will harden as they cool. Store in an airtight jar at room temp for as long as they last which is realistically about five minutes.

For serving: top cake with blackberries and maple almonds! Slice and serve, especially good with vanilla ice cream. Store any leftovers covered, in the fridge for a few days.

IMG_0069

IMG_0082

2017: the tale of demanding, reincarnating bananas

img_5417

Happy New Year! Here’s hoping 2017 treats everyone a little better than last year – 2016 was a rough one for many. But as they say, onward and upward! Preferably with cake, which is where I come in.

img_5419

The dead bananas are calling! I had a plethora lurking around my kitchen this weekend and they put me on notice that they really wanted to reincarnate into something amazing… not banana bread again, if you please (my bananas can get a little demanding sometimes…). That being said, I had a hankering for banana cake (fundamentally different from banana bread, you see), so THIS happened!

img_5418

Happily so. Have you ever had sautéed dates? No? Get into the kitchen immediately and make them! I love dates anyway, but they are mindblowingly good when given a little bath in some olive oil and sea salt. I’ve always been a salt monster, so salty-sweet desserts are absolutely my jam, and these little powerhouses deliver. Besides that, they’re full of good nutrients (dates are high in vit A & K, plus potassium, calcium, phosphorus, magnesium & zinc. woohoo!).

img_5422

This cake is actually full of good things – you have healthy fats from almond flour, hazelnuts, and coconut, and all the good stuff in dates. And besides that, most critically: it’s delicious, which is good for your soul.

Let’s see, what else? Jessie says hello (this is her way of chatting me up during breakfast, adorable cat)

img_5397

More drawings, of course! New year, same series! This is the Havens Mansion, built 1884 on S. Van Ness in SF.

img_5388

My first activity of 2017! Shocked? Nope.

img_5382

More beautiful sky!

img_5386

Show your new and improved 2017 self some love with some sautéed dates atop your cake, and revel in all the possibilities of a new year. Onward!

img_5423

Banana Date Skillet Cake with Coconut Frosting, Maple Hazelnuts, and Sautéed Dates

Pretty freaking amazing, if I do say so! Lightly sweet banana cake with jewel-like date pieces, coconut frosting and OMG sautéed dates, please make them immediately. Serve with a bit of ice cream or non-dairy biz if that’s your jam! Can’t miss either way. Refined sugar free, grain free, gluten free, dairy free, pretty much paleo. Yield: 1 8″ skillet cake, enough frosting to frost the top (cake is served straight out of the skillet); extra hazelnuts because you’ll definitely want extras… and the amount of dates is up to you (make extra!). Skillet cake adapted from Confessions of a Confectionista, here!

img_5421

For the cake:

  • 3 ripe bananas, mashed
  • 3 eggs
  • heaping 1/8 c coconut oil, melted
  • 1.5 tbsp raw honey
  • 1 tsp vanilla extract
  • heaping 1.25 c almond flour
  • 1.5 tbsp ground flaxseed
  • 3/4 tsp cinnamon
  • 3/4 tsp baking powder
  • 3/4 tsp baking soda
  • 1/4 tsp fine sea salt
  • 4 medjool dates, chopped

For the maple hazelnuts (make ahead, if desired):

  • 1 c roasted hazelnuts
  • 1/4 c maple syrup
  • pinch of sea salt
  • splash of vanilla

For the sautéed dates:

  • 1-2 tbsp good olive oil
  • 7-8 medjool dates, halved & pitted
  • pinch of sea salt

For the coconut frosting:

  • 1 can full-fat coconut milk, chilled upside-down overnight in the fridge
  • 1 tsp coconut sugar
  • 1 tsp vanilla extract

I usually make the hazelnuts ahead and store them in a jar until needed. Remove most of the skins from the hazelnuts by rubbing them together; it doesn’t matter if there are skins left, but I try to get rid of the majority. Heat an empty saute pan (not nonstick) over medium heat; once heated, add maple (it will bubble and fizz) and hazelnuts. Cook for about 3-5 minutes, stirring continuously until the maple has caramelized. The nuts will feel a little soft, which is fine. Spread parchment paper on a baking sheet, pour out the nuts and spread them out a bit. They will harden as they cool. Store in an airtight jar at room temp for as long as they last which is realistically about five minutes.

To make the cake: preheat the oven to 350, and grease an 8″ cast iron skillet with coconut oil. In a large bowl, mash the bananas, then add eggs, melted coconut oil, honey, and vanilla. In a smaller bowl, whisk together almond flour, flaxseed, cinnamon, baking powder and soda, and salt. Pour dry into wet, and use an electric mixer to beat until combined. Stir in the chopped dates, and pour the batter into the prepared pan. Bake for 40-45 minutes, until a tester comes out clean and the top springs back when touched. The cake will brown because of the honey – if you feel it’s browning too fast, feel free to cover it with foil. Let cool completely before serving.

While the cake is cooling, make the sautéed dates! (good luck not eating them all straight out of the pan). In a small sauté pan, heat the olive oil over medium heat. Once the oil is warm, add the dates and sauté, stirring frequently, until they caramelize and are heated through, just about 2-3 minutes (the edges will start to get a little crispy). Watch them carefully, as they burn easily. When done, move them to a bowl to cool and sprinkle with sea salt (be sure to get all of the good oil out of the pan for drizzling!).

Also while the cake is cooling, make the coconut frosting. Open the can of coconut milk rightside up, and scrape out the cream that has solidified at the top, leaving the coconut water at the bottom (save it and use it later!). Scoop the cream out into a bowl, add vanilla and coconut sugar, and use an electric mixer to beat into the consistency of whipped cream. Use immediately, or chill for later use.

For serving: Frost the cake with the coconut whip (make sure to frost the cake once it’s completely cool! otherwise a melty mess will ensue); top with sautéed dates and maple hazelnuts. Indulge responsibly (i.e., have another piece)!

img_5398

Happy Solstice! I’m sure the druids ate carrot cake to celebrate too…

img_5339Happy Solstice! Time to really get into it now with the holiday shenanigans — I can’t believe Christmas is Sunday! Sneaky little sucker.

img_5304

img_5326

It’s been below freezing in the mornings here, which is definitely considered a cold snap around these parts! As if I needed an excuse to run the oven and bake for extra kitchen warmth… I took advantage of the cold to not only bake carrot cake but also to re-season all of my cast iron skillets! They’re all shiny and beautiful now, as they should be.

img_5312

img_5318

img_5319

Other new things…

Holiday fun in the city! My Christmas isn’t complete without seeing the SF Ballet’s Nutcracker.

img_5299

img_5300

More architecture and drawing, obviously.

img_5308

img_5302

What better way to celebrate the solstice than with carrot cake?!

img_5322

I’ve been jonesing for it lately, and thankfully I had a seconded favorable opinion, so… it happened! Lightly sweet, carrot-y, and full of nuts just like carrot cake should be. Carrot cake isn’t carrot cake without walnuts! No way. Aside from that, I was tired of the usual cashew-creme frosting, so I got cray with some macadamia nuts to see what would happen, and luckily it was a favorable outcome. Hooray for new things!

Enjoy your Solstice-day with those you love! Indulge yourself in a little healthier carrot cake, you deserve it.

img_5316

Skillet Carrot Cake with Coconut Maple Macadamia Frosting and Maple Walnuts

To me, this is pretty much the perfect carrot cake. Carrot cake and walnuts are a match made in heaven, which is why they’re in this twice! Paleo-ish, refined sugar free, dairy free, gluten free, grain free! Cake adapted from Texanerin Baking – only lightly adapted because this cake is damn perfect as is! Frosting is a Wait are those Cookies original.

For the cake:

  • 1.25 c almond flour
  • 2 tbsp coconut flour
  • 1/2 tsp baking soda
  • 1/8 tsp sea salt
  • 1.5 tsp cinnamon
  • 1/2 tsp ground ginger
  • 1/4 tsp freshly ground nutmeg
  • 2 eggs
  • scant 1/3 c melted coconut oil
  • 1/3 c runny honey
  • scant 1 tbsp vanilla extract
  • 3/4 c grated carrots
  • 1/3 c chopped walnuts

For the frosting:

  • 1 c macadamia nuts, soaked for at least an hour
  • juice of 1 meyer lemon
  • 2 tbsp vanilla extract
  • large pinch of sea salt
  • 1/4 c maple syrup
  • 2 tbsp coconut butter
  • 1/2 tsp cinnamon

For the maple walnuts:

  • 1 c raw walnuts
  • 1/4 c maple syrup
  • large pinch of sea salt
  • 1 tsp vanilla extract

img_5314

I tend to make the walnuts in advance so that they have time to cool completely. Heat a large sauté pan over medium heat until warm, then add maple (it will fizz a bit). Add in walnuts and sea salt, and cook for a few minutes, stirring regularly and scraping up the caramel forming on the bottom, until the maple syrup has mostly reduced and caramelized – about 3 minutes. Turn off heat, stir in vanilla, and pour the walnuts out onto a parchment-lined baking sheet to cool completely. Store in an airtight jar until needed.

I soaked the macadamia nuts for the frosting about an hour, which meant that I put them to soak, made the cake, then made the frosting, which was a great timeline. The cake can easily be made a day ahead and stored in the fridge overnight.

For the cake: preheat the oven to 350, and grease an 8″ cast iron skillet. In a large bowl, whisk together almond flour, coconut flour, baking soda, sea salt, cinnamon, ginger, and nutmeg. In a smaller bowl, whisk together eggs, melted coconut oil, honey, and vanilla. Stir wet into dry, add in grated carrots and chopped walnuts, and stir until incorporated. Pour the batter into the prepared skillet, and bake for 28-30 minutes (mine was perfect at 30); the top should be lightly browned and firm to the touch, and a tester should come out clean. Let cool completely before frosting and serving.

For the frosting: add soaked macadamia nuts to a high-power blender or food processor (I used a vitamix), and blend until smooth. You’ll have to stop and scrape the sides repeatedly, but it’s worth it! Patience is a virtue, ha. Once the nuts resemble nut butter, add in lemon juice, vanilla, salt, maple syrup, coconut butter and cinnamon. These can be adjusted to taste! I usually just taste as I go, until I’m satisfied. Store in an airtight jar in the fridge until needed; any extra will keep for about two weeks.

To serve: I like to serve the cake straight out of the skillet, so I frost and top with walnuts as is. This cake is excellent with vanilla ice cream (what isn’t) — enjoy accordingly! Store any leftovers in the fridge — covering the skillet with foil works nicely, as does moving the cake to a tupperware.

img_5317

Meyer lemons: sunlight in food form

img_5288

More citrus! ALL THE CITRUS! Why stop now? It makes my kitchen smell like sunshine, and besides — meyer lemons are in season (at least on the trees I have access to, ha) and they essentially embody sunshine in one little package.

img_5270

img_5264

Which means they were featured for the last round of dessert shenanigans! In two forms, both in a soufflé-cake-pudding hybrid and some lemon curd because you really can never have too much lemon.

img_5271

img_5272

I love December things! Lights, pretty houses, giant trees, and dessert. And tree elves doing yoga, obviously.

img_5255

More drawing, of course.

img_5261

But, back to the dessert (since I know that’s why you’re all here anyway!) — Light, refreshing and full of lemon flavor — this hybrid soufflé-curd-pie-cake-pudding is damn delicious. Perfect for the wintertime when the pop of citrus brightens up grey days and makes your kitchen smell like sunshine! Also perfect when you want dessert and need a break from the usual heavy desserts of the season.

img_5266

img_5277

Happy holidays! Hopefully you’re enjoying the season with loved ones and eating everything delicious.

Meyer Lemon Soufflé Curd Cake with Lemon Curd, Maple Blackberries and Mint

Paleo, gluten & grain free, dairy free, refined sugar free. Yield: 1 9″ pie dish, serves 2 (just kidding. Only kind of…) — it actually realistically could serve up to 6! But only if you feel like sharing.

img_5274

For the lemon curd (best to make ahead and refrigerate), lightly adapted from What the Fork:

  • 4 eggs
  • zest of 2 meyer lemons
  • 1/2 c meyer lemon juice
  • 1/3 c honey
  • 1/2 c coconut oil
  • large pinch of fine sea salt
  • heaping 1 tsp of vanilla extract

In a saucepan over medium heat, whisk together eggs, lemon zest and juice, honey, salt, and coconut oil. Continue to cook the curd over medium-low, whisking constantly, until it thickens. It should be about the same consistency as pudding after 8-10 minutes. Remove from heat once thickened, whisk in vanilla extract, and strain (I use a mesh strainer and a flat spatula for this) to remove any errant zest chunks. Once cool, store in airtight jars in the fridge. Keeps for a week or two, but I doubt it will last that long!

For the soufflé cake, adapted from 24 Carrot Kitchen, here:

  • 4 eggs, separated
  • scant 1/2 c full fat coconut milk
  • 1/4 c maple syrup
  • 1.5 tsp vanilla extract
  • zest of 2 meyer lemons
  • 1/2 c meyer lemon juice
  • 3 tbsp coconut flour
  • large pinch of fine sea salt
  • mint leaves for garnish

Preheat the oven to 350, and grease a 9″ pie dish.

In a non-reactive bowl (I like to use the bowl of my stand mixer), use a hand mixer or the raw power of your biceps to beat the eggs whites until they’re glossy and hold soft peaks. In a separate large bowl, whisk together the egg yolks, coconut milk, maple, vanilla, lemon zest and juice. Whisk in coconut flour and salt. Gently fold in the egg whites until fully incorporated. Pour the batter (it will be relatively thin) into your prepared pie dish and bake for 30-35 minutes. The filling should be set and the top should be lightly browned — if it’s browning too fast, cover the top with a bit of foil. This cake is designed to have a pudding-y layer at the bottom, so be careful not to overbake. Let cool before serving.

While the cake is baking, toss a bag of thawed (or fresh, if you’re lucky) blackberries with a drizzle of maple or honey, and let marinate in their juices until ready to serve.

Serve this deliciousness in a bowl, since the cake won’t slice all that neatly anyway and it makes a gloriously delicious mess when served with extra lemon curd, blackberries, mint leaves and a little vanilla ice cream.

img_5273

img_5265

This tart is made of grapefruit. Therefore, BREAKFAST!

img_5259

It’s December! I doubt you need reminding, but there it is. Despite the slight annoyances of increased traffic, impacted post offices and whatnot, I do love this time of year, especially all the lighted buildings in the city and the excuse to have a giant tree in my living room.

img_5250

img_5242

AND the baking. Because holidays = baking & eggnog, a well known fact. I haven’t gotten to the eggnog (give it time) but at least I’ve got the baking on lock.

img_5248

I’m on a citrus run over here (scurvy? pshhhh no) — I’ve had requests and I’ve been loving fresh citrus taste. This makes two in a row, and there’s at least one more coming, probably lemon next time — can’t stop won’t stop!

img_5249

I debated calling these bars vs a tart… but tarts are fun I can call it whatever I want! Besides, this slices into wedges which makes me want to call it a tart. Bars are square. Right?! Right. We’ll go with tart. ALSO hahahaha grapefruits are kind of tart. You see what I did there?!

…. Moving on, terrible pun notwithstanding.

This tart is spectacular (and easy!) – if you love grapefruit, these are for you. In the course of my recipe brainstorming, I discovered that caramel is a flavor affinity for grapefruit, which seemed rather counter-intuitive, but I decided I was going to try it anyway. Good thing too because the grapefruit – caramel combination of these bars is SO GOOD IT MUST BE WRITTEN IN ALL CAPS. Not shouting… just for emphasis! ha. But seriously — if you like grapefruit, get on these. They will brighten up your day and make your kitchen smell amazing! The tart has the consistency of lemon bars, with the crust adding a great textural counterpoint. And then there’s caramel… of course.

img_5237

Besides that, it’s paleo, gluten & grain free, refined sugar free and dairy free – enjoy with abandon! ‘Tis the season :)

Jessie would like to say hello:

img_5196

The latest… plus fun at the tree lot:

img_5198

img_5200

Happy December!

img_5253

Side note, this tart is perfectly acceptable breakfast food. Because, grapefruit!

img_5238

Grapefruit Tart on a Coconut Cashew Crust with Coconut Caramel Sauce

A Wait are those Cookies original! Full of grapefruity flavor (if you love grapefruit, these are absolutely for you!) that is complemented by the coconut and cashew crust. Serve with vanilla ice cream of choice for maximum flavor happiness. Gluten & grain free, dairy free, refined sugar free, paleo depending on your definition. Yield: 1 9″ dish; serves as many as your discretion dictates (that could be 2. Or 8!)

For the crust:

  • 1.5 c cashew flour
  • 1/2 c unsweetened shredded coconut
  • 3/4 tsp baking soda
  • heaping 1/4 tsp fine sea salt
  • 1/3 c unsalted cashew butter
  • 1.5 tbsp pure maple syrup
  • 2 tbsp melted coconut oil
  • 2 tsp vanilla extract

For the bars:

  • 4.5 eggs*
  • scant 2/3 c runny honey
  • zest of 1 grapefruit
  • 1/4 + 1/8 c fresh grapefruit juice
  • pinch of sea salt
  • 4.75 tbsp coconut flour
  • 2 tsp vanilla extract

* to achieve half an egg: crack an egg into a small bowl and whisk it; then either measure or eyeball half and use that. or just use a whole one as long as it’s small, I doubt it would affect the consistency of the bars all that much…

For the caramel sauce:

  • 1 can full fat coconut milk
  • 1/3 c coconut sugar
  • 1/2 tsp sea salt
  • 1 tbsp coconut oil
  • 1 tbsp vanilla extract

For the caramel (best made at least one day ahead):

Combine coconut milk, coconut sugar, and sea salt in a small saucepan over medium-high heat. Leave uncovered and bring to a boil, then lower the temp and continue to let the sauce simmer for 40-45 minutes, stirring occasionally. Once the sauce has reduced, thickened and will coat the back of a spoon, remove from heat and stir in coconut oil and vanilla. The caramel will lighten in color and thicken slightly if you keep it overnight in the fridge (though it is still relatively runny caramel) — store in an airtight jar for up to two weeks if not using immediately.

Preheat the oven to 350, and grease a deep 9″ pie dish with coconut oil.

In a large bowl, stir together cashew flour, coconut, baking soda, and sea salt. Add in cashew butter, maple syrup, melted coconut oil, and vanilla, and stir until combined and crumbly. Press the crust dough evenly into the prepared pan and up the sides, and poke with a fork a few times. Bake for 15 minutes. Remove and set aside when done.

While the crust is baking, make the filling! In a large bowl, whisk together eggs, honey, grapefruit zest and juice, sea salt, coconut flour (sifted if lumpy) and vanilla until smooth. Pour into the parbaked crust, and bake for 30-35 minutes. The top should be mostly firm and the filling set, with just a small amount of wiggle (it’ll firm up as it cools). Let cool completely and eat immediately or chill in the fridge for later (I like it cold!) — serve with vanilla ice cream and caramel for maximum happiness. Store any leftovers in the fridge, though I challenge you to actually have any leftovers!

img_5245

Tolkienesque Cake for Dessert and Elevenses!

img_5043

Welcome to the Shire!

img_5034

Happy circumstances dictated that a Tolkeinesque dessert was in the offing (sometimes, you just need themed desserts)… as such, this one was directly inspired by the Hobbit: besides Beorn’s honey cake being mentioned in the Hobbit itself, blackberries and hazelnuts just seem like they’d be something you’d stash in your knapsack during your travels, right? And hobbits seem like the type to have cast iron skillets. So there you go. ALSO this cake is not only dessert but also does double duty for Elevenses (I can attest. I actually ate it for elevenses / brunch / breakfast / lunch, as part of a very complete, Hobbity spread).

img_5028

In other news, I went to the opera on a random Tuesday the other week because, why not?

img_5008

img_4996

More drawing!

img_5014

img_5020

And more cake.

img_5030

It’s rainy and drizzly today and as such is perfect cake and indoor fun weather; I highly recommend this one. It’s somewhat like a light variation on pound cake, and the blackberries / hazelnuts make for a great textural pairing. Plus ice cream. Obviously. They may not have had ice cream in the Shire, but let’s face it: everything is better with a bit of cream, right?

img_5026

Yes, the blackberries in the pictures are frozen — they were subsequently thawed and honeyed and drizzled and got all juicy and delicious, but for ease of transportation, that happened after the photos.

fullsizerender-7

So! Cake! And a nice revisit to the land of the Shire; I was a little overdue. Be warned, the maple hazelnuts are supremely addictive…. don’t say I didn’t warn you ;)

img_5035

Honey Almond Cake with Honeyed Blackberries and Maple Glazed Hazelnuts

Lightly sweet cake that is somewhat akin to a lighter pound cake, topped with tart-sweet blackberries and crunchy hazelnuts. Hobbit-y dessert perfection that also happens to be gluten free, grain free, dairy free, refined sugar free, and arguably paleo (depends on what sweeteners are on your okay list). The cake is adapted from Cookie and Kate, here! One confession: I’m a crazy baking person and for Hobbit authenticity and size preferences I wanted to make this in my 8″ cast iron skillet, which meant that I made a 3/4 recipe of a a full 9″ pan. I will be posting my altered measurements here; if you bake it in a 9″, it will just be a slightly shorter cake (apologies for some of the funky measurements!)

img_5034

For the cake:

  • 1.5 c almond flour (not meal), firmly packed
  • 3/4 tsp baking powder
  • 1/4 + 1/8 tsp baking soda
  • 1/4 + 1/8 tsp fine sea salt
  • 2 eggs, beaten
  • scant 1/2 c runny honey
  • 1/8 + 1/16 c melted coconut oil
  • 1.5 tsp vanilla extract

Preheat the oven to 325, and lightly grease cast iron skillet or pan of choice with coconut oil. Toss a little almond flour in the bottom to finely coat. In a large bowl, whisk together almond flour, baking powder, baking soda, and sea salt. In a smaller bowl, whisk together beaten eggs, honey, melted coconut oil, and vanilla. Pour wet into dry, and stir until just combined. Pour into the prepared pan, and bake on the center rack of the oven for about 38-40 minutes. I checked mine at 30 and put it back in for 8; it was perfect at 38. The top should be golden brown and firm to the touch, and the center shouldn’t jiggle when lightly shaken. Remove from the oven and let cool before topping and serving.

For the honeyed blackberries:

  • 1 bag frozen blackberries, or fresh if they’re in season
  • 1 tbsp runny honey

Thaw blackberries, if frozen, and toss with the honey…. and that’s it! Let sit for a few hours if you have time — they get extra juicy that way.

Maple Glazed Hazelnuts:

  • 1/4 c pure maple syrup
  • 1 c roasted hazelnuts
  • sprinkle of sea salt

Remove most of the skins from the hazelnuts by rubbing them together; it doesn’t matter if there are skins left, but I try to get rid of the majority. Heat an empty saute pan (not nonstick) over medium heat; once heated, add maple (it will bubble and fizz) and hazelnuts. Cook for about 3-5 minutes, stirring continuously until the maple has caramelized. The nuts will feel a little soft, which is fine. Spread parchment paper on a baking sheet, pour out the nuts and spread them out a bit. They will harden as they cool. Store in an airtight jar at room temp for as long as they last which is realistically about five minutes.

For serving: Top cake with honeyed blackberries & glazed hazelnuts, and preferably ice cream.

Store leftover cake in the fridge; covered with foil in the original pan is just fine. I’m here to attest that this cake is fabulous the next morning for breakfast!

fullsizerender-3

Fig season is upon us!

img_4910

It’s fig season!!! Another reason to love fall, as if I didn’t have enough already.

img_4888

As much as I start missing the fresh summer berries, it’s so refreshing when the seasons start changing (ish. Emphasis on ish. It’s been in the upper 90s over here for the last few days…um okay I get it! We’re making up for lost time?! But seriously, enough). Figs are so fun with their little tiny seeds. I used to not be such a fig fan, but they’ve won their way into my heart. Especially when they hang out with goat cheese and hazelnuts and honey. But really, I’ll eat them in any form.

fullsizerender-2

Especially when rice pudding is involved… I never ever say no to rice pudding. EVER.

img_4914

This version is baked into a cake/tart type thing, and is sliceable and delicious and fantastic for breakfast as well as dessert. I could wax rhapsodic about this dessert but you really should just make one and thank me later. It’s delicious! It doesn’t use much sweetener either, which is a giant plus in my book and also makes it doubly acceptable for breakfast (also it’s excellent with coconut gelato… just looking out for you!)

fullsizerender-4

fullsizerender-6

Handily enough, it also comes together quickly and doesn’t require any wildly unusual pantry ingredients.

img_4913

I’m reminded of the Italian cake Torta di Riso (I did one years ago and it’s somewhere on the blog… I used blood oranges for that one) — basically a rice custard that is baked into a sliceable cake. This one is a little denser than the Italian version (definitely NOT a bad thing), and is infinitely adaptable to whatever fruit is in season (though I highly recommend figs).

img_4912

I’ve also had some time to draw again lately, which I love. Baking + drawing = happy days.

img_4871

img_4885

Enjoy fig season in all its glory and bask in some rice pudding. Happy Equinox!

fullsizerender-7

Baked Coconut Rice Pudding Cake with Honeyed Figs

Gluten free, dairy free, and refined sugar free! Densely textured, lightly sweet cake perfect for dessert and breakfast. If you love rice pudding, this cake is for you. Yield: 1 9″ pie pan (mine is the deep variety, about 2″ deep). Recipe lightly adapted from A Fork and a Pencil, here!

  • 1 c arborio rice, rinsed
  • 1 c water
  • 1 1/3 c light coconut milk, divided (should be exactly one standard 13.5 fl oz can)
  • 4 eggs
  • 1.5 tsp vanilla extract
  • 1/4 tsp sea salt
  • 4 tbsp pure maple syrup
  • 2.5 tbsp coconut sugar
  • figs to your heart’s content (I used 4), halved
  • enough small dollops of honey to drop into each fig half

In a saucepan, combine rice, water, and 2/3 c coconut milk. Heat over medium-high, stirring occasionally, until it just barely boils. Cover, Reduce heat to low and simmer until the rice has absorbed the liquid, no more than 10 minutes. Once rice is cooked (it should still have some chewy bite to it) and the liquid is absorbed, remove from heat and let cool briefly while assembling everything else.

Lightly grease your pie plate with coconut oil and preheat the oven to 350.

In a large bowl, whisk the eggs together, add vanilla, sea salt, maple, and coconut sugar. Pour the cooked and cooled rice into this bowl, and stir to combine. Pour the whole thing into the prepared pie dish (don’t freak if there’s some leftover liquid on the top of the dish, it will be fine! Promise). Halve the figs and press them into the rice, dropping small dollops of honey into the center of each fig half.

Bake for 50 minutes to an hour, until the top is firm when touched and the surface is golden brown. Mine came out perfectly at an hour. Let cool for a bit before slicing. I like it cold, so I refrigerated mine for a few hours before eating, but that’s your call! Store any leftovers covered in the fridge (foil over the pie plate works just fine). Enjoy for dessert with your fave ice cream or gelato (coconut is marvelous) or for breakfast alongside your eggs and kale!

fullsizerender-5

The usual nonsense

IMG_6755

More of that light side/dark side dessertyness.

IMG_6761

I actually made these last weekend but have been too busy/lazy/my novel is too good lately to actually get around to posting them. But they happened to be a big hit with the fam so I thought I would be nice and share them. These went well together—the super dense fudgy almond butter brownies played nicely with the lighter caramel bars—those aren’t super sweet, so it made a nice contrast.

IMG_6753

IMG_6762

I’m feeling a little brain dead today so pardon the lack of text and written nonsense, I’ll just leave you with the photos and that drool that just hit your keyboard…

IMG_6759

Almond Butter Brownies

Super fudgy, tall brownies with a chewy crust. These are honey sweetened, and you could definitely taste the honey in my batch. I liked it, as a change from the typical brownies that I make, but if you’re not a fan of honey flavor in baked goods, I would sub maple or another liquid sweetener. Recipe only slightly adapted from Smells Like Brownies, here! Makes one 8 by 8 square pan (I had to use round since the square pan I have was currently in use, but I think there’s something weird about round brownies…). Gluten free, grain free, refined sugar free!

IMG_6754

  • 2 eggs
  • 1/2 c raw, runny honey
  • 2 tsp vanilla extract
  • 1 c organic almond butter (mine was unsalted)
  • 6 tbsp cocoa powder
  • 1/2 tsp baking soda
  • generous pinch of salt
  • 1/3 c extra dark chocolate chips

Preheat the oven to 325, and lightly grease pan of choice with coconut oil.

In a medium bowl using an electric mixer, beat together eggs, honey, and vanilla until smooth. Beat in almond butter. In a small bowl, whisk together cocoa powder, baking soda, and salt. Stir dry into wet, mixing until just combined and adding in chocolate chips. Pour the batter into the prepared pan, and bake 25-30 minutes. The center should be slightly puffed, and a toothpick should come out mostly clean (a teeny bit of fudgy is okay, but excessively under baked is ew). Let cool completely before slicing, and store any leftovers in a sealed container in the fridge.

IMG_6756

IMG_6769

Salted Caramel Coconut Bars

This one is slightly adapted from Quiche-a-week (love that blog!) here! Chewy, thick salty-caramel-chocolate-spelt-coconut things. Vegan, refined sugar free! They’re made with spelt flour, which can be easier to digest than wheat, even if you aren’t wheat intolerant (though this is *not* gluten free). Yield: 9-12 bars, in an 8 by 8 pan.

IMG_6764

For the caramel:

  • 1 tbsp coconut oil
  • 1 tbsp maple syrup
  • 2 tbsp coconut sugar
  • 1/4 c unsweetened almond milk
  • a hefty pinch (1/4+ tsp) sea salt

For the barz:

  • 1.75 c spelt flour
  • 1/4 c almond flour
  • 1/4 tsp sea salt
  • 1/2 tsp baking soda
  • 1/4 c shredded, unsweetened coconut
  • 4 tbsp melted coconut oil
  • 4 tbsp peanut butter (preferably the separating kind)
  • 1 tbsp maple syrup
  • 1 tsp vanilla extract
  • 2 tbsp ground flaxseed+6 tbsp water (2 flax eggs)
  • 1/3 c dark chocolate chips
  • up to 1/4 unsweetened almond milk

Make the caramel first so it has a little time to cool! In a saucepan, melt coconut oil, coconut sugar, and maple until it starts to fizz and thicken. When it starts bubbling, add the almond milk. Let it bubble for just a bit, then turn the heat down to low and let it simmer for 3 ish minutes. Stir only occasionally, but mostly just let it sit. Once it’s thickened a little (almond milk won’t thicken too crazy much), turn off the heat, stir in the sea salt, and let it cool.

IMG_6770

For the barz….

Preheat the oven to 325 and grease an 8 by 8 pan with coconut oil. Make your flax eggs and then set them aside to gel.

In a largeish bowl, whisk together spelt flour, almond flour, sea salt, baking soda, and shredded coconut. In a smaller bowl, whisk together melted coconut oil, peanut butter, maple syrup, and vanilla. Add in flax eggs, then stir the wet into the dry until just combined. You’ll need more moisture in the dough since spelt flour can be dry—I added about a 1/4 c of almond milk a tablespoon at a time until the dough was the right consistency. Fold in the chocolate chippies. Spread half the batter into your prepared pan (using your hands is encouraged), then pour half the caramel over the first layer. Add more chocolate chips to this middle layer because… just because. Spread the other layer of dough over the caramel (it’ll get messy but it’s dessert so who cares?), then pour the other half of the caramel over the top.

Bake for 30-35 minutes, until a tester comes out clean. Let cool on a rack, then slice and eat/store!

IMG_6763

Kelp noodles are ridiculously distracting

IMG_6320

I really freaking love kelp noodles like WAY TOO MUCH.

I want to eat them all day, every day.

Which is weird, given that they pretty much taste like… nothing. It’s like eating noodley nothing.

IMG_0327

So maybe… I’m really obsessed with the almond butter sauce. Realistically that’s probably it, given my history of obsession with anything nut butter related. Sheesh. I’m so predictable.

Whatever. Kelp noodles+almond butter = AMAZING.

IMG_6325

But actually this post is about banana bread. Um. Non sequitur? Sorry, I was just really excited about my leftovers for lunch today… and I’ve been working too much and my I think I lost my brain somewhere between my last six days of work in a row and here. Has anyone seen it? It’s lumpy.. and grey…

Right. Anyway. Banana bread. Not just any banana bread though—this is grain free, refined sugar free, and has CHOCOLATE in it. So I mean, obviously. What are you doing still standing there?? Why aren’t you in your kitchen making this immediately?
Good. I see you trotting off towards your bowls. My pictures have apparently had their desired effect…

IMG_6324

Sorry if there’s drool on your keyboard, I take no personal responsibility for that.

IMG_6318

This went over quite well with its audience: dense with a  good crumb, equal parts chocolatey and bananay… not too sweet but just sweet enough. Excellent with ice cream, if I do say.

IMG_6317

Grain Free Swirled Chocolate Banana Bread

Recipe adapted from My little jar of spices, here! Yield: 1 loaf. Grain free, gluten free, refined sugar free.

  • 3 very ripe bananas (the blacker and more disgusting the better), about 2 cups mashed
  • 2 c almond flour
  • 1/3 c ground flaxseed
  • 1.5 tsp baking soda
  • 3 tbsp salted butter, melted
  • 2 tbsp raw honey
  • 1 egg
  • 1 tsp vanilla extract
  • 2 oz extra dark chocolate, 70% or above
  • 2 tbsp coconut oil
  • 3/4 c pecans, chopped
  • 1 tsp raw honey

Grease a loaf pan (I use coconut oil), and preheat the oven to 350.

In a largeish bowl, whisk together almond flour, flaxseed, and baking soda. Set aside. In a small saucepan over low heat, melt butter and honey together until incorporated, stirring constantly until the mixture is a bit thickened. Remove from heat. In a medium bowl, mash the bananas until you get most of the lumps out. Whisk in egg and vanilla, followed by the butter-honey mix. Whisk to combine. Pour all of this biz into the dry ingredients, and stir until just combined.

In a microwave safe bowl, melt dark chocolate and coconut oil together, stirring occasionally. I usually do mine on 30 second bursts, stirring in between. Divide out half of the batter and stir in the chocolate.

Drop the batter into the loaf pan, alternating between chocolate and banana. I used heaping spoonfuls of each, swirling the tops sightly as I went (really, there is no wrong way to do this. Pretend it’s art!). In a small bowl, combine 1 tsp honey and chopped pecans until mixed. Toss this evenly on top of the batter, spreading it out so it’s all even and pretty. Bake for 45-50 minutes, or until a tester comes out clean. (Mine was perfect at 50) Let cool in the pan completely, and store in the refrigerator. I just left mine in the pan for 3 days, and it was totally fine.

IMG_6319