Fave Human + Birthday = A Very Extra Cake

Alright alright I’m a few days late and SO delinquent on anything resembling regular posts here but….. better late than never.

Charles’ birthday was this week so you better believe there was CAKE! Birthdays are a great excuse to be very extra and bake a layer cake with six layers (yes. I did) – this is the Fave Human we are talking about, after all. He’s cute. He can stay.

Good news is, since I waited a few days to post, I can relay the comments – everyone who ate it thought it was delicious, so I can safely say this one is a winner. Almond cake, marionberry + blackberry and chocolate ganache filling, and vanilla buttercream. Nothing in here is overly complicated; they just are stellar when put together. This is also one of those that can be made in stages, which is such a boon for a busy week. I ended up making the filling over the weekend, the cake layers monday, and then frosting, ganache and assembly on wednesday, his actual birthday. Besides, freezing cake layers actually makes them easier to slice (at least I think) and helps flatten them out a little.

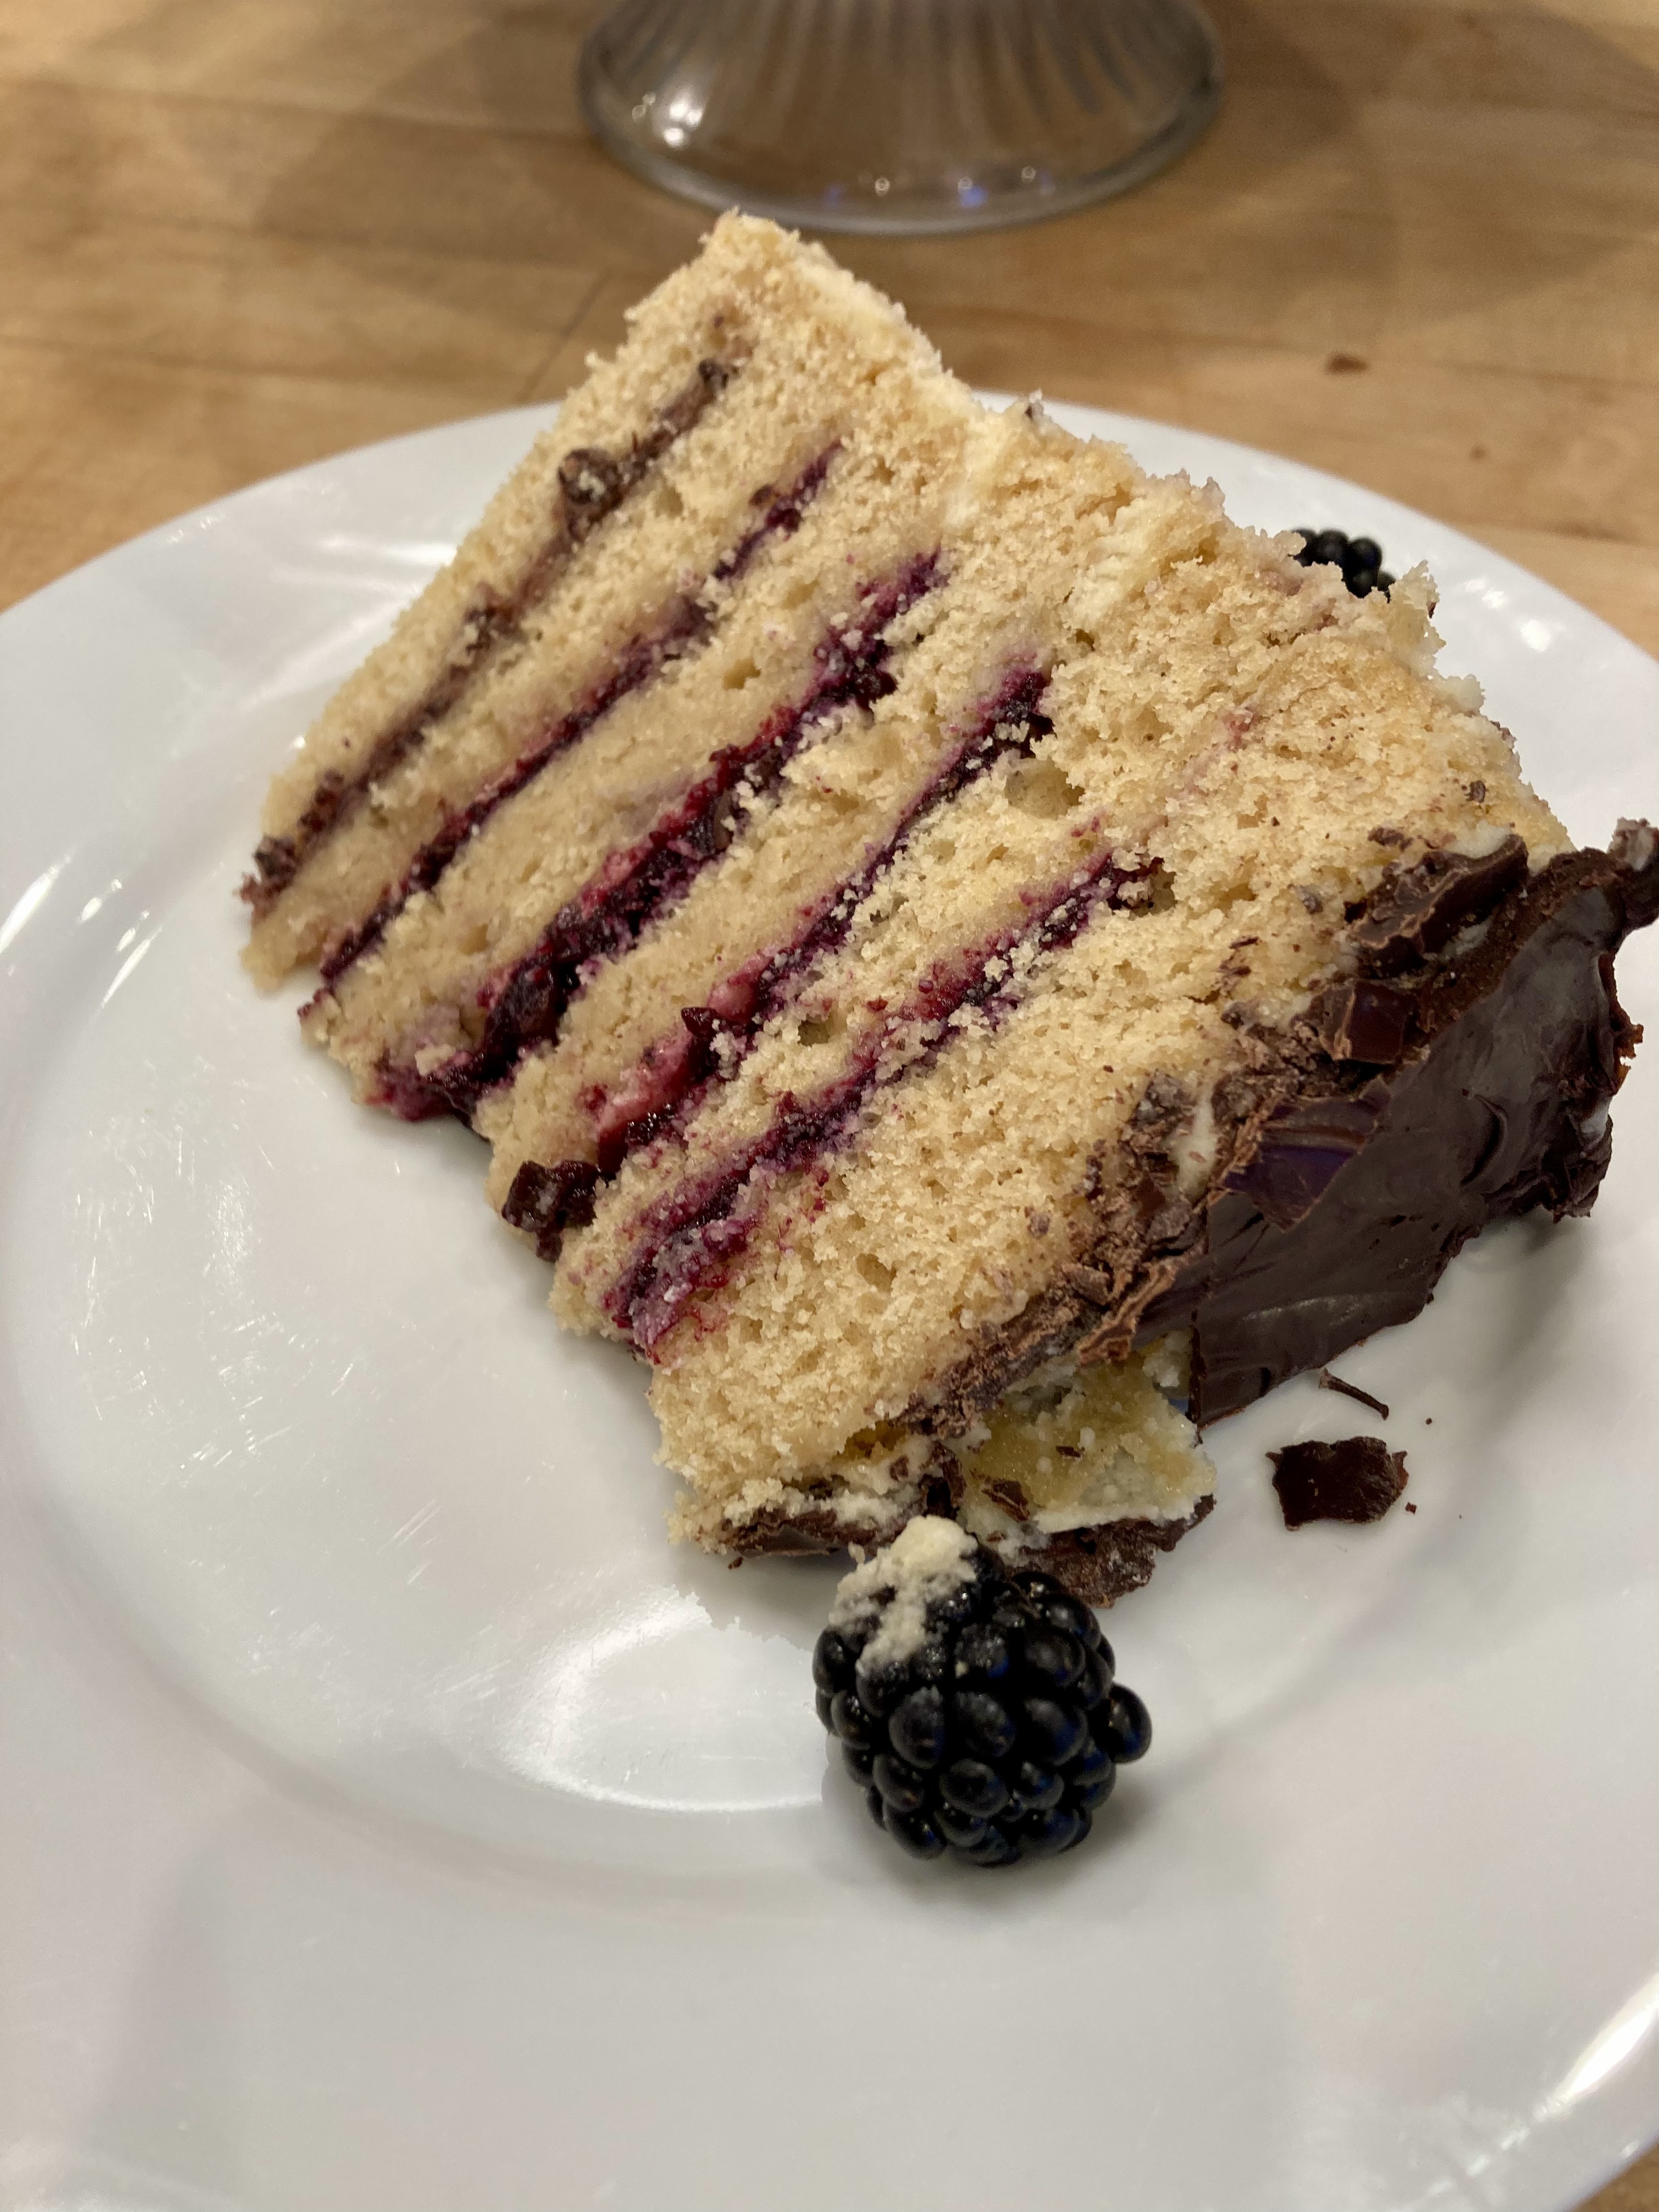
This is a pretty dense cake so a little goes a long way – this was a 7″ cake to feed 6 at dinner, plus about a fourth of it leftover – obviously, who doesn’t love leftover cake. With six layers it makes for a pretty tall slice. It’s sweeter than my average dessert but hey, birthdays only come around once a year. It IS whole grain, so there’s that. Can’t let my dessert morals slide completely….

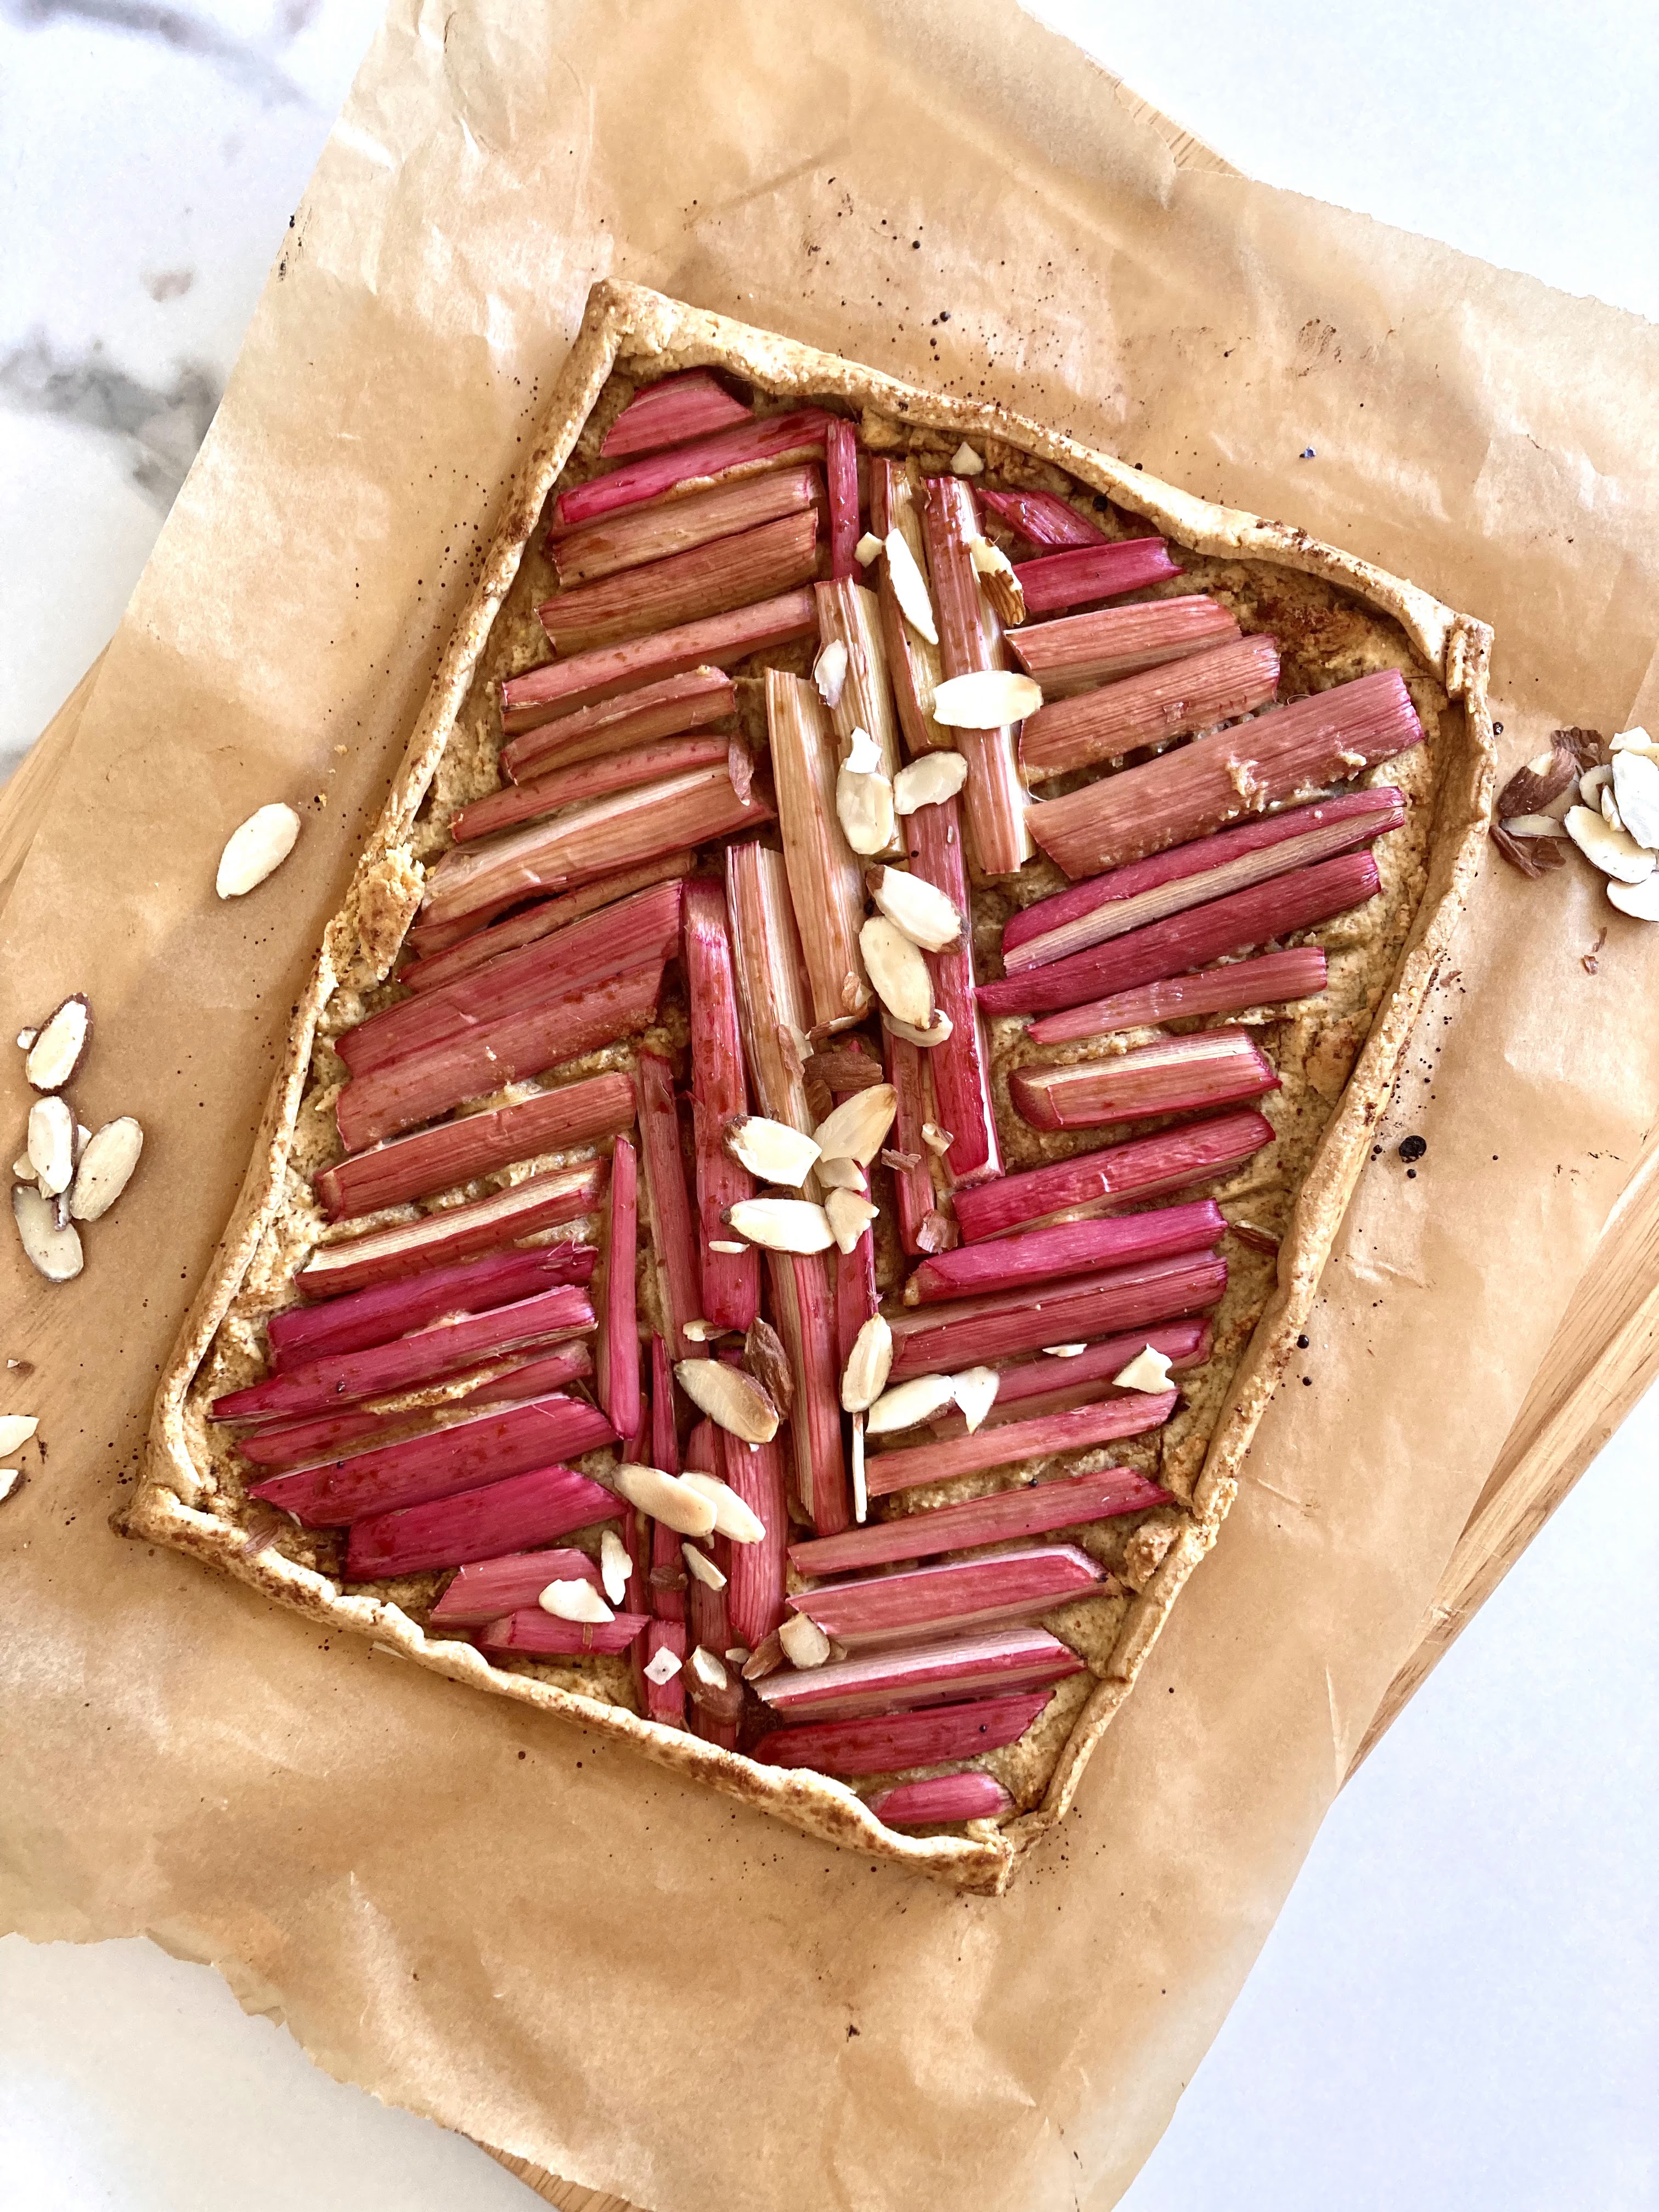
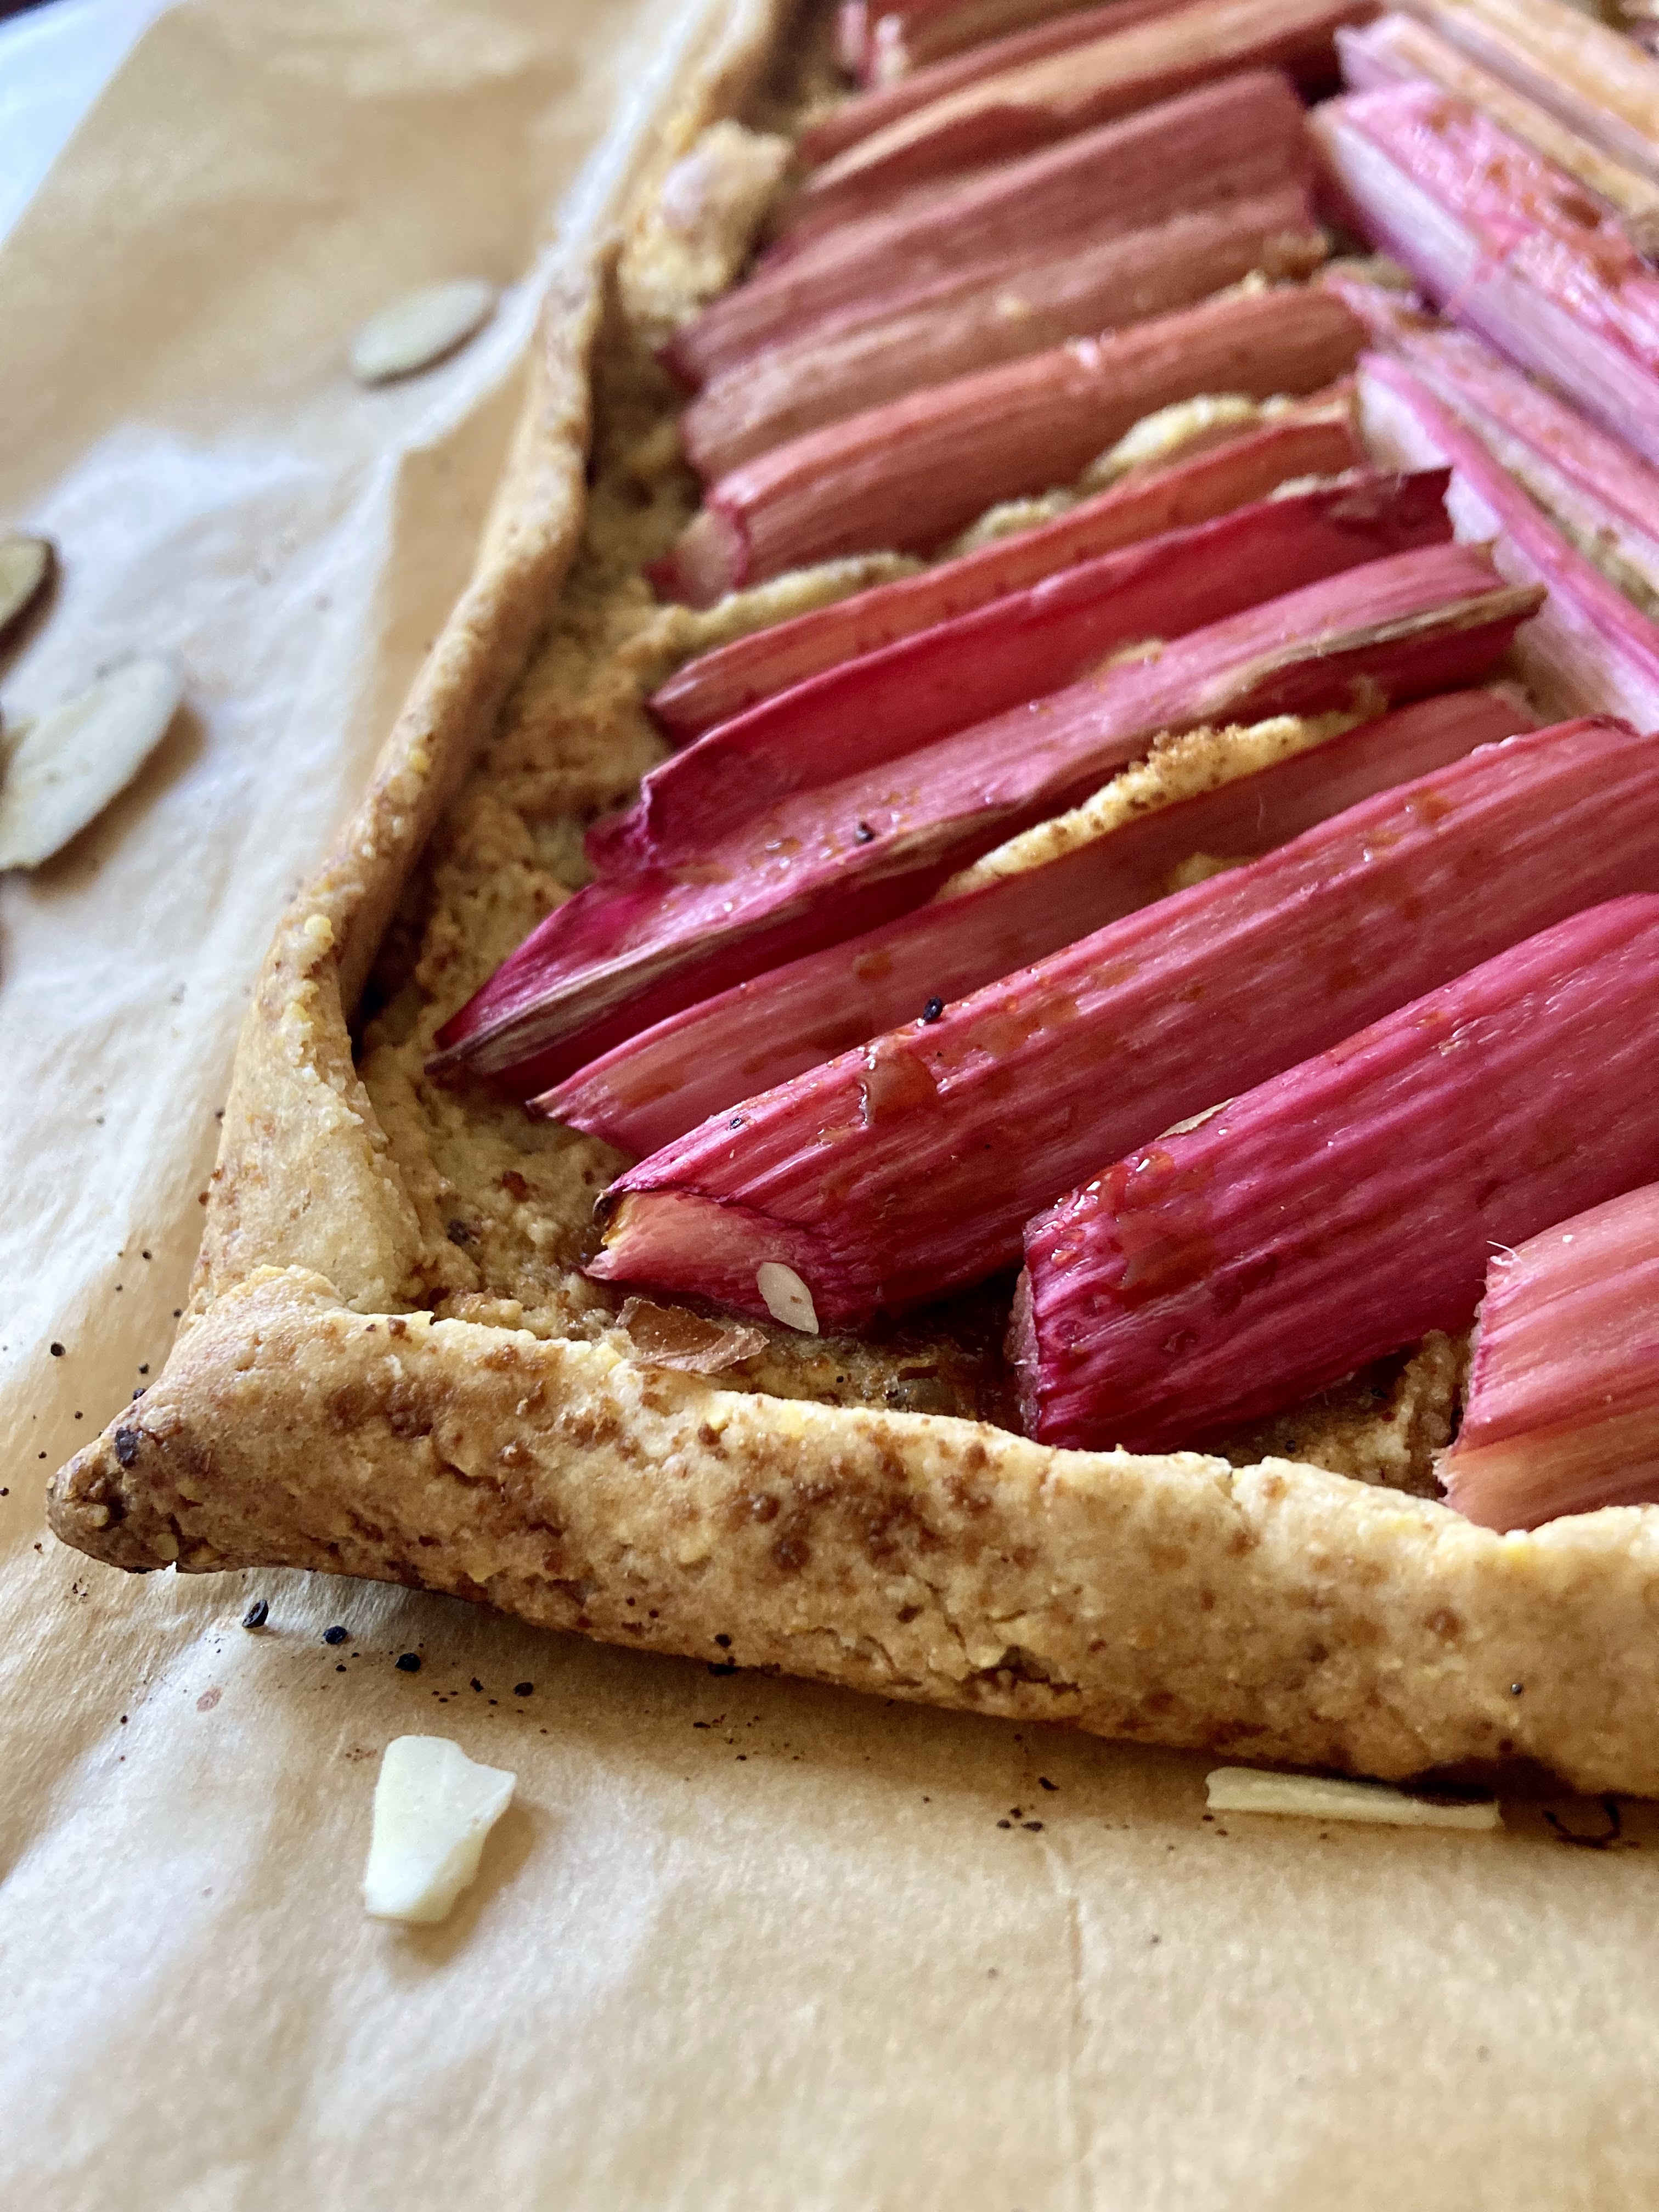
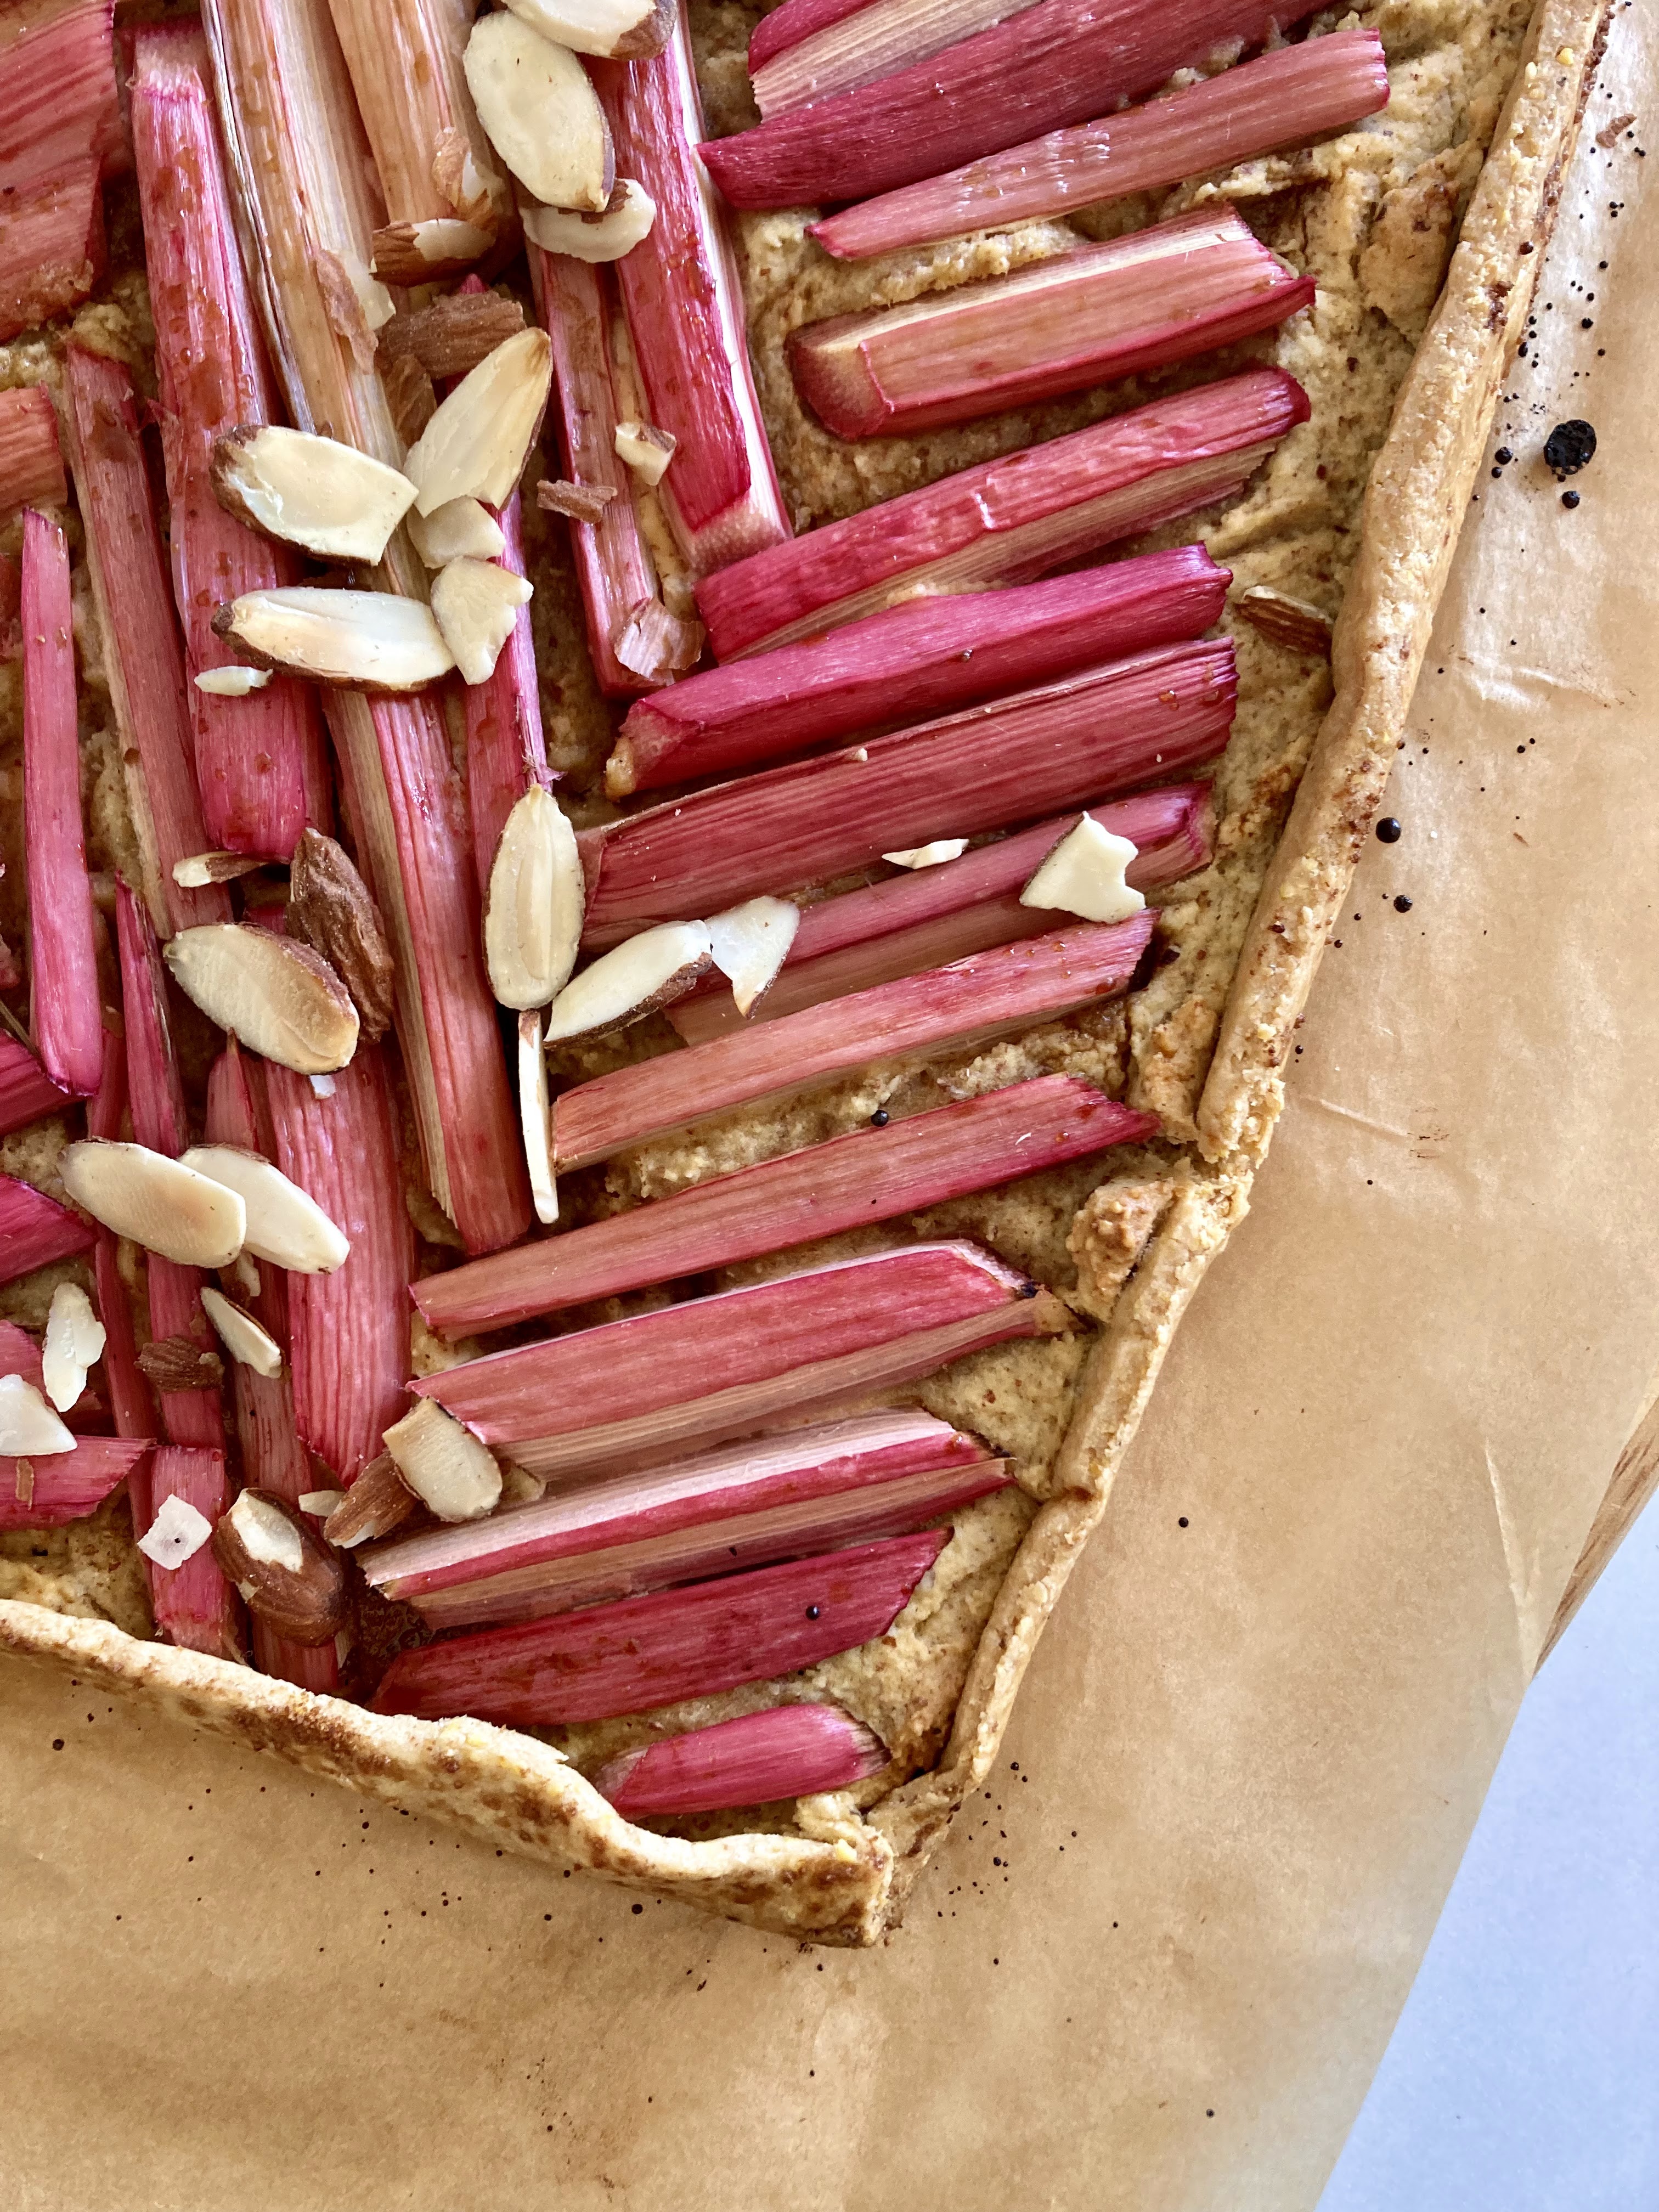
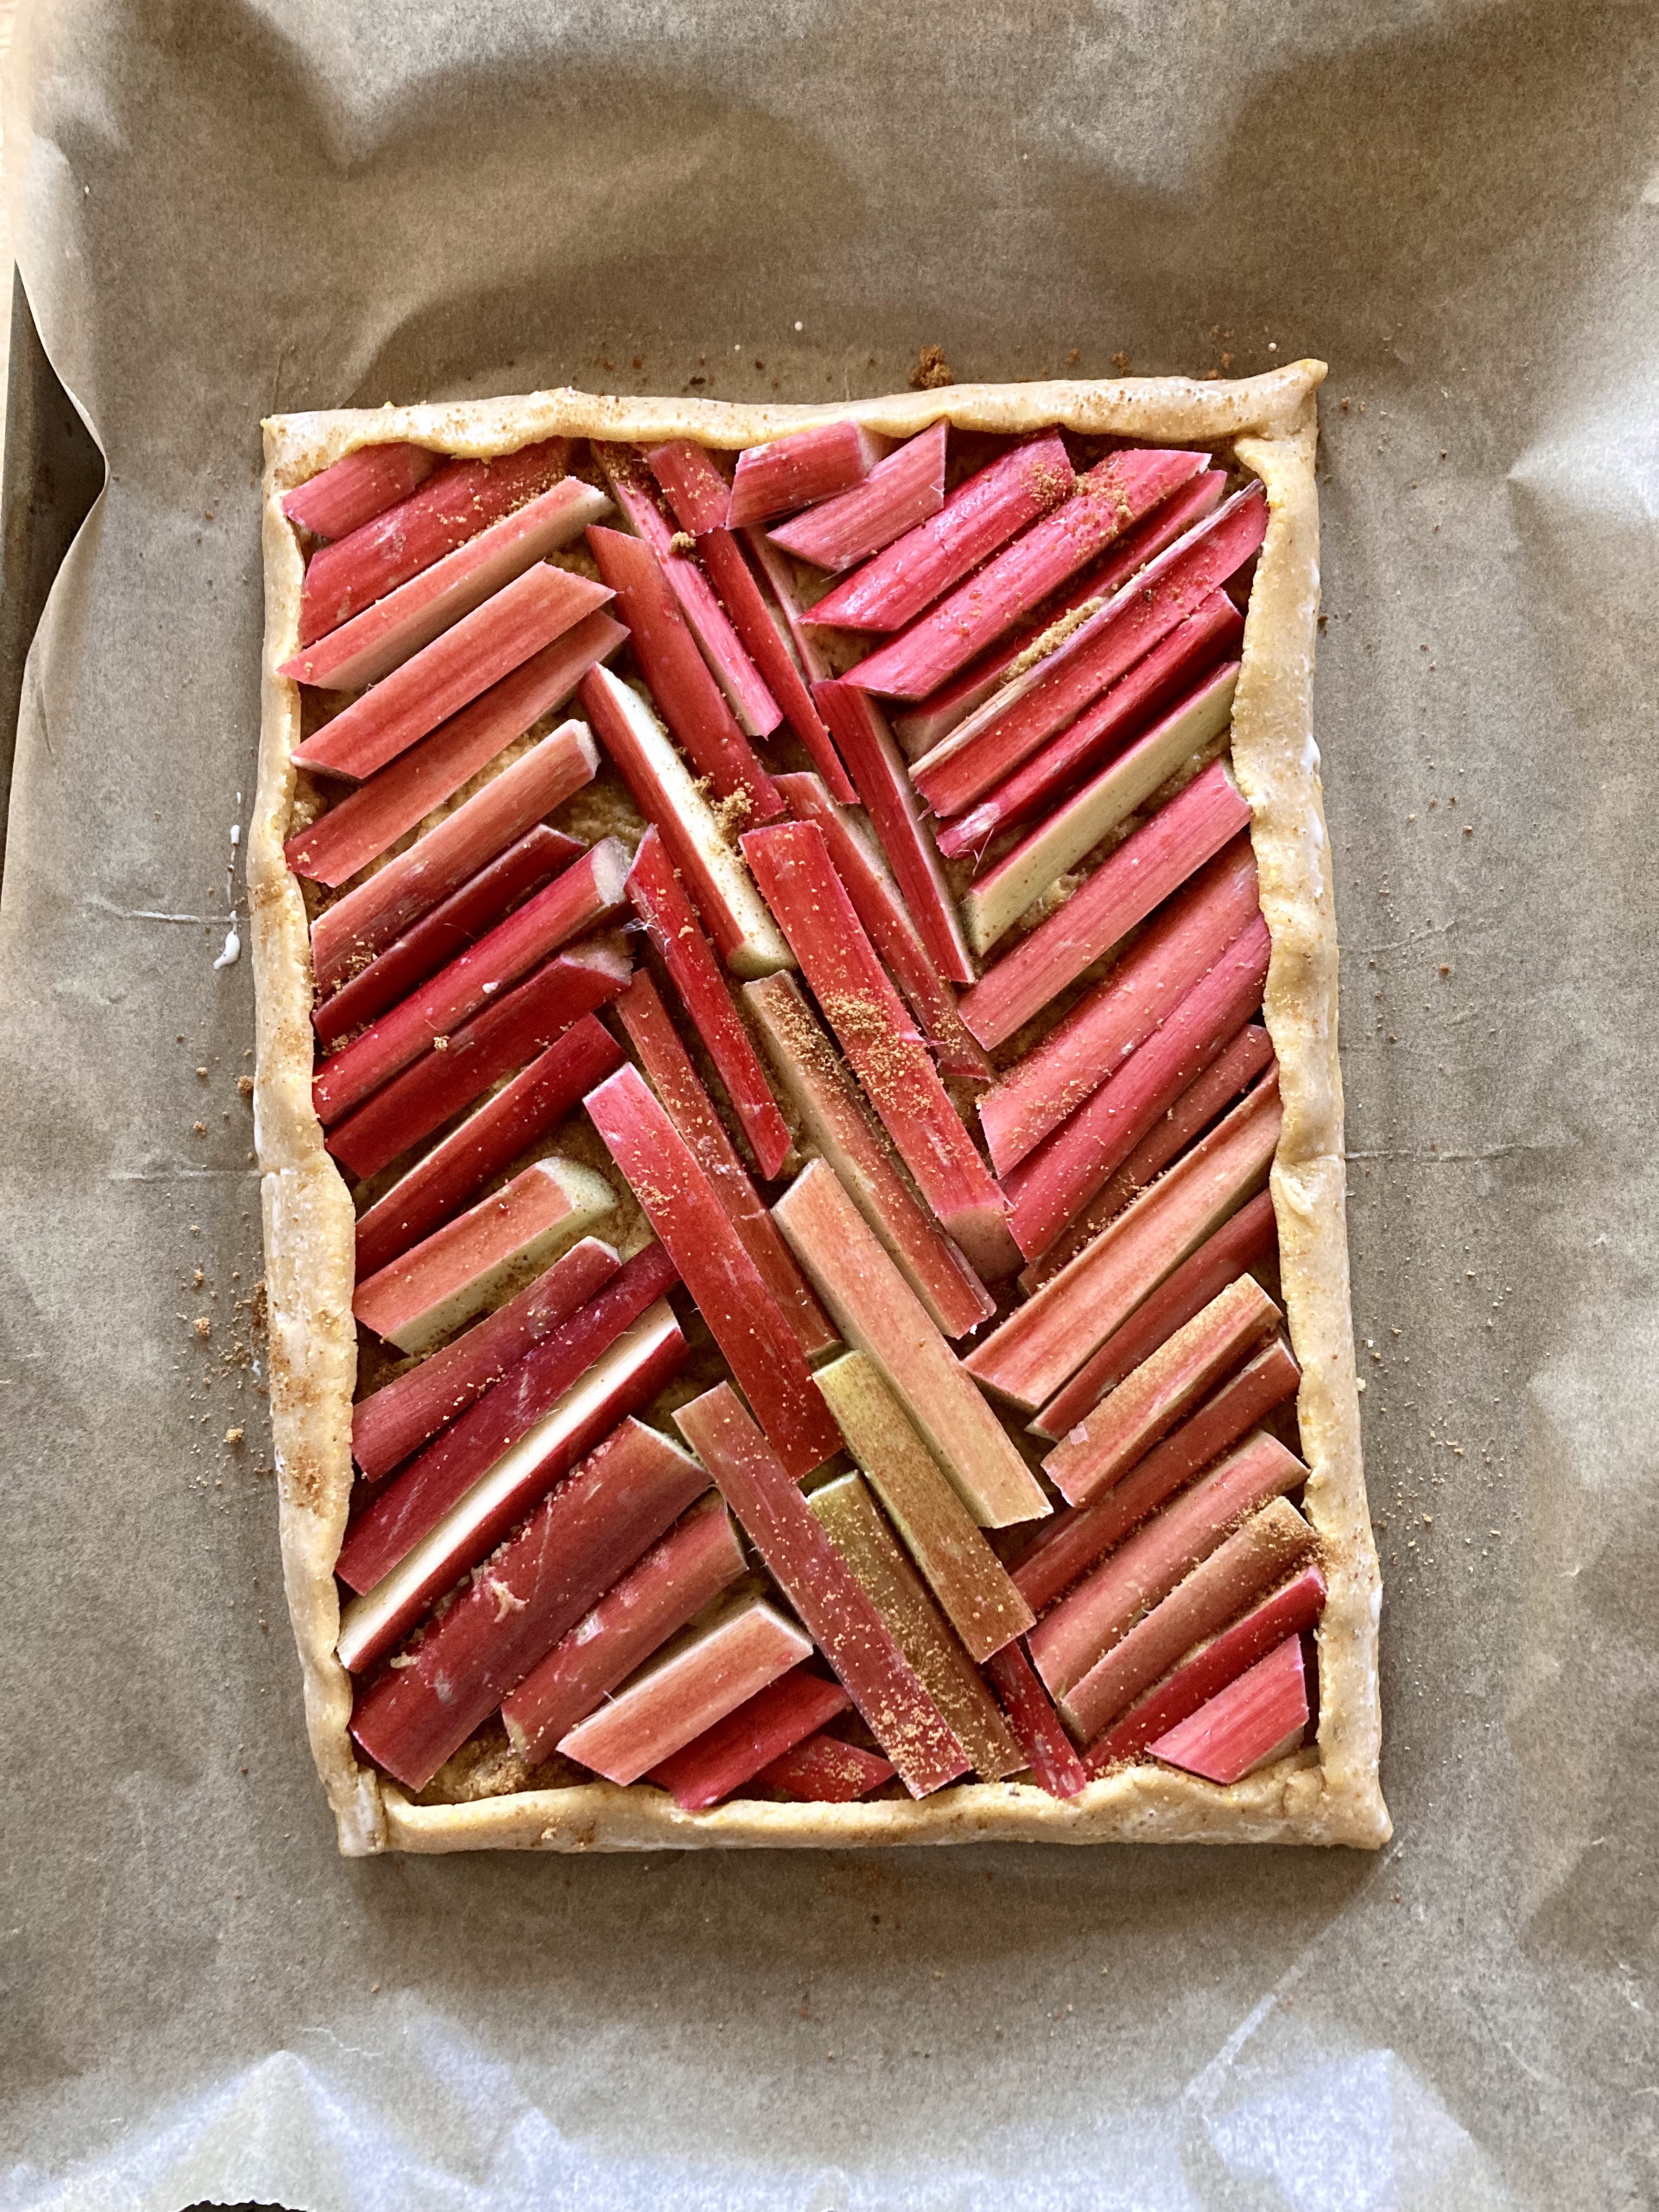
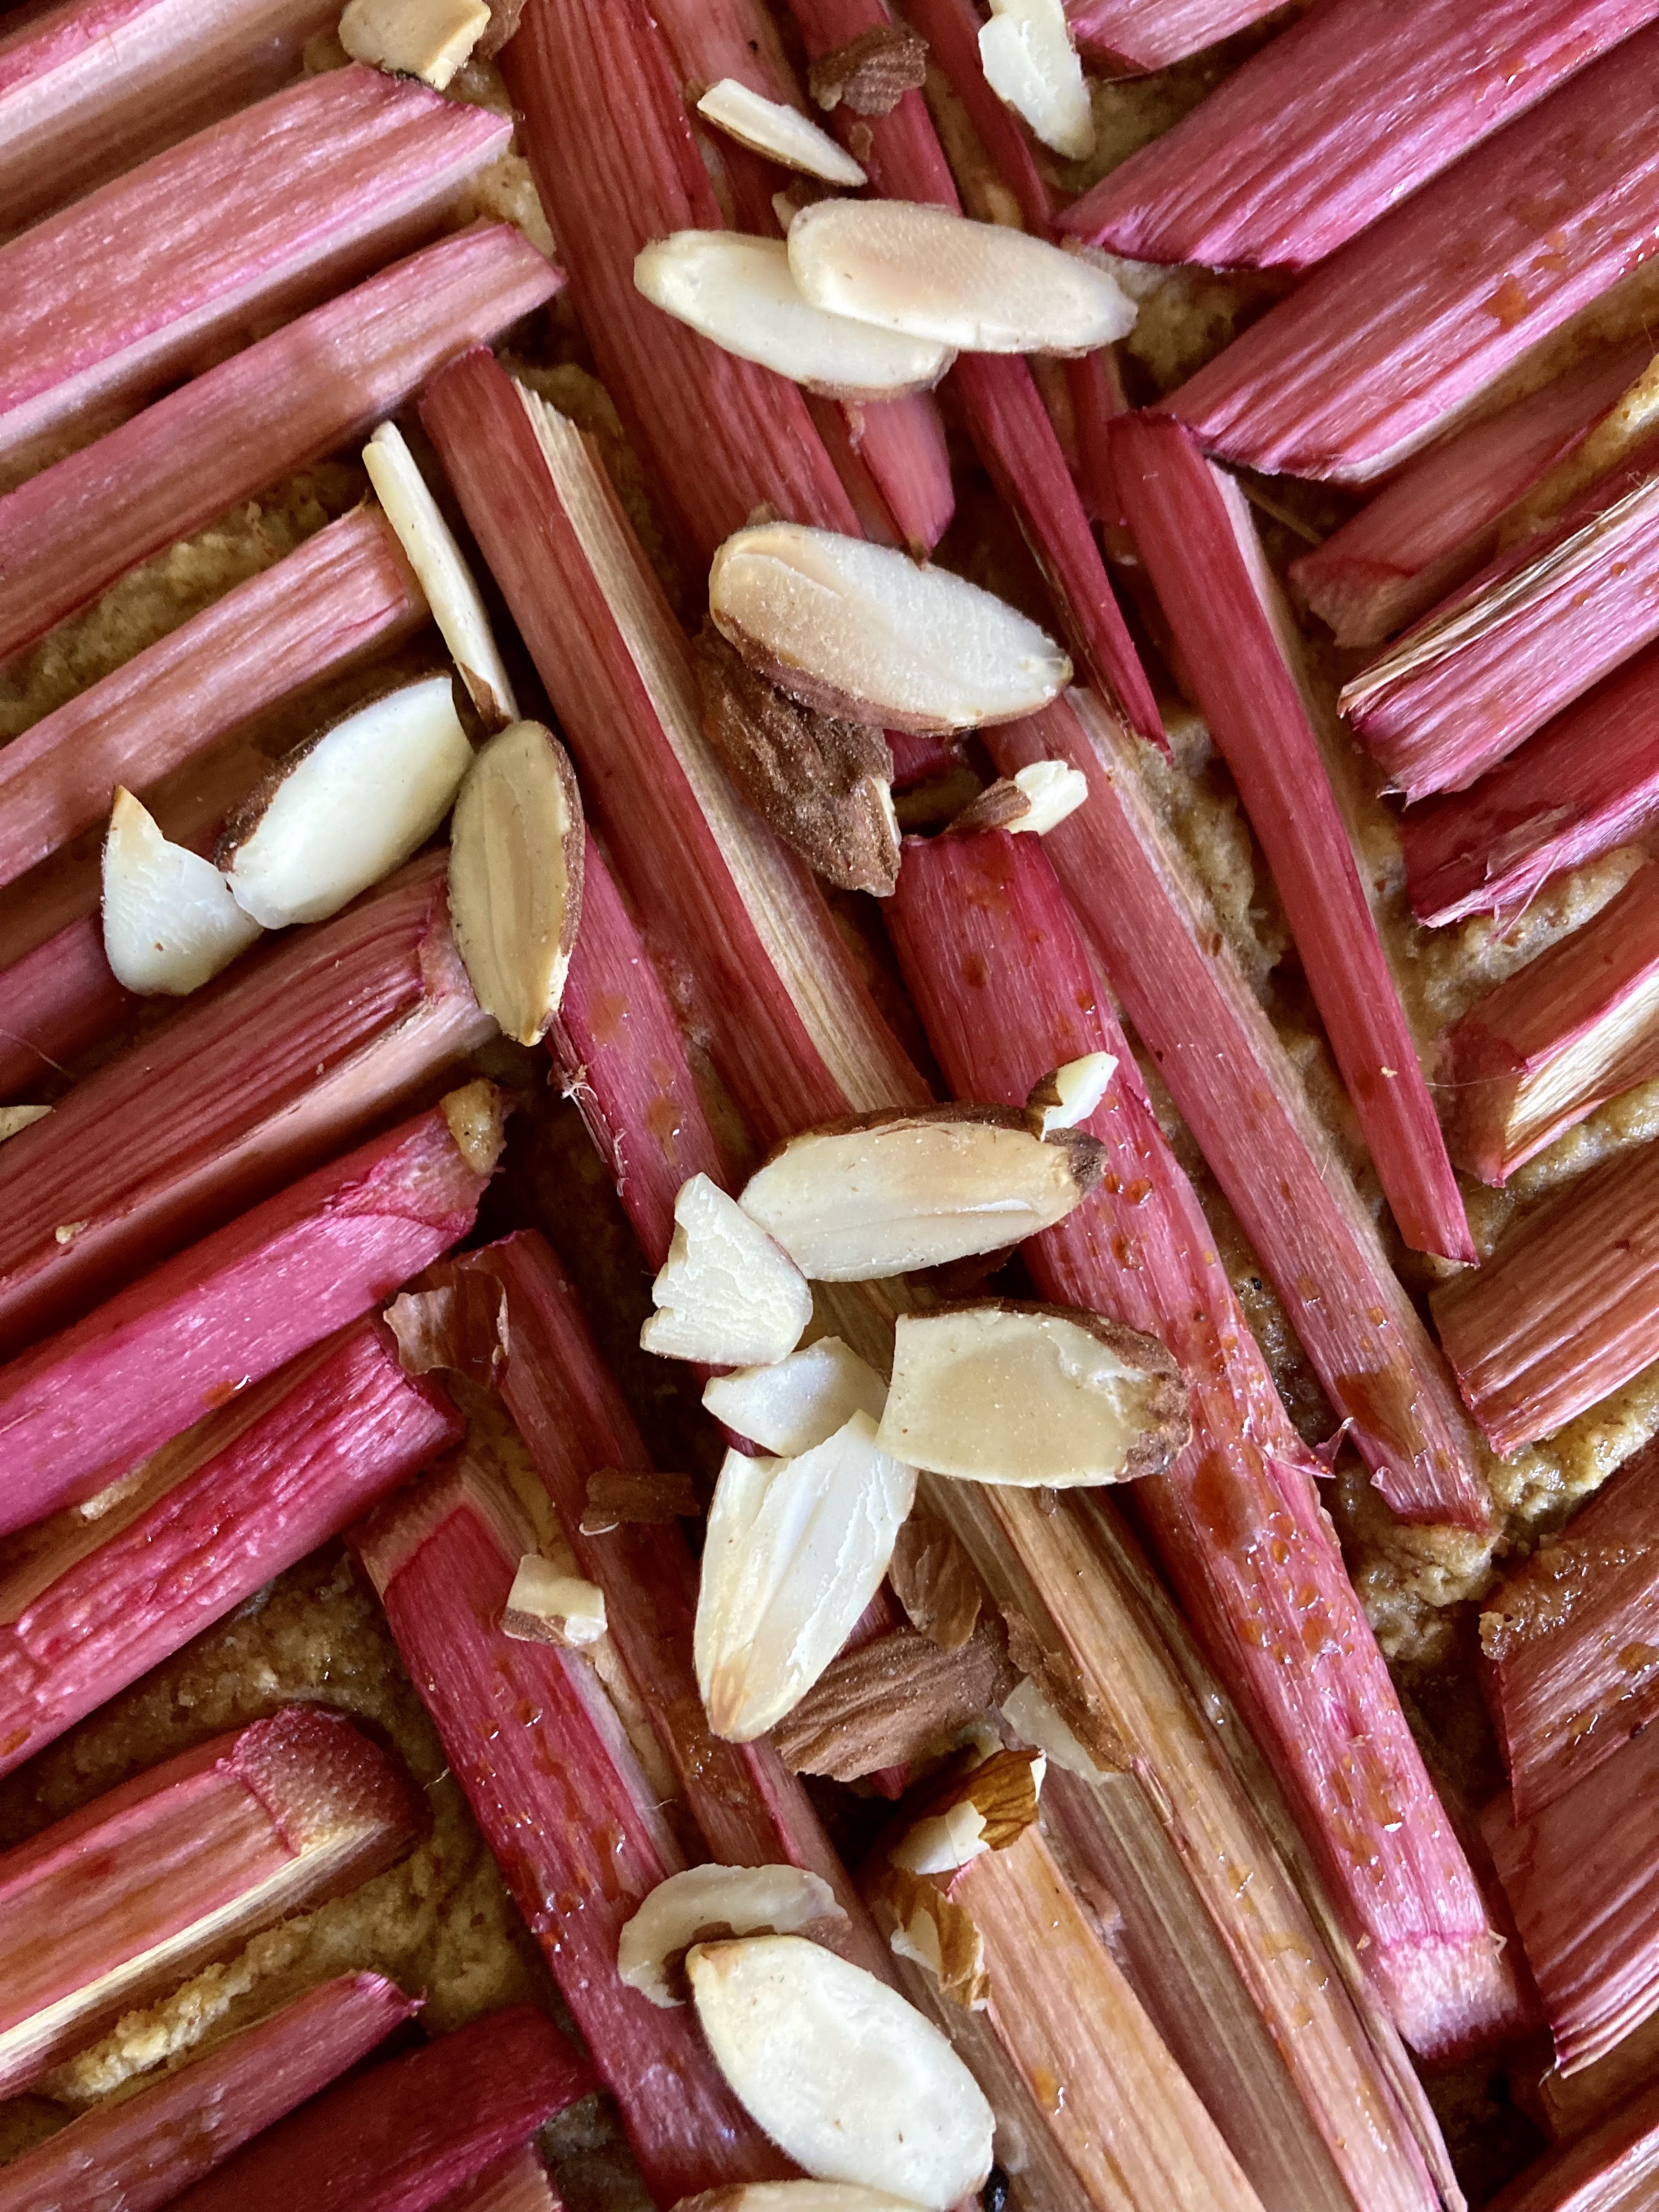
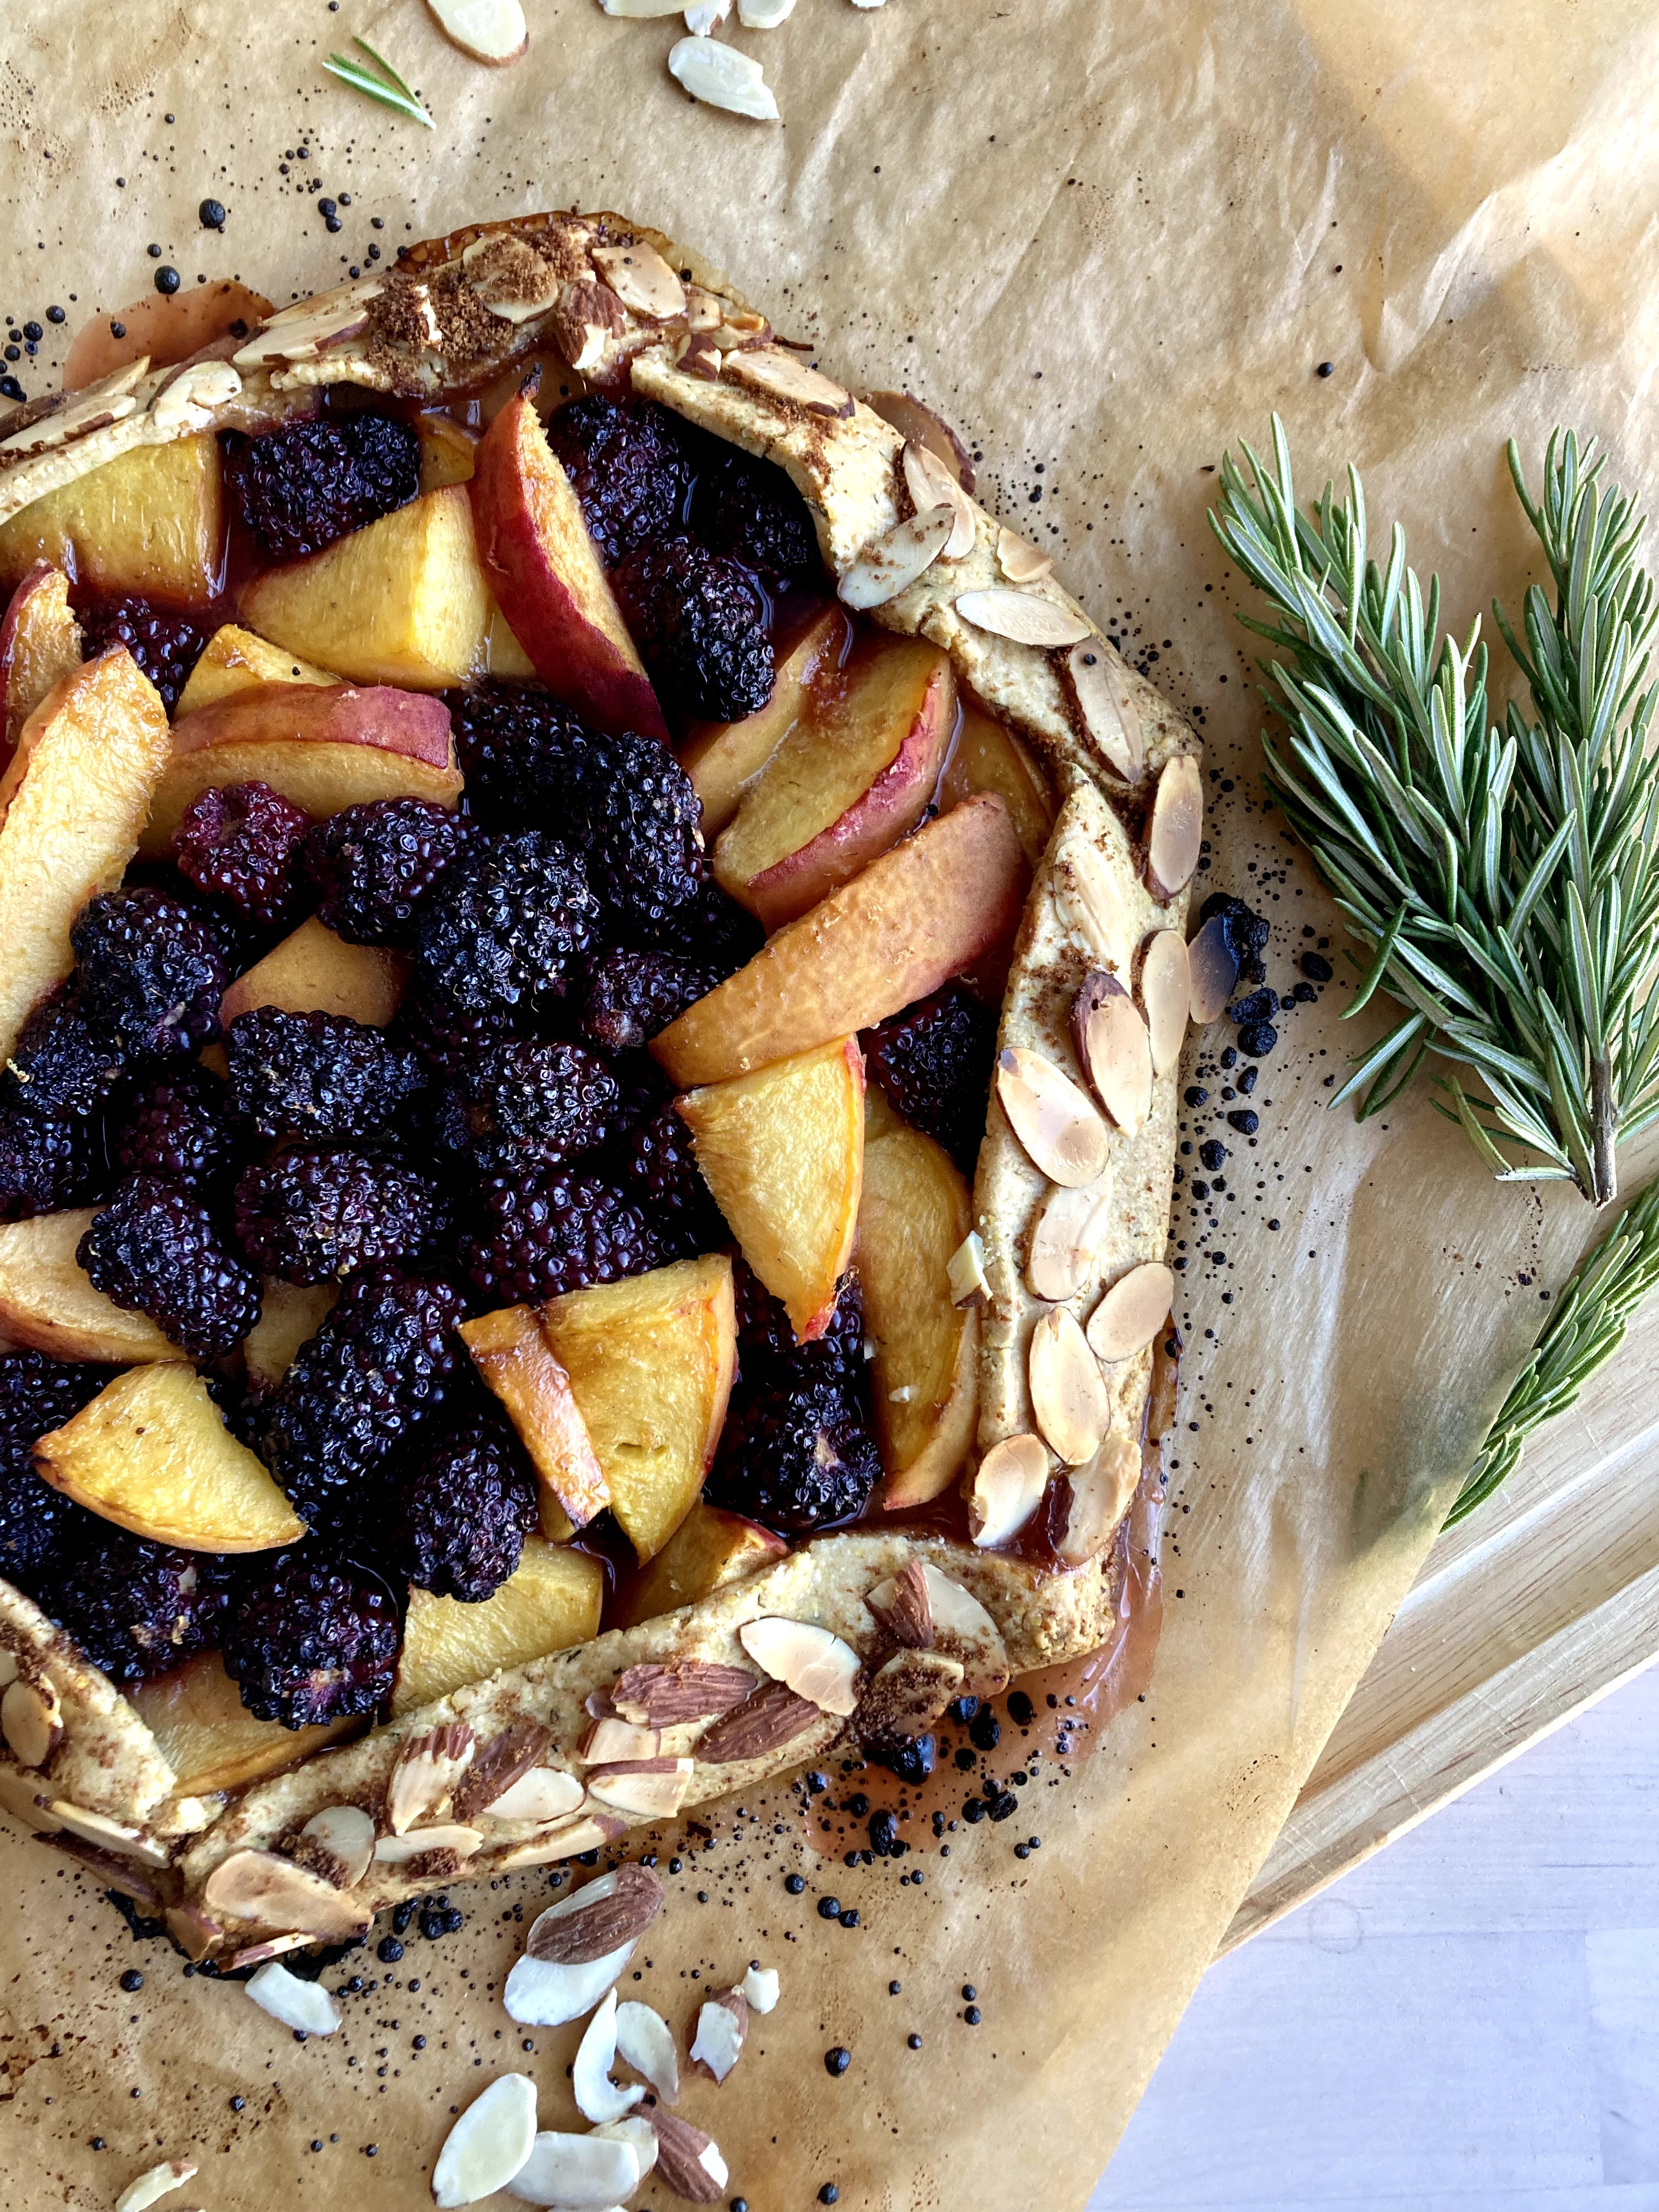
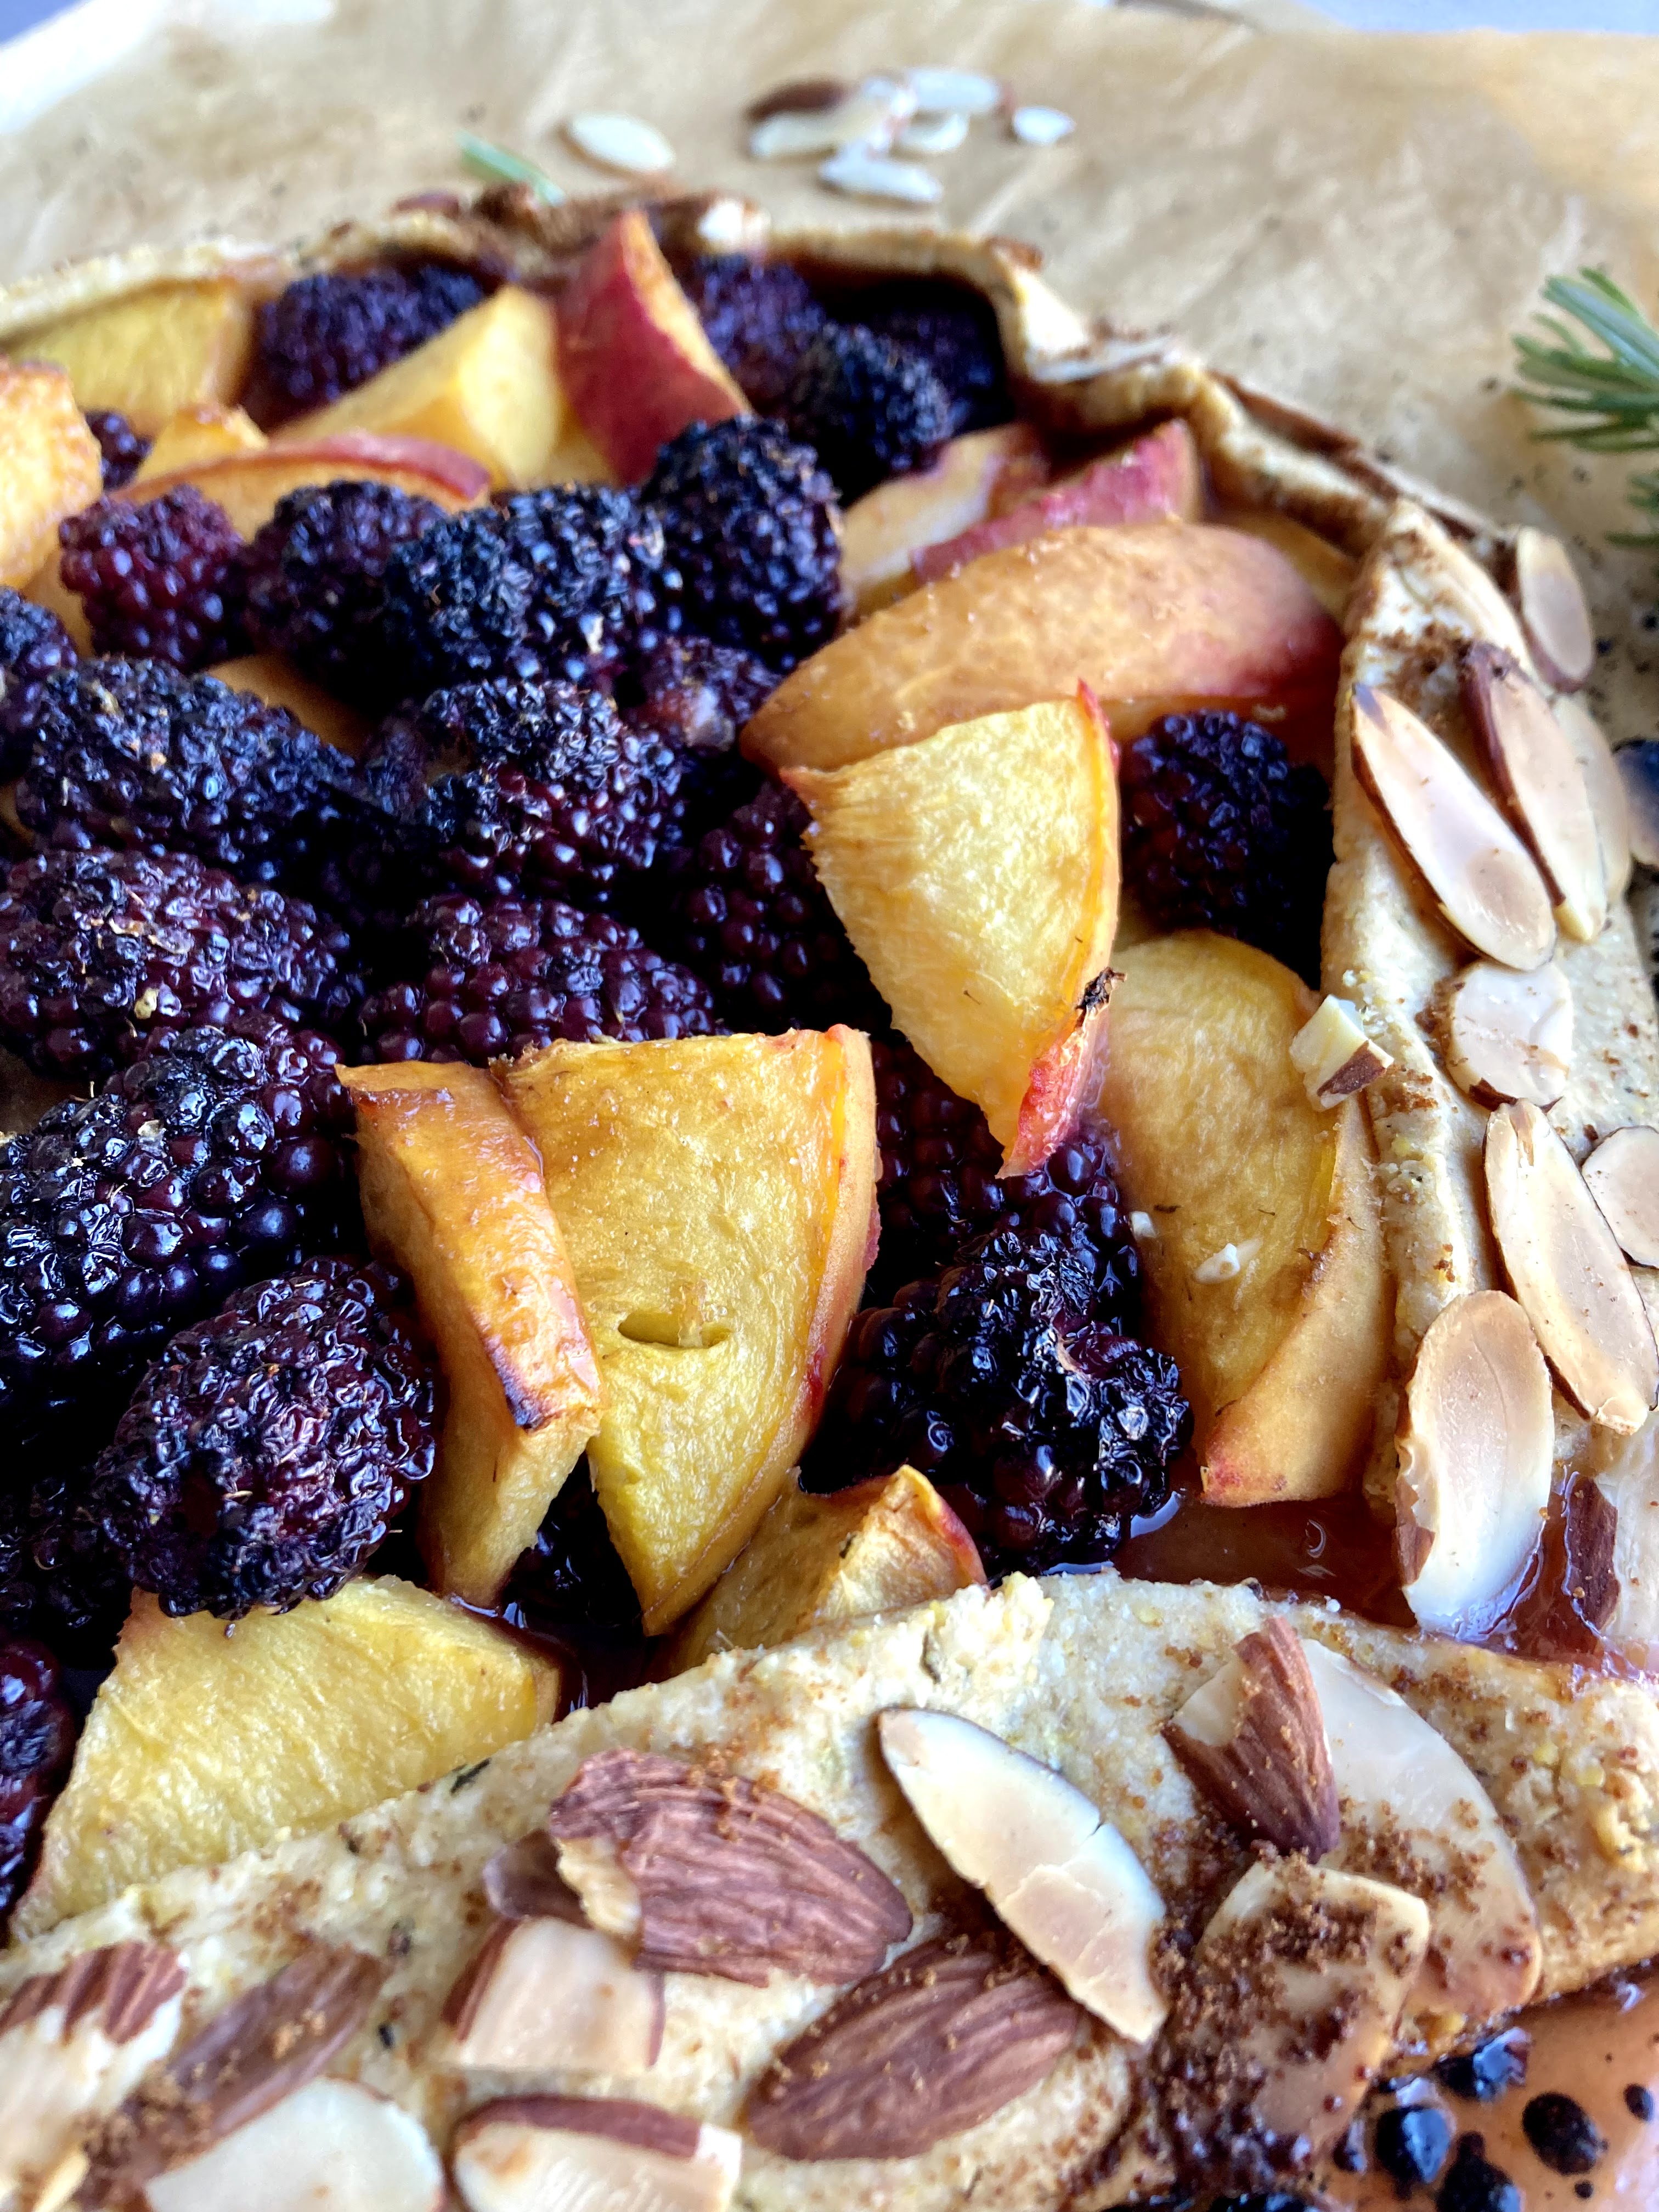
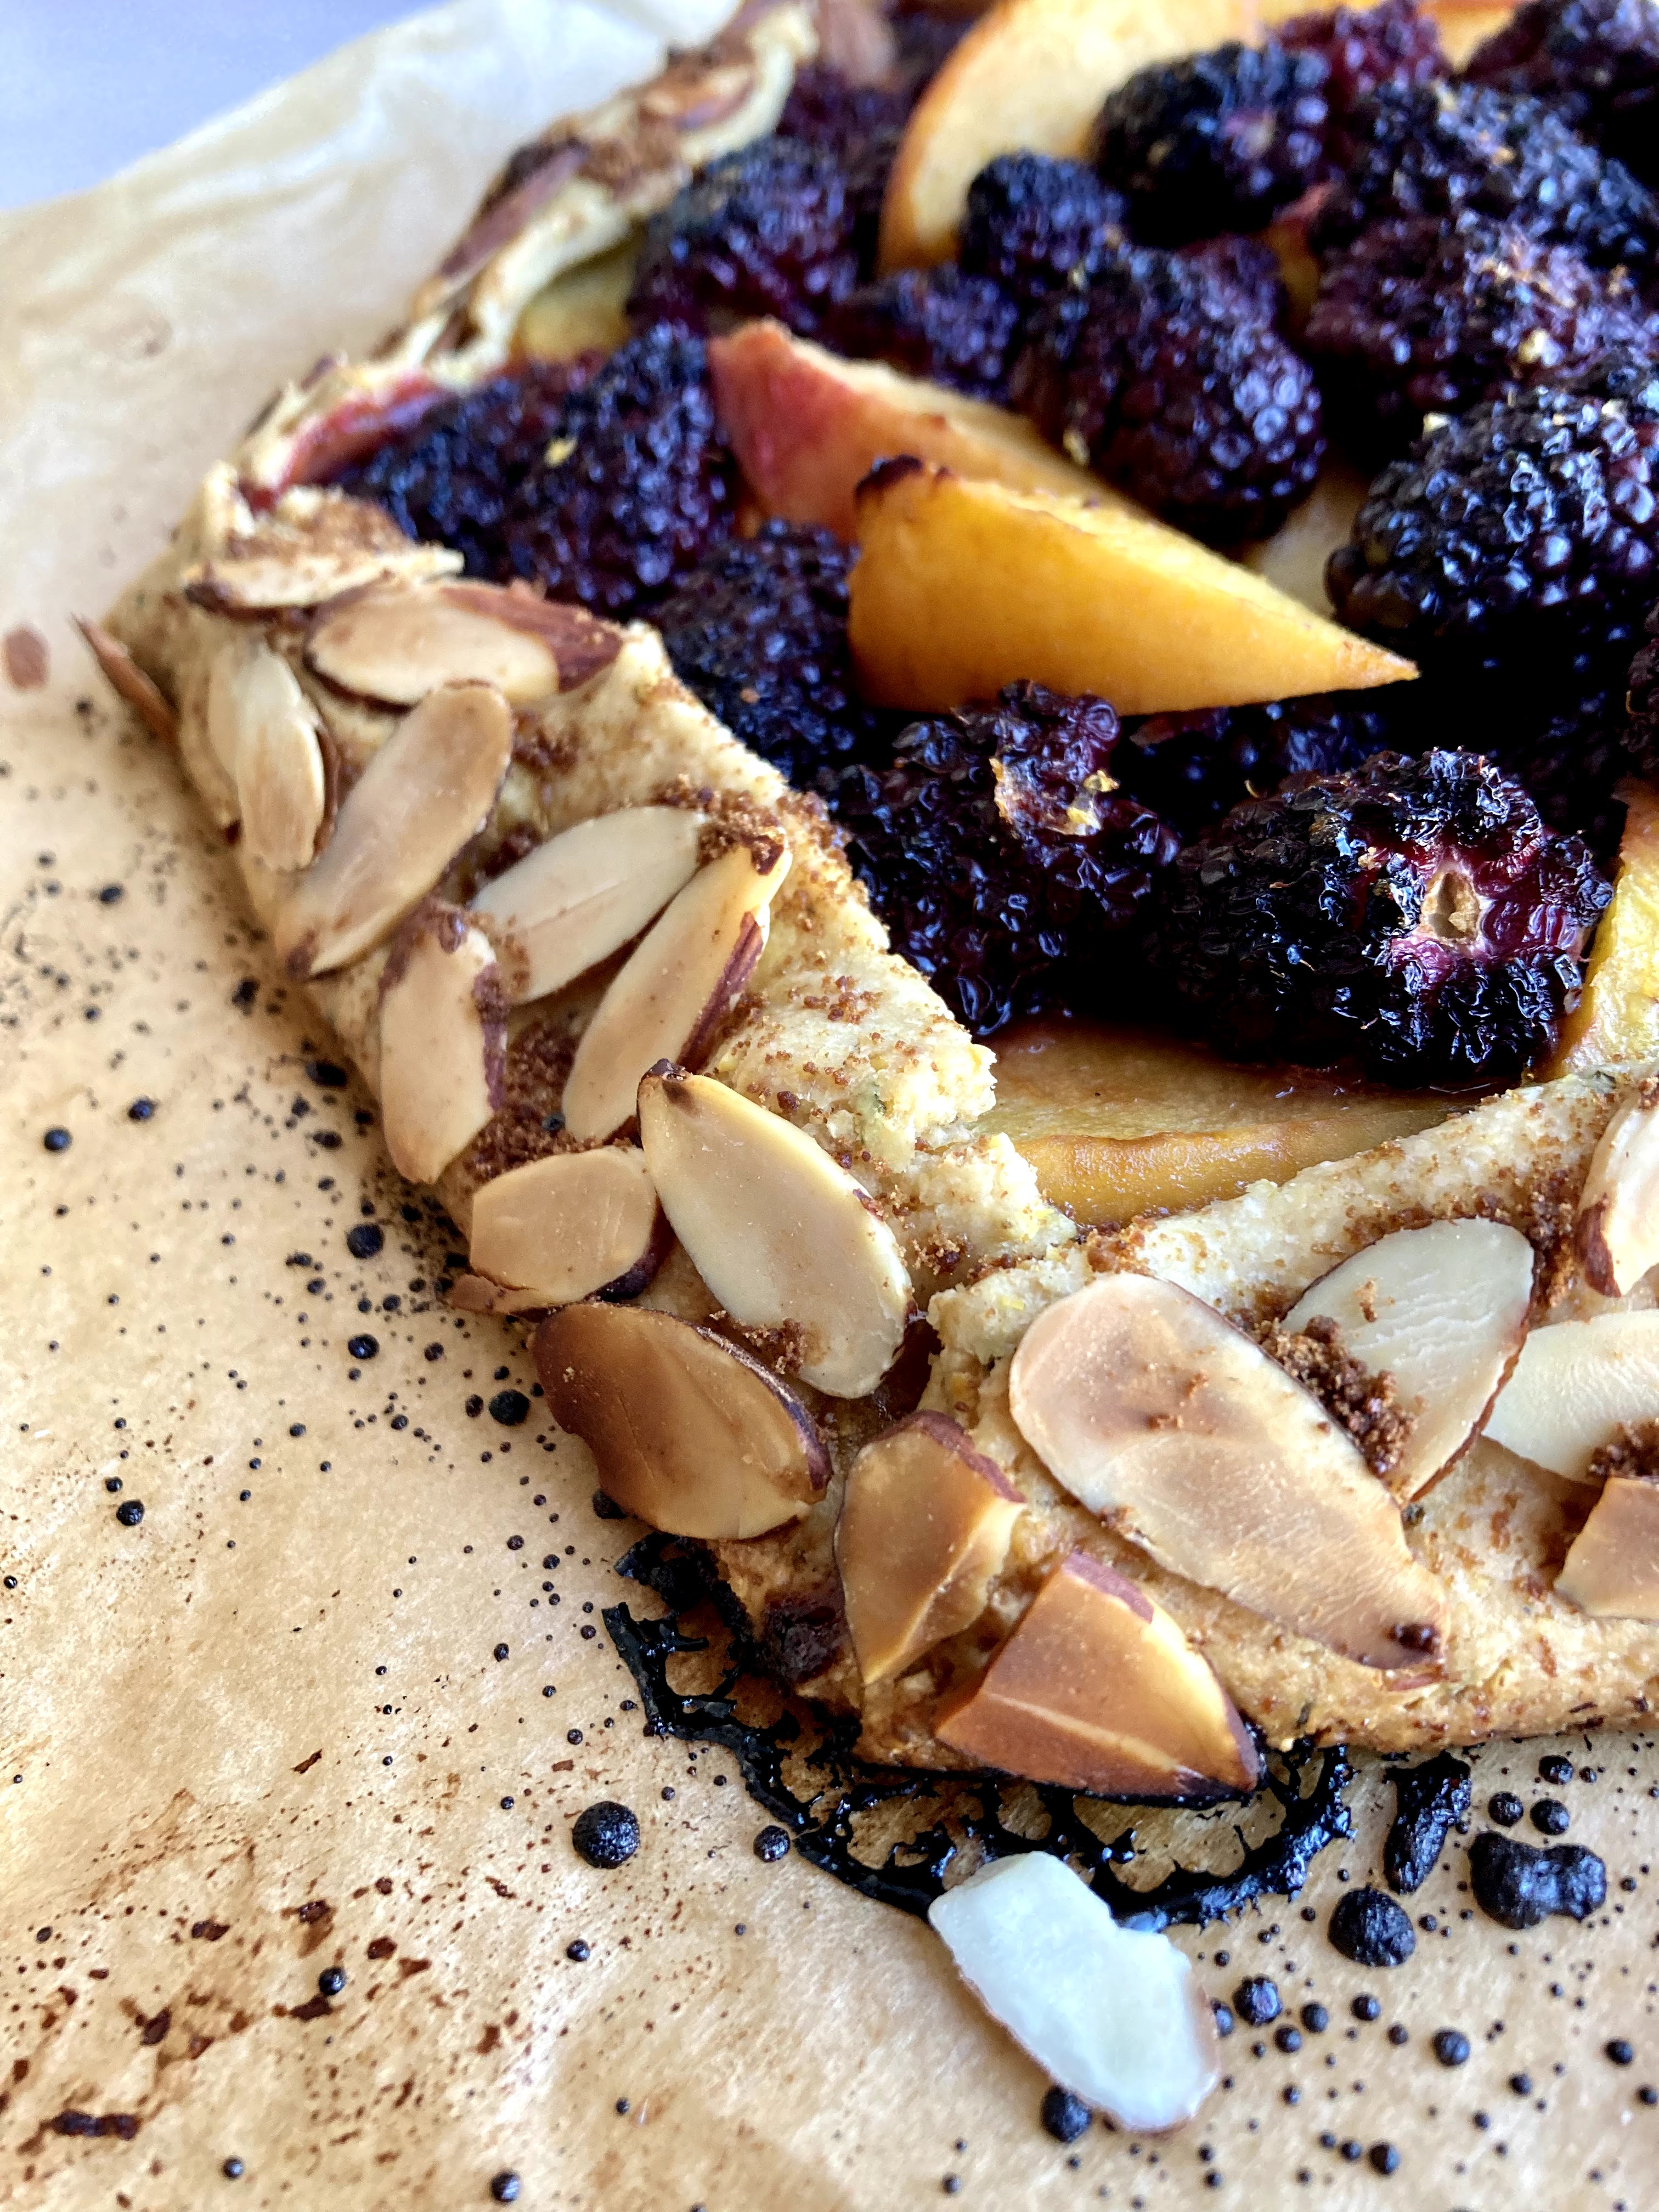
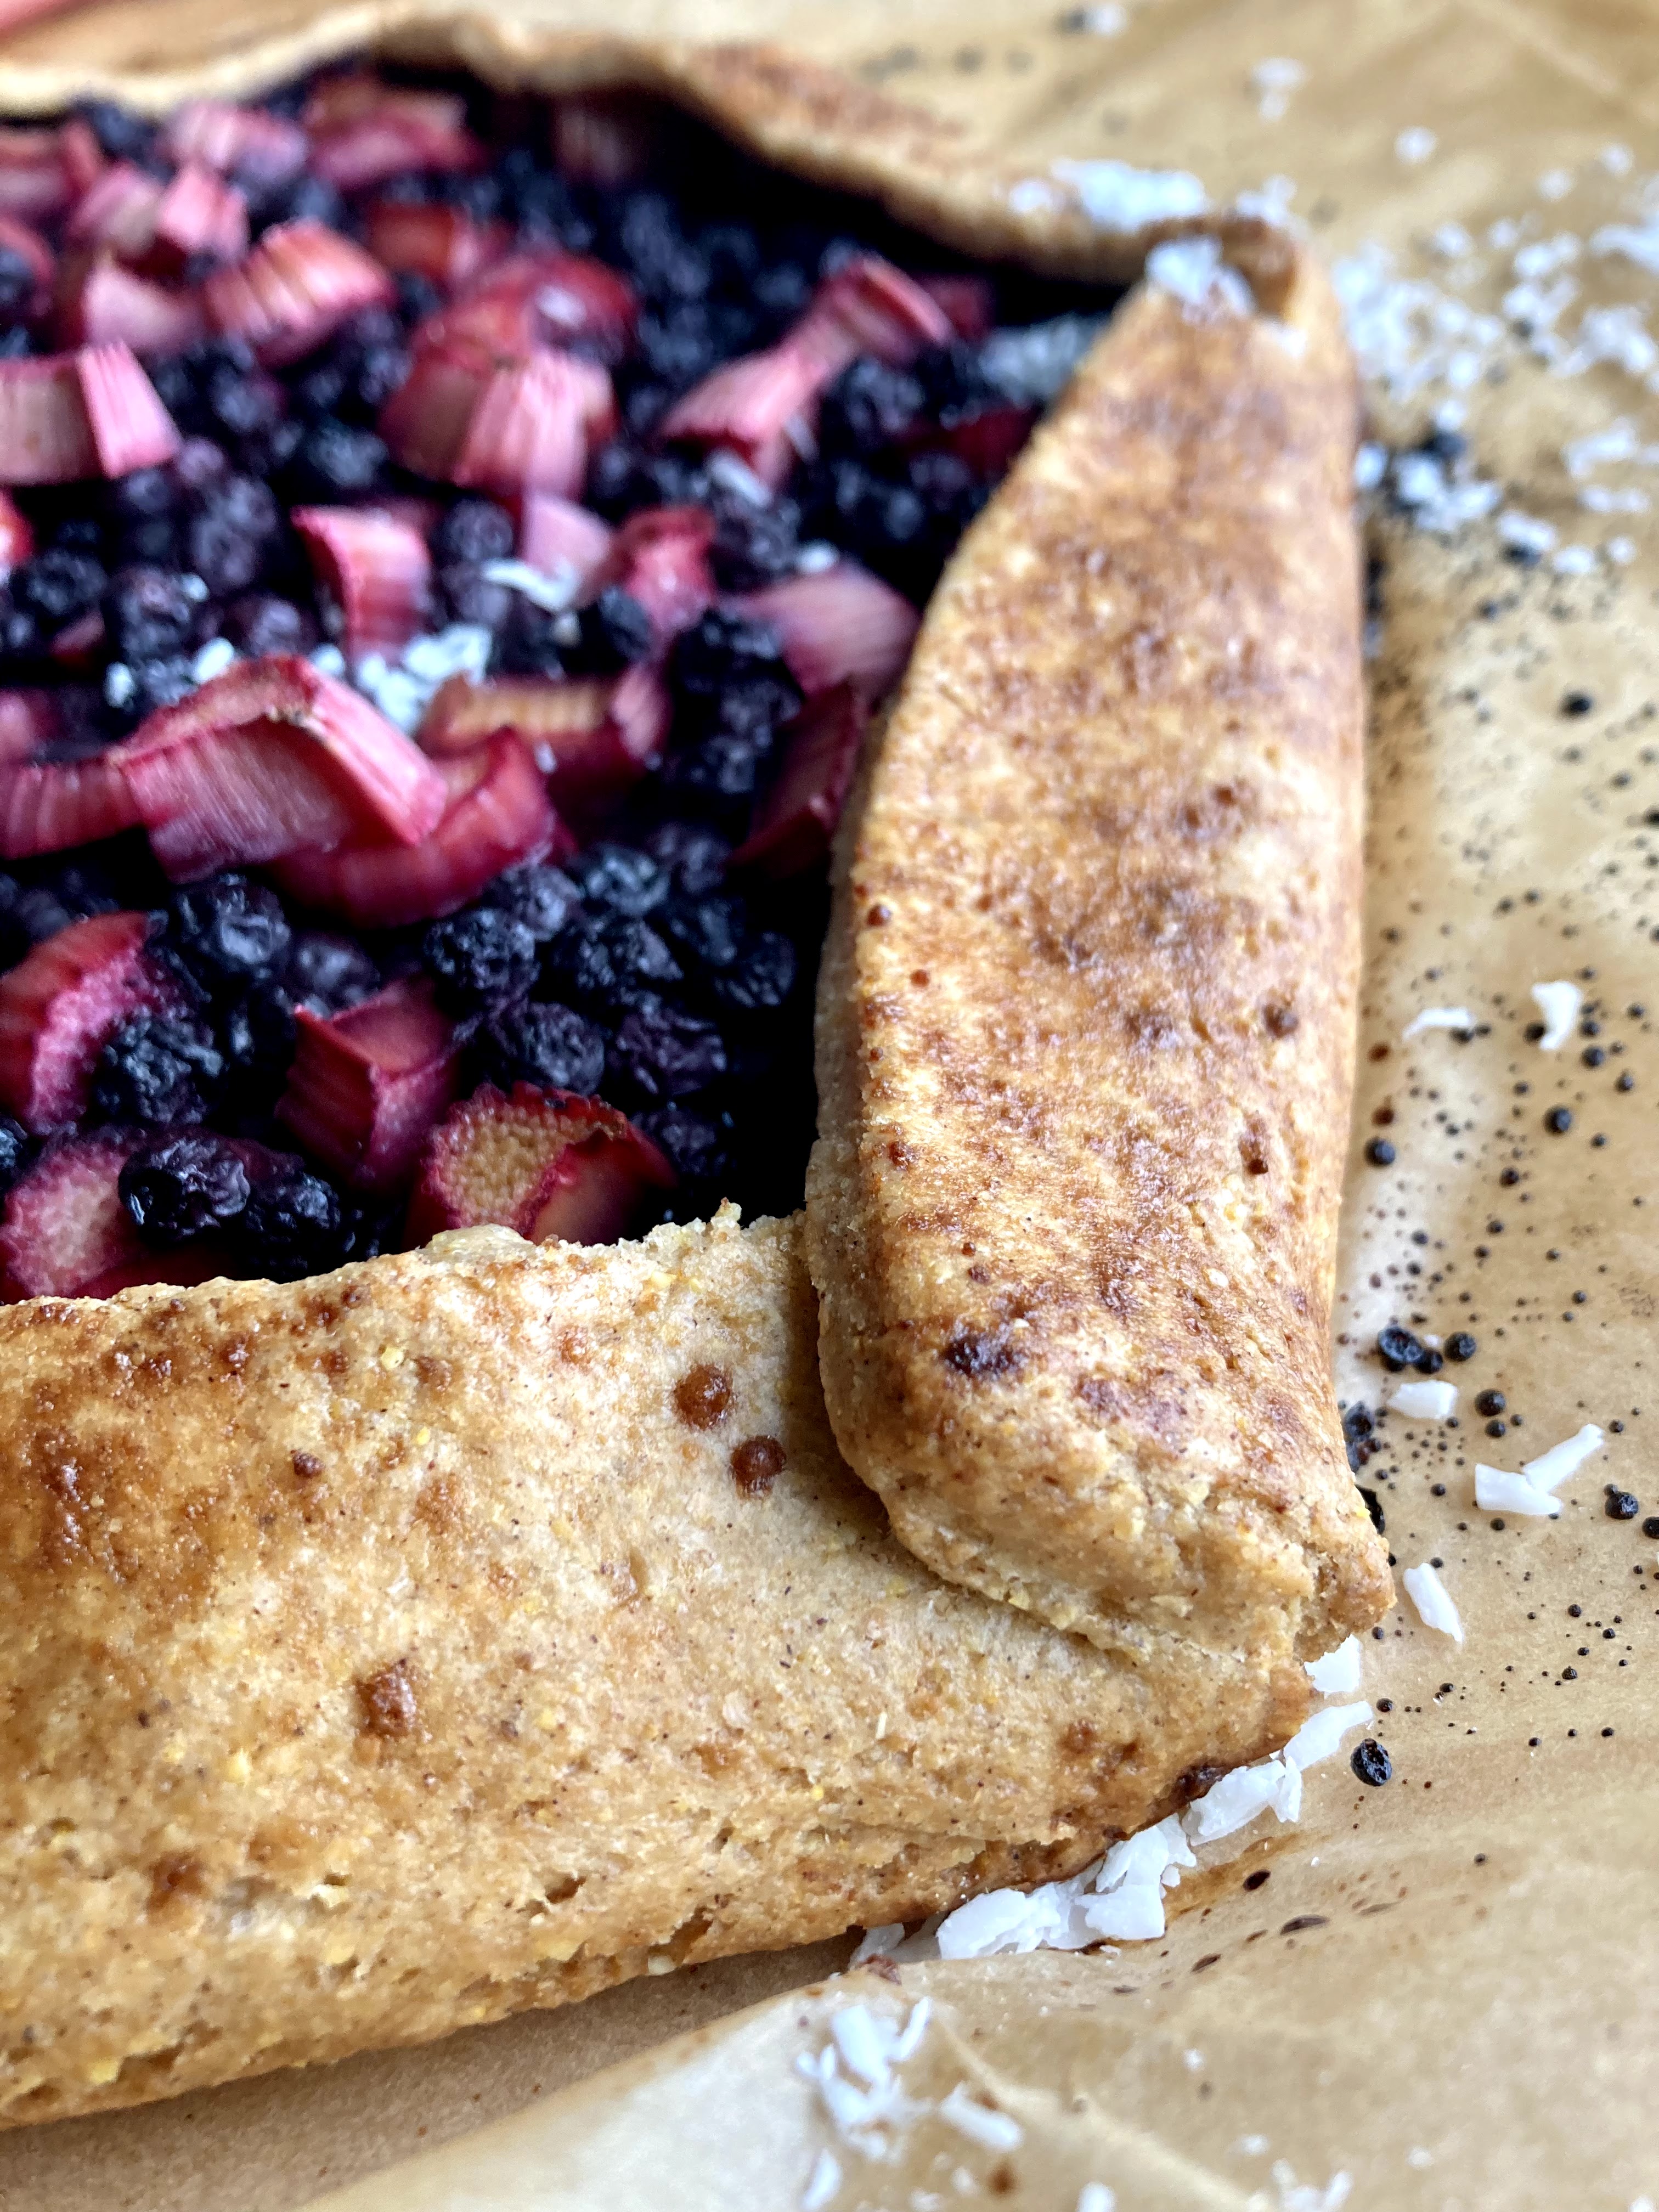
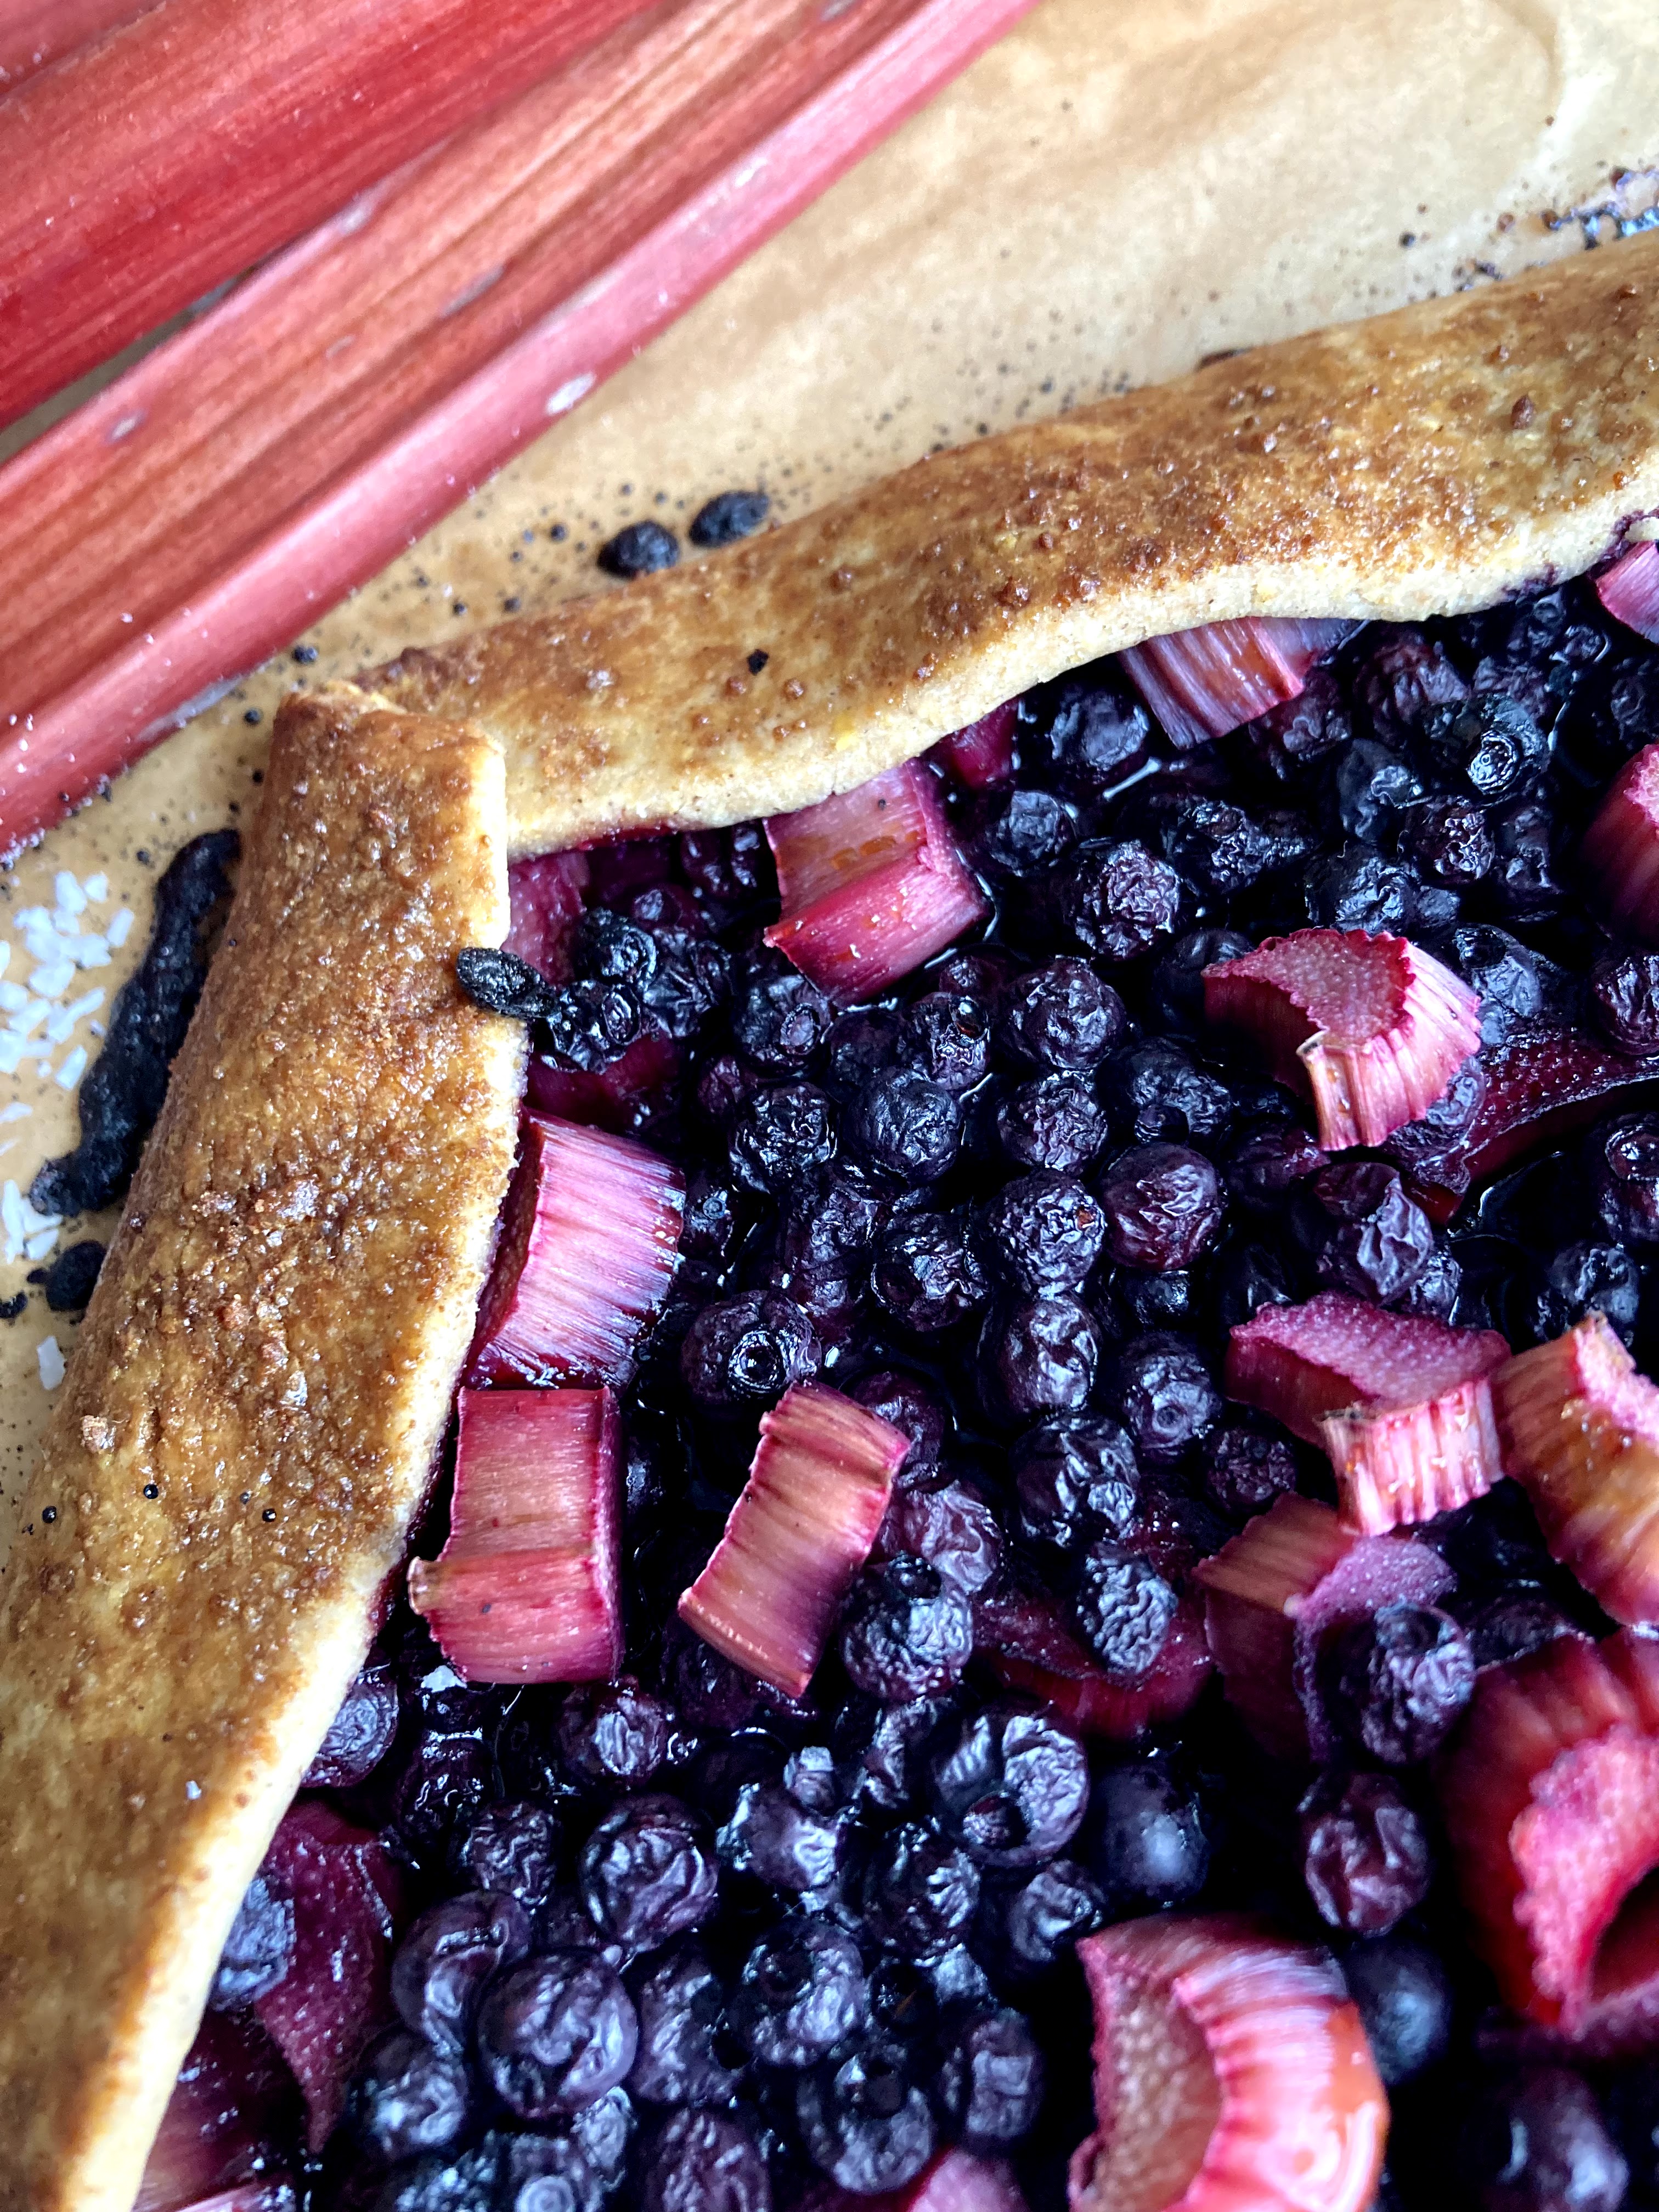
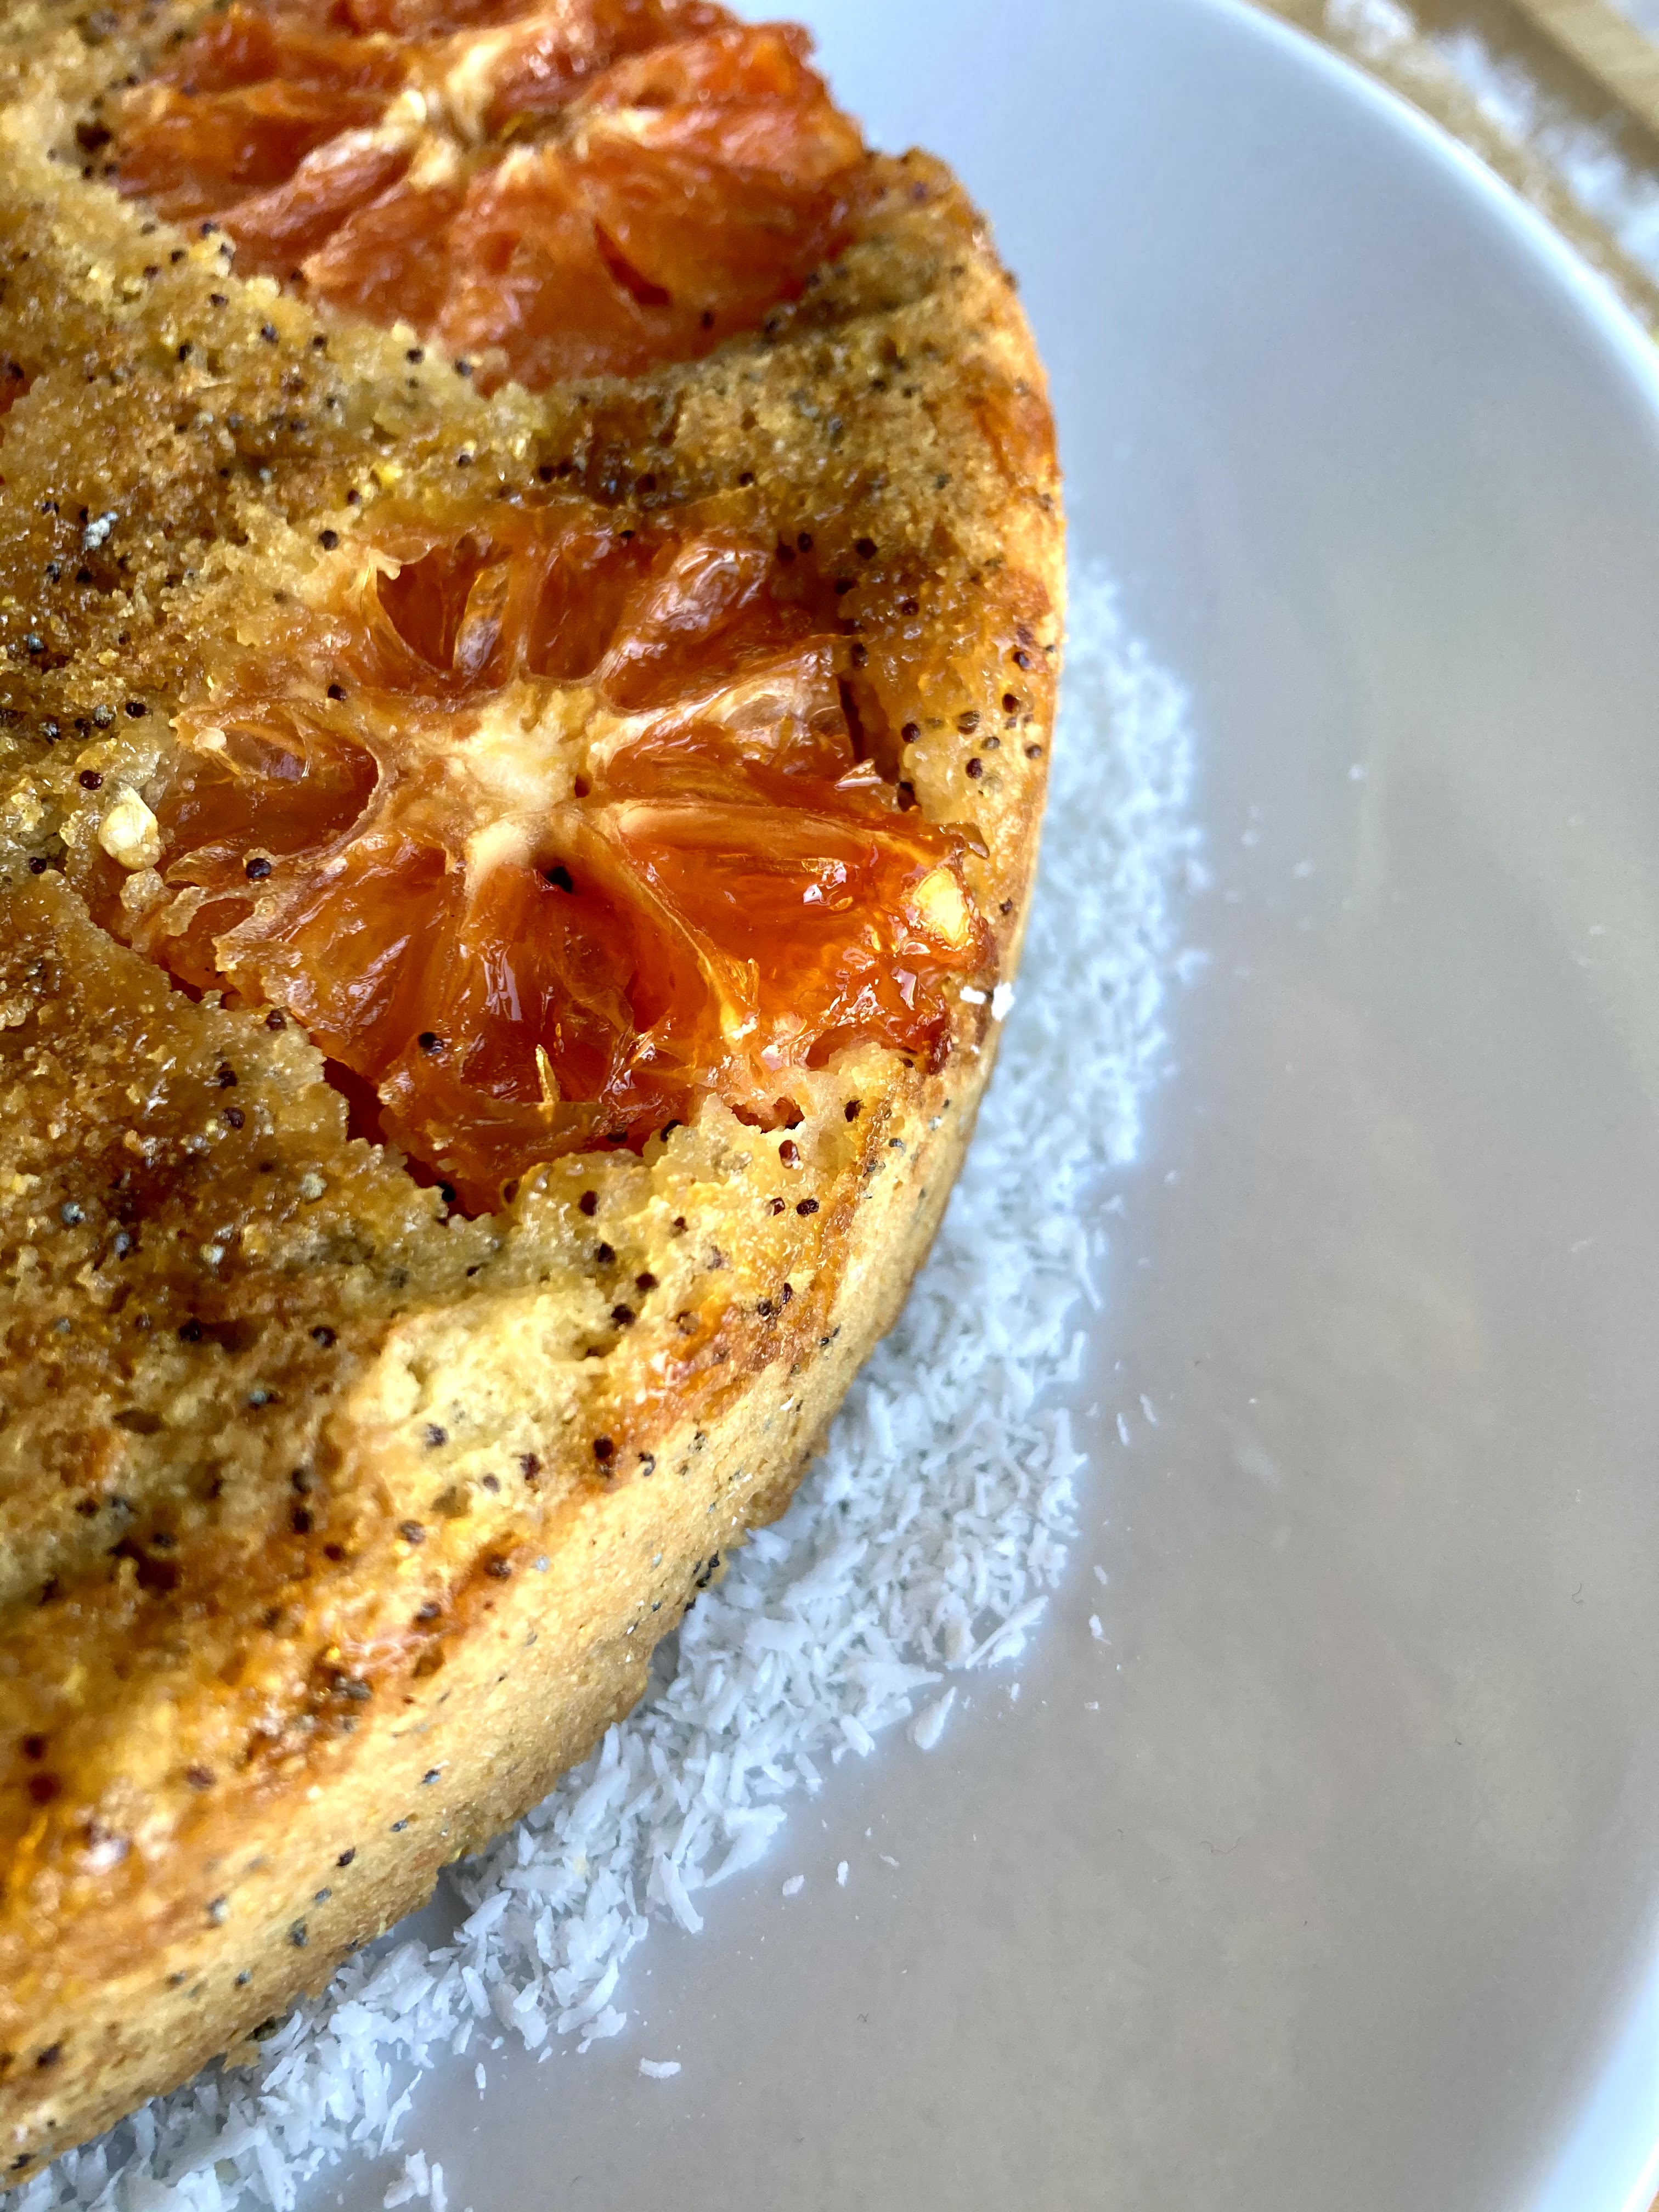
As to why I haven’t really had anything resembling regular posts on here… I *have* been baking, but a) I keep making variations on the same galette and I don’t need to be spamming your feeds with endless galette variations and b) camp is literally IMMINENT and I have been eyeballs deep in director stuff since basically… May… so that plus a full time job = not so much free time for blog things. Promise I’m still baking on a regular basis even though it doesn’t always show up here! Headed up to camp on the 15th, and I can’t wait.

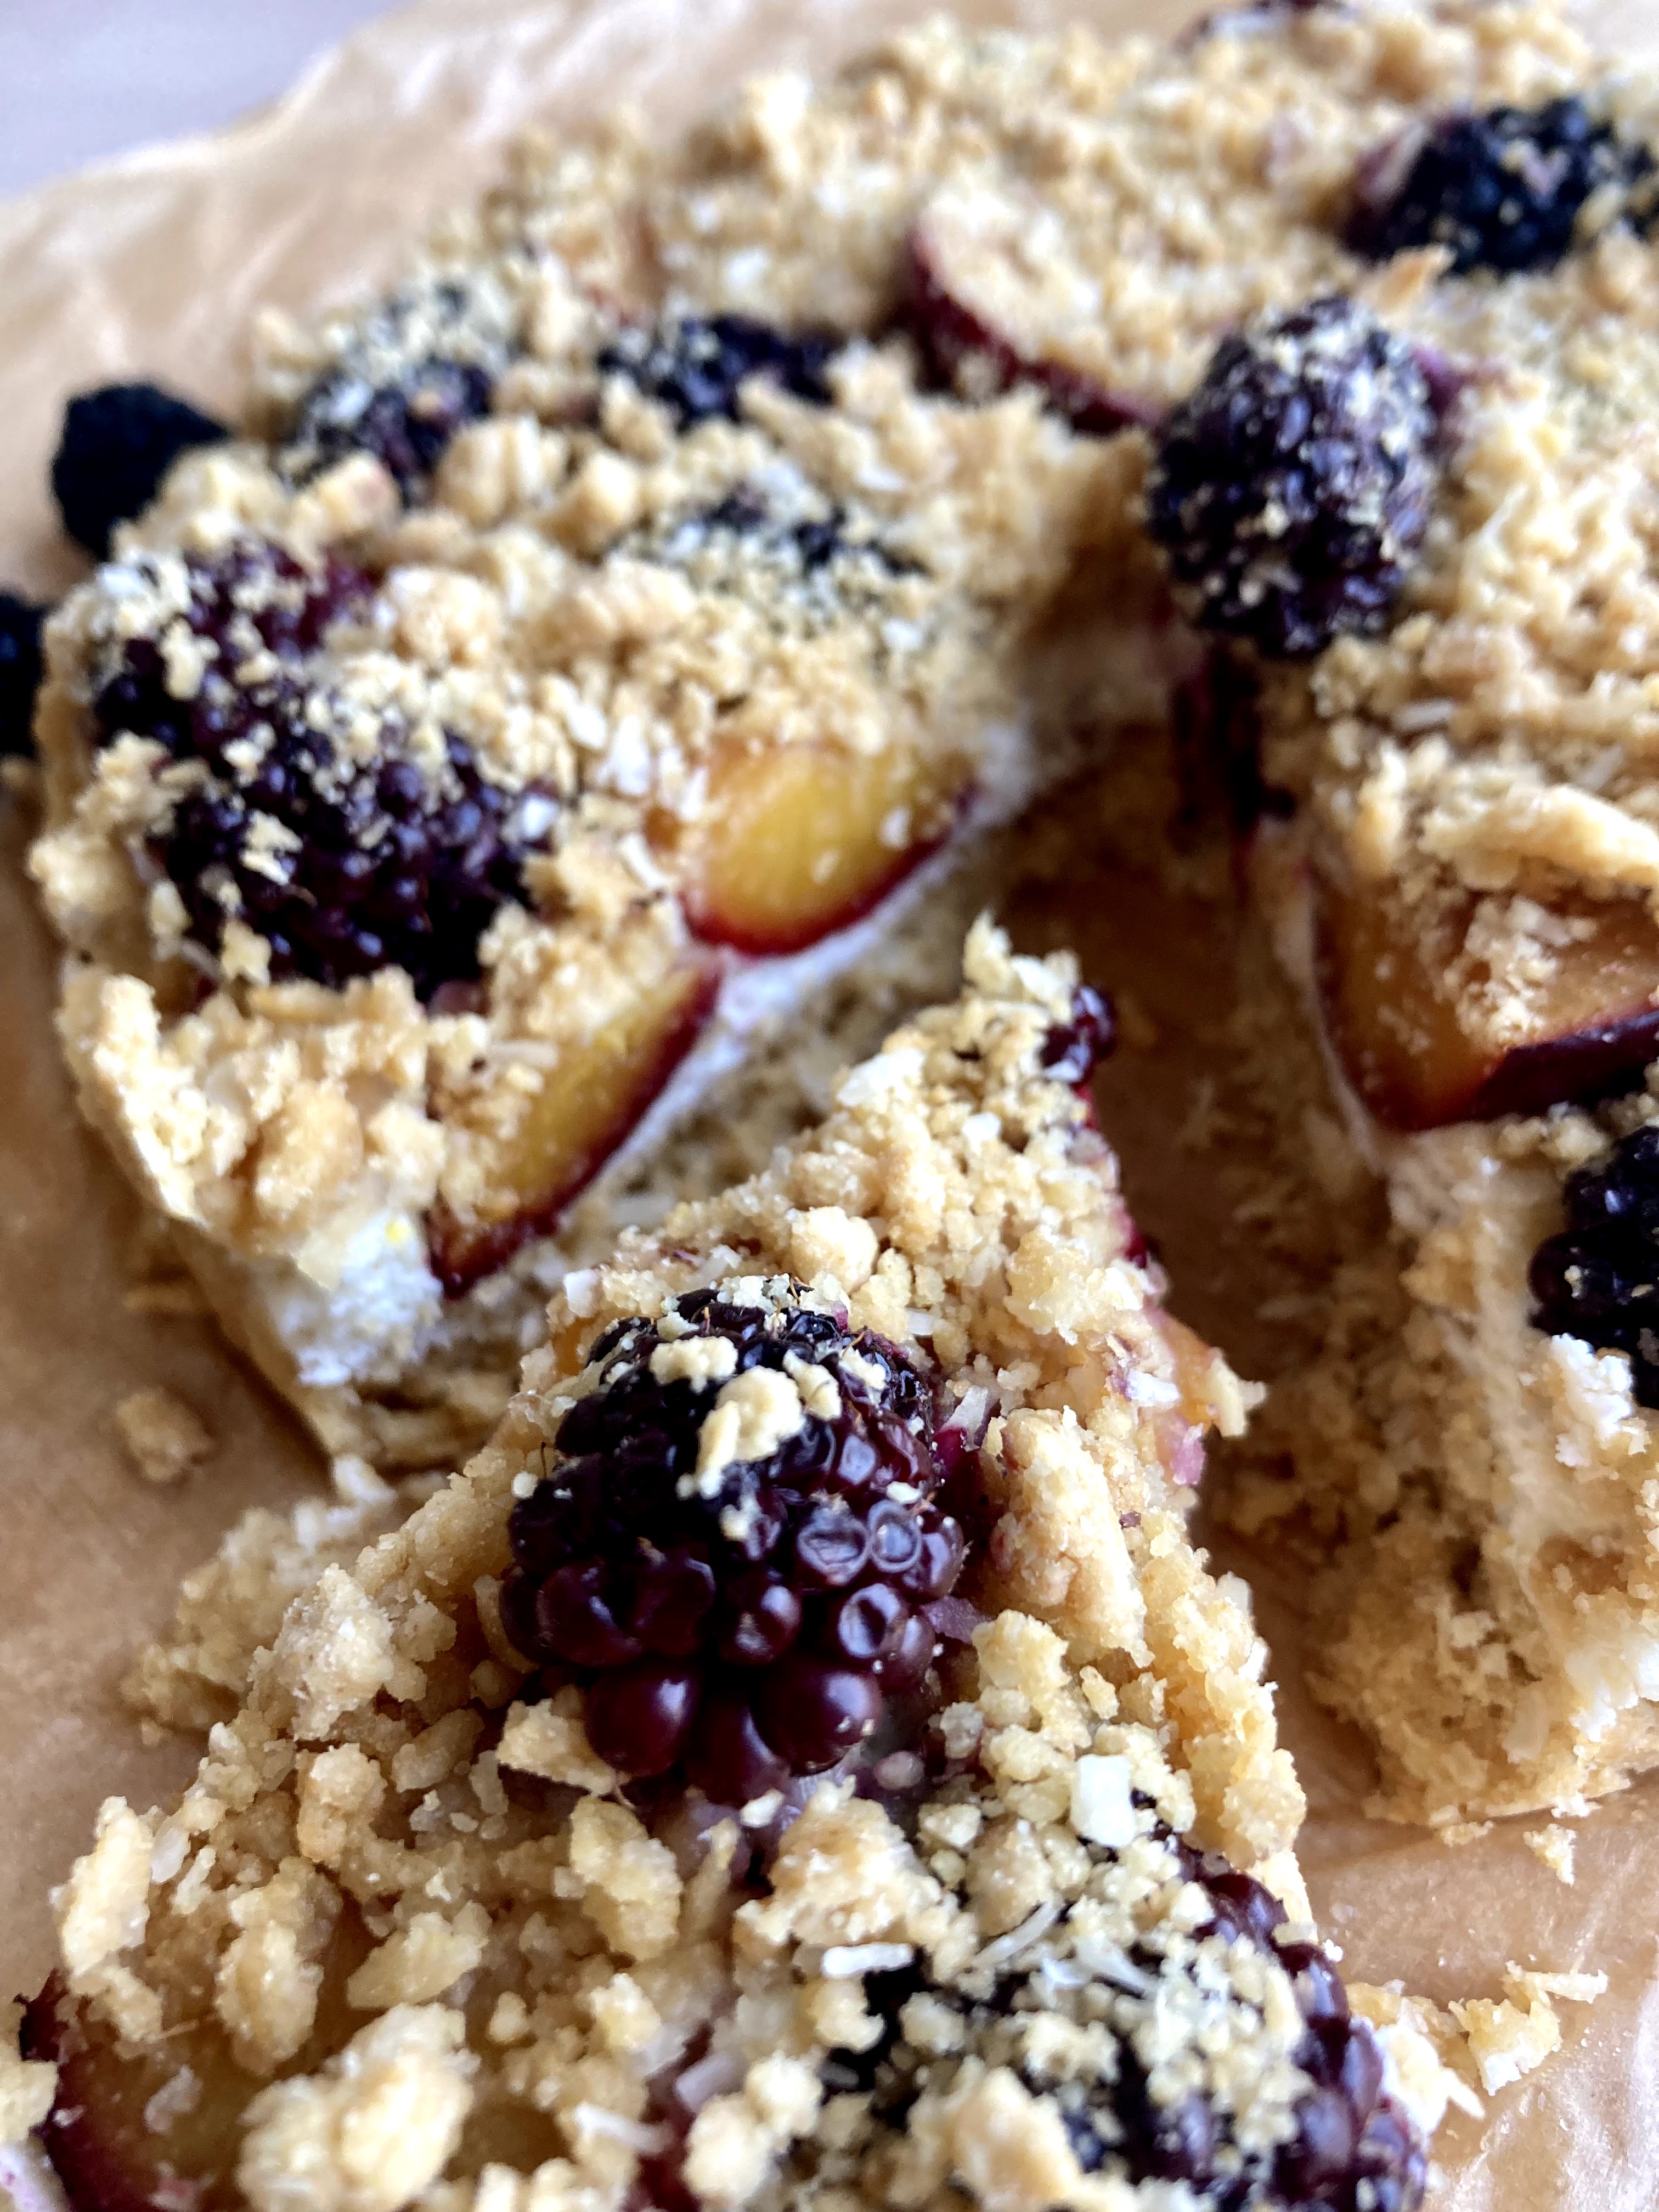
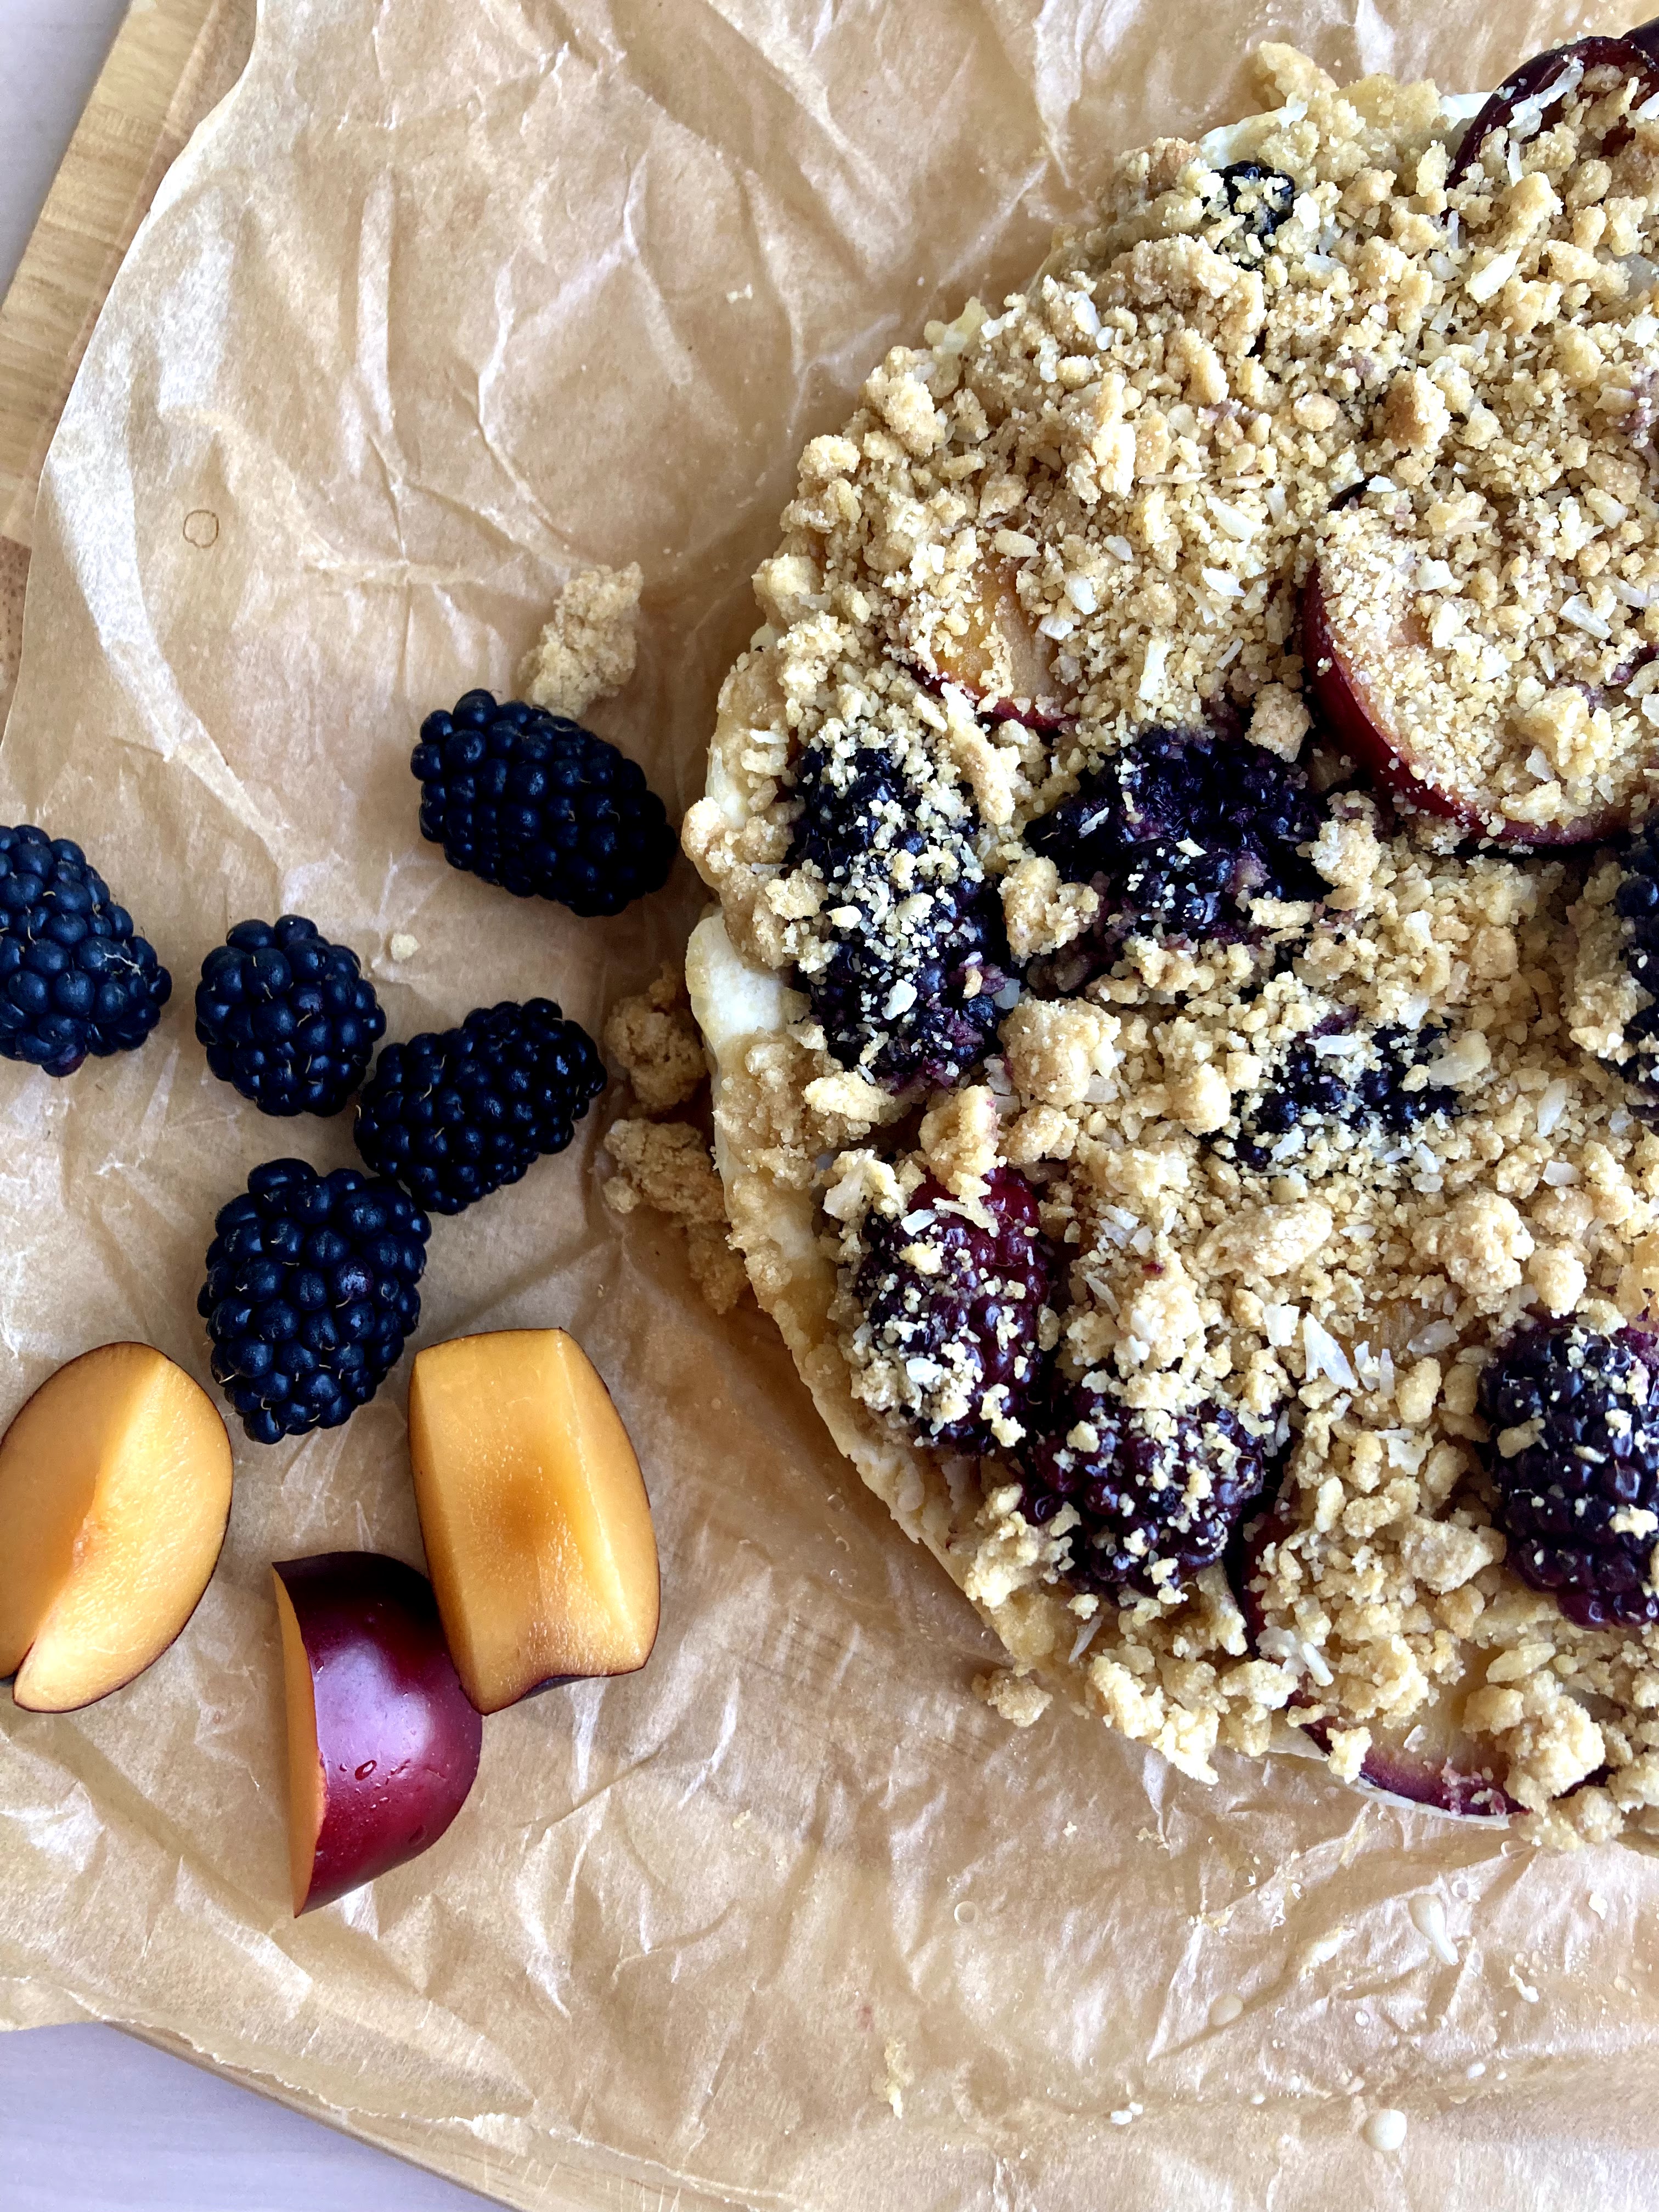
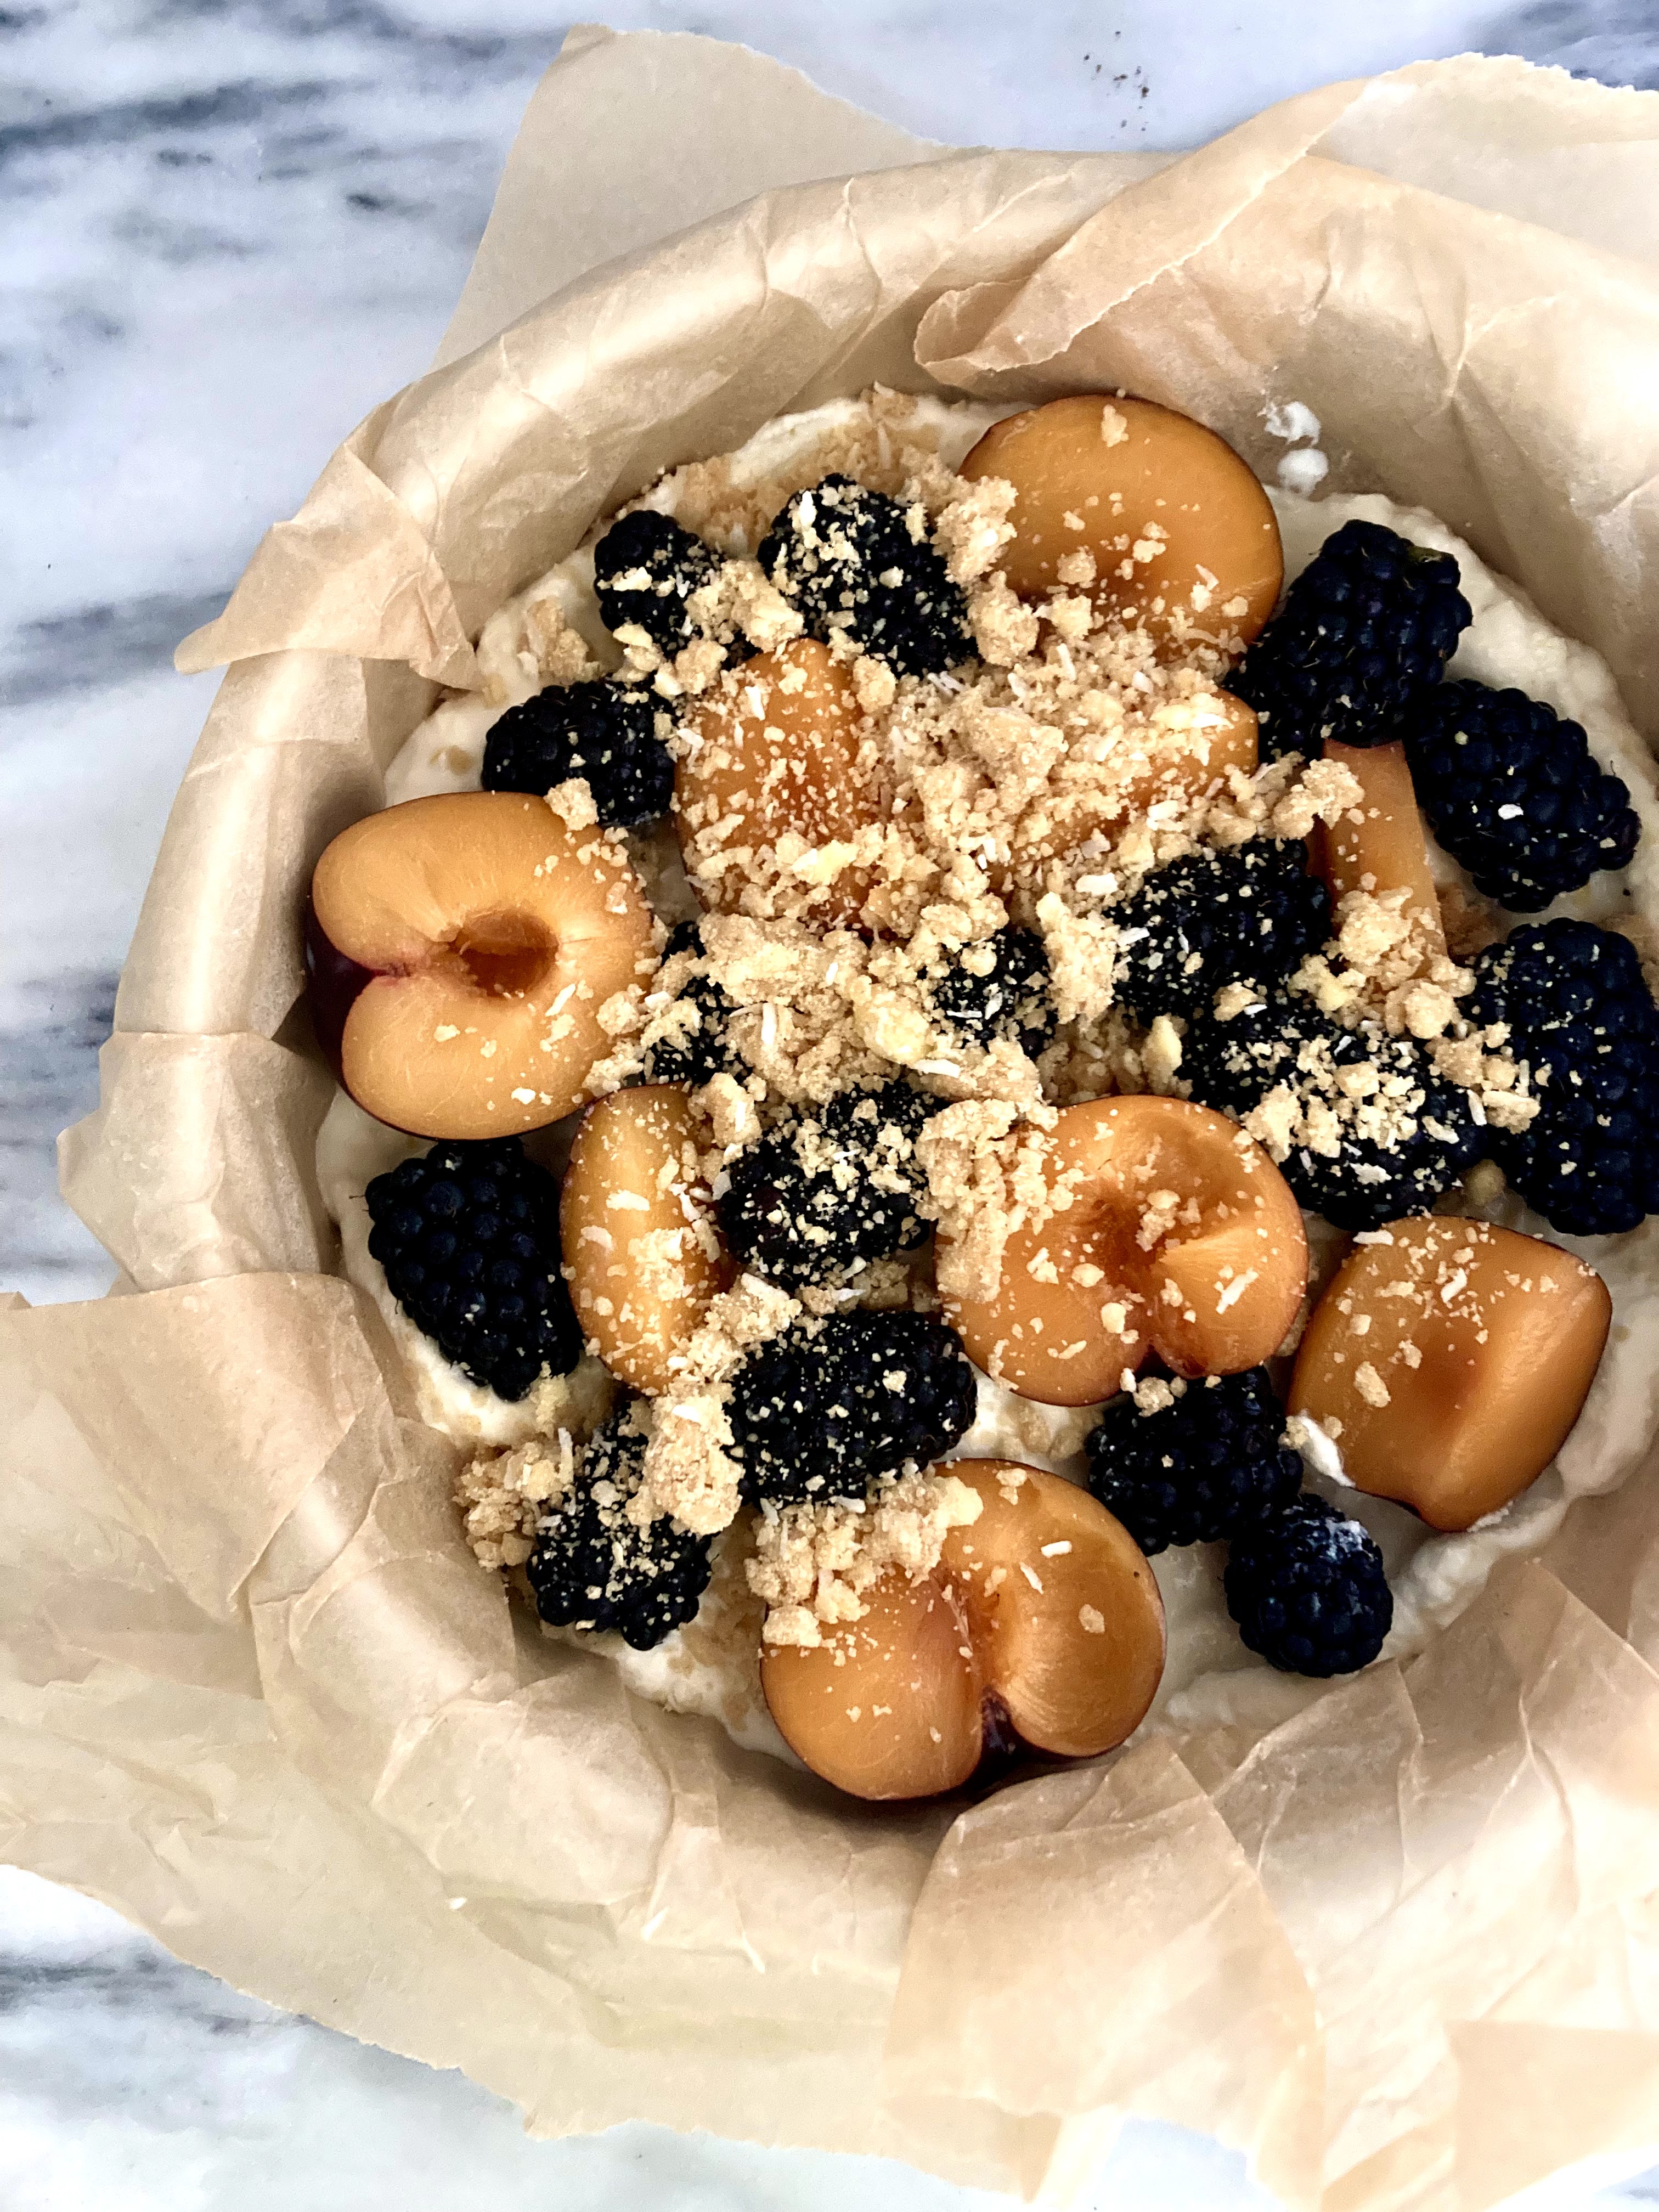
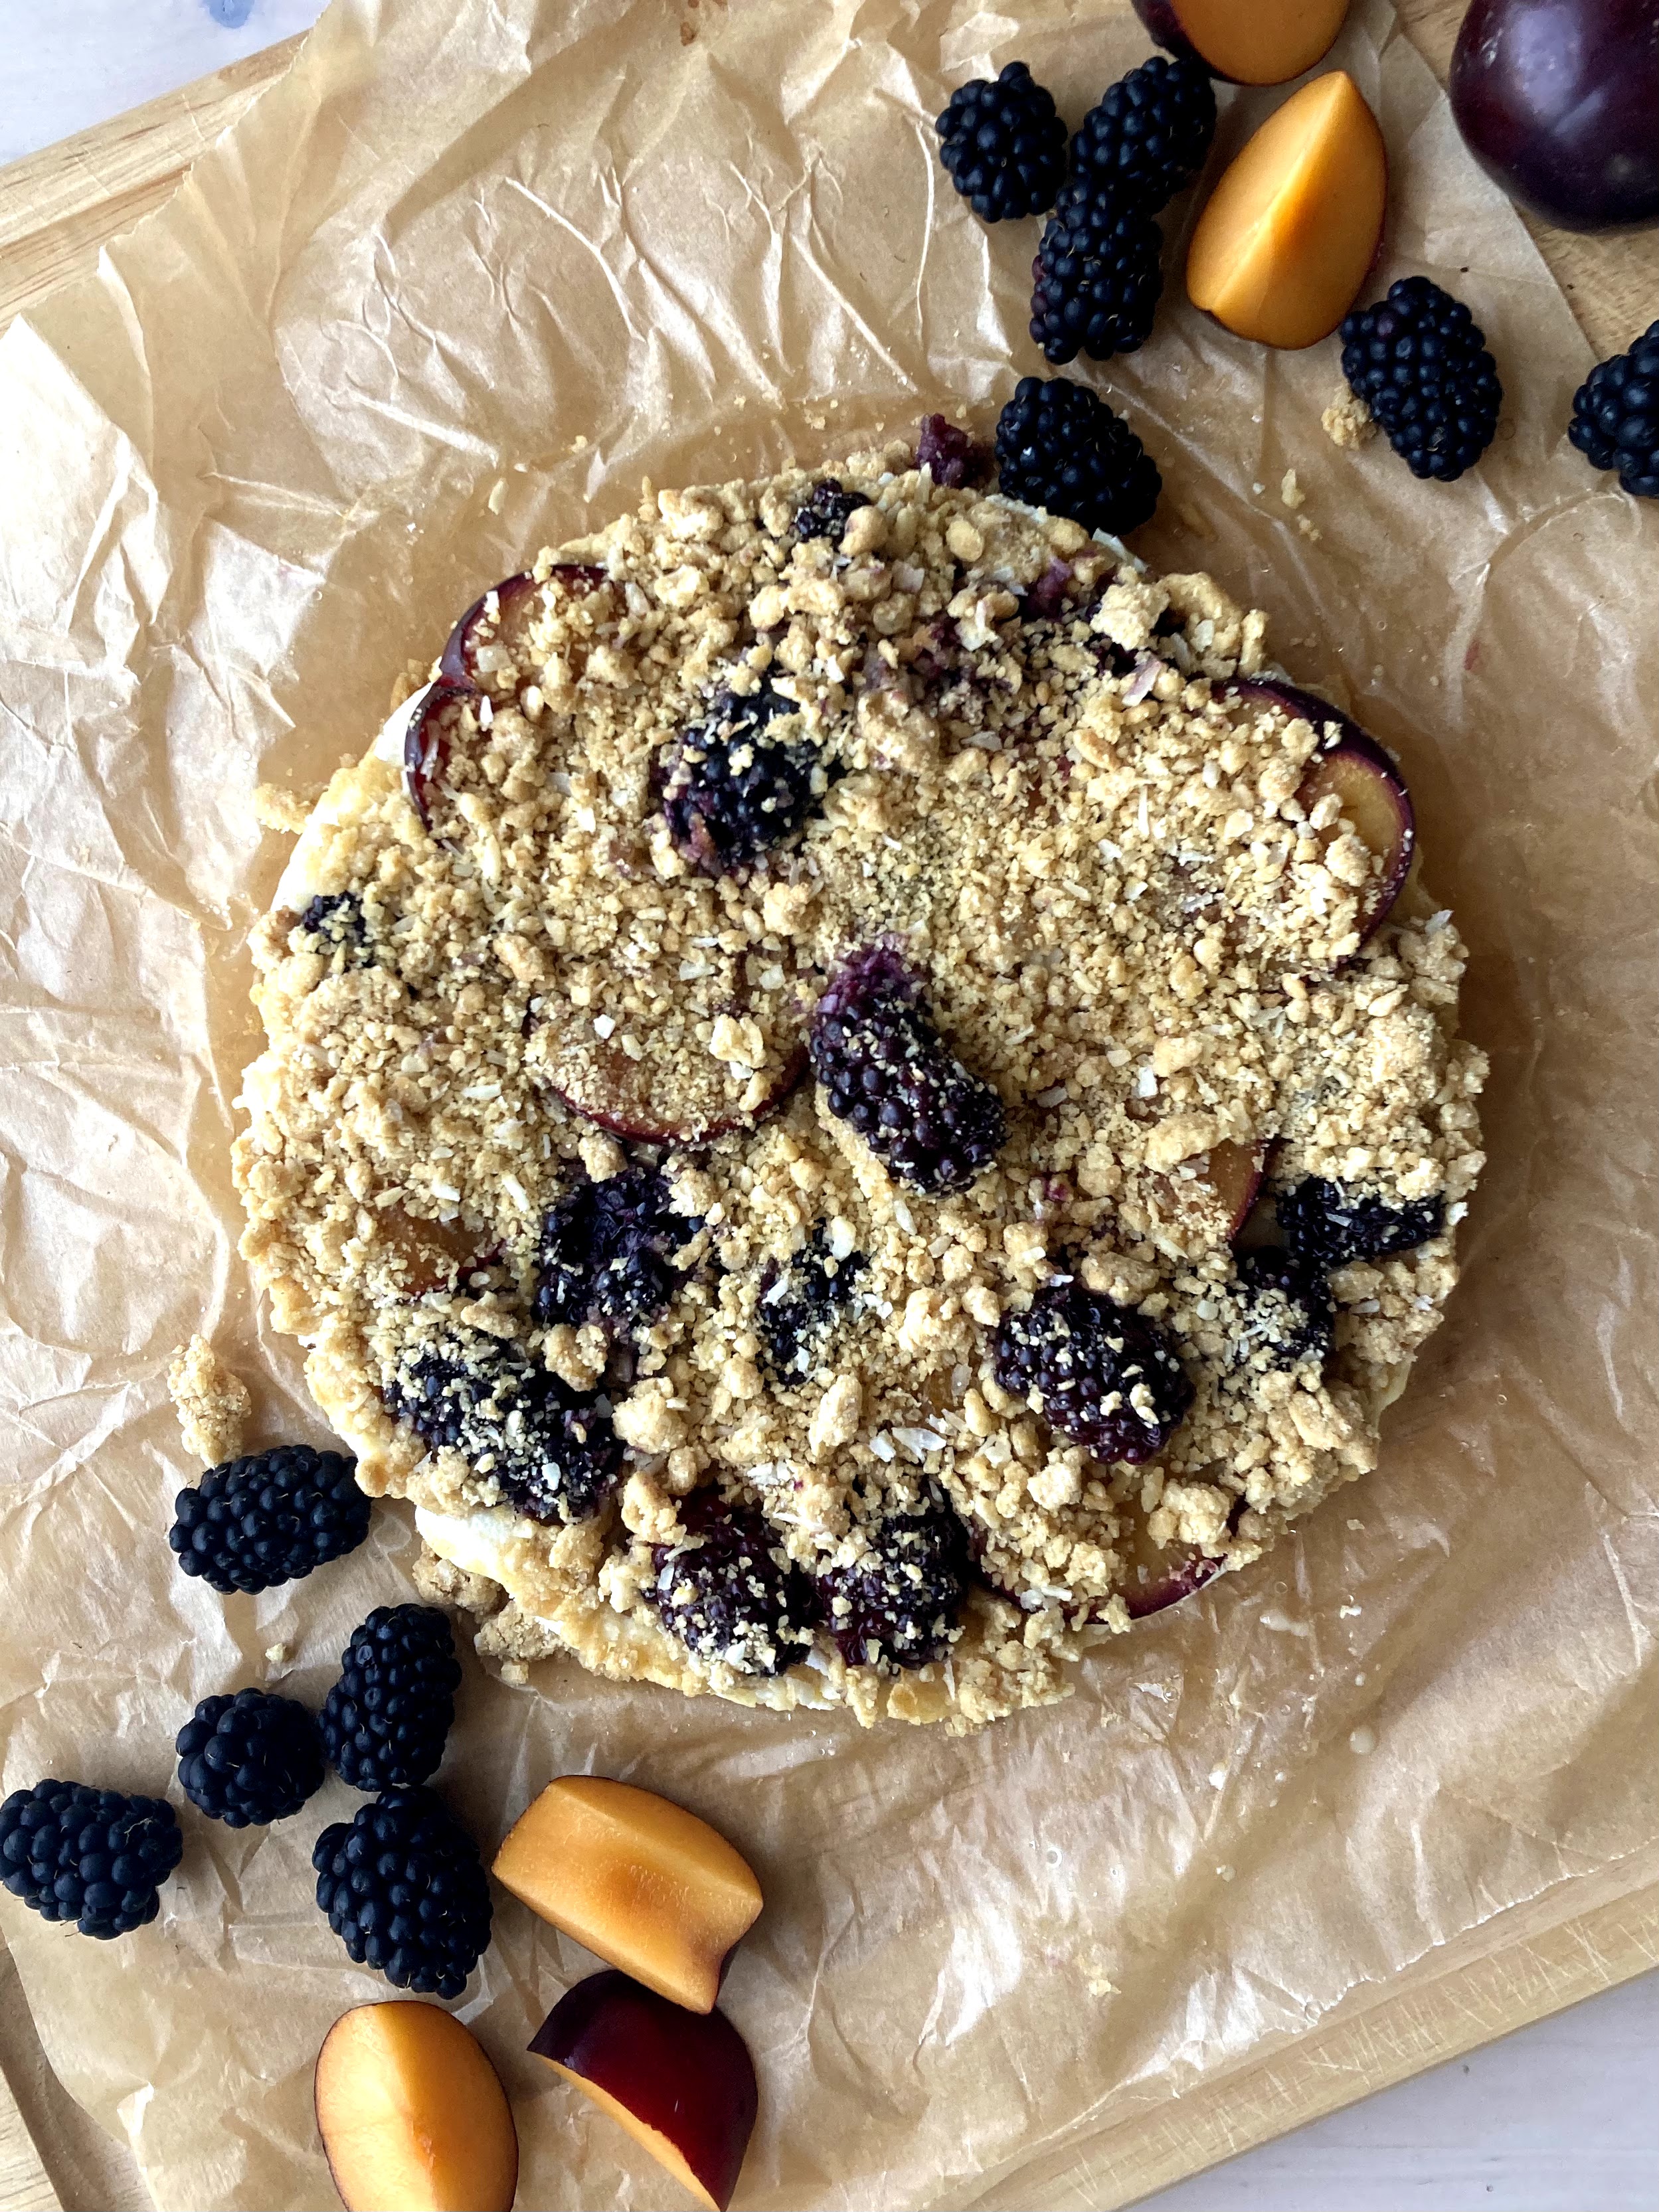
The summer fruit right now is outrageously good… my philosophy is to mess with it as little as possible so it can shine as much as possible; hence the endless riffs on berry-stone fruit galettes.

case in point.

Anyway. Next time you need a layer cake for an occasion – or no occasion, maybe just for fun – might I recommend this one? I promise it’s delicious :)

I hope everyone has a lovely holiday weekend – hugs from my kitchen to yours.

Almond Cake with Dark Berry Filling, Chocolate Ganache, and Vanilla Icing

Not too sweet almond cake sandwiched with a marionberry & blackberry filling, dark chocolate ganache, and a vanilla buttercream. A celebration cake at its finest. Yield: 1 7-9″ cake, depending on what pan you use; serves several. This recipe is written slightly differently than usual; less of a list and more akin to suggestions. Most components can be made ahead, making this a good one to make in stages.

For the cake:

I use this cake, as written with the exceptions as follows: reduce sugar to a scant 1c per batch (I used fair trade cane sugar here); sub whole wheat pastry flour (*not straight whole wheat, it’s not fine enough).

For a 7″, 6 layer cake (3 layers, halved), I made 1.5 batches. I tend to make them ahead of time, wrap well in plastic wrap (the ONLY time it is allowed in my kitchen) and freeze them, at least overnight. Thaw in the fridge overnight before using or at room temp. Typically I will top them for flat layers, like I did here, but you don’t technically have to (though if you do, you can eat the scraps and everyone knows that’s the best part).

For the marionberry & blackberry filling:

Honestly, just use jam! It’s delicious, easy and just about the perfect consistency. If you’re feeling fancy, you can make a berry curd, like this:

Take 2 cups, ish, of frozen berries (I used blackberries & marionberries), and toss them in a saucepan. Add 1 tbsp maple syrup, zest and juice of one lemon, and bring to a boil over medium heat, stirring occasionally. Reduce heat to low and simmer for 5-6 min, mashing the berries slightly with a spoon, until most of them have burst. Remove from heat, and strain into a heatproof bowl, through a fine mesh strainer, pressing to release as much juice as possible. Discard the seeds, or use them creatively somewhere else (maybe a smoothie or something?) In a small bowl, whisk together 2 tbsp cornstarch + 2 tbsp water and set aside.

Return strained berry juice to the saucepan, and whisk in the cornstarch slurry. Turn the heat back up to medium and whisk constantly, until the fruit starts to simmer. Reduce heat to low, cook for 1-2 minutes more (you’ll see it visibly thicken), then remove from heat and let cool completely. Chill in the fridge before using. Can be made up to one week ahead; store in an airtight jar in the fridge and stir well before use.

I ended up using a combination of both jam and curd, just for fun and also for flavor. You do you! All jam is completely fine and much faster.

For the frosting:

1/2 c unsalted butter, room temperature
1 c powdered sugar
2 tbsp plain yogurt
1 tbsp vanilla extract
3 tbsp whole milk

This is a very straightforward buttercream – using a hand (or stand) mixer, cream butter until light and fluffy. Add in powdered sugar a bit at a time, beating after each incorporation. Add yogurt, vanilla and whole milk and beat to combine. The frosting should be smooth and spreadable. Can be made ahead and refrigerated; beat before using to fluff it up. I do prefer to make this immediately before using just for ease, but it works just fine ahead of time too.

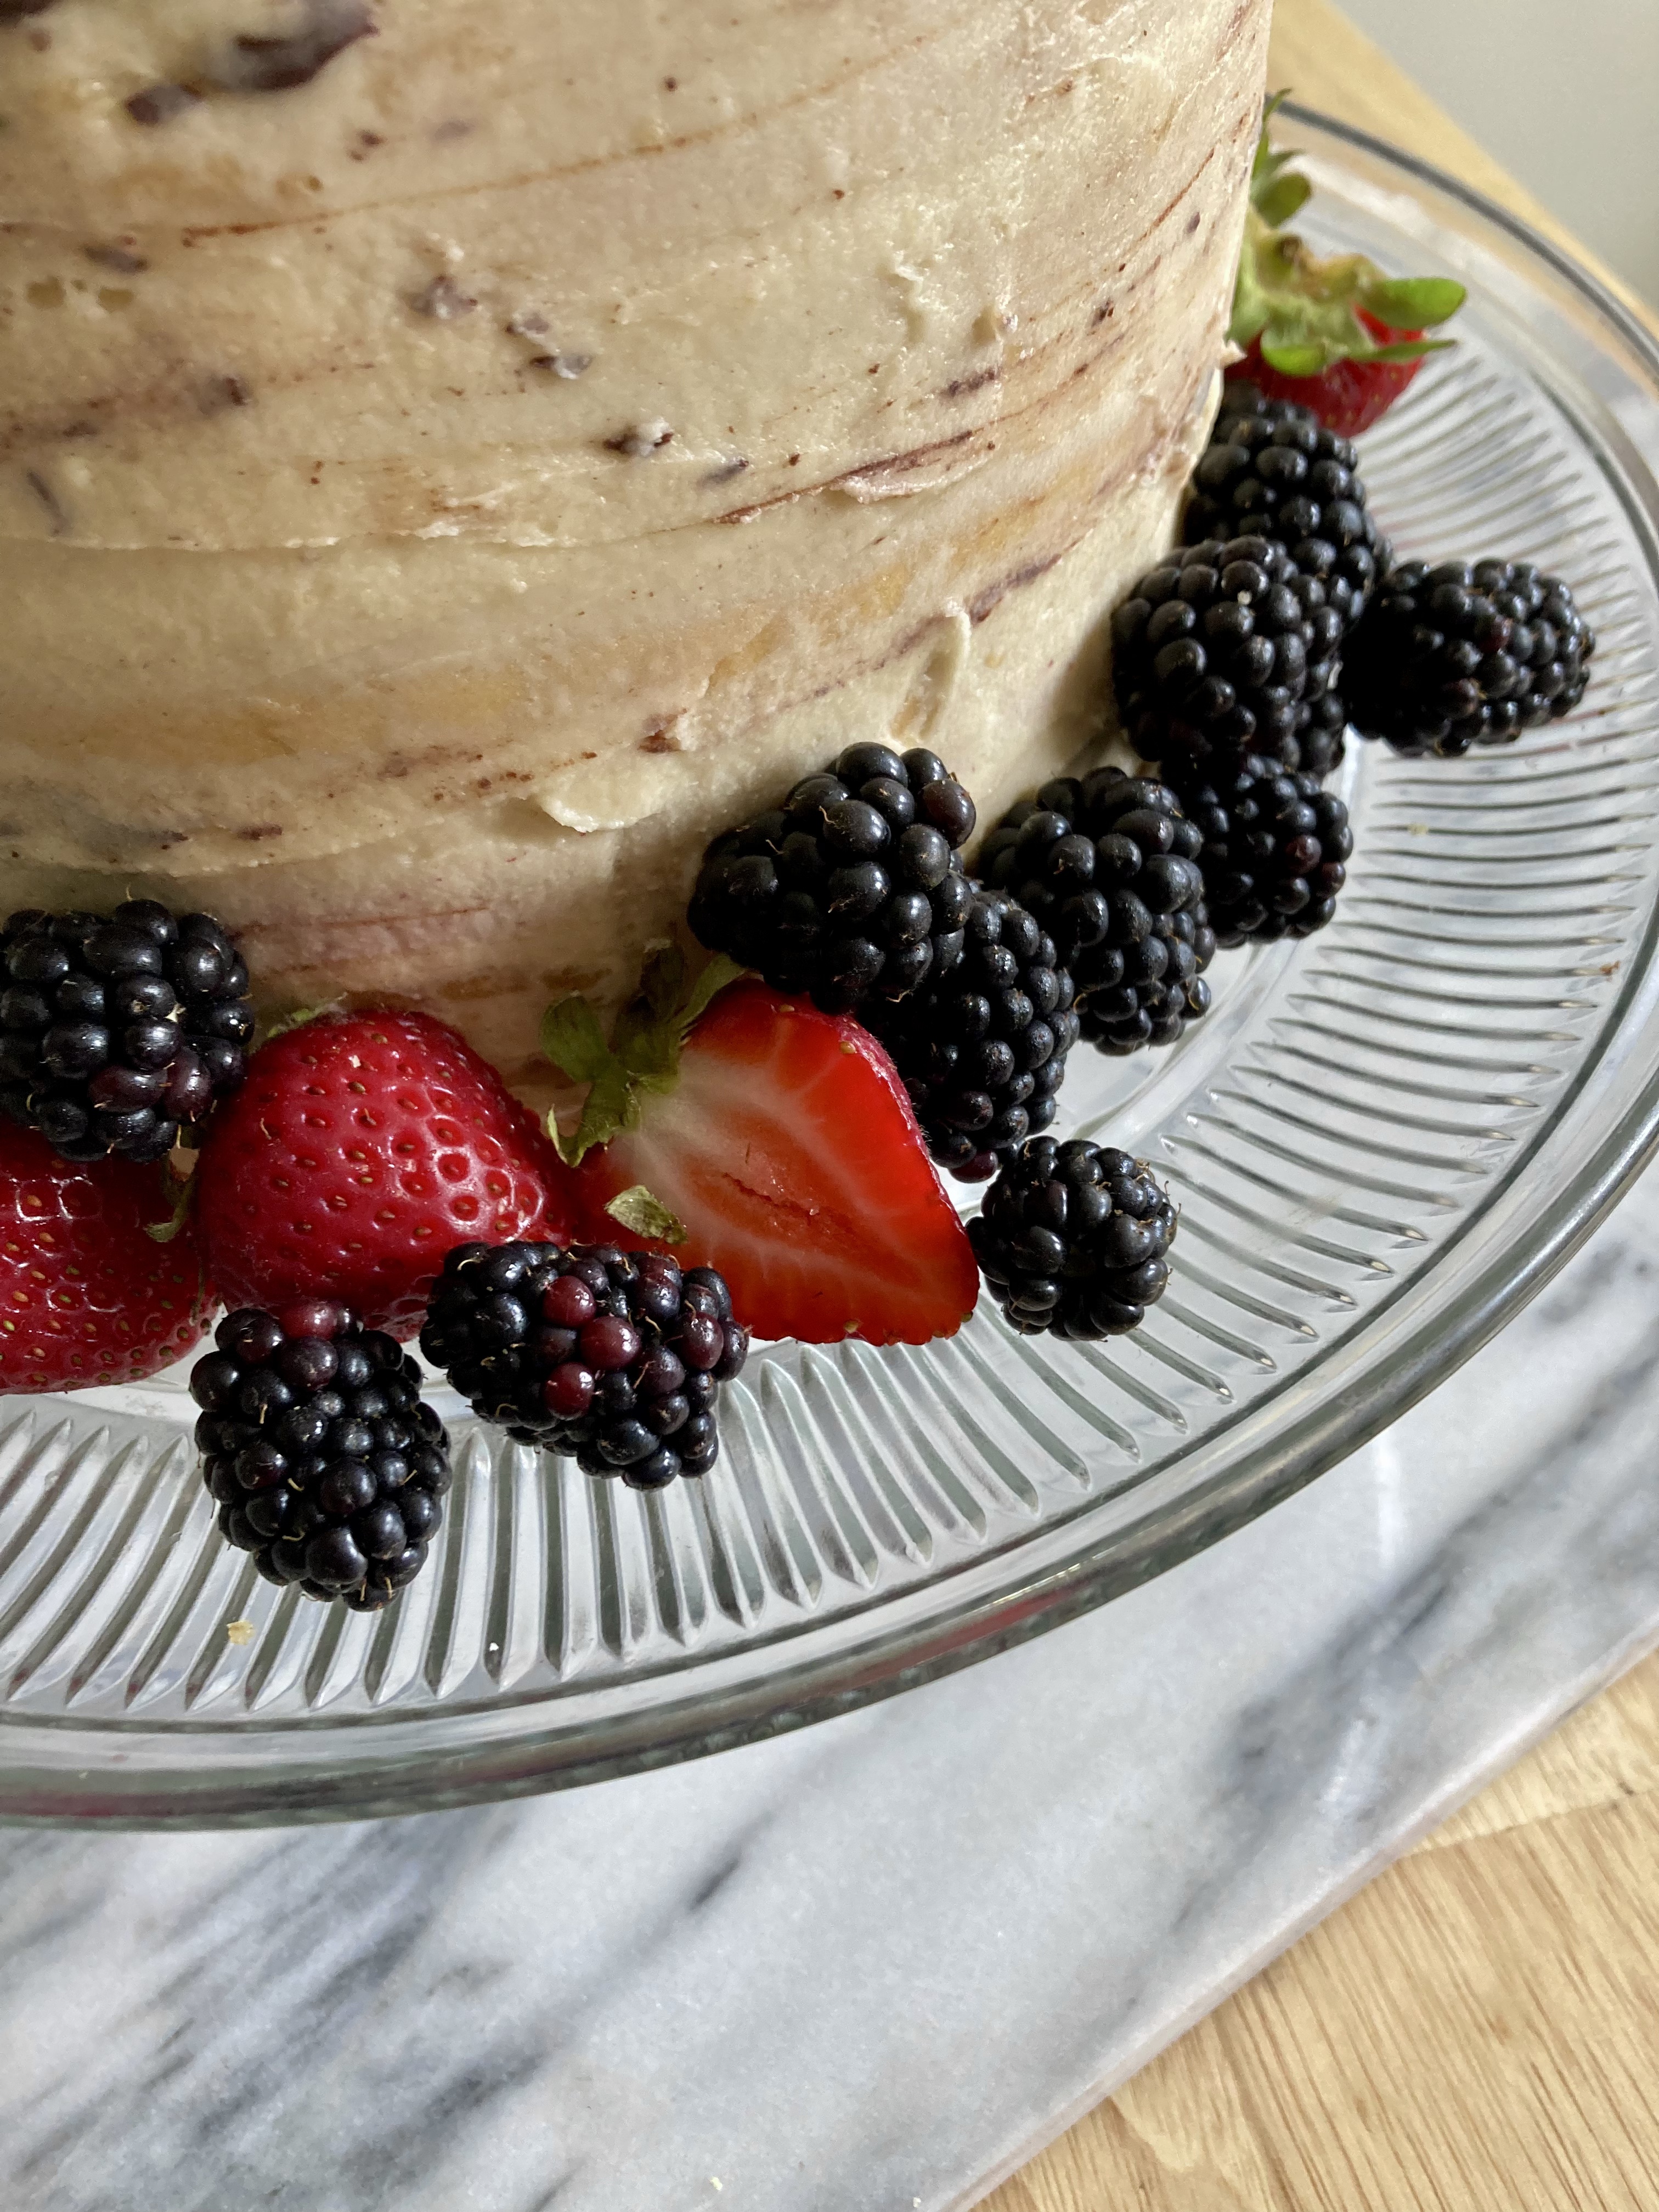
I like my cakes lightly frosted; if you’re making a cake that is going to be fully frosted with frosting also between the layers, make a double batch of what is listed here. This made exactly enough for me to use a thin layer between the cake layers + frost the whole thing naked cake style, but I only wanted a thin layer so that was exactly what I was after.

For the ganache:

Rough measurements – I used about 1c of dark chocolate + 1 tbsp coconut oil. Stir in a double boiler until melted, then use before it starts to set up again as it cools. Reheat as needed to bring it back to a drippier consistency if desired.

To assemble:

I wanted a 6 layer cake; to do that, I baked three 7″ layers, then topped them to flatten them out, and halved them. A serrated or just very sharp knife works well for this; just go slow.

Spread a thin circle of frosting on your cake stand or plate, just smaller than the cake itself. Plop down the first layer, followed by a layer of frosting, a layer of berry curd/jam, and a layer of ganache, then a layer of cake, then frosting, berry, ganache…. rinse, repeat. Once you have the final cake layer on, use an offset spatula to frost the rest. If you want a naked cake look, smooth it on but let the cake layers show like mine; otherwise, you can do a crumb coat, refrigerate, and then come back for the second frosting layer.

Top with ganache – you can have it drop down the sides, or not (I chose to not) – and fresh berries. Refrigerate before serving if it’ll be longer than a few hours and/or your kitchen is very warm; mine wasn’t so I left it out. It’ll do at room temp for a few hours but refrigerate any leftovers. Serve & enjoy!

On Saturdays we wear pink

She’s back!

Oof it’s been an age since I posted anything… I got stuck in a seemingly never-ending oven saga, but I think we’re safely out the other side of that now with a new range. Seems like moving is akin to starting a new relationship – you have to work out a new routine with the appliances and the space. Finally feels like I’m getting there with my kitchen – having gone through three different ranges in literally 2 months doesn’t help things, ha. Very grateful to be cooking at home again!

The not-so-new apartment is feeling more and more homey these days; I hung up a bunch of art and sorted out my disaster of a closet (1906 construction means I have a very all purpose “walk through” closet between my kitchen and bathroom that has to do triple duty for utilities, coats and linens and is extremely visible at all times so…. yeah. tricky tricky)

sunny turret, happy plants

So anyway! Back to normal baking programming. I made a few batches of cookies at C’s in the last month or so but nothing much beyond that – this was a welcome breath of fresh air. I missed making pretty things.

It’s rhubarb season! I think this might have been some of the first – hadn’t seen it in the market before now. I love how tart and jammy it is once baked – I never smother mine in gloppy sugar so if you like tart things, you’re in the right place.

This galette is for those of us who are engaged in an ongoing love affair with almond croissants (me. I resemble this remark) – it has a layer of jammy rhubarb, a layer of almond frangipane (fancy name for almond paste fluffed up with an egg) and a layer of slightly crunchy cornmeal and whole wheat crust. Perfect with ice cream for dessert or on its own for breakfast or a snack.

Happy weekend & happy baking!

Rhubarb and Almond Frangipane Galette

Lightly sweet and perfect for spring! If you love almond croissants like I do, this is your jam. Layer of jammy rhubarb, layer of almond frangipane, crunchy cornmeal crust. Whole grain and refined sugar free. A Wait are those Cookies original. Yield: 1 galette, serves several.

for the crust:
1 c whole wheat flour
1/2 c cornmeal
1/2 tsp sea salt
4oz/1 stick of unsalted butter, cubed
1 tsp vanilla extract
2-3 tbsp ice water

In a food processor, pulse together whole wheat flour, cornmeal, sea salt. Add in cubed butter and pulse until it resembled coarse sand. Add vanilla and ice water 1 tbsp at a time until the dough starts to come together – I usually start with 3 tbsp and then add 1T at a time from there. Turn it out onto a board and knead it into a ball. I like to roll it immediately since it’s pretty forgiving dough – typically I haven’t had trouble with this dough sticking. I roll it between two sheets of parchment paper and use the bottom one to bake the galette on; makes an easy transferral method between cookie sheet & cooling rack. If you’re not rolling immediately, stuck it in the fridge on a plate. Can be made ahead the night before if need be. If you are rolling immediately, roll it out into a circle or rectangle about 1/4″ thick.

For the almond paste:
1/2 c almond flour
1/2 c slivered almonds
1/4 tsp sea salt
3 tbsp maple syrup
1 small egg
1 tsp vanilla extract
1/2 tsp almond extract

3-4 Rhubarb stalks, thinly sliced
Coconut sugar + slivered almonds for decoration

Preheat the oven to 425.
In a food processor, blend almond flour, slivered almonds and sea salt until homogenous but slightly gritty. Add in maple, egg, and both extracts, and blitz until combined.

Spread the almond paste carefully (it’s sticky!) over the middle of the dough, leaving a 1″ border, then pile on the sliced rhubarb. Fold up the sides of the dough over the fruit and sprinkle with coconut sugar and slivered almonds. Brush the dough with milk or half and half. Pop in the oven and bake for 30-35 minutes, until the crust is lightly browned. Remove to a cooling rack and let cool completely before slicing and serving. Store leftovers in the fridge overnight – it’s great for breakfast :)

Moving shenanigans

hello hello!

I’ve been a little off my regular posting schedule lately because of big life things… I’m moving! In a week. Gah.

Long story short, I love my cute little apartment but it is definitely LITTLE and I found a place that is basically this one leveled up – double the size, closer to work, closer to C! Win win. The light will be different (east/north exposure instead of west/south) but the windows are enormous, the ceilings are 10 footers, I’ll have a turret (!) and I’m excited for the change, even though I’ll miss my little jewelbox of a place in japantown.

That being said, this is probably the last baked thing to come out of my current kitchen! This kitchen gets the award for being the best-designed and best laid-out kitchen of any apartment I’ve ever lived in, including the one I’m moving to. Will DEFINITELY miss it. Ah well – kissed it goodbye with this buttermilk lemon tart, which features some amazing-smelling meyer lemons and a slightly crunchy cornmeal-almond crust.

This tart is gluten free and refined sugar free, but does contain dairy – recommend using a dairy free buttermilk alternative if desired; I think that would be a pretty straightforward swap here.

This little guy is excellent for dessert of course, and as always, alongside brunch.

Eugene the haworthia says hello

In other news, took a super fun trip up the coast to Bodega/Occidental/Jenner with a bestie last weekend, ate a ton of crab, hiked and talked for HOURS. Wouldn’t change a thing <3

On that note… fun is over and I should really start packing. Time to play studio packing tetris where I have to pack and live in the same square footage…

Watch this space for further developments! Next time you hear from me, it’ll be from a new kitchen. Cross fingers the move goes smoothly… happy weekending!

current reality.

Meyer Lemon Buttermilk Tart

A Wait are those Cookies original. Gluten free and refined sugar free. Grain free and diary free options noted. Lightly sweet and tangy; perfect for a winter citrus dessert or fun brunch. Yield: 1 9″ tart, serves several.

Note. You’ll be pouring the prepared filling straight into the hot crust so plan accordingly – not one where you want to bake the crust in advance.

For the crust:
1.5 c almond flour
1/4 c unsweetened shredded coconut
1/4 c cornmeal*
heaping 1/4 tsp sea salt
1/2 tsp baking soda
1 tbsp vanilla extract
1/2 tsp almond extract
2 tbsp pure maple syrup
6 tbsp coconut oil, melted

*omit for grain free; use another 1/4 c packed almond flour

In a large bowl, stir together almond flour, shredded coconut, cornmeal, sea salt, and baking soda. Add in vanilla and almond extract, maple, and melted coconut oil, and stir until completely combined. The dough will look crumbly, but you’ll be able to press it together with your fingers.

You’ll want to pour the filling straight into the hot crust, so plan accordingly! Preheat the oven to 350, and lightly grease your tart pan or pie dish of choice with coconut oil. Press the crust into the plate and up the sides with a spoon or your fingers, creating a smooth edge (or not, your call!). Poke the bottom with a fork a few times, and bake for 15 minutes.

For the filling:
1 tbsp flour (gluten free blend or whole wheat)*
2/3 c buttermilk**
1/4 c maple syrup
1/4 c meyer lemon juice (about four lemons for me)
zest of four meyer lemons (or however many you ended up juicing)
1/8 tsp sea salt
2 eggs, beaten
2 tbsp unsalted butter, melted**

*for grain free, a tbsp of tapioca starch would probably work here but I haven’t tried it yet

**I used half plain whole milk yogurt, half whole milk whisked until smooth – you can do straight buttermilk, or make your own with lemon or vinegar added to milk of choice (dairy free if desired for both buttermilk and butter)

Whisk all filling ingredients together until smooth. Pour into the hot crust and bake for 40-45 minutes, until the filling is set and no longer jiggles when you shake the pan a bit. Cover the tart loosely with foil if the edges of the crust start to brown more than preferred (I did this around 30 min). Remove and let cool completely on a wire rack before unmolding it from the tart pan (if you use a pan without a removable bottom, just let cool completely before serving). Serve at room temp or refrigerate before serving – I like it chilled. Leftovers will keep well in the fridge overnight.

Bay swims and blood oranges

First swim of 2022 accomplished! Took me awhile to get back down there but I’m very glad I did. This marks one year of extremely regular bay swimming! My average is probably twice a week – there were a bunch in there where I was very regular with a MWF schedule but lately not so much. It felt COLD to me today but that’s probably because oh right it’s January and also because it’s been a bit since I’ve been in… still in my sleeveless wetsuit though, so that’s something. I think the water temp today was 50? Not sure. Definitely one of my fave ways to start a weekend :)

I have a cake for you today! I think I say this every time but I really don’t make cakes that frequently. Probably because I can cram more fruit into something like a crisp or a galette and that’s always a priority, but I like a good cake now and again for a change.

This one fits the bill perfectly – it’s poppy seedy and almondy, with a moist crumb and a bit of pleasantly dense texture. As it is grain/gluten free, dairy free and refined sugar free, it relies primarily on eggs for its loft and is made only with almond flour. I consider this to be a super simple cake – it doesn’t require a bunch of different flours or a mixer. In fact, it could easily be put together for a brunch the morning of; the blood orange curd (gf but not dairy free) can be made in advance up to a week, so that’s an easy one to knock out a few days ahead.

I love this for dessert with ice cream but it most definitely holds its own in a brunch/breakfast situation, and it’s perfect alongside coffee. The blood orange curd is of course optional but highly recommended (and not intimidating! don’t let it scare you off). Plus, blood orange season isn’t super long – I try to take advantage while I can. They are so beautiful!

In other news, we’ve been having some beautiful sunrises and sunsets in the city of late – here’s a sunrise from earlier this week and a cactus happily doing its cactus thing.

I hope your weekend is full of good things! Maybe cake? I definitely recommend cake :)

Almond Poppy Seed Cake with Blood Orange Curd

Grain and gluten free, refined sugar free and dairy free. Kind of paleo, I guess? A riff on this almond cake I made years ago. Lightly sweet and perfectly moist, especially good for midwinter citrus season! The blood orange curd is gluten free and refined sugar free but made with butter; I think a dairy free butter would work here. Yield: one 6-9″ cake (depending on cake pan of choice), serves several.

2 c (packed) almond flour
1 teaspoon baking powder
½ teaspoon baking soda
½ teaspoon fine sea salt
1/4 c poppy seeds
4 eggs, beaten
1/3 c maple syrup
1/2 tsp almond extract
1 tsp vanilla extract
1/4 c coconut oil, melted
zest of 1 lemon
1 tbsp lemon juice
blood orange curd, for serving (recipe below)

Preheat the oven to 325. Grease an 8″ springform (or cake pan, or cast iron! I’ve used a deep 7″ cast iron to great effect here; I’ve also used a 6″ springform very successfully for a taller cake) with coconut oil and dust with a bit of almond flour. If I use a springform, I typically set it on a baking sheet lined with parchment to catch any drips.

In a large bowl, whisk together almond flour, baking powder, soda and salt, and poppy seeds. In a smaller bowl, whisk together beaten eggs (just beat these in the same bowl before adding everything else) maple, almond and vanilla extracts, and melted coconut oil. Whisk in lemon zest and juice. Stir wet ingredients into dry, until combined. Pour batter into your prepared pan, and bake for 35-40 minutes (9″ will probably be more like 35; my 6″ springform went for 40) – the top should be golden brown and firm to the touch. Remove from the oven and let cool on a rack! Ideally give it at least 10 minutes before releasing the springform; if you used a cake pan, I’d suggest letting it cool completely before removing. Serve warm, room temp or chilled (for a nicely solid cake; I love the texture of chilled coconut oil cakes) with a dollop of blood orange curd and a few citrus slices.

Keeps well overnight in the fridge.

Blood Orange Curd

3 whole eggs
2 egg yolks
1/2 c blood orange + meyer lemon juice (I used 4 small blood oranges + 1 lemon)
blood orange zest (I just zest as many as I will use for juice)
zest of 1 lemon
pinch of sea salt
2 tbsp maple syrup
4 tbsp butter, unsalted
1 tsp vanilla

I use a double boiler for this lemon curd, which I highly recommend! You don’t have to, but in my experience it makes for a better cooking process. Heat water in the bottom of the double boiler until it’s at a high simmer. In the top of the double boiler, whisk together eggs, egg yolks, citrus zest and juice, sea salt, and maple syrup. Add in the butter one tbsp at a time, whisking continuously, not adding the next tbsp until the first is completely melted. Whisk in vanilla. Cook, stirring constantly, until the curd thickens and will coat the back of a spoon (or your whisk leaves tracks) – usually around 5 to 8 minutes. It’s a noticeable change when it happens, so just watch the cooking magic! Remove from heat, and strain through a metal strainer to remove zest and any bits of cooked egg. Store in a glass container in the fridge until ready for use – can be made up to a week ahead.

Apple tarts & north coast fun

Hi friends!

It’s been a little while – C and I took a great trip up to the north coast for my birthday – we stayed in the cutest airbnb and explored the area. Lots of coast hikes, fresh produce and relaxation time. Here are a few favorite photos!

rail bikes on the Noyo Skunk train line!
monster zucchini from the airbnb garden (yes, we ate it)
look at the bee photobomb!

Turns out you can actually make a galette in a cast iron on the stove, in a pinch!

I’d make this again actually, even though it was initially just a punt because of an oven issue. I made my normal galette dough, piled the fruit in there (I’d saute it first next time), let the sides crisp up a little before folding them over the fruit and putting a lid on it. It cooked in about 15 minutes on a high burner – and it was amazingly delicious. Ha! Success.

Since I’m working today for a deadline early next week (taking a minute while I wait on content to write this…), I got up early to make time for this guy… I had some ricotta in my fridge that I really wanted to us, and it’s officially apple season! This looks fancy and intimidating but it isn’t, at all – basically just whisk everything together and call it good. Perfect for a lazy weekend baking project.

It’s gluten / grain free, lightly sweet and light on the stomach – it’s really just all ricotta, but it doesn’t feel like a heavy dessert. Pears would probably be good here too, if you didn’t have apples (I’ve made a variation of it before, with peaches – also excellent. Find it here)

Otherwise, busy as usual. I hope your weekends are going well! Happy October :)

Ricotta, Apple & Rosemary Tart

Gluten and grain free, refined sugar free. Lightly sweet and light on the palette – this is a fairly delicate dessert! Yield: 1 9″ tart, serves several. Leftovers will keep overnight in the fridge, but it’s best the day it’s made. A Wait are those Cookies original.

For the crust:

1.5 c almond flour
1/2 c unsweetened shredded coconut
heaping 1/4 tsp sea salt
1/2 tsp baking soda
1 tbsp fresh rosemary, finely chopped
2 tsp vanilla extract
1/2 tsp almond extract
1.5 tbsp pure maple syrup
6 tbsp coconut oil, melted

In a large bowl, stir together almond flour, shredded coconut, sea salt, baking soda and rosemary. Add in vanilla and almond extract, maple, and melted coconut oil, and stir until completely combined. The dough will look crumbly, but you’ll be able to press it together with your fingers.
Preheat the oven to 350, and lightly grease your tart pan or pie dish of choice with coconut oil. Press the crust into the plate and up the sides with a spoon or your fingers, creating a smooth edge (or not, your call!). Poke the bottom with a fork a few times, and bake for 10 minutes. Remove and let cool for a few minutes.

For the ricotta filling:

1 2/3 cups ricotta cheese
Scant 1/4 cup maple
2 tsp vanilla
2 large eggs
zest of 2 lemons
2 Granny Smith apples, peeled and cut into thin slices

Preheat oven to 400°F

Make the filling:

Combine the ricotta with the eggs and maple. Add the zest and chocolate. Pour the filling into the prepared tart shell. Top with sliced peaches. Bake for about 45-50 minutes or until the ricotta filling is set and caramelized.

Allow the tart to cool in the pan for about 30 minutes, then remove from pan and cool completely before refrigerating. Serve chilled or at room temperature. Store any leftovers covered with foil in the fridge overnight.

Endless galettes

Hi friends!

I actually made this last weekend but then never got around to posting… I’ve been working on a new painting in my off hours, and that is happily taking up most of my (creative) free time. I’ll share it here when I’m finished!

This weekend is VERY chill – no baking actually, so obviously I treated myself to a favorite croissant instead. This galette was too good not to share though, so here it is. I love the rosemary addition for something slightly savory and pleasantly herb-y – it goes extremely well with vanilla ice cream, but is just as good on its own. Since we’re just starting to work our way out of the stone fruit season out here on the west coast (yayyy time for FIGS), I’m trying to make the most of them.

This was made with peaches from a local farm, actually – I got lucky and found some perfectly ripe ones in the market. I say lucky since I hadn’t been planning ahead, and was shopping the day before I made this… usually that’s no dice unless I can get to the farmer’s market.

Let’s see, what else is new..

Heading up the coast this week to spend some quality time with C for my birthday! He tells me there is an oven where we’re staying, so we’ll see what kind of baking shenanigans I’ll get up to. I’m looking forward to lots of hiking and quiet time on the coast.

from a swim earlier this week – the light was just so pretty

I hope it is equally gorgeous outside where you are – it’s just the right combination of sunny/foggy/cool/warm here in SF so I’ve spent most of the day outside. Happy weekend!

Blackberry, Peach and Rosemary Almond Galette

Whole grain, refined sugar free – yet another endless riff on late summer galettes. I love the rosemary here for a slightly herb-y addition; it’s excellent with ice cream or on its own. Yield: 1 galette; serves several. A Wait are those Cookies original.

for the crust:
1 c whole wheat flour
1/2 c cornmeal
1/2 tsp sea salt
2 tsp fresh rosemary, very finely chopped
4oz/1 stick of unsalted butter, cubed
1 tsp vanilla
1/2 tsp almond extract
2-3 tbsp ice water
slivered almonds, for decorating

In a food processor, pulse together whole wheat flour, cornmeal, sea salt and rosemary. Add in cubed butter and pulse until it resembled coarse sand. Add vanilla and almond extracts, then the ice water 1 tbsp at a time until the dough starts to come together. Turn it out onto a board and knead it into a ball. I like to roll it immediately since it’s most pliable – typically I haven’t had trouble with this dough sticking. I roll it between two sheets of parchment paper and use the bottom one to bake the galette on; makes an easy transferral method between cookie sheet & cooling rack. If you’re not rolling immediately, stuck it in the fridge on a plate. Can be made ahead the night before if need be – let it sit on the counter for a bit before rolling it out if it’s been refrigerated.

for the fruit:

peaches, sliced (I used roughly 2 large ones)
2 c blackberries (fresh or frozen)
2 tbsp apricot jam (I like St. Dalfour’s as it’s sweetened only with fruit juice)
1 tbsp half and half or cream, for brushing on the dough

Preheat the oven to 425. Roll out the dough between two pieces of parchment paper until it’s about 1/4″ thick. Spread the jam in a thin layer over the middle of the dough. Pile the fruit in the center, leaving a border of about 3″. Fold up the sides of the dough over the fruit. Brush the dough with an half and half or cream, pat the slivered almonds onto the sides and sprinkle with a little coconut sugar. Dot fruit with butter if you like, though it’s not strictly necessary. Pop in the oven and bake for 35-40 minutes, until the crust is lightly browned. Remove to a cooling rack and let cool completely before slicing and serving. Store leftovers in the fridge overnight – it’s great for breakfast :)

Crumb cake and more pluots

Hi friends, happy weekend! I wish it was the beginning of it and not the end, but at least there’s a long weekend upcoming.

I have a cake for you today! Cakes feel few and far between around here, but I stumbled on this recipe and had to try it. I had stashed some ricotta in the freezer awhile back (not the best for its texture if you’re going to eat it plain, but if you’re baking with it, it’s fair game!) and wanted to pair it with the stone fruit that is all I want these days.

This cake is a pleasantly dense, nutty little thing – I think of it as a breakfast or brunch cake; something that is perfect alongside coffee. It does well served warm out of the oven, or chilled for a couple of hours in the fridge (my favorite, since the chilled cake texture is amazing).

The whole thing is very lightly sweet – there are only two tablespoons of maple in the entire thing, so the almondy dough and fruit flavors can really shine. It’s whole grain and infinitely adaptable – don’t have pluots? No problem – sub in figs, peaches, nectarines, plums, or any other fruit that catches your fancy. I think any berries would be excellent here, and I’m dying to try it with fresh figs – we’re almost into peak fig season here on the west coast!

We had it for brunch this morning – post workout and pre hiking (me) and cycling (him). Exercise nerds? Yeah, we are.

I got a new wetsuit and I’m SO excited about it – I was swimming without one the last week or so but I really love having one for my morning swims – it’s just so much more pleasant in the bay with one on, ha! This one is sleeveless, which is clutch. Not having anything over my shoulders is amazing.

my favorite swimming conditions – calm and foggy

Not a whole ton going on in other news – just cruising along into September (birthday month!) and crossing my fingers for no excessively hot weather in SF because we just know how much I looooove that, ha NOT.

I hope everyone out there had a good weekend! Sending good thoughts from my kitchen for good weeks all around.

Tuscan Ricotta Crumb Cake with Pluots and Blackberries

A pleasantly dense, lightly sweet breakfast cake – or dessert – but really excellent with coffee. Yield: one 7″ cake, serves several with small wedges. Refined sugar free and whole grain; easily gluten free with a cup for cup flour blend. Recipe gratefully adapted from Jules’ Kitchen, here!

For the dough:
1 c whole wheat pastry flour
1/4 c shredded coconut
2 oz almond flour
1/2 tbsp baking powder
1/4 tsp sea salt
2.5 tbsp unsalted butter, cold & diced into small cubes
1 tbsp pure maple syrup
1/2 tbsp vanilla extract
1/4 tsp almond extract
1 egg, beaten

For the filling:
1 c whole milk ricotta (drained if especially runny)
zest of one lemon
1 tbsp maple
1 tsp vanilla extract
heaping handful of fresh blackberries
4 small pluots

Preheat the oven to 350, and grease a 7” cake pan with butter (alternatively, a 6 or 8” would also work – just adjust the bake time up or down accordingly) Line the greased pan with parchment paper and set aside.

In a large bowl, whisk together pastry flour, coconut, almond flour, baking powder, and sea salt. Work the diced butter into the dry ingredients with your fingers or a pastry cutter until it resembles coarse sand. Add maple, vanilla, and almond, followed by the beaten egg. Use your fingers or a fork to work the egg into the dough – it doesn’t need to come together into a ball, it just needs to stick together when you press it with your fingers. Press half the dough into the cake pan to form the bottom layer.

In a large bowl, whisk together ricotta, lemon zest, vanilla, and maple. Spread the filling over the bottom crust, and top with blackberries and sliced pluots. Sprinkle the rest of the crumble topping over the fruit and ricotta.

Bake for 35-40 minutes – the topping should be lightly browned. Remove and let cool in the pan for at least ten minutes, then lift it out onto a cooling rack to cool completely. Slice and serve warm, or chill in the fridge for a few hours before serving. Store leftovers in the fridge for 1-2 days.

The latest craze: rhuberry

I made up a new word: rhuberry! I love hybrid words so any excuse to invent them, really…

Not sure why I’ve never put rhubarb and blueberries together before now but so glad I finally got around to doing it – they’re a great pairing. A little cinnamon and almond in the crust brings everything together – this galette is very forgiving, and comes together so quickly. I love galettes for an easy weekend dessert!

Now that I finally found rhubarb in the market, expect to see it show up here at least a few times soon – I bought a ton last time I found it, since it seems it’s been hard to source lately.

It’s been overcast and exceptionally foggy in the city for the better part of a week – which I love… I know, I know, I’m unusual. It’s also been SUPER windy, so I haven’t been swimming as much as I’d like. Finally got back in today during a nice break in the wind – despite the overcast, it was one of the best swims I think I’ve had in awhile. Strong tide today but no real waves to speak of.

slightly frozen feet

C brought me some beautiful flowers this week! Everything seems to be blooming around here – I’ve been enjoying finding hidden ones on my walks.

Happy weekend!

Rhuberry Galette with a Cinnamon Crust

A Wait are those Cookies original. Yield: 1 galette, serves several. Whole grain, refined sugar free (this crust is excellent with dairy free butter; just swap it in 1-1). Lightly sweet, slightly tart and perfect for a spring brunch or dessert with a scoop of vanilla. Fresh or frozen fruit works well here – no need to defrost before using.

for the crust:

1 c whole wheat flour
1/2 c cornmeal
1/2 tsp sea salt
1/2 tsp cinnamon
4oz/1 stick of unsalted butter, cubed
1 tsp vanilla extract
1/2 tsp almond extract
2-3 tbsp ice water

In a food processor, pulse together whole wheat flour, cornmeal, cinnamon & sea salt. Add in cubed butter and pulse until it resembles coarse sand. Add vanilla & almond extract and ice water. I typically add three tbsp water, pulse a few times, then add more if need be, 1tbsp at a time, stopping just when the dough starts to come together. Turn it out onto a board and knead it into a ball. I like to roll it immediately since it’s most pliable – typically I haven’t had trouble with this dough sticking or cracking if rolled immediately. I roll it between two sheets of parchment paper and use the bottom one to bake the galette on; makes an easy transferral method between cookie sheet & cooling rack. If you’re not rolling immediately, stick it in the fridge on a plate. Can be made ahead the night before if need be. If you are rolling immediately, roll it out into a circle about 1/4″ thick.

for the filling:

2-3 stalks rhubarb, sliced
1 c wild blueberries
2 tbsp apricot jam (I use St. Dalfour’s, which has no added sugar – just fruit juice)
sprinkle of coconut sugar + milk/half and half for brushing

Preheat the oven to 425. Spread the apricot jam over the middle of the dough, leaving a 1″ border, then pile on the sliced rhubarb & wild blueberries. Fold up the sides of the dough over the fruit and sprinkle with coconut sugar. Brush the dough with milk or half and half. Pop in the oven and bake for 30-35 minutes, until the crust is lightly browned. Remove to a cooling rack and let cool completely before slicing and serving. Store leftovers in the fridge overnight – it’s great for breakfast :)

Cake for breakfast

Cake!

It feels like I hardly ever make cake anymore, but boy am I glad I broke that streak.

I was intrigued by the idea of an upside-down cake, but I’ve never liked them that much since they are always SO full of sugar and way overly sweet. I liked the idea in theory but I was curious to see if I could pull it off with just a bit of fruit-only jam & coconut sugar. Turns out, it works marvelously! This guy is gluten & dairy free + refined sugar free; could probably be pretty easily vegan too with an egg replacement.

It’s citrusy and sunny with a satisfying crunch from the poppyseeds; the texture is great with a combination of almond flour & cornmeal. It’s not really dense exactly, but more like a cake/quick bread hybrid.

We both love poppyseed anything, so it was an easy sell. Both of us really enjoyed the cake aspect of it too, so I might put cake back in the rotation more frequently. This one is arguably best for breakfast; we ate it both for dessert and for breakfast per usual, but it reminds me quite a bit of a muffin (in a good way.)

Took a nice long walk on the beach at Fort Funston today; it’s been dry out here and my autoimmune stuff HATES low humidity so I’ve been in the bay or next to the ocean literally every day – and sometimes both.

March already, almost! That’s hard to believe. Definitely wishing I had another day of weekend. Hopefully yours were full of outside time and good food! :)

Grapefruit Poppyseed Upside-down Cake

Free of gluten, dairy and refined sugar. MUCH less sweet than a standard upside-down cake, which always contain scary amounts of sugar. This one makes an amazing breakfast cake, so highly recommend saving a bit for the next morning. Yield: 1 8″ cake, serves several. A Wait are those Cookies original.

1.5 c almond flour
1/3 c cornmeal
3/4 tsp baking powder
1/4 tsp baking soda
heaping 1/4 tsp sea salt
2 tbsp poppy seeds
2 eggs, lightly beaten
1/4 c maple syrup
1/3 c coconut oil, melted
1.5 tsp vanilla extract
1 tsp almond extract
zest of 2 grapefruits
juice of 1 lemon
Two grapefruits, peeled & sliced
1 tbsp apricot jam (mine is fruit sweetened only)
2 tsp coconut sugar

Preheat oven to 325. Lightly grease an 8″ cake pan with coconut oil and line the bottom with parchment paper – I flip it over, trace the outline & then cut, to get a perfectly sized circle. Spread the apricot jam evenly over the parchment, then drop the grapefruit slices into the bottom of the prepared pan. Sprinkle with coconut sugar.

In a large bowl, whisk together almond flour, cornmeal, baking powder, baking soda, sea salt & poppy seeds. Add in eggs, honey, coconut oil, vanilla & almond extract extract, grapefruit zest and lemon juice, and stir until all ingredients are just incorporated. Pour the batter into the prepared pan – it’s thick batter! That’s normal – just even out the top with a spatula. Bake for 35-38 minutes, until the top of the cake is lightly browned, firm, and a tester in the center comes out clean. You can cover the cake with foil during the last 10 minutes of baking if the cake is browning too fast – though mine was done at 37 minutes, and I didn’t need the foil trick. Remove and let cool for a few minutes in the pan before flipping it out onto a cooling rack. Let cool completely before slicing and serving. Stores well overnight in the fridge, and is arguably even better for breakfast.

Panna cotta Saturday

Hi blog friends!

Feels strange to be putting out a blog post on a ‘normal’ weekend when my friends in Texas and family/friends in the PNW have been pretty hammered this week, but I’m going to do my best to create a peaceful little corner of the internet, in case anyone needs a mental break for a minute.

Today I have a rooibos and chai panna cotta for you! It’s sitting in an almond cornmeal crust that has a sneaky layer of dark chocolate hiding between the panna cotta and the crust – a nice little texture contrast you weren’t expecting. The flavors are subtle and delicate – if you love tea, this is absolutely for you. It’s also gluten, dairy and refined sugar free! Easy vegan & grain free swaps listed in the recipe notes, as well.

I drink Numi’s rooibos chai every night – not a sponsored post at all, I just totally love it! It’s caffeine free so perfect for evening. I used it here to infuse coconut milk – the panna cotta itself is made with tea two ways (cold tea to bloom the gelatin + steeped coconut milk.)

Highly recommend for dessert, breakfast, snacks, and anything in between.

what things really look like around here

In other news, the tulip trees are going bananas all over the city; I took a very cold & windy swim this morning at 830, and I have a new wetsuit, courtesy of the fave human. Yay!

Also, the skies have been amaaaazing lately.

please ignore crookedness of this image…. was too lazy to fix it. It’s saturday.

I hope the weekend is treating you well – and that it’s warming up for those who got hit with the gnarly cold last week. Happy Saturday!

Rooibos Chai Panna Cotta with an Almond Crust

A panna cotta tart with subtle chai flavors and a hint of chocolate in an almond crust. Gluten free, refined sugar free, dairy free, paleo. If you need a vegan version, feel free to set the panna cotta with agar, instead of gelatin. For grain free, sub in an extra 1/2 c almond flour for the cornmeal. A Wait are those Cookies original. Yield: 1 9″ panna cotta, serves several.

For the crust:

1.5 c almond flour
1/3 c unsweetened shredded coconut
1/3 c cornmeal
heaping 1/4 tsp sea salt
1/2 tsp baking soda
2 tsp vanilla extract
1/2 tsp almond extract
2 tbsp pure maple syrup
6 tbsp coconut oil, melted
1/3 c dark chocolate chips

In a large bowl, stir together almond flour, shredded coconut, cornmeal, sea salt, and baking soda. Add in vanilla, almond extract, maple, and melted coconut oil, and stir until completely combined. The dough will look crumbly, but you’ll be able to press it together with your fingers.

Preheat the oven to 350, and lightly grease a 9″ tart pan (w/ removable bottom) with coconut oil. Press the crust into the plate and up the sides with a spoon or your fingers, creating a smooth edge (or not, your call!). Poke the bottom with a fork a few times, and bake for 15 minutes. Remove and let cool for a few minutes.

Melt the chocolate chips in a double boiler or in the microwave. Spread the melted chocolate over the interior of the crust, and let cool until set. You can also pop the whole thing in the fridge to help it set faster, if needed.

For the Panna Cotta:

1 package unflavored powdered gelatin
1 can full-fat coconut milk
3 bags of rooibos chai (I used Numi; regular chai would be great too)
1 tbsp vanilla extract
3 tbsp maple
pinch of sea salt
1/4 c brewed rooibos chai (or reg. chai), cold
shredded coconut and crystalized ginger for topping

Pour the coconut milk into a small saucepan and add the bags of rooibos chai tea. Bring to a simmer over medium heat, stirring occasionally. Remove from heat, cover and let steep for 15 minutes.

In a small bowl, sprinkle the gelatin over 1/4 cup of the cold tea. Let stand without stirring until the gelatin is moistened, about 10 minutes.

Remove the tea bags from the coconut milk. Whisk in maple, vanilla and sea salt, and bring the milk back up to a simmer. Remove from heat and whisk in the gelatin mixture. Whisk until completely dissolved, about 3 minutes. Cool until lukewarm. Pour the panna cotta mixture into the cooled tart shell. Place in the refrigerator until set, approximately 4 hours or preferably overnight.

Top with whatever pretty things your heart desires! I used shredded coconut and crystalized ginger, finely chopped. Store in the fridge until serving. Leftovers keep well up to two days in the fridge, covered.