Fancy-sounding french pastries for casual weekends

Woah woah look at me go! Another post in less than a month! On a ROLL.

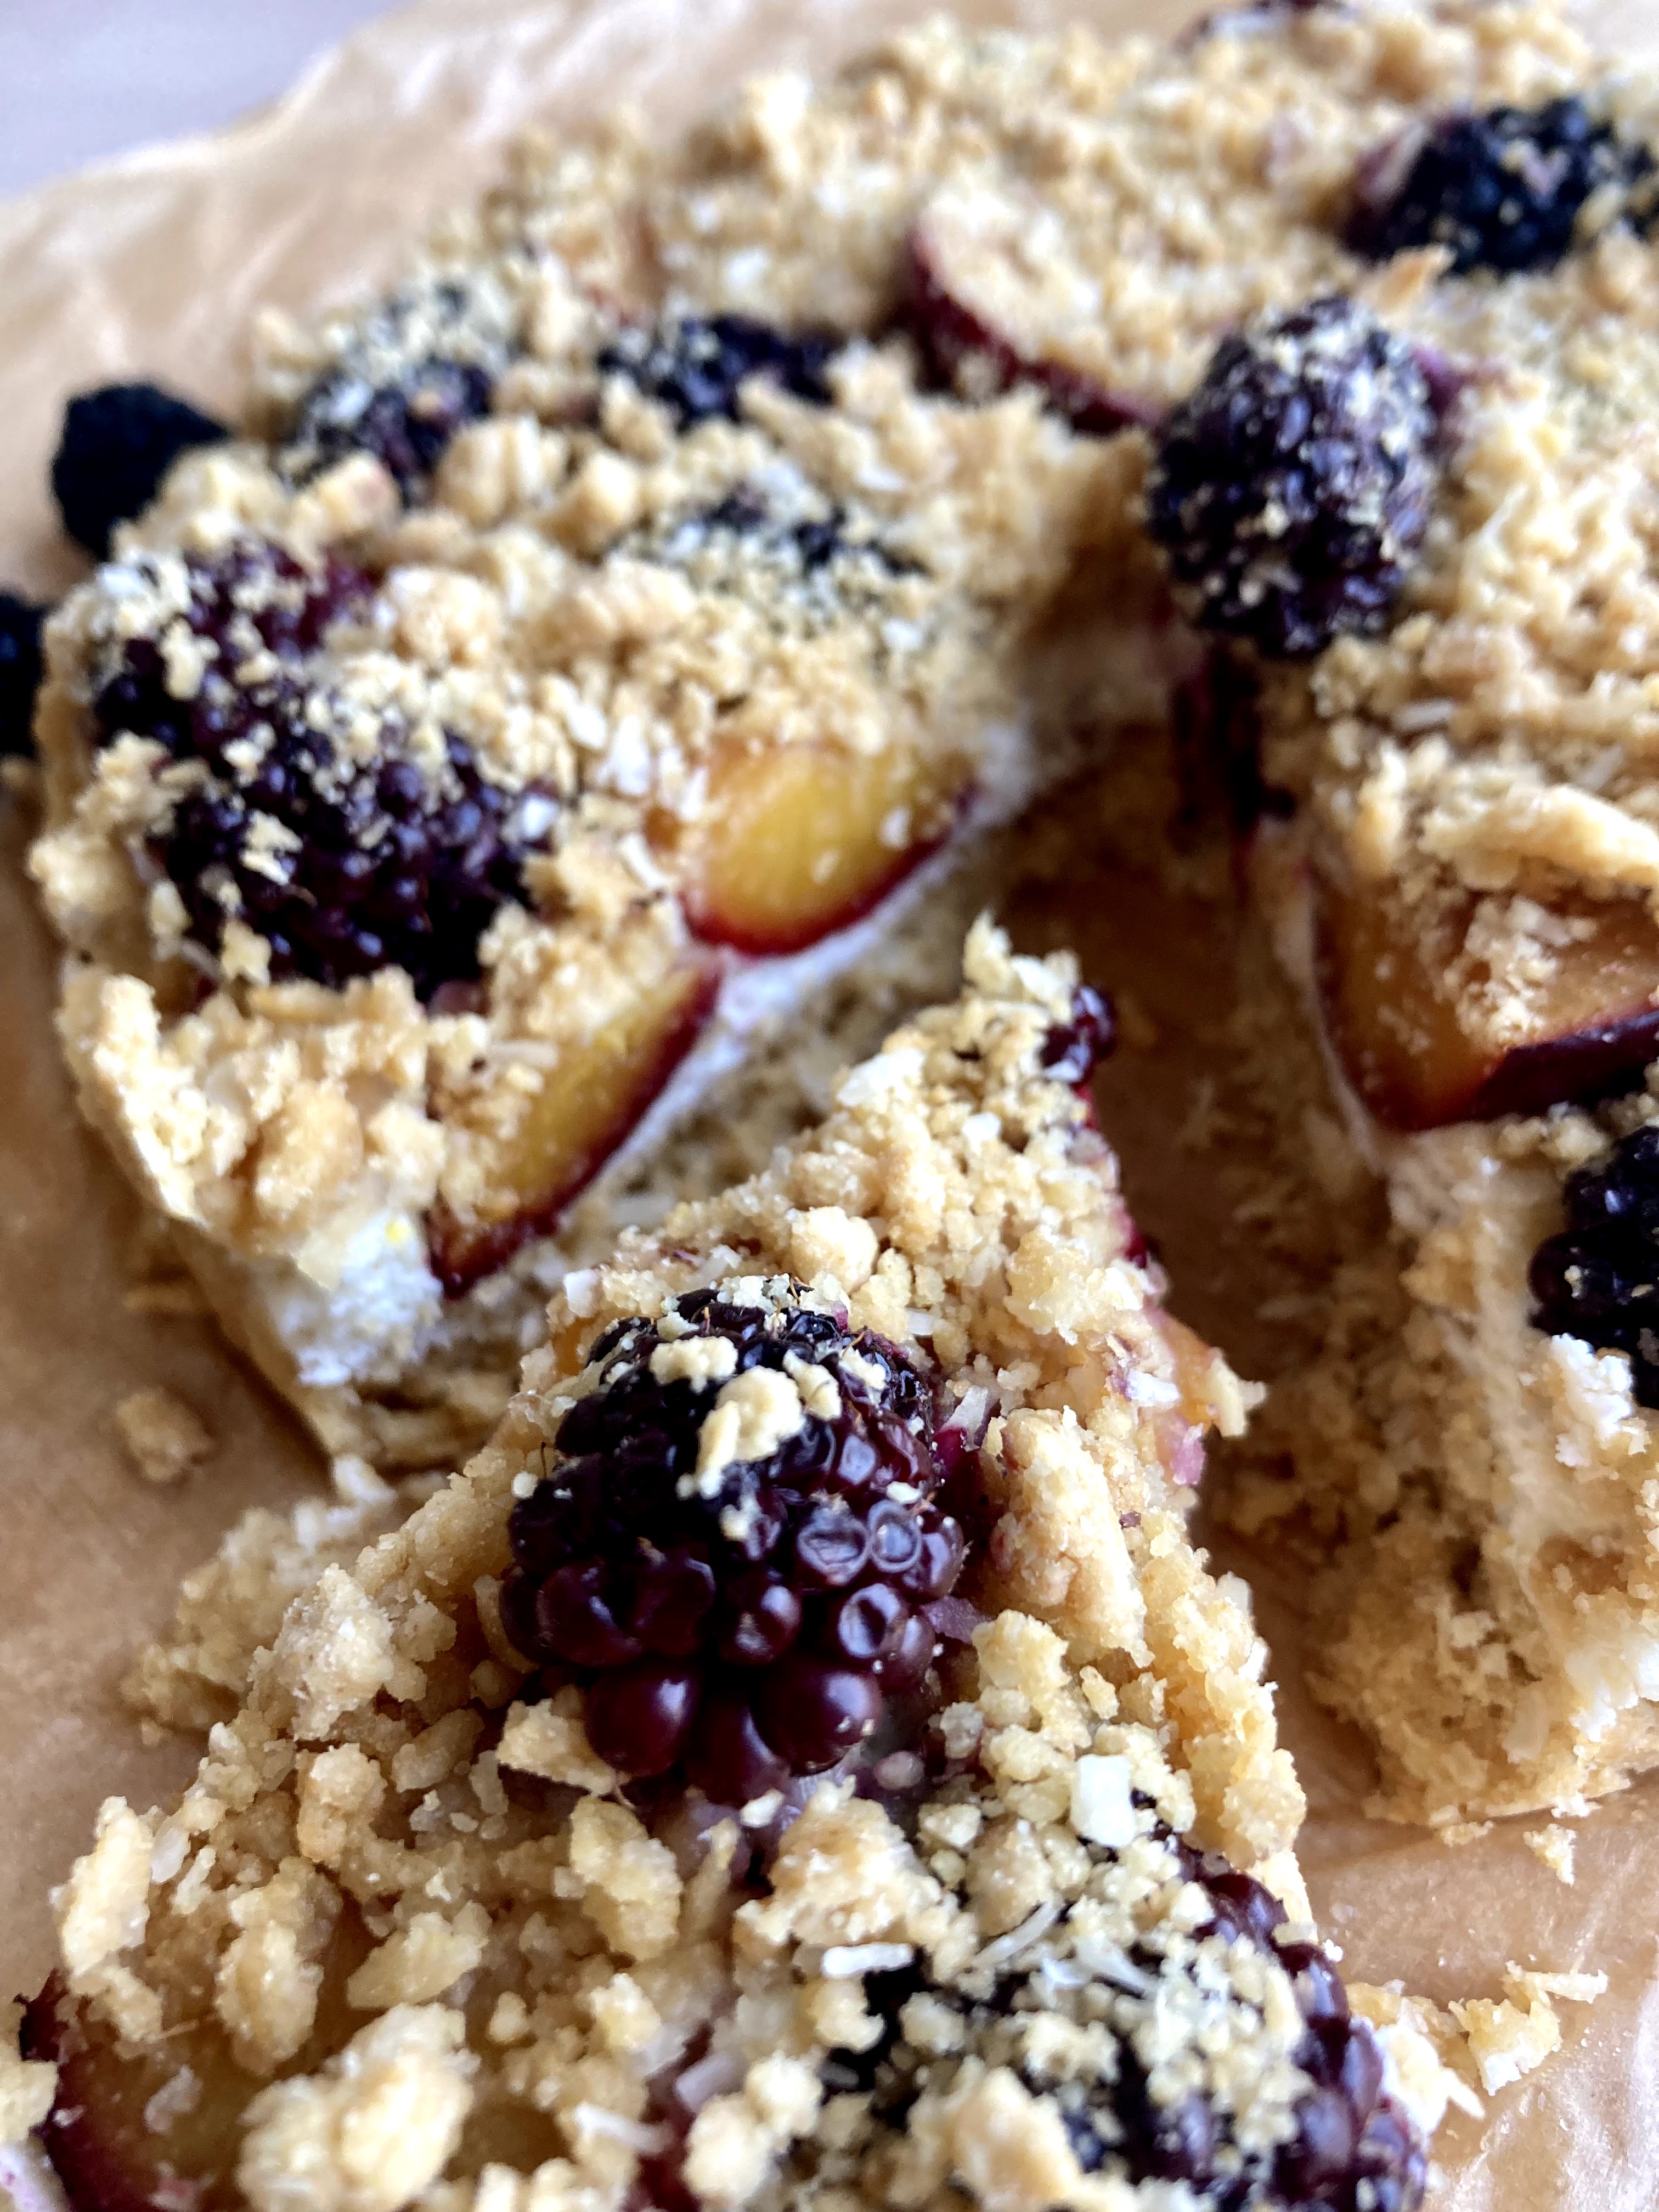
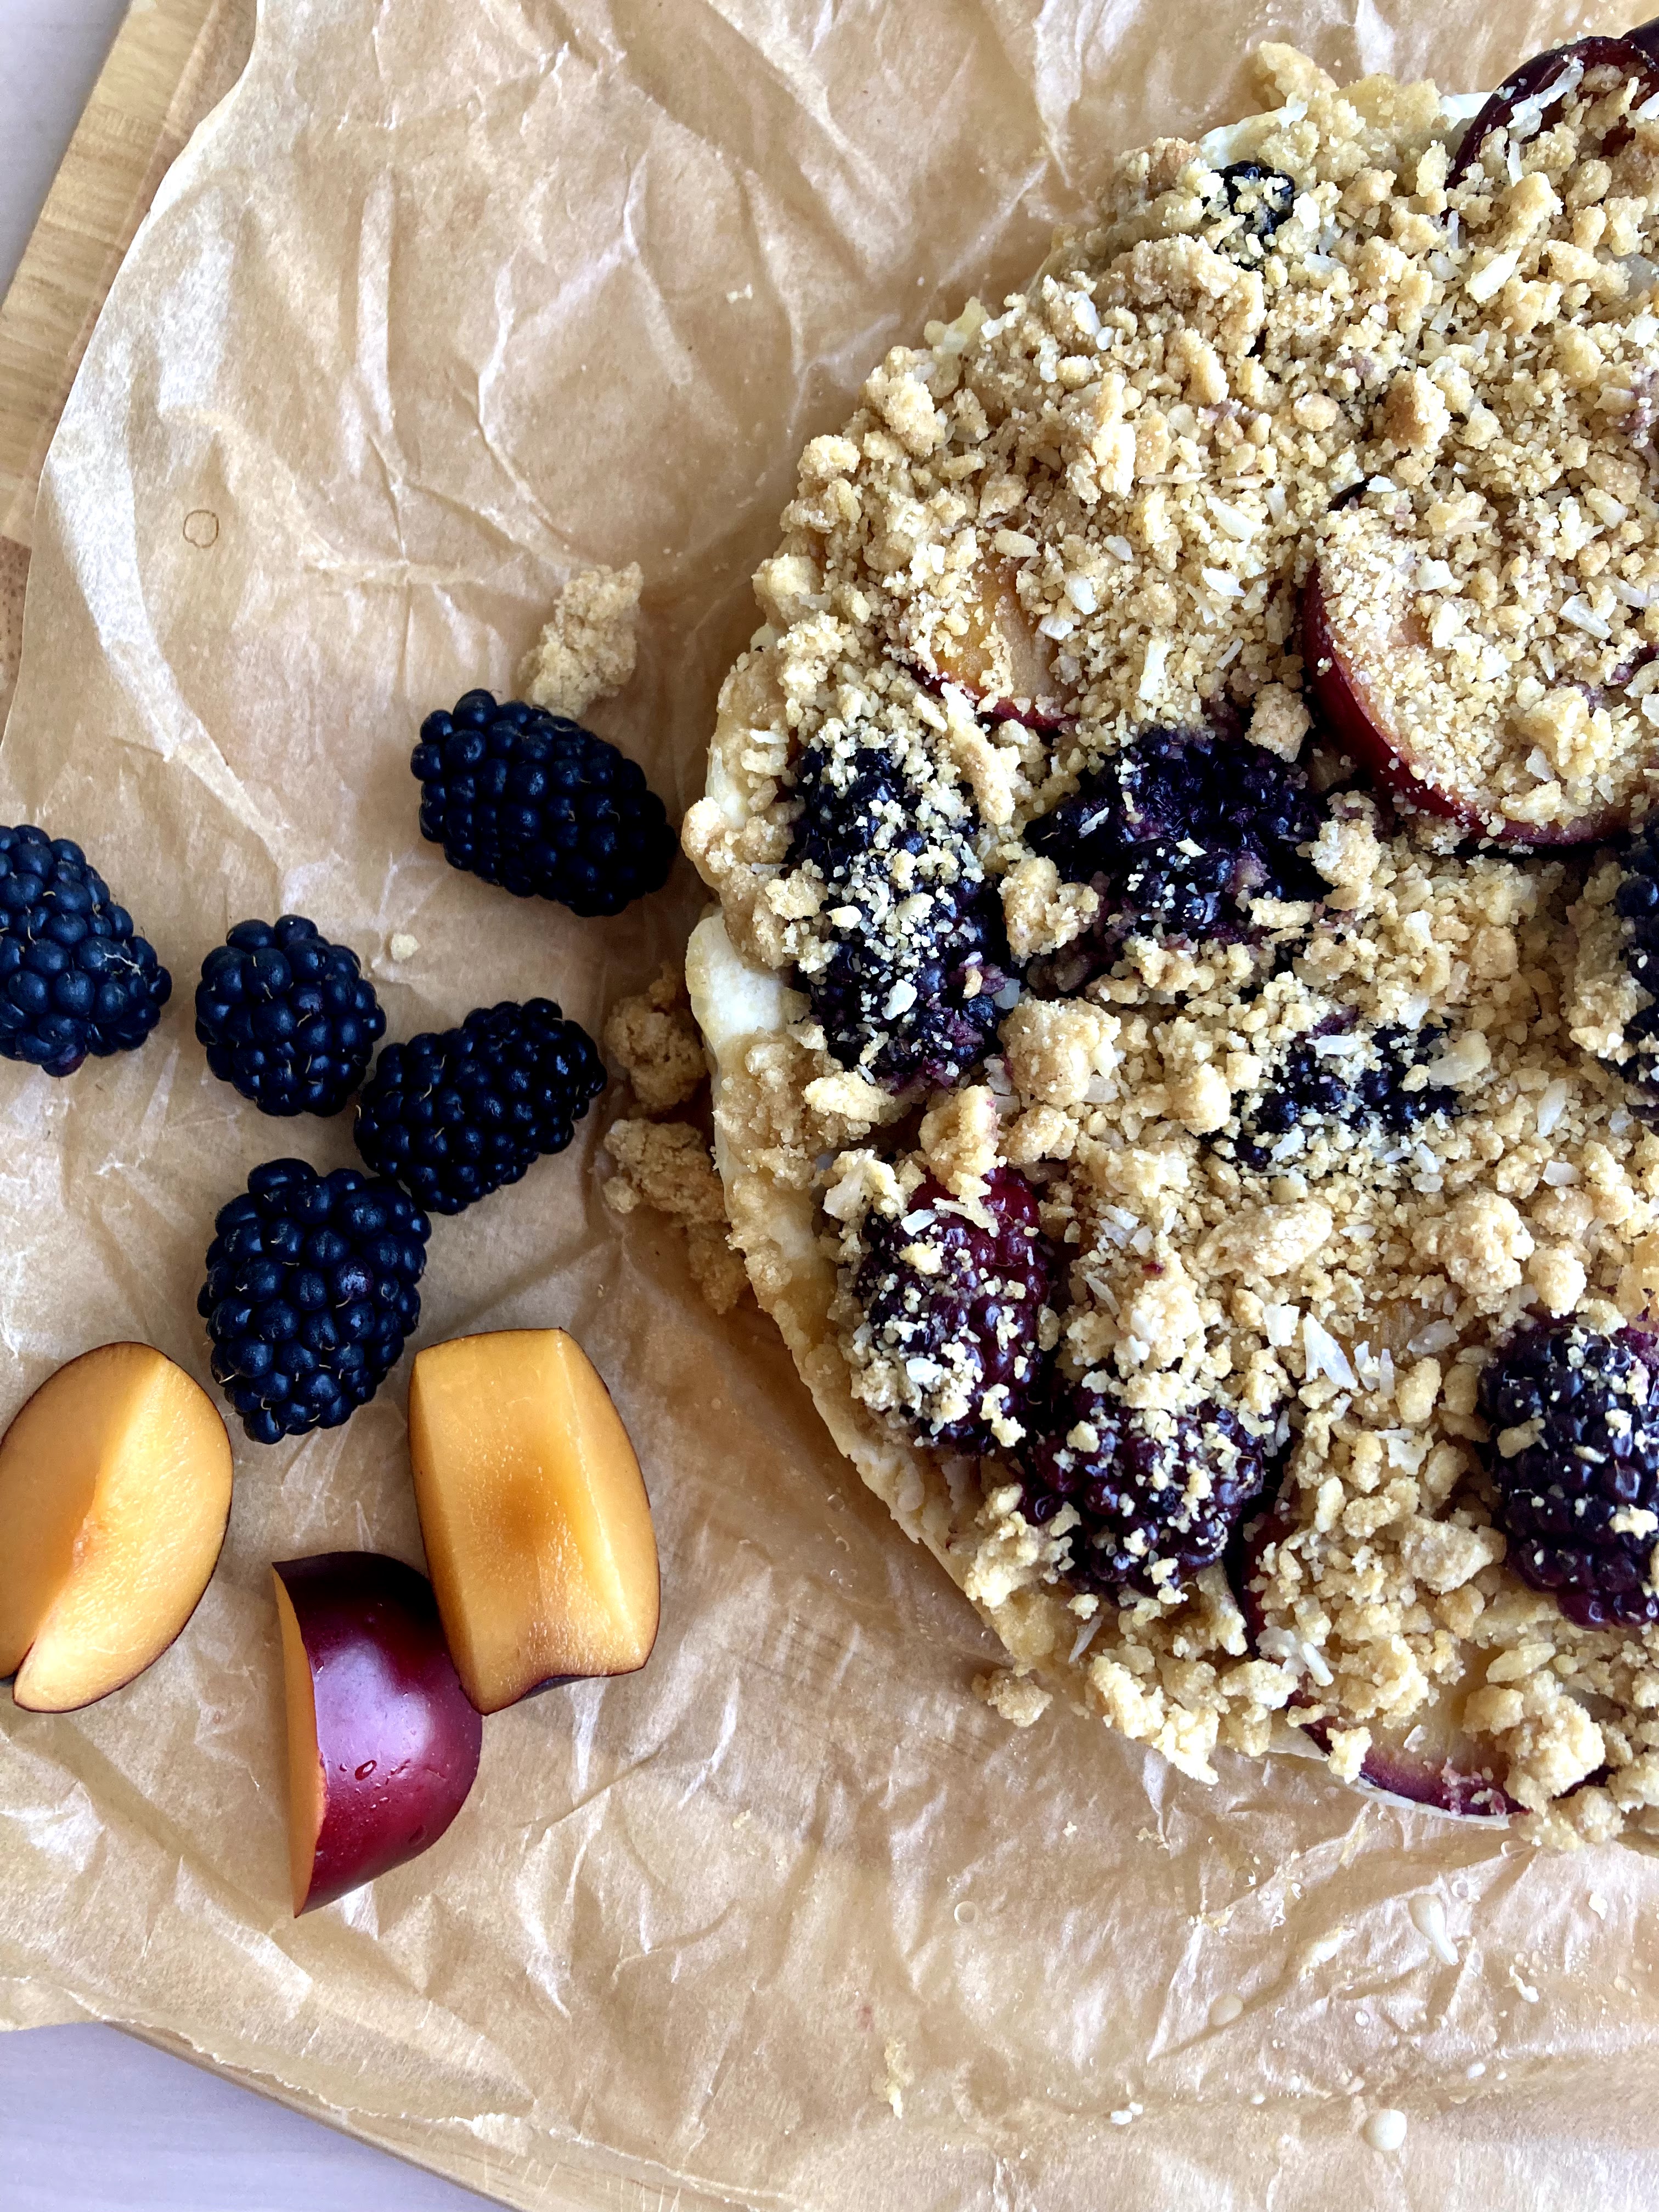
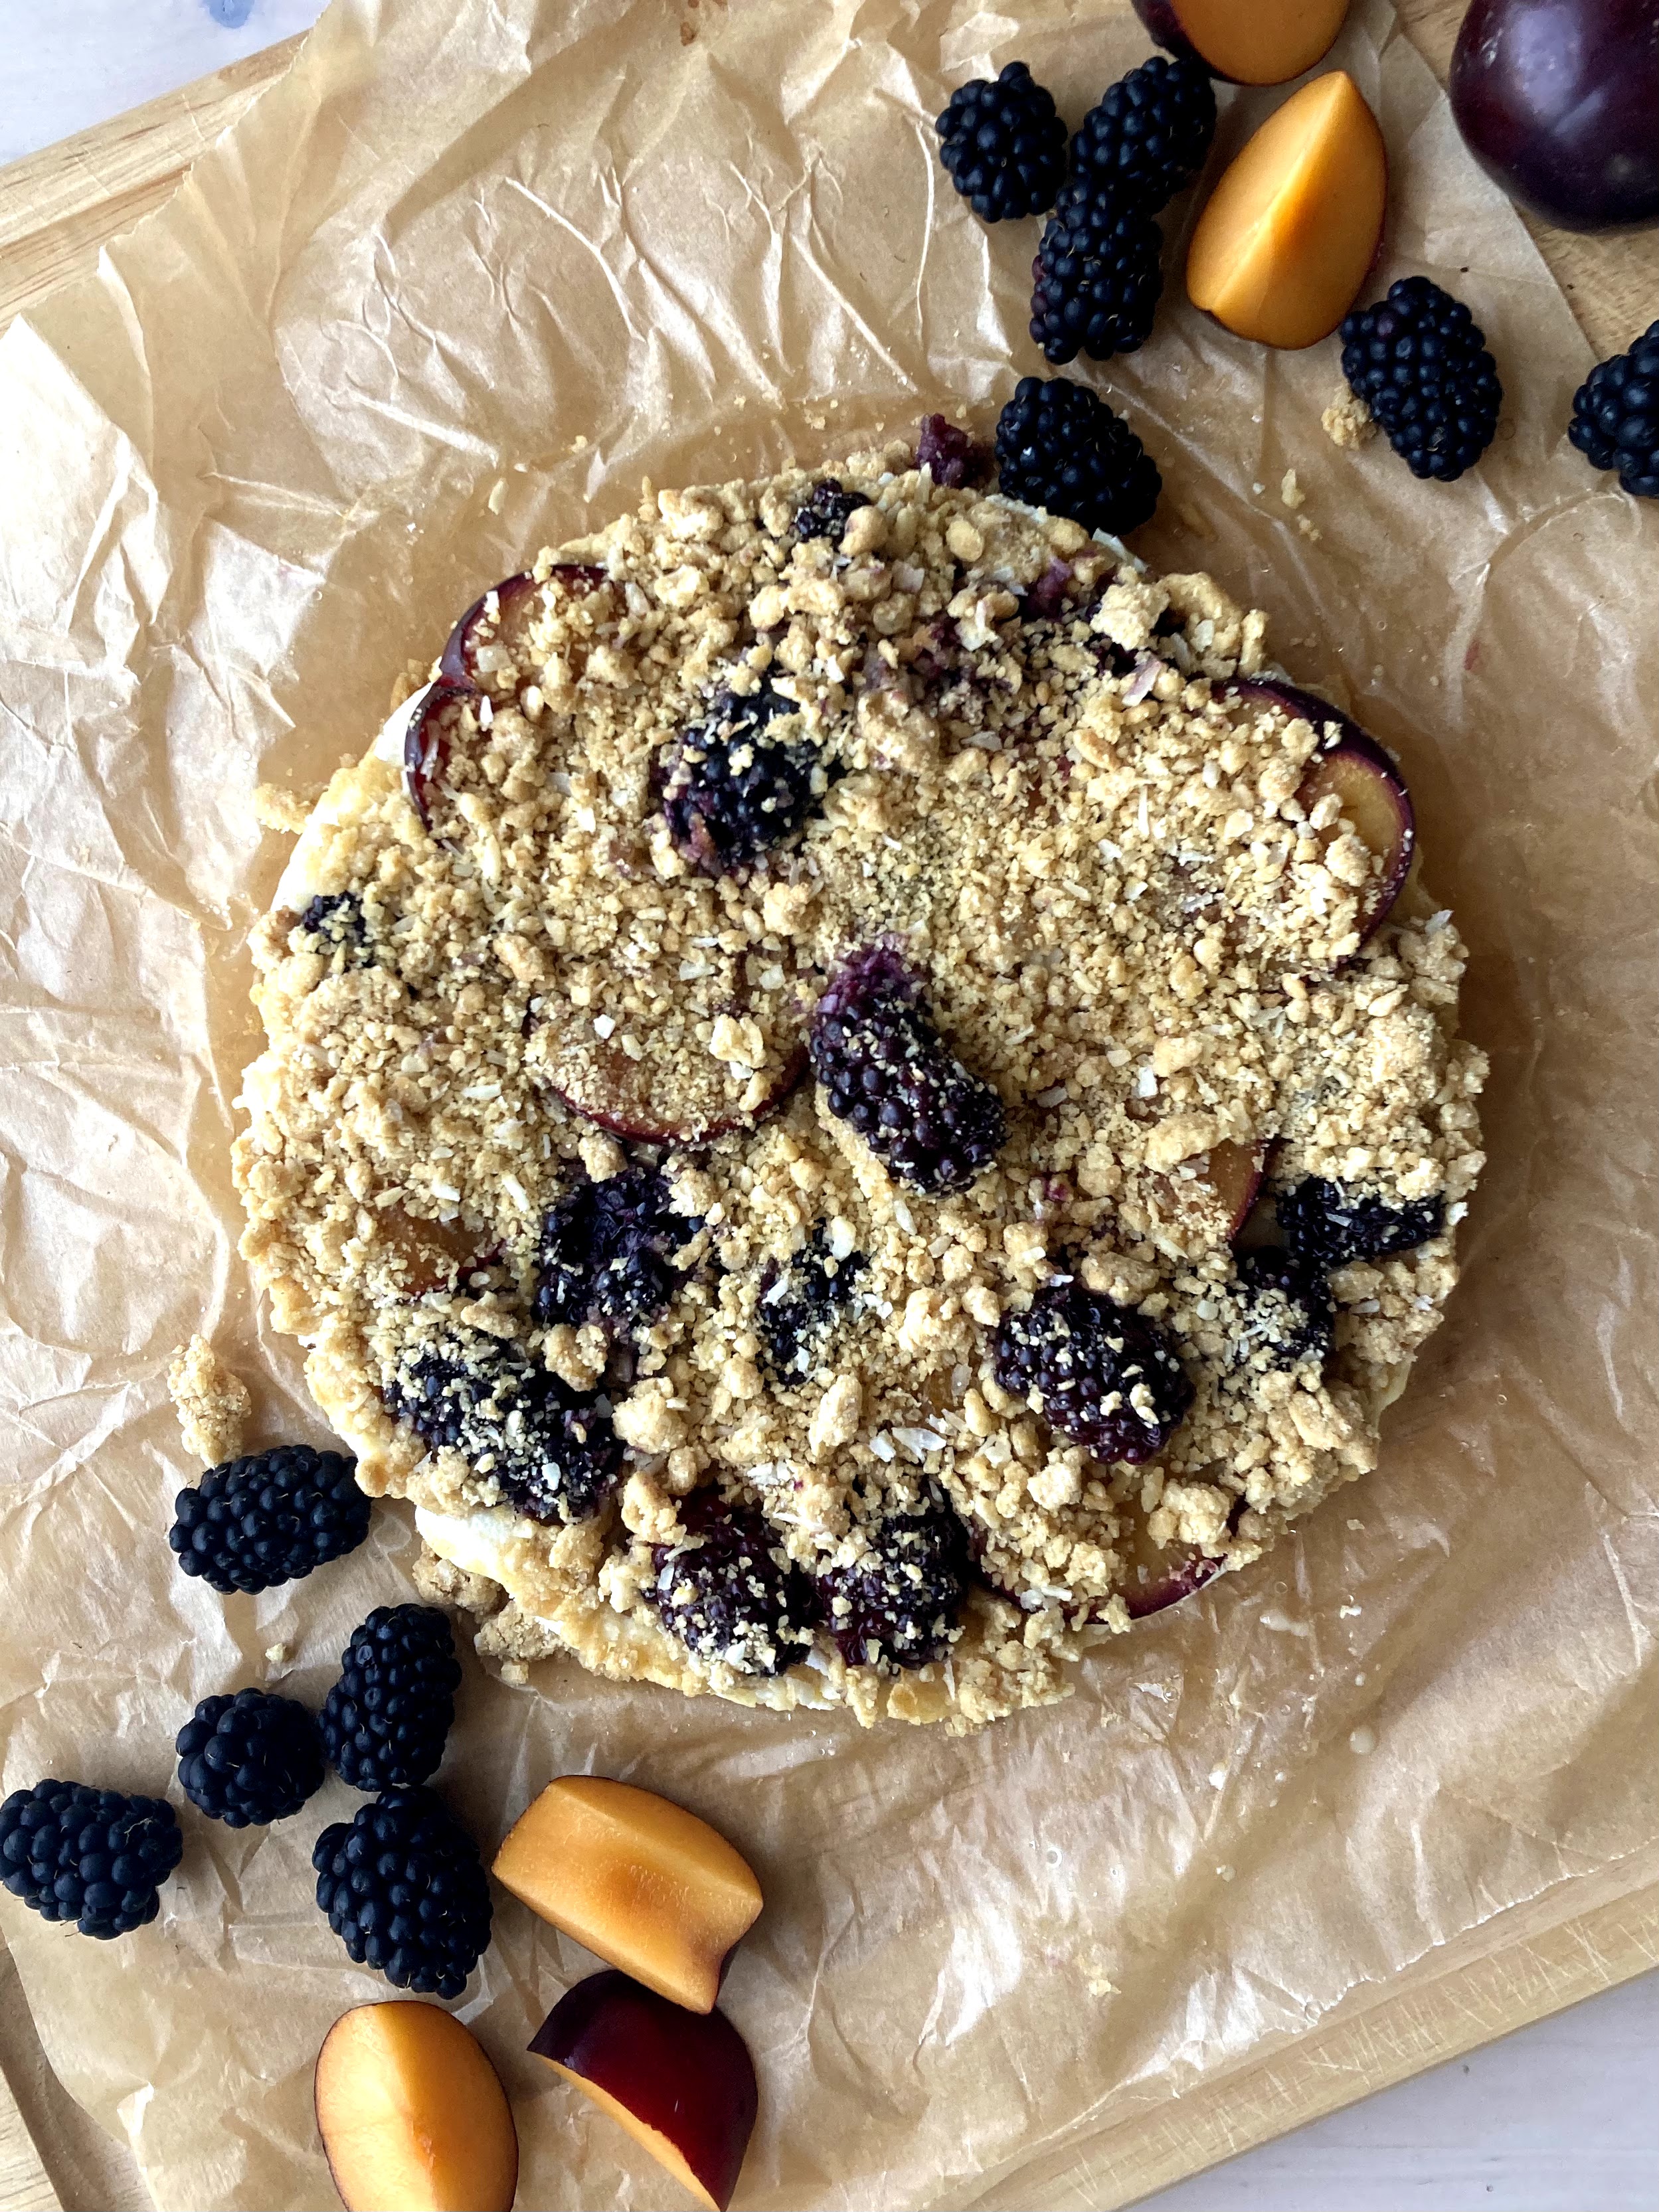
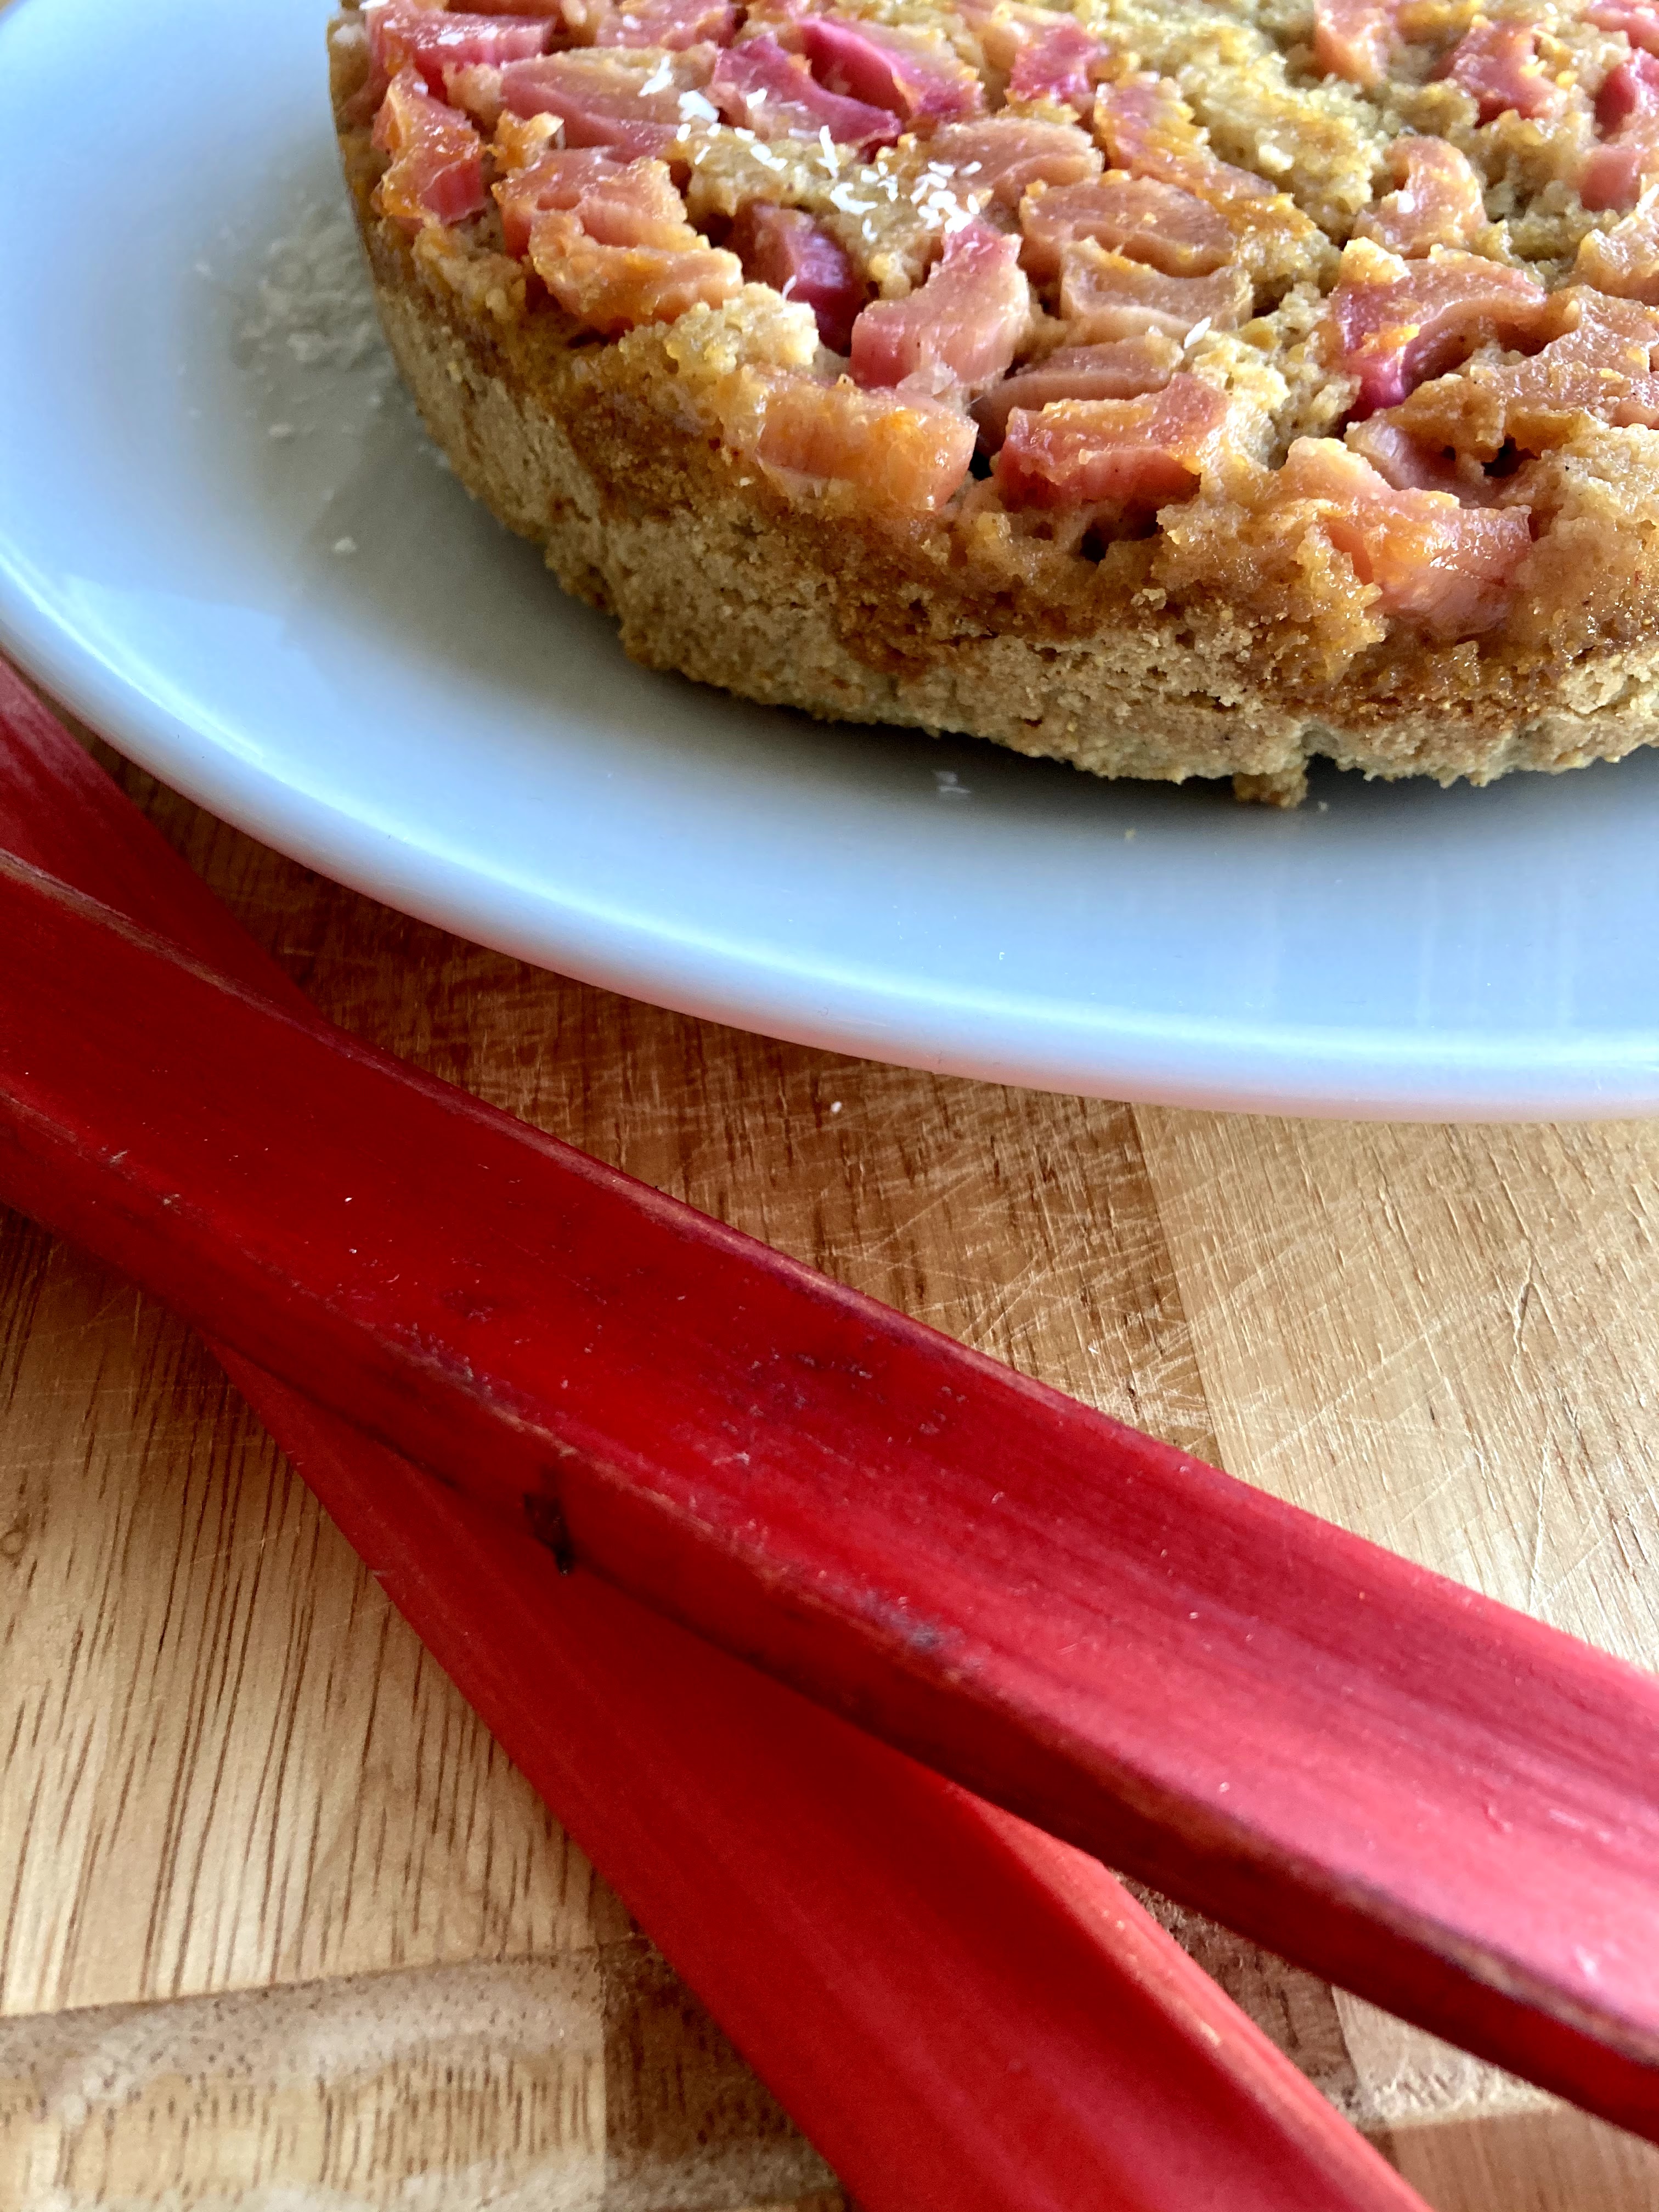
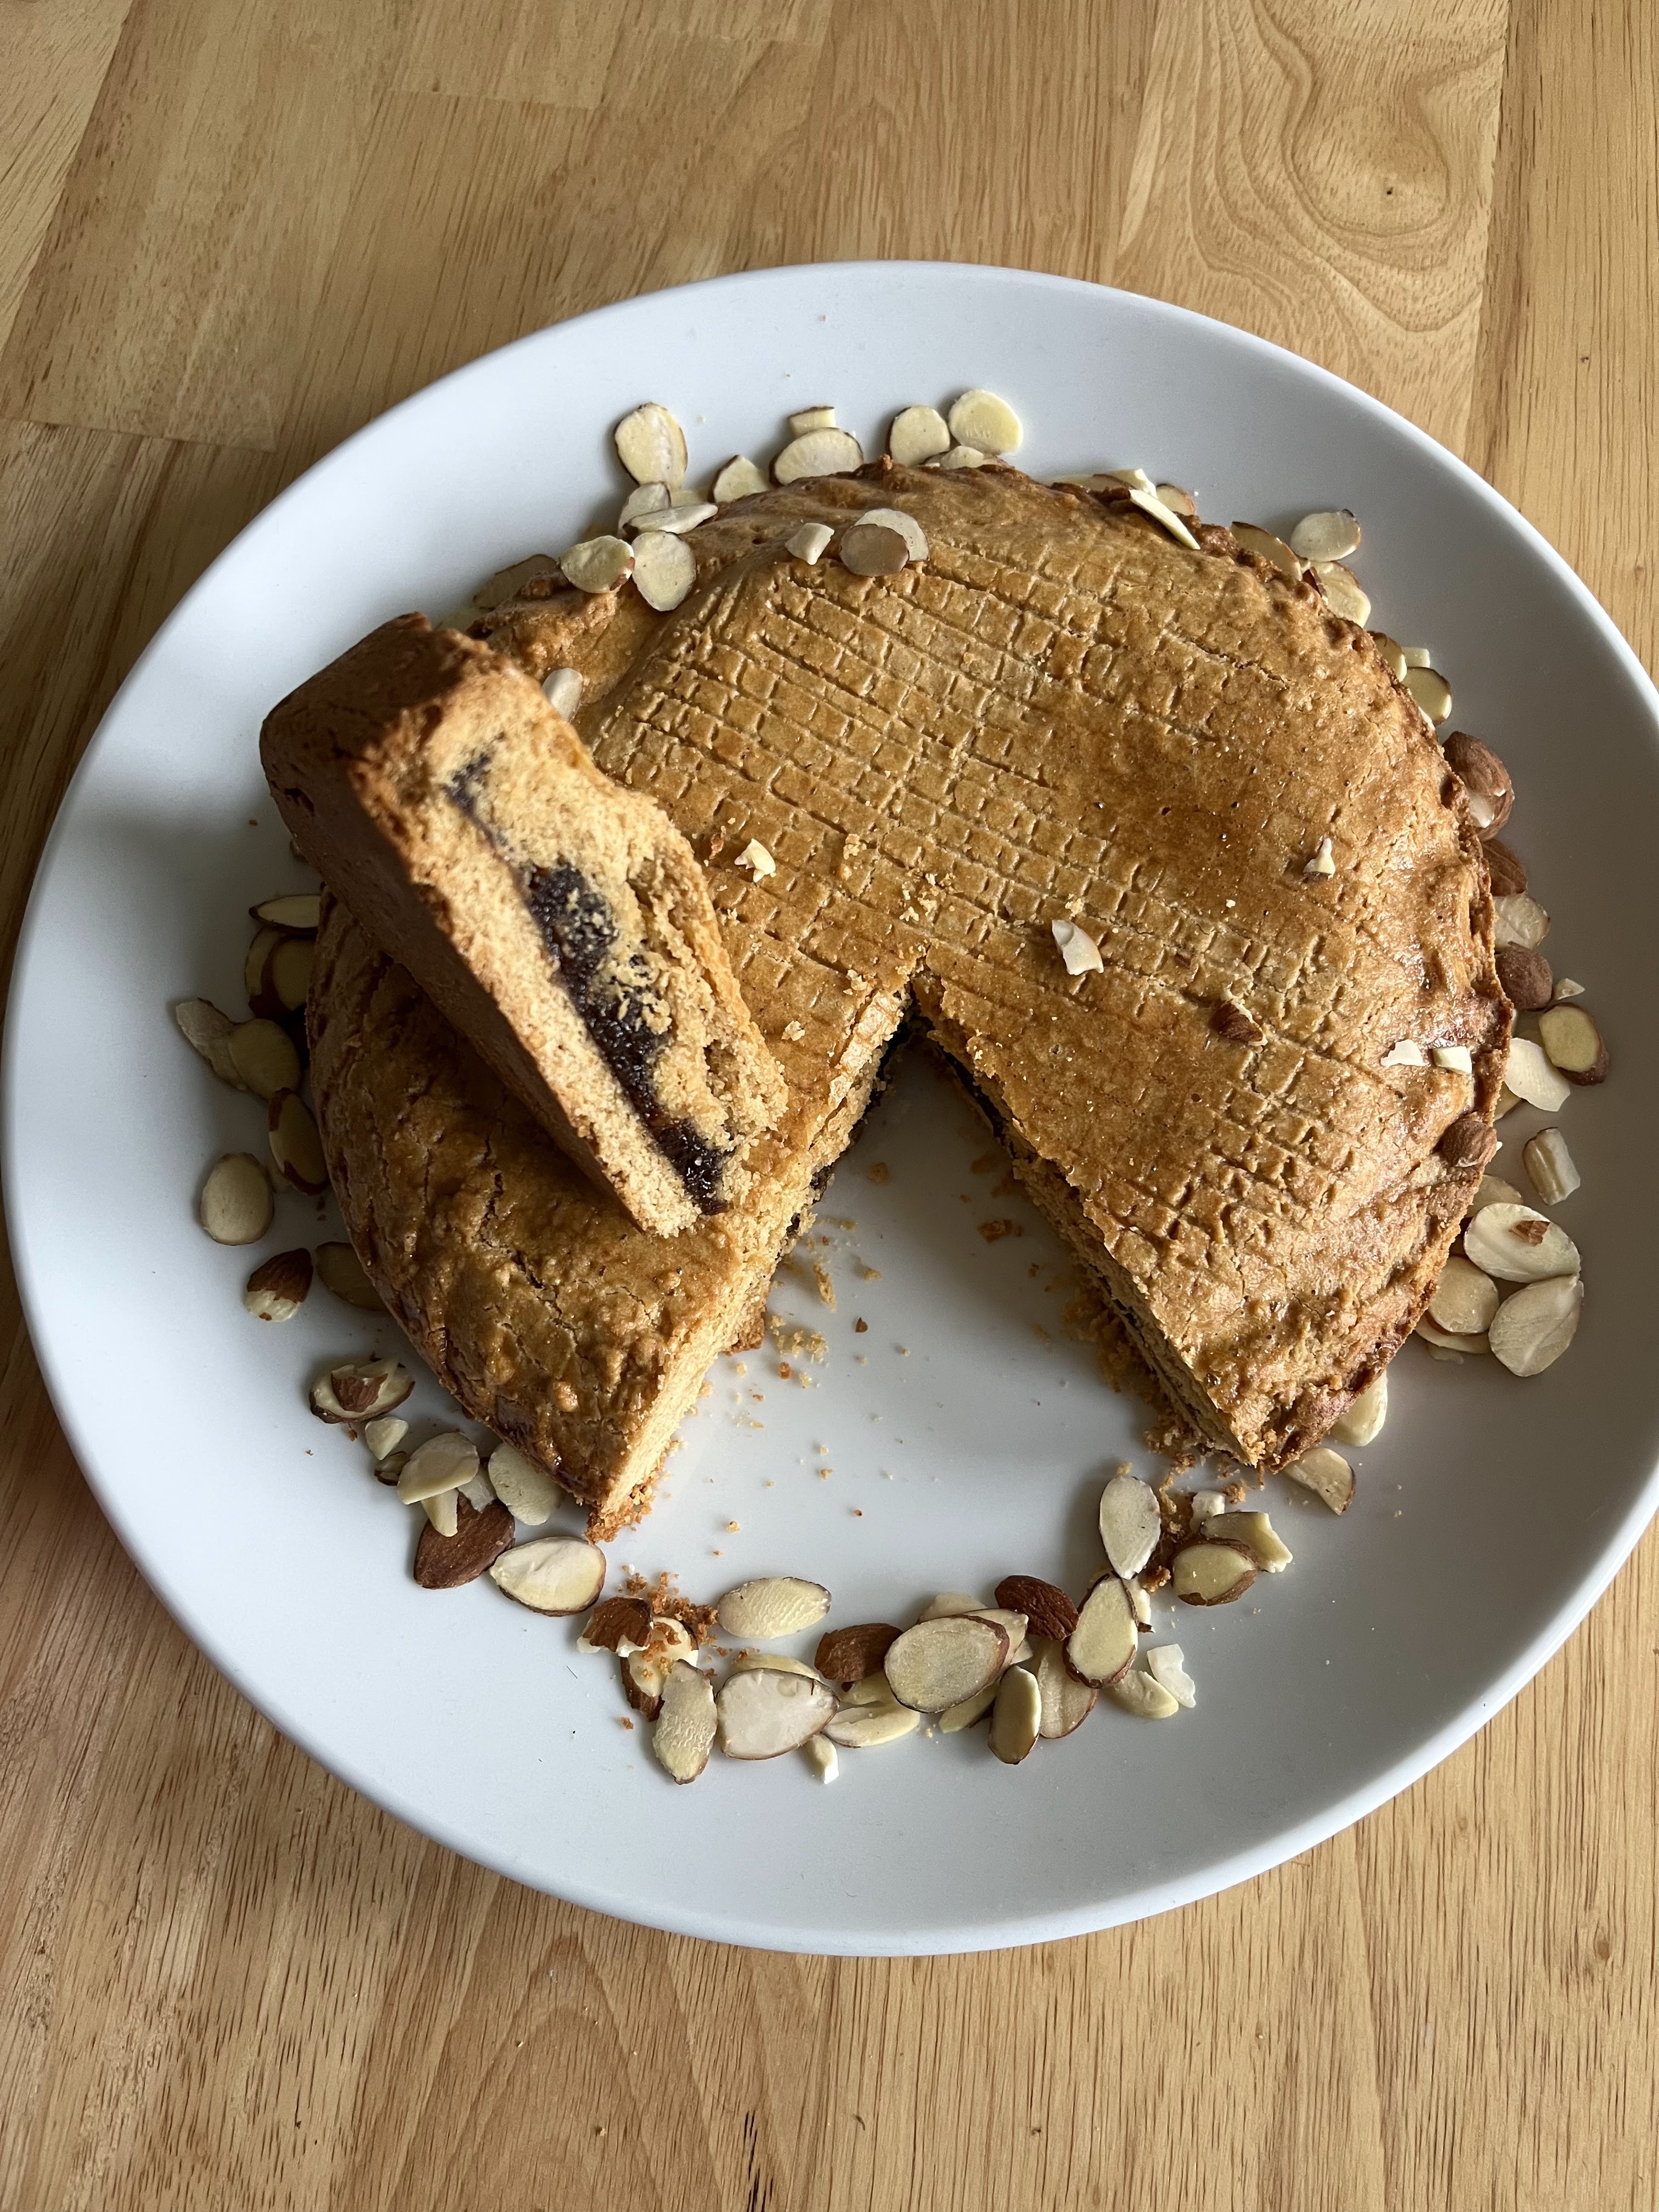
I have wanted to make a gâteau basque for ages, but kept forgetting to actually make one when it came time to bake something. I’m so glad I fixed that…. these are delicious. Called a cake but in reality more like a cookie/tart/jammy pastry, it’s essentially two layers of pastry dough sandwiching a jam or pastry cream filling. They are from the southwestern Basque region in France and gained popularity in the 18th century.

I did modify mine somewhat, so it’s not completely traditional – mostly because I wanted to use things I had at home and avoid a trip to the market, but also because I like to keep things refined sugar free when at all possible.

So, that being said, this is not exactly a traditional gâteau basque, but it IS delicious. I filled mine with fig preserves (more fruit than anything else) instead of the more traditional black cherry jam or pastry cream. I love pastry cream but was feeling lazy so that is for next time (believe me, there will be a next time).

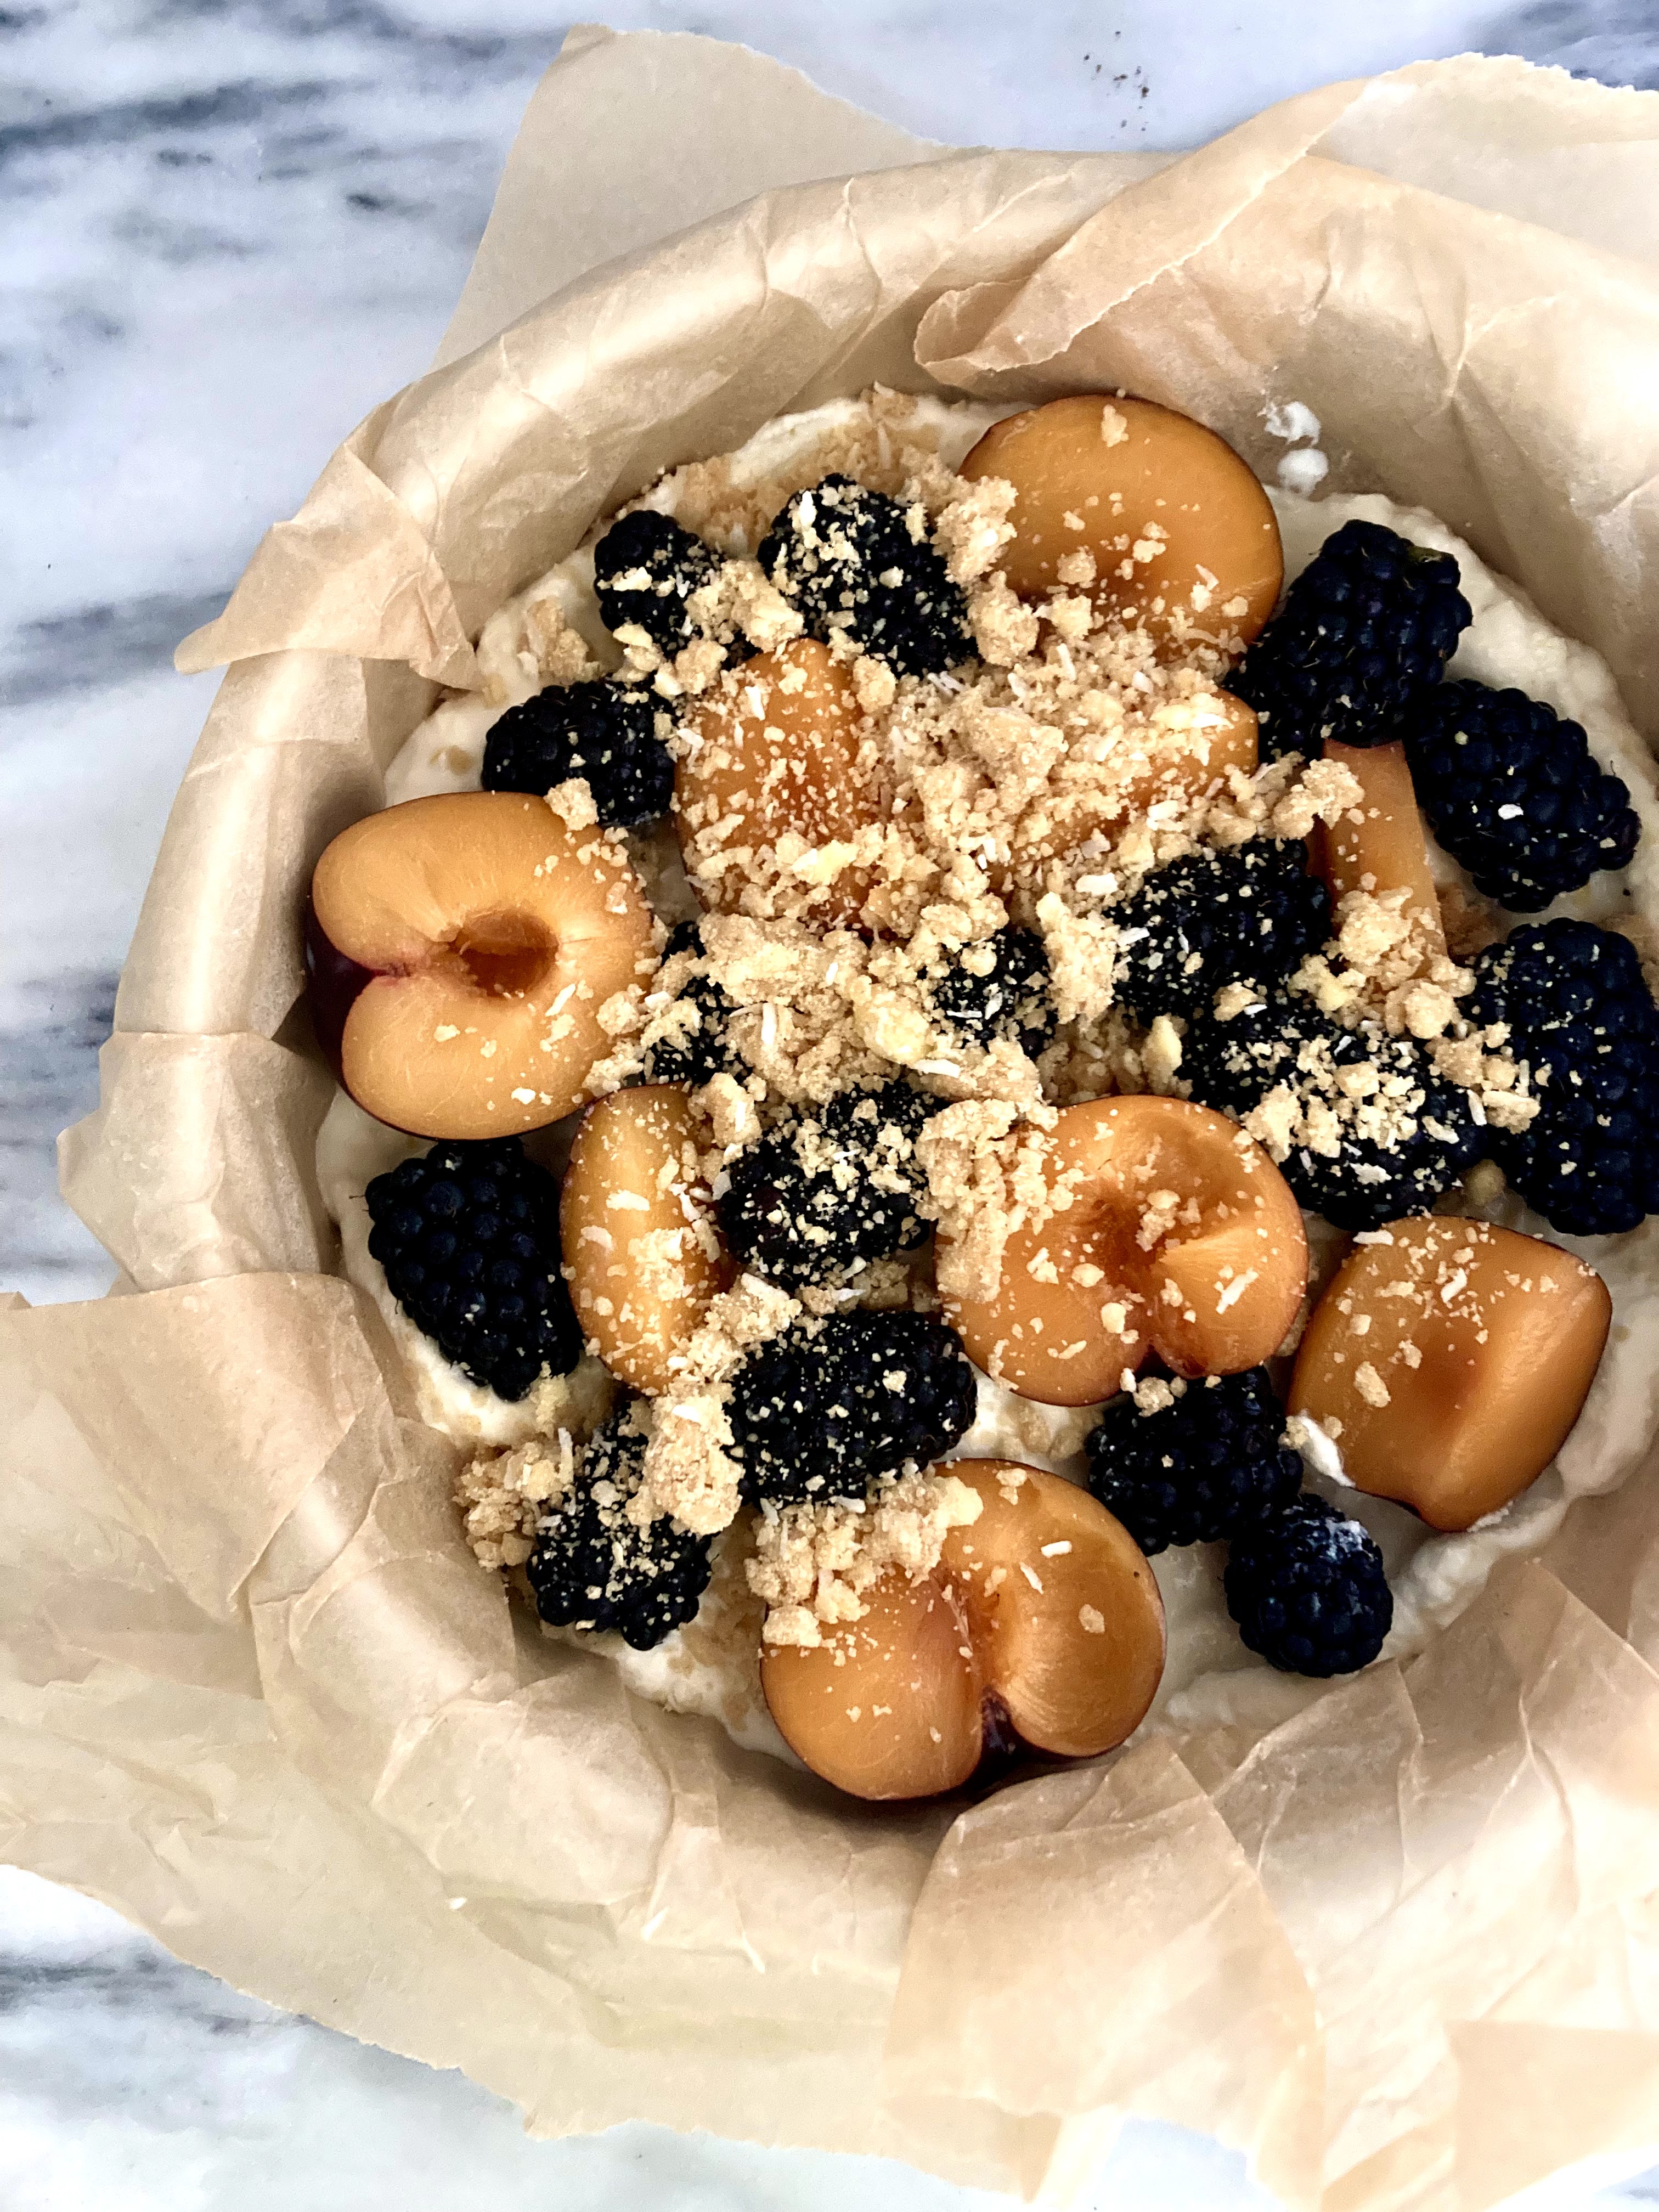
I also happened to have that jar of fig preserves kicking around so this seemed like a good place to use it. This also means that I made what is essentially a giant fig newton! I’m not mad about it though, I loved those growing up and this tastes like an exceptionally better version. While I’m on the metaphors here, it could also be likened to a large, fancy pop tart?

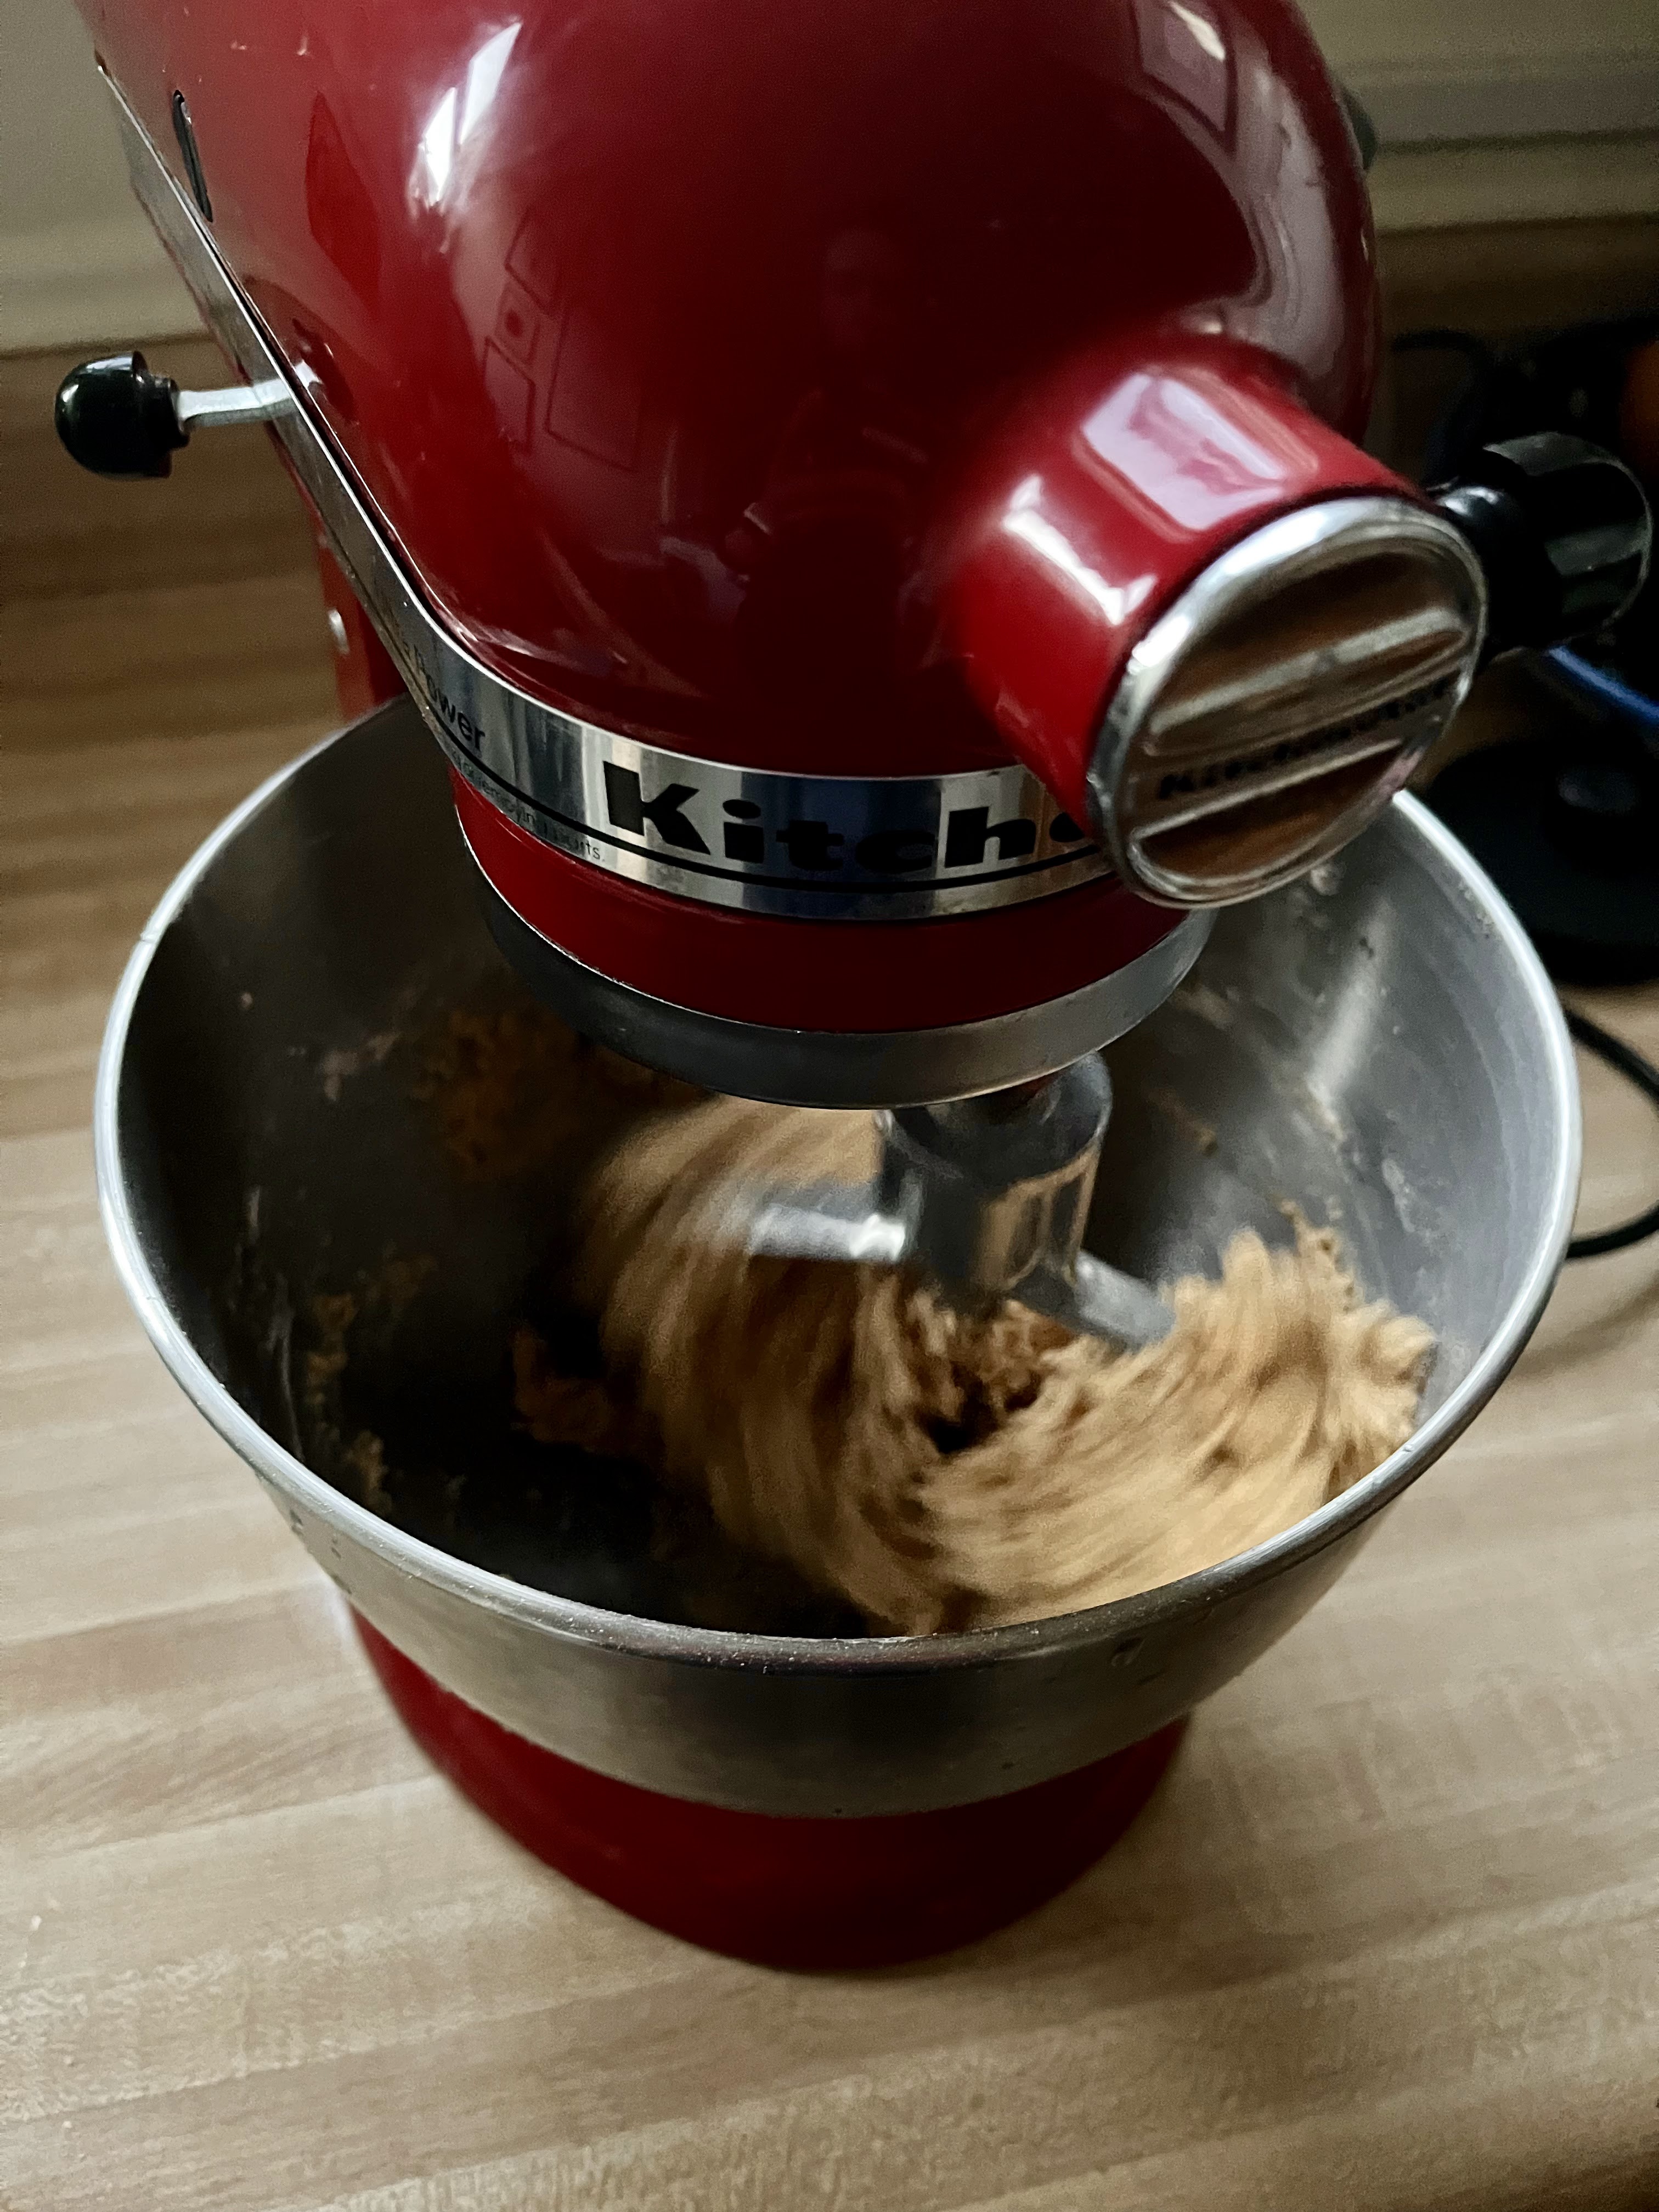
The pastry is crumbly but sturdy, as these are made to be eaten by hand. I added a little almond flour to mine, another departure from tradition, but I like the consistency. This is another one of those pastries that sounds ver ver fancy but is so easy to make, especially in a stand mixer (which I did use, and would recommend if you have one).

Extremely excellent with coffee. I also tried it with ice cream – you know, for SCIENCE – and can confirm that is also an exceptional way to eat it. Especially in lieu of pastry cream.

Let’s see, what else is new… In non baking news, I’ve been trying to make one new savory dinner thing a week, to get myself out of my usual dinner cooking rut. It’s mostly working I think, I have discovered a few new things that are very good, including adding chile crisp to my stir fry sauce and also doing a chile crisp baked tofu.

In recent plant news, Bert the Bird has been going ape and has put out several new leaves! Always an exciting event in my household.

Hopefully everyone is recovering from the time change… go and make yourself something delicious to make up for that lost hour. Happy March!

Gâteau Basque

Lightly sweet, crumbly, shortbready pastry sandwiching a jammy filling. Perfect to eat out of hand with a cup of coffee. Yield: one 8″ pastry; serves several. Whole grain, refined sugar free. Lightly adapted from Dorie Greenspan/NYT Cooking, here.

What you need:

1.75 c whole wheat pastry flour
1/4 c almond flour, packed
3/4 tsp baking powder
1/2 tsp fine sea salt
1/2 c +2 tbsp unsalted butter (1¼ sticks), at room temperature, plus more for greasing the pan
1/4c coconut sugar
scant 1/4c cane sugar
1 large egg
1/2 tsp pure vanilla extract
3/4 cup fig butter/fig preserves
1 egg, beaten with a splash of cold water, for glazing

What you do:

In a medium bowl, whisk together the flour, almond flour, baking powder and salt. Working with a mixer (use a paddle attachment if you have one), beat together the butter and both sugars on medium speed until smooth, about 3 minutes. Add the egg, and beat for another 2 minutes, scraping the bowl as needed. Beat in the vanilla; the mixture should be smooth. Add the flour mixture all at once, then pulse the mixer to begin incorporating it. Mix on low until blended. Turn the dough out onto a work surface, gather into a ball, then divide in half.

Shape each piece into a disk — the dough will be sticky — and put each between sheets of parchment paper. Using a rolling pin, roll each piece into a round just a bit wider than 8″. Keeping the dough sandwiched between the parchment, refrigerate for at least 3 hours (or for up to 3 days).

When you’re ready to bake, center a rack in the oven, and heat to 350 degrees. Generously butter an 8-inch-by-2-inch round cake pan. Remove the dough from the fridge, and leave on the counter until pliable, about 10 minutes. Peel away the paper.

Fit one round into the pan; if it breaks (mine definitely did), just press the pieces together. This isn’t really an exercise in perfection – mine was very uneven. Either fold the extra dough over and onto the base or trim it. Spread about ¾ cup of the jam over the base, leaving a 1-inch border bare and adding more jam, if needed.

Top with the second piece of dough, lightly pressing down around the edges and, if you can, tucking the dough under a bit. Again, it doesn’t have to be perfect; the dough is soft, and as Dorie says, the layers fuse in the oven like magic.

Brush the top with the egg wash, and use the tines of a fork to etch a crosshatch pattern.

Bake the cake for 40 to 45 minutes, or until the top is golden brown. Transfer to a rack, and let rest for 5 minutes, then carefully run a table knife around the edge of the cake. Unmold onto the rack, and then quickly and carefully turn the cake over onto another rack, crosshatch side up, so that it can cool to room temperature. Wrapped well, the cake will keep for 2 days at room temperature.

Moving shenanigans

hello hello!

I’ve been a little off my regular posting schedule lately because of big life things… I’m moving! In a week. Gah.

Long story short, I love my cute little apartment but it is definitely LITTLE and I found a place that is basically this one leveled up – double the size, closer to work, closer to C! Win win. The light will be different (east/north exposure instead of west/south) but the windows are enormous, the ceilings are 10 footers, I’ll have a turret (!) and I’m excited for the change, even though I’ll miss my little jewelbox of a place in japantown.

That being said, this is probably the last baked thing to come out of my current kitchen! This kitchen gets the award for being the best-designed and best laid-out kitchen of any apartment I’ve ever lived in, including the one I’m moving to. Will DEFINITELY miss it. Ah well – kissed it goodbye with this buttermilk lemon tart, which features some amazing-smelling meyer lemons and a slightly crunchy cornmeal-almond crust.

This tart is gluten free and refined sugar free, but does contain dairy – recommend using a dairy free buttermilk alternative if desired; I think that would be a pretty straightforward swap here.

This little guy is excellent for dessert of course, and as always, alongside brunch.

Eugene the haworthia says hello

In other news, took a super fun trip up the coast to Bodega/Occidental/Jenner with a bestie last weekend, ate a ton of crab, hiked and talked for HOURS. Wouldn’t change a thing <3

On that note… fun is over and I should really start packing. Time to play studio packing tetris where I have to pack and live in the same square footage…

Watch this space for further developments! Next time you hear from me, it’ll be from a new kitchen. Cross fingers the move goes smoothly… happy weekending!

current reality.

Meyer Lemon Buttermilk Tart

A Wait are those Cookies original. Gluten free and refined sugar free. Grain free and diary free options noted. Lightly sweet and tangy; perfect for a winter citrus dessert or fun brunch. Yield: 1 9″ tart, serves several.

Note. You’ll be pouring the prepared filling straight into the hot crust so plan accordingly – not one where you want to bake the crust in advance.

For the crust:
1.5 c almond flour
1/4 c unsweetened shredded coconut
1/4 c cornmeal*
heaping 1/4 tsp sea salt
1/2 tsp baking soda
1 tbsp vanilla extract
1/2 tsp almond extract
2 tbsp pure maple syrup
6 tbsp coconut oil, melted

*omit for grain free; use another 1/4 c packed almond flour

In a large bowl, stir together almond flour, shredded coconut, cornmeal, sea salt, and baking soda. Add in vanilla and almond extract, maple, and melted coconut oil, and stir until completely combined. The dough will look crumbly, but you’ll be able to press it together with your fingers.

You’ll want to pour the filling straight into the hot crust, so plan accordingly! Preheat the oven to 350, and lightly grease your tart pan or pie dish of choice with coconut oil. Press the crust into the plate and up the sides with a spoon or your fingers, creating a smooth edge (or not, your call!). Poke the bottom with a fork a few times, and bake for 15 minutes.

For the filling:
1 tbsp flour (gluten free blend or whole wheat)*
2/3 c buttermilk**
1/4 c maple syrup
1/4 c meyer lemon juice (about four lemons for me)
zest of four meyer lemons (or however many you ended up juicing)
1/8 tsp sea salt
2 eggs, beaten
2 tbsp unsalted butter, melted**

*for grain free, a tbsp of tapioca starch would probably work here but I haven’t tried it yet

**I used half plain whole milk yogurt, half whole milk whisked until smooth – you can do straight buttermilk, or make your own with lemon or vinegar added to milk of choice (dairy free if desired for both buttermilk and butter)

Whisk all filling ingredients together until smooth. Pour into the hot crust and bake for 40-45 minutes, until the filling is set and no longer jiggles when you shake the pan a bit. Cover the tart loosely with foil if the edges of the crust start to brown more than preferred (I did this around 30 min). Remove and let cool completely on a wire rack before unmolding it from the tart pan (if you use a pan without a removable bottom, just let cool completely before serving). Serve at room temp or refrigerate before serving – I like it chilled. Leftovers will keep well in the fridge overnight.

Happy 2022!

Hi hello!

Wow it’s been an AGE. I didn’t mean to go this long without posting, but I actually didn’t bake as much as usual over the holidays and I also enjoyed some well deserved time off, so that meant I was outing-and-abouting more than I was thinking about new things to bake. C’est la vie!

I spent a week up in PDX with my parents – such a great week. Workout, eat, make more food, snuggle cat, read, puzzle, rinse, repeat. It snowed while I was up there too, which made for an extra magical holiday.

those tiny paws are wrapped FIRMLY around my heartstrings all the way from pdx
Thea is a champion head-butter

We did do some baking – mom and I made apple/blueberry/date rolls (adapted from this recipe; filling is basically just a compote of those three things cooked down with a bit of cinnamon and butter) plus of course cookies and a really delicious galette with pears and marionberry (rule number one: when in Oregon, eat ALL THE MARIONBERRIES)

Came back, unpacked and repacked and headed up the next day to ski with the fave human for three days over New Years! Hands down best new years and best skiing I’ve had in several years. The conditions were literally amazing; we skied nearly three full days and the snow was incredible for all of it. 10/10 recommend for best way to spend new years!

Then I came back, and a day later officially started a new job! See, told you there was a lot going on. I moved to LEDDY MAYTUM STACY Architects (LMSa) as their marketing manager and I am verrryyy excited to be working for a firm that is mission-driven and so focused on sustainability. Wheee!

So now I’m a week into my job and settling back into a (new) routine after a few weeks off, which means it’s time to get back on the regular baking schedule! This weekend’s crisp was a product of the eternal “what do I have on hand that I can use in order to avoid a trip to the market” game – and I’m not sorry with how it turned out! I love these crisps for how adaptable they are. This one is gluten free, vegan, and only has a few tablespoons of maple in the entire thing, making it very breakfast/snack friendly. I’ve made endless variations of this previously – this one is cranberry and apple with a cinnamon crisp topping, perfect for winter.

I hope you had a wonderful holiday season – happy 2022 from my kitchen to yours!

plants hiding off-camera

Apple, Cranberry & Cinnamon Crisp

Gluten free, dairy free, vegan & refined sugar free. Yield: 1 8-9″ crisp; serves several! A Wait are those Cookies original. Lightly sweet, perfect for wintery breakfast, dessert and anything in between.

For the filling:

4 granny smith apples, peeled and chopped into cubes
1 c fresh cranberries (or frozen)
1 tbsp tapioca starch
zest and juice of one lemon
1 tbsp maple
1/4 c water

For the crisp:

1 cup old-fashioned oats (use certified gluten-free oats for a gluten-free crisp)
½ cup firmly packed almond flour
½ cup chopped walnuts
1/4 c unsweetened shredded coconut
1/4 c flaked unsweetened coconut (optional, good if you have it!)
2 tbsp maple syrup
heaping ¼ teaspoon fine sea salt
1.5 tsp cinnamon
2 tsp vanilla extract
1/3 c coconut oil, melted

Preheat the oven to 350.
Toss apples and cranberries into your baking dish of choice (my dish is 8×8, 2 qt capacity; 9″ square or 9″ deep pie dish would also be fine). In a liquid measuring cup, whisk together the tapioca starch, maple, water until combined. Pour the mixture over the fruit and toss to combine. Bake for 20 minutes.

While the filling is baking, make the crisp. In a mixing bowl, stir together the oats, almond flour, chopped walnuts, coconut, salt and cinnamon. Mix in the maple, vanilla, and coconut oil, stirring until everything is mixed thoroughly.

Once the filling has baked for 20 minutes, stir it and and redistribute evenly in the dish. Plop spoonfuls of the crisp topping evenly over the filling – no need to pack it down. Return the dish to the oven and bake for 25 to 30 more minutes, until the filling is bubbling around the edges and the top is golden.

Let the crisp rest for 5 to 10 minutes before serving. Serve with vanilla ice cream, obviously! Keep leftovers, covered, in the fridge for 2-3 days (yeah right – would take some major feat to make it last more than overnight..)

All things cranberry

Happy December!

What, ALREADY? That happened fast.

At least it’s finally gotten cooler/cold in the city – we had some weird unseasonably warm weather a few days ago but then, BAM, cold. I’m definitely okay with it, I’d rather have it feel like holiday weather.

Happy to report the bay is as cold as ever. I’m still swimming in my sleeveless wetsuit but miiiight be switching back to sleeves here pretty soon; the temperature after-drop once I get out is no joke. Still love it of course; I saw three seals the other day! One popped up right near me, so cute.

Since posting last, Thanksgiving happened – I made two pies (of course) and cranberry sauce. A real winner this year – I added fresh ginger and dates. Luckily, I have a thing of it frozen, so it’ll probably show up in a dessert sometime pretty soon – I’ll share the recipe then.

I have a very seasonal galette for you today – apple, cranberry & fig. I wonder how many galettes I’ve actually made over the course of my life? A lot, that’s for sure. I love anything cranberry (the more tart, the better) so this is a definite win for me. It’s also insanely easy and requires very little effort, BUT is super tasty and pretty. Refined sugar free, whole grain and easily vegan (just change out the butter); it makes a great dessert or late brunch / breakfast snack with coffee.

Happy holiday month! I hope everyone is starting to enjoy the season.

happy cactus

Cranberry, Apple & Fig Galette

Refined sugar free and whole grain; easily vegan with a swap of vegan butter (brush with non-dairy milk instead of half and half). Yield: 1 galette, serves 4-6. A Wait are those Cookies original.

for the crust:
1 c whole wheat flour
1/2 c cornmeal
1/2 tsp sea salt
1 tsp cinnamon
4oz/1 stick of unsalted butter, cubed
2-3 tbsp ice water

In a food processor, pulse together whole wheat flour, cornmeal, sea salt, and cinnamon. Add in cubed butter and pulse until it resembled coarse sand. Add the ice water 1 tbsp at a time until the dough starts to come together. Turn it out onto a board and knead it into a ball. I like to roll it immediately since it’s most pliable – typically I haven’t had trouble with this dough sticking. I roll it between two sheets of parchment paper and use the bottom one to bake the galette on; makes an easy transferral method between cookie sheet & cooling rack. If you’re not rolling immediately, stuck it in the fridge on a plate. Can be made ahead the night before if need be – let it sit on the counter for a bit before rolling it out if it’s been refrigerated.

for the fruit:

apples, peeled & chopped (I used two granny smith)
~1.5 c fresh cranberries (I used half a bag straight from the freezer)
3 tbsp fig jam (I have some fruit sweetened preserves that I like; but anything will work)
1 tbsp half and half or cream, for brushing on the dough
coconut sugar for sprinkling

Preheat the oven to 425. Roll out the dough between two pieces of parchment paper until it’s about 1/4″ thick. Spread the jam in a thin layer over the middle of the dough. Pile the fruit in the center, leaving a border of about 3″. Fold up the sides of the dough over the fruit. Brush the dough with an half and half or cream, and sprinkle with a little coconut sugar. Dot fruit with butter if you like, though it’s not strictly necessary. Pop in the oven and bake for 35-40 minutes, until the crust is lightly browned. Remove to a cooling rack and let cool completely before slicing and serving. Store leftovers in the fridge overnight – it’s great for breakfast :)

Cobbler Two Ways

Hi hello!

Happy end of weekend but almost holiday week! I can’t believe it’s Thanksgiving already, that completely snuck up on me.

I thiiiink I know what I’m baking, maybe? Probably. At least I have a very good idea…

As for normal baking tendencies, I’ve now made us this cobbler two weeks in a row with different fruit and slightly different biscuits – it’s a winner! I’ll include notes for both versions in the recipe itself. Very forgiving, very delicious.

This weekend’s was cranberry + blueberry, plus I added dark chocolate to the biscuit topping… highly recommend. I love anything cranberry so was very excited to find them on sale at the market the other day; I may or may not have bought a couple extra bags to stash in the freezer. To be fair, I’m on cranberry sauce duty for turkey day so at least two will be used for that, ha.

As always, per usual, this was excellent with ice cream and also excellent for breakfast. I dropped a shower of pomegranate seeds over the top which not only was colorful and pretty, but also added a nice crunchy contrast.

We’ve had some beautiful sunsets lately in the city! Inevitably they look better to the naked eye than through a camera lens but… I try. Besides, I’m blessed with a very unobstructed western view, so I try to take advantage and admire them as much as I can.

Somehow the day got away from me today and I’m HUNGRY… time for dinner! I think it’s going to be veggie nachos… that’s a very Sunday dinner for me. I have perfect little 1/4 sheet pans that make a single serving of nachos exceptionally – I only have these ridiculous little pans because my oven in grad school was basically the size of an Easy Bake oven, and I’ve hung onto them ever since. Good thing too, since they’ve gotten a second life as nacho pans – what better afterlife could you ask for?

In other news, finally finished this guy! 16×20 on stretched canvas; so pleased with how it came out. A little bit of my home-away is on my walls now!

Happy Thanksgiving week!

Cranberry & Blueberry (or apple!) Cobbler with Cornmeal & Dark Chocolate Biscuits

Two variations are shown here: one is cran-apple and with plain biscuits (no chocolate; added cinnamon on top) and the other is cran-blueberry with dark chocolate biscuits. Both are delicious! Whole grain, refined sugar free. Adapted from Food52, here. Yield: 9″ or 10″ cobbler; serves 5-6.

for the cobbler:
1 cup whole wheat pastry flour
1 cup fine or medium cornmeal
2 tbsp coconut sugar
1 tbsp baking powder
1/2 tsp salt
1/2 c cold unsalted butter, cut into ½-inch pieces
1/2 c buttermilk*
2 tsp vanilla extract
Optional: 1/4 c dark chocolate, finely chopped

*I was out of buttermilk both times I made this (it’s not something I usually have on hand) – so I subbed in 1/4 c plain whole-milk yogurt whisked with 1/4c milk, adding milk until it reached the consistency of buttermilk. Any of the standard buttermilk subs will work well here, if you don’t have it

for the fruit:
2-3 c fresh (or frozen) cranberries
4 (about 1½ pounds) sweet-crisp apples, such as Fuji or Gala, cut into ¾-inch chunks OR 1c blueberries (fresh or frozen)**
zest and juice from one lemon
1 tbsp tapioca starch
1 tbsp coconut sugar + extra for sprinkling
Pinch kosher salt
Cinnamon, for topping (optional)

**I’ve made both the cran/blueberry and cran/apple version; they’re both delicious

Preheat the oven to 400ºF. In a medium bowl, whisk together the flour, cornmeal, coconut sugar, baking powder, and salt. Use your fingers to rub the butter into the flour mix until it resembles a coarse meal with butter pieces no larger than peas.
Stir in the buttermilk/buttermilk sub and vanilla until just combined, followed by chocolate (if using). Place in the refrigerator while you make the filling.

In a baking dish of choice (deep 9″ pie dish, 2qt baking dish, 9 or 10″ cast iron skillet, etc) , toss together the cranberries, apples or blueberries, lemon zest and juice, tapioca starch, coconut sugar, and salt. Drop ~6 large dollops of batter over the fruit, leaving some areas of fruit exposed. Sprinkle with a bit more coconut sugar and cinnamon, if desired. Place the pan on a sheet pan to catch any drips. Bake the cobbler until the fruit is bubbly and the biscuits are golden brown, 45-50 min (tent with foil after 35 minutes to prevent the biscuits from getting too brown.) Let cool slightly (or completely) before serving. Keeps well overnight in the fridge; leftovers make great breakfast, either cold or reheated.

Crumb cake and more pluots

Hi friends, happy weekend! I wish it was the beginning of it and not the end, but at least there’s a long weekend upcoming.

I have a cake for you today! Cakes feel few and far between around here, but I stumbled on this recipe and had to try it. I had stashed some ricotta in the freezer awhile back (not the best for its texture if you’re going to eat it plain, but if you’re baking with it, it’s fair game!) and wanted to pair it with the stone fruit that is all I want these days.

This cake is a pleasantly dense, nutty little thing – I think of it as a breakfast or brunch cake; something that is perfect alongside coffee. It does well served warm out of the oven, or chilled for a couple of hours in the fridge (my favorite, since the chilled cake texture is amazing).

The whole thing is very lightly sweet – there are only two tablespoons of maple in the entire thing, so the almondy dough and fruit flavors can really shine. It’s whole grain and infinitely adaptable – don’t have pluots? No problem – sub in figs, peaches, nectarines, plums, or any other fruit that catches your fancy. I think any berries would be excellent here, and I’m dying to try it with fresh figs – we’re almost into peak fig season here on the west coast!

We had it for brunch this morning – post workout and pre hiking (me) and cycling (him). Exercise nerds? Yeah, we are.

I got a new wetsuit and I’m SO excited about it – I was swimming without one the last week or so but I really love having one for my morning swims – it’s just so much more pleasant in the bay with one on, ha! This one is sleeveless, which is clutch. Not having anything over my shoulders is amazing.

my favorite swimming conditions – calm and foggy

Not a whole ton going on in other news – just cruising along into September (birthday month!) and crossing my fingers for no excessively hot weather in SF because we just know how much I looooove that, ha NOT.

I hope everyone out there had a good weekend! Sending good thoughts from my kitchen for good weeks all around.

Tuscan Ricotta Crumb Cake with Pluots and Blackberries

A pleasantly dense, lightly sweet breakfast cake – or dessert – but really excellent with coffee. Yield: one 7″ cake, serves several with small wedges. Refined sugar free and whole grain; easily gluten free with a cup for cup flour blend. Recipe gratefully adapted from Jules’ Kitchen, here!

For the dough:
1 c whole wheat pastry flour
1/4 c shredded coconut
2 oz almond flour
1/2 tbsp baking powder
1/4 tsp sea salt
2.5 tbsp unsalted butter, cold & diced into small cubes
1 tbsp pure maple syrup
1/2 tbsp vanilla extract
1/4 tsp almond extract
1 egg, beaten

For the filling:
1 c whole milk ricotta (drained if especially runny)
zest of one lemon
1 tbsp maple
1 tsp vanilla extract
heaping handful of fresh blackberries
4 small pluots

Preheat the oven to 350, and grease a 7” cake pan with butter (alternatively, a 6 or 8” would also work – just adjust the bake time up or down accordingly) Line the greased pan with parchment paper and set aside.

In a large bowl, whisk together pastry flour, coconut, almond flour, baking powder, and sea salt. Work the diced butter into the dry ingredients with your fingers or a pastry cutter until it resembles coarse sand. Add maple, vanilla, and almond, followed by the beaten egg. Use your fingers or a fork to work the egg into the dough – it doesn’t need to come together into a ball, it just needs to stick together when you press it with your fingers. Press half the dough into the cake pan to form the bottom layer.

In a large bowl, whisk together ricotta, lemon zest, vanilla, and maple. Spread the filling over the bottom crust, and top with blackberries and sliced pluots. Sprinkle the rest of the crumble topping over the fruit and ricotta.

Bake for 35-40 minutes – the topping should be lightly browned. Remove and let cool in the pan for at least ten minutes, then lift it out onto a cooling rack to cool completely. Slice and serve warm, or chill in the fridge for a few hours before serving. Store leftovers in the fridge for 1-2 days.

Camp & Cake

HELLO!

I am back (briefly) from my home away from home in the mountains – as always, camp was a balm for the soul that I didn’t know how much I needed until I felt the afterglow.

There’s something intangible and so special about that place and those people – my camp family will always see me and love me for who I am.

Words aren’t even really sufficient – it’s more of a feeling and less of something that I can properly explain. Even as a director where I’m actually technically ‘working’ while I’m there for the session (albeit fun work), I still come home feeling deeply rested and generally better about the other aspects of my life. Camp magic is a real thing. Something to do with laughing until I cry, sleeping under the stars, smelling campfire in my sweatshirts, and jumping in the lake with a cadre of women who have either watched me grow up or grown up alongside me.

This was year 18 at this magical place – almost at the two decade mark and going strong. I already can’t wait until next year! Even better, we passed our ACA reaccreditation with flying colors, which just clinches an all-around great camp year. Since words don’t really do it justice, I’m leaving a bunch of photos here instead.

the view from my bed…. tents are overrated

I am only back for about a week and a half before C and I leave again – this time to the east coast for some family reunion beach time, hooray! The beach is calling my name. Time for a true vacation.

In the meantime, I baked a thing! Had to squeeze something in so you didn’t wonder what happened to me – this one was thrown together from what I had on hand, since I’m avoiding buying anything else before I leave again.

Enter: the black sesame blueberry cake! Amazingly grey colored and fantastic tasting. It’s super simple to throw together – if you don’t have black sesame, no worries; I’m including a sub in the recipe notes. Great with coffee (what isn’t) or for dessert. It’s lightly sweet and nutty; highly adaptable for any summer fruit you have around. I grabbed a bag of blueberries I’d frozen before I left for camp, which worked perfectly – but anything that resembles a stone fruit or berry will do nicely.

Happy baking! Get after that summer fruit while it’s freshest. Have a great weekend!

Black Sesame and Blueberry Cake

Adapted from Food52, here! I tweaked it a bit for personal preferences and am very happy with the result. I may try it in a slightly smaller pan for a thicker cake, next time I make it. Gluten, dairy and refined sugar free. Yield: 1 8 or 9″ cake.

1 c black sesame seeds*
1 1/2 c almond flour
1/4 c oat flour
1/4 c unsweetened shredded coconut
1 tsp baking powder
2 large eggs, at room temperature
1/3 c pure maple syrup
1/4 c unrefined coconut oil, melted
1 tablespoon vanilla extract
1/2 teaspoon fine sea salt
1 c blueberries, fresh or frozen

*if you don’t have black sesame or don’t want to use them, omit them and increase the almond flour by 1c

Preheat the oven to 350, and line a cake pan (8 or 9″) with parchment paper. A springform would also work well for this I think, though I haven’t tried it.

In a food processor, grind the sesame seeds until fine (just don’t let them go until they start turning into tahini). Once ground, add them to a large bowl. Add in almond and oat flour, coconut, baking powder, and salt and stir to combine. In a separate bowl, whisk together eggs, maple, coconut oil, and vanilla. Stir the wet into the dry ingredients, until the batter is just combined. Scrape it into the prepared pan, smooth out and top with blueberries. Bake for 30-35 minutes, until a tester comes out clean (if your fruit is super juicy, it might go for a few more minutes). Remove and let cool on a wire rack for at least 10 minutes before removing from the pan. Slice and serve warm or cool. Keeps for several days in the fridge.

I just want all the rhubarb

I found more rhubarb! Muahaa.

It’s been surprisingly difficult for me to source this year but maybe that’s just my local market. Either way, I absolutely love rhubarb so I’m happy to find it. It pairs so well with apples and raspberries… and obviously I use any excuse to put ginger in things.

This is also one of those that I love cold – refrigerating it makes the crisp topping chewy and SO good. Also highly recommend is a large scoop of vanilla over everything.

The poppies are so pretty right now! They’re all over the city.

Actually, ALL the flowers are so pretty right now:

Low key weekend over here for me, just mostly chilling and being mellow.

Happy weekending!

Rhubarb, Apple and Raspberry Crisp with Ginger

Gluten free, refined sugar free, dairy free and vegan. Springy and fresh! A Wait are Those Cookies original. Yield: 1 8 or 9″ crisp; serves several.

1 granny smith apples, chopped into cubes
3 stalks of fresh rhubarb
2 c frozen/fresh raspberries
juice of two limes
1 tbsp tapioca starch
1 tbsp maple
1/4 c water

1 cup old-fashioned oats (use certified gluten-free oats for a gluten-free crisp)
½ cup firmly packed almond flour
½ cup chopped walnuts
1/4 c unsweetened shredded coconut
2 tbsp maple syrup
heaping ¼ teaspoon fine sea salt
2 tsp vanilla extract
1/3 c coconut oil, melted
1/3 c dried ginger, chopped (mine isn’t crystalized; if yours is, thats fine!)

Preheat the oven to 350.
Toss apple, rhubarb and raspberries into your baking dish of choice (my dish is 8×8, 2 qt capacity; 9″ square or 9″ deep pie dish would also be fine). In a liquid measuring cup, whisk together the lime juice, tapioca starch, maple, water until combined. Pour the mixture over the fruit and toss to combine. Bake for 20 minutes.

While the filling is baking, make the crisp. In a mixing bowl, stir together the oats, almond flour, chopped walnuts, shredded coconut, and salt. Mix in the maple, vanilla, and coconut oil, followed by the chopped ginger. Stir until everything is mixed thoroughly.

Once the filling has baked for 20 minutes, stir it and and redistribute evenly in the dish. Plop spoonfuls of the crisp topping evenly over the filling – no need to pack it down. Return the dish to the oven and bake for 25 to 30 more minutes, until the filling is bubbling around the edges and the top is golden.

Let the crisp rest for 5 to 10 minutes before serving. Serve with vanilla ice cream, obviously! Keep leftovers, covered, in the fridge for 2-3 days (yeah right – would take some major feat to make it last more than overnight..)

Spring = Rhubarb

The first of the rhubarb!

I had to work a little to track some down – my usual market didn’t have any, but luckily I found some when I was out and about in a different neighborhood. Which also meant that I was that person walking down the street with a bunch of rhubarb clutched in my fist – but I am definitely okay being that person.

This cake is another variation on the grapefruit one I posted a few weeks ago – it’s a perfect snack or breakfast cake, as it isn’t all that sweet. It’s lightly spicy from the five spice, and the top gets jammy from the softened rhubarb + the actual jam involved. I use a jam that is fruit-sweetened only, which keeps this guy refined sugar free, but use whatever you have!

Almost wishing this had come out with the rhubarb slightly less soft – I may play around with it a little and see if I can make that happen.

Another insanely busy week here – I would like to stop working on the weekends please (insert eyeroll)…. this week should be less crazy though so I’m hoping for some downtime. At least I was able to swim most days this week; it is definitely preserving my sanity. Took today off since I know the humidity is supposed to drop next week which will trigger some autoimmune stuff – which means I’ll also be spending most days in the water, if at all possible.

Today was also a day of a food-photography mishap… I definitely broke the cake when I moved it from cooling rack to plate. Whatever, nothing some well-placed coconut won’t hide, and we’re going to eat it anyway so who cares. Not everything needs to be perfect.

I hope it is springy and nice where you are! I’m still hoping for some spring rains (CA needs it, but also I just love it.) Happy weekend :)

Rhubarb & Five Spice Upside Down Cake

Gluten free, dairy free & refined sugar free. Lightly sweet, slightly spicy, and perfect for spring. A Wait are those Cookies original. Yield: 1 8″ cake, serves several.

1.5 c almond flour
1/3 c cornmeal
3/4 tsp baking powder
1/4 tsp baking soda
heaping 1/4 tsp sea salt
1 tsp five spice
2 eggs, lightly beaten
1/4 c maple syrup
1/3 c coconut oil, melted
1.5 tsp vanilla extract
1 tsp almond extract
2 stalks of rhubarb, thinly sliced
2 tbsp apricot jam (mine is fruit sweetened only)
2 tsp coconut sugar

Preheat oven to 325. Lightly grease an 8″ cake pan with coconut oil and line the bottom with parchment paper – I flip it over, trace the outline & then cut, to get a perfectly sized circle. Spread the apricot jam evenly over the parchment, then drop the rhubarb slices into the bottom of the prepared pan. Sprinkle with coconut sugar.

In a large bowl, whisk together almond flour, cornmeal, baking powder, baking soda, sea salt & five spice. Add in eggs, honey, coconut oil, vanilla & almond extract, and stir until all ingredients are just incorporated. Drop the batter into the prepared pan – it’s thick! That’s normal – just even out the top with a spatula. Bake for 35-38 minutes, until the top of the cake is lightly browned, firm, and a tester in the center comes out clean. You can cover the cake with foil during the last 10 minutes of baking if the cake is browning too fast – though mine was done at 35 minutes, and I didn’t need the foil trick. Remove and let cool for a few minutes in the pan before flipping it out onto a cooling rack. Let cool completely before slicing and serving. Stores well overnight in the fridge, and is arguably even better for breakfast.

Citrus Saturday

More citrus!

Couldn’t resist; I haven’t made a citrus curd in a bit, and I love using blood oranges while I can get them in season. Plus, C’s meyer lemon tree has been producing again so I figured I’d take advantage.

This is one of those desserts that looks and sounds fancy and intimidating, but it’s not! Break it down into its component parts and it’s pretty straightforward. It’s also grain & gluten free, plus of course refined sugar free – and actually, there is only 1/4c of maple in the whole thing! It’s perfect for those of us who like our desserts on the tart side of sweet, ha. The crust is actually naturally sweet from the almond flour though anyway, so it really balances out the citrus curd.

I took a field trip out to visit Goldie today – Karl wouldn’t come out to play but Goldie and I played hide and seek for awhile while I hiked the bluffs to batteries trail. All told, it was 7mi from the Lincoln steps > coastal trail > Baker Beach > bluffs to batteries > bay area ridge trail (presidio) > home, about two hours and a beautiful day.

hi Goldie!

Swam most days than not this week (see photo evidence), found some really pretty blooming things & watched a few gorgeous sunsets (yay western exposure from my apartment! amazing at all times except when it’s hot)

YES I wear a wetsuit, the water is currently 52 degrees so, yes.

Also, of course – I made a tart! Citrusy and nutty and delicious. Highly recommend, while we’re still in blood orange season (at least out here on the West coast/best coast.)

Happy weekending! Go get outside :)

Blood Orange & Meyer Lemon Tart on a Hazelnut Almond Crust

Gluten & grain free; refined sugar free. I included a couple of options for the order of making this, so read through the whole thing before you get started :) A Wait are those Cookies original. Yield: 1 9″ tart; serves several.

I stabilized the curd for this tart with gelatin, as I was after the texture of a panna cotta more than a softer curd tart for slicing and serving. I’m including an option for a baked tart, if you’d prefer to avoid gelatin or are out.

For tart assembly:

~1c of blood orange & meyer lemon curd, recipe below (I use all of what the recipe makes for a 9″ tart)
1 tart shell, recipe below
1/4 c cold meyer lemon juice (I used two lemons)
1 packet powdered gelatin
1 blood orange, sliced

I suggest making the crust first and letting it cool. Once it’s cooling, start the curd – then just adding the softened gelatin into the already warm curd once the curd is finished cooking.

In a small bowl, sprinkle 1 packet of gelatin over 1/4c cold meyer lemon juice. Stir until incorporated and let sit for a minute. Once softened, stir into the warm curd, whisking until the gelatin is dissolved completely (give it 1-2 minutes of continuous whisking). Strain the curd through a fine metal strainer into a bowl to cool a bit, before pouring the curd into the baked crust shell and transferring to the fridge to cool completely – preferably overnight but at least 4 hours. Top with sliced blood oranges, etc. Store the tart in the fridge until serving. Leftovers keep well overnight, refrigerated.

If you prefer not to use gelatin, you can also set the curd by pouring it into the pre-baked tart shell, and baking the whole thing at 350 for 8-10 minutes, then letting cool completely and refrigerating for at least 4 hours before serving. I prefer the gelatin method with this curd since it will set completely – the baked version might have more wobble / lose some structural integrity when sliced, but it’s a pretty solid second option & is definitely still delicious.

Blood Orange & Meyer Lemon Curd:

3 whole eggs
2 egg yolks
1/2 c blood orange + meyer lemon juice (I used 2 blood oranges + 1 large lemon)
zest of 2 blood oranges
zest of 1 meyer lemon
pinch of sea salt
2 tbsp maple syrup
4 tbsp butter, unsalted
1 tsp vanilla

I use a double boiler for this lemon curd, which I highly recommend! You don’t have to, but in my experience it makes for a better cooking process. Heat water in the bottom of the double boiler until it’s at a high simmer. In the top of the double boiler, whisk together eggs, egg yolks, citrus zest and juice, sea salt, and maple syrup. Add in the butter one tbsp at a time, whisking continuously, not adding the next tbsp until the first is completely melted. Whisk in vanilla. Cook, stirring constantly, until the curd thickens and will coat the back of a spoon (or your whisk leaves tracks) – usually around 5 to 8 minutes. It’s a noticeable change when it happens, so just watch the cooking magic! Remove from heat, and whisk in gelatin (see notes above); strain through a metal strainer to remove zest and any bits of cooked egg and let cool until room temp before pouring into the tart shell.

For the crust:

1.5 c almond flour
1/2 c hazelnut flour/meal
1/3 c unsweetened shredded coconut
heaping 1/4 tsp sea salt
1/2 tsp baking soda
2 tsp vanilla extract
1/2 tsp almond extract
2 tbsp pure maple syrup
6 tbsp coconut oil, melted

In a large bowl, stir together almond & hazelnut flours, shredded coconut, sea salt, and baking soda. Add in vanilla, almond extract, maple, and melted coconut oil, and stir until completely combined. The dough will look crumbly, but you’ll be able to press it together with your fingers.

Preheat the oven to 350, and lightly grease a 9″ tart pan (w/ removable bottom) with coconut oil. Press the crust into the plate and up the sides with a spoon or your fingers, creating a smooth edge (or not, your call!). Poke the bottom with a fork a few times, and bake for 15 minutes. Remove and let cool.