Happy 2022!

Hi hello!

Wow it’s been an AGE. I didn’t mean to go this long without posting, but I actually didn’t bake as much as usual over the holidays and I also enjoyed some well deserved time off, so that meant I was outing-and-abouting more than I was thinking about new things to bake. C’est la vie!

I spent a week up in PDX with my parents – such a great week. Workout, eat, make more food, snuggle cat, read, puzzle, rinse, repeat. It snowed while I was up there too, which made for an extra magical holiday.

those tiny paws are wrapped FIRMLY around my heartstrings all the way from pdx
Thea is a champion head-butter

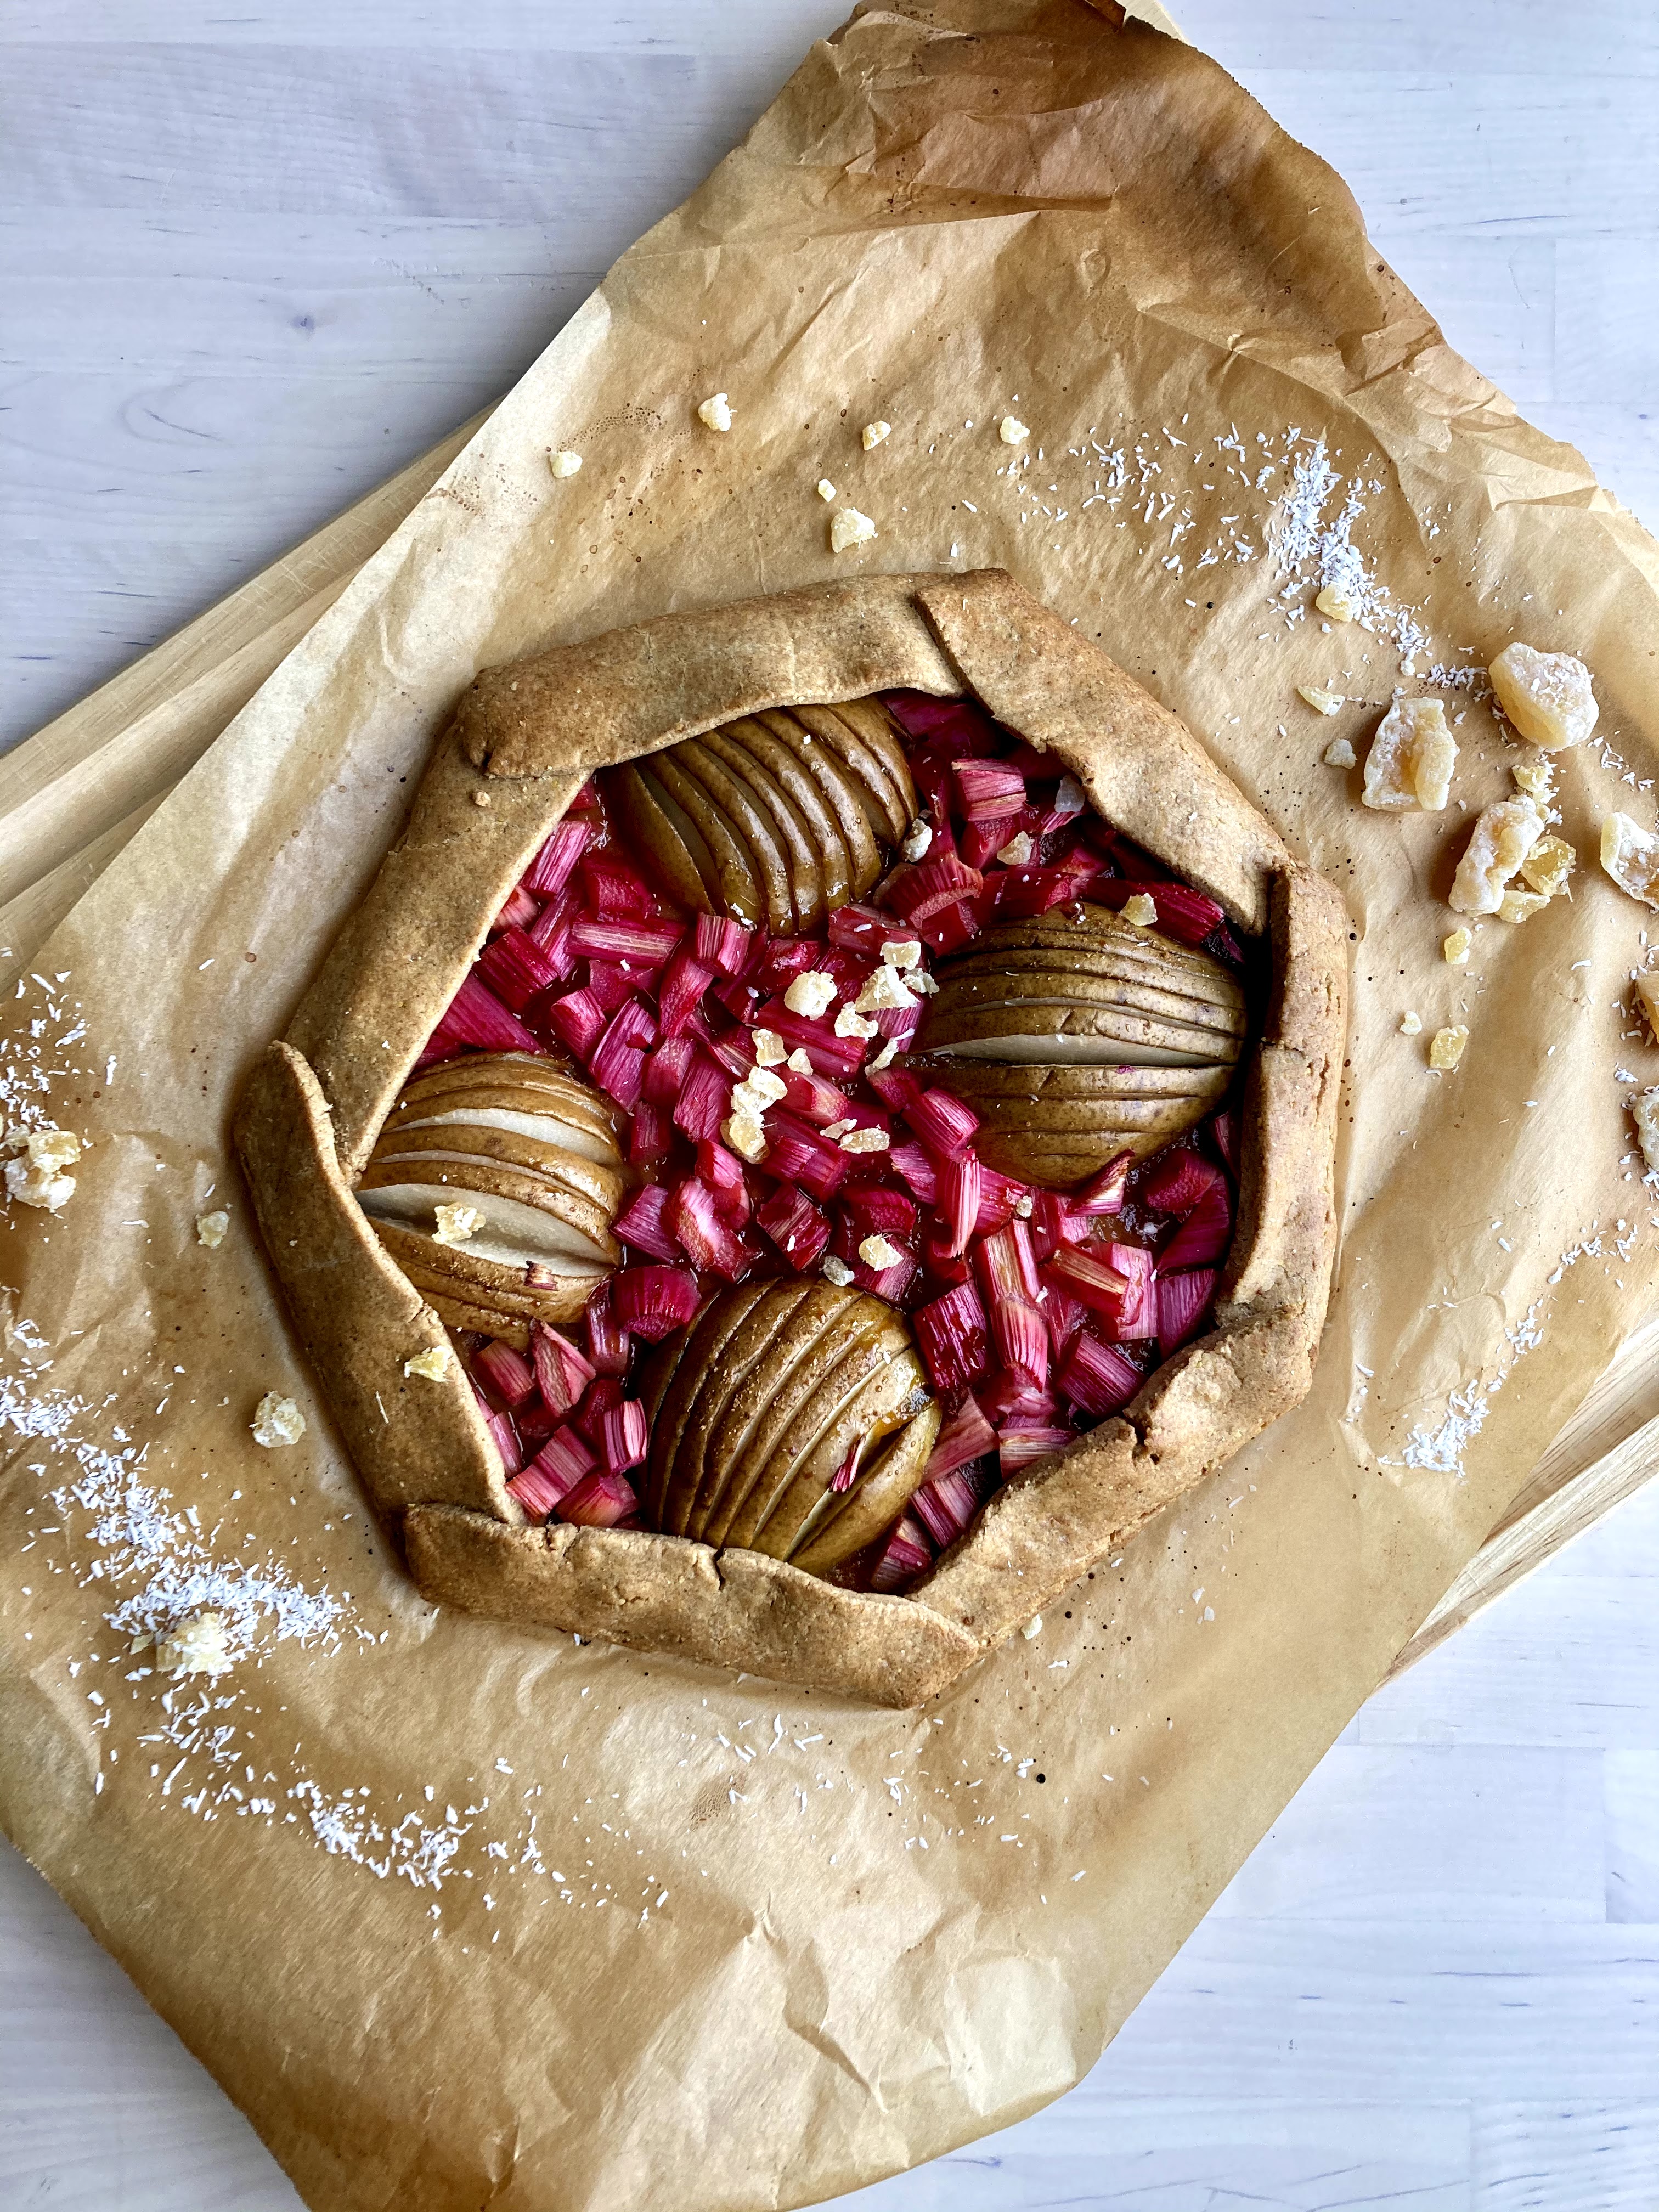
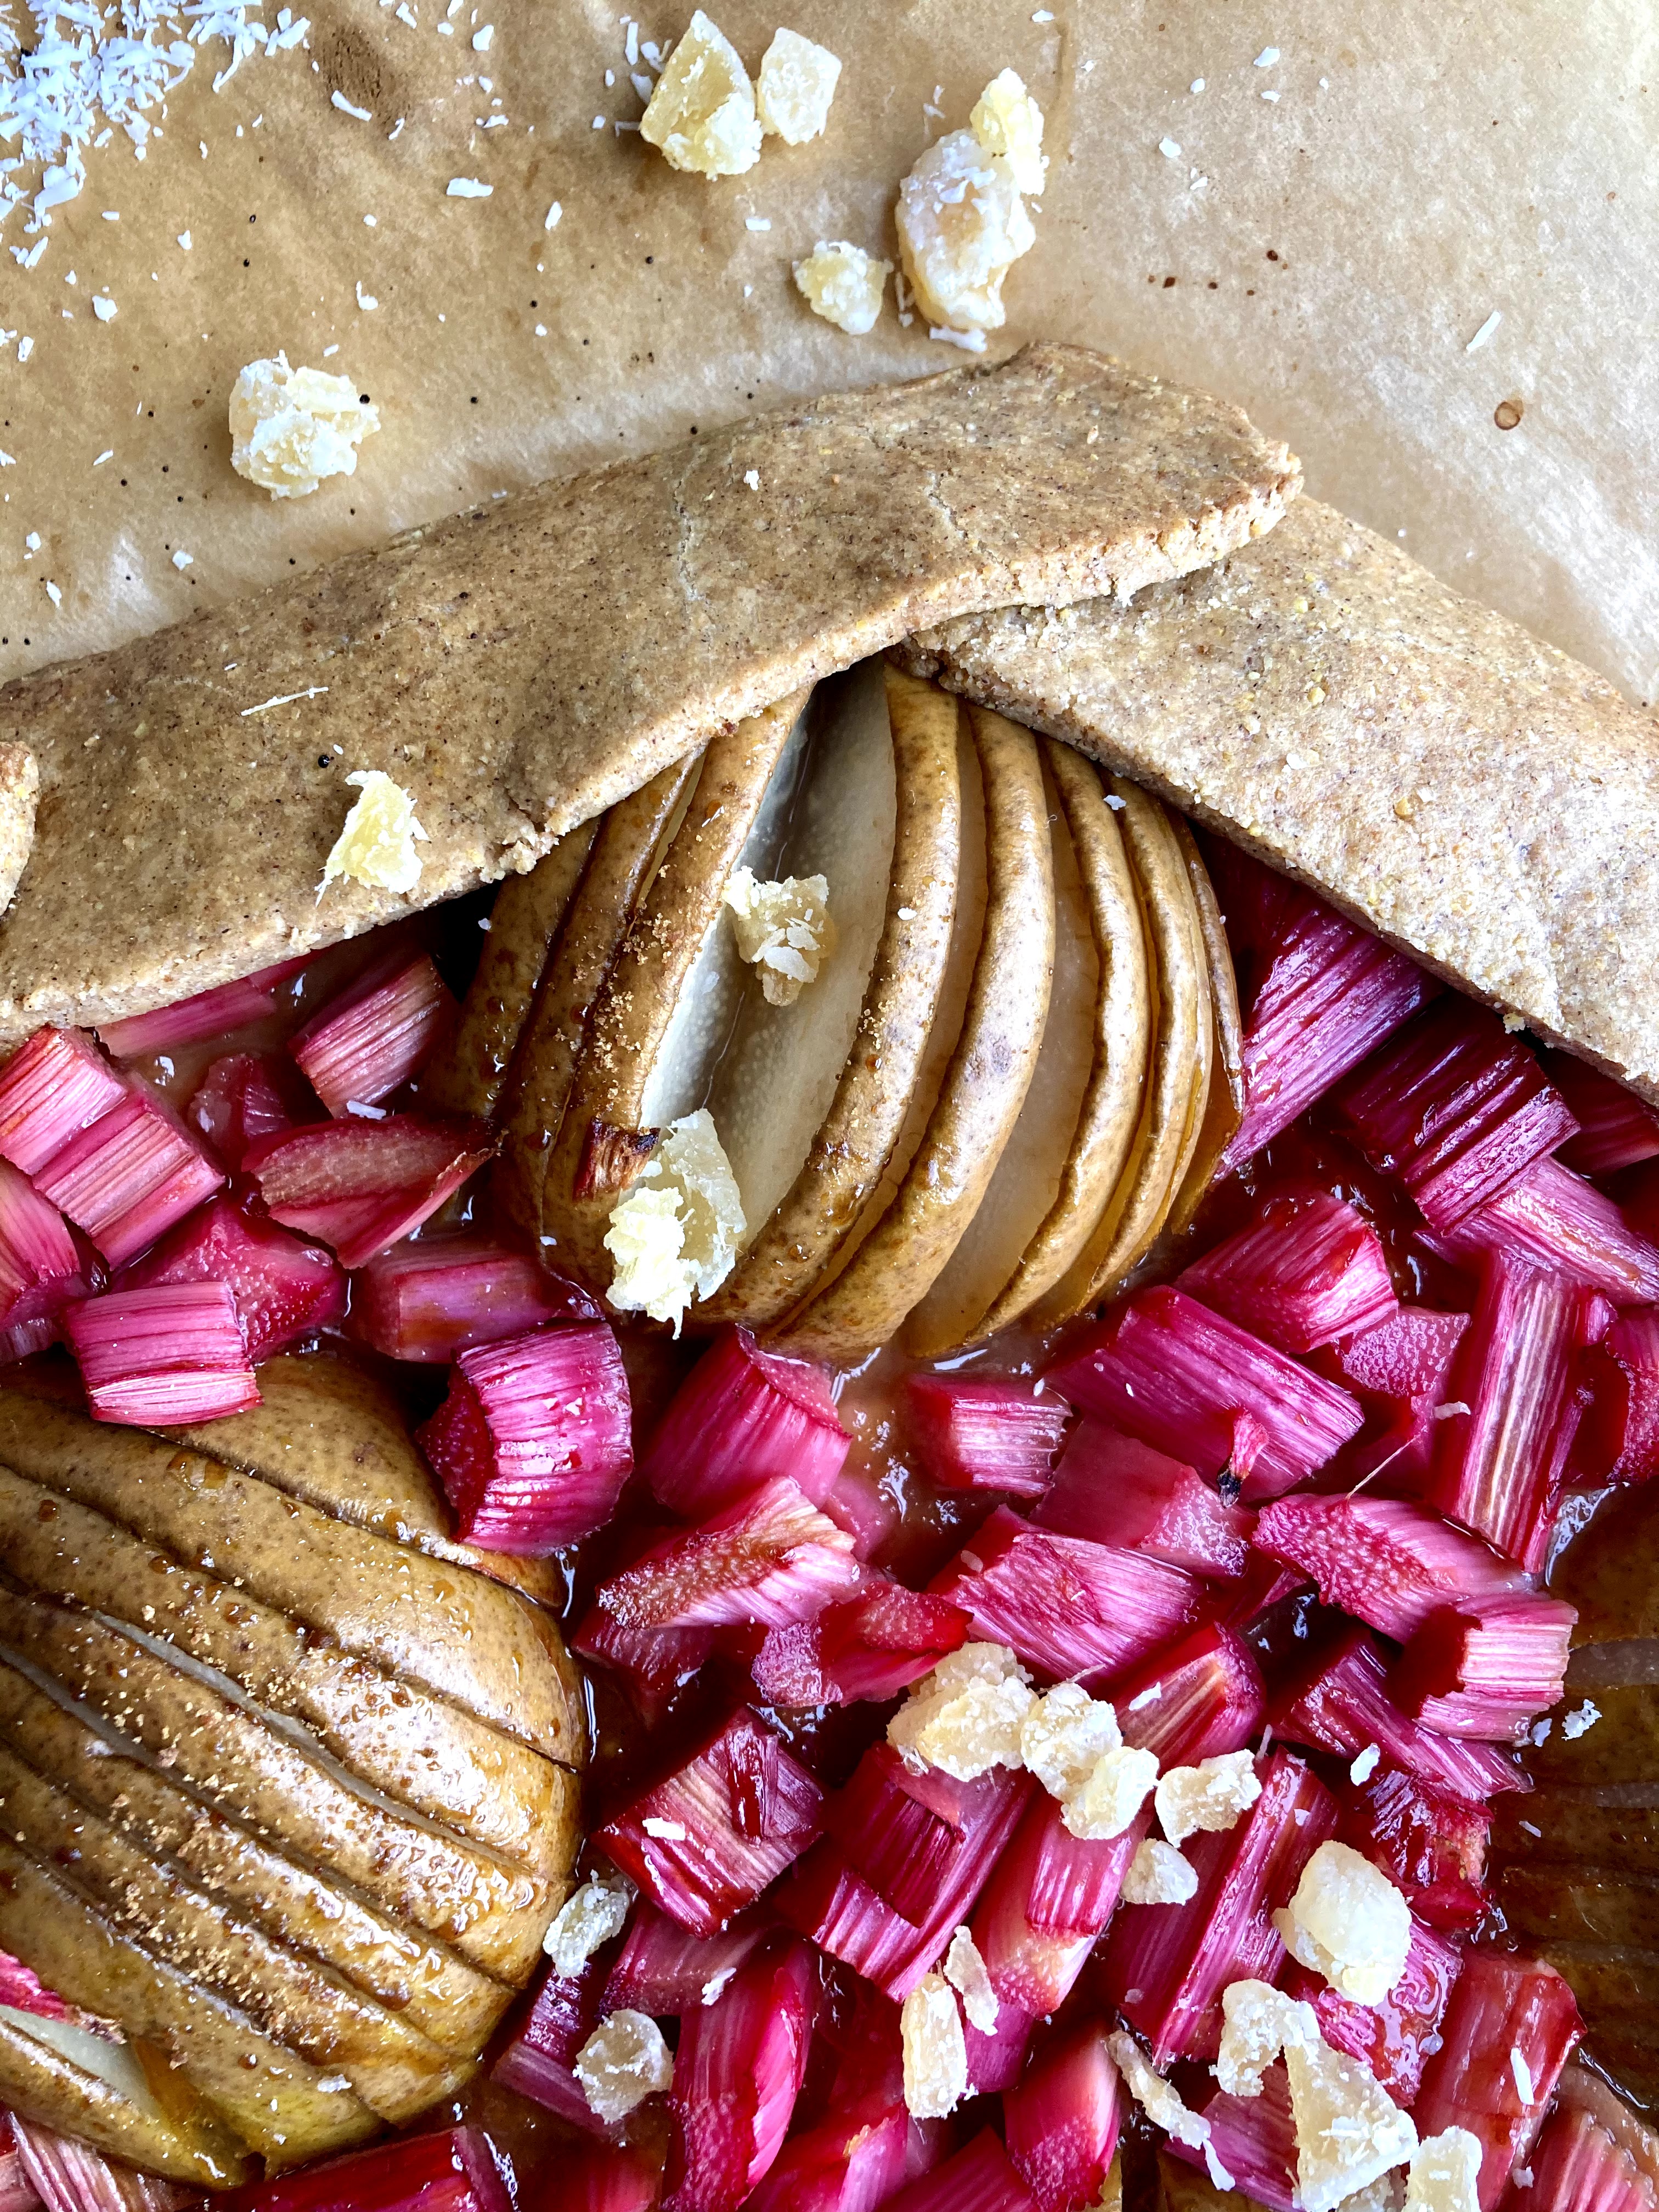
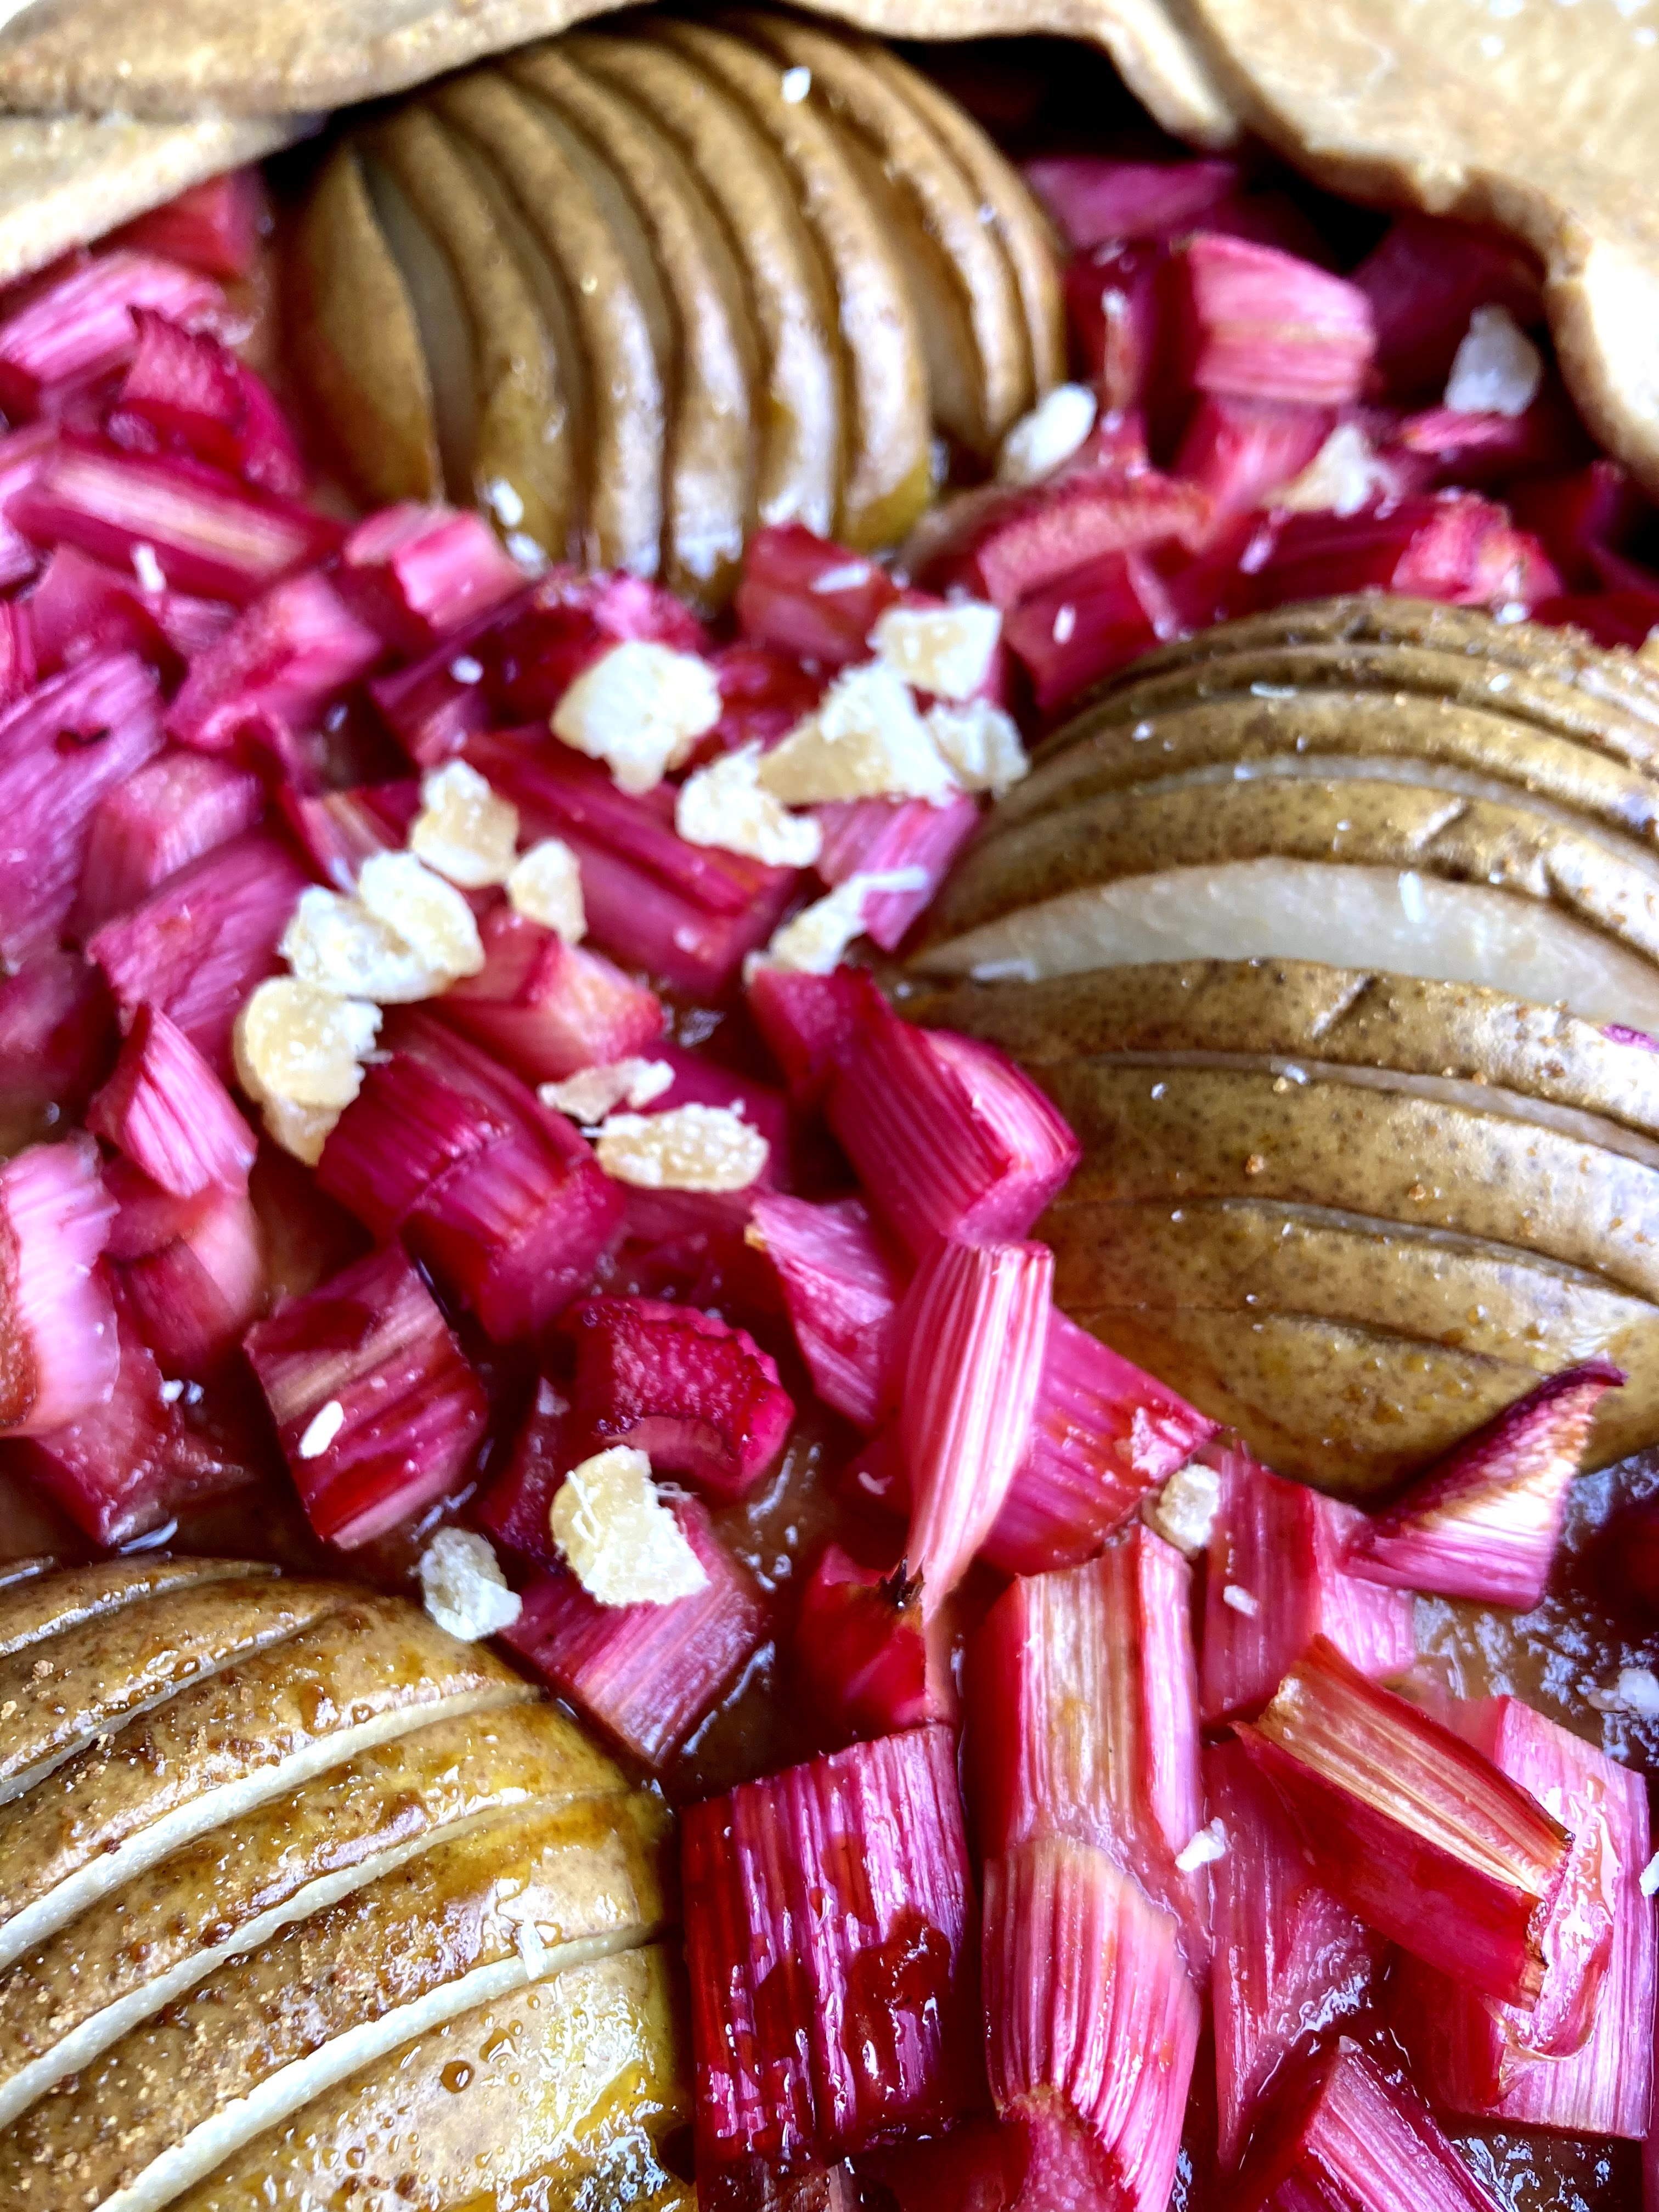
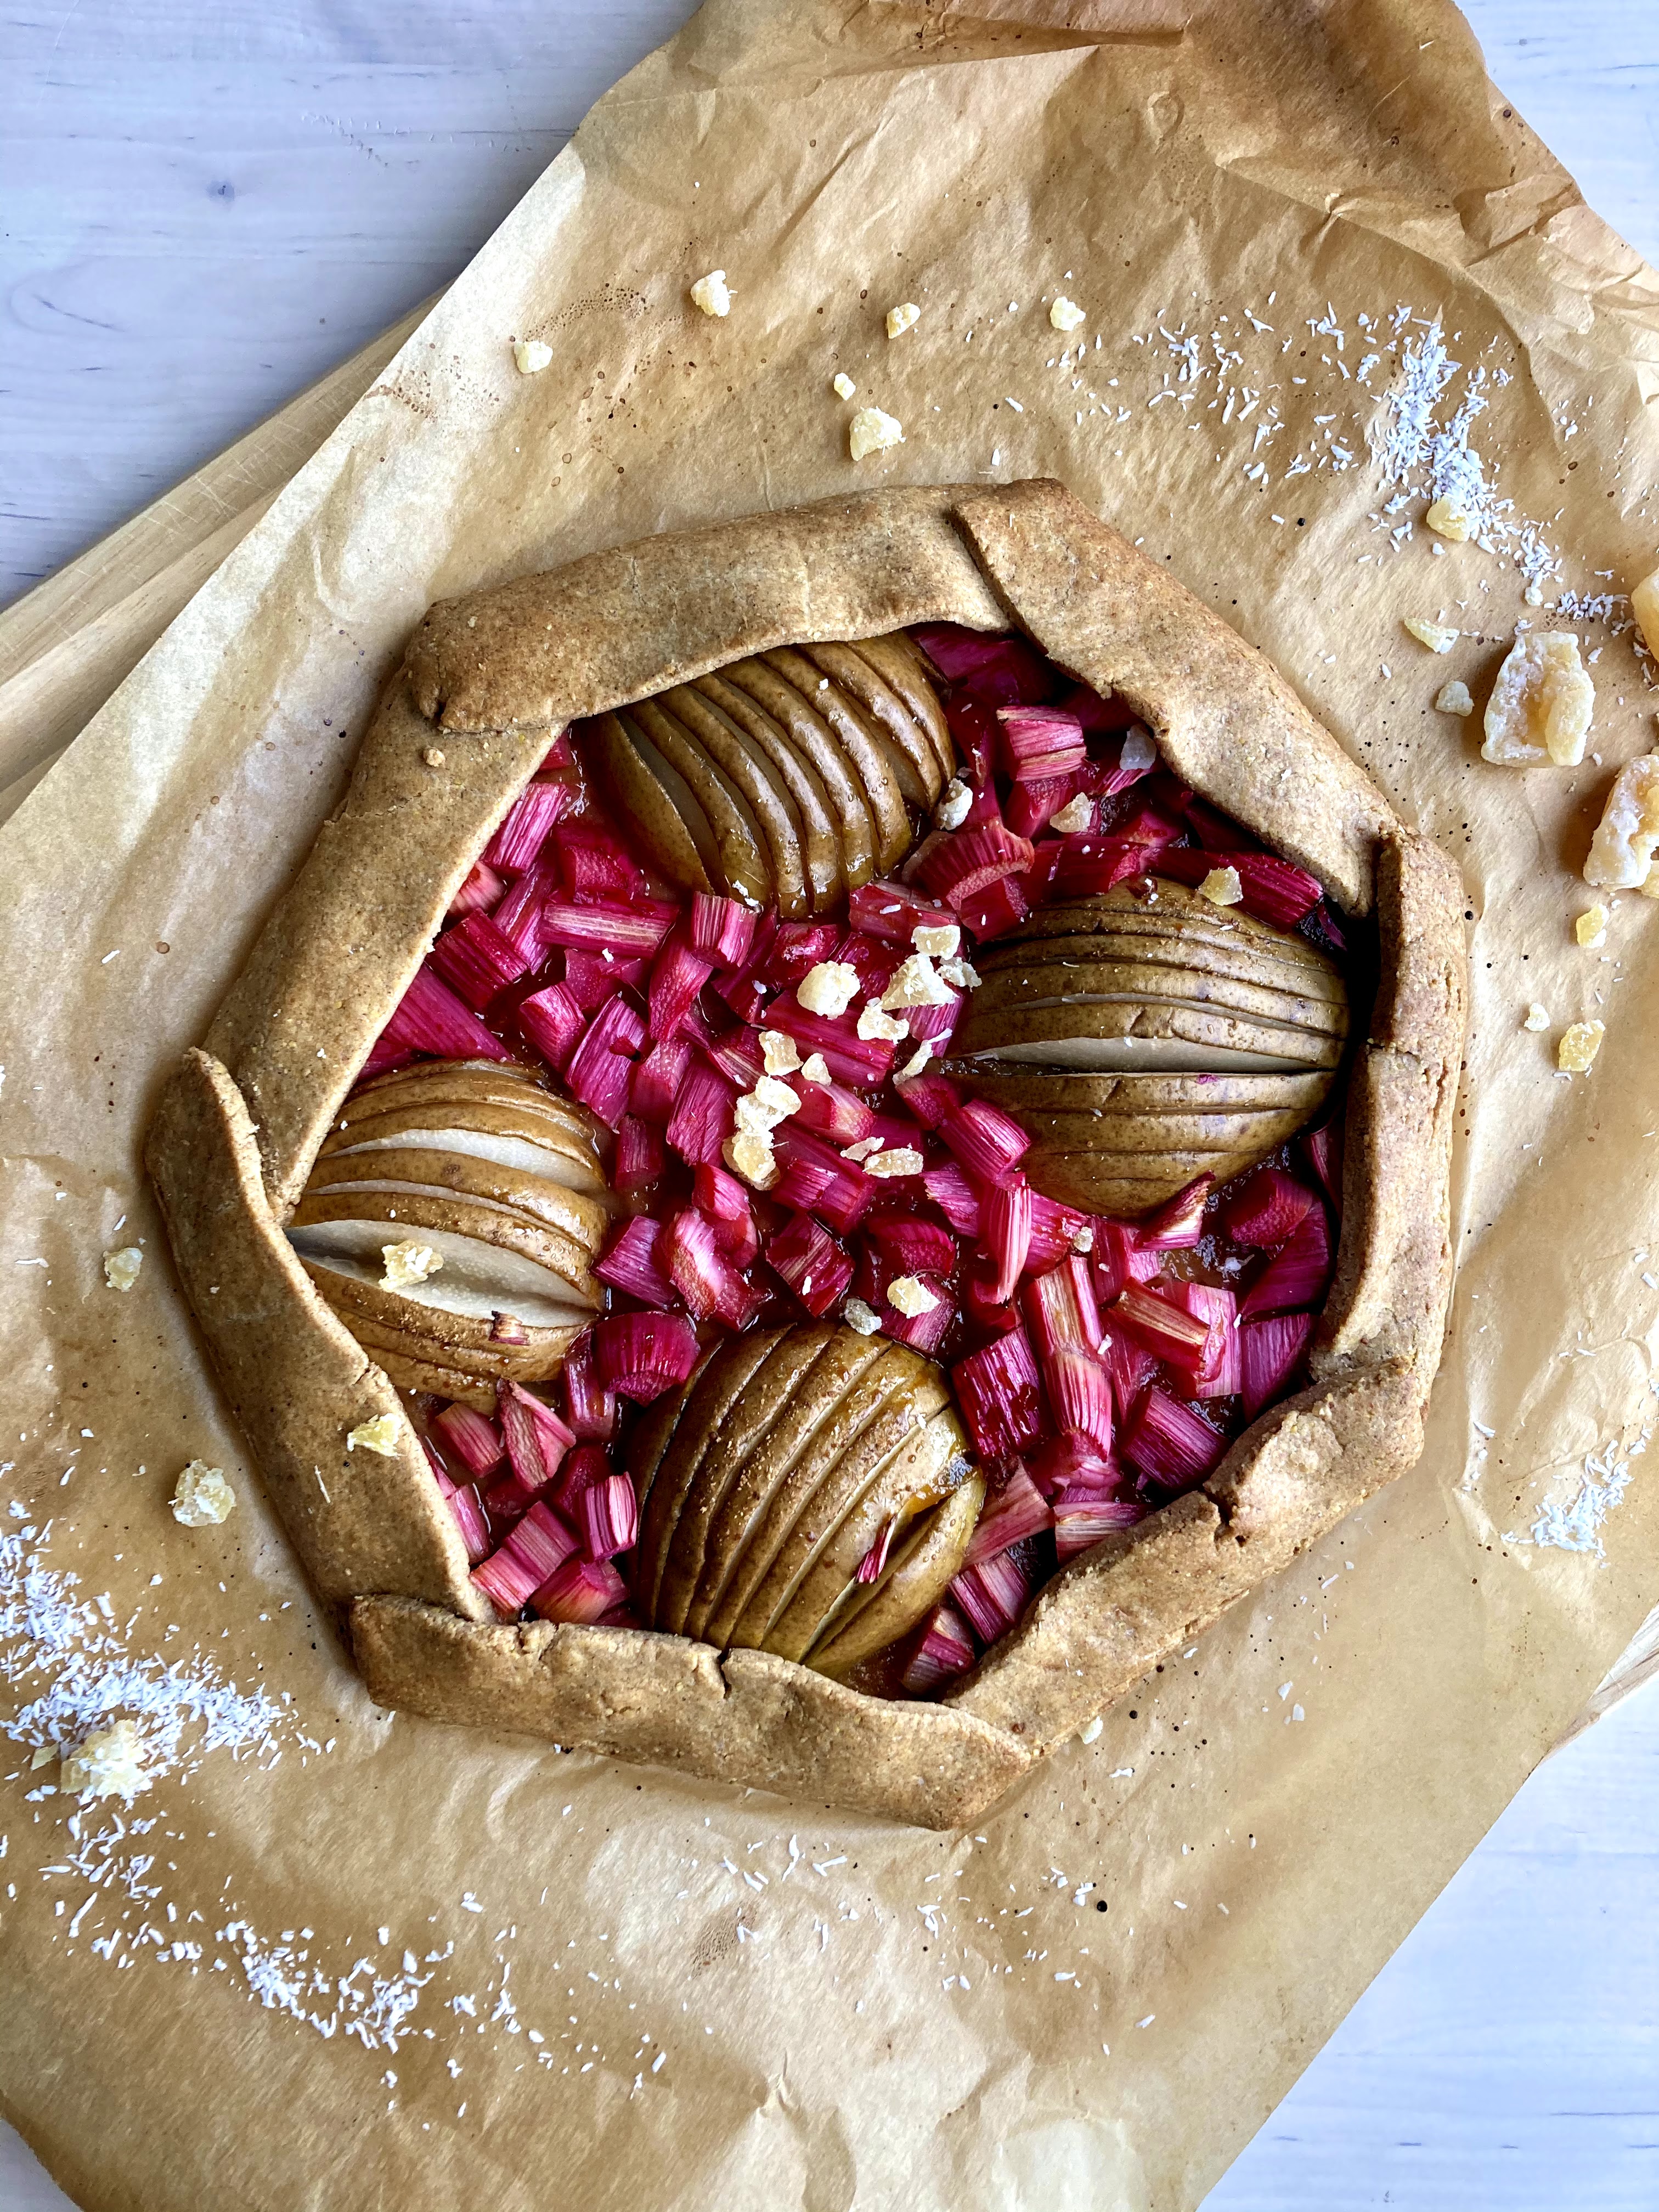
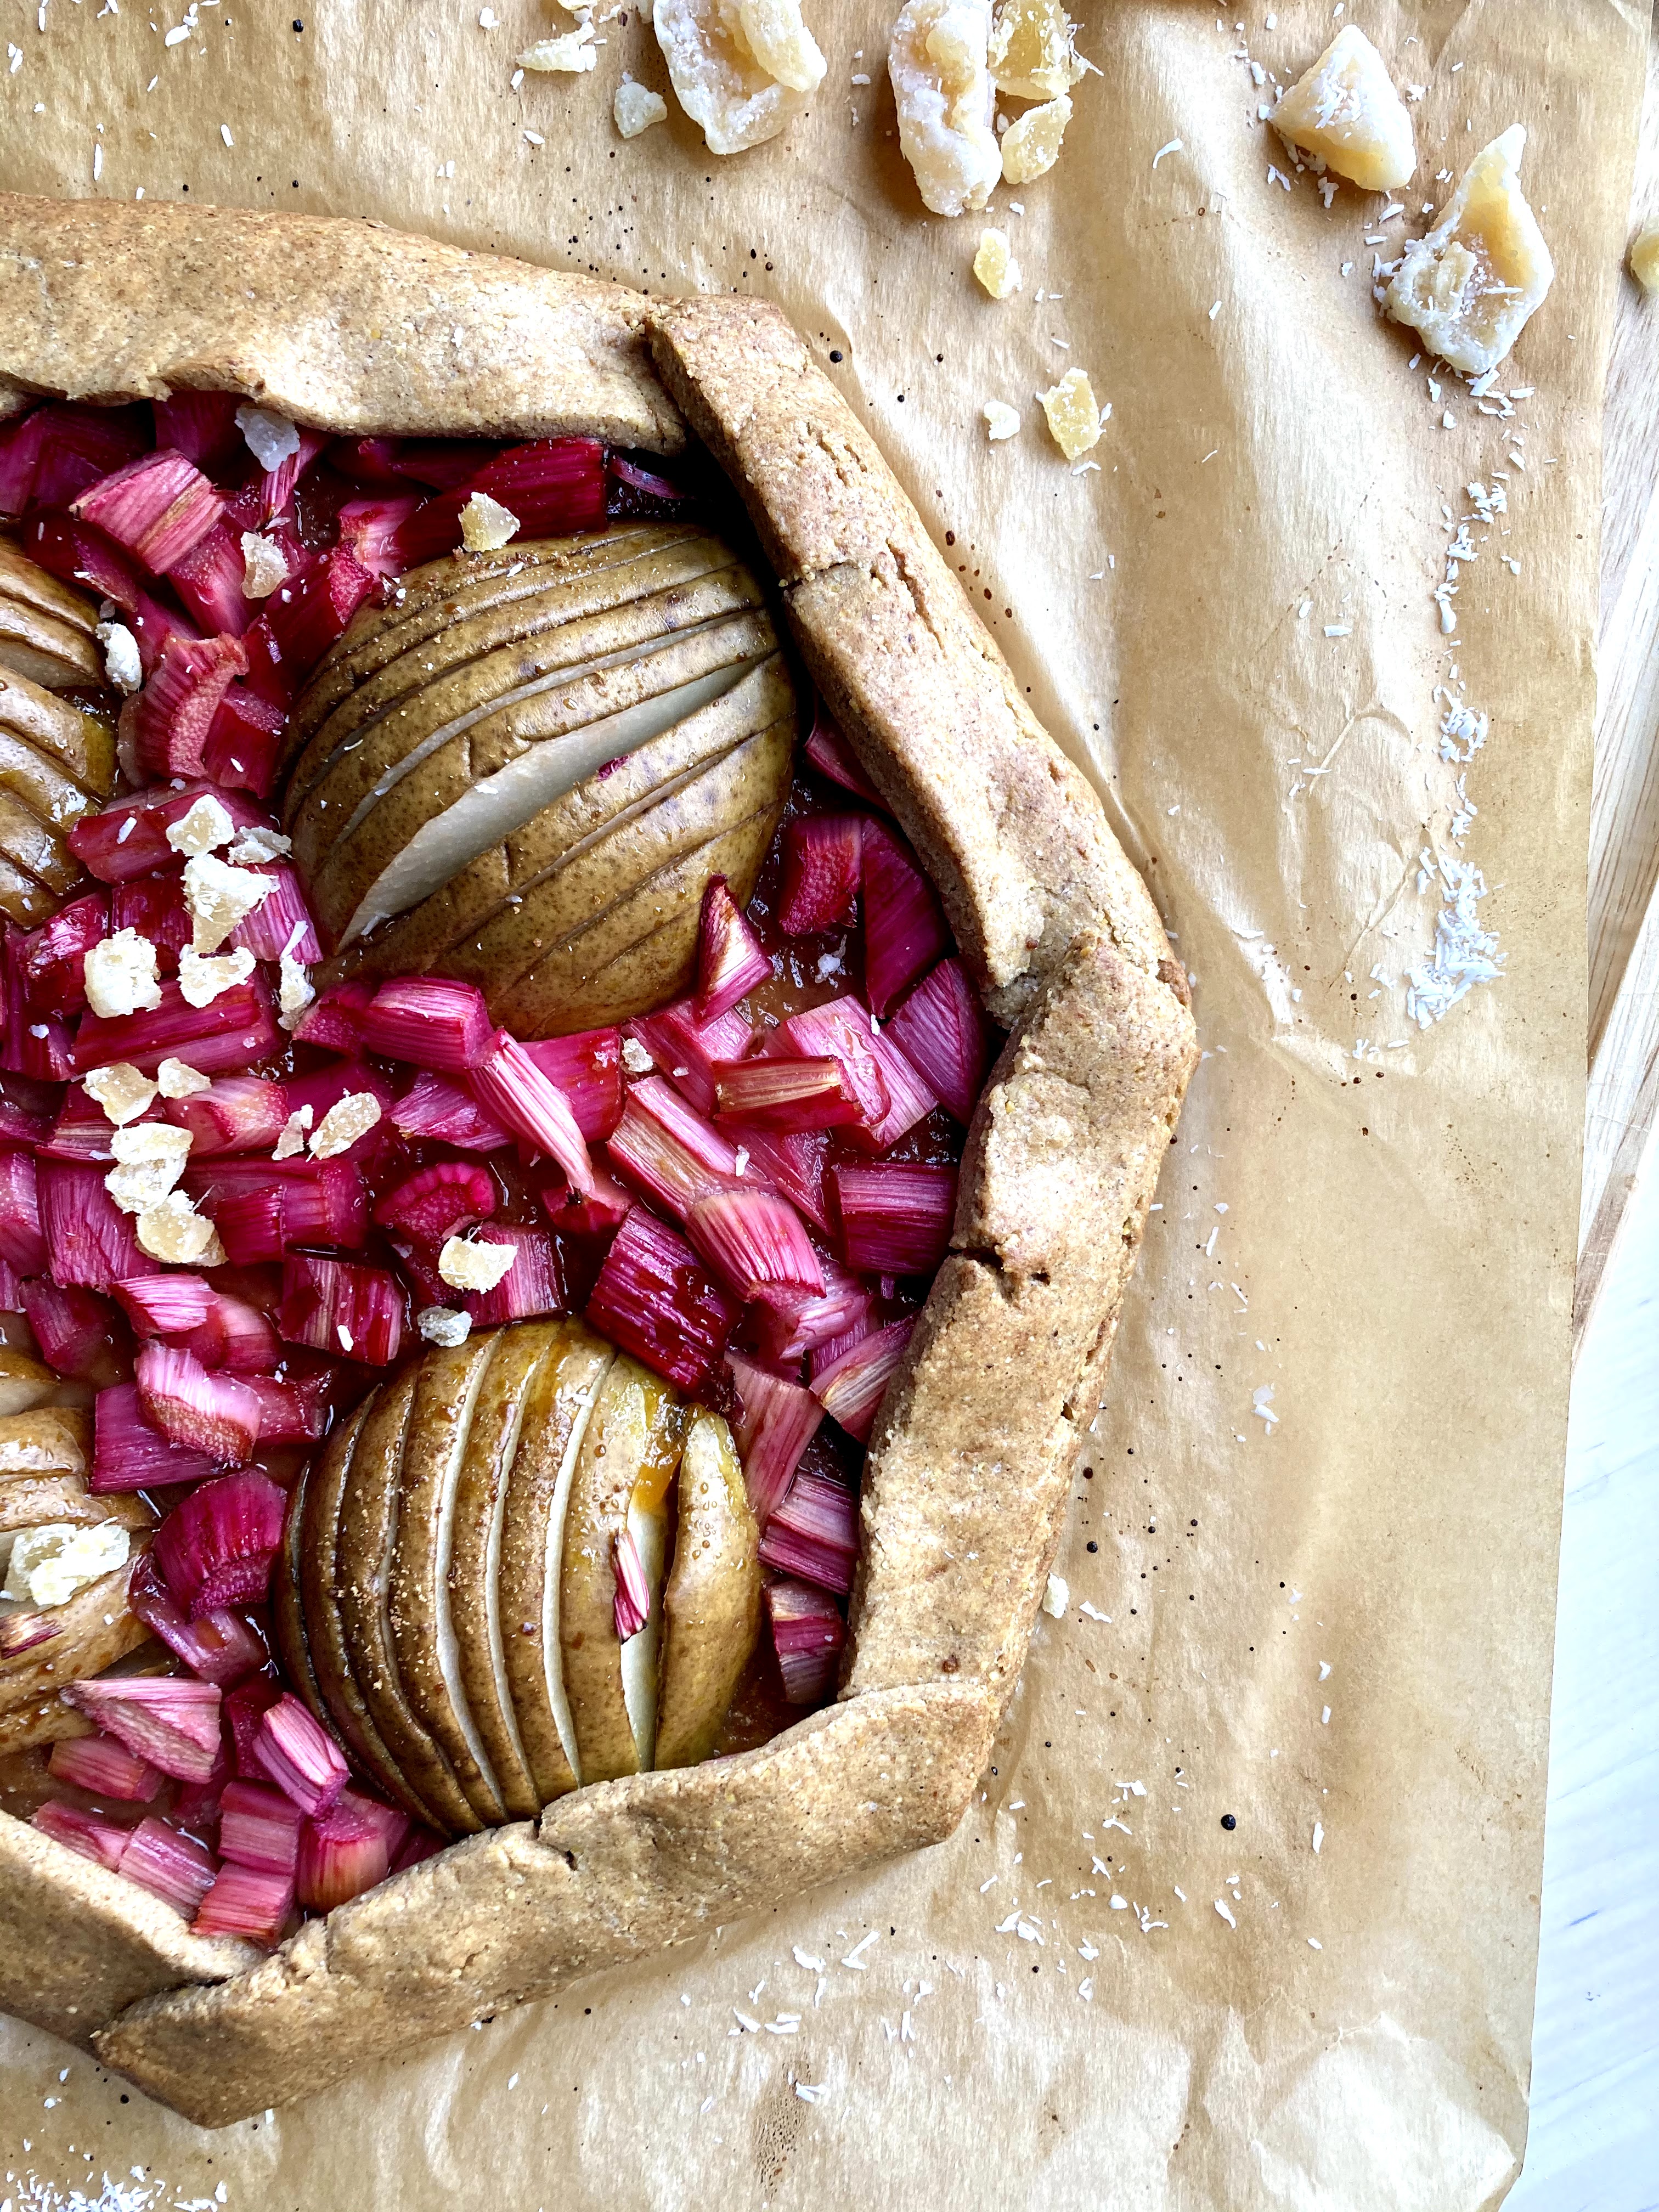
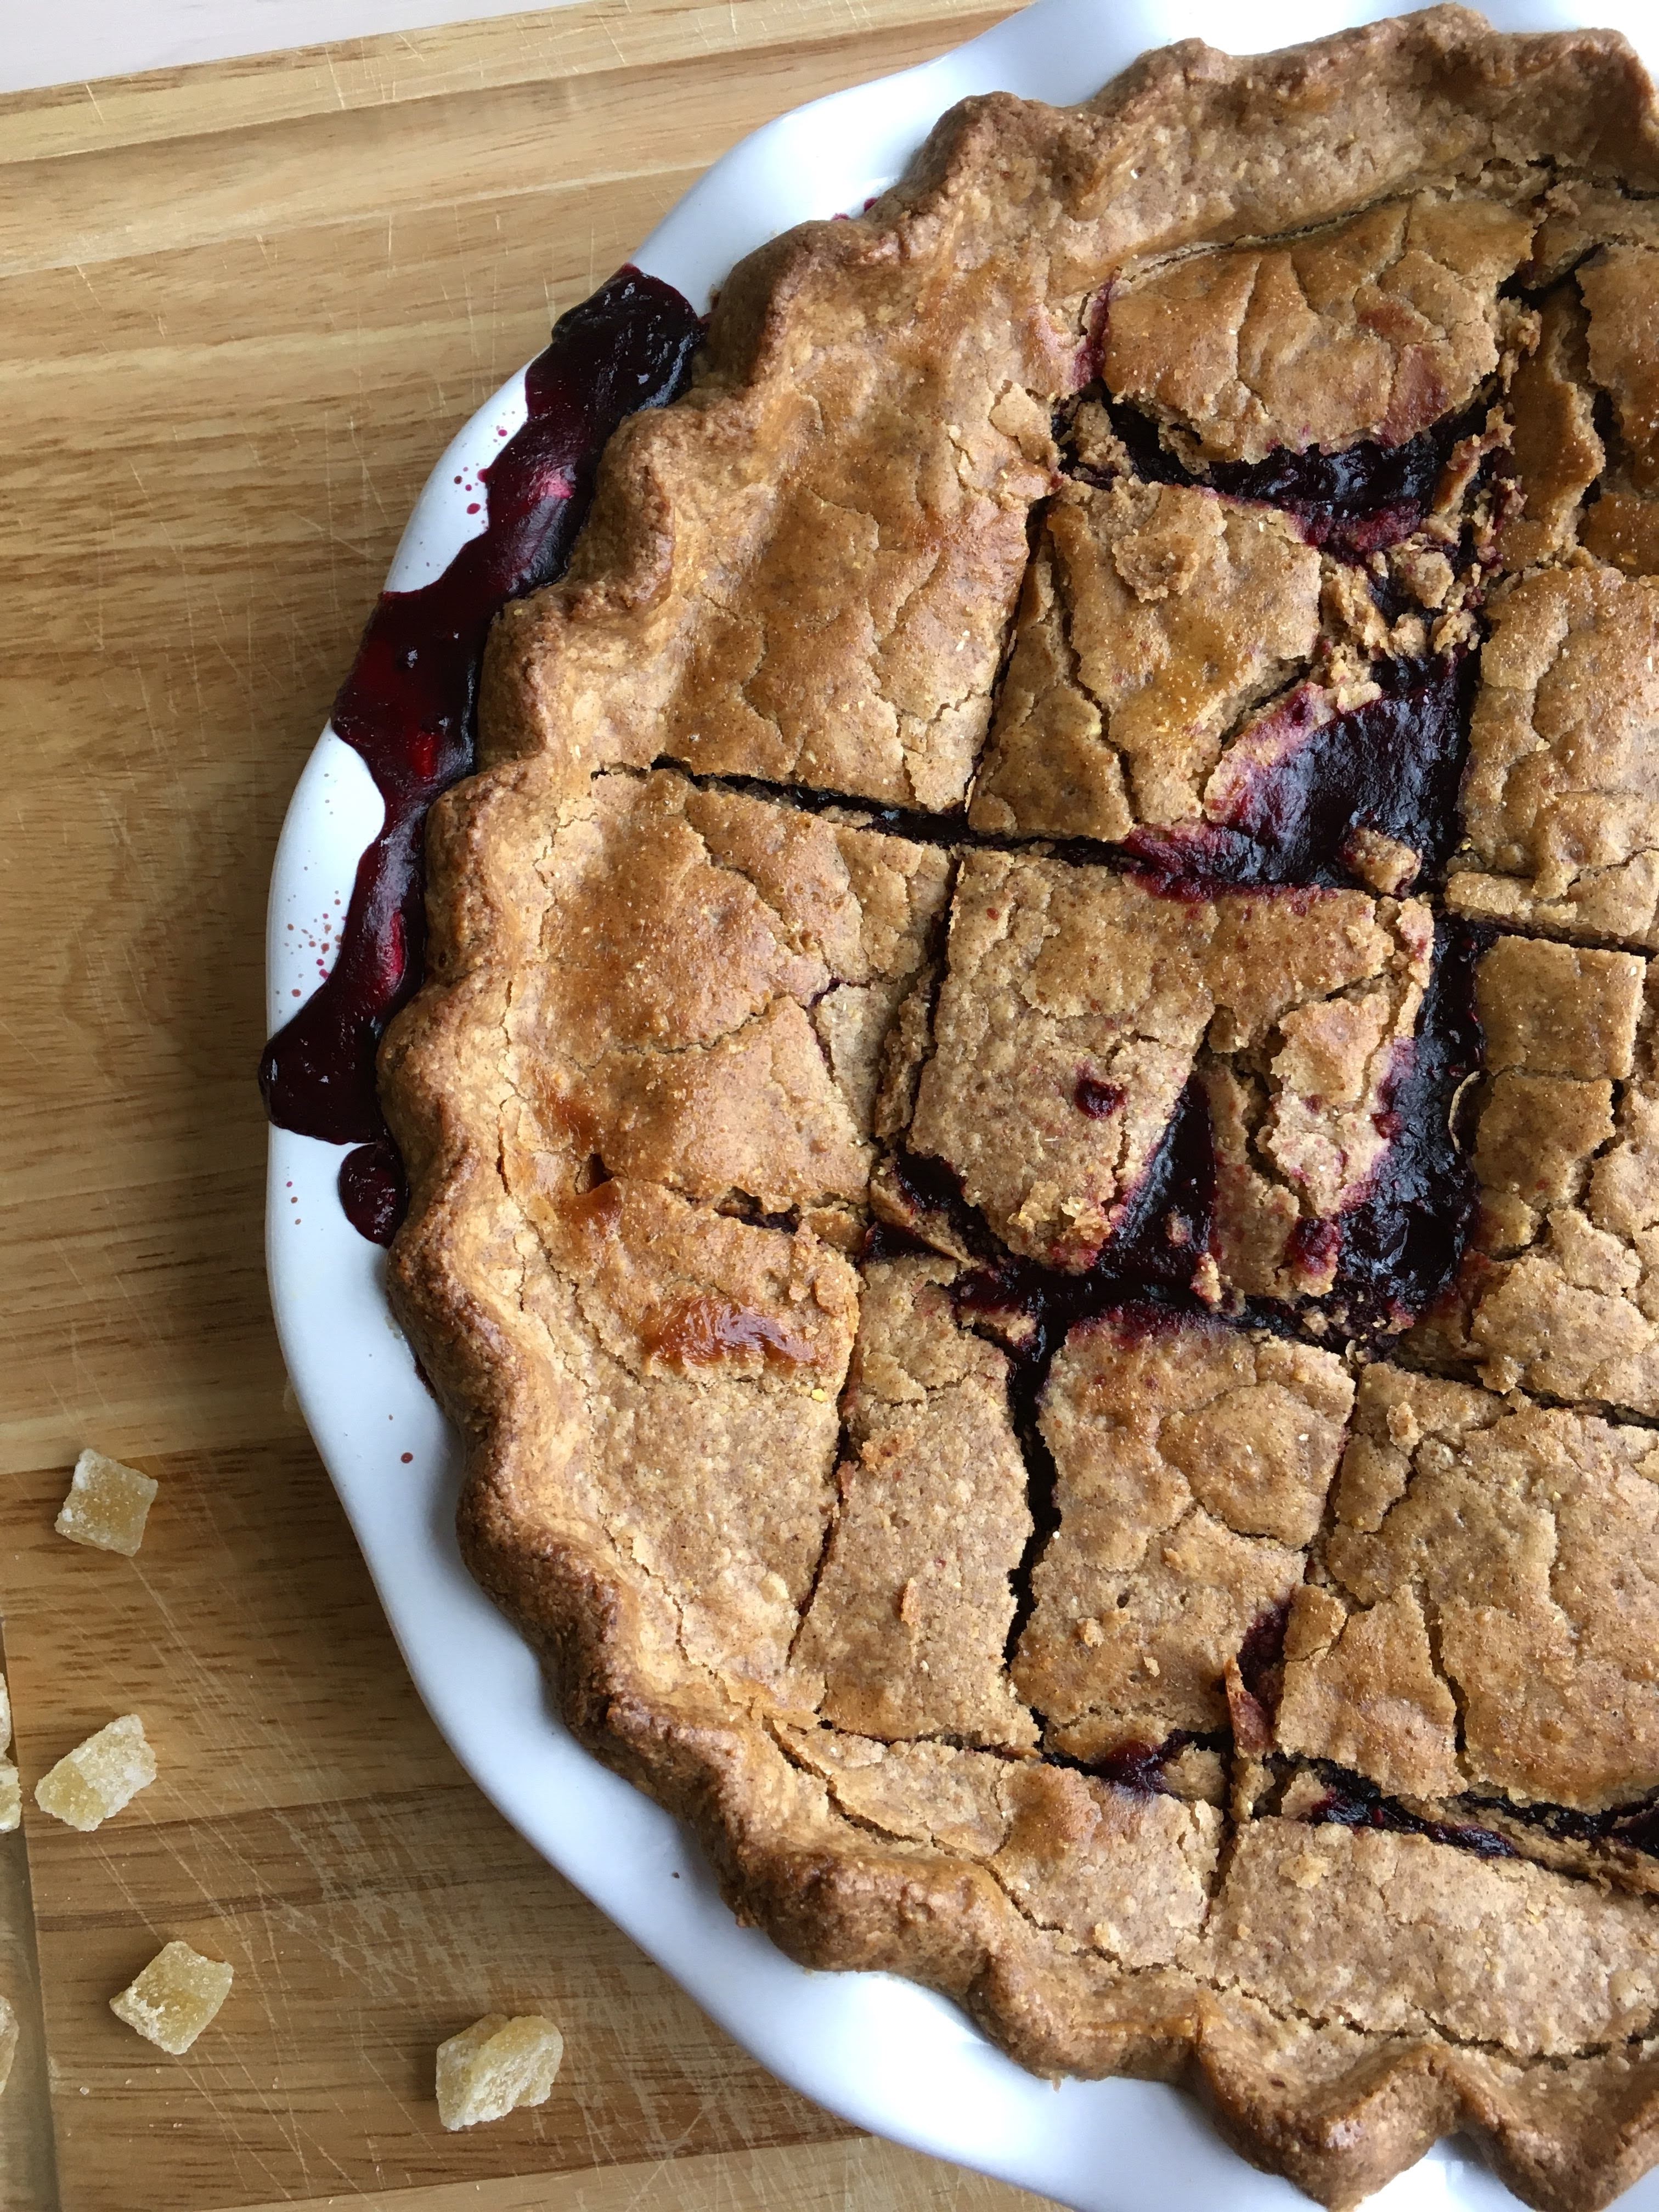
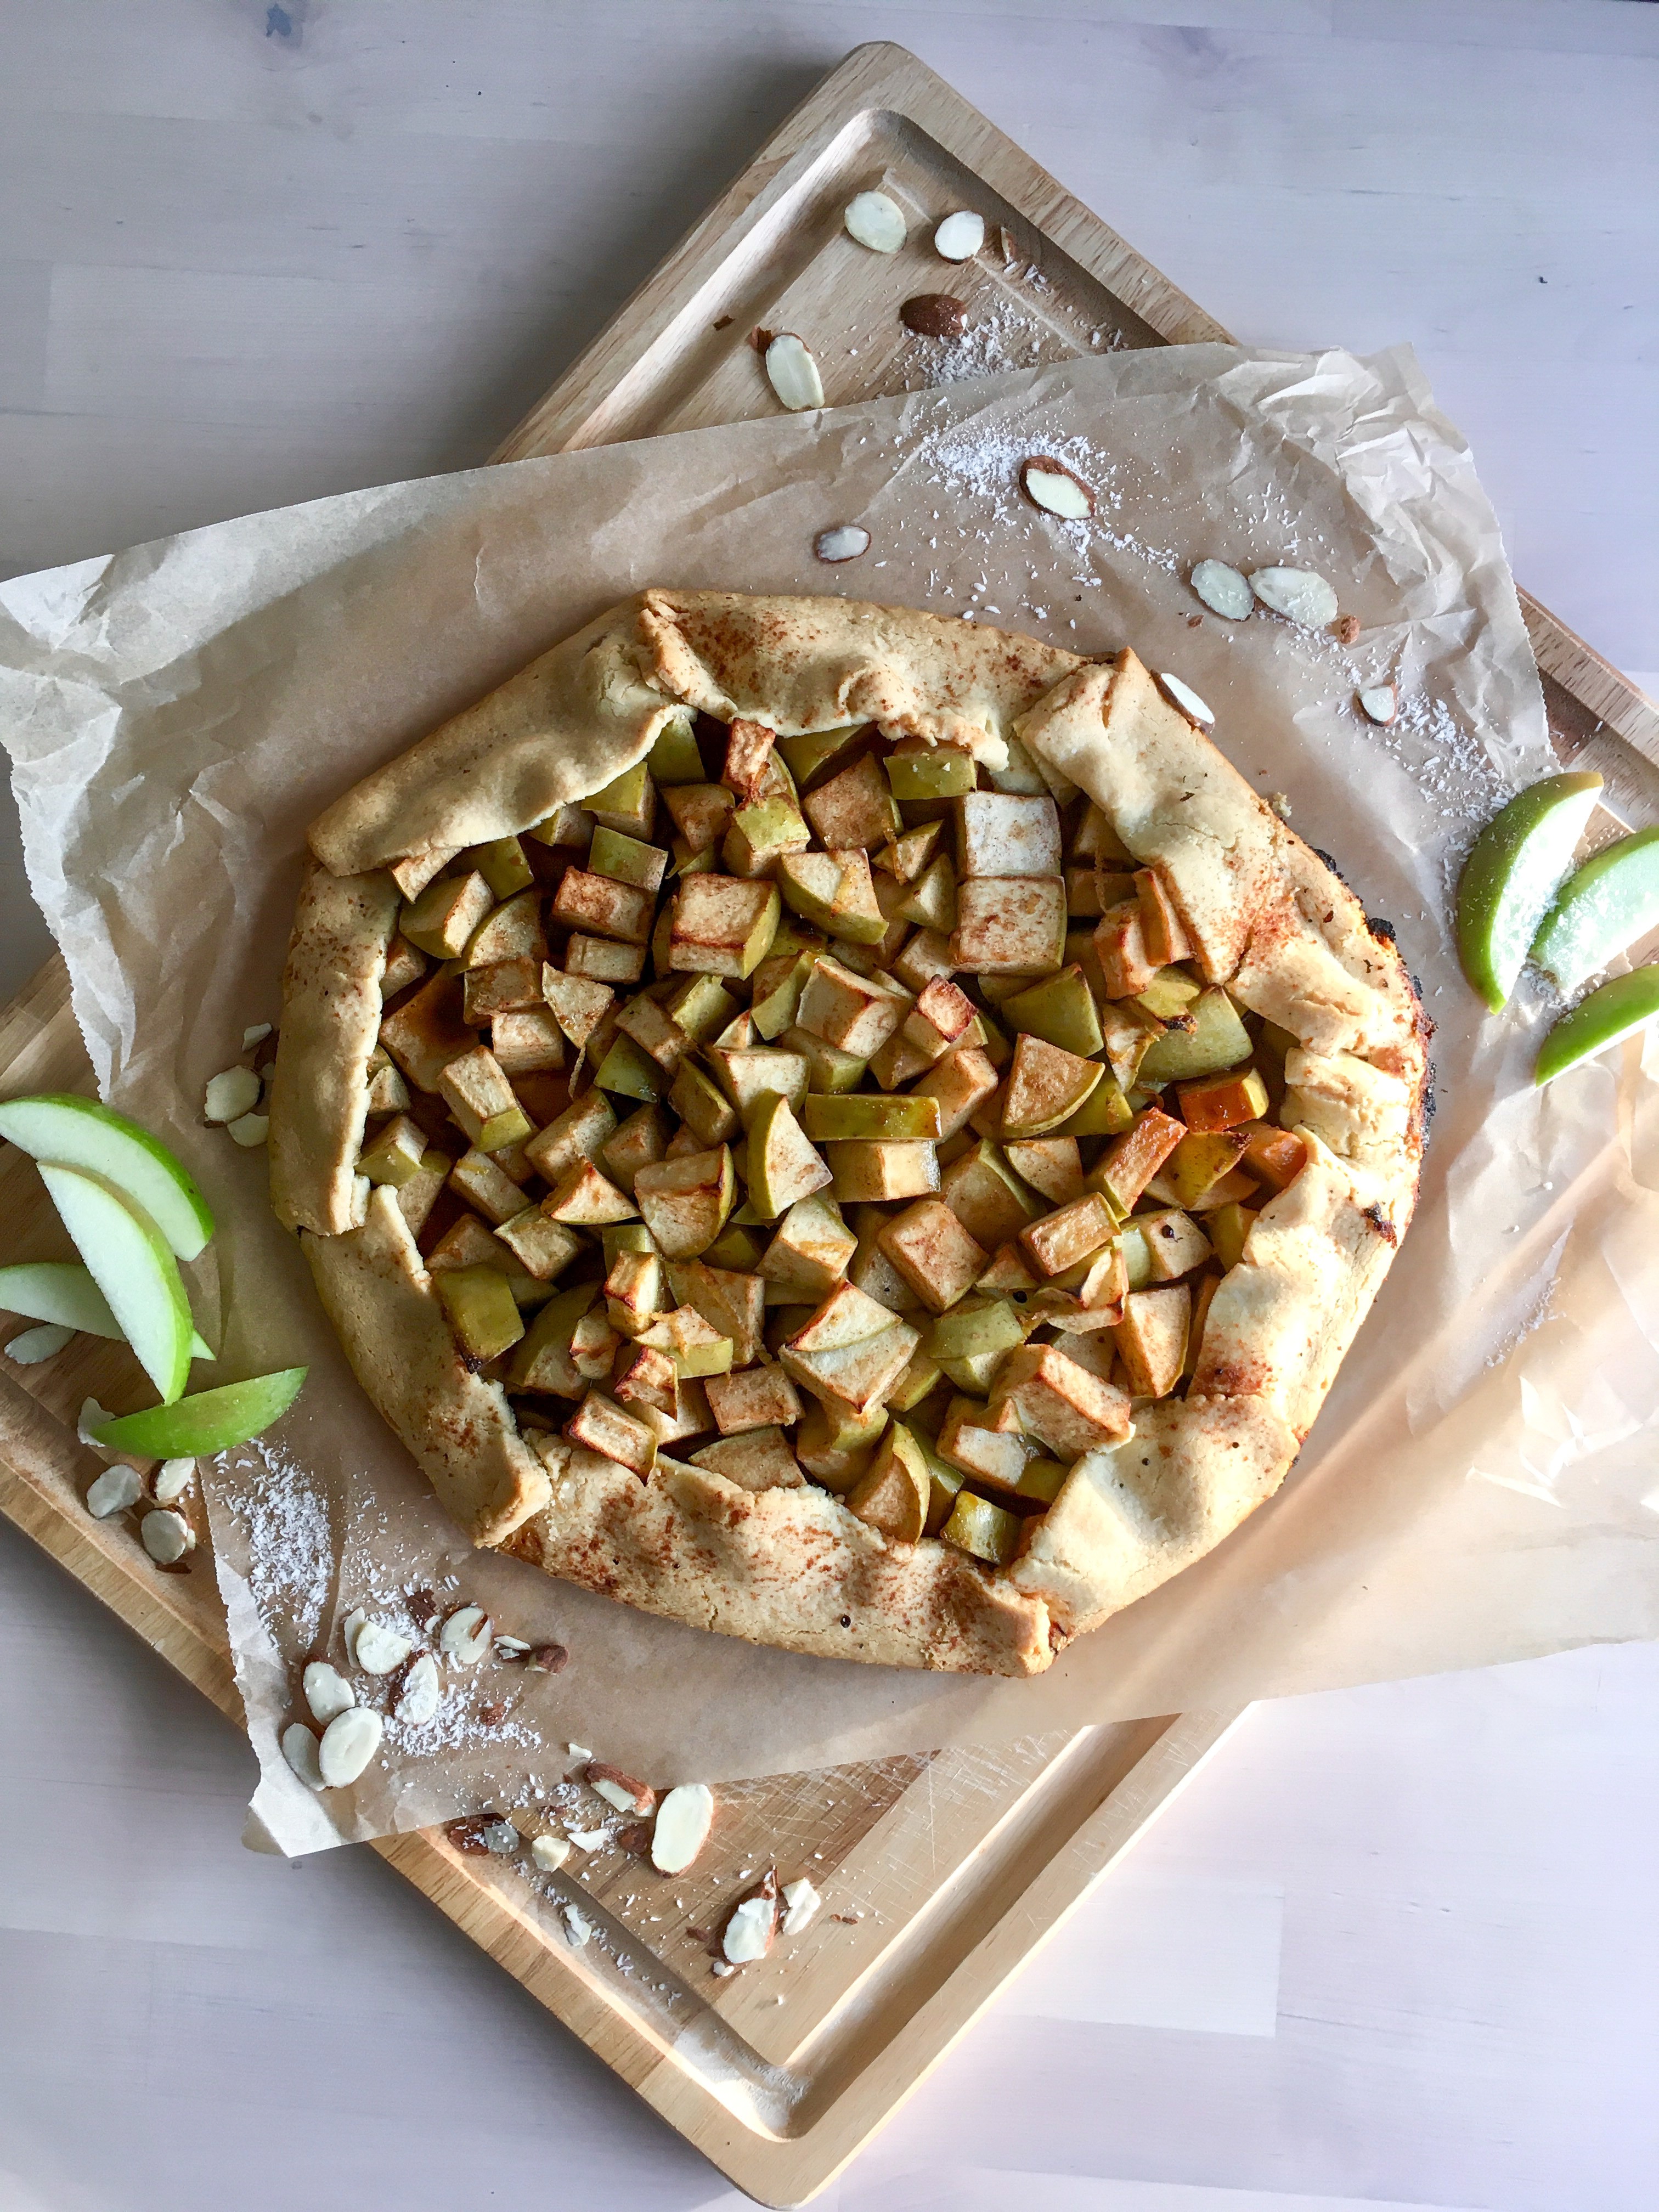
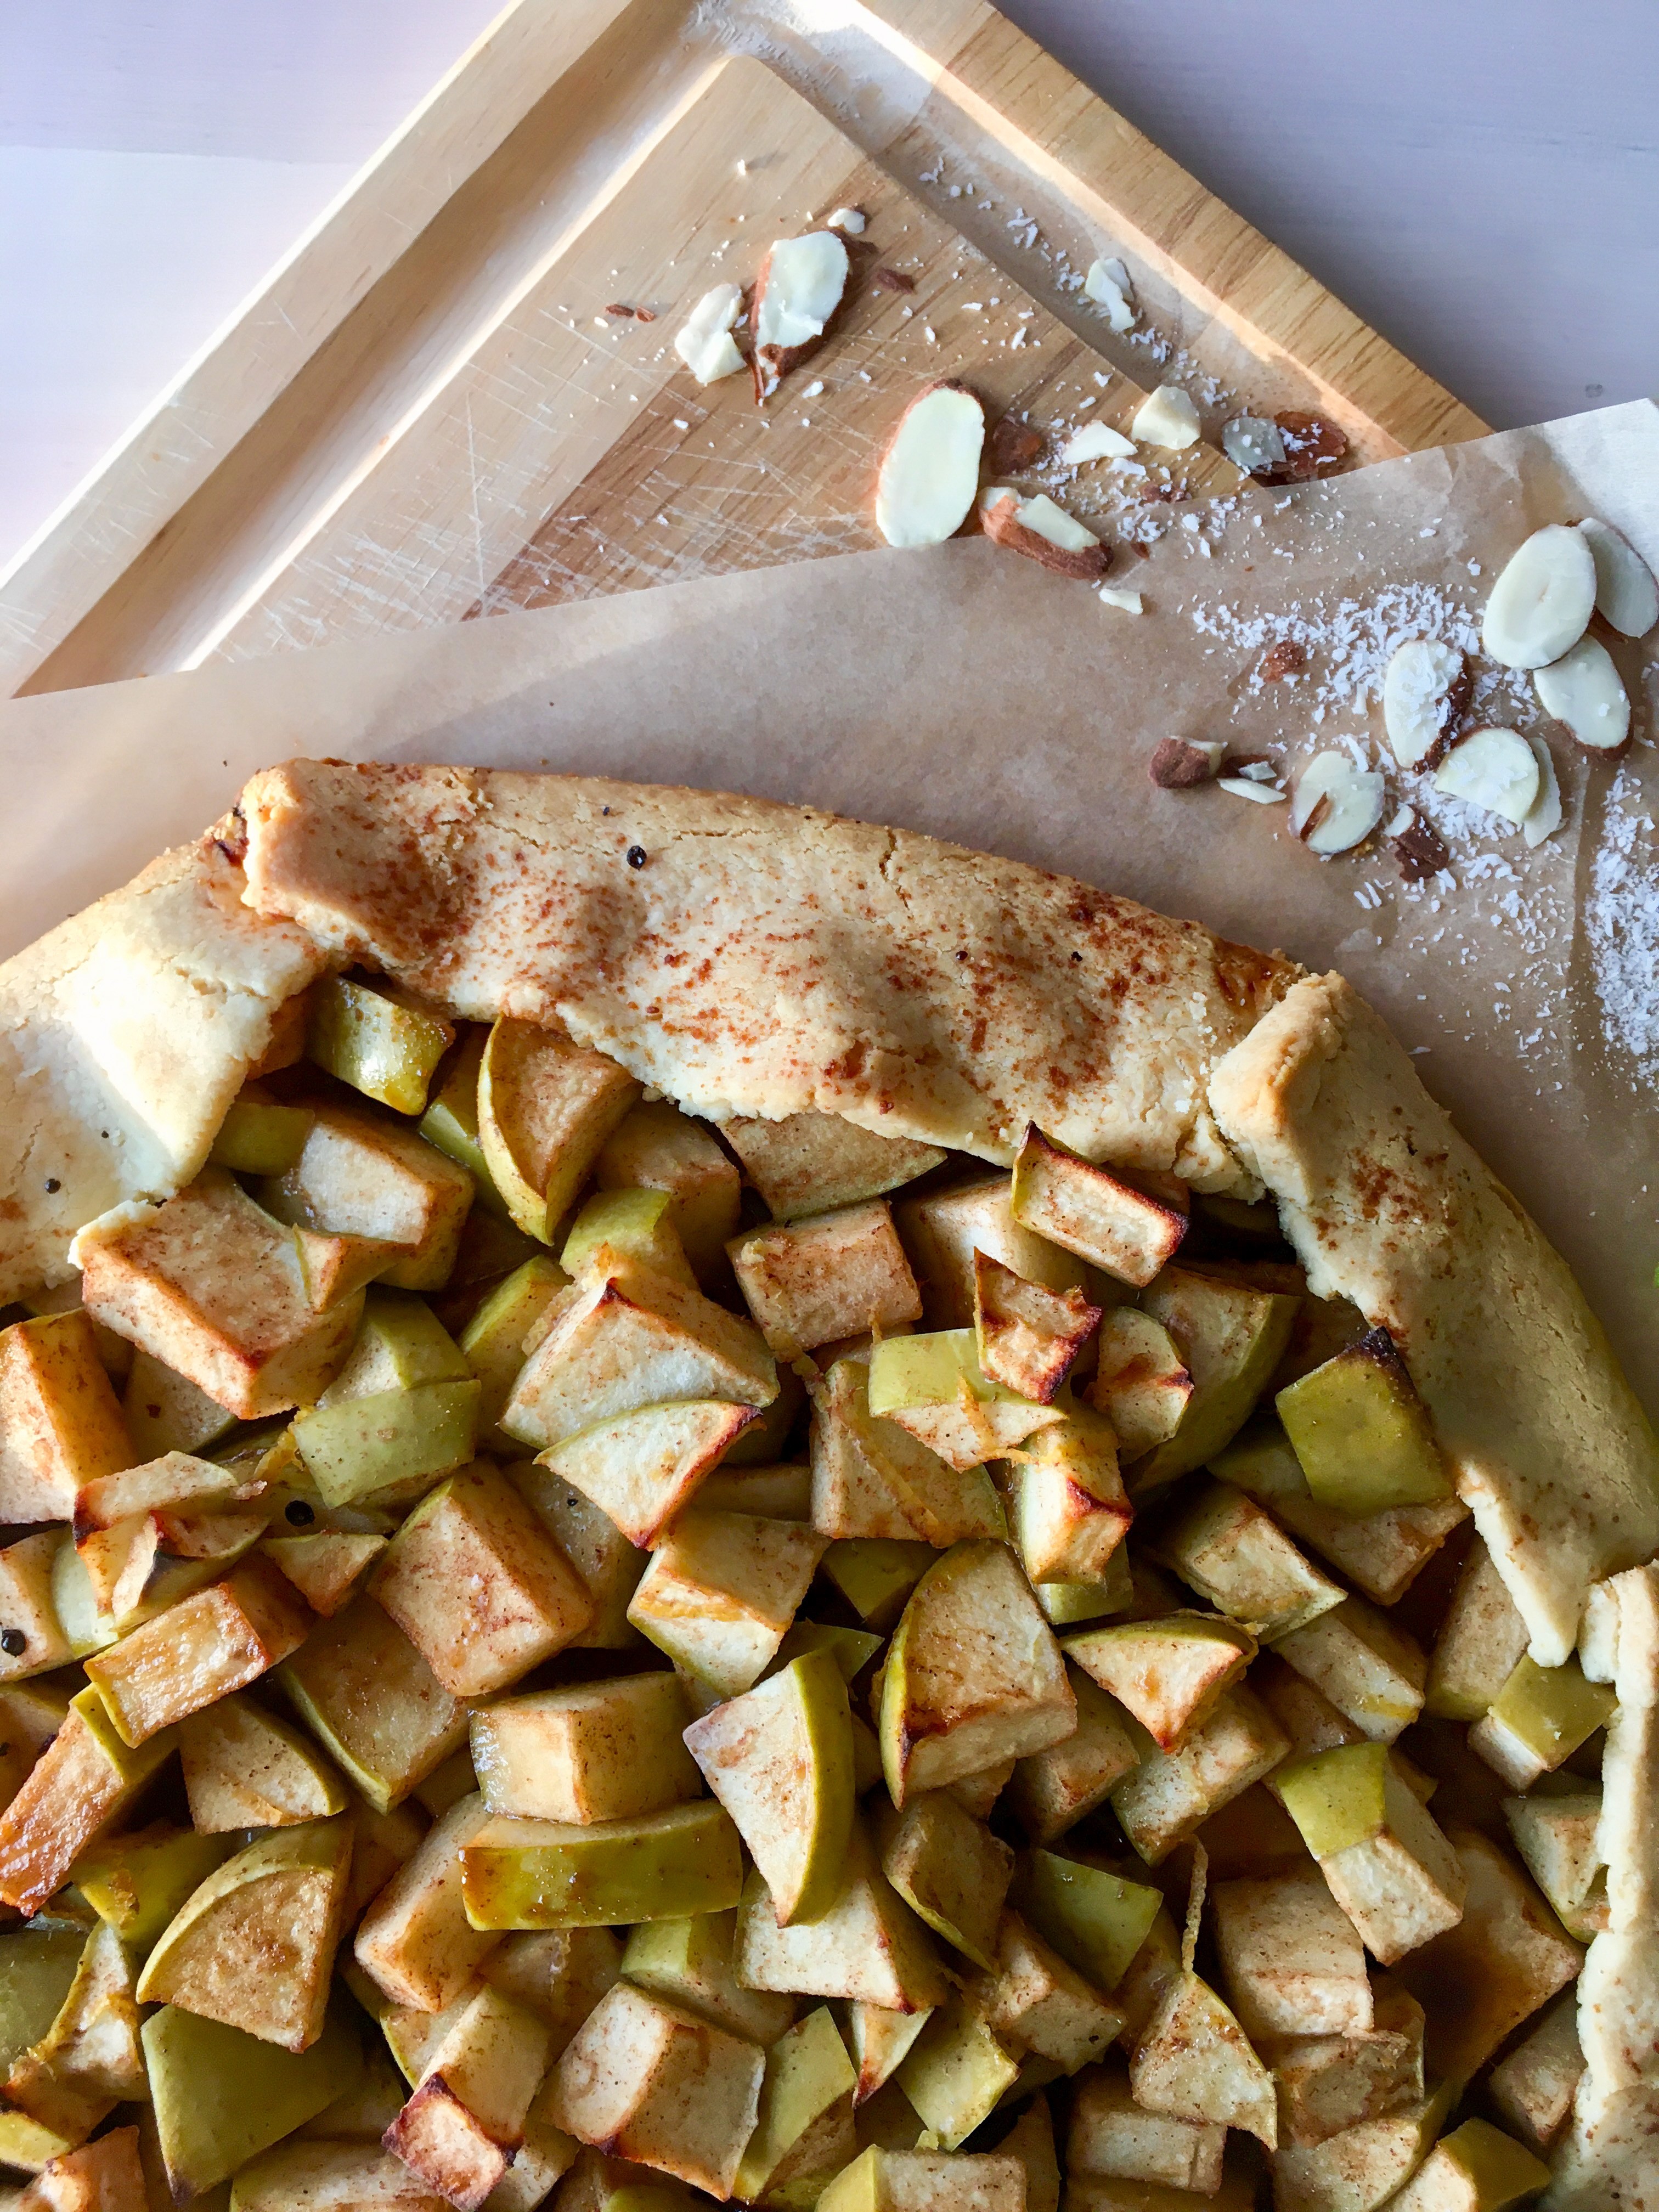
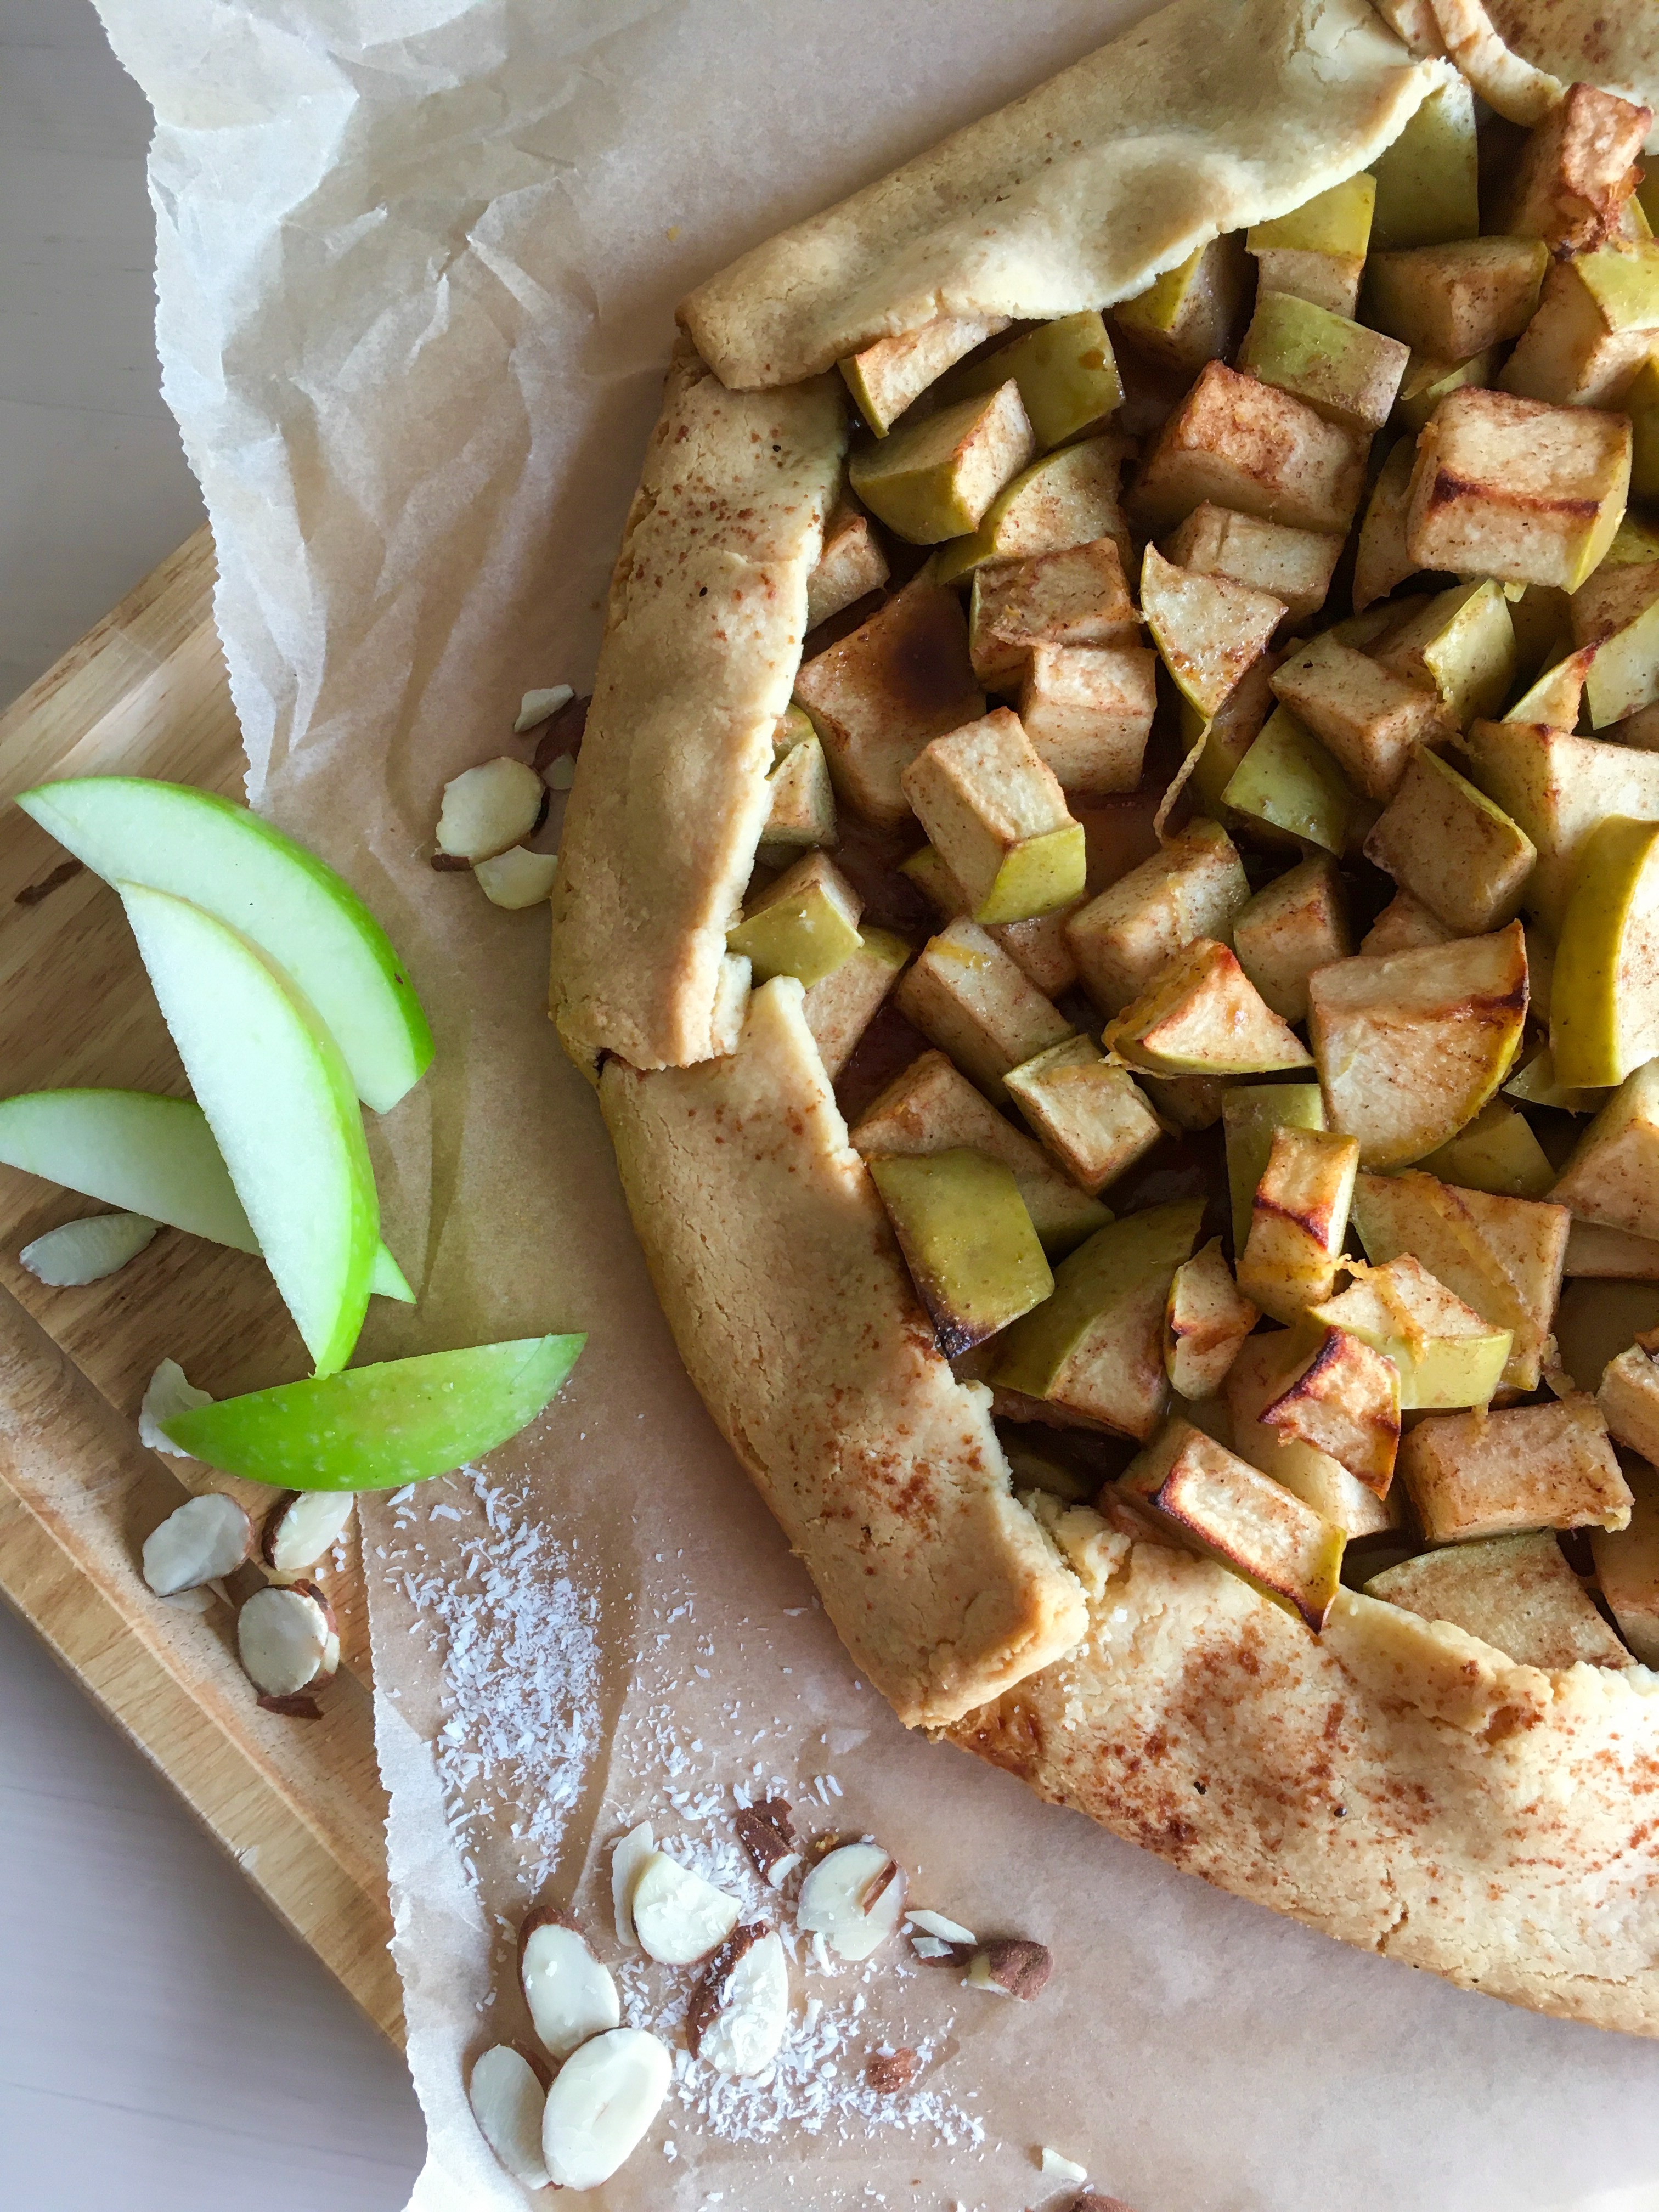
We did do some baking – mom and I made apple/blueberry/date rolls (adapted from this recipe; filling is basically just a compote of those three things cooked down with a bit of cinnamon and butter) plus of course cookies and a really delicious galette with pears and marionberry (rule number one: when in Oregon, eat ALL THE MARIONBERRIES)

Came back, unpacked and repacked and headed up the next day to ski with the fave human for three days over New Years! Hands down best new years and best skiing I’ve had in several years. The conditions were literally amazing; we skied nearly three full days and the snow was incredible for all of it. 10/10 recommend for best way to spend new years!

Then I came back, and a day later officially started a new job! See, told you there was a lot going on. I moved to LEDDY MAYTUM STACY Architects (LMSa) as their marketing manager and I am verrryyy excited to be working for a firm that is mission-driven and so focused on sustainability. Wheee!

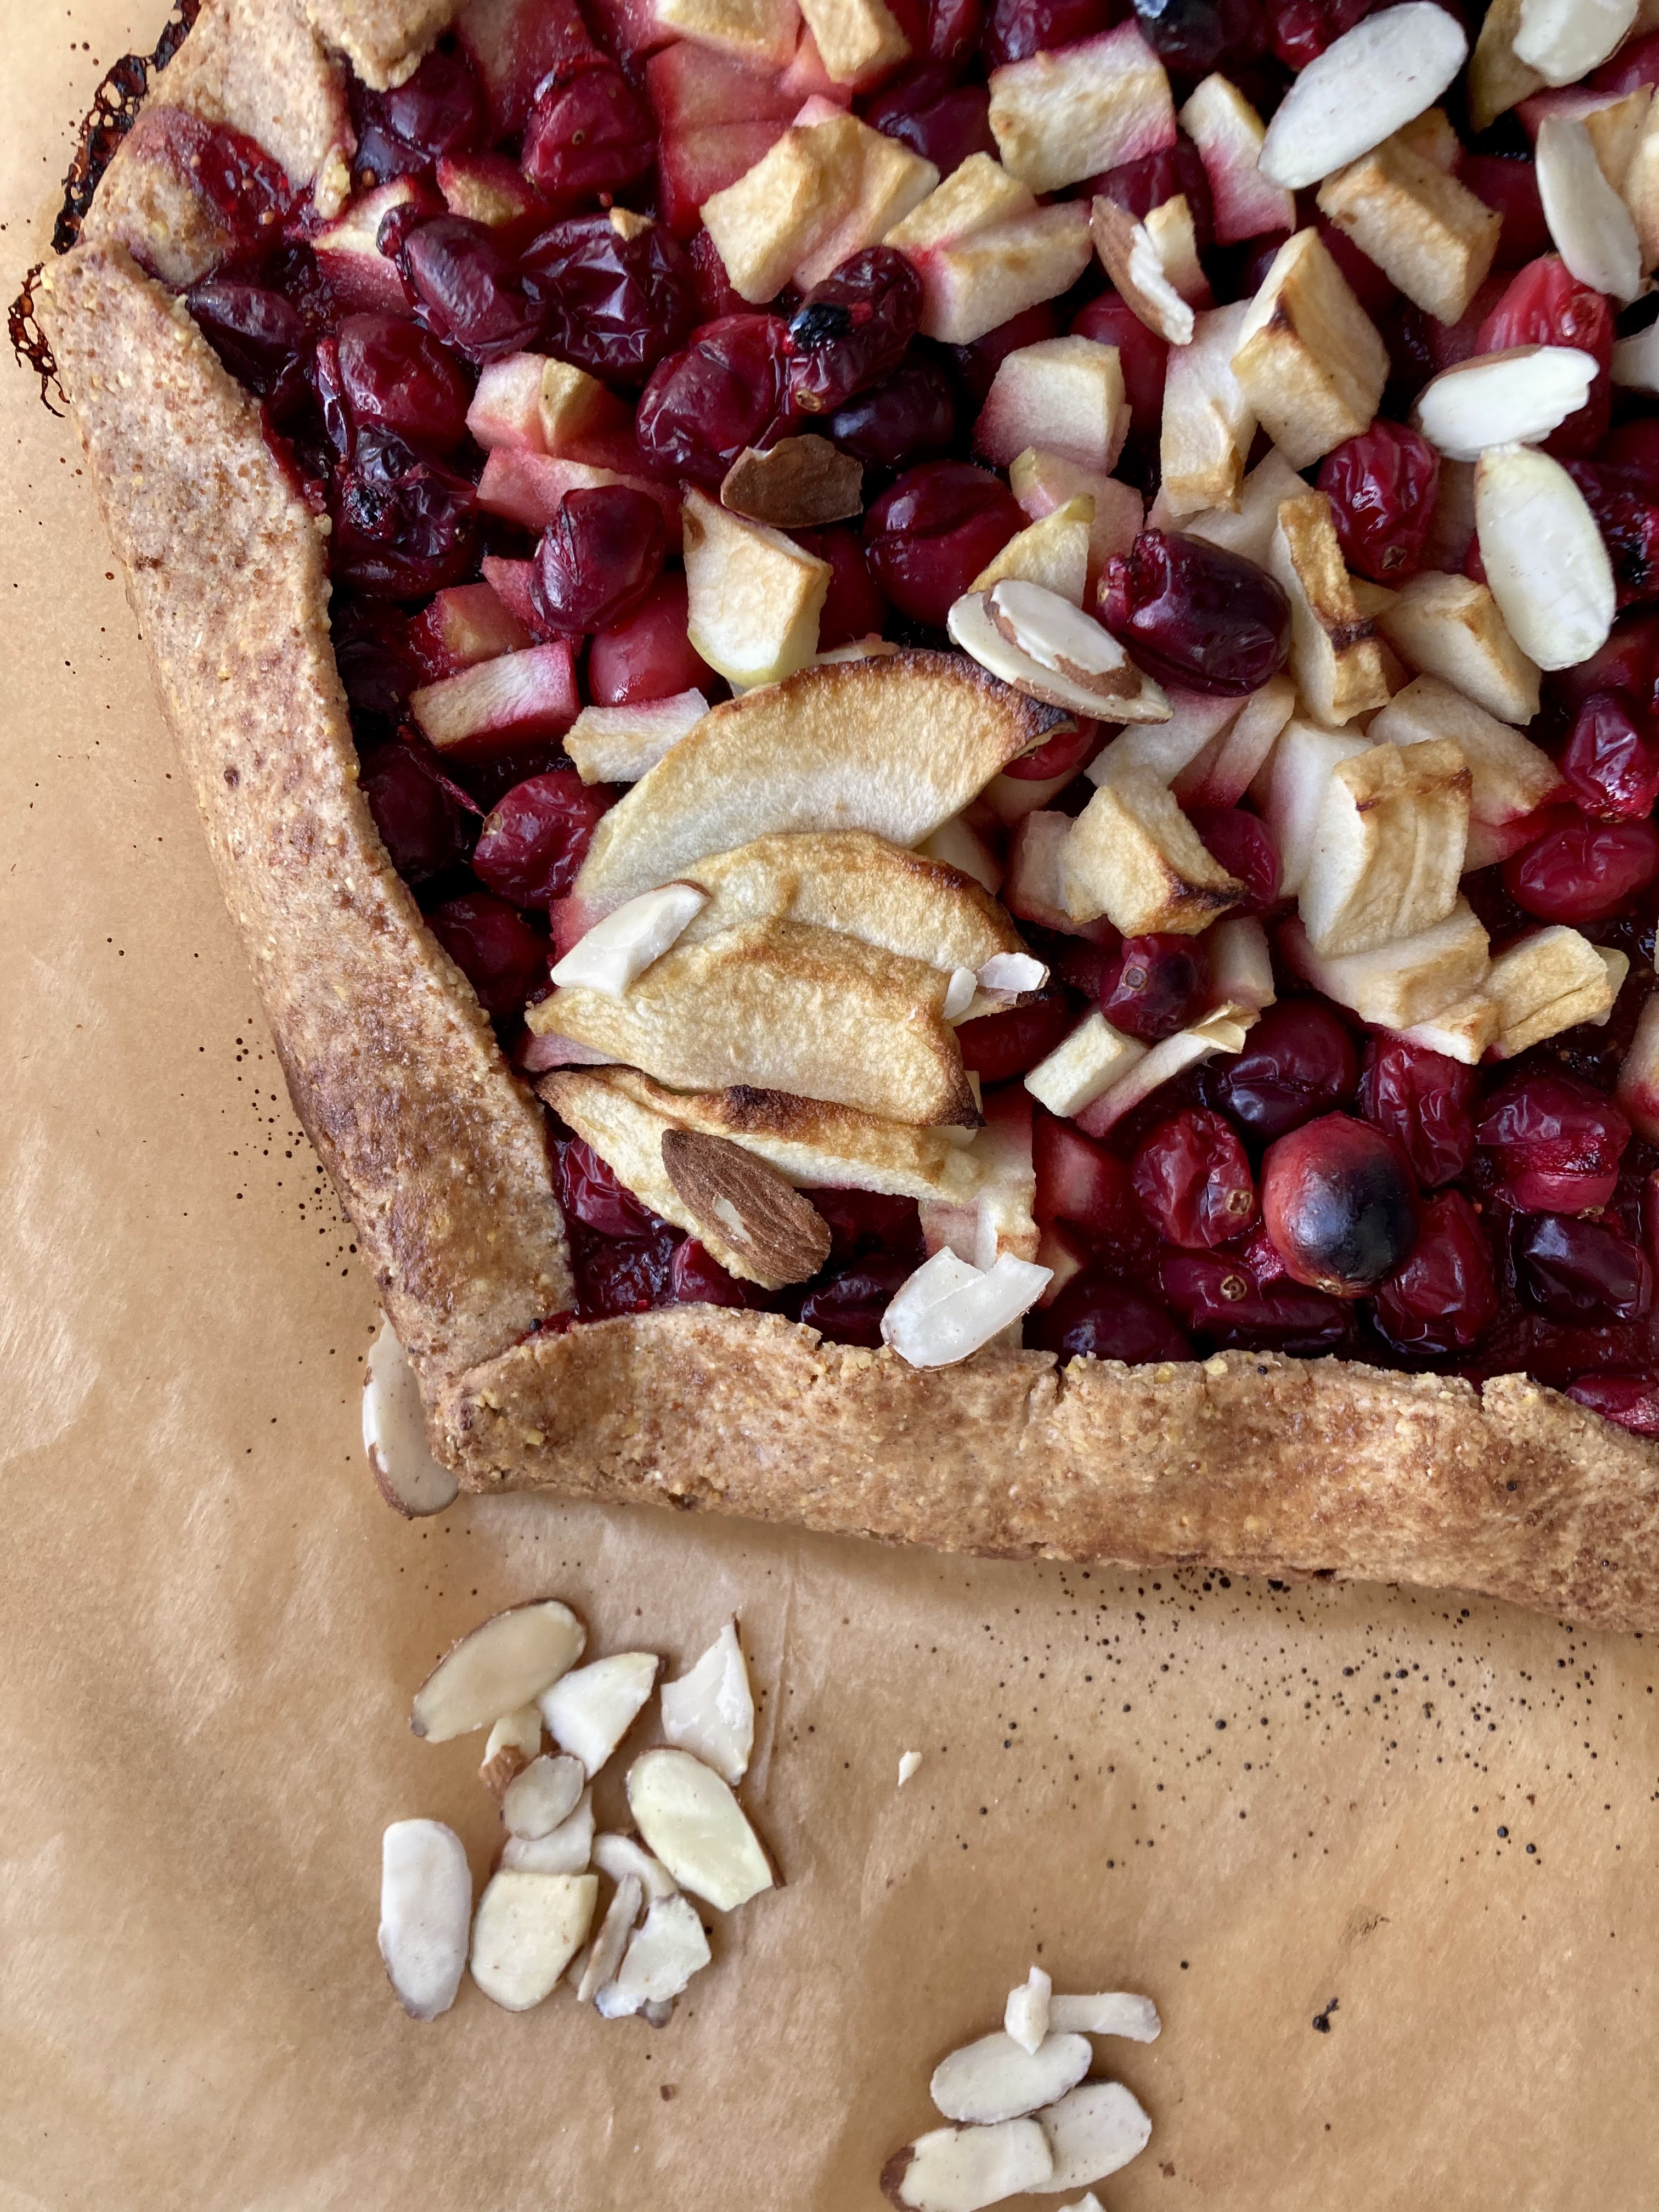
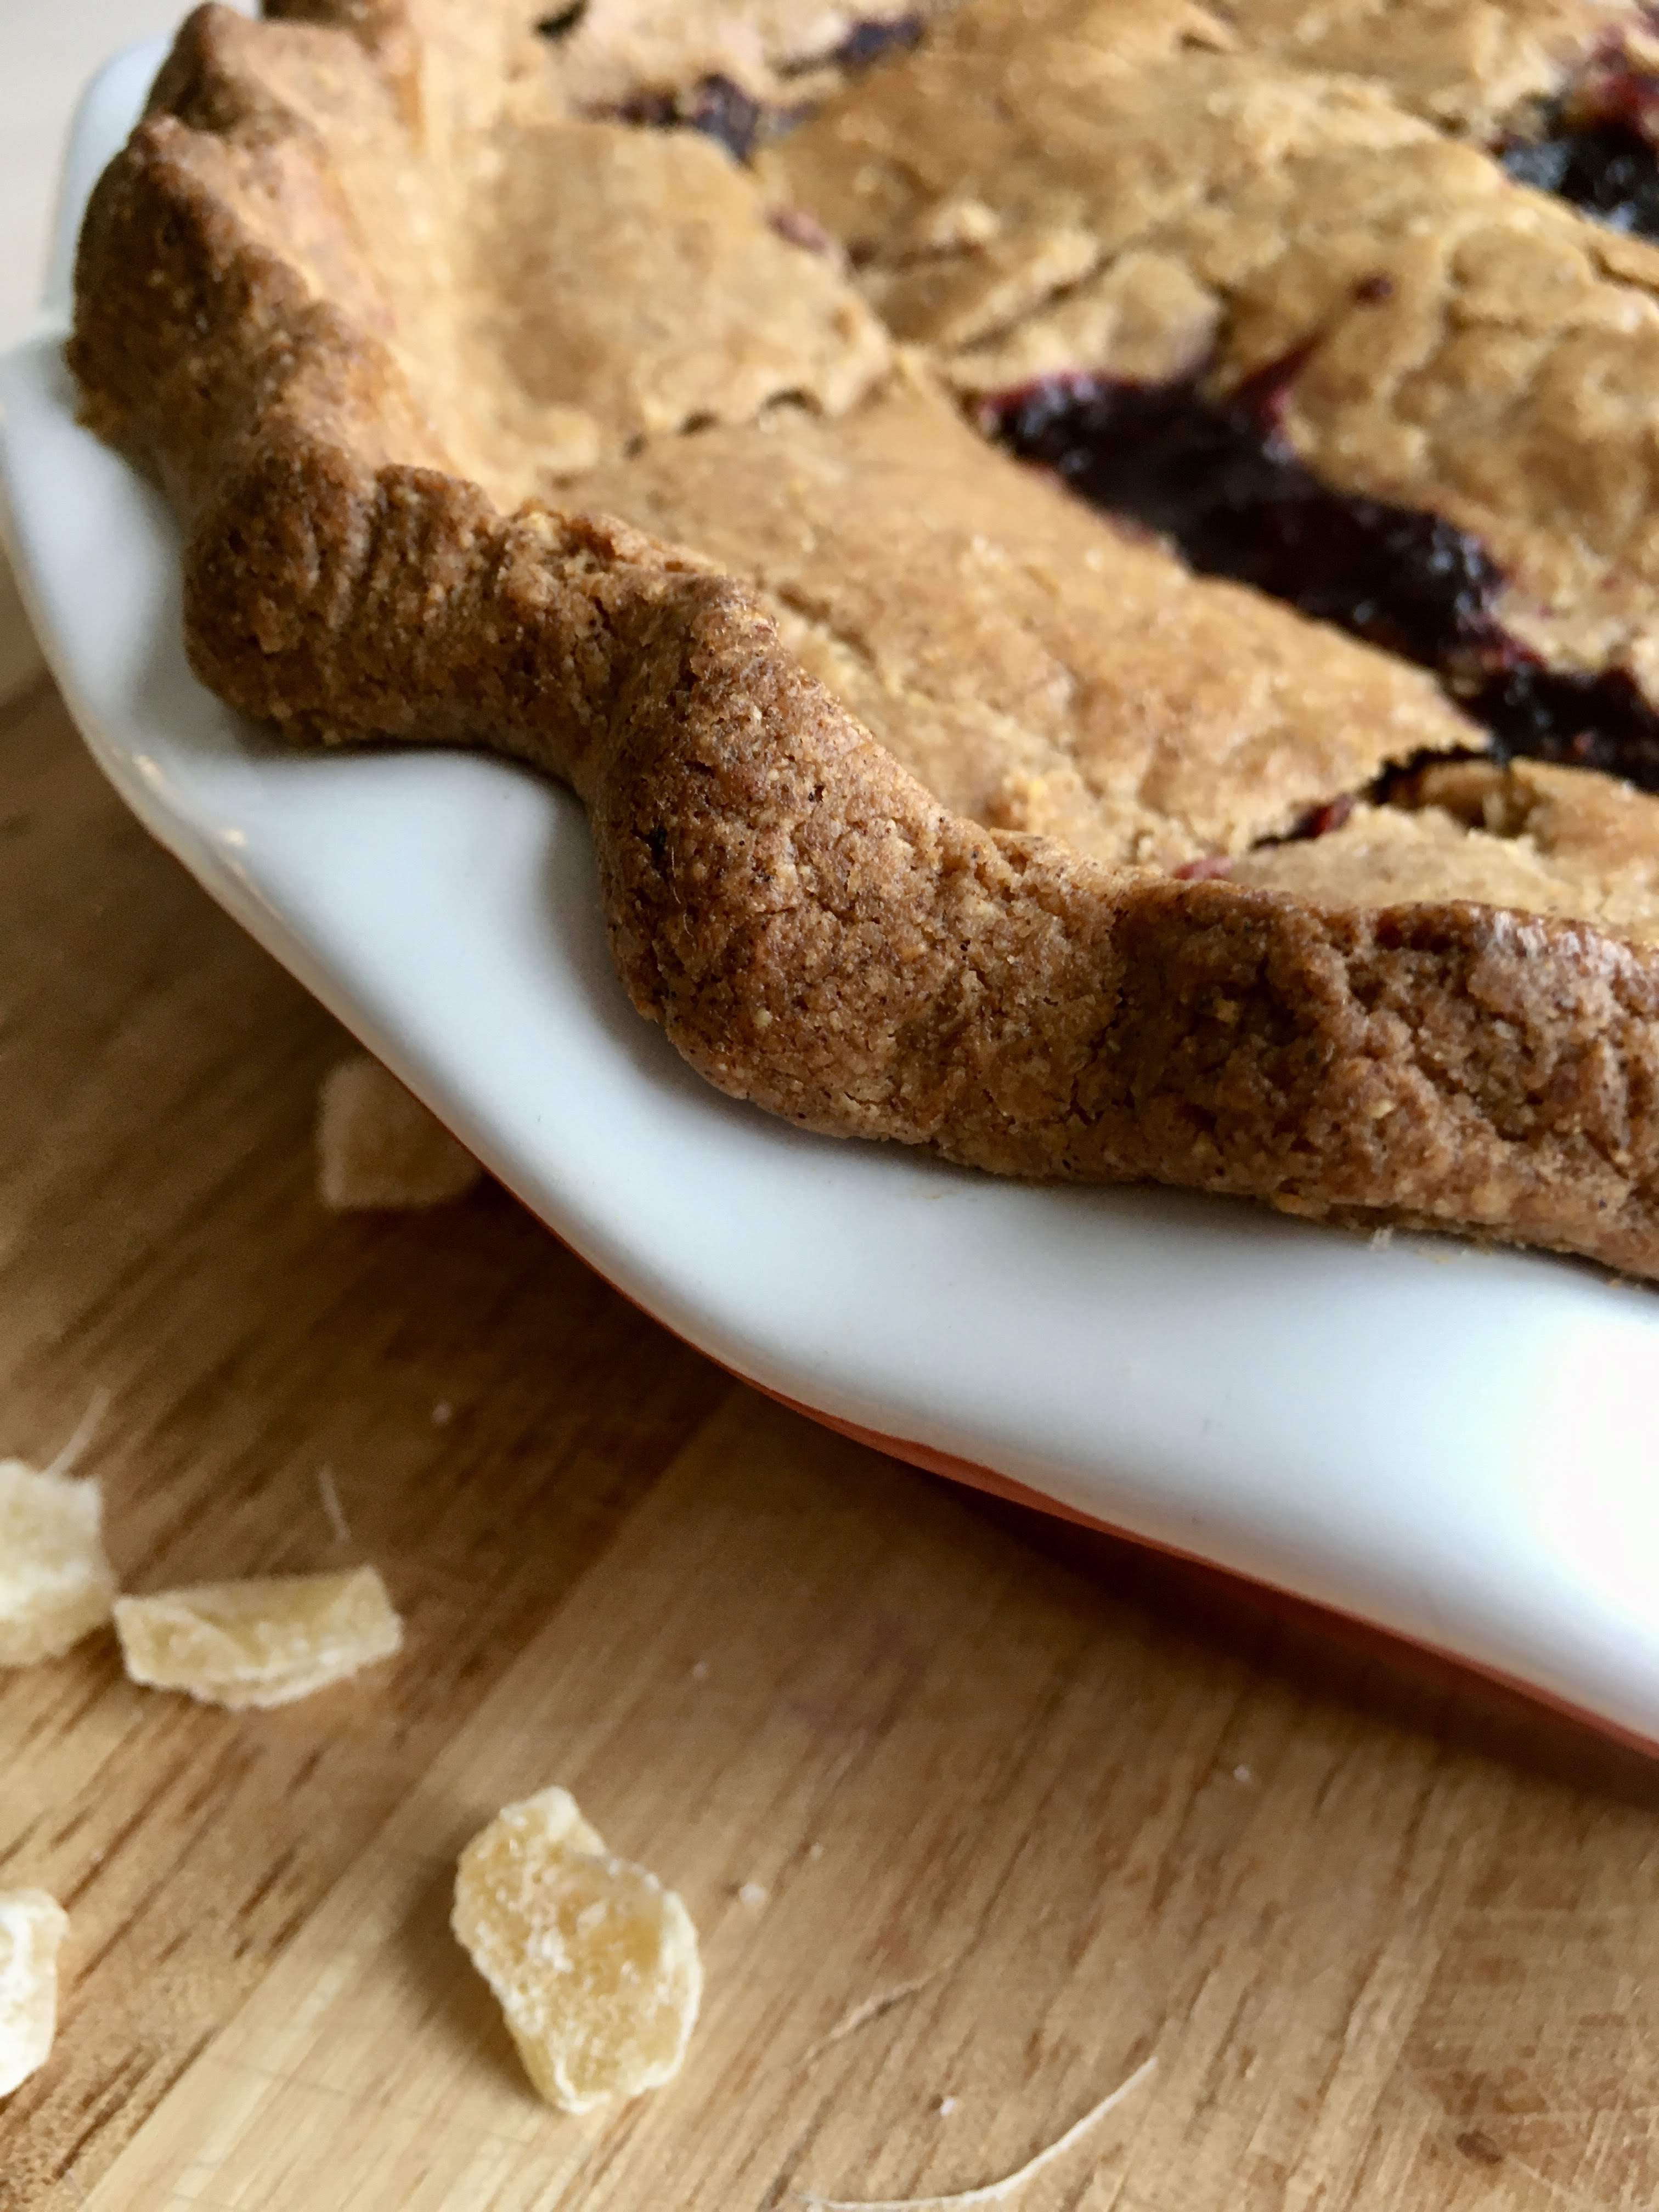
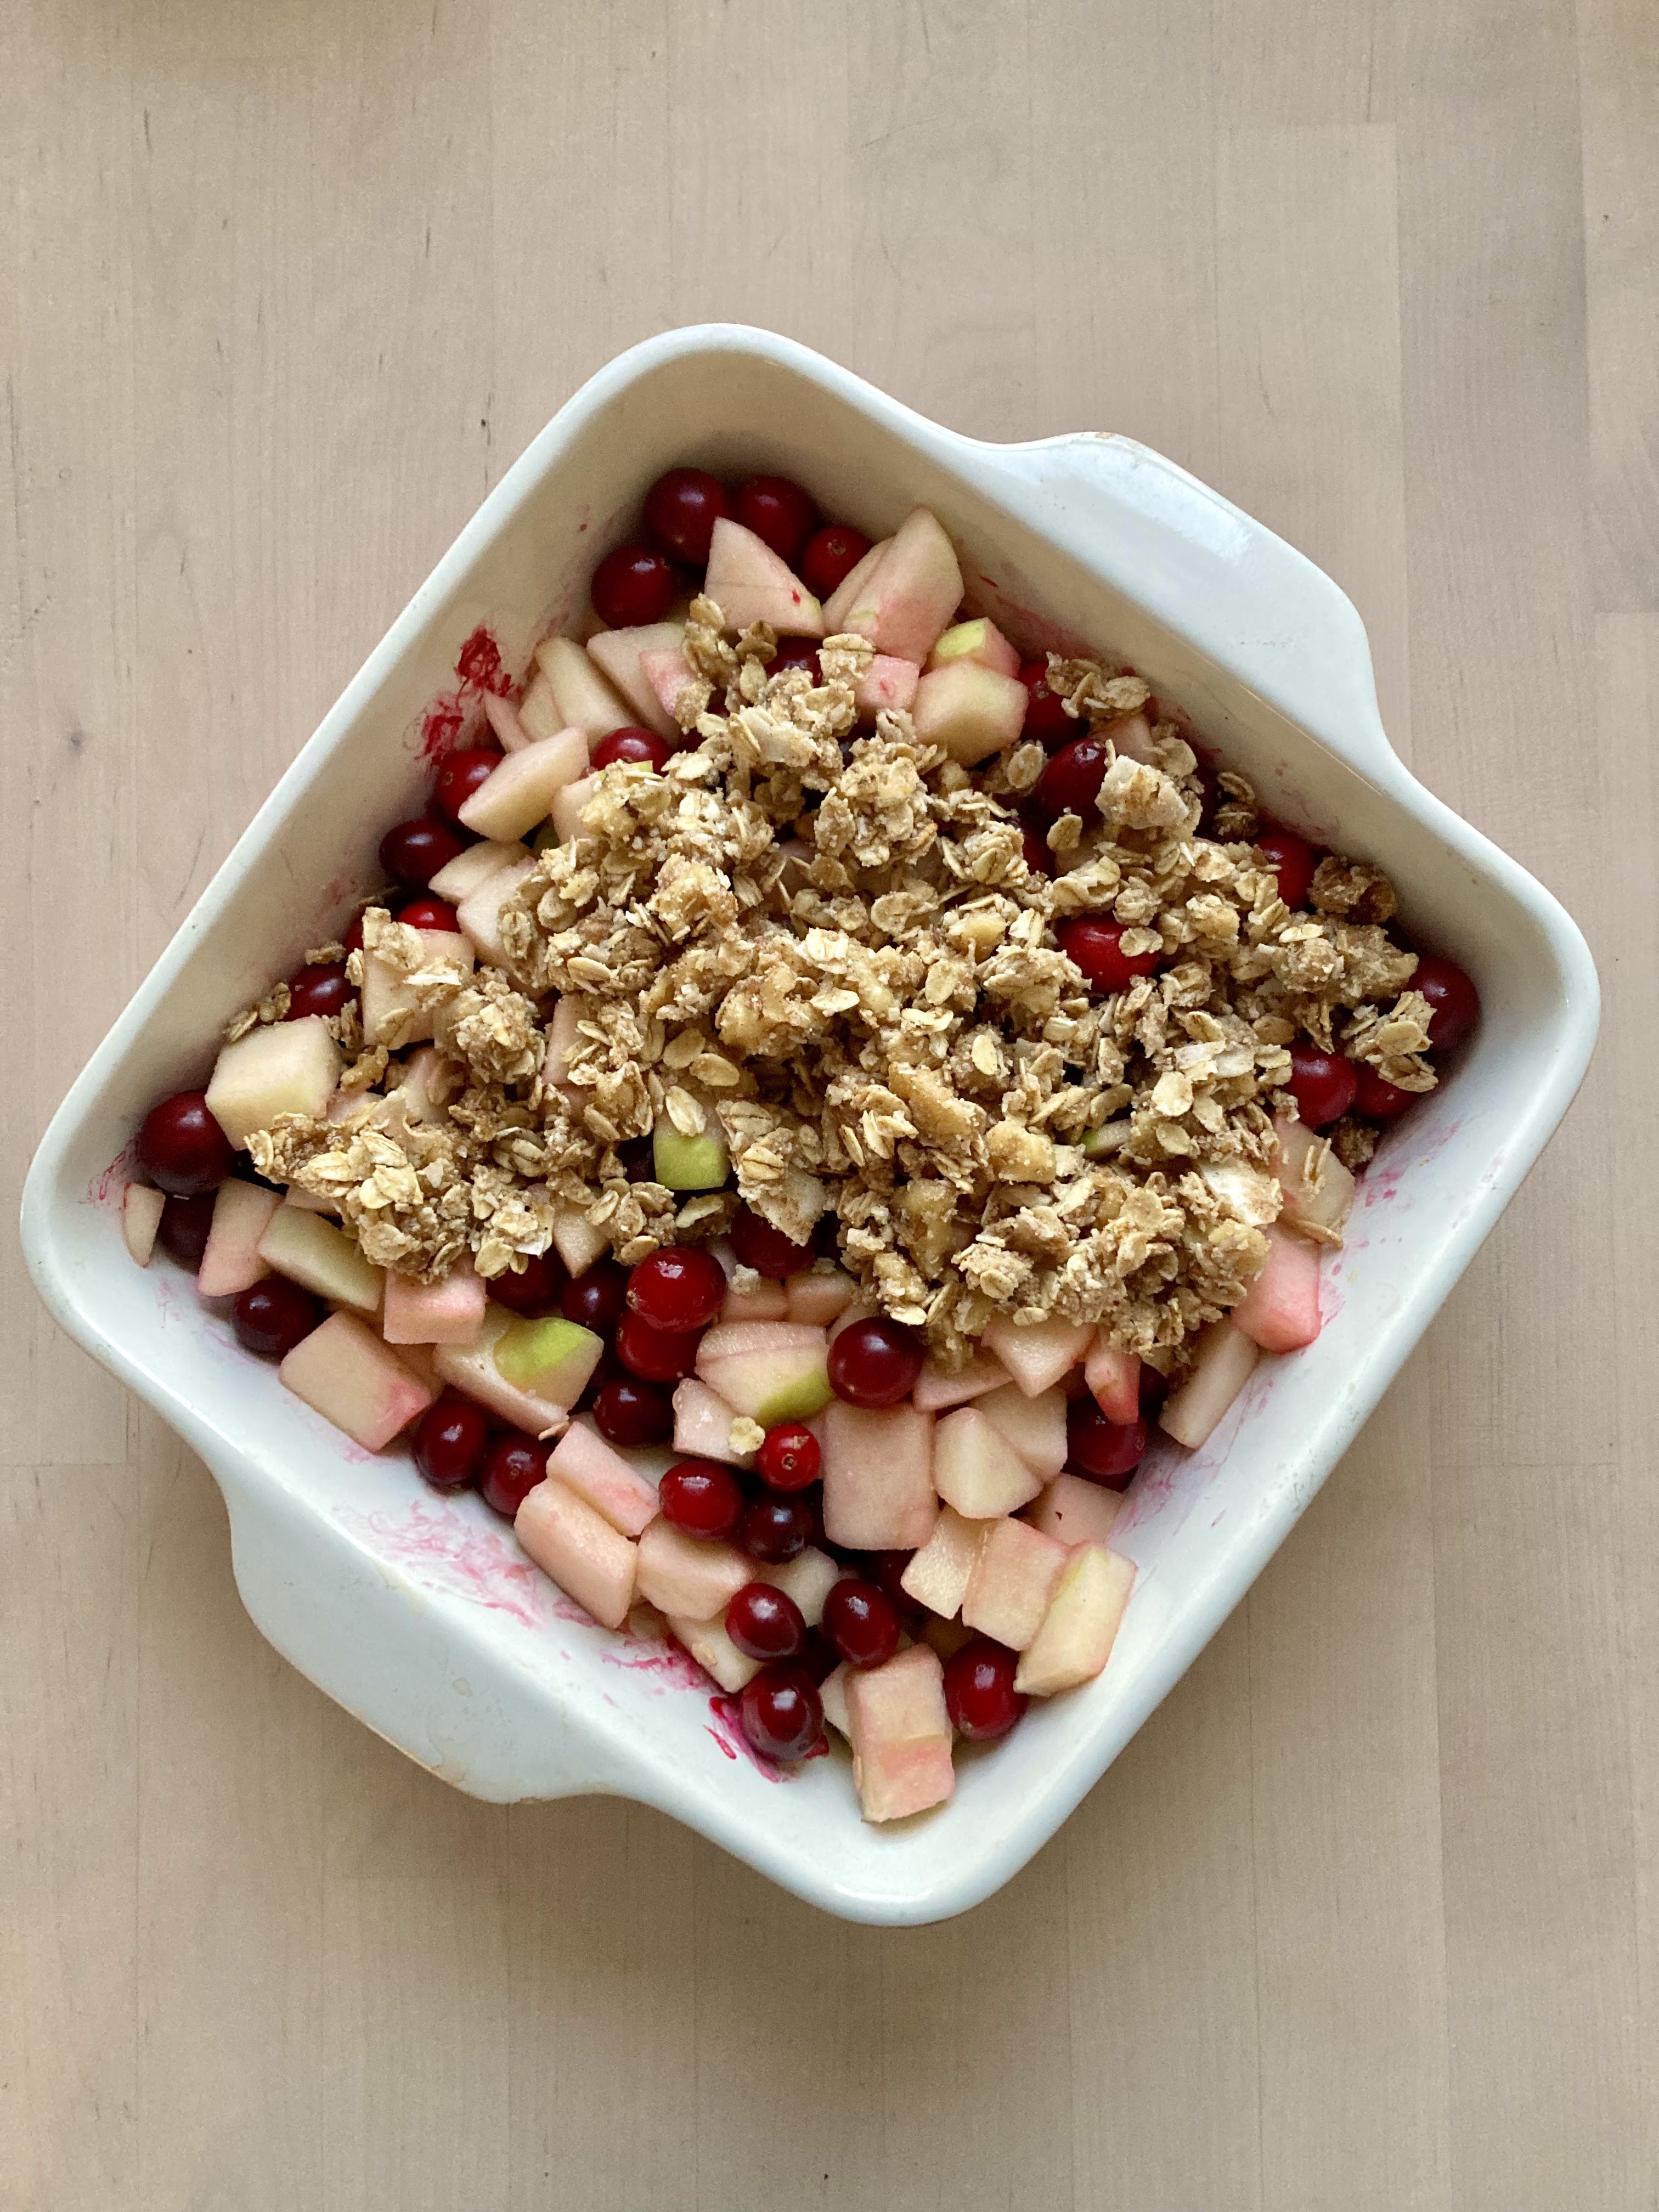
So now I’m a week into my job and settling back into a (new) routine after a few weeks off, which means it’s time to get back on the regular baking schedule! This weekend’s crisp was a product of the eternal “what do I have on hand that I can use in order to avoid a trip to the market” game – and I’m not sorry with how it turned out! I love these crisps for how adaptable they are. This one is gluten free, vegan, and only has a few tablespoons of maple in the entire thing, making it very breakfast/snack friendly. I’ve made endless variations of this previously – this one is cranberry and apple with a cinnamon crisp topping, perfect for winter.

I hope you had a wonderful holiday season – happy 2022 from my kitchen to yours!

plants hiding off-camera

Apple, Cranberry & Cinnamon Crisp

Gluten free, dairy free, vegan & refined sugar free. Yield: 1 8-9″ crisp; serves several! A Wait are those Cookies original. Lightly sweet, perfect for wintery breakfast, dessert and anything in between.

For the filling:

4 granny smith apples, peeled and chopped into cubes
1 c fresh cranberries (or frozen)
1 tbsp tapioca starch
zest and juice of one lemon
1 tbsp maple
1/4 c water

For the crisp:

1 cup old-fashioned oats (use certified gluten-free oats for a gluten-free crisp)
½ cup firmly packed almond flour
½ cup chopped walnuts
1/4 c unsweetened shredded coconut
1/4 c flaked unsweetened coconut (optional, good if you have it!)
2 tbsp maple syrup
heaping ¼ teaspoon fine sea salt
1.5 tsp cinnamon
2 tsp vanilla extract
1/3 c coconut oil, melted

Preheat the oven to 350.
Toss apples and cranberries into your baking dish of choice (my dish is 8×8, 2 qt capacity; 9″ square or 9″ deep pie dish would also be fine). In a liquid measuring cup, whisk together the tapioca starch, maple, water until combined. Pour the mixture over the fruit and toss to combine. Bake for 20 minutes.

While the filling is baking, make the crisp. In a mixing bowl, stir together the oats, almond flour, chopped walnuts, coconut, salt and cinnamon. Mix in the maple, vanilla, and coconut oil, stirring until everything is mixed thoroughly.

Once the filling has baked for 20 minutes, stir it and and redistribute evenly in the dish. Plop spoonfuls of the crisp topping evenly over the filling – no need to pack it down. Return the dish to the oven and bake for 25 to 30 more minutes, until the filling is bubbling around the edges and the top is golden.

Let the crisp rest for 5 to 10 minutes before serving. Serve with vanilla ice cream, obviously! Keep leftovers, covered, in the fridge for 2-3 days (yeah right – would take some major feat to make it last more than overnight..)

All things cranberry

Happy December!

What, ALREADY? That happened fast.

At least it’s finally gotten cooler/cold in the city – we had some weird unseasonably warm weather a few days ago but then, BAM, cold. I’m definitely okay with it, I’d rather have it feel like holiday weather.

Happy to report the bay is as cold as ever. I’m still swimming in my sleeveless wetsuit but miiiight be switching back to sleeves here pretty soon; the temperature after-drop once I get out is no joke. Still love it of course; I saw three seals the other day! One popped up right near me, so cute.

Since posting last, Thanksgiving happened – I made two pies (of course) and cranberry sauce. A real winner this year – I added fresh ginger and dates. Luckily, I have a thing of it frozen, so it’ll probably show up in a dessert sometime pretty soon – I’ll share the recipe then.

I have a very seasonal galette for you today – apple, cranberry & fig. I wonder how many galettes I’ve actually made over the course of my life? A lot, that’s for sure. I love anything cranberry (the more tart, the better) so this is a definite win for me. It’s also insanely easy and requires very little effort, BUT is super tasty and pretty. Refined sugar free, whole grain and easily vegan (just change out the butter); it makes a great dessert or late brunch / breakfast snack with coffee.

Happy holiday month! I hope everyone is starting to enjoy the season.

happy cactus

Cranberry, Apple & Fig Galette

Refined sugar free and whole grain; easily vegan with a swap of vegan butter (brush with non-dairy milk instead of half and half). Yield: 1 galette, serves 4-6. A Wait are those Cookies original.

for the crust:
1 c whole wheat flour
1/2 c cornmeal
1/2 tsp sea salt
1 tsp cinnamon
4oz/1 stick of unsalted butter, cubed
2-3 tbsp ice water

In a food processor, pulse together whole wheat flour, cornmeal, sea salt, and cinnamon. Add in cubed butter and pulse until it resembled coarse sand. Add the ice water 1 tbsp at a time until the dough starts to come together. Turn it out onto a board and knead it into a ball. I like to roll it immediately since it’s most pliable – typically I haven’t had trouble with this dough sticking. I roll it between two sheets of parchment paper and use the bottom one to bake the galette on; makes an easy transferral method between cookie sheet & cooling rack. If you’re not rolling immediately, stuck it in the fridge on a plate. Can be made ahead the night before if need be – let it sit on the counter for a bit before rolling it out if it’s been refrigerated.

for the fruit:

apples, peeled & chopped (I used two granny smith)
~1.5 c fresh cranberries (I used half a bag straight from the freezer)
3 tbsp fig jam (I have some fruit sweetened preserves that I like; but anything will work)
1 tbsp half and half or cream, for brushing on the dough
coconut sugar for sprinkling

Preheat the oven to 425. Roll out the dough between two pieces of parchment paper until it’s about 1/4″ thick. Spread the jam in a thin layer over the middle of the dough. Pile the fruit in the center, leaving a border of about 3″. Fold up the sides of the dough over the fruit. Brush the dough with an half and half or cream, and sprinkle with a little coconut sugar. Dot fruit with butter if you like, though it’s not strictly necessary. Pop in the oven and bake for 35-40 minutes, until the crust is lightly browned. Remove to a cooling rack and let cool completely before slicing and serving. Store leftovers in the fridge overnight – it’s great for breakfast :)

Rhubarb & Houseplants

More rhubarb! Lately, I can’t get enough of it. Some years I’ve been more ambivalent towards it, but not this year apparently. I’m out now though – I’m going to have to track some down again in short order.

I’ve actually never put rhubarb and pears together but I actually really love the combination. Plus, it works well in the shoulder season between winter pears and early spring rhubarb. Not to mention they both are amazing with spices like cinnamon and five spice; I added ginger as a garnish as well because I can’t get enough of that either.

I did a bunch of houseplant work the last two days – my giant hanging pothos got a haircut (his name is Kuzco and he’s been with me probably 4+ years at this point, I’ve lost track). I’m propagating the cuttings so that I can stick them back in the pot when they’ve rooted.

before… getting out of hand, he’s literally resting on my nightstand.
after!

Another little guy got a new pot since he was incredibly rootbound in his last pot, so I have a bunch of much happier plants in here.

The wildflowers around the city are blooming too! So fun to see them up on Twin Peaks and at Crissy Field.

Anyway, rhubarb galette. Per usual, eaten for dessert and breakfast. I love it both ways… I can’t ever say no to eating things with ice cream, so obviously that’s a hit. But I also love it for a midmorning snack alongside coffee – can’t go wrong with that either.

I think rhubarb is starting to be a bit more easy to find in the market – normally it’s paired with a TON of sugar, which I obviously hate. I love it this way instead, alongside a sweeter fruit.

Happy weekend! I hope you are able to do something fun :)

Rhubarb & Pear Galette with Cinnamon and Five Spice

Lightly sweet and perfectly springy. Whole grain and refined sugar free – easy to swap in a gluten/grain free galette crust if needed – just add the cinnamon & five spice to whatever crust you use. Yield: 1 galette, serves several. A Wait are those Cookies original.

for the crust:

1 c whole wheat flour
1/2 c cornmeal
1/4 c almond flour
1/2 tsp sea salt
1 tsp cinnamon
1/2 tsp five spice
4oz/1 stick of unsalted butter, cubed
1/2 tsp almond extract
2-3 tbsp ice water

In a food processor, pulse together whole wheat flour, cornmeal, almond flour, cinnamon, five spice & sea salt. Add in cubed butter and pulse until it resembles coarse sand. Add almond extract and ice water. I typically add three tbsp water, pulse a few times, then add more if need be, 1tbsp at a time, stopping just when the dough starts to come together. Turn it out onto a board and knead it into a ball. I like to roll it immediately since it’s most pliable – typically I haven’t had trouble with this dough sticking or cracking if rolled immediately. I roll it between two sheets of parchment paper and use the bottom one to bake the galette on; makes an easy transferral method between cookie sheet & cooling rack. If you’re not rolling immediately, stick it in the fridge on a plate. Can be made ahead the night before if need be. If you are rolling immediately, roll it out into a circle about 1/4″ thick.

for the filling:

2 pears, sliced (mine were d’anjou)
2-3 stalks rhubarb, sliced
2 tbsp apricot jam (I use St. Dalfour’s, which has no added sugar – just fruit juice)
sprinkle of coconut sugar + milk/half and half for brushing

Preheat the oven to 425. Spread the apricot jam over the middle of the dough, leaving a 1″ border, then pile on the sliced pears and rhubarb. Fold up the sides of the dough over the fruit and sprinkle with coconut sugar. Brush the dough with milk or half and half. Pop in the oven and bake for 30-35 minutes, until the crust is lightly browned. Remove to a cooling rack and let cool completely before slicing and serving. Store leftovers in the fridge overnight – it’s great for breakfast :)

Rainy days and a cranberry tart

Rain!

I love baking when it’s rainy, or really just doing anything when it’s rainy. I even like walking in it! Maybe because I lived in the pacific northwest for awhile, who knows.

We finally got some here in SF – and oddly enough, my autoimmune temperature disregulation stuff calms way down when it’s actively raining, or when the humidity is super high (bizarre, I know. If anyone has ANY insight into this…. please let me know!!) – so I definitely welcomed the day of respite. Plus, I love rain anyway, so no complaints there.

In other news, it’s mid-December already, what?! Insanity. It feels like it was just my birthday in September, and now we’re almost to the end of the year. To that end, I wanted to make something ridiculously “festive” and wintery – enter this cranberry curd tart! I’m in LOVE with the color. None of the photos are edited! This is just the unreal color that it naturally is.

It sounds complicated but really isn’t – basically just a riff on lemon curd, with the extra step of cooking the cranberries (which is fun anyway, I love listening to them pop). The tart itself comes together very quickly once the curd is made – all told, it’s in the oven for less than 30 min. The curd can be made in advance too, since it keeps really well in the fridge – and actually, the color deepens a little if you let it rest overnight. Fun!

See! Curd straight out of the fridge, after resting overnight.

We’ve had more gorgeous sunsets lately – a few that were worth climbing out my window onto the roof for photos. I happen to have the only apartment in my building that has direct roof access, so I try to take advantage…. I took the screen out of the window for that reason!

C and I also took a midweek mental health break walk over at Fort Funston – hands down our favorite beach out here. It was a beautiful, salty and humid 6 miles – perfect.

I hope all is well as can be in your worlds. I’m here to bring a little color to my corner of the internet and wish you a festive season, in spite what is happening in the world. Regardless of my own personal health stuff, I can always find joy in baking, and I hope that is true for you too! At the very least, you can come over here and look at pretty pictures, that’s good too :) Happy December baking!

Cranberry Curd Tart with a Cinnamon Cornmeal Crust

Refined sugar free & gluten free. Crust is easily grain free – just swap out the cornmeal for an equal volume of almond flour (or more shredded coconut). The curd can be made well in advance if desired – it keeps well in the fridge for several days. A Wait are those Cookies original, inspired by a New York Times tart that keeps cropping up in my feeds. Yield: 1 9″ tart, serves several.

For the crust

1.5 c almond flour
1/4 c unsweetened shredded coconut
1/2 c cornmeal
heaping 1/4 tsp sea salt
1/2 tsp baking soda
1 tsp cinnamon
2 tsp vanilla extract
2 tbsp pure maple syrup
6 tbsp coconut oil, melted

In a large bowl, stir together almond flour, shredded coconut, cornmeal, sea salt, baking soda, and cinnamon. Add in vanilla, maple, and melted coconut oil, and stir until completely combined. The dough will look crumbly, but you’ll be able to press it together with your fingers.

Preheat the oven to 350, and lightly grease a 9″ tart pan (w/ removable bottom; or alternatively a pie plate) with coconut oil. Press the crust into the plate and up the sides with a spoon or your fingers, creating a smooth edge. Poke the bottom with a fork a few times, and bake for 15 minutes. Remove and let cool for a few minutes. Increase oven temp to 375.

Cranberry Curd

1 bag of cranberries, about 2 cups
1/2 c freshly squeeze orange + lemon juice (I used 4 small mandarins + 2 lemons)
1/4 c water
zest of 1 lemon
4 tbsp butter
1/4 tsp sea salt
1/4 c maple syrup
1 whole egg
2 egg yolks
1 tsp vanilla

In a saucepan over medium high, heat cranberries, citrus juice, water and lemon zest until cranberries pop, about 10 minutes. Stir occasionally. Once the berries are very saucy, remove from heat and puree with an immersion blender (or a food processor). Strain the puree through a fine mesh sieve, pressing on the solids to extract all the good liquid. Make sure to scrape the bottom of the sieve too! Add liquid back into the saucepan (wipe it out first, if needed); discard solids.

Add maple, salt, and butter into the cranberry mixture, heating over medium-low and stirring continuously until butter is fully melted, about five minutes. In a separate bowl, whisk together egg and egg yolks. Temper the eggs by slowly whisking in a bit of the hot cranberries; then continue to whisk in the rest. Add the whole thing back into the saucepan (no need to wipe it out here), and continue to cook over low heat, stirring continuously, until the curd thickens and coats the back of a spoon – about 8-10 minutes more. Whisk in vanilla, then remove from heat and let cool completely (I usually let it cool in a pyrex snapware container, not the saucepan). You can strain it again if need be – I found mine was smooth enough to do without.

The curd can be made ahead – it keeps well for several days in the fridge. No need to bring it room temp before using in the tart.

Pour the curd into the crust and smooth the top. Bake at 375 for 8-12 minutes, until the curd is barely set. Cool completely before slicing and serving – even better, cool it in the fridge for a few hours before slicing. Leftovers keep well, covered, in the fridge at least overnight.

naked tart, with a small divot where I dropped a crumb and tried to get rid of it. oh well, perfection is overrated anyway.

Low fuss desserts for strange times

img_0525

Hello from week three of shelter in place! It’s finally April? I think? As a friend said today on a virtual zoom coffee date, every day is Blursday and she is NOT wrong.

img_0532

I’m following a pretty typical daily routine at this point, which is weird even to think about but I guess I’m a routine type of person and that helps make it all feel more… normal? Short walk around the neighborhood and up some hills as soon as I get up, then french press coffee + frothy milk (oh yes) and work until the end of the day when I take another looooong walk for at least an hour. Probably TRX in there somewhere so my arms don’t fall off from lack of lifting (waaah).

img_0529

Hourly pacing around / shadowboxing and/or dance parties highly recommend to keep from becoming one with your chair! Ha.

Weekends are for baking something fun! I might make cookies or quickbread during the week, but I like to reserve weekends for something slightly more involved. Plus, I actually find the challenge of baking the pantry really fun, so there’s that.

img_0530

img_0518

This pandowdy (‘dowdy’ pie crust, for those of you who don’t know – you cut it up partway through baking so the fruit can bubble up from underneath) was a happy occurence due to the gift of some vacuum sealed plums from a friend’s yard that had been in C’s freezer for a bit. I knew they’d be really juicy once thawed, so I cooked them down a little & drained some of the juice before turning them into pandowdy filling. I recommend you do the same, unless you’re using fresh plums and baking in season!

It’ll be dessert tonight with ice cream and breakfast tomorrow, I have no doubt. The gingery plums are punchy and tart – I added a bit of lemon zest and maple to round out their flavors. The cinnamon crust is SO easy and smells amazing. It’s easily subbed out for a gluten free or dairy free crust if you can’t do gluten or butter – I’m working through what I have on hand, so this is a whole wheat butter crust.

Added bonus of baking this: it will make your apartment / house / kitchen smell like a graham cracker in the BEST way!

img_0533

It’s rainy today and I love that. I’m giving myself permission to stay in – usually it’s GO GO GO to get in a long hike/run/walk at some point in the day, but my knees are feeling the pavement so I’m giving myself the day off to spend with my plants, minus some TRX work.

img_0459

Kuzco says hello from his new hanging perch! I’m pretty sure he loves it, and I absolutely do too.

img_0475

A shot of the urban jungle on a sunnier day. I’m trying on new names for the apartment – I called it the Eyrie when I moved in, since I’m on the fourth (top) floor and the wind tends to whistle around a lot up here. Now that the plant fam has grown so much though… do we like the Urban Jungleow? orrrr…. the Fogforest? hahaa.

img_0503

I hope you’re going easy on yourselves, too. This is a weird, weird time and everyone should cut themselves a little slack. I definitely suggest baking something awesome :) Happy Saturday!

img_0458

img_0536

Plum and Ginger Pandowdy with a Cinnamon Crust

A Wait are Those Cookies original. Easily made with either fresh or frozen plums – I had been gifted a bounty of vacuum sealed, frozen plums from last summer from a friend’s garden, so I thawed those for use here. Yield: 1 9″ pandowdy, serves several. Refined sugar free! If you’re gluten free, sub in your favorite single-crust gluten free crust here and use that. I used whole wheat, since that’s what I have on hand and I’m doing my best to cook/bake my pantry :)

for the filling:

a whole lotta plums (I had a big thing of vacuum sealed, frozen ones from the summer; fresh would be fine too)
zest + juice of one lemon
1″ piece of fresh ginger, finely diced
2 tbsp tapioca starch
1/4 c chia seeds
3 tbsp maple
pinch of sea salt

Combine everything in a large stockpot / dutch oven / sauce pot / whatever you have that fits, and bring to a slow boil, stirring occasionally. Remove from the heat and let cool completely. Drop the filling into a deep pie plate (mine is 9″) and set aside while you make the crust.

for the crust:

1/2 cup unsalted butter diced and chilled
1 cup whole wheat pastry flour
1/4 c cornmeal
2 tsp cinnamon
1/2 teaspoon salt
2-4 tablespoons ice water
1 tsp vanilla

Combine flour cornmeal, cinnamon, and salt in food processor and pulse briefly to mix. Add butter; process until it resembles coarse crumbs. Add ice water a tbsp at a time until the dough forms a ball – you’ll be able to tell when it’s ready! If it still looks dry, add water 1 tsp at a time. Turn the dough out a floured surface (ie marble slab, or countertop, etc) OR use two pieces of parchment paper like I do for less mess – no need to flour. Roll out the dough to be roughly circular (no need to be perfect here – pandowdies are pie’s unfussy cousin), and lift the dough onto the fruit. Tuck in the edges, leaving a rim of dough between the edge of the pie dish and the fruit – I crimped mine because I’m an overachiever and I also had extra dough, but no need to do that. Chill the assembled pandowdy for at least 30 minutes.

Preheat the oven to 400.
Make a few slits for steam to vent in the top of the crust, then brush the top with egg white and dust with coconut sugar. Pop the whole beautiful thing into the oven for 40 minutes; best if you line the rack beneath with foil or a large baking sheet – the juices runneth over!

Once you hit the 40 minute mark, take the pandowdy out, and use a sharp knife to break up the crust, thus ‘dowdy-ing’ its looks. Stick the pandowdy back in the oven, and bake for another 10 minutes. Let cool completely before serving; it will be gloriously juicy and delicious so might I suggest serving it in bowls? Ice cream is… optional, sort of. You do you!

Store any leftovers (who are you) covered in the fridge, but make sure to save some for breakfast. You’ll thank me later!

img_0528

apples + cheese

img_1964

Okay I admit it…

I was super skeptical of this whole apple-pie/cheddar combination for a loooong time, despite that fact that I LOVE both apple pie and cheese. Not to mention that I like apples and cheese together, ha. For some reason, putting cheddar in pie crust or something like that struck me as slightly not appealing. Despite all that, I’ve had that combination on the brainwaves for awhile now, and finally got around to trying it. Happy to report that I actually find it shockingly delicious, and will be happily making it again in the near future!

img_1956-1

When I ate the crust of this by itself, it almost reminded me of a cracker, but in the beeeest way possible. Add in the filling and a little ice cream on the side (or not!), and we find ourselves an awesome dessert situation.

img_1955

C was even skeptical of this one at first but is definitely a convert, so I consider it a win all around. I almost ALWAYS have sharp cheddar in the fridge (unless there has been some unforeseen terrible event that has arranged to leave me without cheese – travesty) and I also happened to have granny smiths on hand that had been hanging out for awhile – I was feeling like they needed to get used sooner rather than later.

img_1958

Happy circumstances all around, since this thang came together in snap and was so so delicious and easy. Definitely recommend, if any of you are on the apple-cheddar-dessert fence.

Life lately has been a loooot of work deadlines, so my only exciting photos of late are from my walks to/from work – I love walking, since it seems like every time I go out I see something new! Or just some beautiful clouds. Either way, I’m a big fan.

img_1941

Cable car underpinnings.

img_1938

Plants taking a vacation in another window for a change of scenery.

img_1980-1

Please excuse the slightly weird lighting in the galette photos… they look overly dramatic or something because of the time of day – I was off my normal photography routine but it was so good, I had to share.

Happy weekend, blog friends! I hope yours are restful and fun :)

img_1964

Apple Cheddar Galette

Grain and gluten free, and refined sugar free. Slightly savory, slightly sweet and all around delicious. Great for breakfast on its own, or with ice cream for dessert. A Wait are Those Cookies original. Yield: 1 galette, serves several.

For the galette dough:

1.5 c almond flour (not meal; you want the finer flour variety)
1/2 c tapioca flour
1/4 tsp fine sea salt
5 tbsp unsalted butter, chopped (or ghee)
1 egg*
1/2 c sharp cheddar, grated

*alternately you can use a flax egg with very similar results (3tbsp water + 1 tbsp ground flaxseed)

In a food processor or high-power blender (I used a food processor), pulse almond flour, tapioca starch, salt, butter and cheddar to combine until it looks like coarse meal. Add in egg and pulse just until combined. Shape into a disk and chill in the fridge for at least an hour, or up to overnight.

For the filling:
4 granny smith apples, chopped into smallish pieces
zest and juice of two lemons
2 tbsp tapioca starch
pinch of sea salt
1/2 tsp almond extract
1 tbsp vanilla
2 tbsp maple syrup
1 tsp cinnamon

In a large bowl, toss together apples, lemon zest and juice, tapioca, sea salt, almond and vanilla, maple and cinnamon.

Once the dough has chilled, preheat the oven to 375. Roll out the dough between two pieces of parchment paper, keeping the circle to about 1/4″ thickness. Peel off the top piece of parchment, and slide the rolled out dough on its parchment onto a baking sheet. Top with apples. Begin folding up the sides, creasing them together as you go – if the dough rips, that’s okay (you can crimp the cracks back together; remember: galettes are forgiving and rustic!); you can use the bottom piece of parchment to help fold up the sides.

Dot the apples with butter and sprinkle dough with a little coconut sugar. Bake for 35-40 minutes until edges are golden brown — mine came out just fine at 35 minutes, so check accordingly.

Let cool for a few minutes on the baking sheet, then carefully slide the whole galette onto a cooling rack to let it cool completely. Serve with your fave ice cream or whatever of choice! Keeps well covered in foil on the counter or in the fridge.

img_1961-1

Figgin’ delicious

fullsizeoutput_2812

Hi friends!

fullsizeoutput_281e

I’ve had a wonderful week – my birthday was last Monday, so C planned a whole surprise trip to Monterey! So so so lovely and relaxing.

fullsizeoutput_27f1

fullsizeoutput_27c1

fullsizeoutput_27cc

I didn’t bake anything for my birthday this year but I did get to spend quality time with the fave human, enjoy myself at the spa and on the beach and play board games + read my book, so I consider this a winning situation. Ofc we also went to the aquarium! How could you not. Plushies were acquired, ha! He got a kraken and I now have Norma the Narwhal keeping me company.

IMG_0811

fullsizeoutput_27fb

fullsizeoutput_27e7

Vati’s birthday was yesterday! This is the week of all the birthdays. Ergo, there is dessert! He doesn’t know about this one yet as I’m writing this, sneaky sneaky. I’ll be bringing it over in a few hours and scheduling this post to drop after I arrive. Ha!

fullsizeoutput_280b

This tart is inspired by horchata! I love horchata with a fierce passion, though I very rarely drink it because it’s usually so sweet. I took the cinnamon-vanilla idea and threw it in with some coconut milk, tucked inside a spicy chocolate shell. I have to say (based on the few taste tests I had while putting this together) that this is a winning combination. Vati looooves all things spicy so I think it’s definitely his jam.

fullsizeoutput_281d

fullsizeoutput_2809

I love what happened with the surface of the panna cotta too – not sure actually what happened there but my guess is that once it was mostly set, I shut the fridge door slightly harder than I meant to and jostled it. Regardless, it’s a super cool effect so I might try to replicate at some point.

fullsizeoutput_281c

Alsooooo it’s FIG SEASON. I have stopped by the market repeatedly to pick up figs the last several weeks – can’t stop, won’t stop. Fig season isn’t that long so I have to get after it while I can! I LOVE figs. Especially these – they’re called Panachée or tiger stripe figs, and they have gorgeous magenta insides. Eat out of hand or top a tart with them – can’t go wrong either way!

fullsizeoutput_280f

fullsizeoutput_280a

Happy weekend!! I hope you’re out enjoying the beautiful weather.

fullsizeoutput_2811

Cinnamon Coconut Panna Cotta on a Mexican Chocolate Crust

Inspired by horchata! Cinnamony, vanillay goodness with in a spicy chocolate crust. Grain & gluten free, dairy free and refined sugar free. A Wait are those Cookies original. Yield: 1 9″ tart.

fullsizeoutput_2807

For the crust:

1.75 c almond flour
1/3 c unsweetened cacao powder
1/4 c unsweetened shredded coconut
heaping 1/4 tsp sea salt
1/2 tsp baking soda
2 tsp vanilla extract
2 tbsp pure maple syrup
4 tbsp coconut oil, melted

In a large bowl, stir together almond flour, cacao powder, coconut, sea salt, and baking soda. Add in vanilla, maple, and melted coconut oil and stir until completely combined. The dough will look crumbly, but you’ll be able to press it together with your fingers.

Preheat the oven to 350, and lightly grease a pie plate with coconut oil. Press the crust into the plate and up the sides with a spoon or your fingers, creating a smooth edge (or not, your call!). Poke the bottom with a fork a few times, and bake for 15 minutes.

Remove and let cool.

Panna Cotta:
1 package unflavored powdered gelatin
1.75 cup full-fat coconut milk
1/4 c cold water
1 tbsp vanilla bean paste
1.5 tsp cinnamon
1/4 cup maple
Scant 1/4 tsp sea salt

In a small bowl, sprinkle the gelatin over 1/4 cup cold water. Let stand without stirring until the gelatin is moistened, about 10 minutes.

Pour the coconut milk into a small saucepan. Add vanilla, cinnamon, maple, and salt, stirring consistently. Remove from the heat. Add the gelatin mixture and stir until completely dissolved, about 3 minutes. Cool until lukewarm, about 10 minutes. Pour the panna cotta mixture into the cooled tart shell. Place in the refrigerator until set, approximately 4 hours.

Store in the fridge – keeps well overnight for breakfast the next morning :)

Behind the scenes…

fullsizeoutput_280d

fullsizeoutput_2811

Purple desserts & rain

fullsizeoutput_251d

Hi friends!

fullsizeoutput_2506

Slightly delayed post from the weekend, since I was busy busy and didn’t have time to get this out earlier.

fullsizeoutput_24f5

fullsizeoutput_2512

C and I almost completely annihilated this thing in two sittings, haha! It was GOOD. I love the cinnamon crust – it’s reminiscent of cinnamon graham crackers, which which I had a phase when I was a kid. I’ve always loved graham crackers, and anything that reminds me of them (and by association, my gram – who always fed them to me at her house) is totally welcome in my book.

fullsizeoutput_2516

Such a great weekend surrounded by fave human & friends – I wish it hadn’t flown by so fast! We’ve been having some unseasonably rainy weather (accounting for the slightly funky lighting in these photos… the foliage + overcast wasn’t cooperating with me), which I’m LOVING, despite everyone else wanting sun, hahaa. I just love the rain!

FD990747-EDF2-4D1E-A6C3-5725DA110AE7

fullsizeoutput_251a

We ate this tart while board gaming on Saturday night, and then came back for a second round over a late brunch on Sunday. It’s a winner in both contexts – I love it with vanilla ice cream, but it’s also great on its own. It’s not nearly as tart as some of my other desserts, so if you’re baking for a crowd or with kids, I’d suggest this one. Besides, purple is broadly appealing :)

fullsizeoutput_2505

fullsizeoutput_2507

Have a great week!

fullsizeoutput_251d

Blackberry Panna Cotta on a Cinnamon Crust

Gluten free, dairy free & refined sugar free! A Wait are those Cookies original. Yield: 1 9″ tart; serves several. The cinnamon play so well against the berries – this works for a special breakfast or a delicious dessert with ice cream. Or both! :) Crust is easily grain free – just swap out the cornmeal for an equal amount of almond flour.

fullsizeoutput_24fe

For the crust:

1.5 c almond flour
1/3 c unsweetened shredded coconut
1/3 c cornmeal
1 tsp cinnamon
heaping 1/4 tsp sea salt
1/2 tsp baking soda
2 tsp vanilla extract
2 tbsp pure maple syrup
6 tbsp coconut oil, melted

In a large bowl, stir together almond flour, shredded coconut, cornmeal, cinnamon, sea salt, and baking soda. Add in vanilla, maple, and melted coconut oil, and stir until completely combined. The dough will look crumbly, but you’ll be able to press it together with your fingers.
Preheat the oven to 350, and lightly grease a 9″ tart pan (w/ removable bottom) with coconut oil. Press the crust into the plate and up the sides with a spoon or your fingers, creating a smooth edge (or not, your call!). Poke the bottom with a fork a few times, and bake for 15 minutes. Remove and let cool for a few minutes.

For the panna cotta:

2 cups (approx. 1/3 lb.) blackberries — frozen is fine!
1/2 c wild blueberries (frozen is just fine)
2 tsp water
2 tbsp maple
2 cups coconut milk, full fat (one can)
1 tbsp pure vanilla extract
1 packet of powdered gelatin
1/4 c cold water

Make the panna cotta filling:
In a small saucepan, combine the blackberries, blueberries, 2 teaspoons of water, and maple. Cover and simmer over low heat until the berries break down. Taste it – we love it tart, but bump up the maple a little if it’s too tart for your taste.

Add the coconut milk to the berries, and re-heat the berry-coconut mixture over low heat until it just reaches a simmer. Remove from the heat, and allow the mixture to steep for 30 minutes.

Toward the end of the 30 minute steep time, place the 1/4 c cold water in something large, like a mixing bowl or a large pyrex measuring cup (mine is 4c). Sprinkle the powdered gelatin over the cold water.

Return the berry-coconut mixture to the stove, and re-heat again until just barely simmering, and stir in the vanilla.

Place a fine mesh strainer over the pyrex or bowl with the softened gelatin, and strain the berry-cream mixture through the sieve, using a spatula to stir and press berry-y coconut milk to extract every last bit. Once all liquid has been extracted, thoroughly whisk the berry-coconut mixture into the softened gelatin.

Carefully pour the filling into the tart shell, then leave the tart in the refrigerator to at least four hours or overnight. Keeps well in the fridge; serve leftovers for breakfast ;)

fullsizeoutput_250e

Let’s get crackin’

fullsizeoutput_1eb0

Oh heavens, the holiday market shopping madness has already begun! I rather forgot this was the last weekend before Thanksgiving… Whole Foods is already at full-tilt insanity. It’s all good though, I don’t think I need to go back until after the holiday (ha. famous last words).

fullsizeoutput_1eae

It’s time for all things pumpkin, sweet potato, apple, and cranberry! I love the run of late autumn/holiday seasonal baking. I will say though, things can get a little one-note with all of the cinnamon-nutmeg-ginger combinations out there, which is why I especially love this pie. It’s light on the spice, but the cinnamon and ginger are present just enough to give it that seasonal vibe. Plus, it’s purple! Naturally! What’s not to love.

This thing obviously cracked like crazy (it cooled too fast in my apartment…might, *ahem* be a little cold in here?!) but I’m embracing its imperfections! It was delicious, and, like human beings, is unique and imperfect in its own way.

fullsizeoutput_1eb1

Interestingly, it lightened up a lot in color after baking – see below photo! That was taken just over 24 hours after baking. The lighting is a bit different of course, but it was fun watching the color change.

IMG_0407

C and I both loved this one, a LOT. So much so that it might make another appearance this week for Thanksgiving! We’ll see. Regardless, we ate it for dessert and of course for breakfast, as we hibernated away from the bad air.

fullsizeoutput_1eb8

I was traveling in SoCal for work last week and avoided some of it, but we’re still under a big blanket of smoke. The sunsets have been incredible, but that’s small comfort when outside is essentially verboten.

IMG_0340

IMG_0330

fullsizeoutput_1e91

My heart just breaks for those displaced by the terrible fires to the north of us and my beautiful state – we are on our 10th day of extremely unhealthy air quality and choking smoke in the Bay Area, and I can only imagine what it’s like closer to the fires. Sending all the good vibes to those who need them, though I know that isn’t nearly enough.

fullsizeoutput_1eb3

Hold your loved ones, and bake them things – it is always the little kindnesses that are the most appreciated!

fullsizeoutput_1eb6

Purple Sweet Potato Cheesecake Tart on a Chocolate Coconut Crust

Perfect for the holidays! Only lightly sweet – as always – and I love the purple sweet potatoes for their natural color. This comes together in a snap; you can always use regular sweet potato puree, or even pumpkin. This is kind of like a cheesecake, but uses yogurt instead of cream cheese for a lighter dessert. Yield: 1 9″ tart, serves 6-8 realistically or two really hungry people for dessert & breakfast the next morning :) Filling is adapted from the Roasted Root, here!

fullsizeoutput_1eac

For the crust:

1.75 c almond flour
1/3 c unsweetened cacao powder
1/4 c unsweetened shredded coconut
heaping 1/4 tsp sea salt
1/2 tsp baking soda
2 tsp vanilla extract
2 tbsp pure maple syrup
4 tbsp coconut oil, melted
1/4 c dark chocolate, melted

In a large bowl, stir together almond flour, cacao powder, coconut, sea salt, and baking soda. Add in vanilla, maple, and melted coconut oil and stir until completely combined. The dough will look crumbly, but you’ll be able to press it together with your fingers.

Preheat the oven to 350, and lightly grease a tart pan with coconut oil (you can also use a pie pan; I like the tart pans with removable rings). Press the crust into the plate and up the sides with a spoon or your fingers, creating a smooth edge (or not, your call!). Poke the bottom with a fork a few times, and bake for 15 minutes.

For the filling:

1 cup pureed purple sweet potato*
1 cup whole milk, plain yogurt (I use Straus European style – it’s pretty runny)
3 eggs
1/4 c pure maple syrup
1 teaspoon pure vanilla extract
2 tablespoons tapioca flour*
1-1/2 teaspoons ground cinnamon
1/8 teaspoon allspice
½ teaspoon ground ginger
1/4 teaspoon kosher salt

* I boil them; you could also roast & mash them – either way is fine!

Add all of the ingredients for the filling to a food processor or blender and blend just until combined. Pour into the prepared crust and bake at 350 for 25-30 min until the center is set. Let cool completely, then refrigerate until serving.

Keeps well overnight in the fridge; probably best eaten within two days of baking, but I really doubt ours will even last that long :)

I only have (pies!) for you

IMG_1737

Could someone explain to me what happened to October? I blinked, and then… here we are. ALSO it’s already less than two weeks till Thanksgiving?! Um…. wat.

IMG_1738

But regardless… I have PIE!

IMG_1710

And it’s PURPLE pie!

IMG_1708

Because really, how could something like this not make you happy? That color just makes me smile every time. As does the fact that it’s grain & gluten free, dairy free, refined sugar free, vegan & paleo so errrybody can enjoy – because also, despite all the ‘free’ in its name, it is also delicious (NOT taste free. ha!)

IMG_1734

Maybe consider it if you’ve got friends or fam with some dietary stuff and they’re coming for Thanksgiving? I’m 100% sure they’d love you for it.

It’s been raining! I love love love the sound of rain – it so soothing, no matter what kind of day I’m having. Baking when it’s raining is one of my favorite things – I love that even though my apartment’s galley kitchen doesn’t have windows, I have a big window on the wall facing the entrance to the kitchen, which lets in light and rain sound. It’s perfect! Besides, my little one-butt kitchen is exactly the right size for my baking shenanigans.

IMG_1735

In other news, pretty coffee and some opera (shocking, I know…NOT).

IMG_1695

IMG_1696

IMG_1733

I’ve made this pie twice in three days – it’s that good! Full disclosure: the first time I made it, I took the first bite straight out of the pie dish: fork, meet pie. I NEVER do that, since I’m all about the presentation, but you know what? Sometimes it just has to happen.

IMG_1714

IMG_1729

Happy Saturday! I’m loving the beautiful fall weather over here – the leaves are gorgeous, the air is crisp, and I had purple pie, eggs & kale for breakfast with the best company: life is wonderful! Happy baking!

IMG_1709

Purple Sweet Potato Pie on an Almond Coconut Crust

Gluten & grain free, refined sugar free, dairy free, vegan, paleo. Crust is a Wait are Those Cookies original, filling is adapted from The Endless Meal, here! Yield: one 9″ pie, serves 2 or several! ha.

For the crust:

  • 1.75 c almond flour
  • 1 c unsweetened shredded coconut
  • heaping 1/4 tsp sea salt
  • 1/2 tsp baking soda
  • 1 tbsp vanilla extract
  • 1/4 tsp almond extract
  • 2 tbsp pure maple syrup
  • 4 tbsp coconut oil, melted

Preheat the oven to 350, and lightly grease a pie plate with coconut oil.

In a large bowl, stir together almond flour, shredded coconut, sea salt, and baking soda. Add in vanilla, almond extract, maple, and melted coconut oil, and stir until completely combined. The dough will look crumbly, but you’ll be able to press it together with your fingers. Press the crust into the plate and up the sides with a spoon or your fingers, creating a smooth edge (or not, your call!). Poke the bottom with a fork a few times, and bake for 15 minutes. Remove and let cool for a few minutes, but keep the oven on if you’re making the whole thing at once.

For the filling:

  • 2 large purple sweet potatoes, peeled & sliced into 1″ pieces (about 3 cups worth)
  • 3/4 c full fat coconut milk
  • heaping 1/4 c maple syrup
  • 1.5 tbsp tapioca starch*
  • juice of 1/2 a lemon (~1tbsp)
  • 1 tablespoon vanilla extract
  • 1/4 tsp almond extract
  • 2 teaspoons ground cinnamon
  • 1 teaspoon ground ginger
  • heaping 1/4 teaspoon ground nutmeg
  • 3/4 teaspoon fine salt

*full disclosure: I made this twice in three days & totally forgot the tapioca starch the second time. It’s actually not essential – the filling set up fine without it.

While the crust is baking, make the filling!

In a medium saucepan, boil the sweet potato slices until fork tender. Drain and let cool for a few minutes. Add them to a food processor (or high powered blender) and pulse a few times to puree. Add in coconut milk, maple, tapioca, lemon juice, vanilla, and almond extract, and pulse to combine. Add cinnamon, ginger, nutmeg, and sea salt, and pulse until combined. The filling should be thick! Pour/spoon/spatula it into the prepared crust, smooth the top (or not, you do you!), and bake at 350 for about 45 minutes – the crust should be golden brown and the pie should be set, but with just the slightest bit of jiggle in the middle. Remove and let cool completely before serving (preferably with ice cream or whipped cream of choice, either dairy or non dairy). I prefer to make this earlier in the day and refrigerate until serving, to give the filling ample time to set up.

Top with crystalized ginger & extra coconut if desired!

Keep leftovers covered in the fridge – it will last for a few days, provided all of it doesn’t get eaten first!

IMG_1703

IMG_1711