Leap Year! and gnomes

img_0094

Hello hello!

img_0088

Bonus – two recipes for the price of one today, since I am behind and have been too busy to actually keep to anything resembling a regular blogging schedule.

img_0059

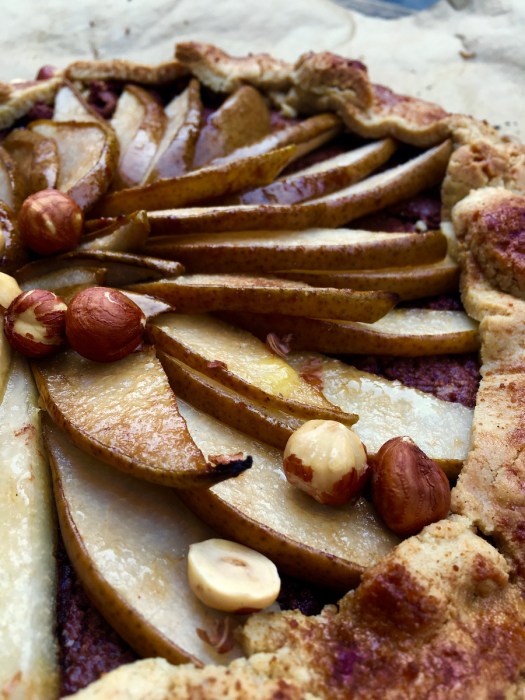
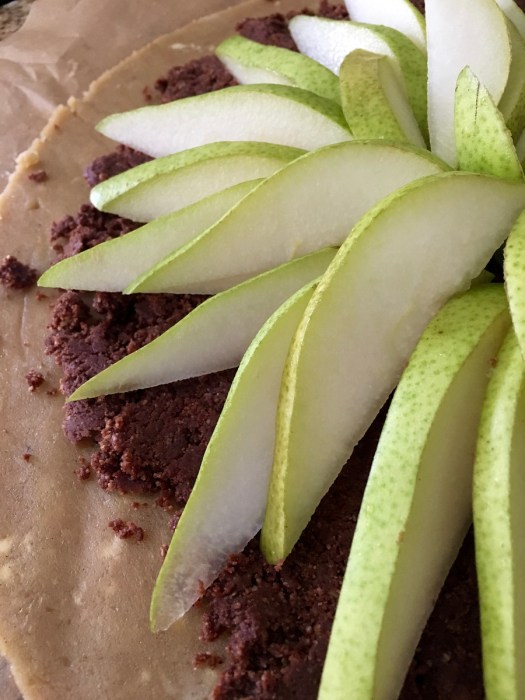
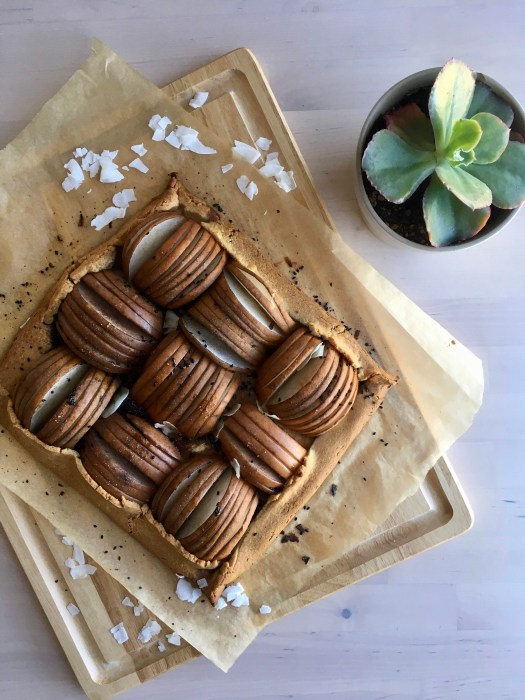
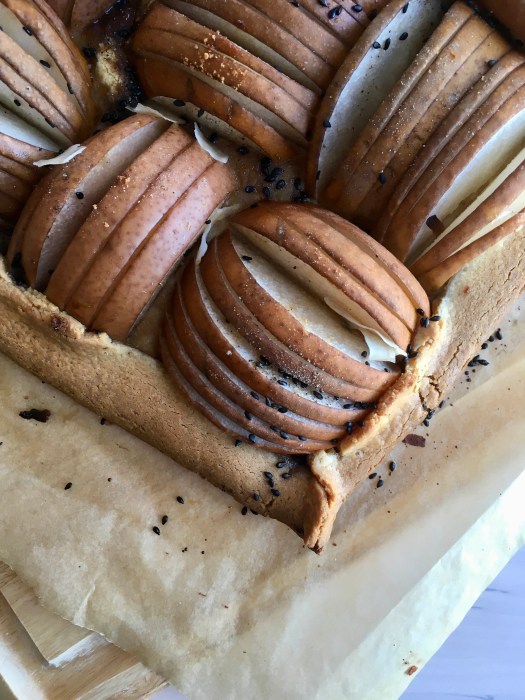
Today’s primary recipe is an asian pear & miso cardamom galette (hey hey hey asian pear season!) – so delicious with the slightly savory miso hanging out in the crust, not to mention a little cardamom somethin’ somethin’.

img_0090

img_0092

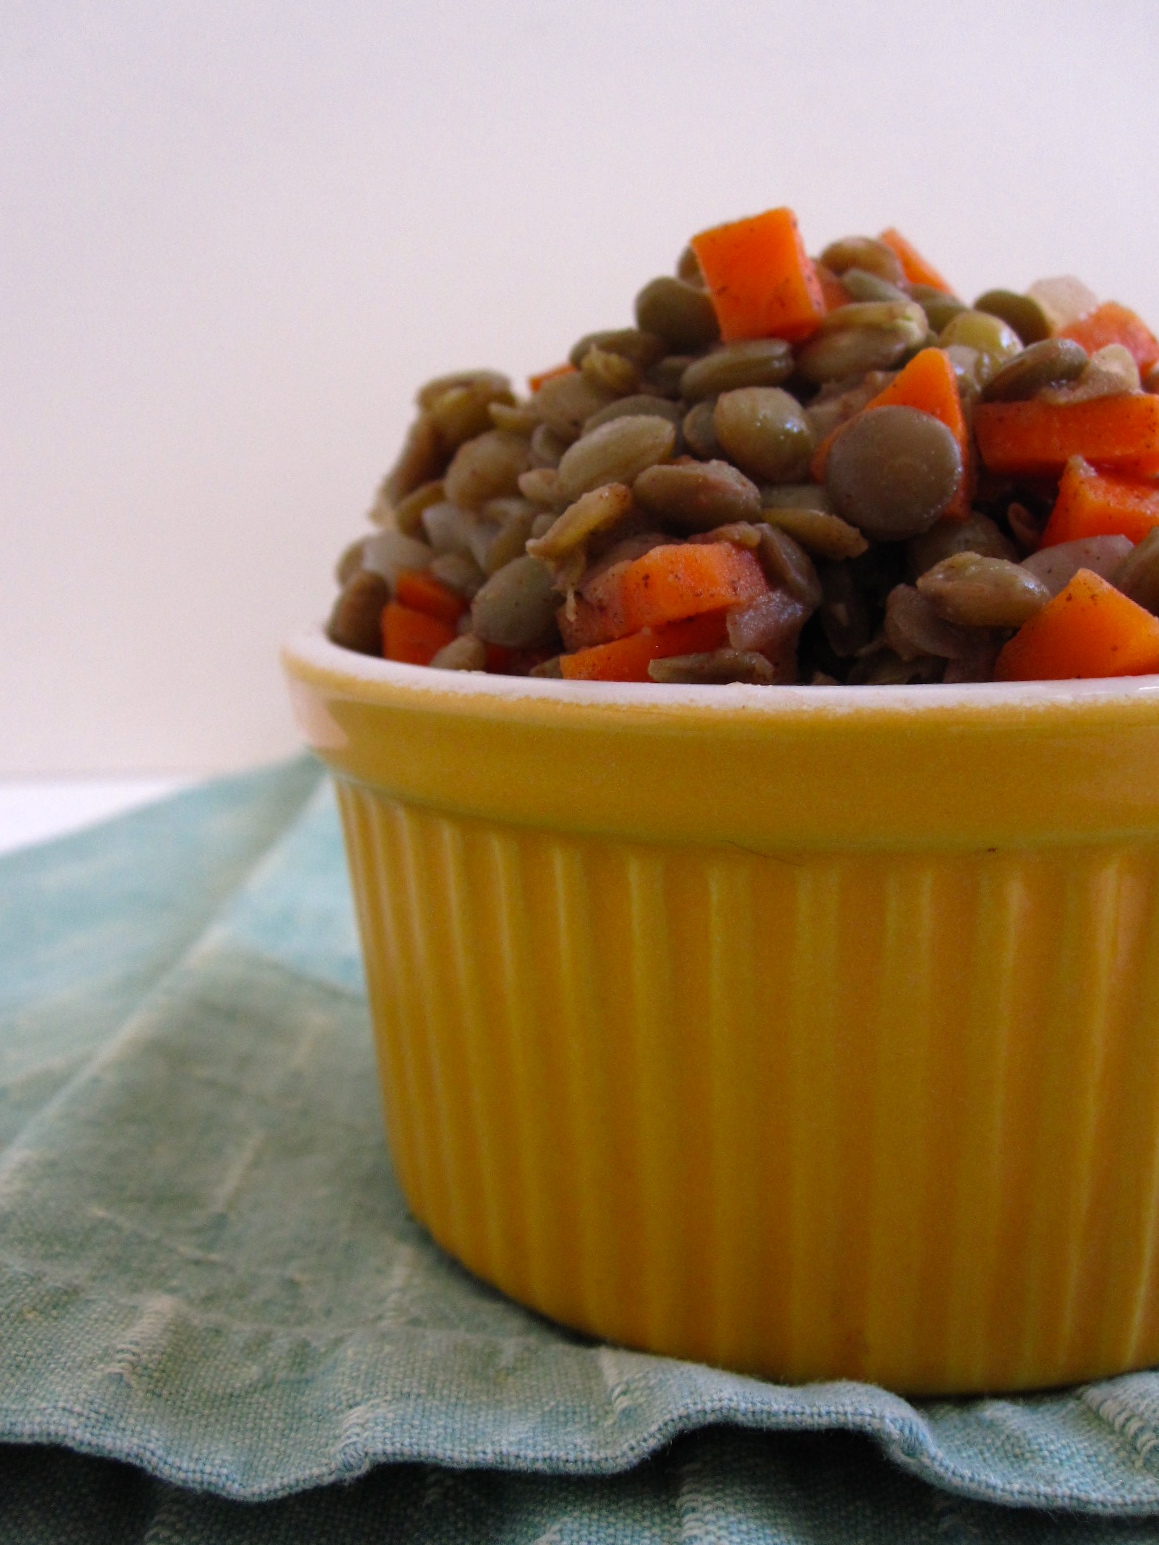
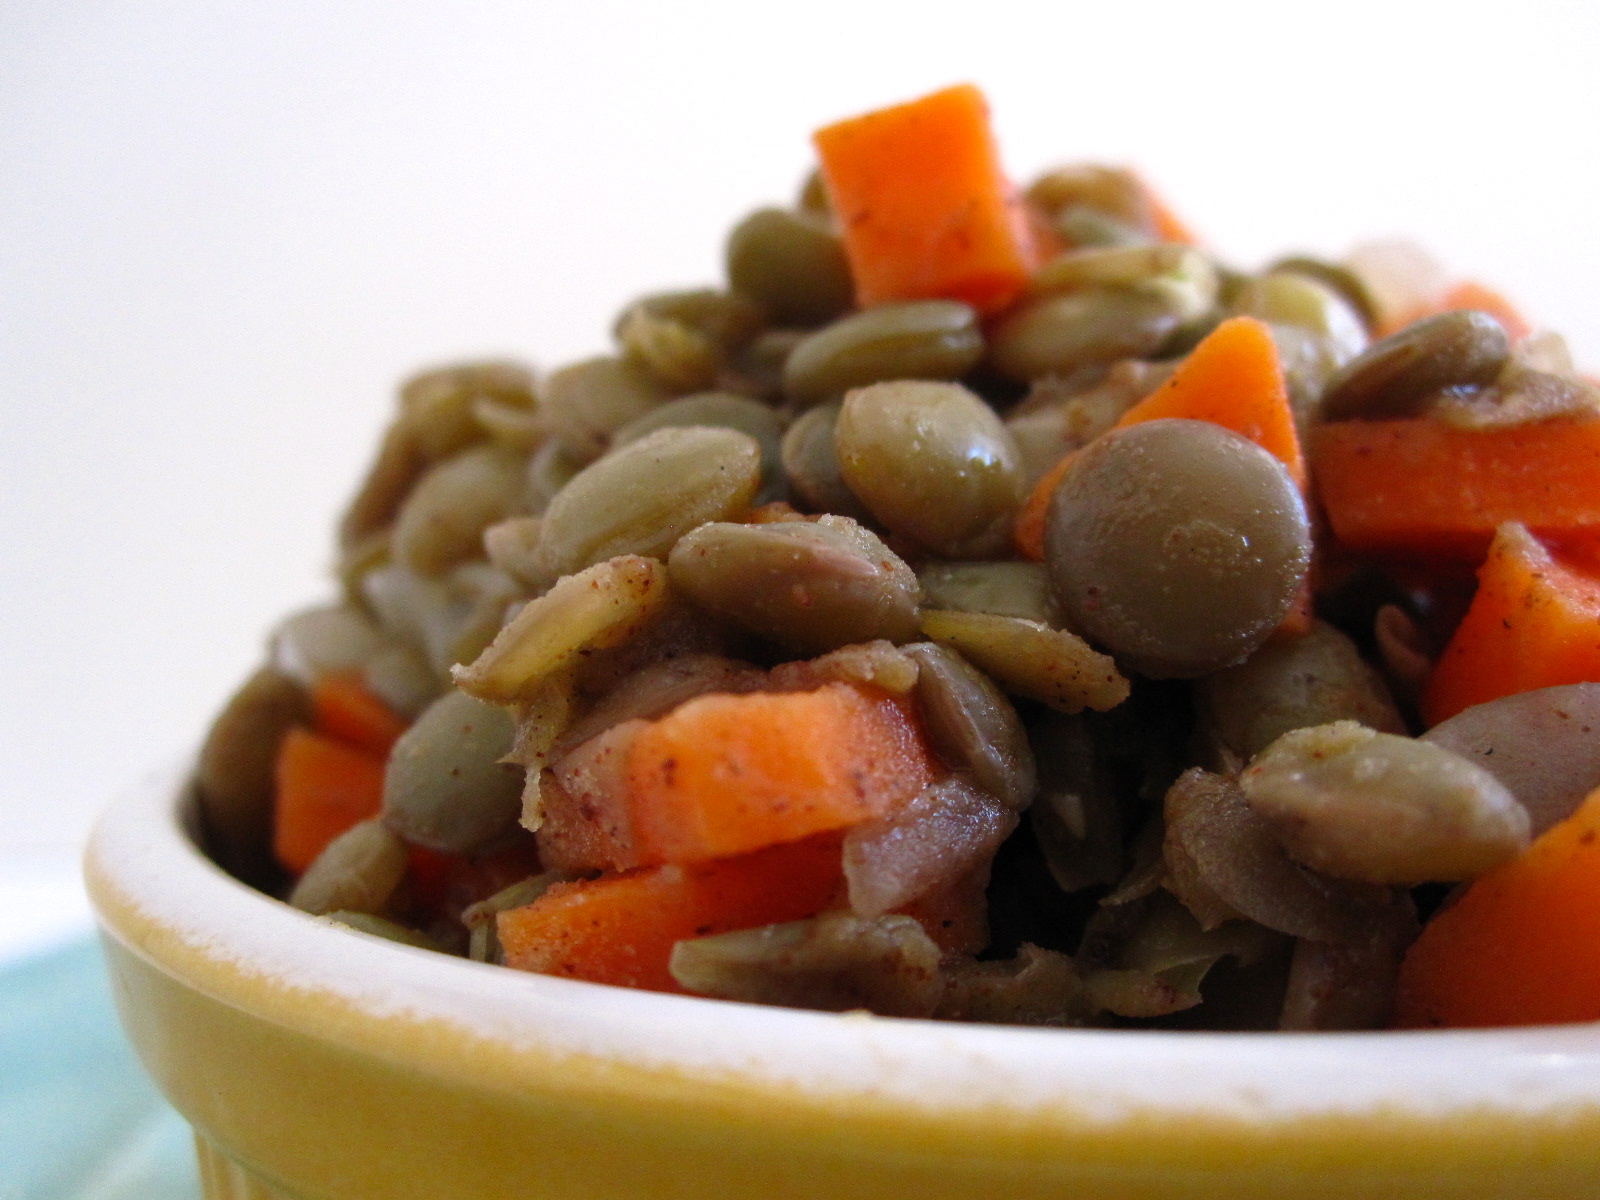
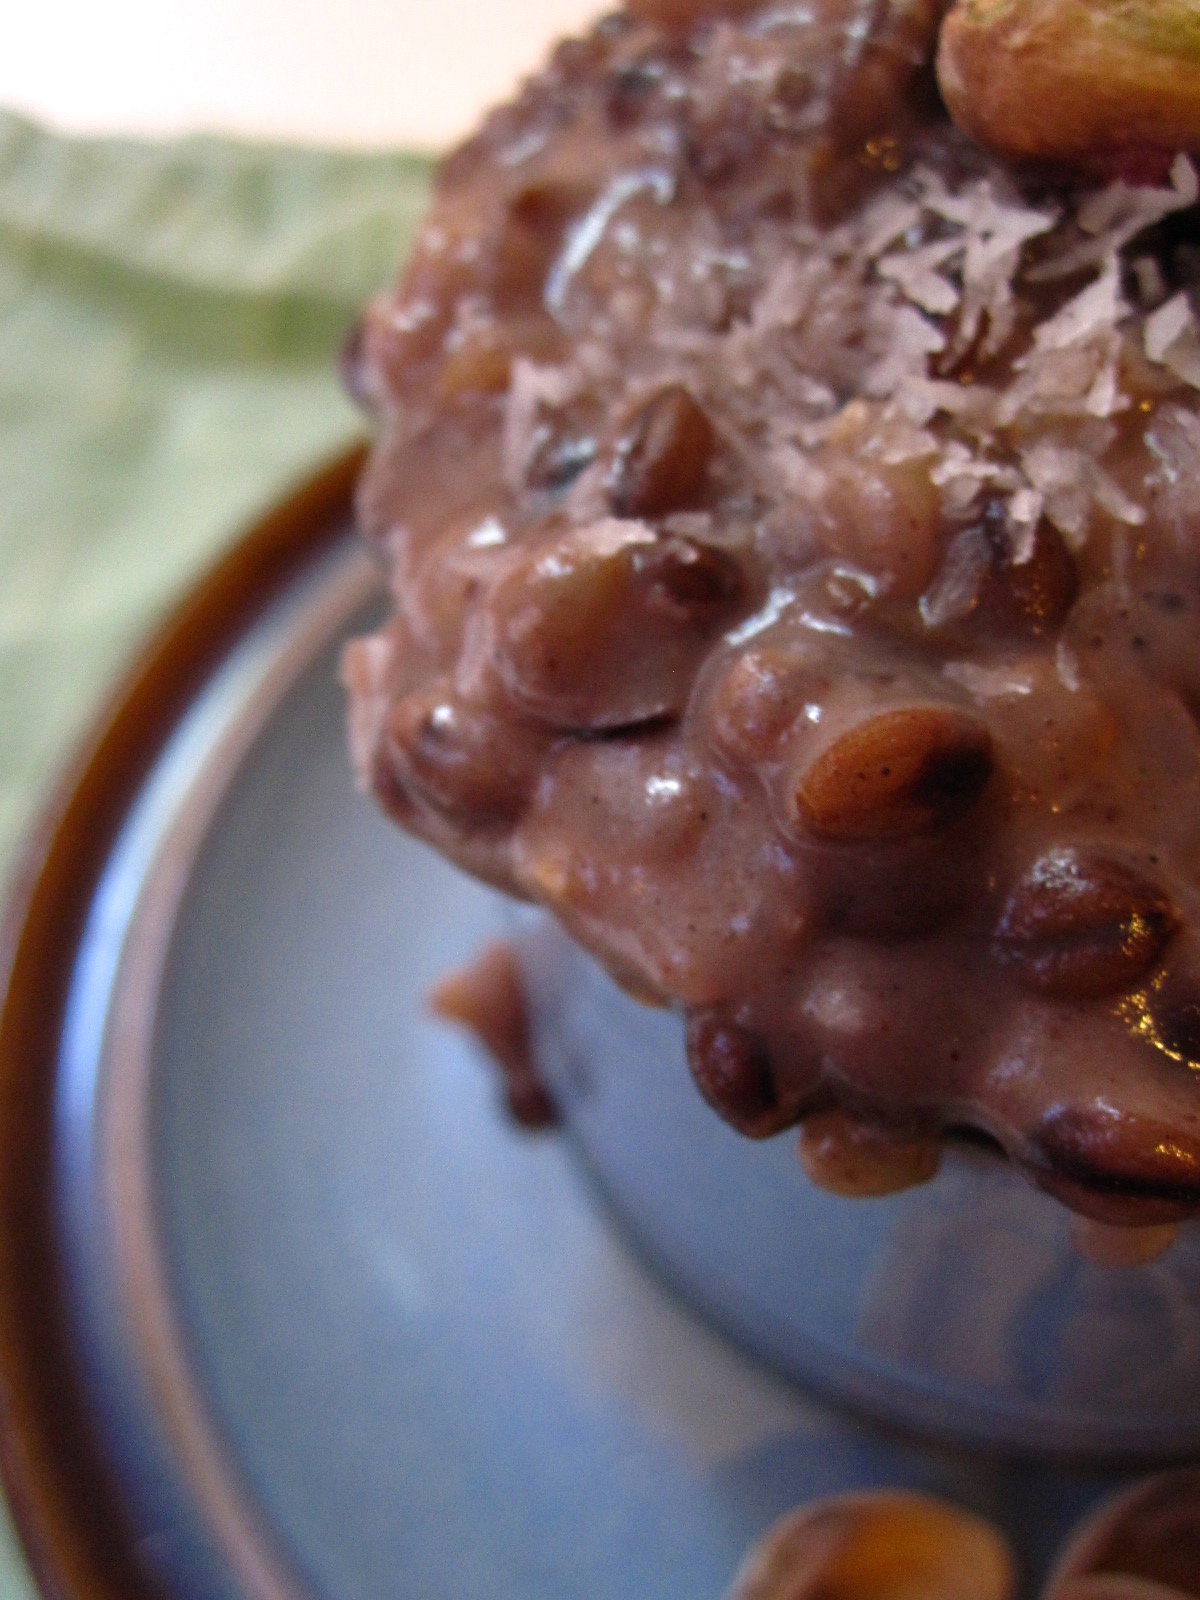
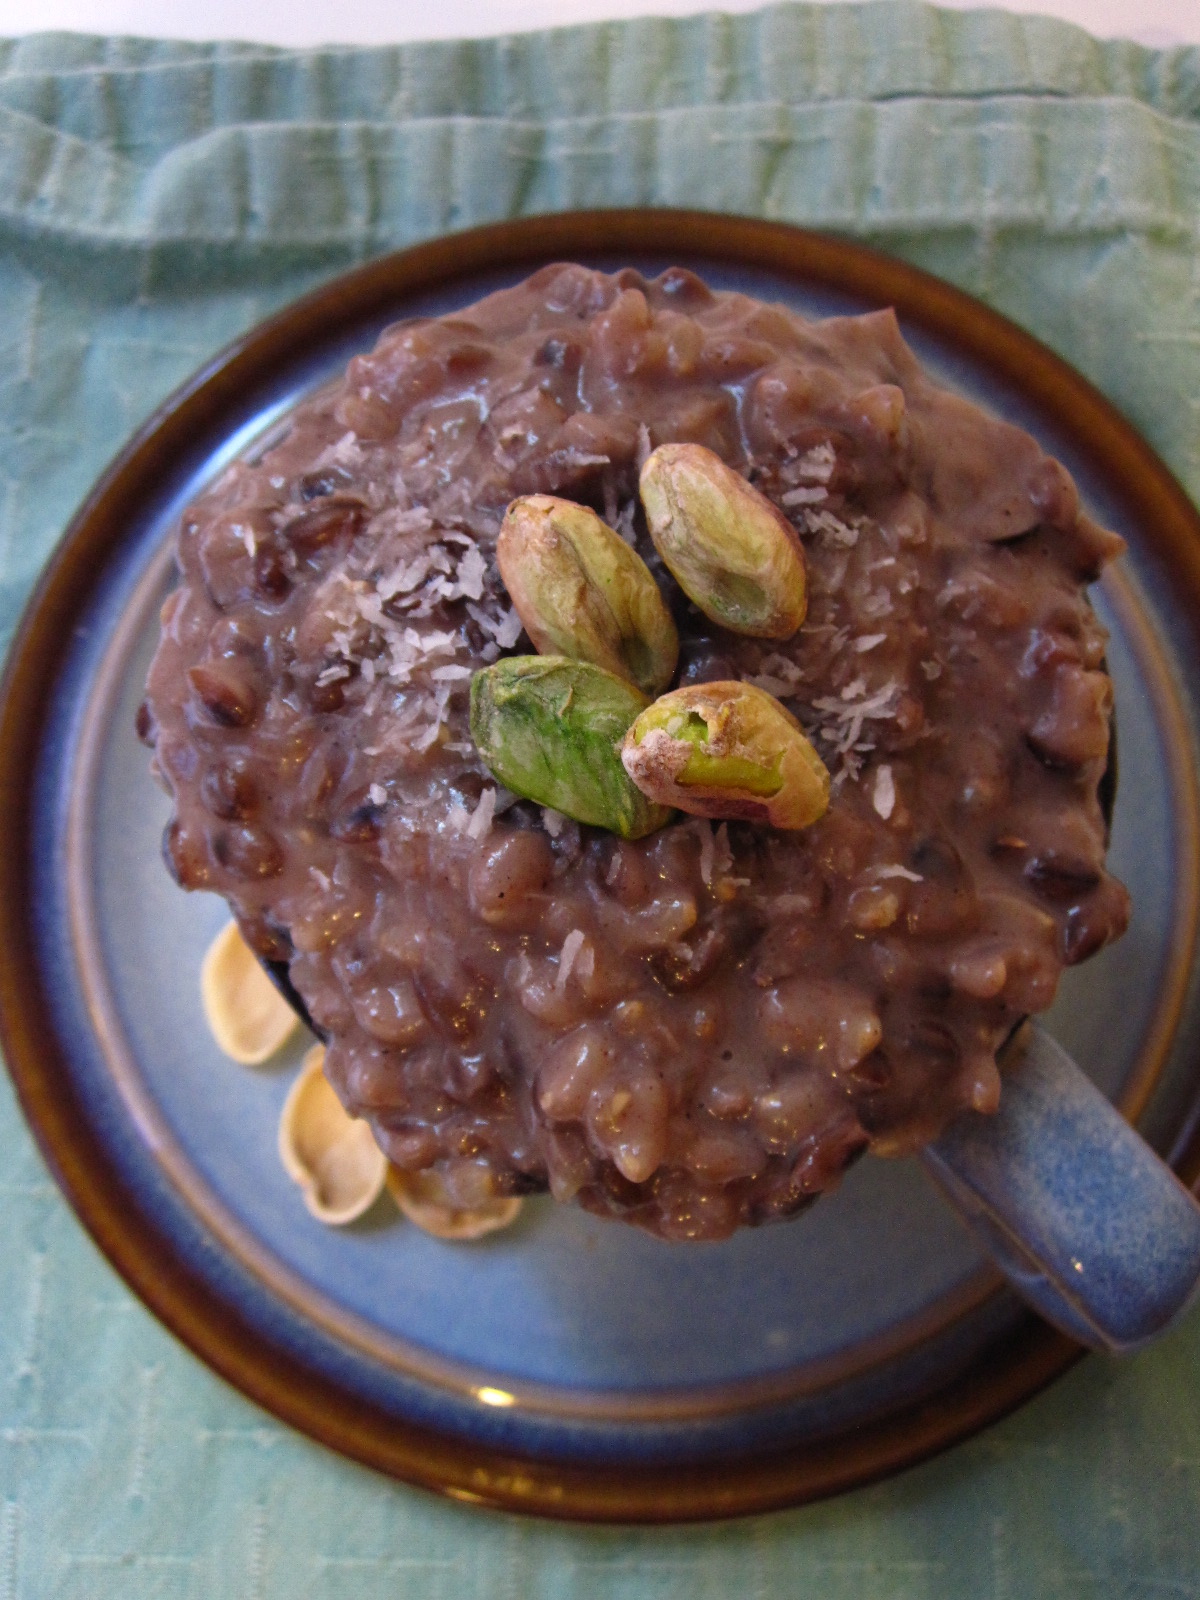
The bonus recipe is these red bean & almond bars that I made last weekend to use up the last of my red bean paste. I’d frozen it, but I didn’t want to relegate it to the unrecoverable depths of the freezer, so into bars it went. Such a happy experiment in throwing things into a bowl and seeing what happened – the bars turned out dense and nutty with swirly pockets of red bean.

img_0061

img_0066

img_0067

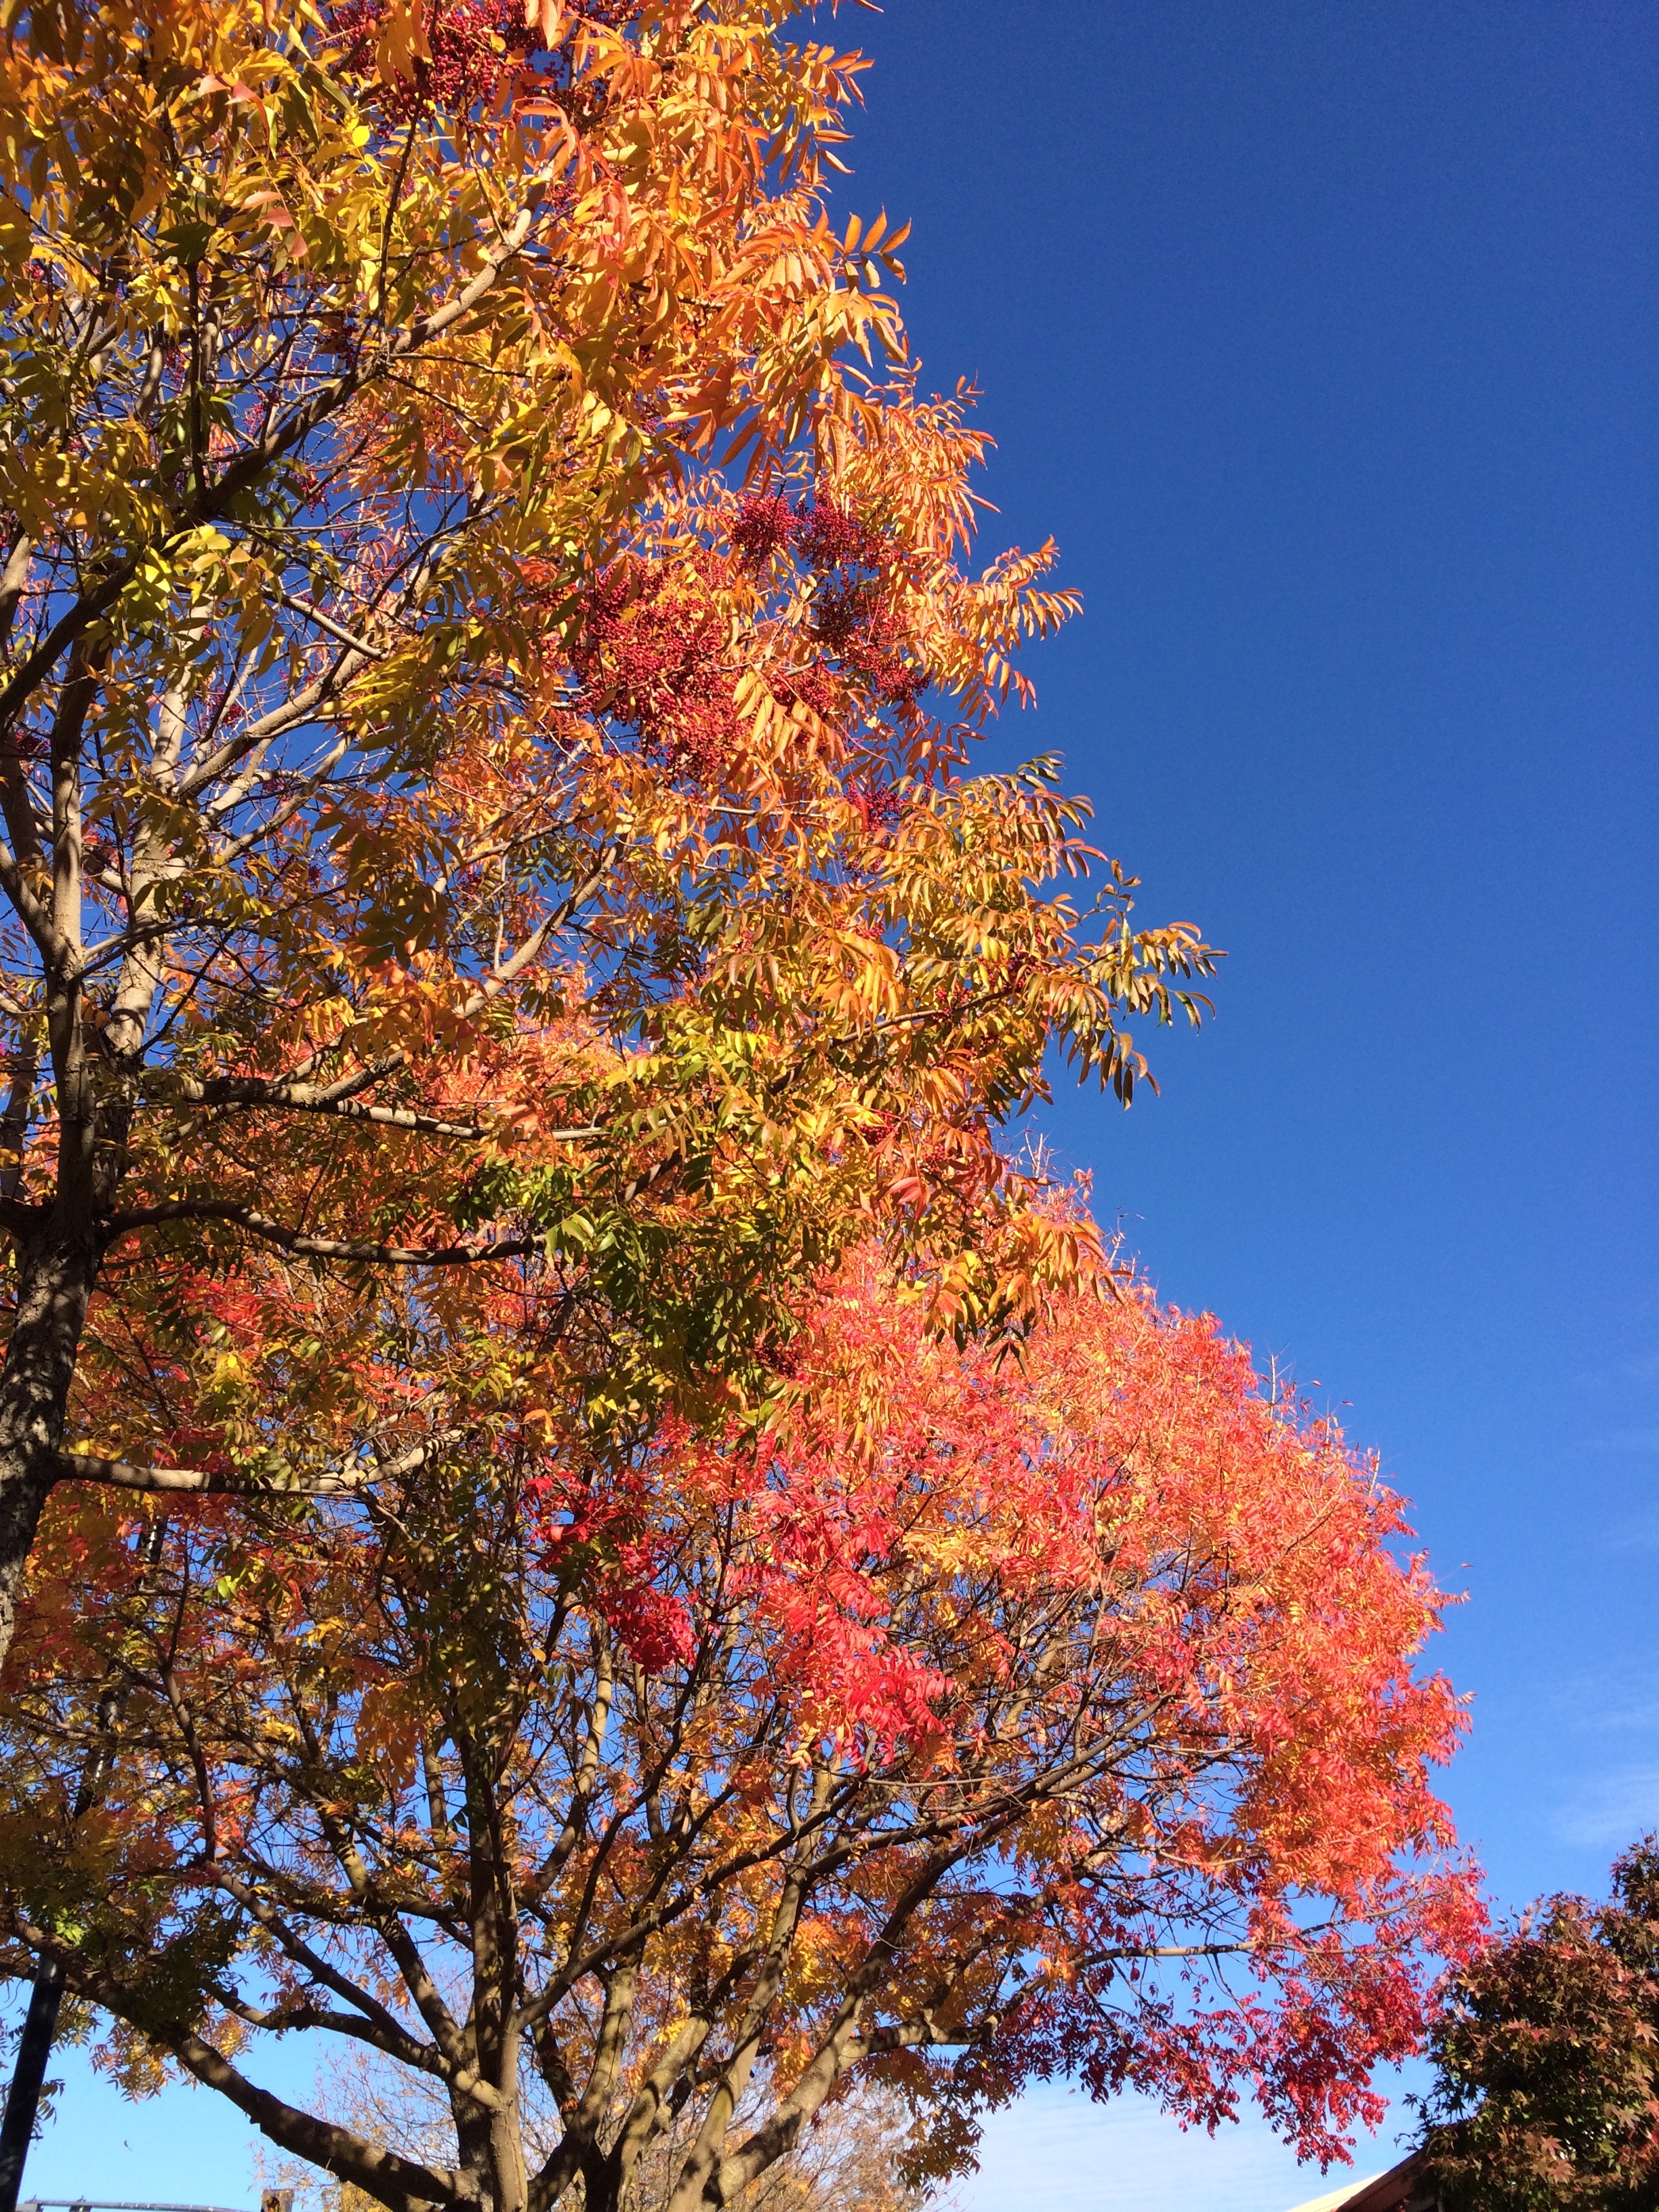
In life news, there have been some fun finds on walks lately, as well as some beautiful sunsets – see following photo story! It’s currently super windy here in SF, and I’m sitting in my apartment listening to the wind howling all over the place – one of the many reasons I named my fourth/top floor apartment the Eryie (NO, not from game of thrones, but from 15th century Latin, thanks very much).

img_0080

img_0081

Every home needs a gnome, a wise friend told me once… and he’s NOT wrong. Inherited this little guy from my gram – he used to sit in her planter and now he hangs out in my little succulent forest.

img_0103

img_0054

I really, really, really love my rooftop & the fact that I’m the only apartment that has access… sneaky sneaky through a window. Not sorry.

img_0053

I highly recommend either or both of these desserts for your Leap Day weekend! Happy Leaping, and happy birthday to Frederic, for all of my fellow g&s nerdloves out there <3

img_0087

Asian Pear, Miso and Cardamom Galette

Grain and gluten free, refined sugar free. A Wait are those Cookies original. Yield: 1 galette, serves several.

For the galette dough:

1.5 c almond flour (not meal; you want the finer flour variety)
1/2 c tapioca flour
1/4 tsp fine sea salt
6 tbsp salted butter, chopped (or ghee)
1 egg*
1 tbsp vanilla extract
2 tbsp dark miso

*alternately you can use a flax egg with very similar results (3tbsp water + 1 tbsp ground flaxseed)

In a food processor or high-power blender (I used a food processor), pulse almond flour, tapioca starch, salt, and butter to combine until it looks like coarse meal. Add in egg, vanilla extract and miso and pulse just until combined. Turn out onto a piece of plastic wrap, shape into a disk and chill in the fridge for at least an hour, or up to overnight.

For the filling:
3 asian pears, sliced
1 tsp cardamom + 1 tbsp coconut sugar
1 tbsp butter, chopped

This might be the easiest thing ever. Once the dough has chilled, preheat the oven to 375. Roll out the dough between two pieces of parchment paper, keeping the circle to about 1/4″ thickness. Peel off the top piece of parchment, and slide the rolled out dough on its parchment onto a baking sheet. Top with sliced asian pears, and dust them with cardamom and coconut sugar. Begin folding up the sides, creasing them together as you go – if the dough rips, that’s okay (you can crimp the cracks back together; remember: galettes are forgiving and rustic!); you can use the bottom piece of parchment to help fold up the sides.

Dot the pears with butter. Bake for 35-40 minutes until edges are golden brown — mine came out just fine at 35 minutes, so check accordingly.

Let cool for a few minutes on the baking sheet, then carefully slide the whole galette onto a cooling rack to let it cool completely. Serve with your fave ice cream or whatever of choice! Keeps well covered in foil on the counter or in the fridge.

img_0060

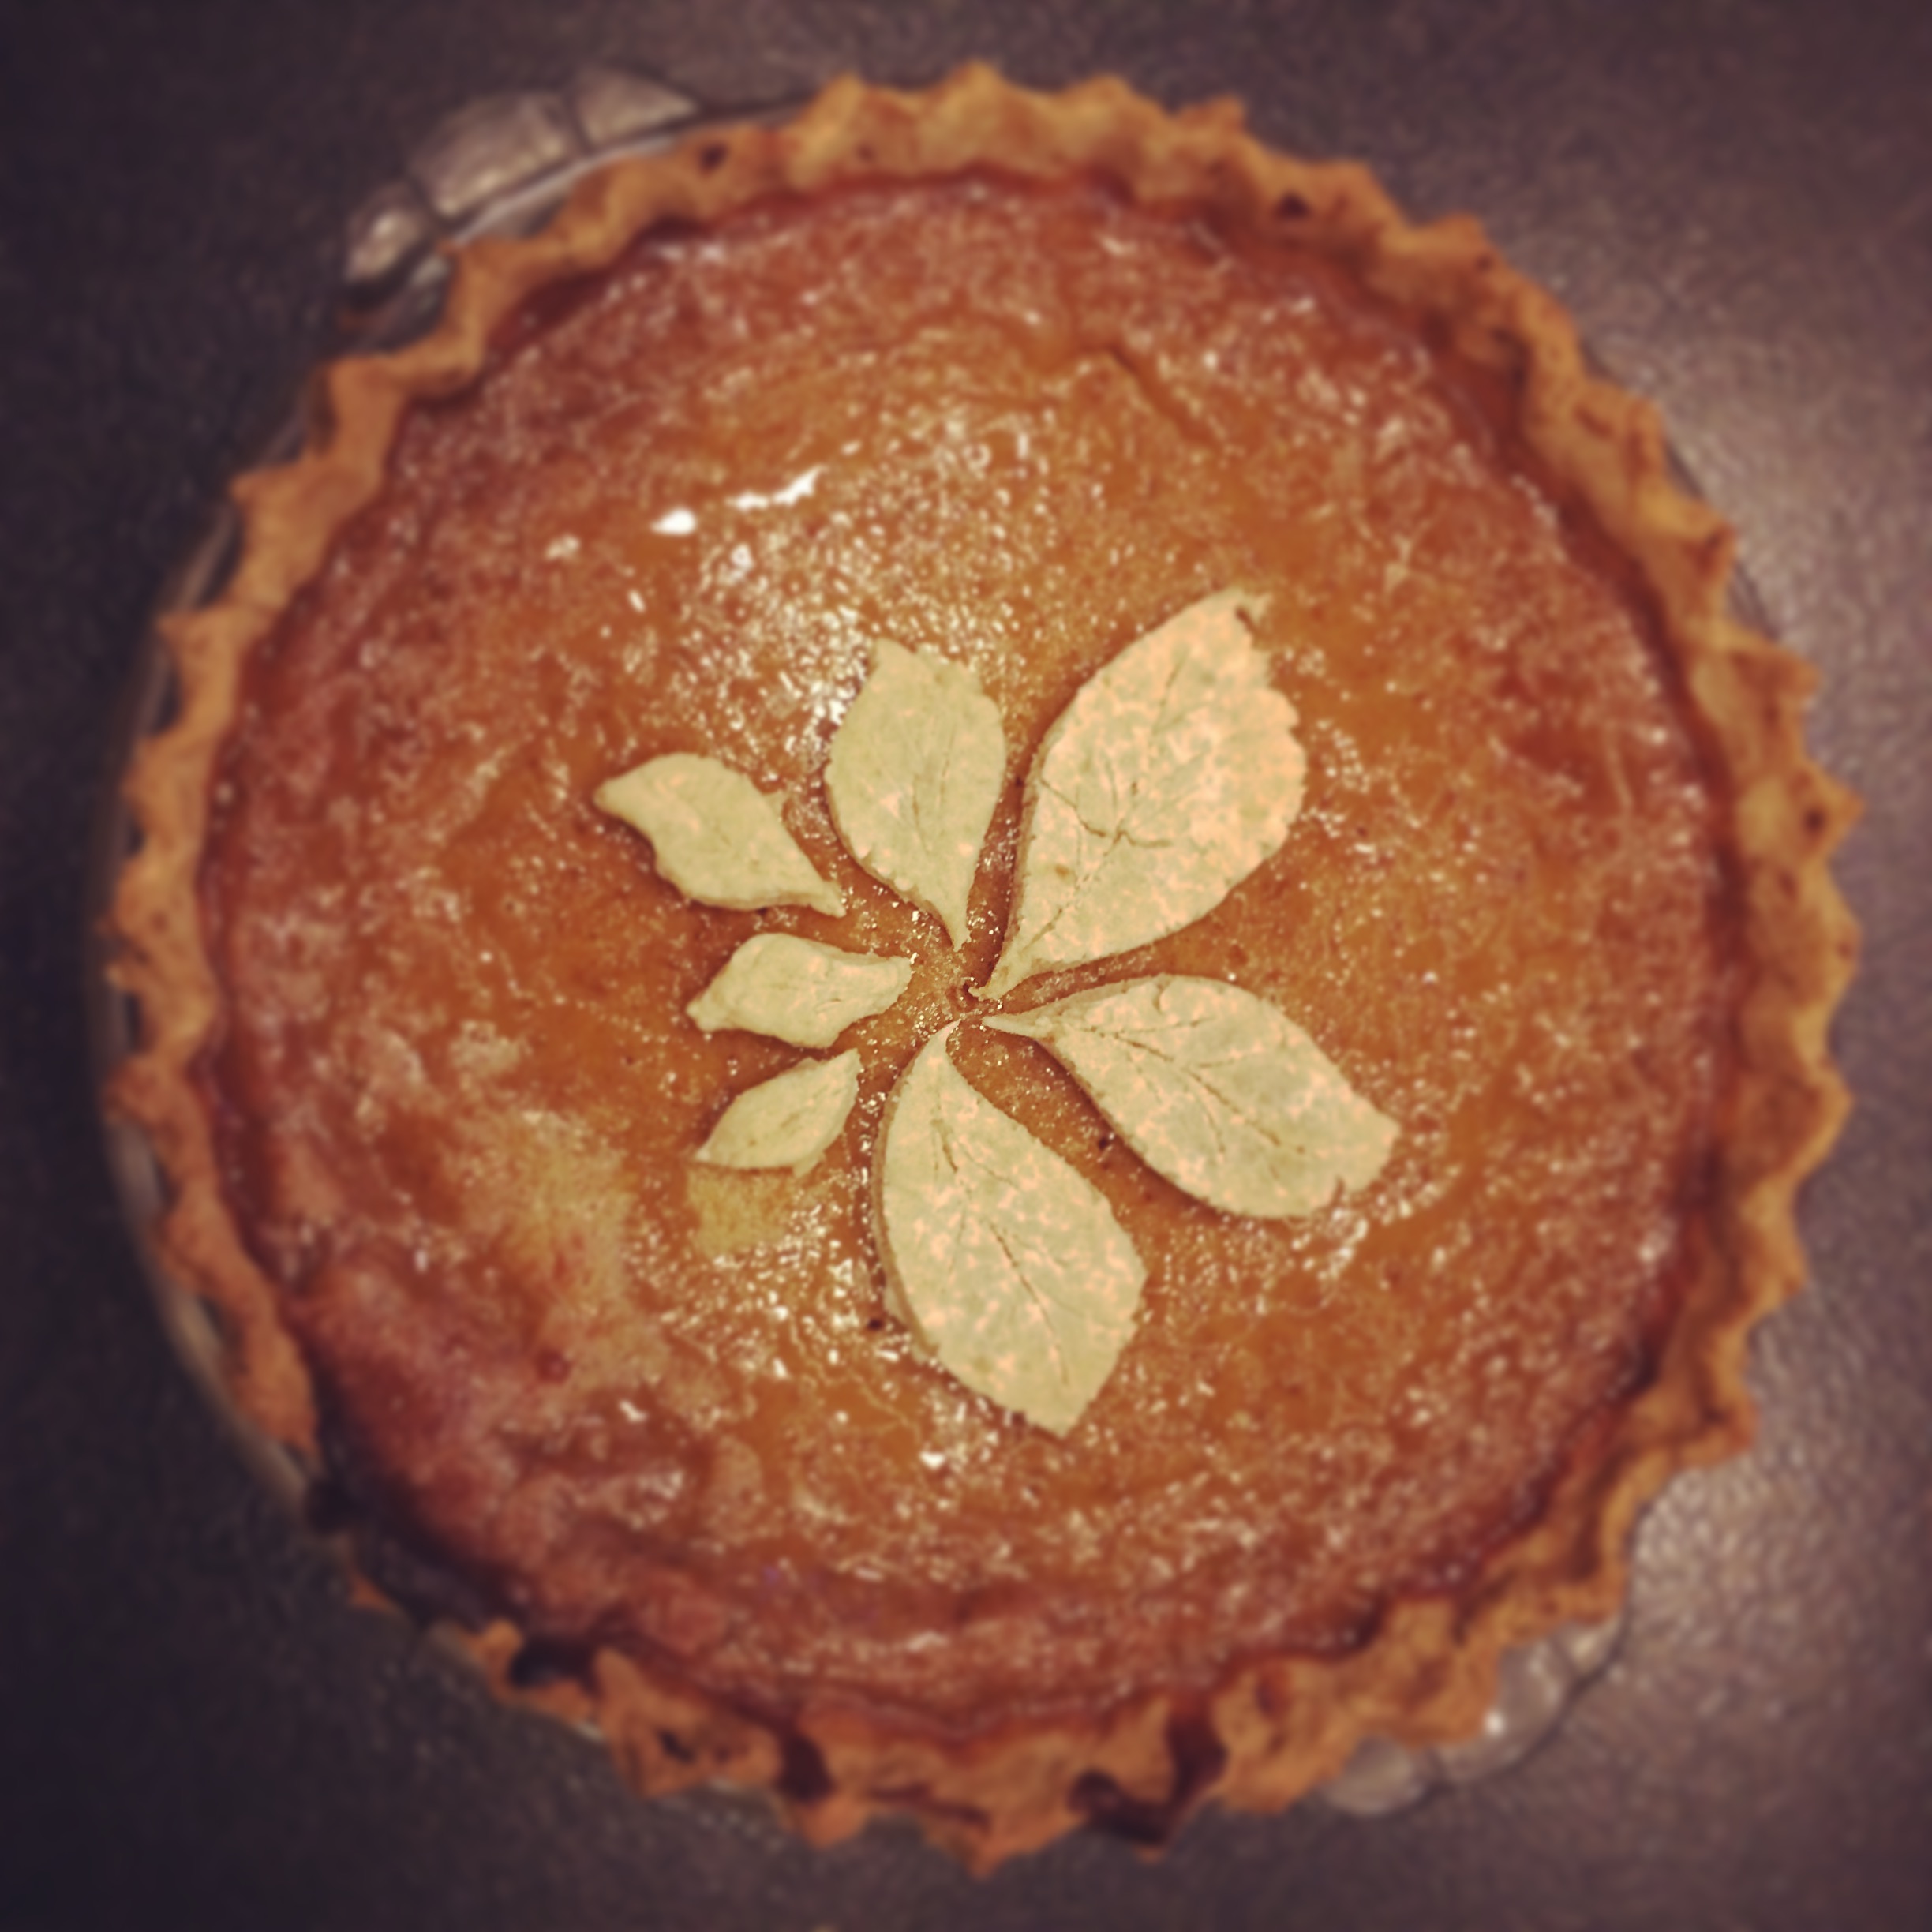
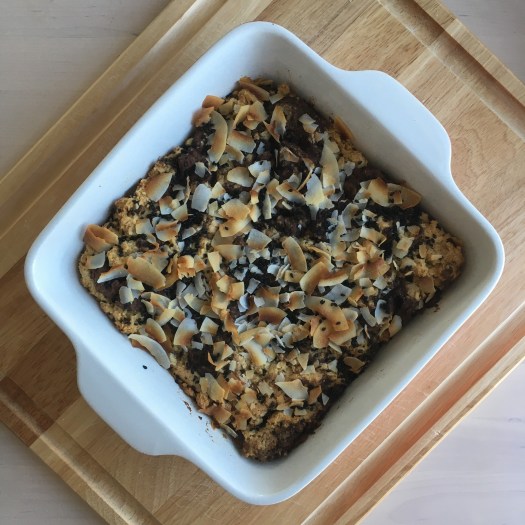
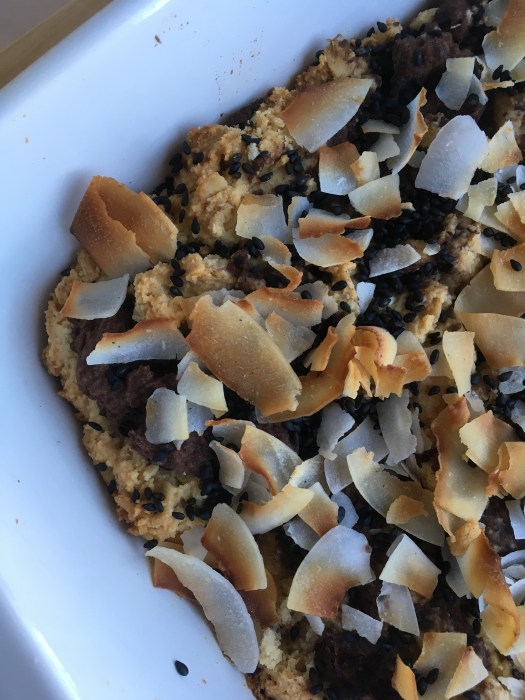
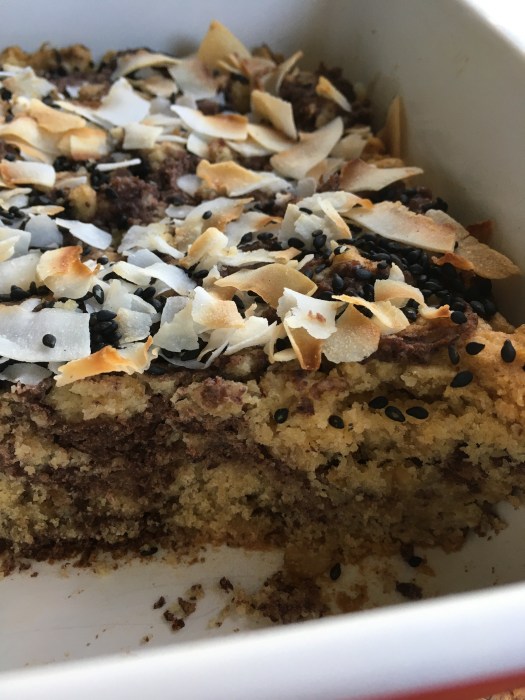
Red Bean and Almond Bar Cookies

Gluten free, refined sugar free and dairy free. A Wait are those Cookies original. Yield: 1 8″ or 9″ pan; serves a few or two, your choice ;)

For the bars:

1 c almond flour
1 c oats
1/2 c shredded coconut
1 tsp baking powder
1/2 tsp baking soda
1/2 tsp fine sea salt
1/4 c maple
1/3 c coconut oil, melted
1 egg
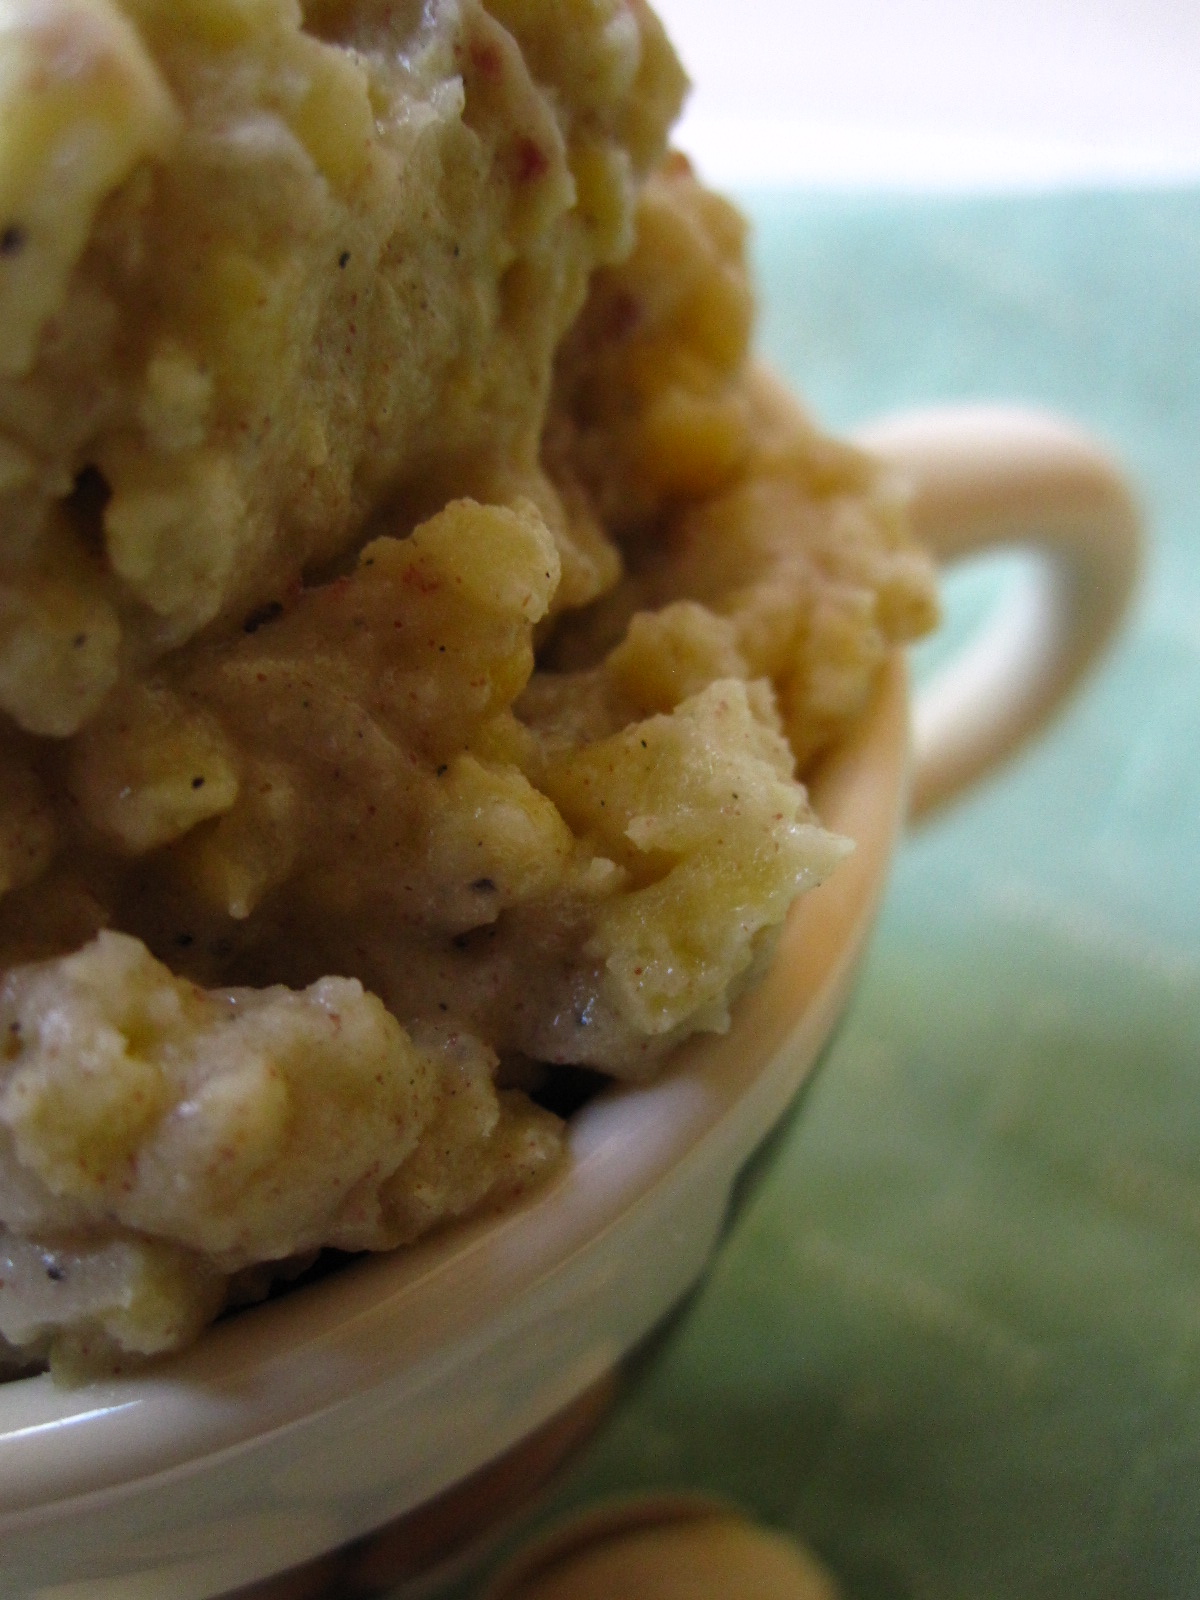
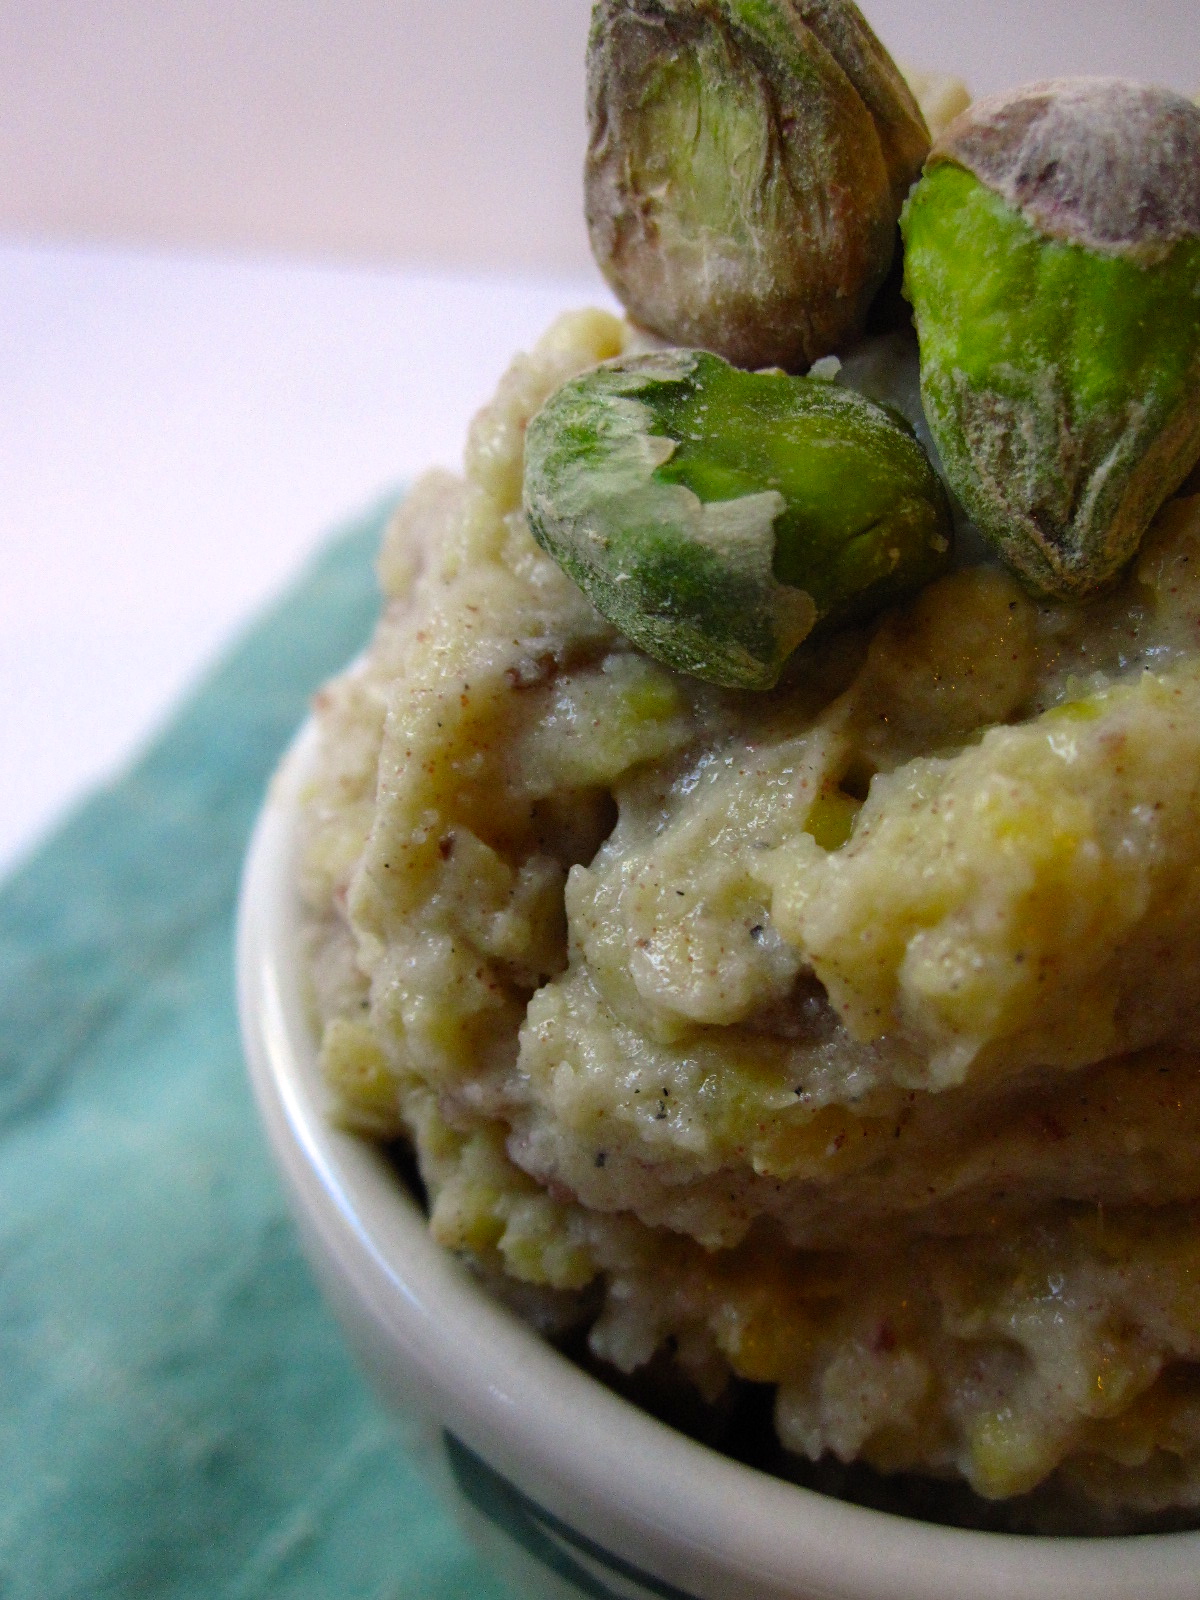
1 c red bean paste (recipe below)
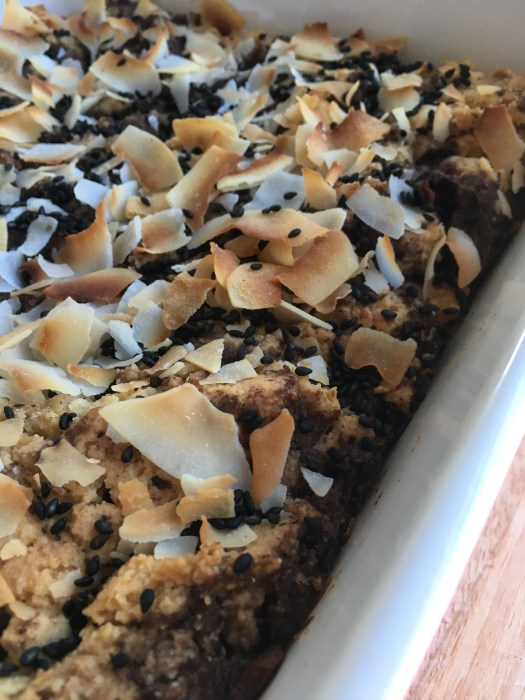
black sesame and coconut flakes for topping

Preheat the oven to 350, and lightly grease an 8×8 or 9×9 pan with coconut oil (alternatively, you can use an 8″ or 9″ round pan, this recipe is totally forgiving).

In a large bowl, stir together almond flour, oats, coconut, baking powder, baking soda, and sea salt. Add in maple, melted coconut oil and egg, and stir until combined. Spread the dough into the prepared pan, then drop spoonfuls of red bean paste onto it. Swirl red bean with a spoon or a knife until it’s mostly sorta evenly distributed through the dough. Top with black sesame and coconut flakes, and bake for ~15-20 minutes, until a tester comes out clean. Bake time will depend on the depth of your pan, so check early and often (psssh nobody has time for dry bars, ew).

Keep leftovers covered on the counter for a day or so; after that I’d store them in the fridge.

For the red bean paste:

1 c dried adzuki beans, soaked overnight, then drained and rinsed
1/4 c maple syrup
pinch of sea salt
1 tbsp miso (I used brown rice – medium)
1 tsp vanilla

Bring the soaked adzuki beans and 3 cups of water to a boil, then lower to a simmer and cook, covered, until you can easily mash beans with a fork – about 1 hour. Once the beans are cooked, drain off any residual water, and stir in maple, salt, miso, and vanilla. Let cool completely. Once cool, take it for a spin in a food processor or high powered blender until smooth (you can leave some chunky too if you like – it’s good either way!). You won’t use all of it for this recipe, so either refrigerate the rest and use within 3-4 days, or freeze it; it keeps for about 3 months in the freezer.

Galette for breakfast: guaranteed to improve your election day experience

img_5117

Galette and pears and hazelnuts and dark chocolate and November!

img_5107-x3

I love fall because it means pears are EVERYWHERE and I love pears so this just feels like a win-win situation. Besides that, throw in some dark chocolate hazelnut filling and put all that goodness in a cardamom crust? Sign me up. And then eat it for dessert with ice cream and then for breakfast with (what else) eggs and kale and sourdough toast? Yeeessssss please thanks.

img_5101-x3

Let’s see, what else… today is election day! Did you vote?! I voted absentee ages ago and didn’t get a sticker… they should send stickers with the ballots!

And the time changed, woohooo for not having to get up in the dark anymore! I miss the extra daylight hours but I’d rather not go to work when it’s still dark out… Jessie and I enjoyed our extra hour of snuggles:

img_5089

Pretty skies lately!

img_5111img_5091

Annnnnd I’ve been drawing again, shocker I know. I just read a study that says making art reduces cortisol levels! Which is awesome and I think I subconsciously knew that because drawing always gets me into the flow state, pretty much without fail.

img_5110-x3

But anyway, back to galette!

img_5094-x3

This sounds complicated but totally isn’t. The crust is forgiving and easy to work with, and the filling comes together in a snap. Also, unlike the last time I made galette and crammed a truckload of blueberries into it, this one is far more structurally sound since pears are a little easier to wrangle than blueberries.

img_5097-x3

Give yourself a break from watching those election returns and gaze on this instead. I guarantee it’ll lower your cortisol levels ;) 

img_5109-x3

Pear Galette with Dark Chocolate Hazelnut Filling and Cardamom Crust

Grain free, gluten free, paleo and refined sugar free. Yay! There is butter, though a sub for coconut oil might definitely be possible (if you try it, tell me how it goes!). Yield: 1 galette, serving sizes are up to your discretion ;) A Wait are those Cookies original!

img_5096-x3

For the crust:

  • 1.5 c almond flour
  • 1/2 c tapioca starch
  • 1/4 tsp fine sea salt
  • 1 tbsp coconut sugar
  • 3/4 tsp ground cardamom
  • 1 egg
  • 6 tbsp salted butter, chopped
  • 2 tsp vanilla extract

In a food processor or high-power blender (I used a Vitamix), pulse almond flour, tapioca starch, cardamom, salt, and butter, and pulse to combine until it looks like coarse meal. Add in egg, coconut sugar, and vanilla extract and pulse just until combined. Turn out onto a piece of plastic wrap, shape into a disk and chill in the fridge for at least an hour, or up to overnight.

For the dark chocolate hazelnut filling*:

  • 1 c roasted hazelnuts, skins mostly removed (reserve a few for topping purposes if you want!)
  • 3 tbsp raw cacao powder
  • pinch of sea salt
  • 1.5-2 tbsp pure maple syrup
  • 1 tsp vanilla extract

* measurements are approximate! Adjust as necessary to suit your tastebuds :)

Blend hazelnuts in a vitamix or high power blender / food processor until a nut butter consistency forms (it’s okay for it to be on the chunkier side; mine wasn’t completely smooth). Add cacao powder, sea salt, maple, and vanilla and pulse until combined. This can be made up to a week ahead — just store it in an airtight jar in the fridge!

For the galette:

  • 1 crust
  • most or all of the hazelnut spread
  • 2 pears, thinly sliced (I used d’Anjou; Bosc would also be good) — you can peel them if you want, I chose not to
  • 1 egg, lightly beaten
  • 2 tbsp coconut sugar, divided
  • 1 tbsp salted butter, melted
  • extra hazelnuts for topping, if desired!

Preheat the oven to 375.

Roll out the dough between two pieces of parchment paper, keeping the circle to about 1/4″ thickness. Peel off the top piece of parchment, and slide the rolled out dough on its parchment onto a baking sheet. If you’re feeling extra artistic or motivated, cut some extra dough off the edge of the circle and cut leaf shapes out of it because… I’m an overachiever and it’s FALL! YAY! Anyway… moving on.

Spread the hazelnut paste carefully over the dough circle, leaving about a 2″ border from the edge — I found that the back of a spoon worked nicely for this (Try not to move it around too much, just press it into place so that the bottom dough stays intact). Spread the sliced pears in a fan shape if you’re feeling fancy, or just toss them all in there (I’m definitely not going to judge!). Begin folding up the sides, creasing them together as you go – if the dough is cracking, that’s okay (you can crimp the cracks back together; remember: galettes are forgiving and rustic!); you can use the bottom piece of parchment to help fold up the sides. Stick the leaves on the edges if you went that route. Brush the pears with the melted butter, and top with 1 tbsp of coconut sugar. Brush the dough with the beaten egg (I like a pastry brush for this), and sprinkle with the remaining tablespoon of coconut sugar.

Bake for 35-40 minutes (mine was perfectly done at 35, so check accordingly), until the dough is firm to the touch and golden brown. Let cool on the baking sheet for a few minutes, then slide the whole piece of parchment paper and galette onto a cooling rack to cool completely (or serve immediately!). Eat with some kind of vanilla ice cream thing (dairy or not) because… you should!

Leftovers keep covered at room temp for about… 1 day. Because it will be gone by then anyway so you won’t even have to worry. Promise!

img_5102-x3

Food fights and turkalurk

IMG_1532

Happy Belated TurkaLurk Day! Gobble gobble gobble…

IMG_1568

We did the usual Thanksgiving things but also did some really awesome things like 18 holes of frisbee golf and extreme ping pong and pie. Obvs. So weird. Pumpkin pie isn’t even my thing and I still can’t help but get all fancy. Whatever. It must be that extra baking gene I picked up somewhere in my travels to this particular incarnation.

IMG_1563

Oh hi, we love whipped cream.

IMG_1565

And then in attempting to use my parent’s favorite kitchen gadget (the Austrian whipped cream whipper they’ve had foreverrrr) at altitude, we laughed till our abs ached as the silly thing tried to explode and decant its contents violently all over the kitchen. No such luck, rouge whipper, we have your number and in no way are you going to be allowed to explode, no matter how much copious fizzing and spurting and hilariously juvenile noises end up emerging from your innards. In the end, a second batch of cream got whipped by hand but not before a mini food fight broke out. No big deal.

IMG_1534

IMG_1561

IMG_1537

Also lentils. IMG_6986

I made this dish forever ago but never got around to sharing it, so I’ll do that now… which is rather fitting considering it’s made of lentils and despite the plethora of turkey currently sweeping the nation, I prefer lentils, thank you. So here you go, my non-turkalurk-eating-crowd, this is for you. And for me, come to think of it…

IMG_6989

Happy Thanksgiving! I’m grateful for lots of things, up to and obvs including food. Gobble gobble…

IMG_6988

Roasted Kabocha Squash Lentil Dal

Gluten free and vegan! Rather quick, if you preroast the squash and all that. I adapted the recipe from happy hearted kitchen, here! Hearty and perfect for winter comfort food without the heavy ick factor… Just a warming bowl of spicy lentils to keep you dancing and happy.

  • 1 small kabocha squash
  • glug of olive oil
  • 1 onion, diced
  • 1 clove of garlic
  • 2 heaping tbsp freshly grated ginger
  • 1 tsp turmeric powder
  • 1.5 tsp cumin
  • 1/2 tsp ground ginger
  • 1/2 tsp cardamom
  • scant 1/2 tsp cinnamon
  • 1/2-1 tsp sea salt, to taste
  • a few twists of freshly ground pepper
  • 1 c red lentils, rinsed
  • 1 yellow pepper, diced
  • 1.5 c light coconut milk
  • 4 c veggie stock
  • chopped cashews, Persian cucumbers and shredded coconut to garnish

IMG_6984

For the squash: wrestle the squash and successfully cut it in halvsies. Preheat the oven to 400. Scoop out the squash seeds, and brush the insides of the squash with avocado oil (or another high heat oil would be fine here). Roast, cut side down, on a rimmed cookie sheet until the sides of the squash can be pierced with a fork, about 40 minutes. Remove squash from oven, flip over, and let cool until you can comfortably scoop out the puree.

In a large pot over medium, heat olive oil. Add diced onion and garlic, fresh ginger and turmeric, and sauté until the onions are translucent. Add a splash of water if needed if things get too dry or the spices are sticking. Toss in cumin, ground ginger, cardamom, cinnamon, a twist of pepper, and some sea salt, and stir to combine. Add rinsed and drained lentils and diced bell pepper, followed by the coconut milk and enough broth to cover the top of the lentils, and stir again. Bring to a boil (I covered mine and watched it like a hawk), then reduce heat to low and let it simmer covered for about 35-40 minutes. Remove the lid and stir in the squash puree. I purposefully left some chunks in mine for texture… You can blend it with an immersion blender here if you like, but I chose to leave mine as is—red lentils are so soft anyway that they’re pretty much perfect here. Season to taste with the rest of the salt and more pepper, if you’re spicy like me. Garnish with persian cucumbers, chopped cashews, and shredded coconut for fun!

Store any leftovers in the refrigerator. If it’s thickened up quite a bit when you go for leftovers, add a splash of broth and heat it back up on the stove (or leave it thick—I love it like that the next day).

IMG_1559

Brain mush.

IMG_6862

I think I’m just really obsessed with mushy food.

IMG_6866

What a nice way to start a blog post about FOOD, right?? Like, I’m trying to get peeps to keep reading the post, not click off immediately…

IMG_6856

But seriously. Mushy food is my jam. I like oatmeal SO MUCH that it gets me out of bed in the morning. For reals. I lay there going ‘ughghghh it’s dark and whyyyy and I know I have to but uhhhgggh’ and then it hits me… I get OATMEAL for breakfast. And I’m out of my bed like a shot. This is true life, I’m not kidding. It actually works. Every. Single. Morning. And I will be just as excited about it tomorrow as I was yesterday. Or the day before that. Or… well. You get the idea.

IMG_6865

And applesauce. And buckwheat. And any type of porridgy thing besides oatmeal. Is this weird??

I’m making the executive decision that it’s not. Because lentils can also be mushy but lentils are DELICIOUS. Stupidly so. And sooo easy. And cheap. And nutritious so what’s not to like?!

IMG_6855

Also. Too much studying of useless math and endless hours revising grad school app essays have turned my brain into mush so maybe that’s why I’m so fixated on mushy food today? Whatever. I made this for dinner yesterday and it was mushy and delicious and really, calling it mushy is really kind of mean because it is SO delicious. Let’s call it… creamy. And unctuous. And lentily. Spicy, comforting, soul food. There we go. That’s far better than mushy. It has character. I like my food to have character.

IMG_6859

Red Lentil Dal with Creamy Coconut Buckwheat

Gluten free, vegan, full of delicious grains and healthy carbs, and inflammation-fighting turmeric. Serve hot or cold—I like it as cold leftovers the next day. Recipe serves four easily, with leftovers. Buckwheat is my own method, dal adapted from Wholehearted Eats, here!

IMG_6857

For the buckwheat:

  • 1 c buckwheat groats, rinsed
  • 2 c light coconut milk
  • 1/4 c unsweetened shredded coconut
  • salt to taste

For the Dal:

  • heaping 1/2 c diced onion
  • 1 tbsp avocado oil
  • 1 tbsp freshly grated ginger
  • heaping 1/8 tsp ground cardamom
  • 1/4 tsp turmeric
  • 1/8 tsp cayenne pepper
  • 1/2 tsp ground cumin
  • 1 c red lentils, rinsed
  • 1 c light coconut milk
  • 3 c water
  • 2 carrots, chopped into smallish pieces
  • 1 tsp fine sea salt
  • a few grates of pepper
  • chopped Persian cucumber, roasted cashews, pepitas, unsweetened coconut for garnish

Buckwheat is amazing: In a medium sized saucepan, bring coconut milk to a boil. Once boiling, dump in buckwheat groats, cover, and turn down to a simmer. I usually add a few sprinkles of sea salt here (and more to taste after it’s finished cooking).  Let the groats simmer until they have absorbed most of the liquid, about 30 minutes (though I never set a timer; I just check it periodically. Groats should retain their chewy texture when fully cooked). Add salt if needed. Buckwheat tends to thicken up as it sits, so I usually turn it off when there is just a bit of liquid left.

What is a grain without a friendly topping?? For the dahl: heat avocado oil in a medium saucepan. Add in onion, ginger, cardamom, turmeric, pepper, and cumin and sauté until the onions are translucent. If the spices start sticking, add a splash of water—I find it helpful to stir the onions relatively frequently. Add in lentils, coconut milk, water, and diced carrots. Bring to a boil, then reduce heat and let it simmer, covered, for about 40 minutes (Stirring occasionally is probs good). Uncover, add salt (more to taste if that’s your jam) and let simmer for about 20 minutes more. Turn off the heat, let it sit and thicken for a few minutes more.

Serve over buckwheat, with veggie of choice and fave garnishes. I like chopped cashews and pepitas+cucumber and coconut. Leftovers are excellent cold or reheated the next day.

IMG_6861

Nuts for texture

IMG_5901

My favorite part of Indian food is the dessert.

Once (not that long ago… ahem, possibly less than a month), my family went out for Indian food at this ridiculously delicious place in LA… and I was goaded encouraged to order dessert before dinner… and then a dessert for after dinner. And I thought, why not?! Because I always get so full with naan and curried goodness and end up eating dessert anyway, and then I can’t move for a week. Or maybe a few hours but it feels like a week.

IMG_5894

So this time I got smart!! A bowl of kheer to start the dinner… and a bowl to end it. A proper way to do things, if you ask me.

IMG_5902

Anyway. This isn’t exactly like the kheer you find in Indian places—it’s made with quinoa and rice milk rather than white rice and dairy (which obviously gives it a nutritional bump), but it’s close enough that I love it anyway. Give me some textural, lumpy puddingy thing and I’m totally sold. Seriously. I can’t stand mousse or regular pudding, but tapioca?! Oh yes. Rice pudding? In a heartbeat. Bread pudding? Bring it. You see? Nuts for texture.

Besides, this one is gluten free, refined sugar free, and full of protein! Why *wouldn’t* you eat this for dessert?! It’s perfect, provided you’re nuts for texture like me :) (or maybe just nuts, that’s a distinct possibility)

IMG_5898

Quinoa Kheer

Recipe adapted from A Brown Table, here! My fambam was in a pudding mood so it served three…
Gluten free, high protein, refined sugar free, and dairy free (if you sub in vegan butter)! What’s not to love?

  • 1.5 c cooked quinoa
  • 1 tbsp butter (mine is Kerrygold Irish butter, salted)
  • 4 dates, roughly chopped
  • 1/4 tsp ground cardamom
  • 3 c unsweetened almond milk
  • 1.5 tbsp coconut sugar
  • 1 tsp honey
  • chopped pistachios for garnish

Melt butter over medium heat in a thick-bottomed saucepan. Add chopped dates and cardamom, and saute for just about a minute. Toss in quinoa, almond milk, coconut sugar, and honey, stirring to combine. Bring to a boil, stirring frequently, then reduce to a simmer. Let it simmer, uncovered, until the liquid has reduced significantly (you’ll be able to tell—it will become thicker, with a more puddingy consistency. It will still thicken as it cools, so I stopped mine when it was reduced by about a 1/3). Stir frequently as it simmers, as the milk will scald if left too long. Let cool at room temperature, then stick it into the fridge for another hour or two. Serve chilled with chopped pistachios!

IMG_5900

An absurd amounts of lentils (is maybe the best thing ever!)

IMG_5173

Shut the front door.

LENTILS.

IMG_5171

There are no words.

Except…

I’m obsessed?! Forget the question mark after obsessed. No question. Ob. Sessed. As in…I eat them for three meals a day (not in the same day, obviously, but I do kind of have to stop myself from doing that): breakfast, lunch, dinner. I put them in oatmeal. With coconut milk and a date (seriously. You don’t know what you’re missing until you try it). Over sautéed mixed greens for lunch. With bread and mo’ veggies for dinner. Or a snack. Or whatever. OBSESSED. Lentils, where have you been all my life?!

IMG_5170

I’m not entirely sure what I was eating up until now in order to fill this gigantic hole that is now filled with lentils… thankfully I can make huge vats at one time so that I have lentils for days (literally). Which means I kind of go through them a little, ahem, rapidly. Kind of like vegetables. But lucky for me, last week Whole Foods had a one day bulk sale!!! (danger, danger, this is my kryptonite) So now my cupboards are exploding with all kinds of fun bulk-type things like pepitas, mung beans, brown rice, dates, and.. oh yeah. LENTILS. Three. Different. Kinds. I literally have enough lentils to feed a small army. Or me. For about a week.

IMG_5161

This is my favorite way to make them: they can be sweetish (in oatmeal with coconut milk and a date), or savory, over sauteed greens with avocado and a little splash of coconut aminos (or soy, if that’s your thing). I love that they can go either way, depending on what meal I’m eating or whatever.

You don’t even have to be alternative like me to enjoy them… if lentils in oatmeal scares you (we might not be able to be friends anymore but I’ll try really hard…) just make the lentils! They’re fast and delicious and… healthy! Naturally. Would I share anything less than that with my invisible internet friends? Answer: no!!

IMG_5165

Lentils are also awesomely little super nutritious powerhouses: full of fiber and complex carbs, folate, magnesium, and vitamin B6. Which all means that they help lower cholesterol, are good for your heart and digestive health, provide an excellent source of energy and iron, and help stabilize blood sugar. Therefore… in a nutshell: eat lentils!! Your body will thank you :)

And look!! Sorry for the radio silence, my former roomie Kira visited me!! We went and had some fun in Mountain View Cemetery, so I was a little too busy going face-first into a plate at Rick and Ann’s to eat lentils. But. I’m back, in full lentil eating mode, here to cheer your inbox!

IMG_3163

Marjoram, Cinnamon and Cardamom Spiced Lentils

Recipe by… me! Mutti gets credit too, especially when I have absolutely NO time, and she nicely makes may weekly vat of lentils for me. The measurements here make enough for dinner three, with leftovers. Or for one: Dinner, followed by three days of breakfasts….

  • 1 c lentils (I like green lentils for this)
  • 3 c water
  • 1 onion, diced
  • 3 large carrots, finely diced (or roughly chopped, whatever floats your boat)
  • a good glug of olive oil
  • 1/4 c low-sodium chicken broth (to make vegan/vegetarian, sub veggie broth)
  • 1 tsp marjoram, chopped
  • 2 tsp cinnamon*
  • 1 tsp cardamom*
  • 1/4 tsp nutmeg*
  • salt and pepper to taste

*the measurements are approximate: I season to taste as I go with all the spices, and salt and pepper. I tend to go light on the pepper in this.

IMG_5172

No need to soak the lentils, which is awesome. Toss lentils and water into a medium pot, bring to a boil, and then lower to a simmer. Let cook until the lentils have absorbed *most* (not all) of the water, about 15-20 minutes. They should have a bit of chew to them, but be on the softer side. Taste them, and you should be able to tell. Drain and rinse them, and set them aside.

Finely dice the onion and carrots. Pour the olive oil into a large saucepan. When hot, toss in onions, and sauté until they become translucent. Add salt and pepper and marjoram, and let cook for a minute more. Add carrots, lentils, and chicken broth. Cover and let cook until the carrots are soft (this is why I like to dice them really finely, or microwave the carrots first, as it shortens cooking time and I’m usually hungry). Stir in cinnamon, cardamom, and nutmeg to taste, while the carrots are cooking. I usually let it go for about 10-15 minutes, unless I’ve precooked the carrots.

Leftovers keep well in the fridge for at least a week, not that I’ve ever really had them around that long… Serve warm! Excellent over greens with some bread on the side :)

IMG_5175

Sunday things and pudding.

IMG_5114

Things.

Pictures today, since I’m feeling more visual and less like the chatterbox I usually am. 

This. No words needed.

IMG_5101

 Architecturally glorious, but…  

2013-05-12 10.24.44

Mother Nature always wins! 

IMG_20130512_101456

Look! A barley-rice yin-yang! 

IMG_5108

And now the real subject of this post… pudding!! 

IMG_5111

Mmm, pudding. There has been so much pudding in my life lately, this is a trend I’ll be continuing. This one is barley and brown rice (would have been all barley but I was a little short—a fortuitous happening since barley and brown rice go well together!), made with rice milk and coconut milk. I like it for breakfast with more milk added, or dessert with a chopped date or some raw honey (or maple). Kind of whatever floats your boat, any way you eat it, it’s delicious! Comforting in the tummy, warming, and soothing. 

IMG_5119

IMG_5120

Coconut Barley-Brown Rice Pudding

Recipe lightly adapted from The Gouda Life, here! Makes a fairly good-sized vat… I got maybe 5 servings out of it? They were varying sizes though, some were bigger than others. 

  • 3/4 c purple barley, rinsed
  • 1/2 c brown rice (mine was kashikiri) 
  • 1 c original rice milk
  • 1/2 c water
  • 2 c light coconut milk 
  • 2 tsp cinnamon, plus more to taste
  • 2 tsp cardamom, plus more to taste
  • 3 dates, pitted and chopped
  • 2 tsp vanilla extract
  • shredded unsweetened coconut, for garnish
  • pistachios, for garnish

In a pot, combine barley, brown rice, rice milk, water, cinnamon, and cardamom. Bring to a boil, then turn down and let simmer until most of the liquid is absorbed. Stir in chopped dates. Once the liquid is mostly gone, add coconut milk 1/4 c at a time, stirring frequently (I found it helpful to stand there with a book and stir…it’s kind of like risotto), adding the next batch after the previous has been mostly absorbed. When all of the coconut milk is added, the barley should be mostly cooked (it should be a little chewy when done). Mine needed a little more time, so I added a bit more rice milk and let it cook longer. I tasted it as I went and added more cinnamon/cardamom or vanilla to taste. Let cool a bit, and top with shredded coconut and pistachios to serve. I liked mine with chopped date or raw honey, but maple is good too! 

IMG_5117

IMG_5112

My personality in four words: I eat bird food! Peck peck peck…

IMG_5032

Ahhh, a day off.

And… I have THIS!

IMG_5035

Mmm… birdseed. Peck peck peck.

Not even joking. You know those little seed thingies they put in birdseed mix? Yeah. These things:

IMG_5045

That I just ate for breakfast! And youuu thought I couldn’t get any weirder. HA!

These little birdseeds remind me of being in my grandma’s backyard and blowing bubbles… and feeding the birds! And quite often the squirrels… Anyway. I associate millet with sun-drenched afternoons with my gram, eating ice cream and getting soapy bubble stuff all over the dish towel in my lap. And then probably running through the sprinklers! So obviously I’m naturally inclined to like this seed, besides it being totally delicious.

IMG_5033

But anyway. Millet is an excellent grain substitute: creamy and kind of nutty tasting, high in manganese, magnesium, and phosphorus. So far I’ve only used it as a breakfast/pudding/dessert thingy, but savory biz is coming soon, just wait. I can’t believe I haven’t eaten this before—it’s like rice pudding but a thousand times better! AND it’s good for you, soooo… why not eat it for every meal?! This one has heart healthy fats from coconut milk, natural sweetness from dates (as well as a boatload of other good bennies like vitamins and minerals), and cardamom has the added benefits of (in Ayurveda theory) of being warming, improving blood circulation to the lungs, and balancing the doshas.

IMG_5034

Coconut Millet Pudding

Recipe slightly adapted from Delicious Living, here. As listed below, this one is vegan, gluten free, dairy free, and refined sugar free. Hooray! And… it’s delicious. Obvs. Otherwise I wouldn’t share it with you!

Rustle around and collect the following:

  • 1/2 uncooked millet, rinsed
  • 1 (14oz) can of light coconut milk
  • 3/4 c milk bev (I used Eden Soymilk, which is just soybeans+water)
  • 2 tbsp water
  • 1/4 c medjool dates, chopped
  • 3/4 tsp ground cardamom
  • dash of sea salt
  • 1 tsp vanilla extract
  • optional: pistachios for topping

Combine millet, coconut milk, soymilk, water, chopped dates, cardamom, and sea salt in a saucepan. Bring to a boil (Being careful not to let it boil over, oops no of course I don’t speak from experience…), covered, then turn it down to a simmer and let it cook, covered, until millet is fluffy and most of the liquid is absorbed, about 20-30 minutes (mine was more like 20), stirring frequently. Once millet is cooked, remove from heat and stir in vanilla. Top with pistachios for a garnish if desired! Excellent warm or cool.

IMG_5031

Baking > Stress Butterflies

mmm, antioxidants!

I warned you about the baking itch, did I not? Or wait. Let’s be real: the stress baking prior to my thesis presentation on Tuesday! Butterflies, I will defeat you with copious amounts of baked goods! So there. Baked goods and lots of yoga. Stress ain’t got nothin’ on downward dog. (Or this is what I will tell myself, ha)

So, since I had a spare afternoon yesterday relatively unexpectedly, I made a tart! Because what else am I supposed to do with that time? That’s right, I thought you’d agree that a tart is clearly the superior option.

This tart was/is delicious! I’m so pleased with myself since I winged bits of it, and threw a bunch of elements together into a credible whole. YAY! Love when that happens. The flavors all work really well together, and it’s even semi-healthy! Or at least not bad for you… I’m sure I can come up with some nutritional benefits: coconut is always good; the crust is vegan; blueberries contain LOTS of antioxidants, and cardamom has some spice-type benefit, I’m sure. And it gave me another excuse to use my tart pan, and that awkward half bag of frozen blueberries in the freezer.

AND I baked it whilst wearing one my pearl necklaces. Which made me feel lots like Julia. Especially when my tart turned out fabby! Don’t forget, you’re all alone in the kitchen! Bonnnnnn Apetit!

crust! I always have fun with my tart pan...

Blueberry Tart with Coconut-Cardamom Pastry Cream and Almond Crust

Makes one 9″ tart. I used a really basic crust recipe, and adapted the pastry cream from Delicious Shots, here! Assembly is really easy, and the chilling times are probably the longest part of this recipe. Fresh blueberries would be wonderful, but frozen work just as well—I defrosted them in the fridge and then in the counter for a bit. The crust is suuuper crumbly, but don’t worry, you can press it into the tart pan and it’ll behave.

/

Tart Crust:

  • 1.5 c whole wheat pastry flour
  • 4 tsp sugar
  • 1/4 tsp salt
  • 5 tbsp Earth Balance
  • 1.5 tbsp almond paste
  • 2-3 tbsp cold water

In  a food processor, combine flour, salt, and sugar. Add in butter and almond paste until the mixture looks like coarse crumbs. Add water until the dough comes together. Don’t worry if it’s crumbly—mine was, and turned out fine. Shape into a disc, and wrap in plastic. Let it chill in the fridge for 30-45 minutes. Preheat the oven to 375. Once the dough is chilled, roll it out to 1/8″ thickness on a floured surface, and press it into your tart pan, evening out the sides as you go. Prick the bottom with a fork, and line with foil and weights (I used rice. Beans are fine too, or pie weights if you’re swanky and have cool kitchen tools like that). Bake for 20-25 minutes, until lightly browned. Mine went for 20 with the weights, and then 5 without them. I’m sort of a crust noob, so mine seem to come out ‘needing improvement’. Granted, I usually think they taste great… this one maybe could have used a tablespoon-ish more Earth Balance, perhaps?

cardamom flecks!

Coconut-Cardamom Pastry Cream

  • 3 egg yolks
  • 1/4 c turbinado sugar
  • 1 tbsp cornstarch
  • 1 tsp whole wheat pastry flour
  • 1 c light coconut milk
  • 1/2 tsp vanilla extract
  • between 1/4 and 1/2 tsp cardamom, depending on preference (I used more like 1/2, since Kira and I are cardamom nuts)

In a bowl, whisk the egg yolks and half of the sugar until light yellow in color. Toss in the cornstarch and the flour, and whisk until combined. Set aside. In a small saucepan, combine coconut milk, vanilla, and cardamom, and bring to a boil, stirring constantly. Temper the milk mixture by pouring it in a steady stream over the egg yolks/sugar, whisking constantly to prevent the eggs from scrambling. Once the two are completely incorporated, pour the mix back into the saucepan, and bring to a boil again, still stirring constantly (Sorry. Lots of stirring. But oh hey, arm workout!). The custard will start looking thick and your whisk will make tracks. Boil for just one or two minutes, and then remove from heat and pour into a bowl to cool. I used a shallow one, so it would cool faster… and place a bit of plastic wrap or sandwich baggie over the surface to prevent a skin forming. Once cool, place in the fridge for further chilling.

tart. Sans antioxidants.

Assembly! (Aka the best part)

  • Fruit of choice. I recommend blueberries… I used about 5 oz, or half a bag of frozen.

Pour the custard into the cooled crust, and smooth it out until it looks pretty…and then top with fruit! Easy peasy. And delicious. And looks like you put so much more work into it than you actually did. Shhh, I won’t tell :)

Best eaten the day it’s made, but it still makes excellent (if not quite as aesthetic) leftovers. Store in the fridge!

yumyumyum

Workout. Get pumped! Eat. Love. Repeat as necessary!

semi-leaning tower of quinoa bars!

Happy first day of spring to you too, Salem. Thanks for the nice weather SNOW. What?! Like, actual snow this time too. About three inches of fluff on my car this morning… what is this?! Thankfully today was Workout Wednesday (ie the only reason I go to campus is to work out), or else I might have skipped class, hehe. (As Kira pointed out, at least I have my priorities straight. Miss a workout with Christine? NEVER! ha. But hey! Justified, as pilates/fitness instructor is my career of choice) Besides, I had to go give Christine her quinoa-banana bars. Yes. I am the kind of person who bakes treats for her fitness instructor. We have the same workout addiction after all: Must…work… out! And buy new active wear! Healthy snacks in exchange for a Pilates-Core body butt kicking? I think it’s a fair trade ;)

So now I’m nicely sore and contemplating going back out into the wet for work. And wet indeed it is now… we’re getting semi-frozen rain-ish-slush-gross now, because, well, why not? I have holes in my uggs, that’s why not. My heels got suspiciously damp when I was wearing them this morning… seriously, I had all these grand plans to take my winter-wear home over spring break to leave it, so that  I had less to take home in May. Fat chance. Watch, I’ll leave it all here and it’s be sunny and glorious the rest of April. Hmm. Maybe this is logical… maybe I should take it home?! Oh weather gods, how you love to mess with us here in Salem. I like snow, don’t get me wrong, but only when I can ski on it, pleaseandthankyou.

there's a rogue one!

Anywayyyy. Today I have bars for you! Healthy snack-type bars, like a cross between banana bread and a granola bar. They’re packed with all kinds of goodness: whole grains, peanut butter (YAY!), quinoa, flaxseed, bananaaaaas, and cardamom. Mmm. Can’t go wrong with the banana-cardamom combo, it’s fab. These bars also happen to be vegan, just for funzies! They’re perfect with a little (more) nut butter swiped on top (uh-oh, I can see the bottom of my peanut butter jar, mayday mayday!) and extra bananas :)

oh hey, up close!

Peanut Butter-Banana Quinoa Bars

Recipe only slightly adapted from here! Makes… 8 ish? I made it in a pie dish, and cut rectangles out of the center. Wedges would have been good too.

  • 2/3 c whole wheat pastry flour
  • pinch of salt
  • 1 tsp cinnamon
  • 1/2 tsp ground cardamom
  • 1 tsp baking powder
  • 1/4 c chunky peanut butter
  • 1 ripe banana
  • 1/3 c cooked quinoa*
  • 1/4 c wheat germ
  • 1.5 tbsp ground flaxseed
  • 3 tbsp turbinado sugar
  • 1/4 tsp apple cider vinegar
  • 1/3 c milk bev (soymilk for me)
  • sprinkling of dark chocolate chippies!
barsssss

*I cooked 1/3 c dry quinoa in 2/3 c water, yielding enough for the bars + dinner leftovers :)

Preheat the oven to 350, and lightly grease a dish of choice. I made mine in a 9″ pie dish, since a square 9″ seemed too big.

In a smallish bowl, whisk together flour, salt, cinnamon, cardamom, and baking powder. In a largeish bowl, mash up the banana with a fork, and then vigorously stir in peanut butter until combined. (Added bonus: bicep workout!) Add in quinoa, wheat germ, flaxseed, sugar, vinegar, and soymilk, and stir to combine. Toss flour mixture and chocolate chips into the wet ingredients, and mix together until combined. Spatula-ize the batter into your prepared pan (Yes, spatula is a verb now), and bake for just about 30 minutes. A tester should come out clean when done.

Workout, feel pumped, eat, love! Repeat as necessary.

this may or may not be how my peanut butter disappears so fast...