Let’s get crisp-y

fullsizeoutput_1853

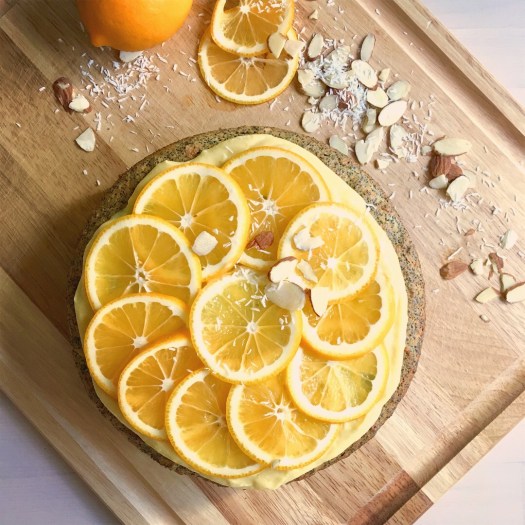
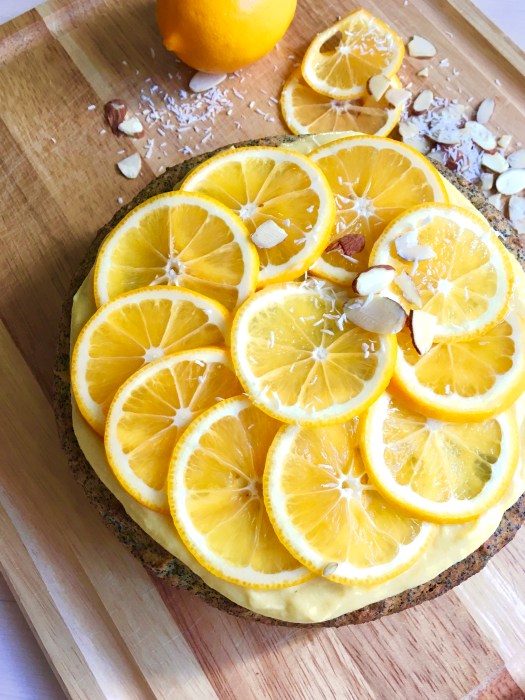
Happy Pride! It is hard to believe we are this far into June – I’m excited, since the stone fruit season is starting to really get going, and berries are lovely right now.

This week was eventful – I gave myself a black eye with a 900 page paperback (sci-fi of course) when I accidentally (duh) dropped it on my face… such a raging Friday night! I wasn’t even asleep, it just slipped out of my hand & got me. Rude! Sometimes I impress even myself. Photo evidence, just in case you needed proof:

fullsizeoutput_181b

fullsizeoutput_184f

Anyway, enough of my raging & back to the fruit at hand: I also love rhubarb – though I typically think of it more as a late spring thing than summer. This will probably be the last rhubarb thing on here – it gets harder to find, and I really want to play with all the stone fruit anyway!

fullsizeoutput_1566

The California summer is definitely in full swing: the hills have gone that golden shade that is so pretty against the dark oaks and blue sky. I could do without the hot weather but… at least I have access to a very cold pool! You will find me there more than frequently ;)

IMG_3549

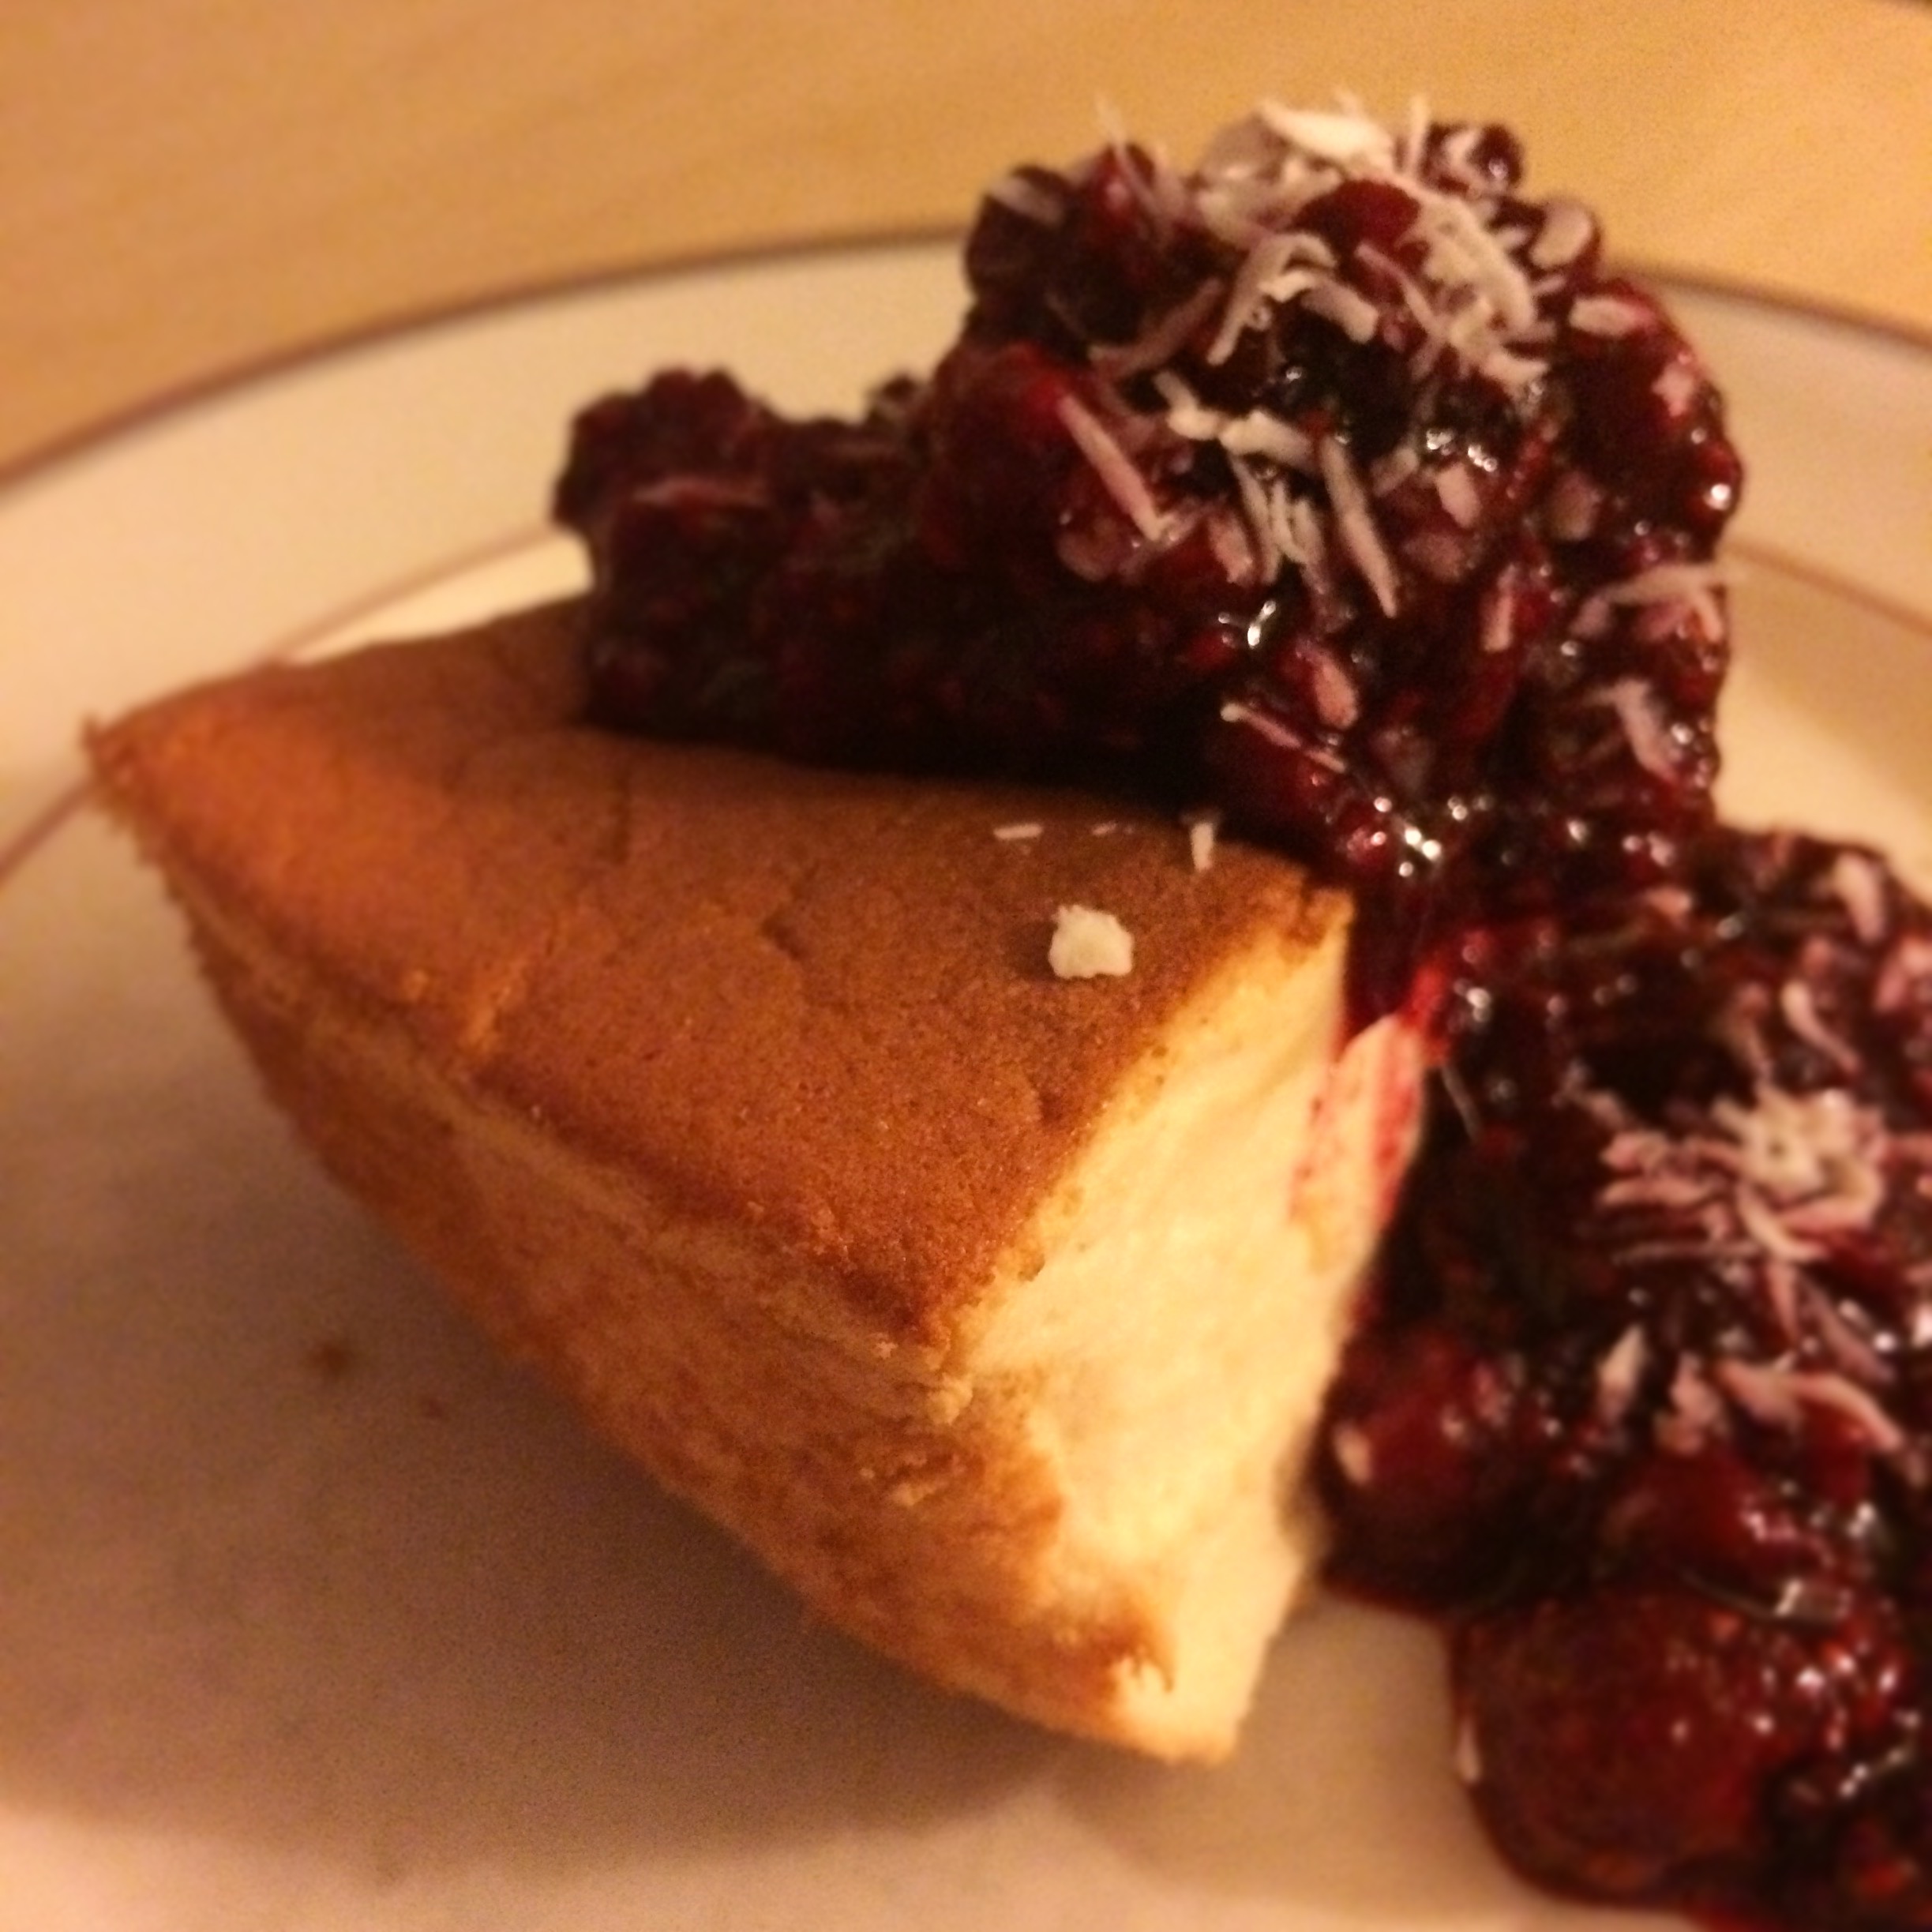
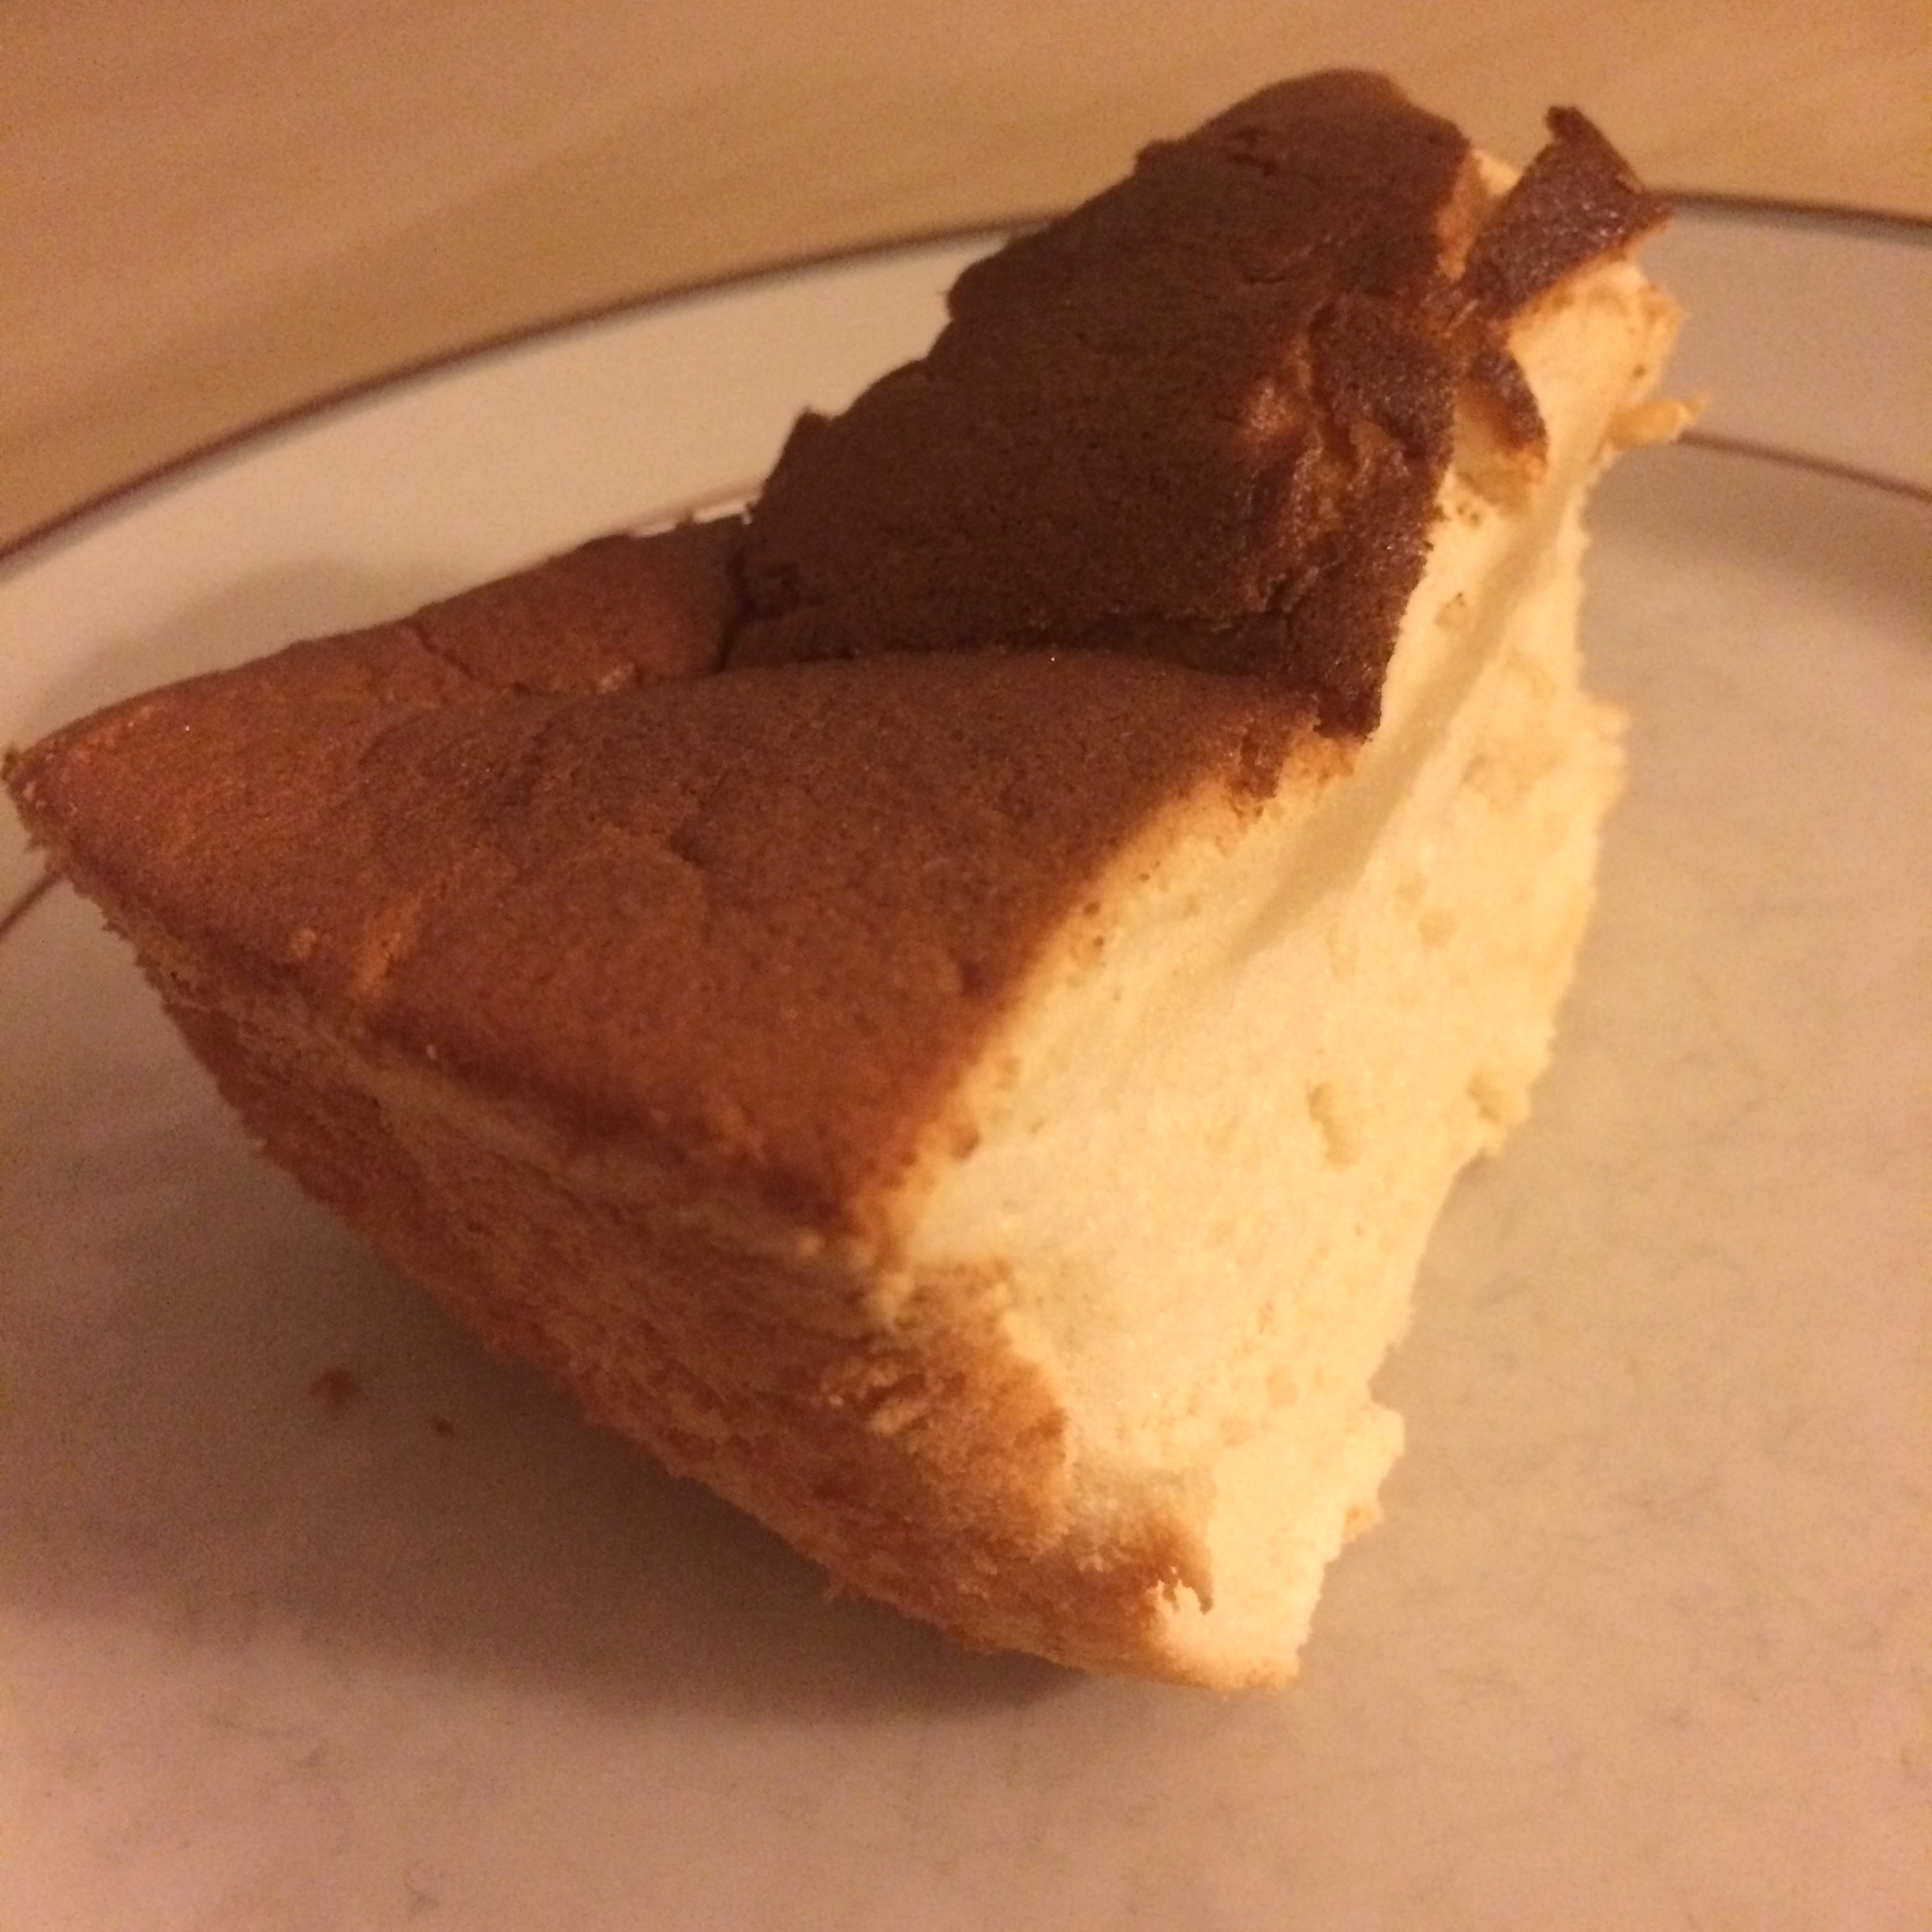
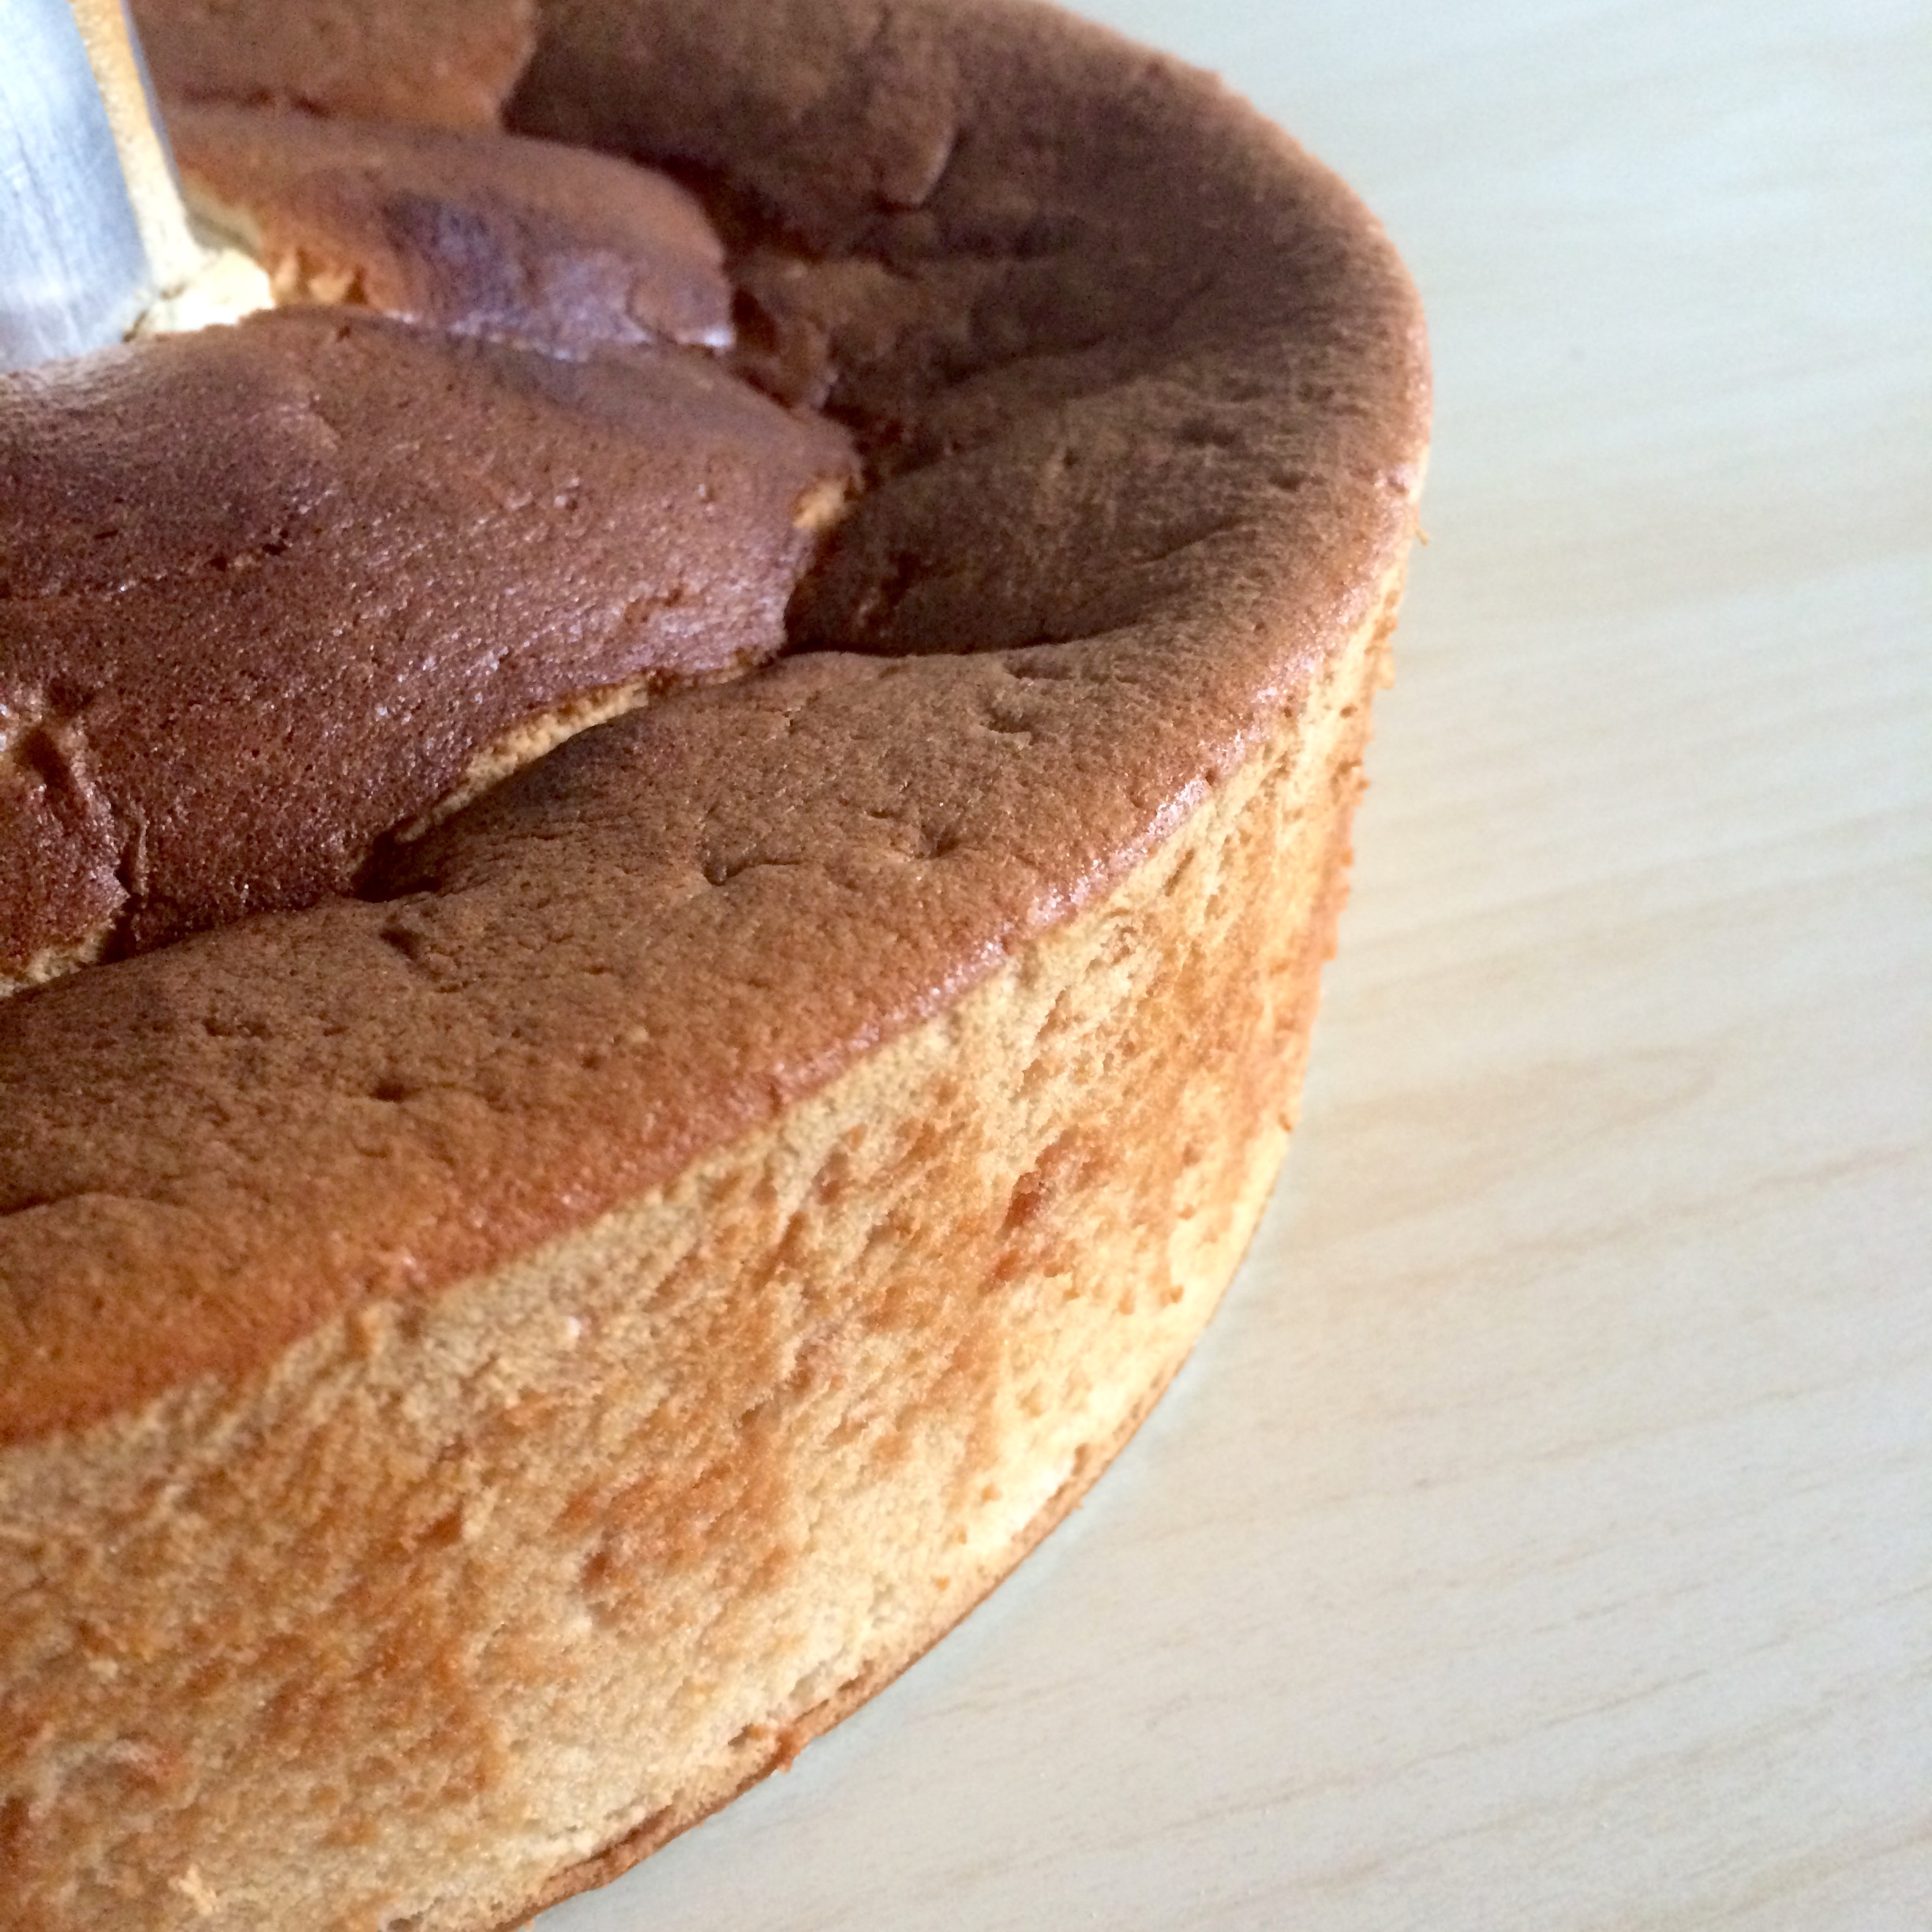
Super fun weekend over here – time with fave human, dessert, urban hikes, etc etc – a few pictures below.

fullsizeoutput_1854

fullsizeoutput_1856

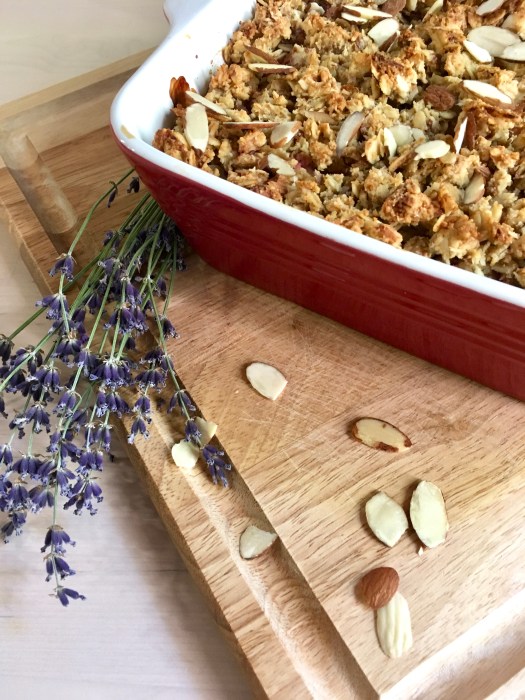
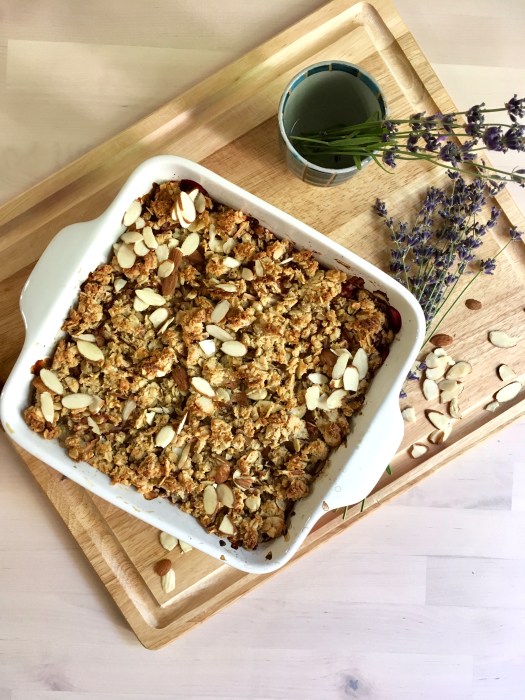
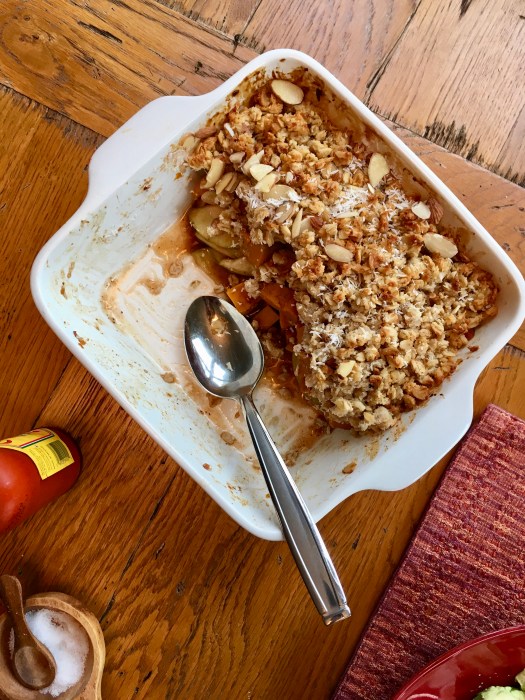
This crisp is for those who LOVE rhubarb – it’s very rhubarb-forward! We both love the tart awesomeness of it, but I know it’s not everyone’s jam. Lavender was an interesting addition – I don’t use it all that frequently in baking (I find it can get a little… soapy, sometimes) but it adds a nice floral note here, which pairs especially nicely with ice cream…

fullsizeoutput_1852

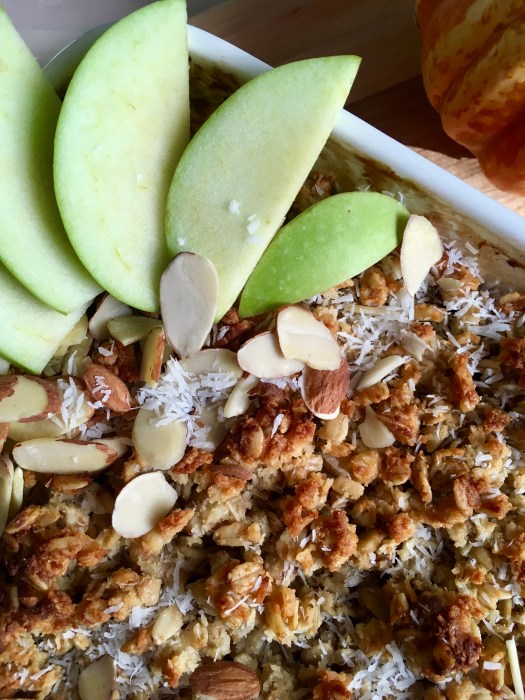
Of course, it’s us – this got eaten for dessert and then alongside the usual breakfast. No regrets! We were both starving anyway after having woken ourselves up by walking up some hills on a nice little shorty hike.

fullsizeoutput_1858

fullsizeoutput_184c

I hope everyone out there in my corner of the internet is enjoying their weekends! Happy baking, if indeed you do some :)

fullsizeoutput_184e

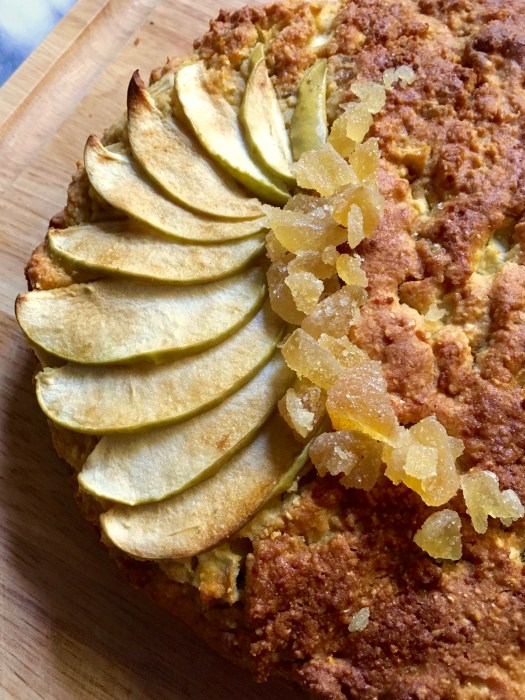
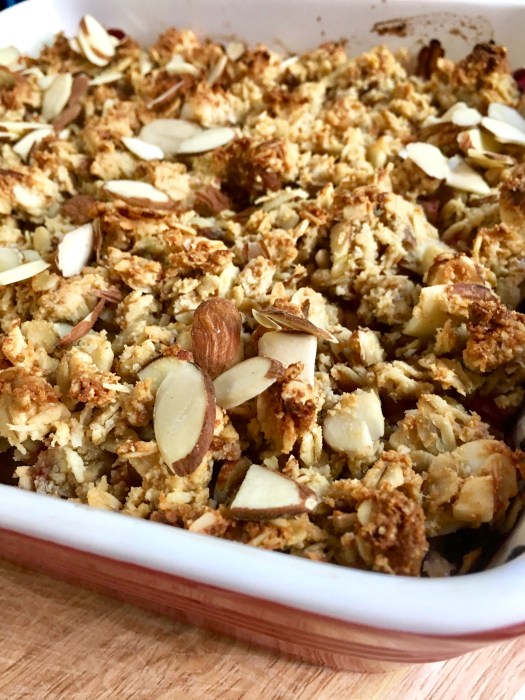
Rhubarb, Blackberry and Lavender Almond Crisp

For those who LOVE rhubarb! This one is right in your face. Lightly sweet but seriously tart; lightly floral from the lavender and perfect with ice cream for a summer dessert or on it’s own for breakfast. A Wait are Those Cookies original! Yield: 1 crisp – I use an 8 by 8 dish that holds two quarts; you can also use a 9″ deep pie dish. Just make sure there is ample room for fruit! Serves: 2, or several… you decide!

fullsizeoutput_184b

For the filling:

3 c rhubarb, chopped*
1 c raspberries*
1 c blackberries*
1 tsp lavender buds
1/4 c maple syrup
¼ cup water (I used 1/8 c port & 1/8 c water)
2 teaspoons arrowroot starch

*I just approximate; I use however many it takes to fill my 2 quart, 8×8 baking dish
*I baked straight from frozen; fresh would also be fine

For the crisp:

1 cup old-fashioned oats (use certified gluten-free oats for a gluten-free crisp)
½ cup firmly packed almond meal
½ cup chopped almonds
1/4 c unsweetened shredded coconut
1/4 c maple (or coconut) sugar
¼ teaspoon fine sea salt
2 tsp vanilla extract
4 tablespoons unsalted butter, melted
¼ cup plain whole milk Greek yogurt

Preheat the oven to 350.
Toss chopped rhubarb, raspberries and lavender into your baking dish of choice (my dish is 8×8, 2 qt capacity; 9″ square or 9″ deep pie dish would also be fine). In a liquid measuring cup, whisk together the maple and water/port until combined. Add the arrowroot, and whisk to combine. Pour the mixture over the fruit and toss to combine. Bake for 20 minutes.

While the filling is baking, make the crisp. In a mixing bowl, stir together the oats, almond meal, chopped almonds, shredded coconut, maple sugar and salt. Mix in the vanilla, melted butter and the yogurt. Stir until everything is mixed thoroughly.

Once the filling has baked for 20 minutes, stir it and and redistribute evenly in the dish. Plop spoonfuls of the crisp topping evenly over the filling – no need to pack it down. Return the dish to the oven and bake for 25 to 30 more minutes, until the filling is bubbling around the edges and the top is golden.
Let the crisp rest for 5 to 10 minutes before serving. Serve with vanilla ice cream, obviously! Keep leftovers, covered, in the fridge for about five days (yeah right. It would take some kind of major feat to make it last that long)

fullsizeoutput_184a

When life hands you lemons… make curd, of course!

IMG_2589

Hello hello!

fullsizeoutput_13c8

My car died on a freeway on-ramp today, isn’t that special? So thankful nothing worse happened – no one rear ended me, and it didn’t happen on the bridge. Could have been so much worse! Whew.

fullsizeoutput_13cd

But before that happened, at least I had cake with brunch! Poppy seed cake with Meyer lemon curd, to be exact. So so delicious & so awesome for brunch and dessert.

IMG_2582

I believe this cake is actually old world Austrian in origin (actually – I had to look it up! It’s an Austrian-Northern Italian Alps hybrid beauty), but it happens to be naturally grain and gluten free. Interestingly, it also contains no added fats like butter or oil, but is leavened with whipped egg whites. I adapted it to be much less sweet and refined sugar free, making it pretty much paleo. It’s also dairy free, as is the lemon curd – which is appropriately tart, as per our joint penchant for tart things!

fullsizeoutput_13c1

We loved this cake both with ice cream for dessert and alongside eggs and kale for breakfast – it really shines both ways. Don’t be fooled into thinking it’s a super rich layer cake – it’s actually airy, light and refreshing. I made extra lemon curd for drizzle because our general motto is that you can never have too much curd! Ha.

fullsizeoutput_13d2

fullsizeoutput_13bf

In other news, I’ve been doing a lot of ridgeline hiking to take my mind off some persistent and uncomfortable health issues. The views are awesome and it’s great to get outside (and outside my head). More on that later, maybe or maybe not – I try to keep this space light. It’s just not been my best month, and I and I’d rather not pretend everything is rosy when it isn’t.

fullsizeoutput_139a

IMG_2588

I can make cake though, and eat it with my favorite human. That makes life so much brighter, and I always find solace in baking and in the company of loved ones.

fullsizeoutput_13a4

fullsizeoutput_13bd

Bake, eat, love; surround yourself with those who make you feel loved and safe, and feed them. To me, this is one life’s best gifts.

Happy weekend!

fullsizeoutput_13b7

Lemon Poppy Seed Cake with Meyer Lemon Curd

Grain and gluten free, dairy free, refined sugar free, pretty much paleo. Lightly sweet and plenty tart, in the best way! Prepare to floss excessively – this is for those who love poppy seeds! Yield: 2 8” cake layers or one 10” cake. Serves 6-8 (or two, for two meals with leftovers ;) cake adapted from Food52, here; the lemon curd is one I’ve made a zillion times; you’ll find it elsewhere on the blog and it is my current reigning favorite.

fullsizeoutput_13b2

For the cake

  • 1 Meyer lemon
  • heaping 1/4 c maple sugar
  • 2 tbsp maple syrup
  • 1 tbsp vanilla extract
  • large pinch of salt
  • 5 eggs, separated
  • 1 Granny Smith apple, peeled & grated
  • 7 oz almond flour (~2c but weighing is better!)
  • 7 oz poppy seeds
  • 1.5 tsp baking powder

Heat oven to 350. Grease 2 8” cake pans (or one 10” pan) and line the bottoms with parchment paper.

Zest the lemon and place the zest along with the maple sugar in a large bowl. Rub the sugar and the zest together until the sugar is damp and fragrant. Separate the eggs and add the yolks to the bowl with the sugar and zest, and the whites to another large bowl. Beat the yolks with the zest and sugar until light in color and creamy. Juice the lemon and stir juice through the grated apple, then add to the bowl of yolks/sugar/zest along with maple syrup, vanilla, salt, almond flour, poppy seeds, and baking powder. Stir to combine – the batter will be thick. Wash the beaters thoroughly, and beat the egg whites until soft peaks form. Fold the egg whites into the rest of the batter, then pour it into the prepared pans.

Bake for 30 minutes (for 8” cakes; 40 minutes for a 10”), until the top is springy and golden brown. Let cool for a few minutes, then turn out onto cooling racks to cool completely.

Once cool, layer with lemon curd and store in the fridge until serving or serve immediately. Keeps well covered in the fridge for about 2-3 days.

For the Meyer lemon curd

  • 2 whole eggs
  • 2 egg yolks
  • 1/3 c Meyer lemon juice
  • zest of 4 Meyer lemons
  • pinch of sea salt
  • 2 tbsp maple syrup
  • 3.5 tbsp coconut oil
  • 1 tsp vanilla

I use a double boiler for this lemon curd, which definitely is a game changer. Highly recommended! Heat water in the bottom of the double boiler until it’s at a high simmer. In the top of the double boiler, whisk together eggs, egg yolks, lemon zest and juice, sea salt, and maple syrup. Add in the coconut oil one tbsp at a time, whisking continuously, not adding the next tbsp until the first is completely melted. Whisk in vanilla. Cook, stirring constantly, until the lemon curd thickens and will coat the back of a spoon (or your whisk leaves tracks) – usually around 5 to 8 minutes. It’s a noticeable change when it happens, so just watch the cooking magic! Remove from heat, strain to remove any solids (ie lemon zest) – I use a metal mesh strainer over my storage jar of choice – and store in a glass container in the fridge until ready for use. Keeps for a week in an airtight jar, and freezes well for later use.

fullsizeoutput_13d3

fullsizeoutput_13d7

Vegetables for dessert? Sure, why not.

fullsizeoutput_11a5

Happy 2018! I hope your new year got off to a good start – mine certainly did, absolutely no complaints over here!

fullsizeoutput_11a8

I’ve always been intrigued by the idea of using a squash other than pumpkin in a dessert.

fullsizeoutput_118f

Don’t be deceived by the cute little dumpling squash hanging out in these pictures – what really went in here is kabocha, one of these guys:

IMG_2199

I like the kabocha here – if you’ve never encountered one, they’re a bit of a cross between pumpkin and butternut squash. I really like it for the earthiness it brings here, which plays nicely against the apples. Side note: after some thought, we gave it mixed reviews – it feels a little vegetabley to be dessert – I almost wonder if it would work as a side dish. That being said, if you like not too sweet things / vegetables, go for it!

fullsizeoutput_117f

Besides, this is my absolute favorite crisp topping – it has a little extra protein from greek yogurt and almond flour, and is just so fun to eat. It stays crispy even after hanging out in the fridge overnight, which makes this excellent breakfast (see exhibit A).

fullsizeoutput_11ac

I also love it for dessert with ice cream (obviously) – the crisp ends up covered in melty ice cream, making it into slightly indulgent granola/muesli.

fullsizeoutput_11ad

fullsizeoutput_118e

In other news, I’ve been museuming and drawing again, which feels great. I let it lag a little too long I think!

fullsizeoutput_1168

IMG_2201

Of course coffee.

IMG_2198

Here’s hoping you’re enjoying the beginning of the new year! I have good feelings for this one. If you’re in the mood for a lightly sweet, perfectly healthy desserty-breakfast, I’ve got you covered! Happy baking :)

fullsizeoutput_1195

fullsizeoutput_11a9

Kabocha Squash and Apple Walnut Crisp

Gluten free, refined sugar free, and whole grain. Full of healthy fats AND fruits & veggies! Feel free to eat this as breakfast, I certainly did. Side note: we gave it mixed reviews – it feels a little vegetabley to be dessert – I almost wonder if it would work as a side dish. That being said, if you like not too sweet things / vegetables, go for it! Adapted from the Raz-Apple crisp I made around Thanksgiving, here. Yield: 1 2-quart baking dish (it’s about 8 by 8 and deep). Serves: 2 for dessert & then breakfast! Or… you know, a normal amount of people.

For the filling:

2-3 largish Granny Smith apples, cored and sliced into thin wedges*
1 small kabocha squash, peeled & cubed*
1/4 cup maple syrup
1/4 c port**
1 tablespoon lemon juice
2 teaspoons arrowroot starch
½ teaspoon ground cinnamon
¼ teaspoon ground allspice

*I just approximate as I slice; I use however many it takes to fill my 2 quart, 8×8 baking dish; for ease of cutting kabocha squash, I recommend slicing it in half, then in wedges and using a knife to carefully peel it. The peel is totally edible, but I didn’t want its texture in the crisp. You’ll still get an arm workout peeling these babies, believe me!

**the port is optional but amazing; if you don’t use it, use 1/4c water instead

For the crisp:

1 cup old-fashioned oats (use certified gluten-free oats for a gluten-free crisp)
½ cup firmly packed almond flour
½ cup chopped walnuts
1/4 c unsweetened shredded coconut
2 tbsp maple sugar
¼ teaspoon fine sea salt
2 tsp vanilla extract
4 tablespoons unsalted butter, melted
¼ cup plain whole milk Greek yogurt

Preheat the oven to 350.
In a veggie steamer (I use a metal steamer inside a pot), steam the kabocha squash for 10-15 minutes, until just barely fork tender.

Slice apples into a deep baking dish, and add steamed kabocha squash (my dish is 8×8, 2 qt capacity; 9″ square or 9″ deep pie dish would also be fine). In a liquid measuring cup, whisk together the maple and water/port until combined. Add the lemon juice, arrowroot, cinnamon and allspice, and whisk to combine. Pour the mixture over the squash and apples and toss to combine. Bake for 15 minutes.

While the filling is baking, make the crisp. In a mixing bowl, stir together the oats, almond meal, walnuts, shredded coconut, maple sugar and salt. Mix in the vanilla, melted butter and the yogurt. Stir until everything is mixed thoroughly.

Once the filling has baked for 15 minutes, stir to redistribute it evenly in the dish. Plop spoonfuls of the crisp topping evenly over the filling – no need to pack it down. Return the dish to the oven and bake for 25 to 30 more minutes, until the filling is bubbling around the edges and the top is golden.

Let the crisp rest at least 5 to 10 minutes before serving; or do like I did and make it earlier in the day, and have it later. Serve with vanilla ice cream, obviously! Keep leftovers, covered, in the fridge for about three days (yeah right. It would take some kind of major feat to make it last that long; ours was gone in just over 1!) Serve cold alongside breakfast because it’s extra awesome that way.

fullsizeoutput_11a5

Walking in a mint-ery wonderland

IMG_2111

Happy holidays!

fullsizeoutput_10e5

As much as certain elements of this time of year drive me bananas (having to throw elbows in the grocery store to retrieve the last piece of whatever, extra lines everywhere, no parking, where do all these extra people come from?!), I do undeniably love the run-up to the holidays.

Everything looks festive, even traffic light reflections in wet pavement. And of course I love the excuse to have a tiny conifer in my living room.

fullsizeoutput_10d5

Let’s not overlook holiday baking! Heaven forbid.

fullsizeoutput_10ae

Fun fact! This is actually a giant panna cotta tart. It didn’t really occur to me while I was making it – I was just thinking, la la la cream tart la la but then I got curious and did some googling. I had forgotten that cream stabilized with gelatin is technically panna cotta… so, there ya go! Panna cotta tart, if that’s even a thing.

This one is even grain and gluten free! I suppose you could make this with coconut milk to make it dairy free, but I haven’t tried that yet (next time!) – partially because I have a massive weakness for cream.

fullsizeoutput_10e6

Heavy cream reminds me of being a kid and pouring a bit over my cereal – my grandmother used to do this, and after my dad told me that, I always lurked around waiting for leftover cream to appear the fridge. As I recall, my favorite combination was a giant bowl of honey nut cheerios with about 3/4 milk and 1/4 cream.

fullsizeoutput_10e3

Now I’ve leveled up and adult-ed my cream: it gets baked into cream biscuits, set into a panna cotta tart, or poured into my coffee (omg heaven).

fullsizeoutput_10c5

I love this dessert though: it looks like a mini winter wonderland! Walking in a mint-er wonderland? Ha. And it’s delicious. It actually took a minute to grow on me, but then I couldn’t get enough. Minty, chocolatey & slightly tart from the yogurt-cream panna cotta, it’s a perfect holiday dessert when something light is called for. I couldn’t resist the pomegranate, both for flavor and texture, but also for color. They are always so pretty!

fullsizeoutput_10dd

fullsizeoutput_10d9

Happy holidays! Share this with loved ones, since it’s so much better enjoyed in good company :)

fullsizeoutput_10e9

fullsizeoutput_10b2

Mint Cream Tart on a Dark Chocolate Coconut Crust

Grain free, gluten free, refined sugar free! A perfect wintery dessert, especially since it even *looks* festive. You can even make the whole thing the night before, since gelatin-based things like to hang out in the fridge for awhile. Lightly minty, slightly tart from the yogurt, balanced nicely by dark chocolate. Who doesn’t love mint and chocolate?! This is really a giant panna cotta in a crust, if we want to get technical. Mint cream adapted from Martha Stewart, here; the rest is my brainchild. Yield: 1 9″ tart, serves… two ;) Kidding! 2-8, realistically.

For the crust:

1.75 c almond flour
1/3 c unsweetened cacao powder
1/4 c unsweetened shredded coconut
heaping 1/4 tsp sea salt
1/2 tsp baking soda
2 tsp vanilla extract
2 tbsp pure maple syrup
3.5 tbsp coconut oil, melted

Preheat the oven to 350, and lightly grease a 9″, deep pie plate with coconut oil. Alternatively, you could use a tart ring with a removable bottom – I needed to transport mine so opted for just keeping it in a less fussy dish.

In a large bowl, stir together almond flour, cacao powder, coconut, sea salt, and baking soda. Add in vanilla, maple, and melted coconut oil and stir until completely combined. The dough will look crumbly, but you’ll be able to press it together with your fingers.

Press the crust into the plate and up the sides with a spoon or your fingers, creating a smooth edge (or not, your call!). Poke the bottom with a fork a few times, and bake for 17 minutes.

For the filling:

2 cups heavy cream
1/4 cup maple sugar*
6 stems peppermint or spearmint, plus more for garnish
1 tsp vanilla extract
2 tsp peppermint extract
1/2 teaspoon fine sea salt
1/3 c dark chocolate, melted
1 tablespoon unflavored gelatin (one envelope)
1/2 cup cold water
1/2 cup whole milk greek yogurt, plain
pomegranate arils

*I use maple sugar here because it’s lighter in color than coconut or maple syrup, and I wanted to preserve the lightness of the cream filling. But any granulated sweetener would be fine, just keep in mind the filling color may darken.

Make the filling: Bring cream, sugar, mint, and salt to a simmer in a medium saucepan. Remove from heat, and let cool completely, about 30 minutes.

In a double boiler or in the microwave, heat the 1/3c dark chocolate until completely melted. I am lazy and use the microwave method: 30 second intervals, and stir in between until everything is melty. If you’re using a double boiler, stir continuously until the chocolate is melted.

With a pastry brush (or a spoon, totally fine – this is what I used), coat the bottom the crust with an even layer of melted chocolate. Refrigerate (or leave on the counter in your freezing apartment) until chocolate sets, about 10 minutes.

Sprinkle gelatin over water in a small bowl. Let stand until softened. Remove mint from cream mixture, and bring cream mixture to a simmer. Whisk in softened gelatin until it dissolves. Remove from heat, and stir in the yogurt. Pour filling into the prepared crust (if there’s leftover, pour it into a ramekin or two & save for later!) Carefully transfer to the refrigerator. Chill, uncovered, until set, at least 4 hours (or overnight). Garnish with mint stems, pomegranates, and sliced almonds if you’re feeling fancy. Slice and serve!

Chocolate dipped mint leaves are easy too: wash and pat dry nice-looking mint leaves, and dip in melted chocolate. Lay on a parchment lined baking sheet, and freeze until needed.

Keep leftovers covered in the fridge for a day or two.

fullsizeoutput_10df

fullsizeoutput_10dc

Appropriately autumnal baking

IMG_1677

There is something so soothing about early morning baking. I don’t necessarily choose to bake at 6:30a, but when a workout and work have to happen before I can deliver & eat dessert, baking by necessity becomes an early morning activity. That being said, though, it’s a very meditative way to spend a morning, especially when it’s still dark outside.

IMG_3170

Of course, then of course there’s that moment when you go to put socks on and somehow find some crystallized ginger stuck to your foot… um… no comment.

IMG_1654

It also gives me a great sense of productivity to know I’ve created something before I even leave the house that day – and then add a workout and a highly productive work day and by 6p I feel extraordinary accomplished.

IMG_1656

IMG_3171

And THEN I get to eat cake! Ha. Win win, all around. Besides, coming back into my apartment after work, I’m greeted with a waft of OMG THIS CAKE SMELLS AMAZING – always a good sign.

IMG_3168

IMG_1663

This cake was well loved by both of us – it is definitely going on the to-make-again list – and I have high standards for that list! The cornmeal/polenta give it great texture – it’s a cross somewhere between cake and cornbread, in the best way possible. It’s amazing with ice cream for dessert, and equally so alongside eggs and kale for breakfast – see exhibit A below.

IMG_3173

Besides that, just in case you needed proof as to how loved this cake was, see exhibit B:

IMG_3177

No crumbs. One (large) slice left – that is after a stint of very productive yard work & leaf raking – that cake had NO chance.

IMG_1656

I can’t believe it’s already November. What happened to October?! Happy autumn!

IMG_1653

Apple Ginger Polenta Cake

Gluten free, refined sugar free, and dairy free. Lightly sweet, sort of like a cross between cake and cornbread – perfect for dessert (served with ice cream!) and breakfast alongside eggs and leafy green things. Yield: 1 8″ cake, serves… um… 2! Ha.

1 c almond meal
2/3 c yellow corn meal (I used medium grind)
1/3 c rice flour
2 tsp baking powder
Heaping 1/4 tsp sea salt
1/4 c extra virgin olive oil
2 eggs
1/6 c maple sugar
1/6 maple syrup
2 tsp vanilla
2 Granny Smith apples
1/3 c crystallized ginger chunks, chopped*

*I have also made this with fresh ginger and it’s equally amazing; finely mince peeled, fresh ginger root and add to the batter. The quantity is up to you – I love ginger, so I used a knob probably about 1.5″ long

Preheat the oven to 350, and line an 8″ cake pan with parchment paper, or do like I did and use strips of parchment paper for easy removal. Be sure to grease the pan first though to prevent any stickage.

In a large bowl, whisk the eggs with the maple sugar and maple syrup until soft and fluffy. Add in olive oil and vanilla. In a smaller bowl, whisk together almond flour, polenta, rice flour, and baking powder. Stir dry into wet. Cut one and a half apples into cubes and thinly slice remaining half. Add the apple cubes and chopped ginger and stir until just combined. Pour the cake batter into the prepared pan, and smooth it out a bit.

Arrange a few apple slices on top of the cake, sprinkle with a bit of maple (or coconut) sugar. Bake at 350F for 40 minutes. Check the cake after 35 minutes; mine was perfect at 40. If the top of the cake is browning too quickly during baking, you can always tent it with a sheet of tinfoil.

I stuck mine in the fridge for a few hours of storage, which didn’t hurt it at all. It keeps well on the counter overnight (covered with foil), and makes a ridiculously amazing addition to breakfast the next day!

IMG_1631

IMG_1632
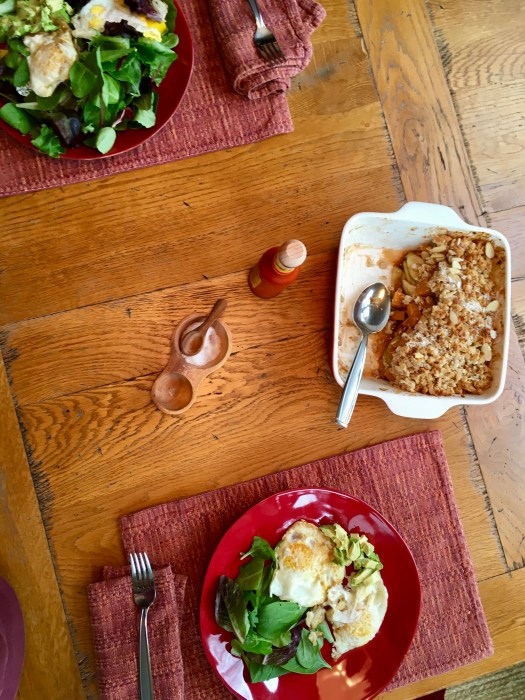
Early morning mis en place…

IMG_1637

Lousy weeks = Angel Food Cake (Science. Obviously)

IMG_3068

Sooo…. Hi! It’s been awhile.

You can thank grad school for that (and for being a royal pain in my butt). My stomach was being a real winner today too, rude. On the bright side, one of the things it seems to tolerate with a minimum of fuss is this cake! Probably because angel food is basically egg whites and air and fluff, in the best possible combination. I’ve always loved angel food — I asked for it for a birthday cake at some point when I was a kid, and I’ve always thought it was delicious.

IMG_3060

It’s fun to make, too! Egg whites are my favorite piece of kitchen chemistry. I love watching them go from foamy… to glossy… to peaks! I never get tired of it. And besides, even though I am the one who hardly ever uses a mixer unless I really have to, angel food gives me the chance to get out my beautiful red kitchenaide stand mixer! Wheeeeee! It looked so happy to see me. And don’t tell me inanimate objects don’t have feelings… KITCHEN APPLIANCES totally do. They feel neglected and sad when you just leave them to languish in the pantry… which is also why I love my pegboard so much. It means that my pots and pans and whatnot can hang out and watch the action from their corner (and egg me on. It’s like “use me!!! I am so great for making eggs!!! … constant ruckus from the peanut gallery).

IMG_3061

But actually.

IMG_3066

I will stop anthropomorphizing my appliances for the time being in order to get back to the cake. But admit it… if you love to cook and bake, your favorite pans and appliances become your friends. Don’t try to deny it, I know you. You know where they stick, how they heat, if they affect the consistency of whatever you’re baking… they’re like friends!

But also, in other news…

Mother Nature puts on some pretty amazing shows:

IMG_3051

Day 4 of the Drawing Challenge! Favorite Place… this one was easy :)

IMG_3008

And E and I had a fun date night at the British pub Fox and Goose, in the historic R district of Sacto. Fun fun!

IMG_3018

But. Back to the regularly scheduled programming…

THIS CAKE! IS AMAZING!

Yep. still obsessed with this app.

And is gluten free, refined sugar free, and beyond delicious. When I made this, I actually ended up with a much denser consistency than angel food usually has (I have reason to suspect my oven; firstly, it is wee. It’s like half the size of a normal oven, so consequently all of my sheet pans are quarter sized. I feel like a Barbie. But also I do believe it runs hot and heats unevenly. Further research is required; until then it’s an interesting challenge) — but I don’t care, because it is AMAZING! It’s almost… custardy. But also kind of fluffy?! If you can possibly have custard and fluff at the same time, this is it. Mine got a tad overdone on the top half, and I actually pulled it out far sooner than it was supposed to go (hence the suspicion  that my oven runs hot), since it was done and browning quickly. It didn’t rise as much as they normally do, but it has that custardy wonderfulness so E and I definitely don’t care. Add to that, it’s tummy friendly and lower in sugar than most angel food cakes, so it just wins all around.

IMG_3055

That all being said, I highly recommend making it on a Friday afternoon when your week has been rather wretched and you just need some cake. Not that I speak from experience or anything. Nope. Not me..

IMG_3064

Grain Free Maple Angel Food Cake

Made of arrowroot starch, this cake is tummy friendly for IBS, gluten-free, grain free, and paleo. It’s also refined sugar free and lower in sugar than most angel food cakes, which is a bonus in my book for sure. Recipe from Deliciously Organic, here! I didn’t change a thing, as it was perfect as is. Yield: 1 cake (standard angel food pan).

  • 12 egg whites (I used 1 carton = to 10 whites + 2 whites from whole eggs for convenience)
  • 1 tsp fresh lemon juice
  • 1/4 tsp fine sea salt
  • 1.25 tsp cream of tartar
  • 1 tbsp pure vanilla extract
  • 3/4 c maple sugar, divided
  • 1 c arrowroot starch
  • whatever toppings float your boat for serving — I made a simple raspberry compote and topped it with a little shredded coconut

Preheat the oven to 350, and get out your *un-greased* angel food tube pan. You might want to put a cookie sheet down below the cake pan in the oven to account for any leakage — my tube pan tends to leak just a bit out of the bottom. Adjust the rack for the cake to be in the middle of the oven.

In the bowl of a stand mixer, beat the egg whites with the lemon juice on medium high until foamy. Add salt, cream of tartar, and vanilla, and continue beating on medium high until soft peaks form, about 1 to 2 minutes.

With the mixer running on medium, slowly add 1/2 c of the maple sugar, a spoonful at a time. Sift the remaining maple sugar and arrowroot starch into a small bowl, and, with the mixer still running, slowly add this to the mixer bowl. Once it’s all added, whip on medium high until completely incorporated (you may need to scrape the sides of the mixer bowl, I did). Pour the batter into your tube pan, and bake for 35-45 minutes*, until the top is golden brown and the cake is puffed.

*Normal ovens are probably done at a minimum of 40 minutes. Mine was excessively brown at 35, and done, though not as puffy as it could be.

Remove the cake from the oven, and immediately invert over the neck of a wine bottle to cool completely — about 1 to 1.5 hours. Cooling it upside-down helps maximize loft! Once the cake is completely cooled, run a knife around the inside of the pans to loosen the sides, and pull the cake + the removable bottom out of the pan. Run a knife along the bottom between the pan and the cake to loosen it fully, then lift off to the serving plate. Decorate at will!

Angel food cake keeps well at room temp for a day or two if it’s not too hot or humid where you are. I’m keeping mine in the fridge and it’s totally fine — cover it with an inverted bowl and it will stay good for several days in the fridge.

Enjoy your perfect bits of cake fluff!

IMG_3058