Apples and Autumnal Dessert Shenanigans

img_5061

Good morning, invisible internet blog friends!

img_5055

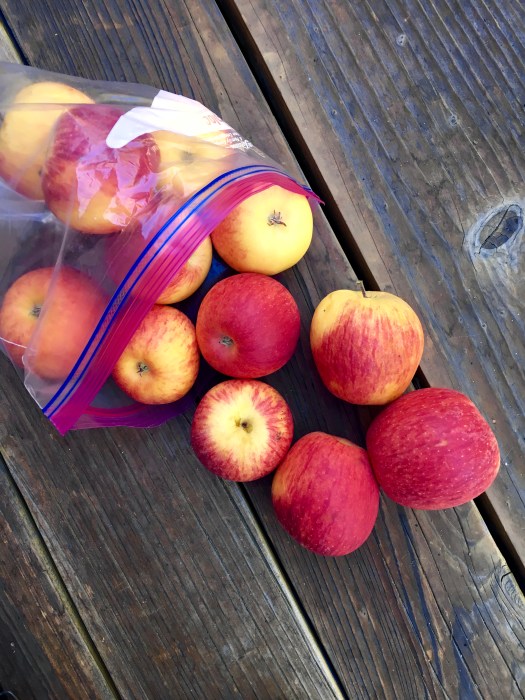
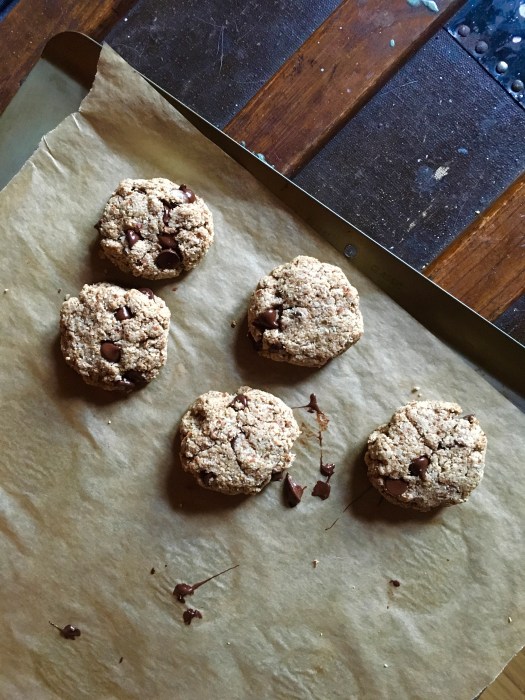
I have apple-y, fall-y dessert for you today! And can someone explain to me how it’s almost November already? That snuck up on me… but whatever, I have baked apples (or at least I did, they’re all gone now, what a shocker) so it’s all good.

img_5045

img_5054

Despite looking and sounding kind of complicated, these apples actually aren’t so bad, they just require some advance planning. But there’s no prolonged dough chilling involved, and the dumpling dough is very forgiving (all good things in my book).

img_5053

I’m keeping it short and sweet today — apples, fall, cooler weather, rain, and caramel sauce. All that’s needed on a lazy October weekend.

img_5056

img_5046

In other news, I’m sitting with my legs wrapped in a blanket because it’s cool this morning and when I just went to get up, I got all tangled up and almost ate it. But I didn’t! I’m basically a mermaid…

img_5065

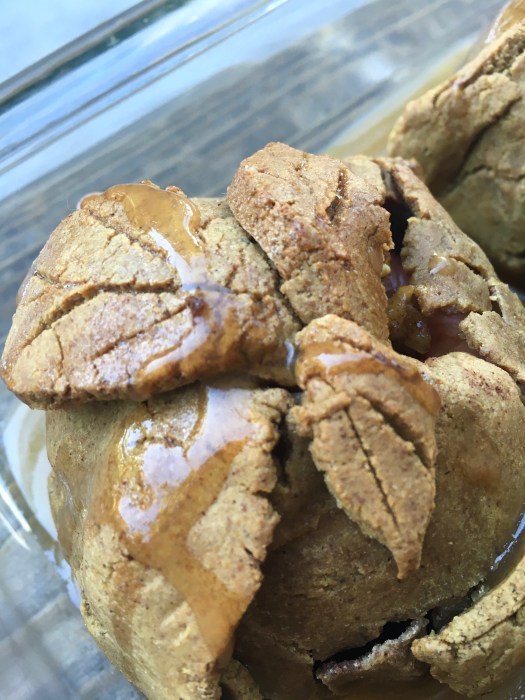
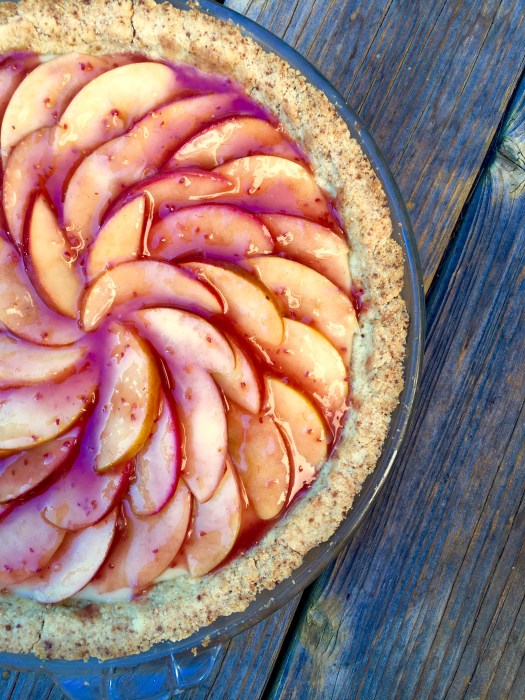
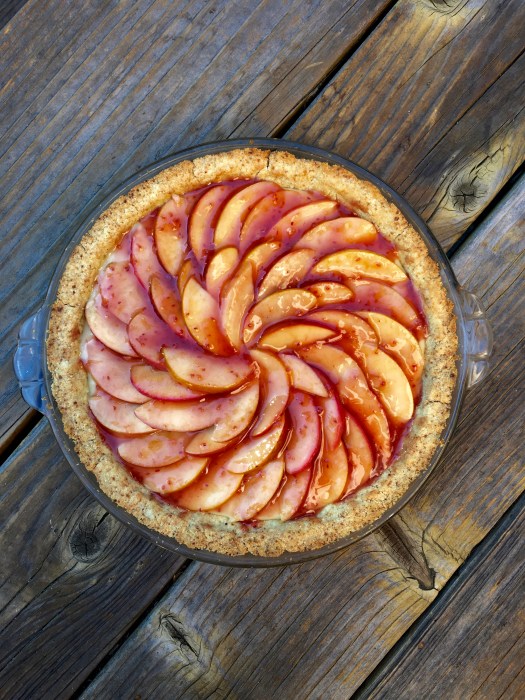
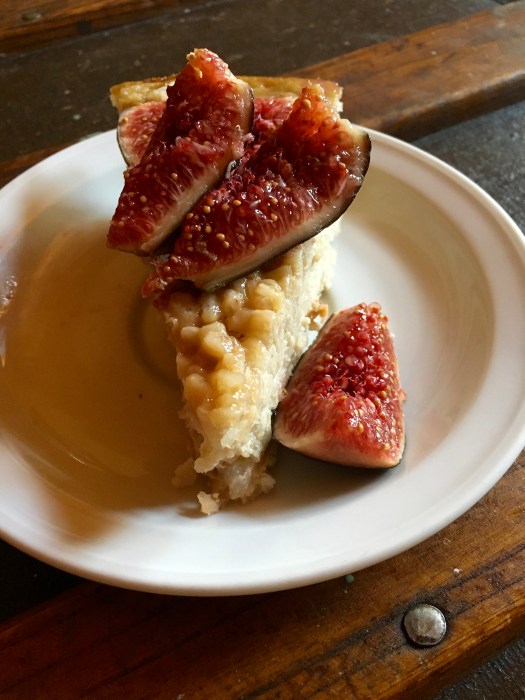
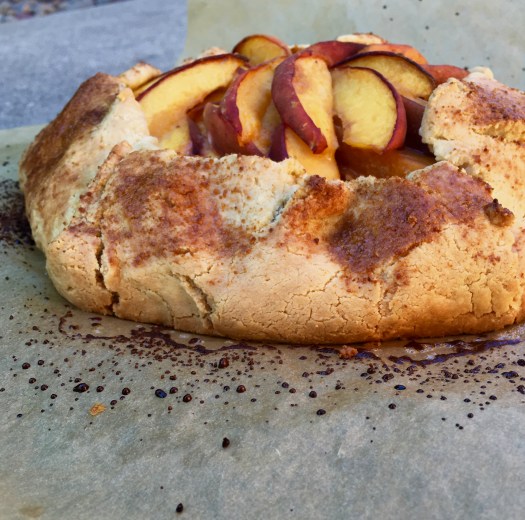
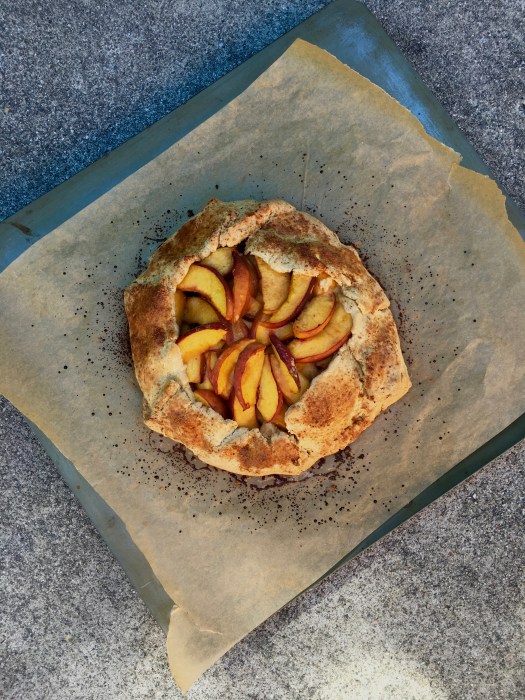
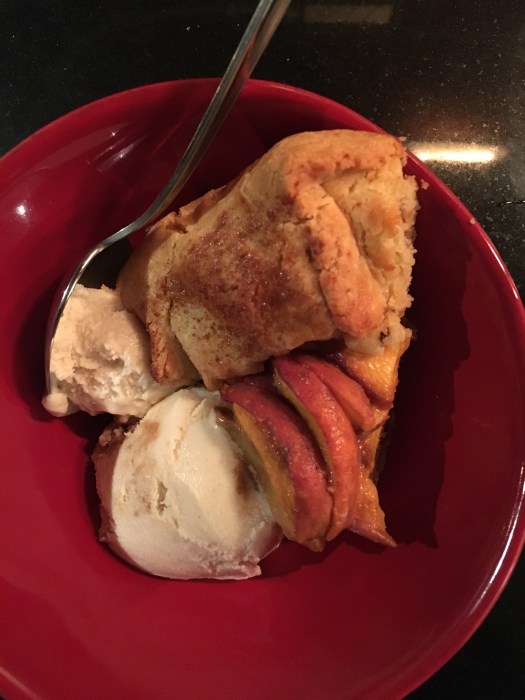
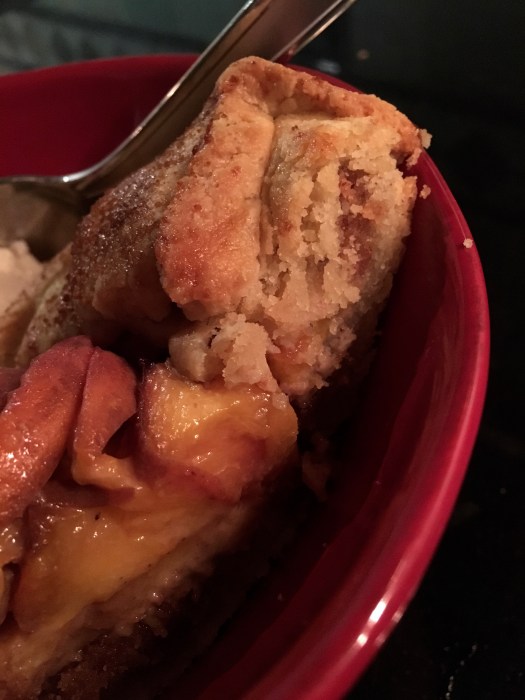
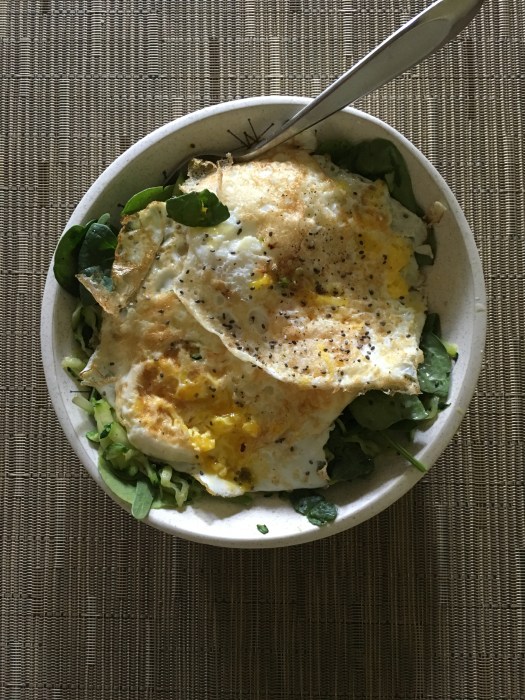
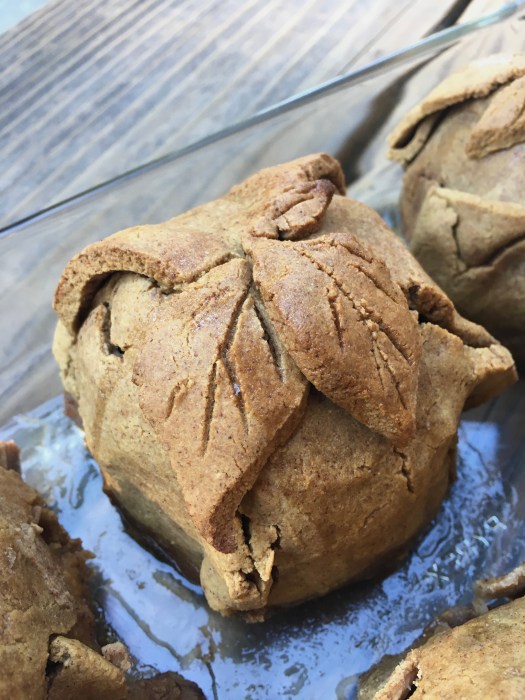
I don’t think desserts get more autumnal than this: apples stuffed with oats and walnuts, wrapped in pastry dough and baked in a caramel bath. Highly recommended both for dessert (with ice cream, obviously) and for breakfast, alongside eggs and something green. Happy Fall!

img_5059

Quinoa Flour Apple Dumplings with Caramel and Maple Glazed Walnuts

Gluten free, refined sugar free! Can be dairy free with a very easy swap (coconut oil for the butter in both the dough and the caramel); a delicious and quintessentially autumnal dessert. Despite looking tricky, these aren’t especially hard — they just take a little planning. Yield: 6 apple dumplings + sauce + walnuts; we found that 1/2 an apple was totally sufficient in one sitting but this could easily be 6 servings if that was all you were eating! Recipe adapted from The Kitchn, here!

img_5050

For the crust:

  • 3 c quinoa flour, toasted*
  • 2 tbsp coconut sugar
  • 3/4 tsp baking soda
  • large pinch fine sea salt
  • 1 tbsp maple syrup
  • 1 tsp vanilla extract
  • 4.5 tbsp salted butter
  • 1 c unsweetened almond milk

*toasting reduces the natural bitterness of quinoa — I do mine in a skillet over medium heat, stirring frequently for about 3-5 minutes, until the flour is fragrant and the flour is just barely starting to go golden. Let cool before using.

For the filling:

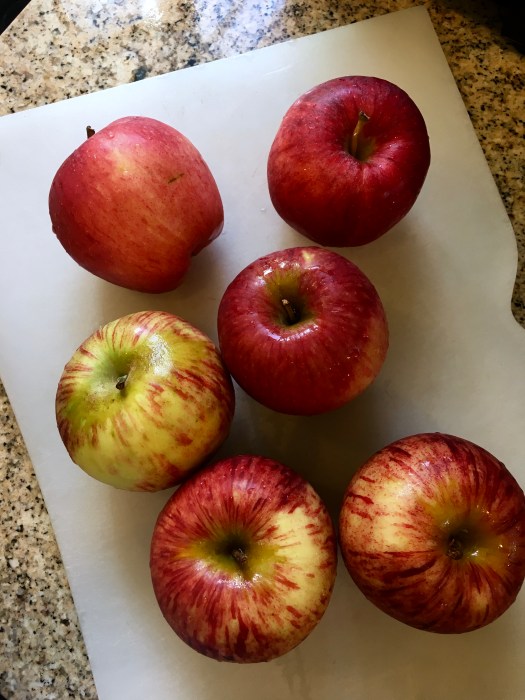
  • 6 small baking apples (I used Gala and Jonagold)
  • cinnamon & coconut sugar to taste
  • heaping 1/8 c rolled oats
  • large pinch of fine sea salt
  • a handful of glazed walnuts (reserve the rest for topping)
  • 2 tbsp salted butter, cut into 6 pieces

Glazed walnuts:

  • 1 c raw walnut pieces
  • 1/4 c pure maple syrup
  • 1 tsp vanilla extract
  • large pinch of fine sea salt

For the caramel sauce:

  • 6 tbsp salted butter
  • scant 2/3 c unsweetened almond milk
  • 1/4 tsp sea salt
  • 1 tsp vanilla
  • 6 tbsp maple syrup
  • 1.5 tsp arrowroot starch

These have a lot of parts, but they’re not very complicated when you break it down! I made the walnuts several days ahead, which I recommend.

Heat a saute pan over medium until warm. Add maple (it should fizz when it hits the pan), walnuts, vanilla, and sea salt. Stir to combine and let cook, stirring frequently, until the maple has caramelized and the liquid is gone. The walnuts will feel soft until they cool, which is fine. Line a baking sheet with parchment paper and spread them out to cool, breaking up any large chunks. Store in an airtight jar for several weeks (but, yeah right. Mine were gone in a day!)

To make the pastry: In a large bowl, stir together toasted quinoa flour, coconut sugar, baking soda, and sea salt. Cut in the butter using a pastry cutter or your fingertips, until the butter pieces resemble small peas. Add in maple, and vanilla. Add milk, 1/4 c at a time, stirring until the dough just comes together (I like using my hands for this, I find it easier than a spoon). Once most of the milk is added, the dough should form a largish shaggy ball. Turn it out onto a floured surface and roll it out to about 1/8″ thick. I found it easier to roll out two sections of dough separately, as my counters are slightly small. Cut a piece of parchment paper into a 6×6″ square, and use it to trace and cut 6 dough squares. Stack them on a plate with pieces of parchment paper in between, and let them chill in the fridge while you prep the apples for the filling.

Peel and core each apple. In a small bowl, mix together oats, cubed butter, cinnamon and a few glazed walnuts — this goodness should be chunky, which is fine since it’ll just be stuffed into the space where the apple core was.

Preheat the oven to 450, and lightly grease a 9×13 baking dish (or large cast iron skillet).

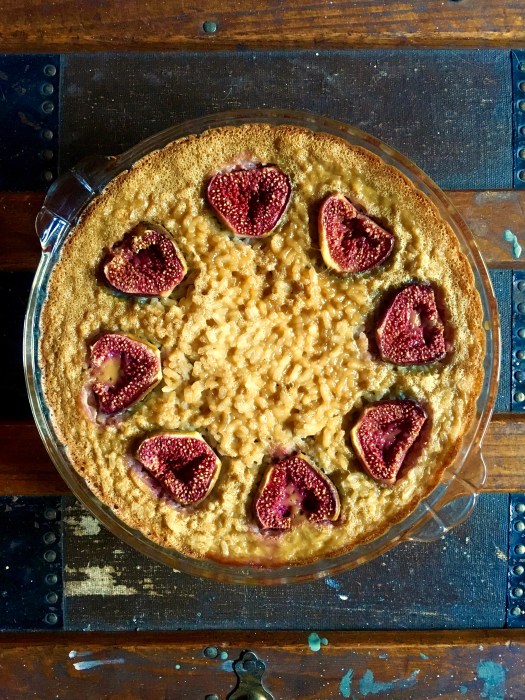
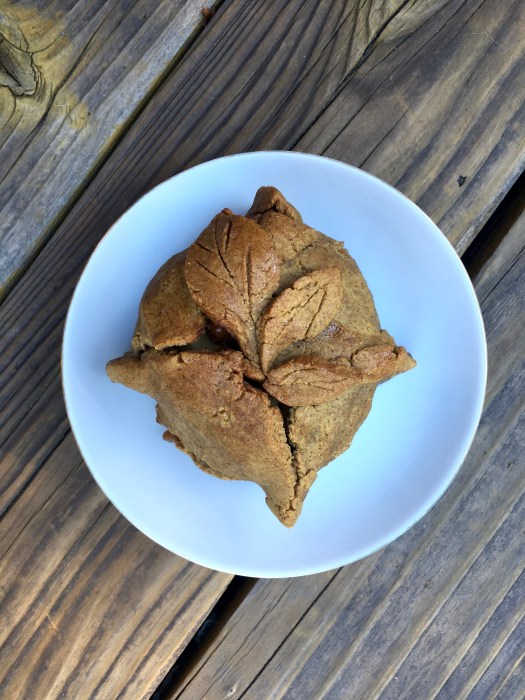
Retrieve the dough squares. Sprinkle a bit of cinnamon and coconut sugar on the bottom of each, put the apple in the center of the dough, stuff some of the filling in the cored space (I used a few walnuts per apple, and filled the rest with the oat/butter blend), and bring the corners of the dough up to meet over the top of the apple. Pinch the sides together to seal the seams. Repeat for all remaining apples, and if you’re an overachiever like me, make little leaves out of the excess dough for decoration.

Place the apples in the prepared baking dish or skillet, about 1″ apart. Bake for 20 minutes, until the crust begins to brown. While the crust is baking, make the caramel: in a small saucepan, melt butter / add almond milk, sea salt, and vanilla over medium, until it comes to a simmer. Stir in maple and arrowroot, and let simmer for a few more minutes until thickened. Remove from heat.

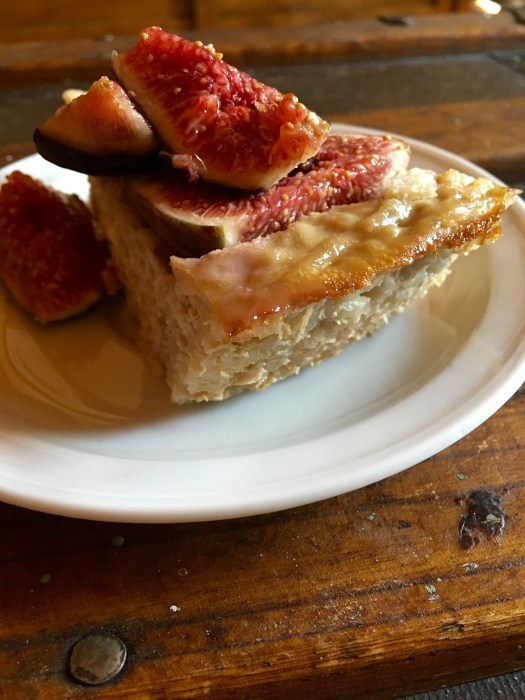
Lower the heat to 350, and bake the apples for 30-40 more minutes**, until the apple is soft when poked with a fork and the dough is browned (quinoa flour is a little delicate, so if your dough cracks after baking, don’t worry! It’s still delicious). Remove from the oven once done, and pour caramel sauce over hot apples, and in and around them in the pan. Let cool for a few before eating — top with sauce and walnuts and ice cream for serving!

These keep well overnight in the fridge, and are delicious for breakfast (as well as for dessert, obiovusly, I can vouch for both). Store in the original pan, loosely covered with foil.

**I have some beef with the original apple dumpling method, which is to pour the caramel over after the initial par baking, and then continue baking for about a half an hour. That’s what I did, but I ran into some soggy dough and had to resort to some interesting pan switching techniques to continue baking them and THEN add the sauce back. SO. I would recommend the above method, which is how I would make them, when I make them again. That being said, they are delicious either way so you really can’t go wrong.

img_5063

Tolkienesque Cake for Dessert and Elevenses!

img_5043

Welcome to the Shire!

img_5034

Happy circumstances dictated that a Tolkeinesque dessert was in the offing (sometimes, you just need themed desserts)… as such, this one was directly inspired by the Hobbit: besides Beorn’s honey cake being mentioned in the Hobbit itself, blackberries and hazelnuts just seem like they’d be something you’d stash in your knapsack during your travels, right? And hobbits seem like the type to have cast iron skillets. So there you go. ALSO this cake is not only dessert but also does double duty for Elevenses (I can attest. I actually ate it for elevenses / brunch / breakfast / lunch, as part of a very complete, Hobbity spread).

img_5028

In other news, I went to the opera on a random Tuesday the other week because, why not?

img_5008

img_4996

More drawing!

img_5014

img_5020

And more cake.

img_5030

It’s rainy and drizzly today and as such is perfect cake and indoor fun weather; I highly recommend this one. It’s somewhat like a light variation on pound cake, and the blackberries / hazelnuts make for a great textural pairing. Plus ice cream. Obviously. They may not have had ice cream in the Shire, but let’s face it: everything is better with a bit of cream, right?

img_5026

Yes, the blackberries in the pictures are frozen — they were subsequently thawed and honeyed and drizzled and got all juicy and delicious, but for ease of transportation, that happened after the photos.

fullsizerender-7

So! Cake! And a nice revisit to the land of the Shire; I was a little overdue. Be warned, the maple hazelnuts are supremely addictive…. don’t say I didn’t warn you ;)

img_5035

Honey Almond Cake with Honeyed Blackberries and Maple Glazed Hazelnuts

Lightly sweet cake that is somewhat akin to a lighter pound cake, topped with tart-sweet blackberries and crunchy hazelnuts. Hobbit-y dessert perfection that also happens to be gluten free, grain free, dairy free, refined sugar free, and arguably paleo (depends on what sweeteners are on your okay list). The cake is adapted from Cookie and Kate, here! One confession: I’m a crazy baking person and for Hobbit authenticity and size preferences I wanted to make this in my 8″ cast iron skillet, which meant that I made a 3/4 recipe of a a full 9″ pan. I will be posting my altered measurements here; if you bake it in a 9″, it will just be a slightly shorter cake (apologies for some of the funky measurements!)

img_5034

For the cake:

  • 1.5 c almond flour (not meal), firmly packed
  • 3/4 tsp baking powder
  • 1/4 + 1/8 tsp baking soda
  • 1/4 + 1/8 tsp fine sea salt
  • 2 eggs, beaten
  • scant 1/2 c runny honey
  • 1/8 + 1/16 c melted coconut oil
  • 1.5 tsp vanilla extract

Preheat the oven to 325, and lightly grease cast iron skillet or pan of choice with coconut oil. Toss a little almond flour in the bottom to finely coat. In a large bowl, whisk together almond flour, baking powder, baking soda, and sea salt. In a smaller bowl, whisk together beaten eggs, honey, melted coconut oil, and vanilla. Pour wet into dry, and stir until just combined. Pour into the prepared pan, and bake on the center rack of the oven for about 38-40 minutes. I checked mine at 30 and put it back in for 8; it was perfect at 38. The top should be golden brown and firm to the touch, and the center shouldn’t jiggle when lightly shaken. Remove from the oven and let cool before topping and serving.

For the honeyed blackberries:

  • 1 bag frozen blackberries, or fresh if they’re in season
  • 1 tbsp runny honey

Thaw blackberries, if frozen, and toss with the honey…. and that’s it! Let sit for a few hours if you have time — they get extra juicy that way.

Maple Glazed Hazelnuts:

  • 1/4 c pure maple syrup
  • 1 c roasted hazelnuts
  • sprinkle of sea salt

Remove most of the skins from the hazelnuts by rubbing them together; it doesn’t matter if there are skins left, but I try to get rid of the majority. Heat an empty saute pan (not nonstick) over medium heat; once heated, add maple (it will bubble and fizz) and hazelnuts. Cook for about 3-5 minutes, stirring continuously until the maple has caramelized. The nuts will feel a little soft, which is fine. Spread parchment paper on a baking sheet, pour out the nuts and spread them out a bit. They will harden as they cool. Store in an airtight jar at room temp for as long as they last which is realistically about five minutes.

For serving: Top cake with honeyed blackberries & glazed hazelnuts, and preferably ice cream.

Store leftover cake in the fridge; covered with foil in the original pan is just fine. I’m here to attest that this cake is fabulous the next morning for breakfast!

fullsizerender-3

Sometimes, dessert just needs to be an unashamedly sloppy, delicious mess

fullsizerender-5

This tart is a lesson in what dessert sometimes should be: an aesthetically pleasing, sloppy, delicious mess. Because sometimes dessert should just be eaten out of the pan it was baked or assembled in, with two spoons and happy grins. Or, you could attempt civilized plating (as I did) when you consume it for dessert, with a hasty decant into bowls topped with ice cream. Which is perfectly acceptable. Until the next morning when you peek at the custard tart that’s been hangin’ in the fridge overnight and notice that the custard has decided to attempt an escape outside its proscribed bounds, at which point you decide to eat it out of the pan with spoons. Wise and delicious decision!

img_4940-2

fullsizerender-2

Sometimes, you need a less than perfect dessert. Messy, delicious and less than perfect is exactly what this tart is. You’ve been warned! Indulge accordingly.

fullsizerender-7

In other news, I completed another year on this earthplane, and celebrated accordingly at Gary Danko! Nowhere else am I going to sit down to a four course dinner with two desserts. Shockingly, I didn’t even need a wheelbarrow to leave…. I consider this a success all around. Thanks to everyone who made my birthday weekend such fun! Y’all are so rad.

img_4931

Hmm, what else. It’s officially autumn! Which means apples, scarves, boots, and pumpkin. And baking. Except that the Bay has decided to have a heat wave these last few days, which means baking is totally off the table until it gets back down into the 80s, at least. Since when do I wear a dress and no jacket in San Francisco all evening?! Since never… until yesterday! Reason number one to eat messy, cool, creamy dessert that can be had with minimal baking and heating of the kitchen!

fullsizerender-4

More drawing! A wee bit of dome practice with the beautiful San Francisco city hall.

img_4937-2

Nighttime cityscapes are so beautiful.

img_4953-2

But back to the food!

This tart presents beautifully but once cut, devolves into a sloppy, delicious mess. But, fear not! Just grab a spoon and eat it straight from the pan. Messy and delicious, just how dessert should be.

img_4954

Maple Custard Apple Tart with Almond Crust

Lightly sweet, creamy and an appropriate amount of crust. Refined sugar free, grain free, gluten free, paleo & dairy free with one small swap (coconut oil for butter in the crust). Yield: 1 10″ pie pan of the deep variety; serves as many as you feel like sharing with. Recipe adapted from Hip Foodie Mom, here!

fullsizerender-3

For the crust:

  • 2.5 c almond flour
  • scant 1/4 tsp fine sea salt
  • 2 tbsp coconut sugar
  • 4 tbsp salted butter (or coconut oil), melted
  • 1 runneth-over tsp vanilla
  • 1 egg white

For the custard:

  • 1.5 c coconut milk (mine was light; use whatever you have)
  • 6 egg yolks
  • 1/2 c pure maple syrup
  • 1/4 c tapioca starch
  • 1/2 tsp fine sea salt
  • 2 tsp vanilla extract

For the apple topping:

  • 2 apples, finely sliced
  • 3 tbsp raspberry jam, thinned with a bit of water and lemon juice

Because the custard needs to sit and chill in the fridge after cooling for at least 2 hours, I made this a day ahead and let it hang out in the fridge overnight. The crust only takes about 15 minutes to bake, so the tart itself comes together quite quickly.

Preheat the oven to 400 and lightly grease a 9 or 10″ deep pie plate with coconut oil or butter. For the crust: in a large mixing bowl, stir together almond flour, salt, and coconut sugar. Add in melted butter or coconut oil, vanilla, and egg white, and stir until combined — I found it more fun and more efficient to use my hands at the end. Press the dough into the bottom of your pie plate of choice, poke the bottom a few times with a fork, and bake for 15 minutes. The crust should be lightly browned. Remove from the oven and let cool completely.

For the custard: in a medium saucepan, heat the coconut milk over medium, until small bubbles begin forming along the egg whites. In a medium bowl, whisk together egg yolks, maple, tapioca starch, and salt. Slowly temper the eggs by pouring the hot coconut milk into the egg bowl in a thin stream, whisking constantly until all the milk is incorporated. Pour this whole bowl of goodness back into the pot that was previously holding the coconut milk, and cook over medium-low heat, whisking constantly, until the custard begins bubble and thicken (you’ll know. it’ll go from watery to thick enough that your whisk makes tracks). Remove from heat, stir in the vanilla, and let sit until cool. Give it a good stir, and store in an airtight container in the fridge if you made it ahead.

Pour the custard into the completely cooled crust. Thinly slice 2 apples of choice, and drop them in a bowl of lemon water to prevent browning while slicing. In a small bowl, thin the raspberry jam with a few tbsp of water and lemon juice (I used the leftover from my apple-soaking water). Fan the apple slices across the surface of the custard, brush with the raspberry jam mixture to prevent excess browning. Cover and refrigerate if not eating immediately!

Keeps well overnight in the fridge, covered, but don’t expect it to stay in one piece! The custard is runny — best advice (and I definitely put this into practice) is to just eat it with a spoon, straight out of the pie plate. For breakfast! Keep any leftovers in an airtight container in the fridge.

fullsizerender-8

Fig season is upon us!

img_4910

It’s fig season!!! Another reason to love fall, as if I didn’t have enough already.

img_4888

As much as I start missing the fresh summer berries, it’s so refreshing when the seasons start changing (ish. Emphasis on ish. It’s been in the upper 90s over here for the last few days…um okay I get it! We’re making up for lost time?! But seriously, enough). Figs are so fun with their little tiny seeds. I used to not be such a fig fan, but they’ve won their way into my heart. Especially when they hang out with goat cheese and hazelnuts and honey. But really, I’ll eat them in any form.

fullsizerender-2

Especially when rice pudding is involved… I never ever say no to rice pudding. EVER.

img_4914

This version is baked into a cake/tart type thing, and is sliceable and delicious and fantastic for breakfast as well as dessert. I could wax rhapsodic about this dessert but you really should just make one and thank me later. It’s delicious! It doesn’t use much sweetener either, which is a giant plus in my book and also makes it doubly acceptable for breakfast (also it’s excellent with coconut gelato… just looking out for you!)

fullsizerender-4

fullsizerender-6

Handily enough, it also comes together quickly and doesn’t require any wildly unusual pantry ingredients.

img_4913

I’m reminded of the Italian cake Torta di Riso (I did one years ago and it’s somewhere on the blog… I used blood oranges for that one) — basically a rice custard that is baked into a sliceable cake. This one is a little denser than the Italian version (definitely NOT a bad thing), and is infinitely adaptable to whatever fruit is in season (though I highly recommend figs).

img_4912

I’ve also had some time to draw again lately, which I love. Baking + drawing = happy days.

img_4871

img_4885

Enjoy fig season in all its glory and bask in some rice pudding. Happy Equinox!

fullsizerender-7

Baked Coconut Rice Pudding Cake with Honeyed Figs

Gluten free, dairy free, and refined sugar free! Densely textured, lightly sweet cake perfect for dessert and breakfast. If you love rice pudding, this cake is for you. Yield: 1 9″ pie pan (mine is the deep variety, about 2″ deep). Recipe lightly adapted from A Fork and a Pencil, here!

  • 1 c arborio rice, rinsed
  • 1 c water
  • 1 1/3 c light coconut milk, divided (should be exactly one standard 13.5 fl oz can)
  • 4 eggs
  • 1.5 tsp vanilla extract
  • 1/4 tsp sea salt
  • 4 tbsp pure maple syrup
  • 2.5 tbsp coconut sugar
  • figs to your heart’s content (I used 4), halved
  • enough small dollops of honey to drop into each fig half

In a saucepan, combine rice, water, and 2/3 c coconut milk. Heat over medium-high, stirring occasionally, until it just barely boils. Cover, Reduce heat to low and simmer until the rice has absorbed the liquid, no more than 10 minutes. Once rice is cooked (it should still have some chewy bite to it) and the liquid is absorbed, remove from heat and let cool briefly while assembling everything else.

Lightly grease your pie plate with coconut oil and preheat the oven to 350.

In a large bowl, whisk the eggs together, add vanilla, sea salt, maple, and coconut sugar. Pour the cooked and cooled rice into this bowl, and stir to combine. Pour the whole thing into the prepared pie dish (don’t freak if there’s some leftover liquid on the top of the dish, it will be fine! Promise). Halve the figs and press them into the rice, dropping small dollops of honey into the center of each fig half.

Bake for 50 minutes to an hour, until the top is firm when touched and the surface is golden brown. Mine came out perfectly at an hour. Let cool for a bit before slicing. I like it cold, so I refrigerated mine for a few hours before eating, but that’s your call! Store any leftovers covered in the fridge (foil over the pie plate works just fine). Enjoy for dessert with your fave ice cream or gelato (coconut is marvelous) or for breakfast alongside your eggs and kale!

fullsizerender-5

The only acceptable summer blues

IMG_4839

Hi! I made galette again because it was so good last time I just couldn’t stay away. Besides, it’s still gloriously late summer so I will stay happily buried in late summer fruit desserts until seasonality dictates otherwise.

These are the only acceptable kind of summer blues!

FullSizeRender 6

I also sojourned up to Portland for a minute last weekend and caught up with all the PNW buds and did ALL the EATING. No really. ALL of it. Rather glad to be back to eating my kale and eggs, I will say — love traveling and love eating but omg I need a break after awhile! So now I’m back and galetting around, blah blah the usual.

FullSizeRender 5

I may have gone a little overboard in my excitement of finding an enormous (2 pound!) clamshell of organic blueberries at whole foods for a reasonable price…. apparently they disappeared about 2 hours later too so obviously it was meant to be and my excitement is warranted. There were 2 full cups of blueberries in this thaaang, which meant that I was more than slightly concerned with its structural integrity. However! The crust held its own (barely) and all the goodness stayed contained within its slightly leaky exterior. Galette structural engineering for the win.

FullSizeRender 2

For those who love lemon and blueberry, this is for you. Flaky crust, jammy blueberries and tart lemon curd. Late summer shenanigans don’t get much better than this! Messy, beautiful and delicious, just like summer should be.

IMG_4837

Grain Free Blueberry Galette with Lemon Curd

Grain free, gluten free, paleo, and refined sugar free! Easy to put together and obviously delicious or I wouldn’t be shoving these photos into your inbox. Yield: 1 largish galette; about 9″ across. Serving size is up to your discretion… like the last one, this one was dessert and breakfast with a bit of leftovers for 2. No shame.

FullSizeRender 3

For the crust:

I used the same one as I did for the last peach galette I did; but omitted the almond extract.

  • 1.5 c almond flour
  • 1/2 c tapioca starch/flour
  • 1/4 tsp fine sea salt
  • 6 tbsp salted butter
  • 1 eggs, divided
  • 1/2 tbsp coconut sugar
  • scant tbsp vanilla extract (yes, that is a tablespoon!)

Glaze:

  • 1 tbsp coconut sugar for sprinkling over the crust
  • 1 egg, lightly beaten for the egg wash
  • a few small chunks of butter to dot the top of the fruit

For the paleo lemon curd: I used meyer lemons for this recipe here from What the Fork blog (which was absolutely delicious); any lemon curd recipe will work just fine; here is a traditional one that I made a billion years ago that is also spectacular (just excuse the horrendous pictures). Make this a day before (or earlier in the day) so that it has time to cool completely before you put it into the galette. It will thicken / not run all over the place, and you’ll thank your foresight.

For the blueberry filling:

  • 1.5 c fresh blueberries
  • 2 tbsp tapioca starch
  • 1 tbsp coconut sugar
  • 2 tsp vanilla extract
  • 1 tbsp lemon juice

For the crust: In a food processor or high-power blender (I used a Vitamix), pulse almond flour, tapioca starch, salt, and butter, and pulse to combine until it looks like coarse meal. Add in egg, coconut sugar, and vanilla extract and pulse just until combined. Turn out onto a piece of plastic wrap, shape into a disk and chill in the fridge for at least an hour, or up to overnight.

While the crust is chilling (or a day before, which I found to be easier), make the lemon curd! See links for recipes.

Once the dough has chilled, toss the ingredients for the filling into a large bowl: blueberries, tapioca, coconut sugar, vanilla extract, and lemon juice; toss to coat and incorporate.

Preheat the oven to 375, and roll out the dough into a circle between two pieces of parchment. It should be uniformly thick; about 1/4″ but no thinner. Slide the dough and the bottom piece of parchment paper onto a baking sheet. Spread a thick layer of lemon curd in the middle of the dough, leaving about a 2″ border all around. Pile the blueberry filling onto the lemon curd, and carefully fold the edges of the crust up around it, sealing any cracks that happen. Some juices will probably leak out when you bake it, but that’s no big deal. Brush the crust with the beaten egg wash, and sprinkle with a bit of coconut sugar. Dot the tops of the blueberries with a few small chunks of butter. Bake for 35-40 minutes – mine is usually always perfect at 35; the crust should be lightly golden and firm to the touch.

Remove from oven and let cool on the baking sheet for about 10 minutes; then slide the whole piece of parchment+galette onto a cooling rack to cool completely. Serve with extra lemon curd and vanilla gelato! Galette leftovers keep on the counter overnight and make a fabulous addition to breakfast; if you keep leftovers any longer I would store them in the fridge. Store any leftover lemon curd in the fridge!

FullSizeRender 4

Late summer galettes and camp shenanigans

IMG_4745

Hello! Long time no see.

Mostly because it’s summer so I had to do this:

IMG_7122

IMG_4718

IMG_4715

IMG_7119

IMG_4721

IMG_7219

Step off the grid for 10 days to reconnect, laugh, love and play in the dirt at my favorite place on earth. Two Sentinels will always be my mountain home, and there is nothing like my camp family!

IMG_4738

But now I’m back! And because it’s late summer, all the fruit desserts are called for. Especially galettes, because there is something about the rustic pie dough thing that is so forgiving and accepting of whatever fruit you have on hand that reminds me of late summer. Besides that, galettes play much nicer than pie in the sandbox: less time in the oven, less fussy dough (usually) and less crimping, fussing, and general worries about ice cold this and that and the other thing. Which is mostly why I love them, but also because they’re delicious (and I am totally not hating on pie; I love it equally!! But I also love not dying in a hot kitchen, so there’s that).

IMG_4742

This galette made the perfect dessert with a spot of ice cream, and then a rad breakfast accompanied by eggs and kale… you really can’t go wrong here.

IMG_4739

Grain free, lightly sweetened, almondy crust surrounds almondy peaches and a homemade almond paste. Very little sweetner actually goes into this, since the peaches are so sweet on their own. Pretty much any summer fruit can go into this, but I love the combination of peach and almond!

IMG_4740

Hopefully you have some late summer produce hanging around, begging to be made into a galette. Trust me, it’s a good plan. Definitely recommended to eat this for breakfast… Happy baking!

IMG_4737

Grain Free Almond Peach Galette

Grain free, refined sugar free, and paleo! Yay! Minus chilling time, the actual galette making comes together in a snap. Lightly sweet: the perfect vehicle to highlight late summer produce that is so sweet on its own. Yield: 1 galette; serves two for dessert and breakfast with leftovers, or somewhere between 6-8 peeps. Your call on how much you feel like sharing… Crust recipe lightly adapted from Running to the Kitchen, here! The almond paste and filling are Wait are those Cookies brainchild. Happy eating!

For the crust:

  • 1.5 c almond flour (not meal; you want the finer flour variety)
  • 1/2 c tapioca flour
  • 1/4 tsp fine sea salt
  • 6 tbsp salted butter, chopped
  • 1 egg
  • 1/2 tbsp coconut sugar
  • scant 1/2 tsp almond extract

For the almond paste*:

  • 1/3 c almond flour
  • 1/4 c almond butter
  • 3 tbsp maple syrup
  • 1 tsp vanilla extract
  • scant 1/2 tsp almond extract

*disclaimer: didn’t measure when I made this… so these are best guess estimates! Taste as you blend, and adjust the flavor as you like!

For the filling:

  • 3 peaches, thinly sliced
  • 1 tbsp tapioca flour
  • 1/2 tsp almond extract
  • 1/2 tsp vanilla extract
  • 1/2 tbsp coconut sugar

Last little beautification elements:

  • 1 egg, beaten
  • 1-2 tsp coconut sugar
  • 1 tbsp butter, chopped

Let’s make galette!

In a food processor or high-power blender (I used a Vitamix), pulse almond flour, tapioca starch, salt, and butter, and pulse to combine until it looks like coarse meal. Add in egg, coconut sugar, and almond extract and pulse just until combined. Turn out onto a piece of plastic wrap, shape into a disk and chill in the fridge for at least an hour, or up to overnight.

In the (cleaned) blender or food processor, combine the ingredients for almond paste: almond meal, almond butter, maple syrup, vanilla, and almond extract. The texture should be pretty thick, and should stick to itself when you press it between your fingers. Add more almond butter or flour, and adjust sweetness accordingly. Set aside once made.

Once the dough has chilled, preheat the oven to 375. Slice the peaches, and toss in a largish bowl with tapioca, extracts, and coconut sugar. Roll out the dough between two pieces of parchment paper, keeping the circle to about 1/4″ thickness. Peel off the top piece of parchment, and slide the rolled out dough on its parchment onto a baking sheet. Top the dough circle with the the almond paste, spreading it to about 2″ from the edge. Pile on the peaches, keeping them towards the center if possible. Begin folding up the sides, creasing them together as you go – if the dough is cracking, that’s okay (you can crimp the cracks back together; remember: galettes are forgiving and rustic!); you can use the bottom piece of parchment to help fold up the sides. Top the exposed peach filling with dots of butter, and brush the edges of the dough with the beaten egg. Sprinkle a little coconut sugar around the sides.

Bake for 35-40 minutes until edges are golden brown — mine came out just fine at 35 minutes, so check accordingly. Let cool for a few minutes on the baking sheet, then carefully slide the whole galette onto a cooling rack to let it cool completely. Serve with your fave ice cream or whatever of choice! Keeps well covered in foil on the counter; mine didn’t last longer than about 2 days so I can vouch for it at least that long!

Galette in situ:

IMG_4743

IMG_4744

Death by chocolate via skillet

IMG_4627

Hello!

This is a rather belated post / a compilation of a lot of things that have transpired out of my oven of late… I have no other excuse other than that I’ve just been lazy on the blogging front. And also it’s been HOT. So running the oven is the last thing I ever want to do when it’s a thousand degrees in the shade. Despite that, I’m sharing these brownies that require an oven because a) they’re amazing and you need them and b) I made lemon bars that got eaten so fast there was no picture to be had but they were AMAZING and if it cools down several degrees I’ll no doubt make them again soon and hopefully get in some pictures so you can see the deliciousness, in case you don’t believe the words (though you should).

Let’s see, what else has been shakin…

Occasionally I have fun with fans.

IMG_4625

I’ve been doing a lot of this, and it’s been glorious (btw; highly recommend this book; I couldn’t put it down).

IMG_4635

I got to see my favorite band ever ever ever in the beginning of June!! Caravan Palace is AMAZING.

IMG_4557

Summer means a glut of zucchini (at least in theory; I am [im]patiently waiting for the zucchini plant to really get going; at the moment am having to restrain myself from ripping the somewhat tiny zucchinis off the plant and eating them immediately. That being said, I did get to get out my spiralizer again after a long hiatus, and that was fun.

IMG_4588

But.

These brownies. Do you see that caramel sauce swirl going on down there?!

IMG_4626

Are pretty much death by chocolate in a skillet. In the best way. I took these brownies that are super dark, fudgy and dense and refined sugar free and dairy free and gluten free and DELICIOUS….

… and then I trashed them up with paleo caramel and coconut and more chocolate and they became a fairly evil dessert. I use evil in a complimentary way, of course.

IMG_4629

Topped with paleo gelato, they just about sent me over the edge (I was not eating these alone either, and I was not the only one accusing them of delicious death by chocolate). Good thing I was watching a movie on the floor so I didn’t really have to move very much after I finished them.

IMG_4630

But really. They’re amazing. Just pace yourself when eating, ha.

IMG_4619

Coconut Caramel Brownies

Gluten free, refined sugar free, dairy free. Fudgy, dark brownies with a deep dark chocolate taste — these are not for the faint of heart or for those who prefer a cakier brownie. No way man; eat these if you love dark chocolate in all its forms. The coconut caramel and coconut flakes take them over the top. Serves: a lot. Yield: 1 8″ cast iron skillet or an 8″ square baking pan.

Use the recipe below for the brownies: Deep Dark Flourless Brownies 

  • 6 tbsp coconut oil
  • 4 oz extra dark chocolate [mine was 77%]
  • 2 oz dark chocolate [mine was 63%]
  • 2 eggs
  • scant 1/4 c coconut sugar
  • 2 tsp vanilla extract
  • 1/4 c unsweetened cacao powder
  • 3 tbsp arrowroot starch
  • 1/4 tsp fine sea salt
  • a handful of extra dark chocolate chips

1 batch of paleo caramel (I used this one from Bakerita, here — it is DELICIOUS)

  • much easier to make this ahead of time and refrigerate until needed — I made it the day before. It will also thicken up in the fridge the longer it sits.

For toppings: flaked coconut, shredded coconut, melted chocolate if desired

Preheat the oven to 350, and grease an 8″ cast iron with coconut oil or line an 8 by 8 pan with foil.

In a saucepan over med-low, melt coconut oil+extra dark chocolate+dark chocolate until smooth, stirring occasionally (you can also do this in the microwave, stirring at 30 sec intervals if you are feeling supremely lazy). In a biggish bowl, use an electric mixer to beat the eggs, coconut sugar, and vanilla until pale and smooth, about 2 minutes. After that’s all good, beat in the coconut oil-chocolate goodness until incorporated. In a small bowl, combine cocoa powder, arrowroot powder, and sea salt; then slowly use the mixer to beat that into the rest of the mix. Don’t overmix, just make sure there aren’t any pockets of cocoa powder. The batter should be thick and smooth. Stir in the extra chocolate chips. Spread the batter into the prepared pan.

Drizzle about 1/3 to 1/2 of the cooled caramel onto the brownie batter, and use a knife to swirl it together. You’ll end up with streaks and pockets of caramel, which are delicious– don’t feel like you need to completely stir it into the batter.

Bake for 30 minutes in an 8″ skillet (it’s thicker, so test accordingly) or for just about 25 minutes in an 8 by 8 pan, until a tester comes out clean. Let cool completely before topping.

Once cool, drizzle remaining caramel sauce over the top and excessively top with all the coconut. Toast the flakes if you like, or toss them on un-toasted – I did half and half and both were delicious. Melted chocolate drizzle is also a nice touch!

Slice. Eat. Devour. Might I suggest eating them in delightful company, since good food is so much better that way?! Also because a chocolate coma is more fun when you’re in good company.

IMG_4631

One week…

IMG_4493

I did it!!!

IMG_4460

IMG_4470

IMG_4480

Well, almost. I walked this weekend, which means there is only one more advent calendar baked good between me and me officially having my masters. That and one presentation… as one of my cohort peeps so accurately said “It’s like going back to the Dursleys after spending a year at Hogwarts”. TRUER WORDS NEVER SPOKEN. Sheesh. Nothing like getting hooded and walking in your graduation to go right back to editing your slides for the looming presentation… but whatever. Almost there!

IMG_4476

One more week.

IMG_4499

And in the meantime, I have baked goods. Or rather, a no-bake treat since it’s bloody hot out and I’m not about to turn on the oven. But if I have to work on practicum stuff, you better believe I’m going to have something interesting to eat.

IMG_4498

Fast, easy, and delicious. These kind of remind me of a gourmet PB&J…. except better! And they’re cold. Which is bueno when it’s so hot outside, and you want a treat that feels more like real food (ie. me every day).

IMG_4500

So! Next time I blog I will be DONE DONE DONE DONE.

IMG_4501

Hayley Scott, Master of Public Health. Hmm… that has a nice ring to it :)

IMG_4471

Almond Butter Raspberry Chia Bars

Gluten free, vegan, refined sugar free. Healthy fats, antioxidants, and chocolate. YAY! All the good things. Yield: 1 loaf pan. Recipe lightly adapted from This Rawsome Vegan Life, here!

IMG_4496

  • 1 c rolled oats
  • 1/4 c ground flaxseed
  • 1/2 c almond butter (mine was salted)
  • 1 tbsp maple syrup
  • 1 tsp vanilla extract
  • 1/2 tsp cinnamon
  • 1 c frozen raspberries, thawed
  • 4 tbsp chia seeds
  • 1/3 c extra dark chocolate chips
  • 1 tbsp unrefined coconut oil
  • unsweetened shredded coconut, for garnish

In a smallish bowl, mash together thawed raspberries and chia seeds. Let sit while you make the rest of the bar crust.

Line a bread pan with parchment paper. In a vitamix or food processor, process the oats until they become flour. Toss into a bowl with the flaxseed, almond butter, maple, vanilla, and cinnamon. Stir (or use your hands, it’s more fun) everything together until it all comes together. Press all this goodness into the prepared pan. Set aside for a hot minute.

The raspberry-chia jam should have thickened by this point. Spread it on top of the almond butter-oat mixture in the prepared pan.

In another smallish bowl, melt chocolate chips and coconut oil until melty enough that you can stir it all together sans lumps. Spread this on top of the raspberry layer in the pan, then top with shredded coconut if that’s your thing. Toss it all into the fridge for about an hour before slicing and serving!

Store in the fridge.

IMG_4495

Two Weeks: Brownies are obviously called for.

IMG_4326

The advent calendar of baked goods continues! TWO MORE WEEKS. Actually, less than two weeks. Let’s get to days, shall we? 13. And that includes weekends.

Version 2

Also, the to-do list is finally getting smaller, which might account for the two types of baked things that emerged this weekend.

And eggs! Always eggs. These were especially pretty though, so… here they are.

IMG_4328

I exercised my math skills and made 3/4 of a brownie recipe this weekend, because a) I’m just cool like that and b) I was using my favorite skillet and I decided that a 1/2 batch doesn’t appropriately fill up the skillet and c) more brownies is ALWAYS the answer. This isn’t a new recipe, but these are probably just my favorite brownies, pretty much ever. Big claim, I know… but I think if I had to pick one brownie recipe for the rest of forever, there is a really good chance it would be these.

And they disappeared in short order (though I did have help…)

This is the recipe I love so much — I suggest just making a double batch (I list the 1/2 batch measurements here) because they’re just THAT good. Gluten free, grain free, refined sugar free, full of healthy fats and… nearly three kinds of chocolate. WINNING.

That elusive last piece…

IMG_4327

And then in the midst of presentation preparations (PowerPoint for DAYS), I needed a study break so I made a small batch of chocolate chip cookies… because, cookies. I wasn’t even really craving cookies, but just to stand up and look at something that was NOT a computer or a powerpoint slide…. and then I ended up with cookies. Solid choice.

IMG_4334

The cookie recipe is from Living Healthy With Chocolate, here! I didn’t alter it aside from using 1/4 c date sugar instead of coconut and added ~1 tbsp maple syrup.

IMG_4332

They’re delicious! And they’re vegan which was important because I was feeling the need to eat a few bites of the dough…

IMG_4333

It’s the homestretch! Let’s see if we can’t squeeze in at least one more baked thing between now and June 3. Ready… GO.

IMG_4331

Crisp = dessert, then breakfast

IMG_4231

Woah woah woah I graduate a month from yesterday! Wheeeeee almost time to decorate my mortar board. Because I care not that I’m getting a masters and that any display of creative originality might be frowned upon for grad ceremonies; any flat, otherwise boring surface is acceptable for yogic doodle decoration and glitter. Also, it’s probably time to make a dent in that giant pile of work I have to do between now and my practicum presentation but…. nah. I made crisp instead.

Because… CRISP!

IMG_4230

Infinitely more fun than papers and literature review and and and.. ew. Someone make all that go away so I can enjoy my crisp in peace, mmk?! Great.

IMG_4232

This one is full of springy, fruity deliciousness. Good for the soul and the bod — brightly colored (food should be fun!) and full of whole-food nutrients. Because all desserts should be able to do double duty as breakfast! Obviously.

IMG_4239

And with that… I’m back to work. Because even that little respite couldn’t last long (waaah).

Let’s get to it. Happy weekend!

IMG_4233

Vegan Raspberry Crisp with Meyer Lemon and Coconut

Fruity, lemony, springy, delicious, and good for your bod! All you could want out of a dessert / breakfast / fruity whole food shenanigan. Full of whole grains (oats), healthy fats (coconut and almonds), antioxidants (raspberries) and all kinds of textural fun. Vegan, gluten free, refined sugar free. Yield: one 8 by 8 pan. A Wait are those Cookies original!

For the fruity goodness:

  • 4 c raspberries (frozen is totes fine; just thaw them first)
  • 2 tbsp tapioca starch
  • 2 tbsp pure maple syrup
  • 1 tbsp meyer lemon juice*
  • 1 tsp vanilla extract

For the crispy fun:

  • 1 c almond meal
  • 1 c rolled oats**
  • 1/4 unsweetened, shredded coconut
  • 1/2 tsp fine sea salt
  • zest of one meyer lemon*
  • 3 tbsp pure maple syrup
  • 1/4 c melted coconut oil

*regular lemon will do but Meyers are SO fabulous; find them if you can!

** gluten free if desired

Preheat the oven to 350 and locate your trusty 8 by 8 pan that you make EVERYTHING in. Or maybe that’s just me…

In a large bowl, toss together raspberries, tapioca, maple, meyer lemon juice, and vanilla extract. Once it’s all combined, spread this evenly into the bottom of the 8 by 8.

In another largish bowl, stir together almond meal, oats, sea salt, and lemon zest. Add in maple syrup and melted coconut oil, and stir until combined, mashing out the largest lumps. Spread this goodness evenly over the raspberries in the prepared pan, and bake for 30-40 minutes, until the crumble topping is golden brown and the filing is bubbly and juicy (omg yum). Let sit for a few before annihilating. Leftovers (ha) store best in the fridge and are excellent for breakfast, just saying.

Top with any kind of iced dessert of choice – i.e.. vegan paleo gelato, dairy deliciousness, whipped coconut cream?! The sky’s the limit. You do you!

IMG_4236