Cookies that play nice in the sandbox

IMG_5803

OoOooOOOOooohhhh the first of the fall baking has arrived!
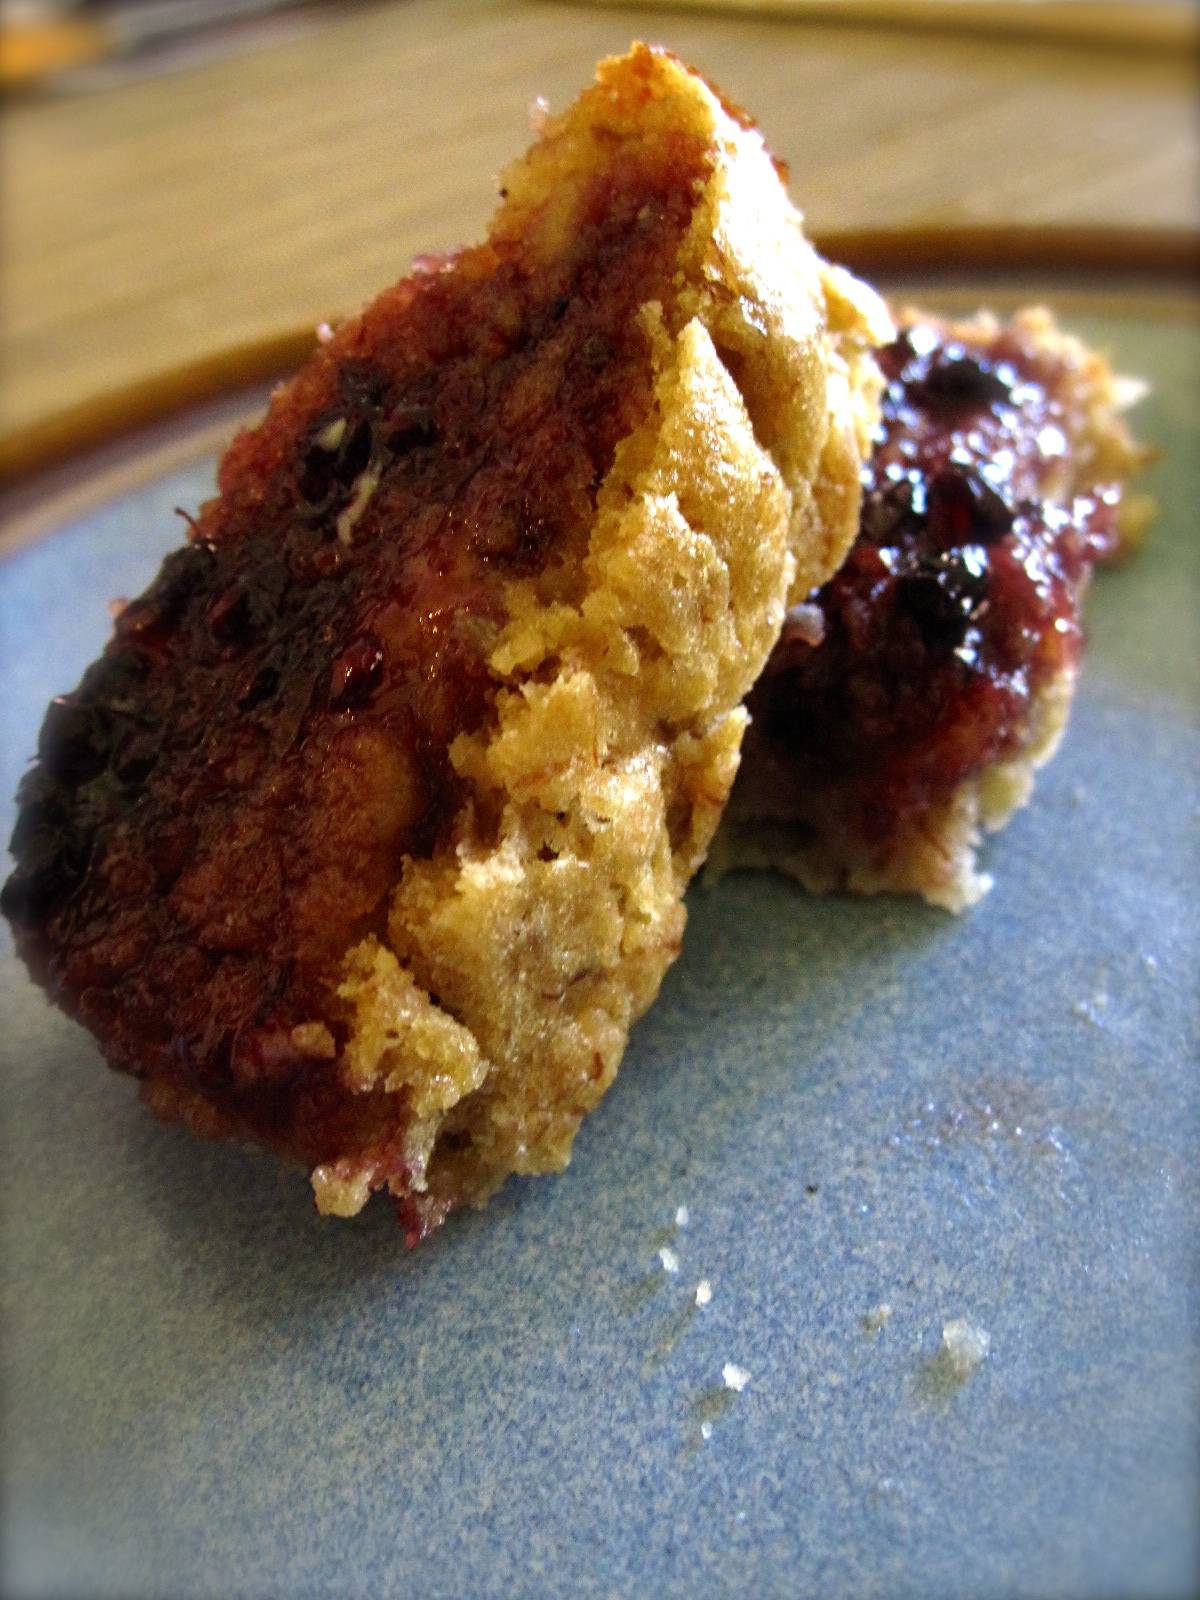
PUMPKIN.

IMG_5795

Why isn’t it a year-round thing?? I always think that summer fruit is my favorite thing, but then around comes fall (which happens to be my favorite season anyway) and I get all obsessed with pumpkin. So fickle.

But seriously. Pumpkin is one of my favorite things ever. And healthy cookies are right up there next to pumpkin on the favorite things list, so obviously why would I NOT combine these?! Helloooo.

IMG_5792

I’m going to start my pumpkin hoarding sometime soon…. you know what I mean if you’ve hung around my inbox snark the last several years: come fall, everyyytime I go to the store, I grab an extra can of pumpkin. Can never have too much, right?! … Right. Sorry. I have a problem. BUT. That also means that when everyone else is fighting over the *last* can of pumpkin within a 10 mile radius, I am sitting pretty on my hoarded stash. And can therefore make pumpkin things. All. The. Time. Yep. Be jealous. Or don’t, and implement my genius strategy for yourself… you’ll thank me later.

IMG_5796

These cookies play nice in the sandbox, too, as they’re dairy free, refined sugar free, gluten free, and paleo. Even if you don’t subscribe to any particular dietary theory (like me. I’m an omnitarian), it’s only fair to make cookies that can make nice for other people too, right?! Cookies are meant to be shared. They’re like love, in food form.

Bake love. Share food (preferably with a bestie over tea). Eat. Be happy!
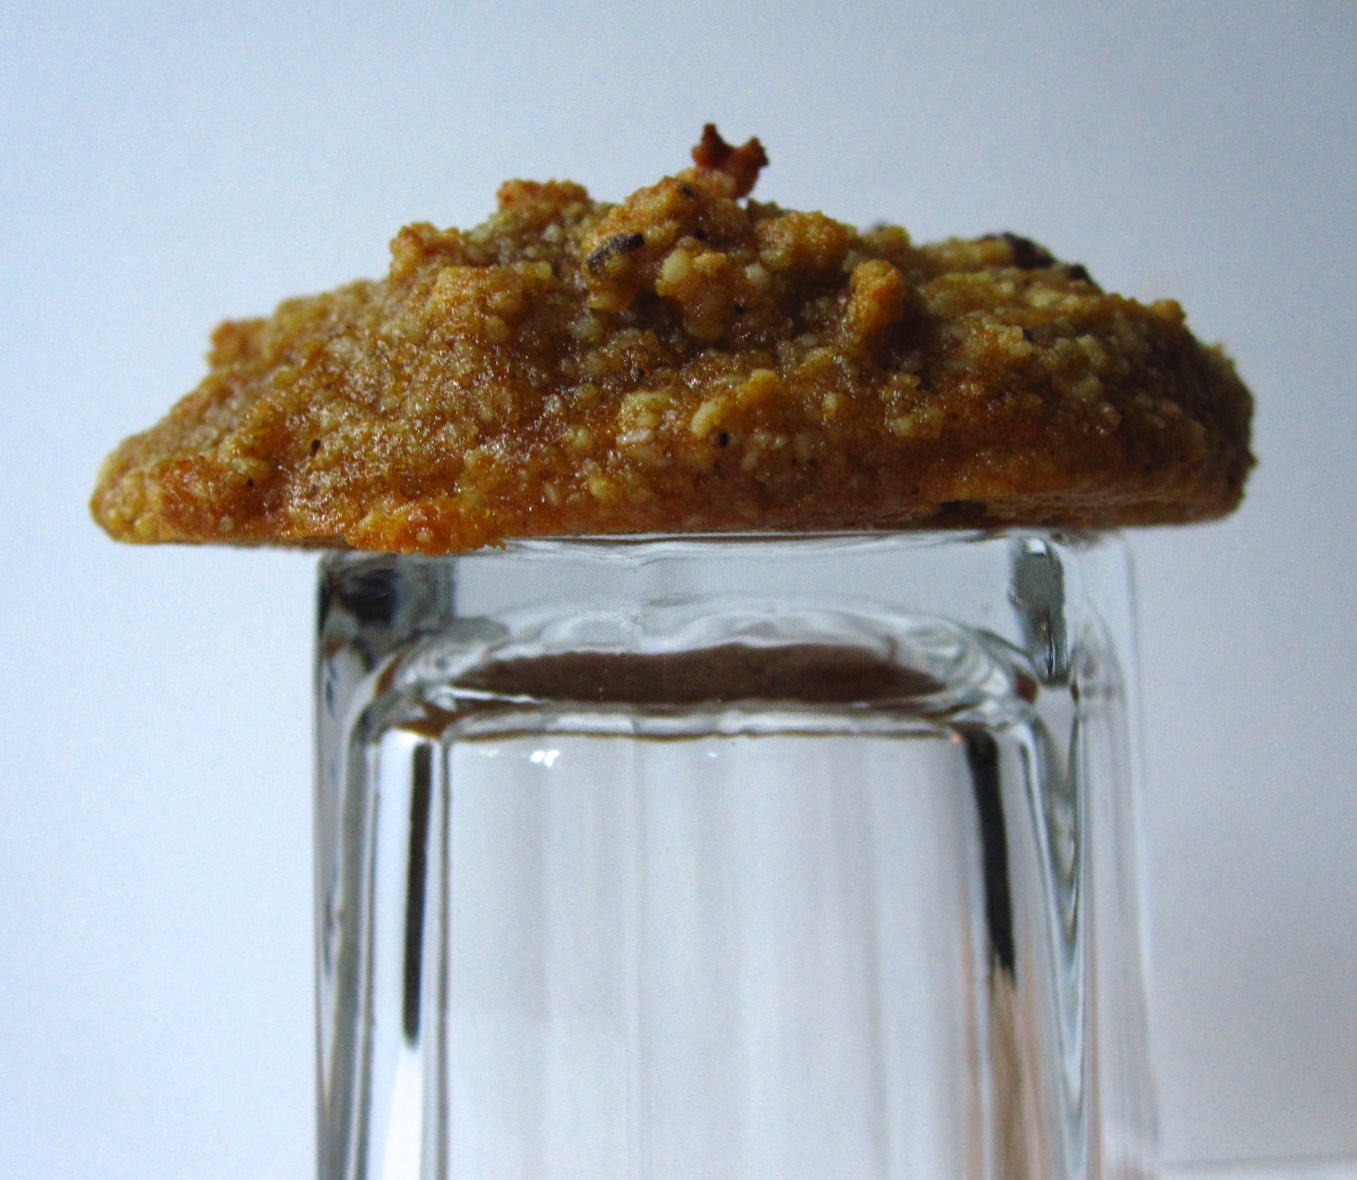
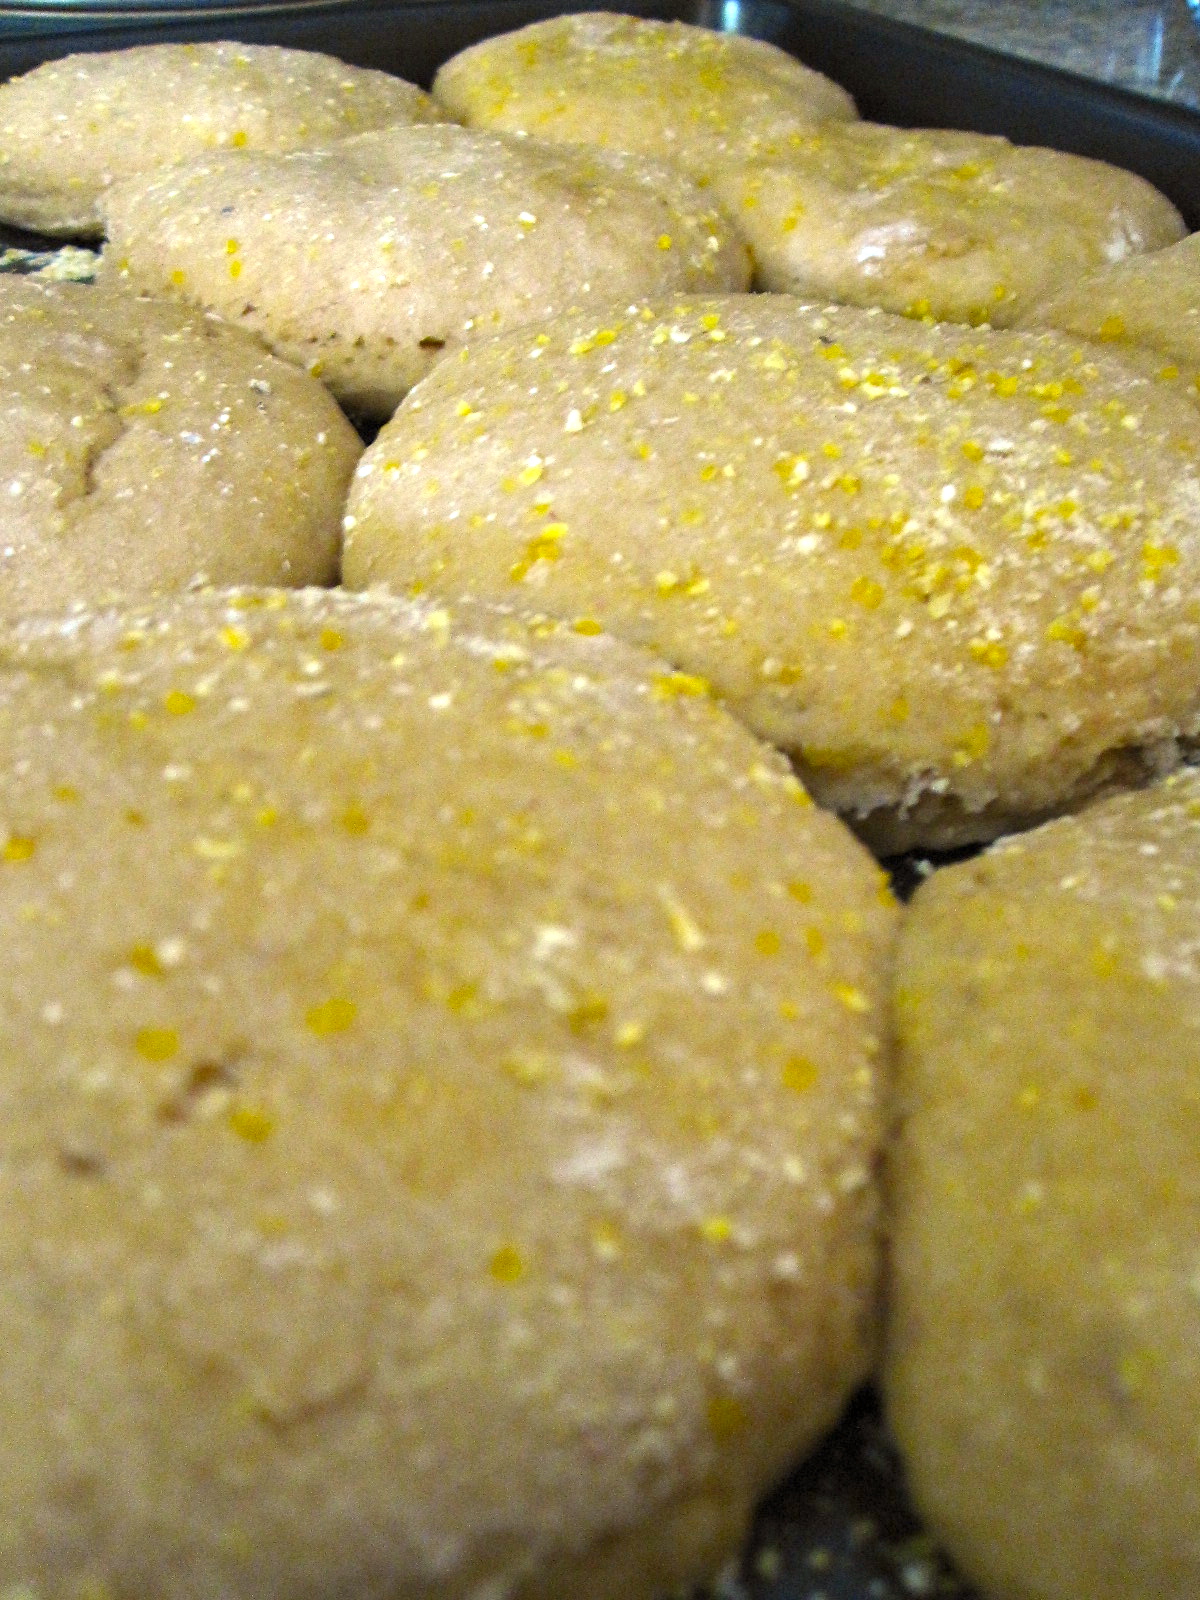
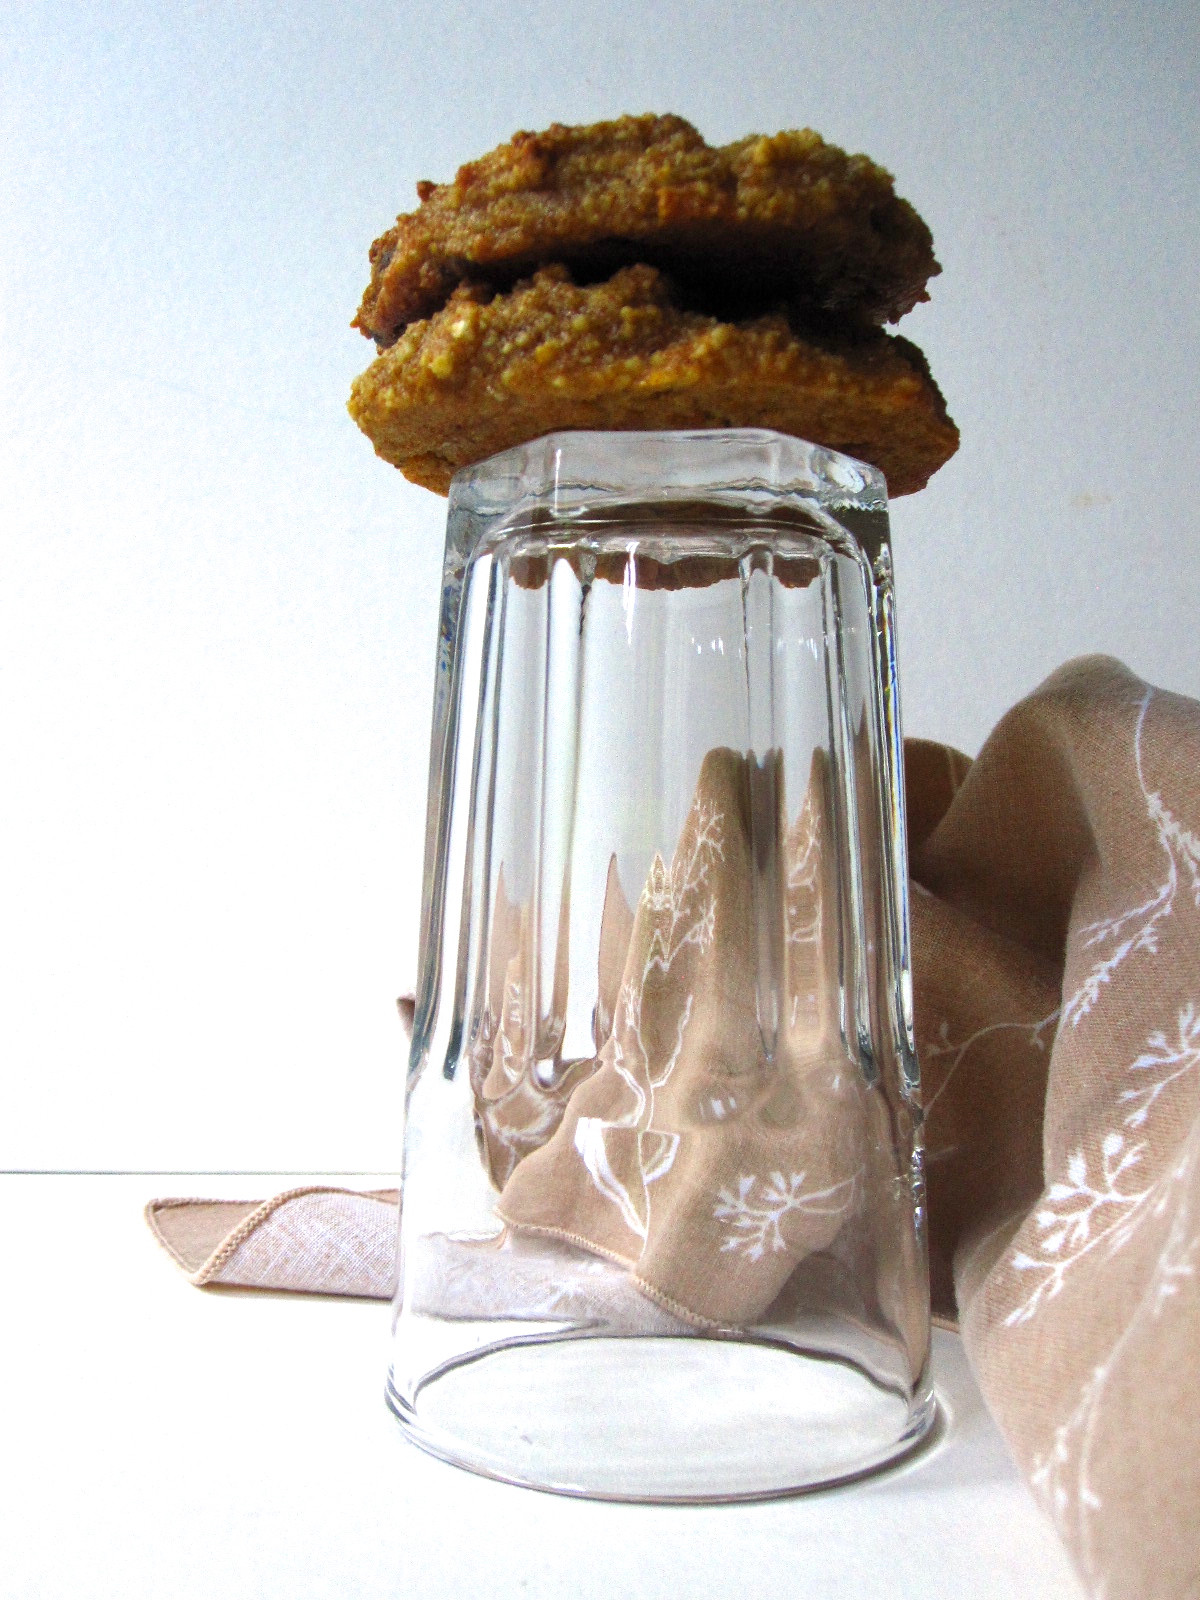
IMG_5800

Pumpkin Cookies

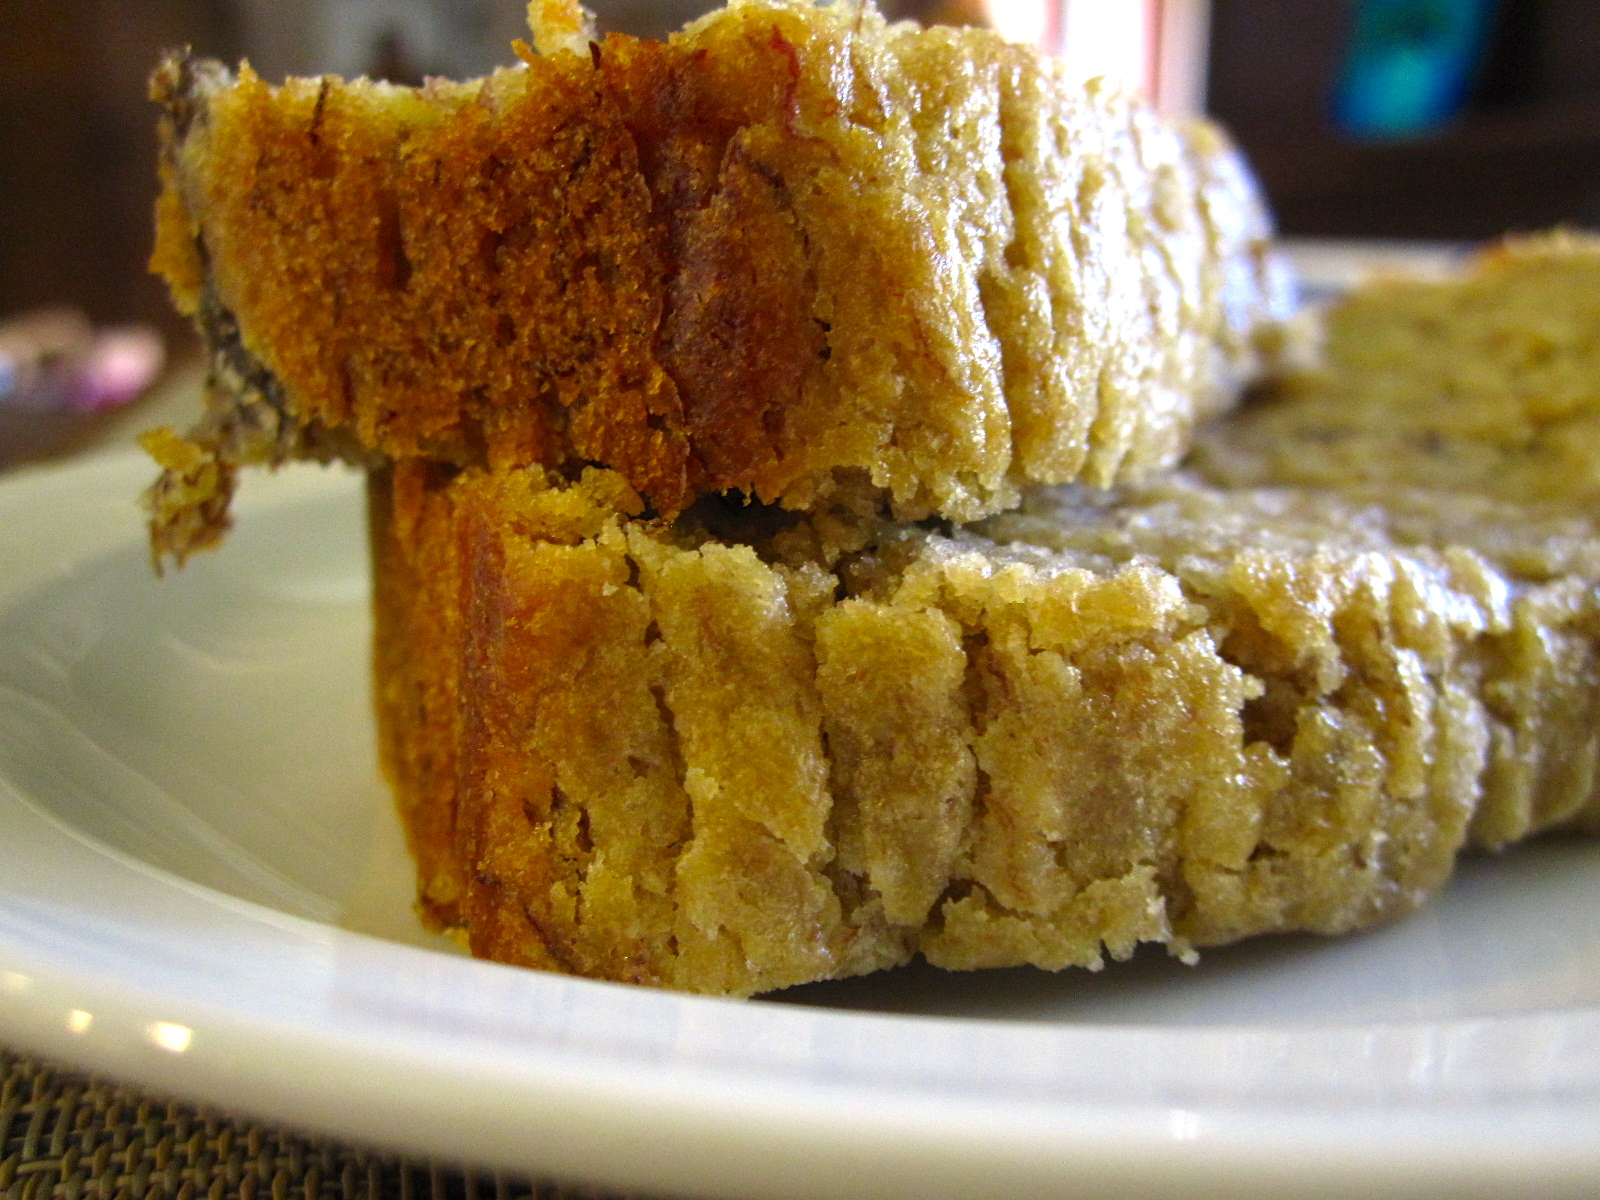
Recipe lightly adapted from Lexi’s Clean Kitchen, here! My batch yielded 10 cookies, about 2.5-3″. Paleo, gluten free, refined sugar free, and dairy free! Not to mention full of beta carotene, healthy fats, and antioxidants. How could you pass up these little gems?! That’s right… I thought not!

  • 1 c almond flour/almond meal
  • 1 tbsp coconut flour
  • 1 egg
  • 1 tbsp refined coconut oil, melted
  • 1/4 c pumpkin puree (Just pumpkin, not pie filling pleeease!)
  • 2.5 tbsp raw honey
  • 1 tsp vanilla extract
  • 1/8 tsp sea salt
  • 1/4 tsp baking soda
  • heaping 1/4 tsp pumpkin pie spice (I make my own: 1 tbsp cinnamon, 2 tsp ground ginger, 1/2 tsp ground cloves, 1/2 tsp allspice, 1/2 tsp nutmeg, pinch of cardamom or mace), plus more to sprinkle on the top of yet-to-be-baked cookies
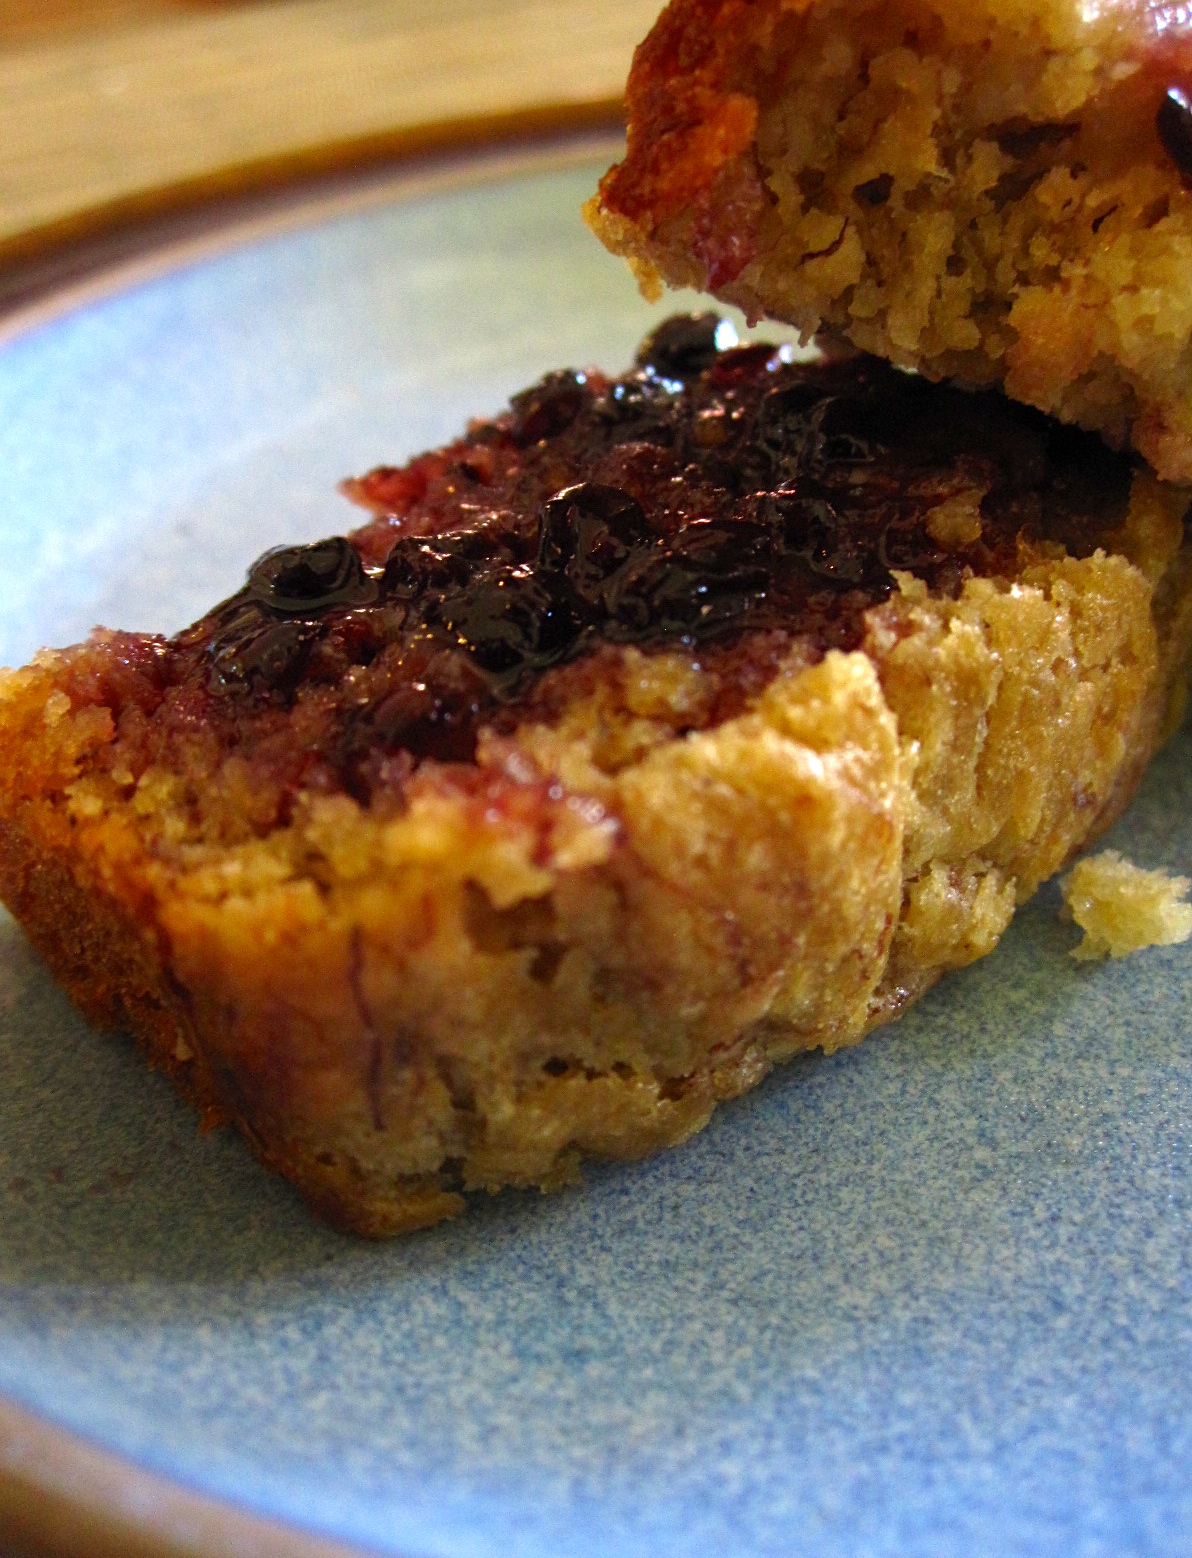
  • 2 large squares of 70% dark chocolate, roughly chopped

IMG_5801

Preheat oven to 350, and line a baking sheet with parchment paper.

Whisk together almond flour, coconut flour, sea salt, baking soda and 1/4 tsp pumpkin pie spice. In a smaller bowl, whisk together melted coconut oil, pumpkin, honey, and vanilla. Stir wet into dry (and do try to avoid overmixing, we can’t have that…). Stir in chocolate, and drop by the tablespoonish onto the prepared baking sheet. Sprinkleysprinkle some extra pumpkin pie spice on there because that is an excellent idea. Smooth them out just a little… then pop them into the oven for about 15 minutes.

Let cool on the cookie sheet for a few as they’re soft right out of the oven—they’ll seem too soft at first but they firm up nicely. Store them in the fridge, if they last that long!

Your kitchen will smell like heaven. Indulge responsibly ;)

IMG_5804

A lentil and squashlet autumnal party

IMG_5781

You can never have too many lentils.

Ever.

My nickname at work is lentil. That explains a lot.

Besides, lentils are bomb since they give you a protein source to pair with all of the autumnal squashlets (no, auto correct, squashlet IS in fact a word, so there). Wheeeee SQUASH! Not only did I use pumpkin yesterday, but I also got to bust out a (homegrown!) butternut squash! Get ready, there’s going to be an abundance of orange coming in the next few months…

I love that squash coincides with my birthday. It feels like nature’s birthday present!! Large, orangey deliciousness.

IMG_5790


Butternut squash always reminds me of a particularly memorable game of Cranium that took place ohhh, probably sometime in high school… my pair was supposed to be acting out butternut squash, and it was maybe one of the more hilarious things I’ve watched: First word: sounds like…*points at butt*… second bit: *mimes being a squirrel burying something*… lastly and rather violently smooshes hands together—-I had been guessing as she was miming and somehow I guessed it!! Excellent mime skills right there. But anyway… I can’t really cook a squash without thinking about that, hehe.

IMG_5784

Skillet Popped Balsamic Lentils

Recipe adapted from Happy Healthy Life, here! I made one cup of lentils, which, supplemented with all the veggies, fed my fambam of 3 with enough leftovers for at about one meal. My butternut squash was small, so it only made enough puree for 3. Feel free to play with the seasoning—mine was an eclectic bunch of flavors that somehow came out tasting good. Funny how that works, isn’t it?!

  • 1 c green lentils, rinsed
  • 2 c water
  • 3-4 tsp good quality balsamic vinegar, divided
  • a few grinds of cracked pepper
  • judicious sprinkles of salt
  • 1 butternut squash, cubed
  • a tbsp or two of milk beverage
  • 1 tsp butter (or vegan butter)
  • 1 zucchini, diced
  • 1 small onion, diced
  • 1 bell pepper, diced
  • 4-5 mushrooms, sliced
  • 3 massive handfuls of spinach, rinsed
  • a bit of chicken (or veggie) broth
  • a good glug of olive oil
  • seasoning to taste*

*I used fresh marjoram, basil, and oregano to sauté the onion, then added cinnamon, cardamom, nutritional yeast and coconut aminos (and more balsamic) to the veggies after I added them in to sauté.

IMG_5783

For the lentils:
Add 2 cups of water to a medium saucepan, and bring to a boil. Add lentils, reduce heat, and simmer until the lentils are done (about 30 minutes). They should be soft but still have some bite to them. Rinse and drain.

Heat a skillet over medium, and add a small bit of olive oil. Once the skillet is hot, add about a cup of lentils, shaking the pan to ensure that they’re evenly spaced. They should sizzle and pop and make all kinds of fun noise. Let them sit for a few minutes, then toss in a tsp of balsamic and a bit of salt and pepper. Stir occasionally. You’ll know they’re done when they get a bit toasty and crispy around the edges. Remove the first batch, add more oil, and repeat until all the lentils are used.

For the butternut puree: Peel and dice squash, discarding stringy and seedy inner bits. Using a steamer basket or your preferred method of steaming, cook squash until very fork tender. Remove from the steamer and mash with a potato masher or a fork (or a food processor, but I didn’t want to do extra dishes). Add a bit of milk beverage (I used unsweetened almond) to smooth it out, and (obviously) a bit of butter and salt.

For the veggies, I did a simple sauté with a bit of chicken stock added. Chop and dice all yo’ veggies, add olive oil to a deep skillet, and let it heat over medium. Once hot, add onions and sauté until translucent. Add cinnamon and cardamom and a bit more olive oil, then the rest of the veggies (zucchini, pepper, mushrooms, and spinach. I added a bit of broth after about 4 minutes of sautéing, then chucked in all the spinach and covered the skillet to let it reduce. Add coconut aminos, nutritional yeast, Bragg’s, or whatever other seasonings you like here, add lentils, and let it cook on low for a few. Serve warm, over butternut squash puree!

IMG_5789

This is how I roll: Like a BOSS!

IMG_5763

GUYS.

I MADE SUSHI!!!

IMG_5765

You have no idea how excited I am about this. Well, maybe you do, given the excessive use of capitals and exclamation points, but really. I feel like a proud parent of my little sushi children. What’s more, I didn’t use a tutorial (ain’t nobody got time for that) but just used the instructions on the back of t the nori wrapper. Like. A. Boss.

I know you’re not supposed to say your own food is amazing but I’m going to flagrantly break this rule as a) they were freaking delicious and b) I wasn’t the only one eating them and thinking they were delicious and c) my birthday is tomorrow so I can do what I want! Ha.

IMG_5776

I’ve always loved sushi anyway—my parents started me early, and I was always asking to go to this sushi bar that had revolving boats in front of you with fresh sushi. Totally dangerous, because you end up going from ‘dang I’m hungry’ to ‘does a wheelbarrow come with this??’ in about thirty seconds. At least my dad introduced me early to raw fish and these little crabby things that he told me were like potato chips. So I ate them. Such trickery. And I always thought the orange fish roe was interesting looking, so I probably ate that too just because I liked the glowing orange globs. Such a visual child…

IMG_5779

I do love raw fish but I wasn’t about to expend that much energy or resources to source some (especially on a Friday, noooo thank you I’m tired and lazy) so these are chicken rolls! Not terribly traditional, but I really don’t care–they were awesome and they look like authentic sushi rolls so who’s judging? Besides, the chicken is marinated in rice wine vinegar and coconut aminos, so really—what more could you ask for?! But seriously. These are startlingly easy, they just require some prep time. Make them!! Be a proud parent of your sushi roll-lets. They’re adorable, and delicious. And your cats might be interested in them too…

IMG_5771
Um, Nosh?? You’re casting a shadow..
IMG_5767
hahahhaha. These are sanitary, I promise!

Forbidden Rice Sushi

Makes approximately 6 rolls—I had a nori packet with 7 sheets but I was only feeding three, so I made 6 and we ate the leftover nori sheet plain. I had a bit of leftover quinoa and made a roll that was combined rice/quinoa—also delicious!

  • 1 c Forbidden (black) rice
  • 2 c water
  • 2 Persian cucumbers, sliced very thinly
  • 1 large avocado
  • 3 chicken breasts, defrosted
  • 2 tbsp coconut aminos
  • 3 tbsp seasoned rice wine vinegar+3 tsp (approx)
  • 2 tsp refined coconut oil
  • toasted nori sheets
  • sushi mat for rolling
  • extra sharp serrated knife
  • Bragg’s liquid aminos or soy sauce for dipping

IMG_5759

Sometime earlier in the day (so that your rice has time to cool), make yo’ rice! Bring 2 c of water to a boil in a medium saucepan, then add rice and stir once or twice before covering and reducing to a simmer. Simmer for about 30 minutes, until the rice is still a little chewy and the water has been absorbed. Once rice is done, season it with a bit of salt and about 3ish tsp of rice wine vinegar. Let sit until fully cooled.

IMG_5754

Combine coconut aminos, rice wine vinegar, and a bit of water in a bowl (I approximate the measurements, so taste before you toss in the chicken). Prep chicken by cutting it into thin strips, and let marinate while the pan is heating. Heat coconut oil in a skillet over medium heat—when hot, toss in chicken and cook until chicken is fully cooked, with none of that pink business going on. Let it cool a bit while you prep the other roll ingredients.

Slice avocado and cucumber into thin strips. Place a piece of nori (rough side up) on your sushi mat. Spread rice evenly across the lower 3/4 of the nori, leaving the edge farthest from you rice-free. Lay strips of cucumber, avocado, and chicken across the middle of the rice, and begin rolling from the side closest to you. I found it easiest to guide the roll by rolling the mat back on itself as I began to compress the roll. Wet the far end of the nori with a bit of water so that the roll will stick together once it’s completed. Use the mat to tighten the roll, then let it rest on it’s seam for a minute before cutting. Use a very sharp, serrated knife to cut the rolls, wetting it each time you cut a new roll.

Roll, repeat, roll, repeat!

Obviously there are lots of ways to customize this—I made some veggie rolls and some with chicken, but the chicken ended up being my fave! Roll to your heart’s content, then slice and serve. I ate mine with a bit of Bragg’s liquid aminos for dipping. These best the day they’re made, but would probably keep fairly well in the fridge for a day or so.

IMG_5775

Upgrading the childhood favorites, one cookie at a time

IMG_5734

As you can see, I’m having quite a bit of fun riffing on things that I used to eat as a kid, except making them… edible. Because I don’t know about you, but if I try to eat conventional graham crackers now, they taste like cardboard. STALE cardboard… which is about as bad as it can get, in my book.

IMG_5736

So this is fun! Real food ingredients that you can pronounce and have fun eating. Because these taste almost like the “real” thing, but BETTER! Wheee!

Graham crackers. What an ubiquitous little kid snack (um. And adult?! Hellooooo).

IMG_5744

My grandma used to keep them in the cupboard above her fridge, probably because it was high enough up to be out of the reach of small Hayley (though why the baking drawers with chocolate chips and butterscotch chips were at child level I’ll never know—I got really good at swiping handfuls of ‘baking morsels’ every time I went into the kitchen… although sometimes it was with my grandma’s consent, ha). Anyway. She ALWAYS had graham crackers. And I loved them. Crunchy-soft, subtly sweet. Besides that, I have called my grandma Gram for as long as I can remember, and gram=graham! Get it?? Like Gram Crackers? The crackers that Gram always has? Do you see? Perfect.

My dad and I used to eat them for lunch sometimes with milk. We’d get out a really nice plate, put a glass of milk in the center, and then break up about two sleeves worth of crackers nicely and place them around the edge of the plate. And then sit outside, preferably, in the sun, companionably dipping graham crackers.

IMG_5738

Middle school meant that I was obsessed with the cinnamon graham sticks, except my mom would never buy them (actually… thanks mom! In retrospect that was an excellent choice you made), so I would always eat them over at my friend’s house… with applesauce. For some reason that was our thing and we would literally go through a box in one sitting. Whoops. I do have to say, they were startlingly good dipped in applesauce. Weird.

Later in life (ie college) I started buying organic ones and eating them with nut butter and dark chocolate for dessert. Sort of like a deconstructed s’more, except better as I don’t care for marshmallows… so this just leaves you with the good parts… carbs and chocolate! Yessss.

IMG_5747

SO anyway. Lots of good memories associated with these little guys, besides the fact that I like the way they taste. BUT. I don’t really like that they come in a package, even if they are organic. SO. I’ve started making my own! It’s WAY more fun, AND I know exactly what’s going in them. Solving for nostalgia and taste, all in one fell swoop.

IMG_5748
Milk in a shot glass. So classy.

Homemade Graham Crackers

Recipe from Salt&Smoke, here! I adapted it only very slightly. I made two batches, one with coconut oil and maple syrup, and one with butter and honey. The butter ones browned a slight bit more, due to the honey, but they’re both delicious. I think the coconut oil one is actually my favorite—you can’t taste the coconut, but something about the almond flour/coconut oil/maple/vanilla combo really tastes like graham crackers to me. I think my next project will be adding cinnamon to the batter, to make cinnamon crackers!!

I got a yield of 20 from the coconut oil batch, and 23 from the butter batch. They’re about 2″ by 2.5″ (ish).

  • 1 c almond flour
  • 1 c whole wheat pastry flour
  • 1/2-1 tsp sea salt (I used fine grain with 1 tsp, if you’re using coarse, use 1/2!)
  • 1/2 tsp baking powder
  • 1/4 tsp baking soda
  • 5 tbsp refined coconut oil or butter (I used unsalted)
  • 4 tbsp maple syrup or raw honey
  • 1 tsp vanilla
  • a small splash of almond extract*

*I only used the almond extract in the butter/honey version, and to me it is barely noticeable

Preheat oven to 350.

Combine dry ingredients in a medium sized bowl, and stir until combined. In a small bowl, combine coconut oil or butter, and maple or honey, and microwave (I’m lazy—you can also use a saucepan) until melted and combined. Stir in extract(s). Pour wet into dry, and stir until mixed.

Roll dough out between two pieces of parchment paper, approximately the size of your cookie sheet. I rolled mine out to about 1/8″ thick—-go thinner if you want really crunchy cookies. Score into rectangles using a butter knife, then get fancy and poke little holes in the tops with a fork (because graham crackers aren’t complete without fork marks, duh). I trimmed the excess dough off the edges and re-rolled it into more squares and a few circles.

Bake for 13-15 minutes, until lightly golden. I took both batches out around 13, let them cool on the sheet for a few minutes, then moved the parchment paper to the cooling rack.

IMG_5751

Fig Newtons don’t have figs in them… do they?!

IMG_5722

I’m pretty sure everyone has a fig newton memory.

Not necessarily a good one, mind you, but I’m sure there’s at least one stored away in those memory banks. Mine happen to be a positive ones… I looooved those little figgy cookies growing up. I liked to eat around the cakey outside first, and then eat the middle with tiny little nibbles (Strangely enough I did that with Madeline cookies too, I see a trend here?!). But probably if you’d have asked me if I liked figs, I would have turned my nose up in an unbridled look of disgust. Because I did I associate figs with fig newtons? Absolutely not. Does a fresh fig taste like the interior of a fig newton? Um… no.

IMG_5721

Luckily for me, liking figs had nothing to do with liking fig newtons. I was fairly well supplied with fig newtons as a child, and even into college when I became obsessed with the Whole Foods version of “healthier” figgy bars (and my mom would nicely send a box of them in my freshman care packages). I’m pretty sure I hadn’t eaten a real fig until I was (gasp) OUT of college. Whoops. Definitely didn’t do that on purpose. Hey, in my defense, I didn’t cross paths with figs very often (until now).

IMG_5727

Oh fig newtons, how full of processed crap you are! I want to like them from a nostalgic point of view, but seriously?! I tried a bite of one a while ago and almost spat it out. Fact: they taste like cardboard. Thanks, five kinds of corn syrup… you might enable these to last through the apocalypse, but you can’t make them taste like food! Oh wait. That’s right, they’re a food product, not a food.

BUT!

Lucky for you. THESE taste even better than a fig newton AND they’re made from real food and things you can pronounce. Wheeee!

IMG_5723

Vegan Figgy Bars

I got about 20 little bars out of this, that were slightly bigger than a conventional fig newton. Vegan, refined sugar free, and gluten free. What’s not to like? Oh and right, they’re delicious. Recipe slightly adapted from The Iron You, here!

  • 1.25 c almond flour
  • 1/4 tsp sea salt
  • 1/4+1/8 c maple syrup
  • 1/8 c refined coconut oil, melted
  • 1/2 tbsp vanilla extract
  • 1/2 c (a good handful) dried figs*
  • 1/8 c lemon juice
  • 2 dates, chopped
  • 1 tbsp peach jam**
  • 1/2 tbsp vanilla extract

*my figs were SO dry, they were like small pebbles. I reconstituted them in a bit of boiling water for about 10 minutes, which made them soft enough not to kill my food processor.

**mine was flat peach, raspberry and vanilla (freaking delicious), courtesy of Anna!! Her blog is over here.

In a largeish bowl, combine almond flour and salt. In a slightly smaller bowl, stir together maple syrup, melted coconut oil, and vanilla extract. Add wet ingredients to dry, and stir until combined. The batter will be super runny, which is okay! Cover the bowl and pop it into the fridge for at least an hour, to let it solidify a bit.

In the bowl of your food processor, process figs until they’re more like a chunky paste. Add in lemon juice, dates, jam, and vanilla, and blend until combined. I tasted mine a few times along the way and adjusted as I went. Set the filling aside until the dough is done.

Preheat oven to 350, and line a baking sheet with parchment paper. Using two separate sheets of parchment, roll out the dough to about 1/4″ thickness. Use a knife to divide it into two roughly even rectangles, then spread the filling down the dough, slightly off center so there is enough dough to cover it back up. Use the parchment paper to roll the dough back over the filling, pressing the edges and the ends together to seal it off. Make them look pretty by smoothing with your fingers (you’re all alone in the kitchen, who’s to see?!)… then pop them into the oven for about 20-25 minutes, until they begin to brown. They should feel slightly firm to the touch in the center when they’re done. Let cool on the baking sheet before moving them, as they’re slightly delicate before they’re cooled. These keep best in the fridge!

IMG_5726

Like a boss. And some quinoa.

2013-09-01 11.06.49

You know it’s Labor Day when there’s tartan! Gotta be reppin’ at the Scottish Gatherings and Games in all my Clan Scott-ness, ancient green tartan and all. Like a boss. Or a Scot. Which is pretty much the same thing!

IMG_20130901_123506

Also… I made english muffins again! But… they were kind of flat. Delicious, but flat. So no recipe yet but a picture nonetheless because the little rising muffinlets were cute.

IMG_5714

So. Quinoa.

I kind of have a love-hate relationship with it… I either really do it right and really love it, or I’m rather meh about it. Like for instance if I just cook it with water and then expect myself to eat chicken and veggie on top of it, I’ll do it but I inevitably end up thinking less than flattering thoughts about it in my brain. However! When I do it right, like in these little guys, all is right in the quinoa universe.

Sorry that the carrots are rather aggressively orange in these photos…

IMG_5718

They’re like little hockey pucks of deliciousness! Besides, who doesn’t like an excuse to make things in muffin tins?

Easy to throw together, delicious, and good for me. Of course I want a dinner like that! And versatile enough to be lunch (and breakfast if you’re me, odd child).

IMG_5719

Quinoa Cakes with Peas and Zucchini

I made these in my so-called ‘jumbo’ muffin tins, but I didn’t fill them all the way and I don’t find them to be particularly jumbo anyway sooo… use what you have! I got 12, which was dinner for 3 with enough leftovers for my lunch. The recipe is slightly adapted from The Fitchen, here!

Vegan!

  • 1/2 c dry quinoa
  • 1 c water
  • 1.75 c oat flour
  • 1/4 c rye flour
  • 1 c peas
  • 1/2 c grated zucchini
  • 1 flax egg [1 tbsp ground flaxseed+3 tbsp water]
  • 1/4 c refined coconut oil, melted
  • 1/4 c + 2 tbsp unsweetened rice milk (or other nondairy bev)
  • 1/4 c nutritional yeast*
  • 1.5 tsp baking powder
  • 1 tsp sea salt
  • pepper, to taste

*Nutritional yeast is easy to find in the bulk section—I get mine at Whole Foods

Firstly, cook quinoa! Start water and rinsed quinoa in a medium saucepan, bring to a boil, then turn down to a simmer and let it go, covered, until the water is absorbed (about 15-20 minutes). Don’t peek! It makes it take longer… Fluff it with a fork when done and let cool.

Preheat the oven to 350, and lightly grease muffin tins of choice (I use coconut oil or butter for this).

Grind your own oat flour in a food processor! 2 cups of oats=1.75 c oat flour, or thereabout. I swapped in a 1/4 c of rye flour, but feel free to use all oat. Toss flour into a largeish bowl, stir in cooled quinoa, baking powder, and salt, and set aside. Make your flax egg now, and set that aside as well. Grate zucchini, defrost peas. In a smaller bowl, combine all the liquid ingredients: flax egg, coconut oil, and rice milk, as well as the nutritional yeast.  Stir liquid ingredients, zucchini, and peas into the dry bowl, until just mixed.

Fill muffin tins about 3/4 full, smooth the tops (or not), and pop them into the oven for 25 minutes. These keep well in the fridge to be reheated for lunch or breakfast later!

Happy Tummy Conga Lines

IMG_5705

YOU. GUYS.

I know I have like umpteen zillion banana bread recipes on the blog, but seriously. Ignore the other ones (well, not really–they have their merits too.. just for today!)

THIS is my favorite. Hands down, I’ve-already-eaten-two-slices-and-am-heading-for-another-one-someone-stop-me kind of bread. Like, half the loaf is gone (I’ve had help, let’s be real here).

IMG_5708

And besides that, it is FAB with blackberry jam. Especially when that jam is handmade and acquired from a lovely local source. I’ve never put jam on banana bread before now but I’m probably not going back. Ever.

IMG_5702

Luckily for me, not only is this one a fast and easy one to whip up, but it’s full of healthy for me things like coconut oil and buunahhnuhhsss and whole grains and honey.  Good thing too that we had literally two bunches of dead bananas spread out between the fridge and the freezer and they were looking so sad and dead and brown… clearly they needed to go into something delicious like this. They’re much happier now, they wanted me to tell you.

Go make your dead bananas happy. Bake them into something that then makes your tummy do a happy dance! Mine is, we could have a tummy conga line. Umm yeah okay this is getting out of hand with talking bananas and gastrointestinal conga lines, but seriously. Make, eat, love!

IMG_5706

Why is it gone?!

Coconut Oil and Honey Banana Bread

If you’re not a coconut fan, don’t worry! There’s no coconut flavor noticeable in the bread—I used refined coconut oil for baking, as it can take high heat. This bread is SUPER hydrated (remember, we don’t use the m word), but not squishy. It’s the perfect balance between hydrated and dense, with a nice crumb. It only has a 1/4 c of honey added, so make sure your bananas are deady-dead-dead. The deader the bananas, the sweeter the bread! Mine were literally black. So gross…until they aren’t! This makes one loaf, and the recipe is (ever so slightly modified) from Relishing It, here! SO happy I found it.

  • 1/3 c refined coconut oil
  • 1/4 c honey (mine was local, yay!)
  • 2 eggs
  • 1 tsp vanilla
  • 1.5 c mashed, dead bananas (I used about 5)
  • 1.75 c whole wheat pastry flour
  • 2 tsp baking powder
  • 1 tsp sea salt
  • a few sprinkles of chia seeds (can be left out)

IMG_5699

Preheat the oven to 350, and lightly grease a loaf pan (I use more coconut oil).

In a mediumish bowl, whisk together flour, baking powder, sea salt, and chia seeds. In a smaller bowl, have fun mashing up all of your dead bananas and trying not to be too disgusted by how brown they are. Ahem, moving on…

Stir together coconut oil and honey until they’re creamy and mixed. Slightly beat eggs and then stir them in as well, followed by vanilla. Mix lightly until combined, then stir in dead banana mashup. Adding the dry ingredients a bit at a time, stir them in until the dry is just incorporated–don’t over mix! No one wants tough buhhnahhnuhh breadz.

Pour the batter into the prepared loaf pan, and pop it into the oven for just about 45 minutes—mine came out at 45 but probably could have gone for a few more. Let cool in the pan for a bit, then turn out onto a cooling rack to cool completely. I’m sure it stores well, but as mine is rapidly disappearing I’m sure we’ll have no issues on that front…

IMG_5712

Throwback Thursday and the Lentil Life

IMG_5691

AND THEN. I made lentil bars! Because… well, why not?! And then I sort of became the lentil bar fairy and handed out several at work, one of which went to this particular friend who *claims* that she doesn’t like lentils. Uh-huh. Just wait.

Said friend ate lentil bar.

One day later…

Friend commissions an entire batch of lentil bars for eating purposes!!

VICTORY OF THE LENTILS! Muahhahah.

And guess what? I have a new nickname!

I’ll give you one guess…

Lentil!!!

IMG_5694

Naturally. The now lentil-converted friend decided I was henceforth to be dubbed Lentil (always said with some sort of accent, of course), mostly because we have a running joke that she brings meat and I bring rabbit food for lunch…and then when I bring beef it’s like.. WOAH. So yeah. A very apropos nickname, I would say ;)

And one more for your viewing pleasure… Throwback Thursday! I was six. Things haven’t changed much…

HMS 1996

Lentil Bars

Recipe slightly adapted from She Bakes Here! I’ve made this twice—once as a single recipe, once doubled. I used green lentils once and red lentils once, and I think I prefer red, though you can use either. If using green, make sure you cook them just a little bit longer so they’re easily mushable (technical term). I reduced the sweetener a little so these aren’t overly sweet, but perfect for a mid morning or on the go snack. They were a big hit with the work peeps!

As posted, the recipe makes a single batch in an 8 by 8 pan (I used a circular pie dish).

Vegan, refined sugar free.

  • 1/2 c red lentils
  • 1 c water
  • 1.5 c rolled oats
  • 1/2 c whole wheat pastry flour
  • 1/4 c ground flaxseed
  • 1/2 tsp cinnamon
  • heaping 1/4 tsp salt
  • 2 tbsp almond butter
  • 1/3-1/2 c maple syrup
  • 1/4 c dark chocolate chips

Bring water to a boil in a medium saucepan. Add lentils, reduce to a simmer, and cook for about 15 minutes until very soft. Drain, if needed. Mash lentils a bit with a fork (though they should be pretty much like puree already), and set aside in a large bowl.

Preheat oven to 300, and line your baking pan of choice with parchment paper.

Using the same bowl the lentils are hangin’ out in, add oats, whole wheat flour, flaxseed, cinnamon, salt, almond butter, and maple syrup. Toss in chocolate chips and stir to combine (seriously, could this be any easier?). Once incorporated, spread the dough into your prepared pan—I found it easiest to use my fingers to spread it out, as it’s really thick. Get it mostly even and then pop it into the oven for 20-25 minutes, until the oats on top are slightly crispy.

Let it sit in the pan for a few, then pull the whole thing out by grabbing the parchment. Let cool completely on a rack before slicing! These keep well in tupperware at room temp for a few days.

IMG_5695

Apparently I love veggies. Who knew?!

IMG_5668

Stuffing things is fun!

It’s somehow very rewarding to encapsulate your dinner into a tidy little package. Or into a pepper, whatever. And it’s even better when there’s cornbread involved because seriously, when does cornbread NOT make things better?! Right, never, that’s what I thought.

But ick. Why do I always end up making things like this when it’s disgustingly hot outside? It’s like I’m hardwired to automatically want things that require baking as soon as it gets above 90. Because heating your oven to 425 on a day when it’s still over ninety after 5 pm is SUCH a great idea… not. I just love opening the oven door to be subjected to a massive blast of heat… not to mention sticking my face anywhere near it to check and see if things are done.

IMG_5674


Ughhhh. Is it fall yet? Because I have an abundance of winter squashes that snuck into our garden and I need to use them. And they usually rudely require ovens. Or at least sometimes. But it’s also too hot for soup and I sadly don’t have an immersion blender (anyone have an extra they want to chuck my way? Anyone? Anyone? … Bueller?) which makes soup making messy.

Okay. Enough whining because I can’t do anything about the weather and these stuffed peppers were delicious!! Easy and healthy too, so obviously they should go at the top of your to-make list immediately. Maybe just wait until it’s not ninety in the shade…

IMG_5661

Apparently I love veggies. Who knew?! I “discovered” this after I chopped up a metric ton very meticulously… there was a massive pile of greens in there too (natch) that didn’t make it into the picture (sneaky little suckers).

IMG_5671

Bean and Green Stuffed Peppers with Cornbread

Serves 3, with leftover bean/green mixture and cornbread (mostly because I looooove leftovers). Recipe from… the inside of my slightly disorderly brain! The cornbread is my favorite recipe—SO FREAKING GOOD. A little crumbly but properly hydrated (we know how I hate the ‘m’ word), and slightly sweet. So delicious combined with the beans and greens, and crammed inside a pepper. Vegan, full o’ veggies, refined sugar free, and whole grain. Wheeee!

For beans+greens:

  • 3 largeish bell peppers, de-seeded
  • 1 can pinto beans, rinsed and drained
  • 1 can black beans, rinsed and drained
  • 3-4 c mixed greens (I used spinach, chard, kale)
  • 1 zucchini, finely diced
  • bell pepper remnants from around the stems (waste not, want not!)
  • a handful of mushrooms, finely diced
  • a pinch of nutritional yeast
  • ~1 tbsp tahini
  • salt and pepper to taste
  • olive oil

For cornbread [lightly adapted from this bomb recipe, at Eat Well, Party Hard, here!] [refined sugar free, vegan]

  • 1 c cornmeal*
  • 1 c whole wheat pastry flour*
  • 1 tbsp baking powder
  • 3/4 tsp sea salt
  • 2 flax eggs (2 tbsp ground flax+6 tbsp water)*
  • 1/4 c coconut oil, melted*
  • 1/6 c maple syrup (1/4 if you like a sweeter bread)*
  • 1 c non-dairy milk (I use rice milk usually)*

*Always organic!

IMG_5666

For the peppers, bring a large pot of water to a boil. Once boiling, drop in peppers and cook until they’re soft, about 10-15 minutes. Remove from water and place in a casserole dish, and set aside.

IMG_5664

For the cornbread: Make flax eggs and set aside. In a large bowl, whisk together dry ingredients. In a smaller bowl, combine melted coconut oil, maple syrup, and rice milk. Add wet into dry, stir in flax eggs, and mix until just combined. Set batter aside temporarily.

Preheat oven to 425.

In a largeish sauté pan, heat a glug of olive oil over medium, and add diced zucchini, bell pepper remnants, and mushrooms. Sauté for a few minutes, then add greens and continue to let them cook (you may need to cover the pan to let the greens reduce in size a bit). Add more olive oil if needed. Stir in both types of beans, then nutritional yeast, tahini, and salt and pepper to taste. Let cook over low for 5-10 minutes, enough to let the oven finish preheating.

Fill the cooked peppers about 3/4 of the way with the bean mixture, then top with a layer of cornbread batter.  I had leftover cornbread batter, so I baked it separately into my two 6″ cake pans. Use whatever pan you have on hand, or else bake it on top of the remaining beans (sans peppers). I let my peppers go for 17 minutes, until a tester came out clean from the cornbread layer. The cornbread usually bakes for 15 minutes in a dark pan, but these went a bit shorter as they were smaller volume. Test as you go! Mine took about 10-15 minutes total, as I put them in with the peppers at first.

Serve hot!

IMG_5680

All the lentils, all the time

IMG_5660

Soo… mo’ lentils!

Mmm. For such a tiny little thing they pack a nutritional wallop and are astoundingly delicious.

IMG_5655

In other news… I love when I can walk outside and pick a snack out of my garden.

IMG_5635

And that the crepe myrtle in the front yard is practically exploding. When I was in school it seemed like I would always miss the blooms, but this year it’s making up for it in full force. See? Pink explosion.

IMG_5636

Anyway. OH! I almost forgot. Pluots are amazing right now, you should go eat one.

IMG_5644

Right. Lentil pasta. An excellent idea, not sure why I hadn’t thought to do this before. The sauce texture kind of resembles bolognese but is obviously meat-free, which is a nice alternative and just as delicious. Besides, lentils are cheap and filling and super good for you, so everyone wins! Besides all that there is essentially a metric ton of veggies crammed in here, so you can feel reeeeally good about eating it. Winner, winner, lentil dinner! Ha.

IMG_5652

I don’t think my brain is working too well on account of a really filling and tasty lunch (nap time? I think yes) soooo… I’m going to leave it at that. Pictures for you, hooray!

IMG_5649

Lentil Marinara

Recipe serves 3 for dinner, with bountiful leftovers (so really 4 for dinner with some change). Healthy and delicious, and relatively fast, this can be on the table in less than an hour.

  • 1 c  lentils, rinsed (I used French lentils, they’re smaller and chewier)
  • 2 c water
  • 1 onion, diced
  • a good glug of olive oil
  • 1/2 clove garlic (I used 1/2 of the little frozen chunks TJ’s sells)
  • fresh basil, marjoram, oregano and sage to taste (Dried is fine too)
  • salt and pepper, to taste
  • 1/6 c (ish) good red wine (Optional. I never measure)
  • 1 bell pepper, diced
  • a few heaping handfuls of mixed greens or spinach
  • 1/2 zucchini, grated
  • 2 c green beans, parboiled
  • 1 can of tomato sauce (just tomatoes)
  • pasta noodles of choice for serving
  • avocado for serving, optional (but recommended!)

IMG_5642

Combine lentils and water in a saucepan. Bring to a boil, then reduce to a simmer and let cook until the lentils have absorbed most of the water and are soft but still have a bit of bite, about 30 minutes. Drain and set aside.

In a  sauté pan, toss in a bit of olive oil and heat over medium-low. Sauté onions until translucent, about 5-10 minutes depending on your onion-crunchy preference. Add garlic, basil, marjoram, oregano, sage, and wine and sauté a few minutes more. Add in bell pepper, mixed greens, zucchini, and green beans, and keep sautéing, until the veggies are cooked and delicious. Toss in the can of tomato sauce, salt and pepper to taste, and the cooked lentils. Cover and let simmer for about 15 minutes to get all those wonderful flavors to comingle… then serve over noodles! This is excellent topped with avocado, or cheese if that’s your thing!

IMG_5657