Death by chocolate via skillet

IMG_4627

Hello!

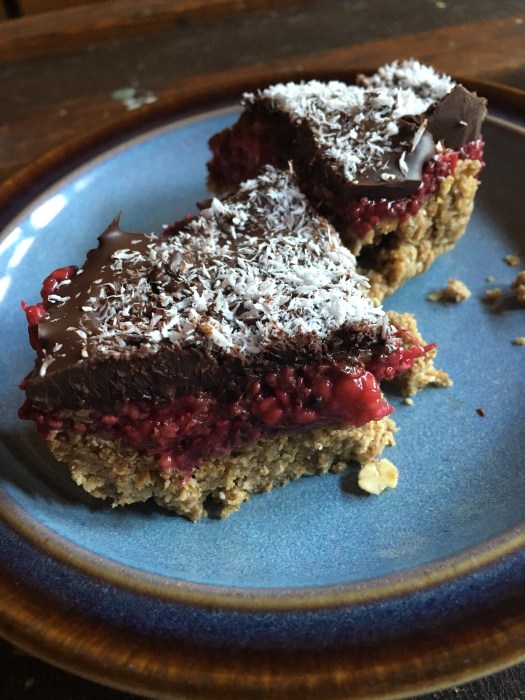
This is a rather belated post / a compilation of a lot of things that have transpired out of my oven of late… I have no other excuse other than that I’ve just been lazy on the blogging front. And also it’s been HOT. So running the oven is the last thing I ever want to do when it’s a thousand degrees in the shade. Despite that, I’m sharing these brownies that require an oven because a) they’re amazing and you need them and b) I made lemon bars that got eaten so fast there was no picture to be had but they were AMAZING and if it cools down several degrees I’ll no doubt make them again soon and hopefully get in some pictures so you can see the deliciousness, in case you don’t believe the words (though you should).

Let’s see, what else has been shakin…

Occasionally I have fun with fans.

IMG_4625

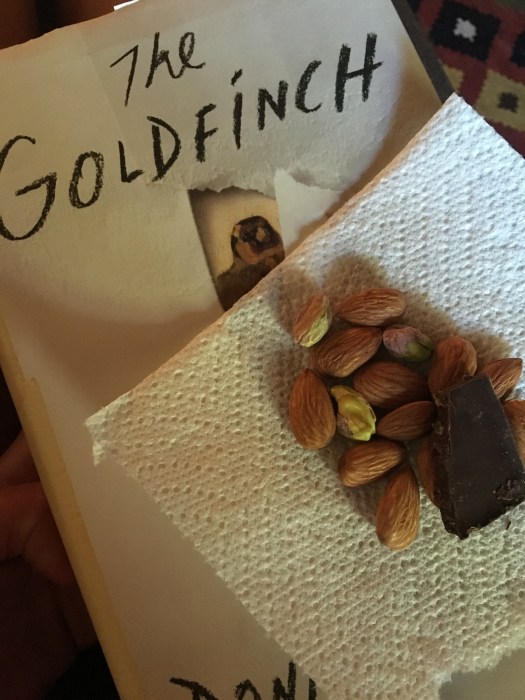
I’ve been doing a lot of this, and it’s been glorious (btw; highly recommend this book; I couldn’t put it down).

IMG_4635

I got to see my favorite band ever ever ever in the beginning of June!! Caravan Palace is AMAZING.

IMG_4557

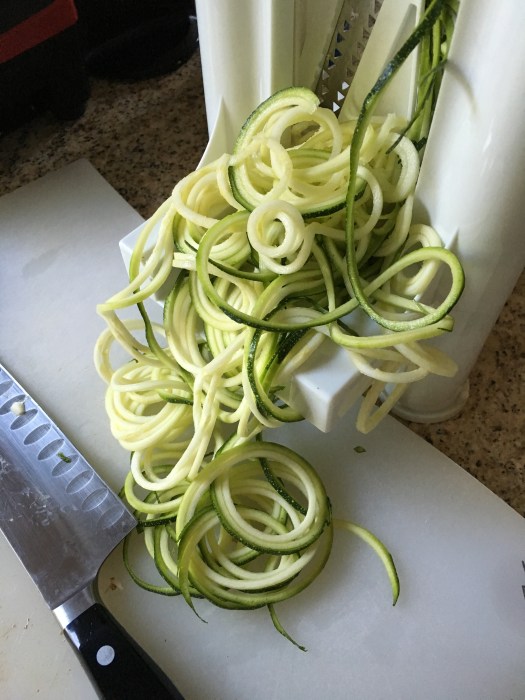
Summer means a glut of zucchini (at least in theory; I am [im]patiently waiting for the zucchini plant to really get going; at the moment am having to restrain myself from ripping the somewhat tiny zucchinis off the plant and eating them immediately. That being said, I did get to get out my spiralizer again after a long hiatus, and that was fun.

IMG_4588

But.

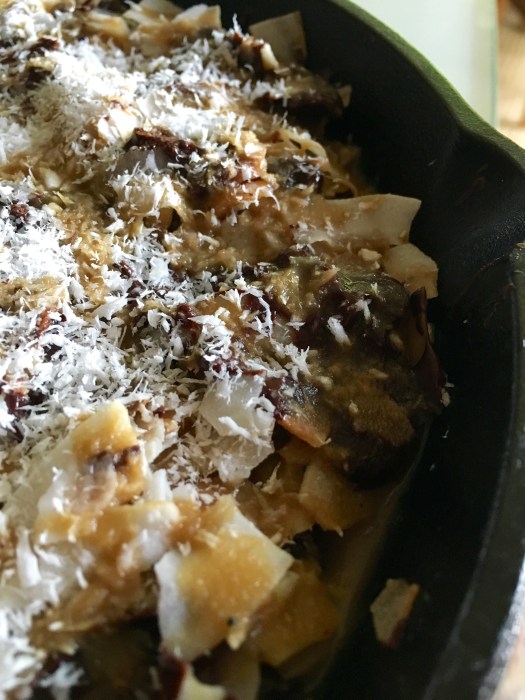
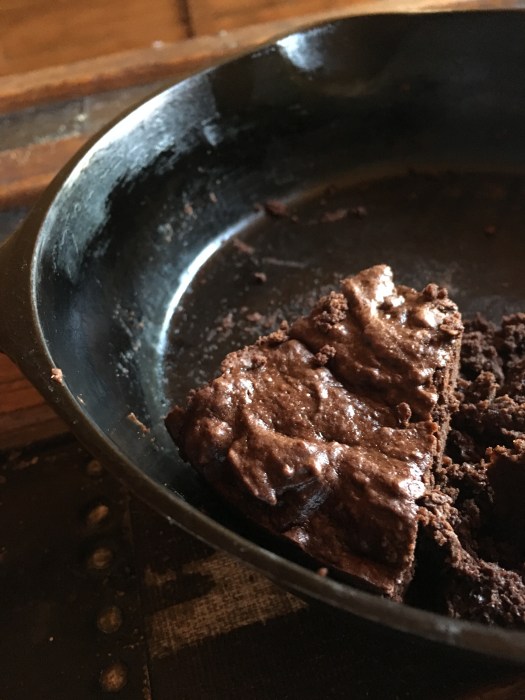
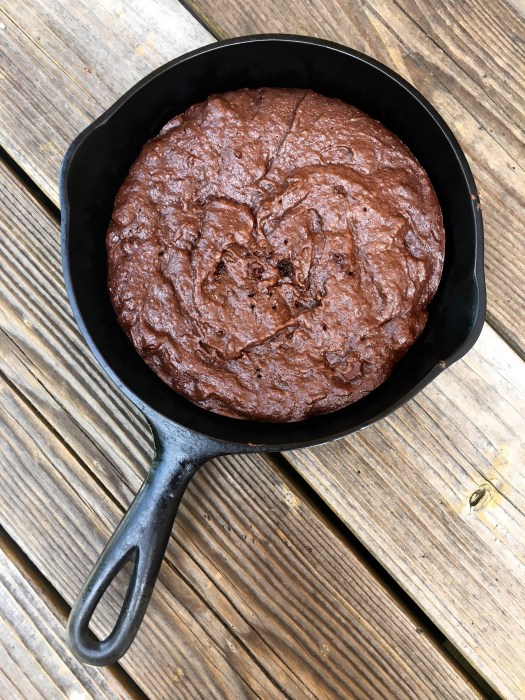
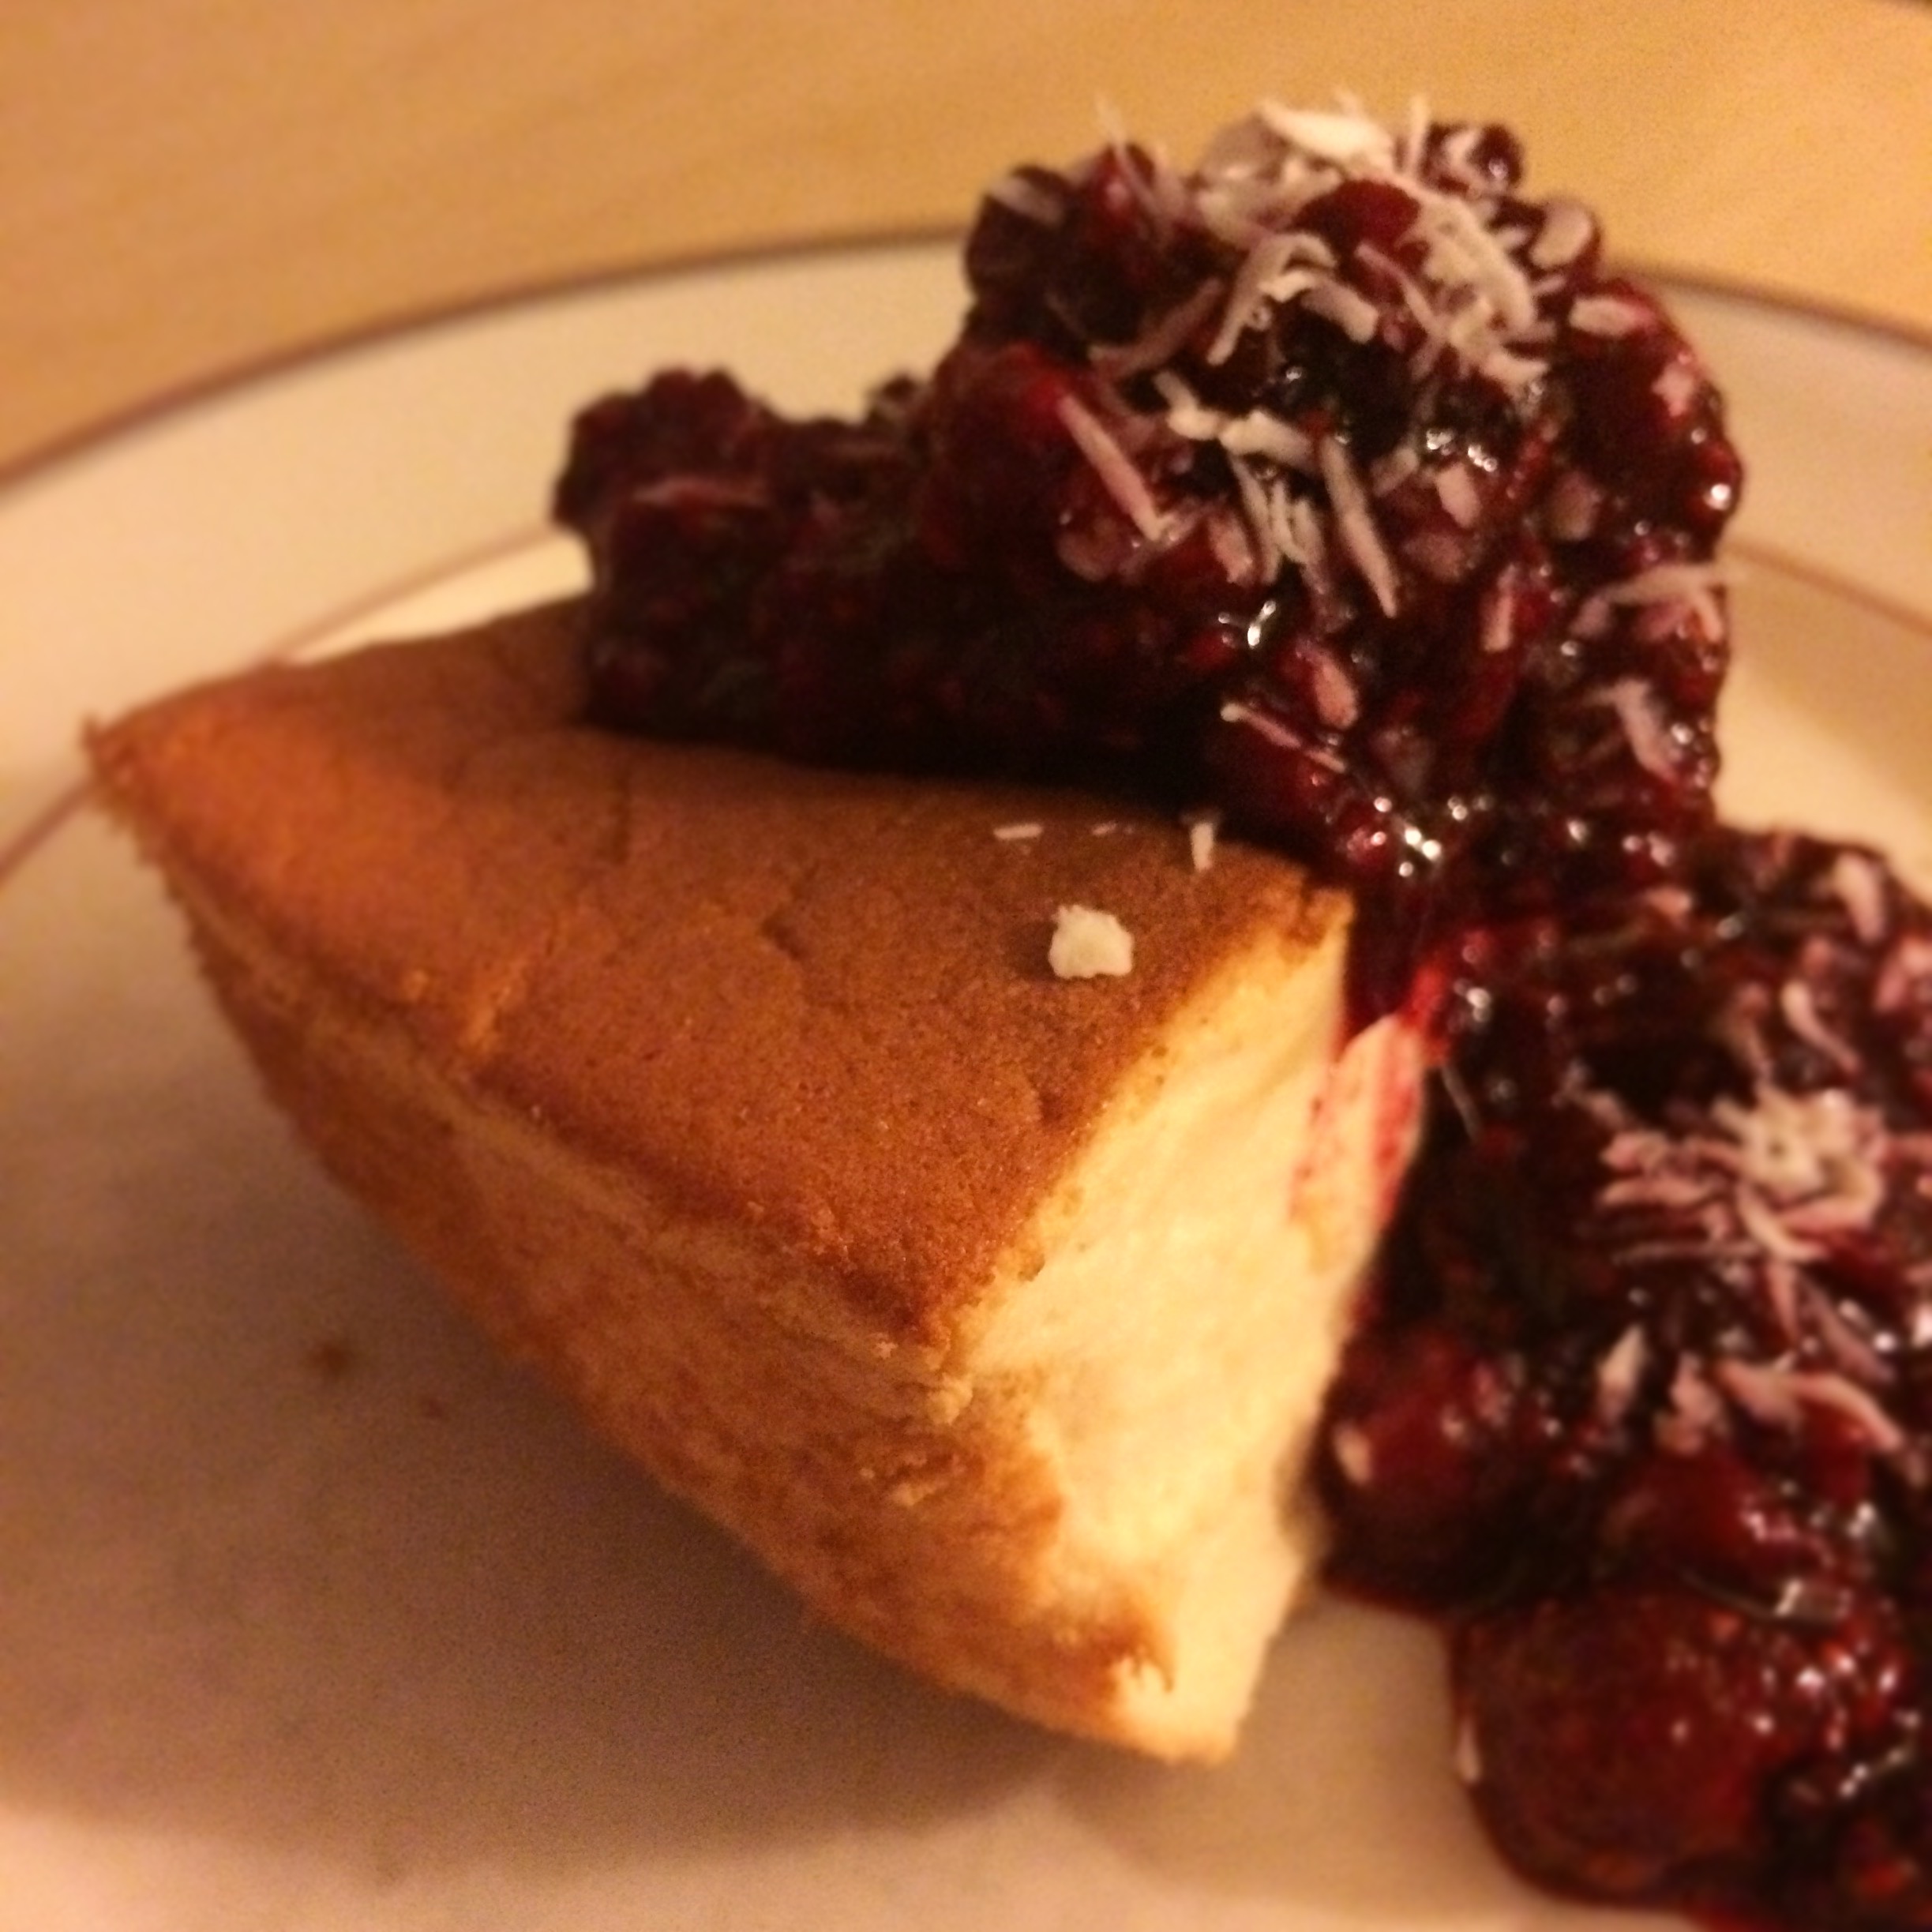
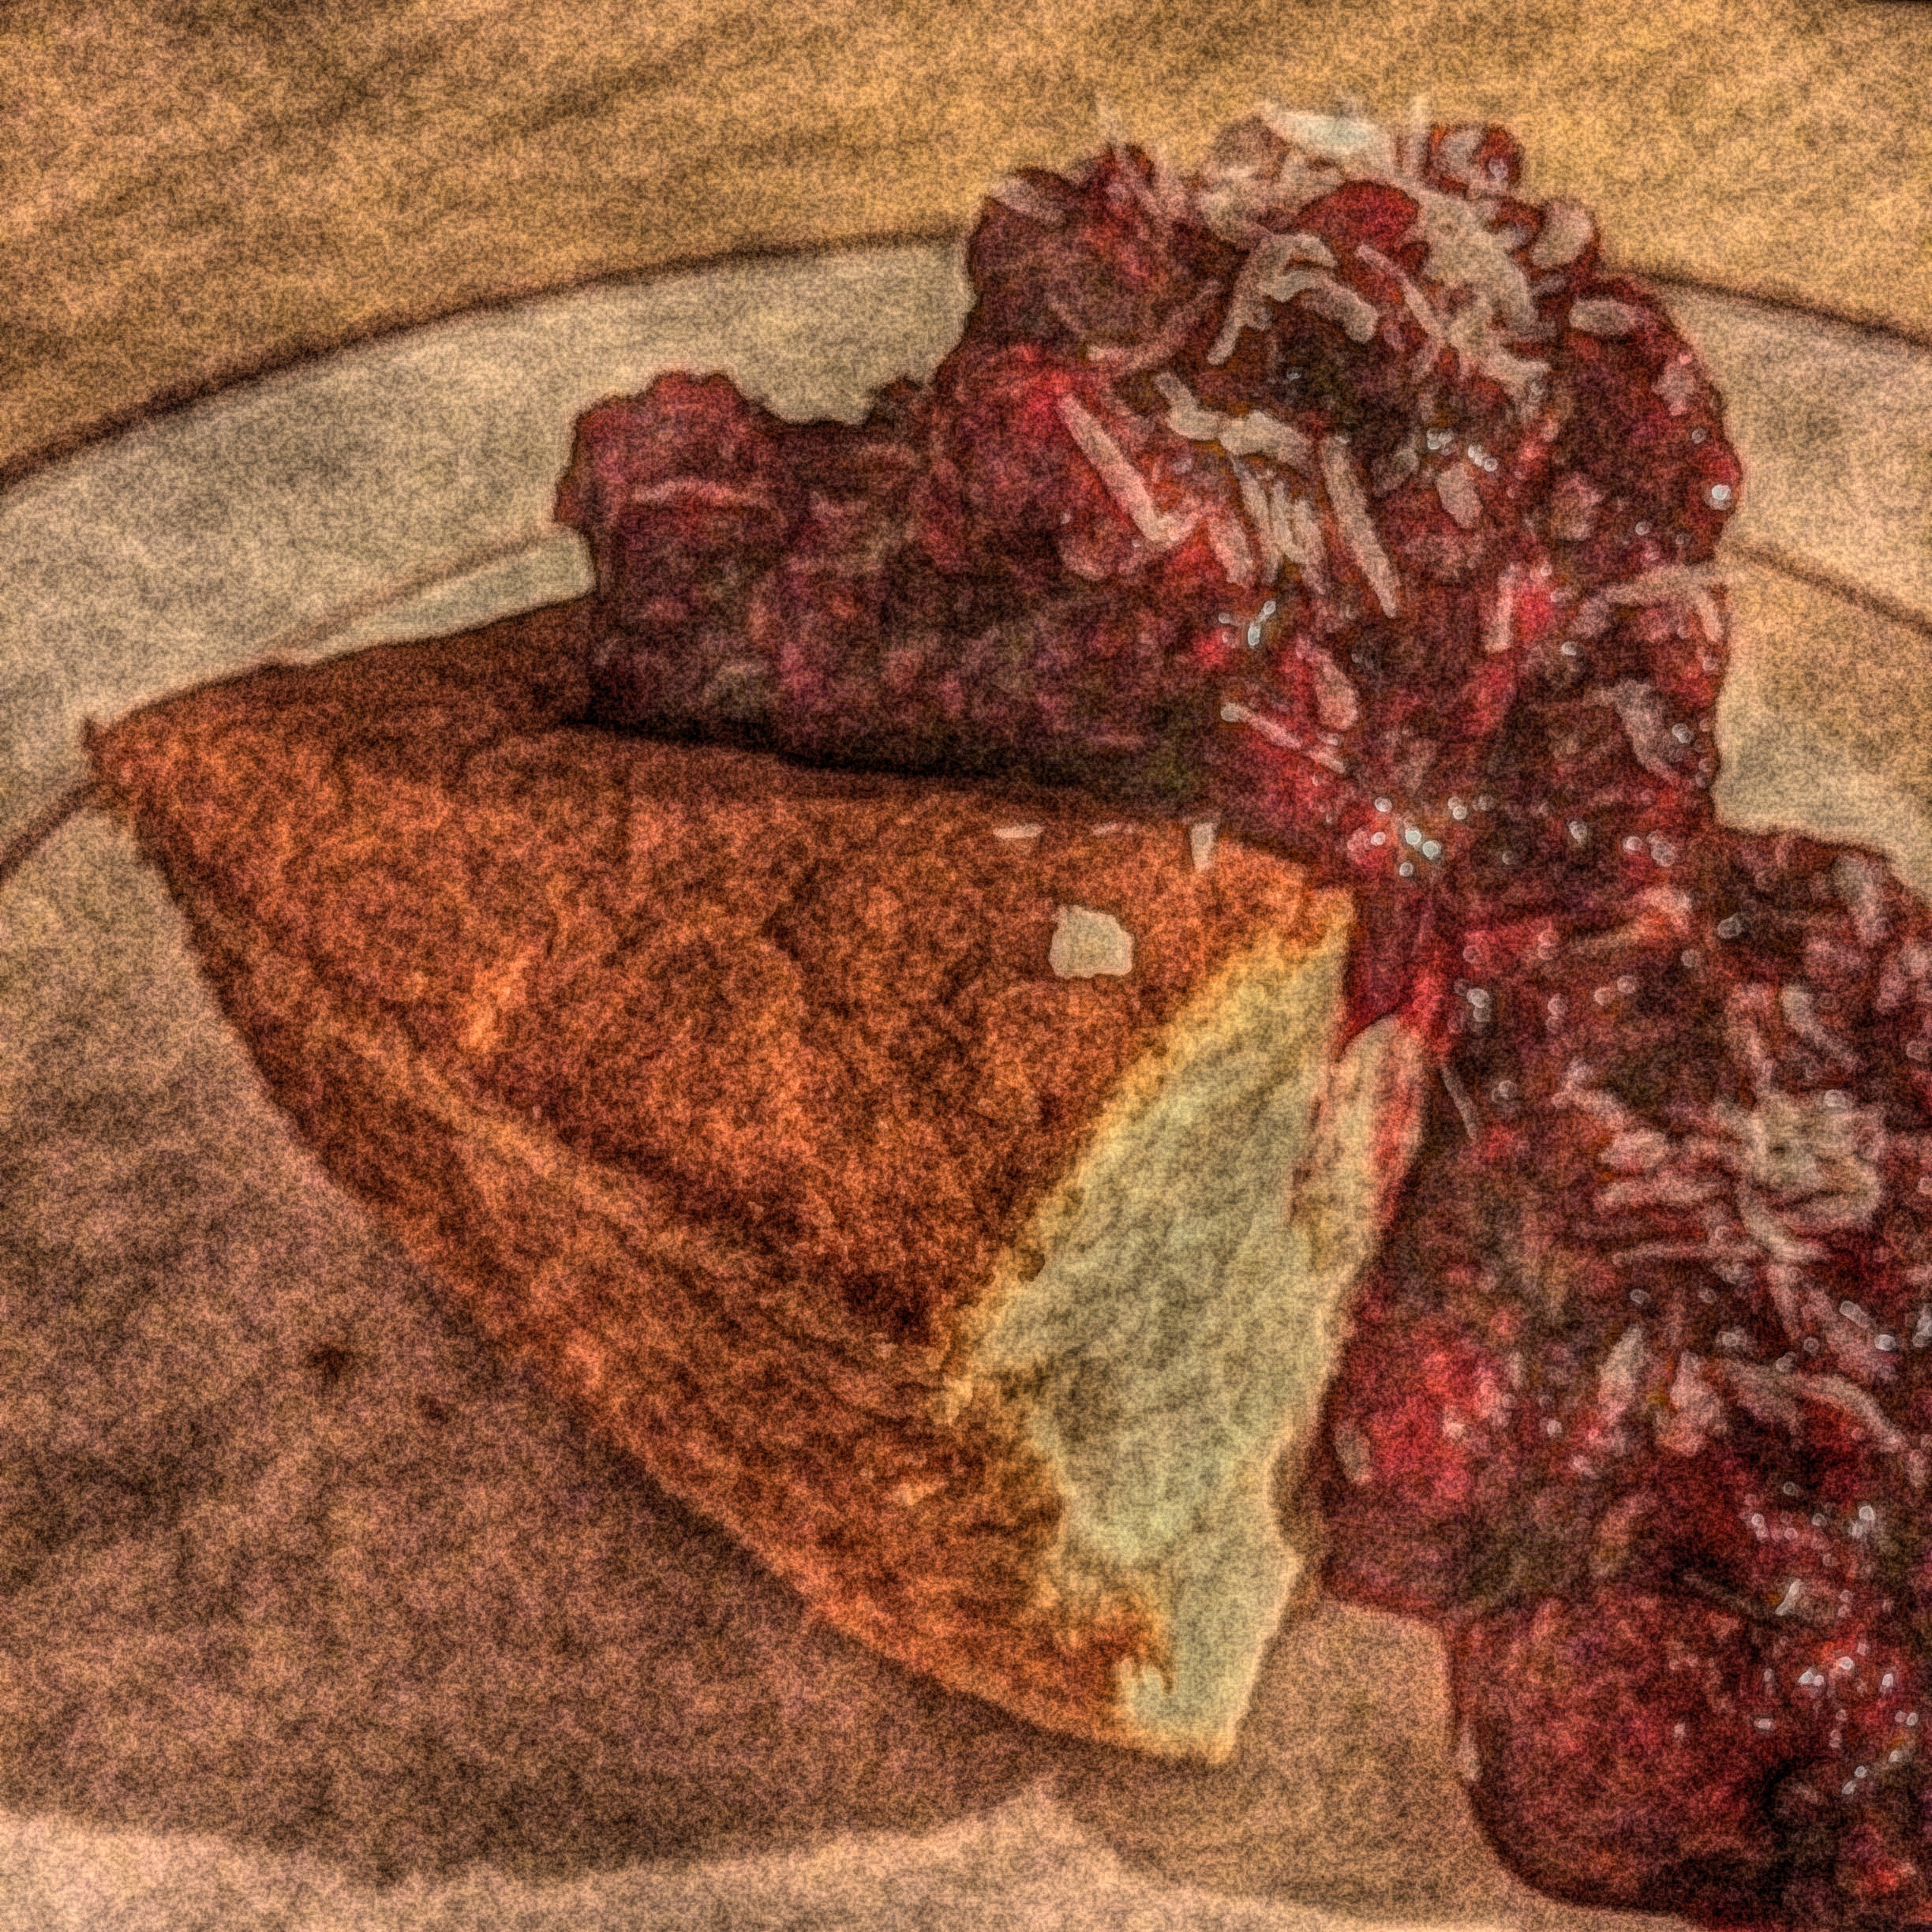
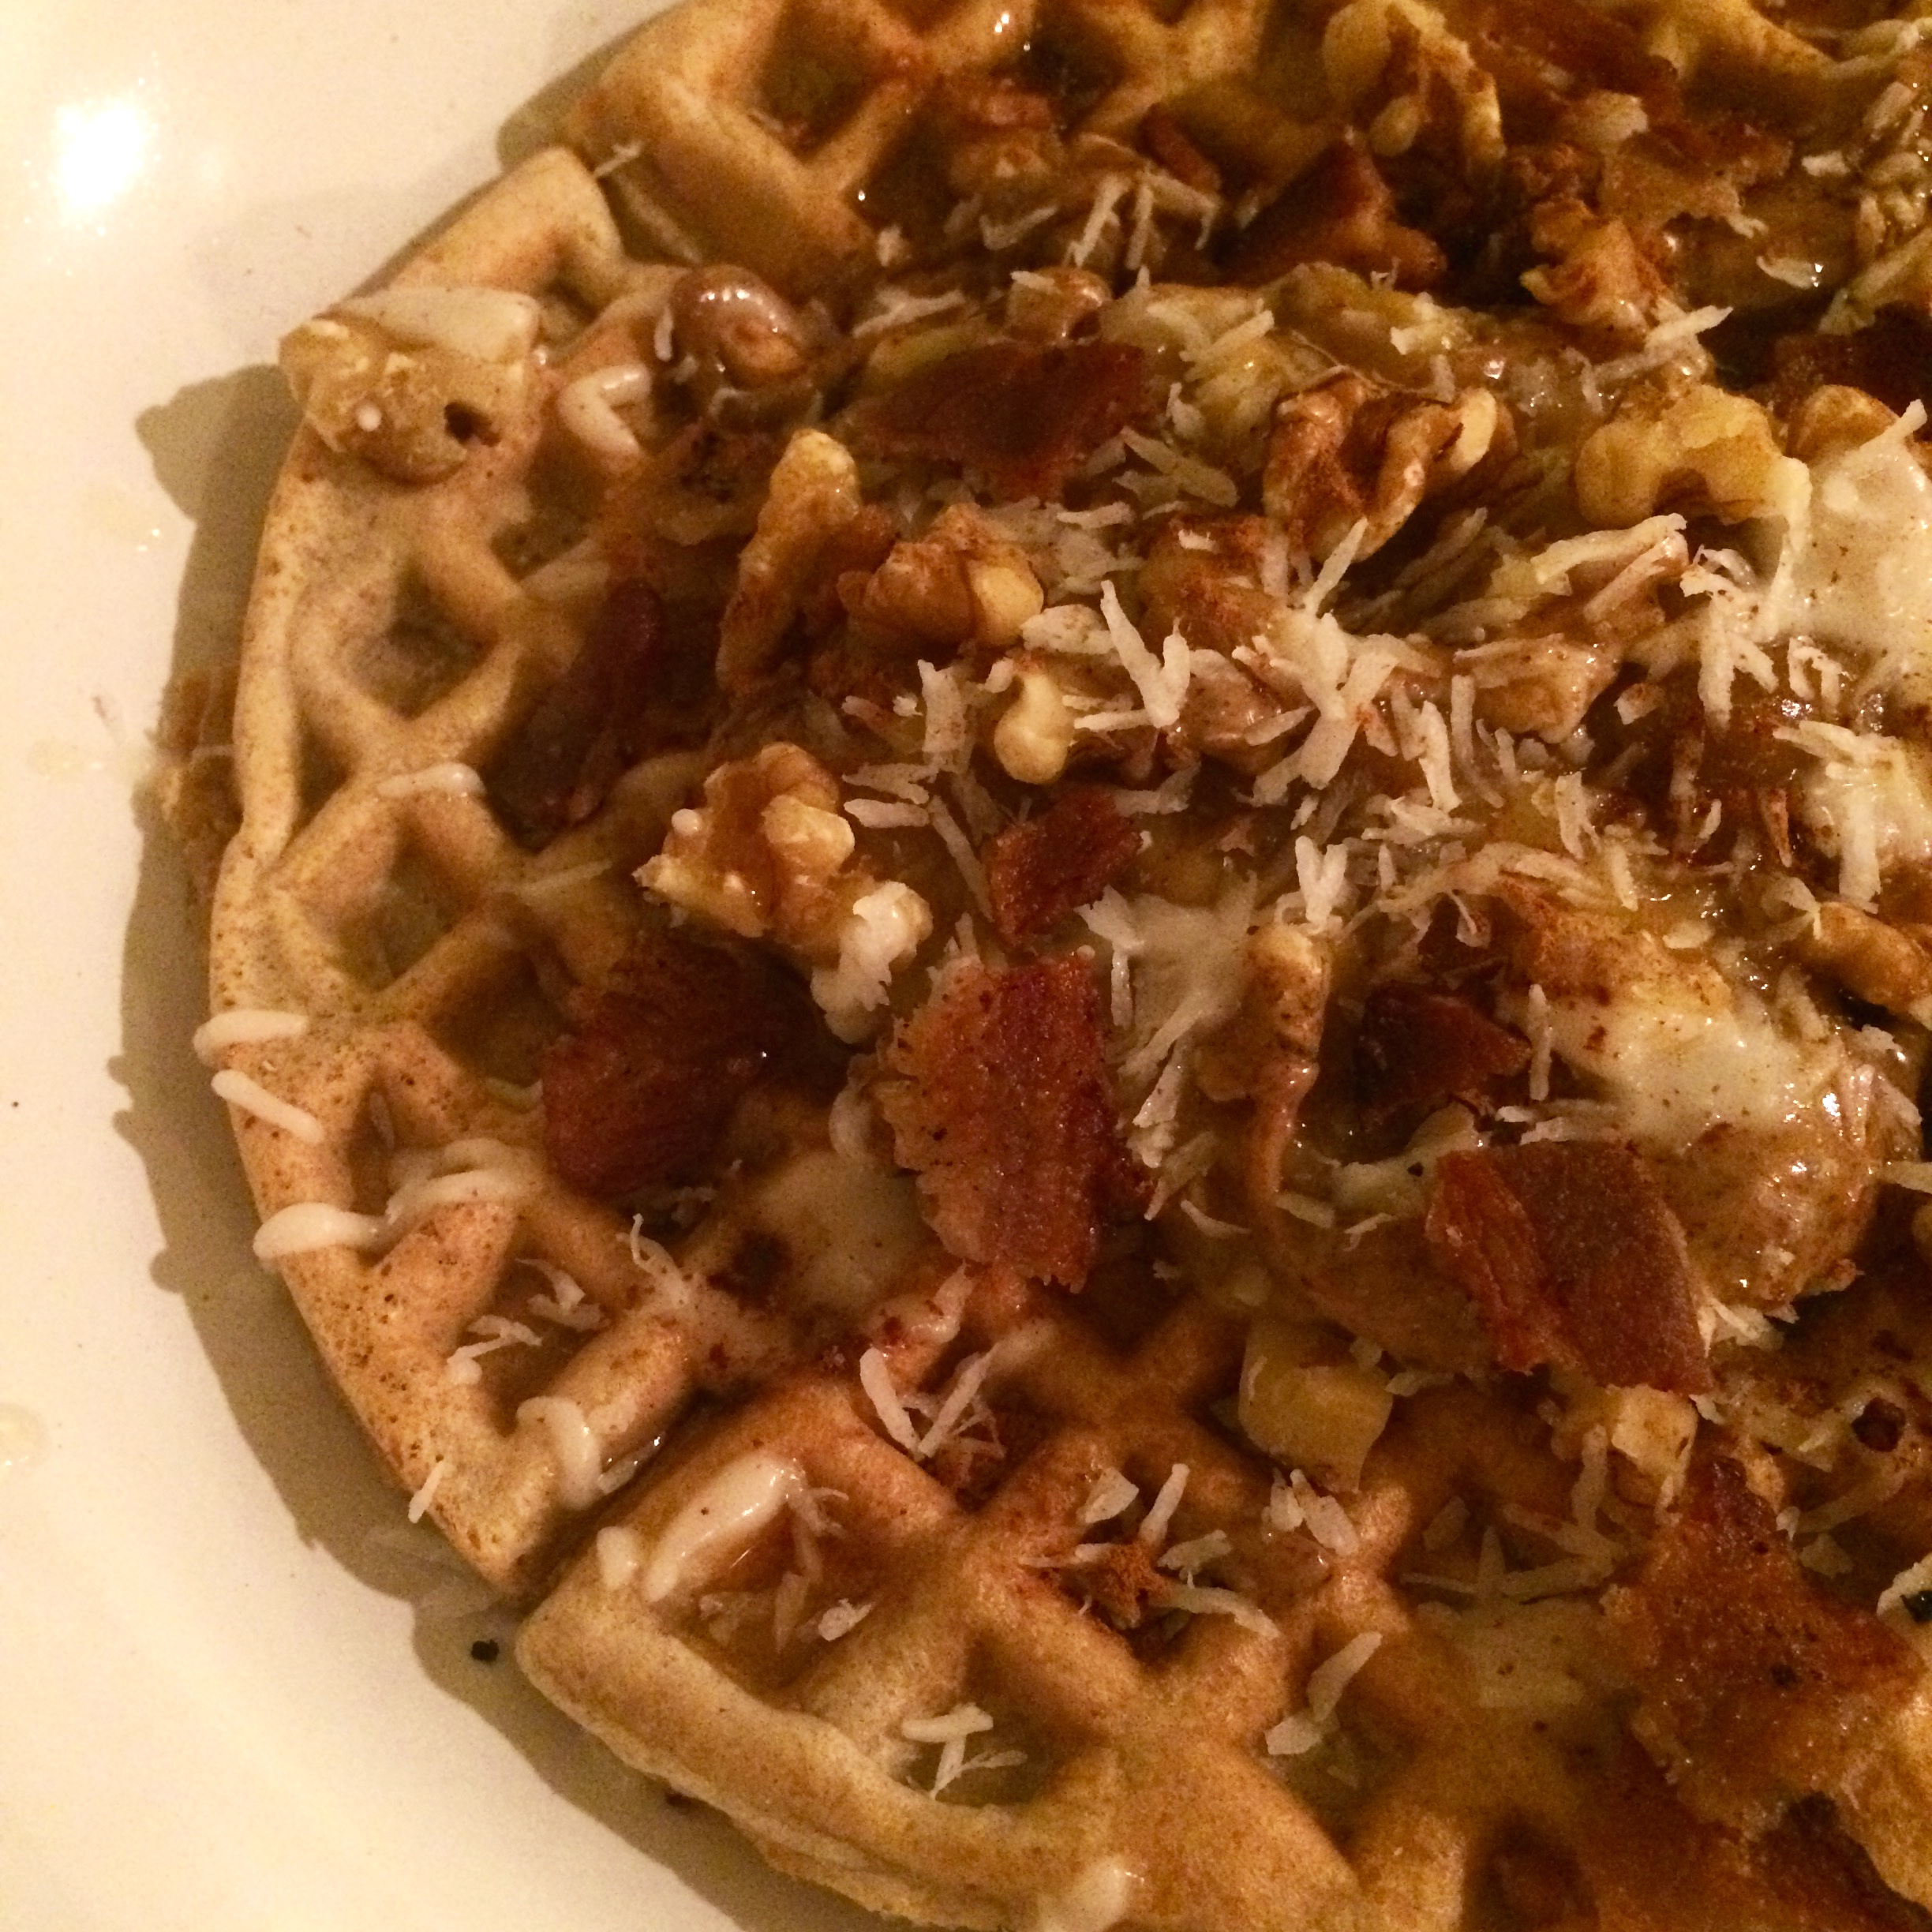
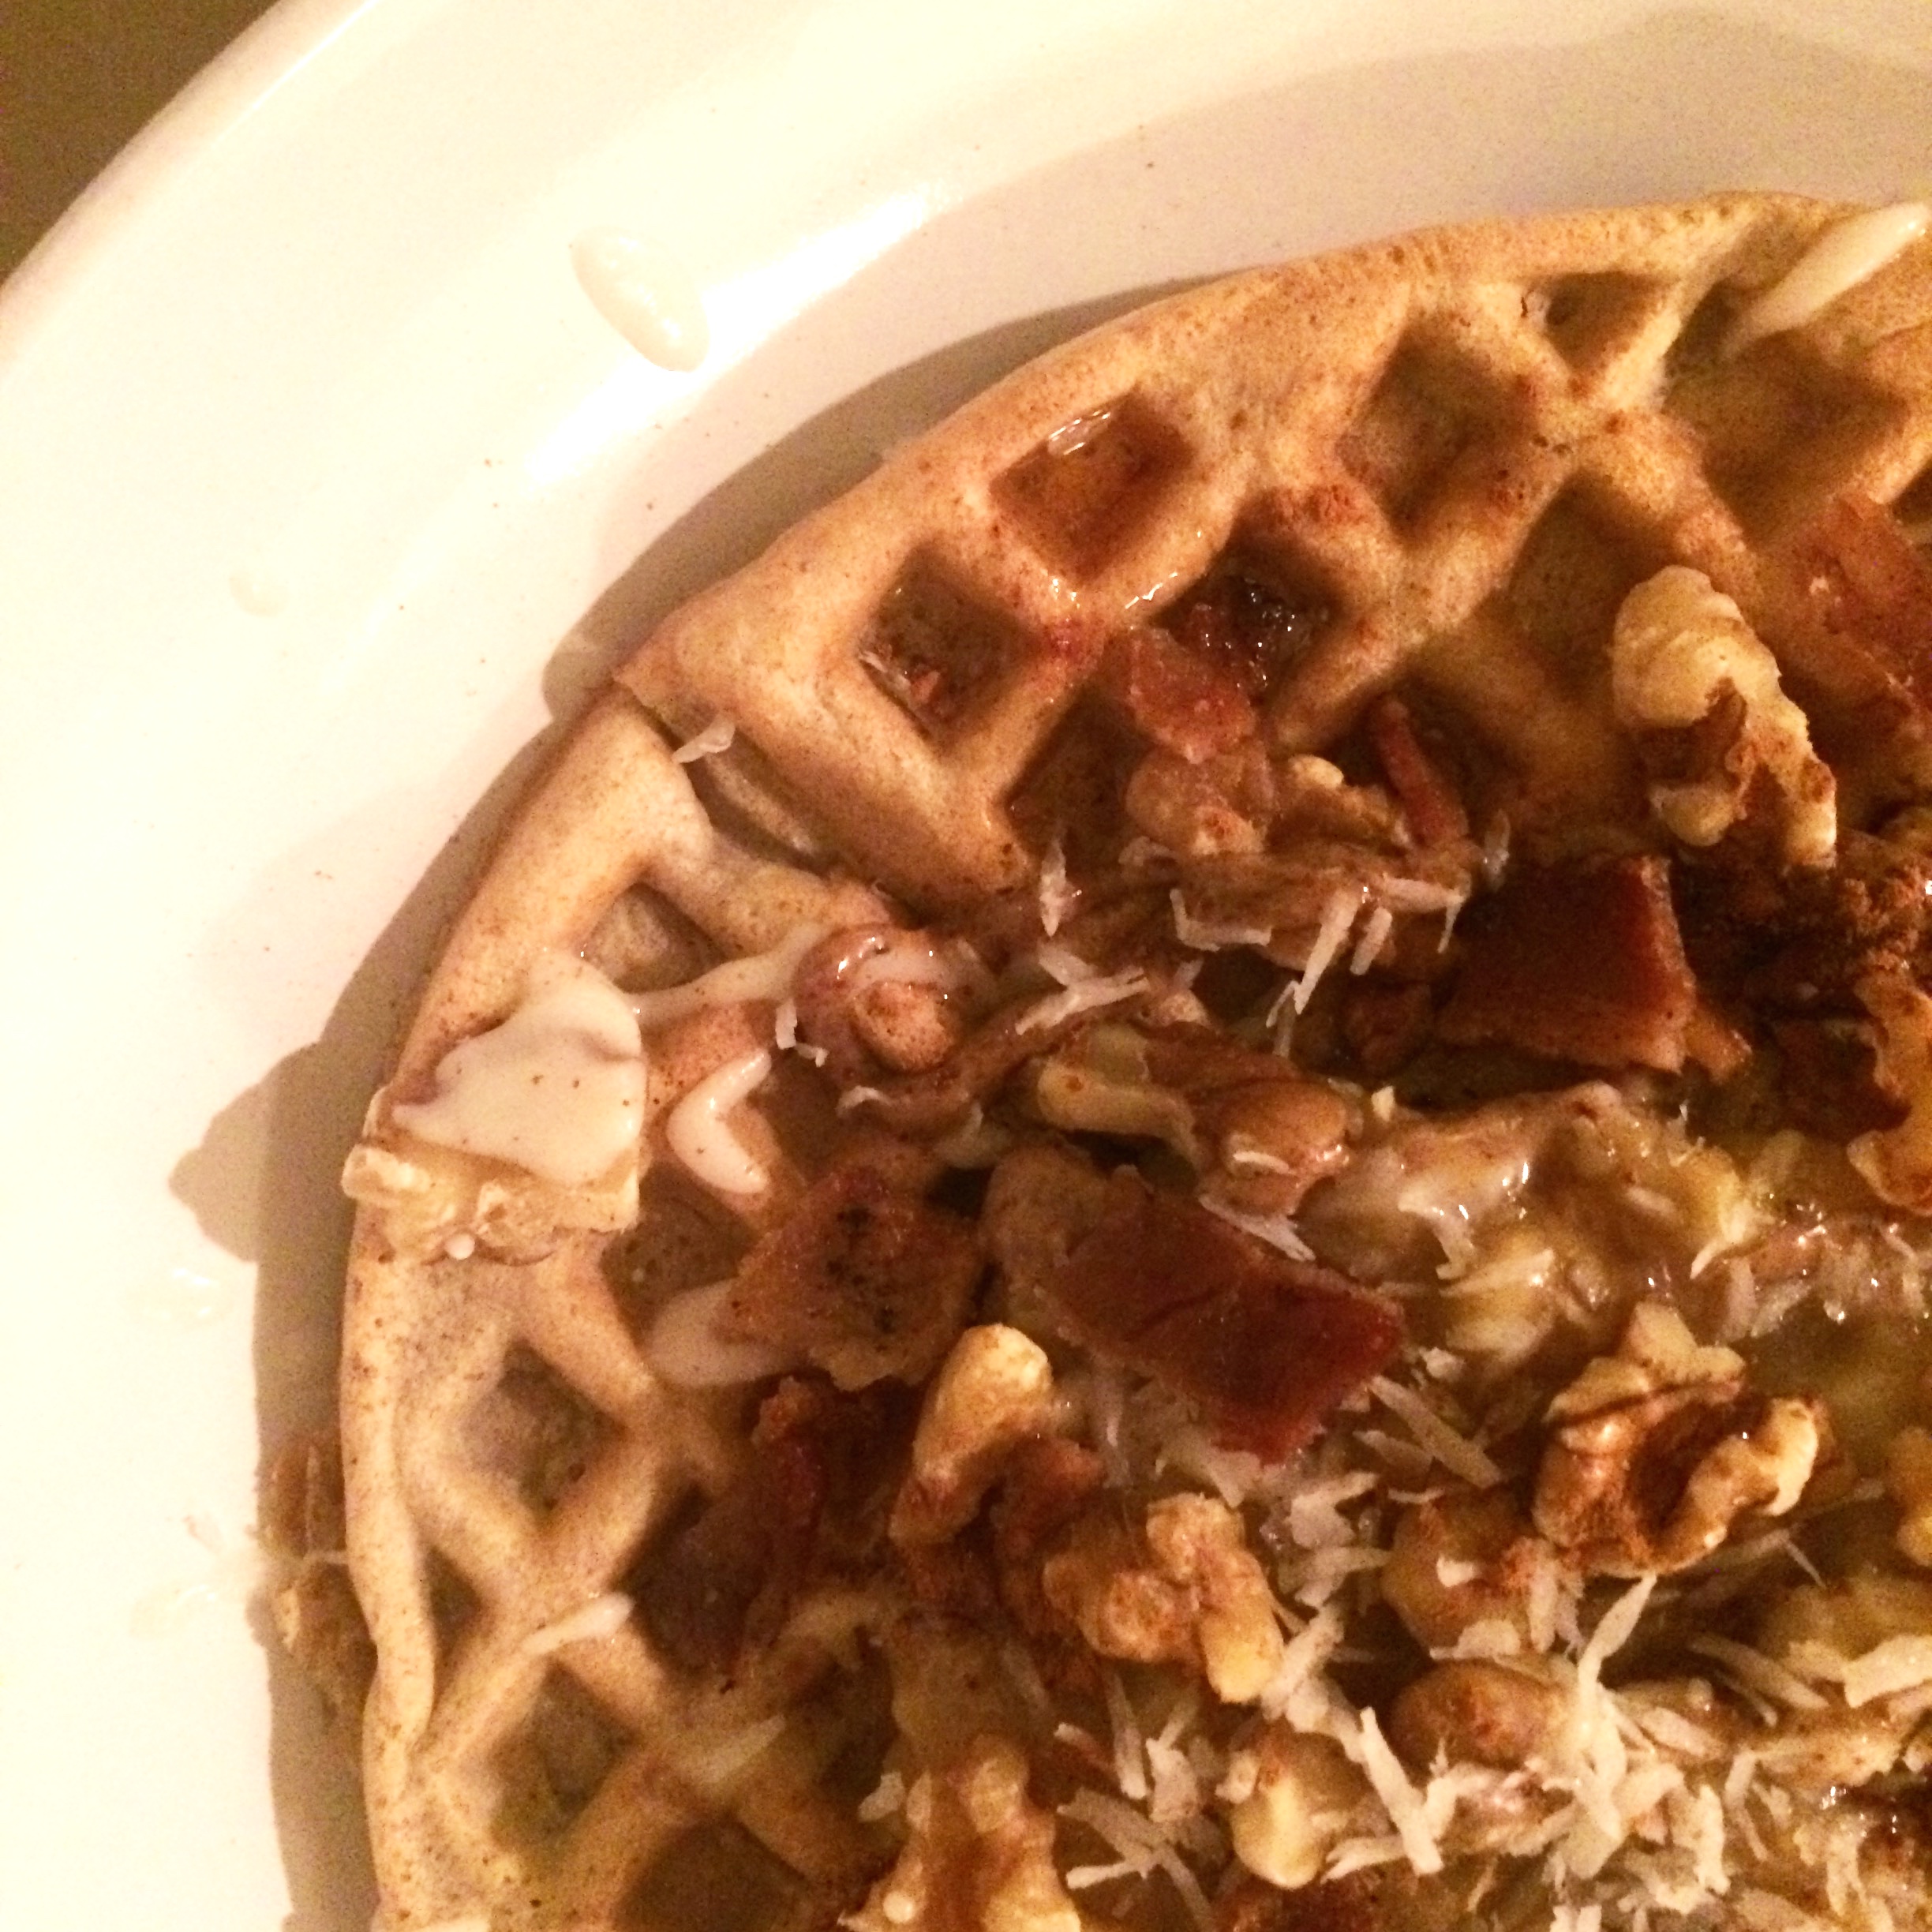
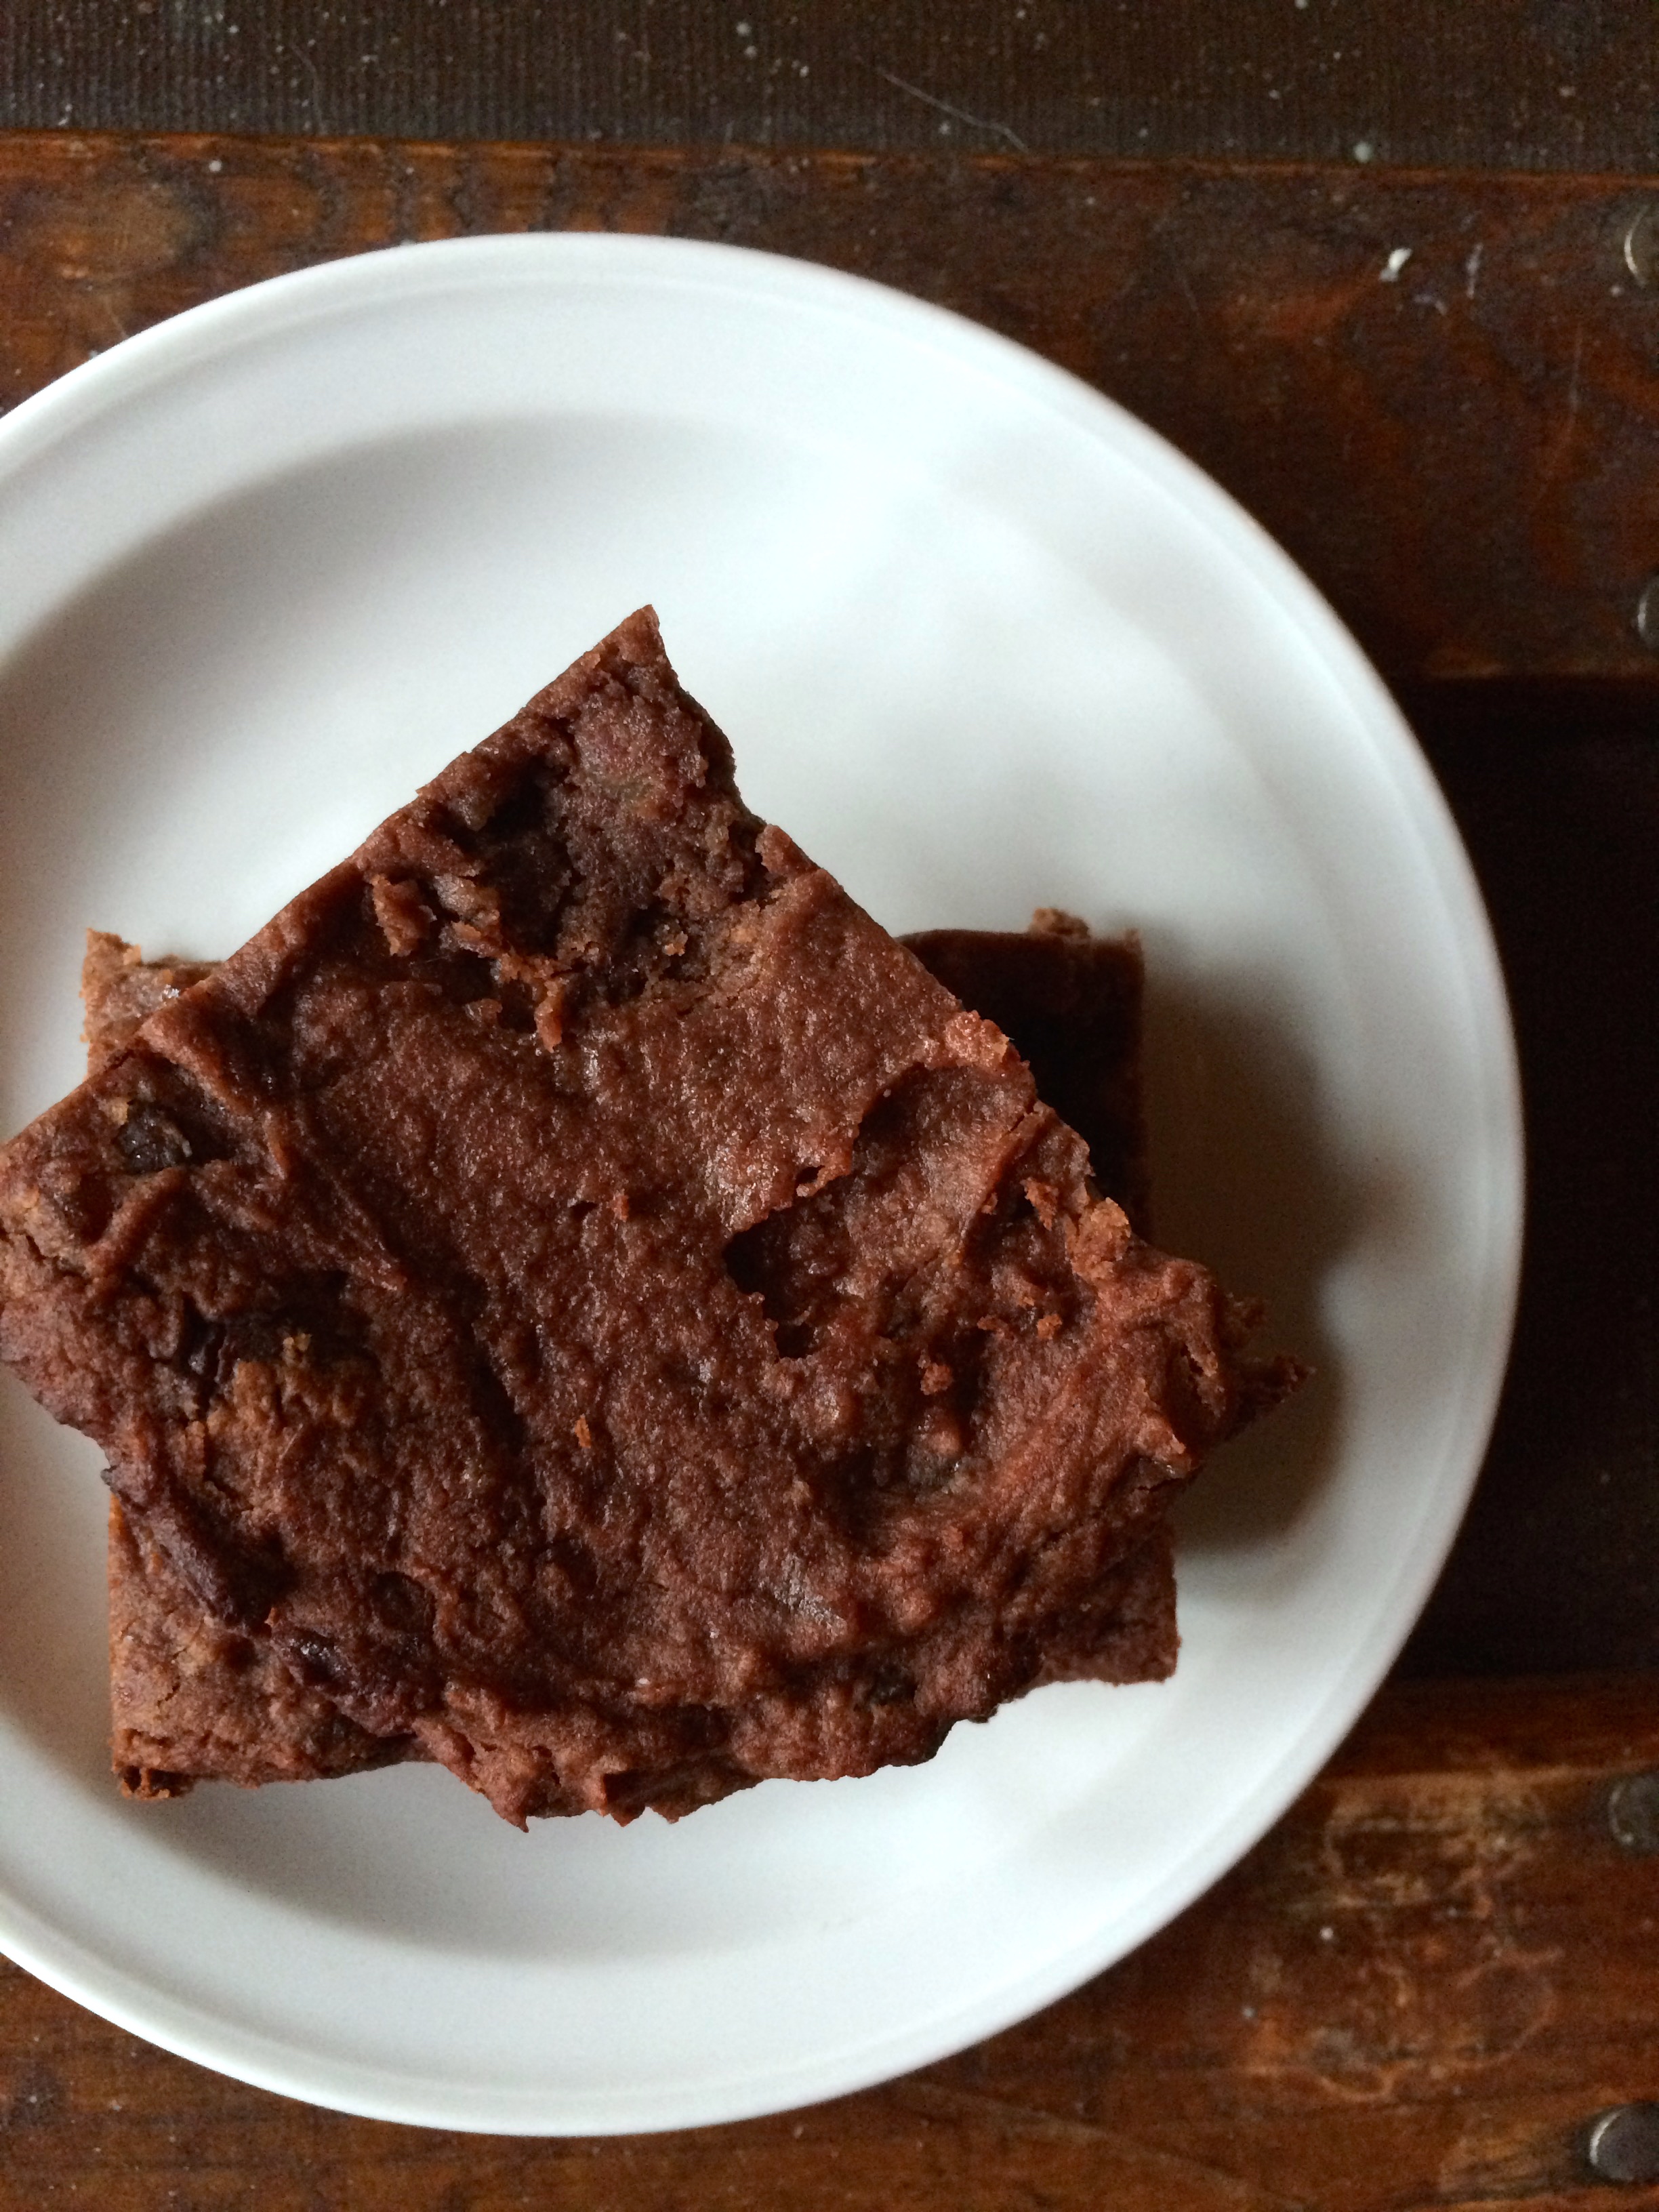
These brownies. Do you see that caramel sauce swirl going on down there?!

IMG_4626

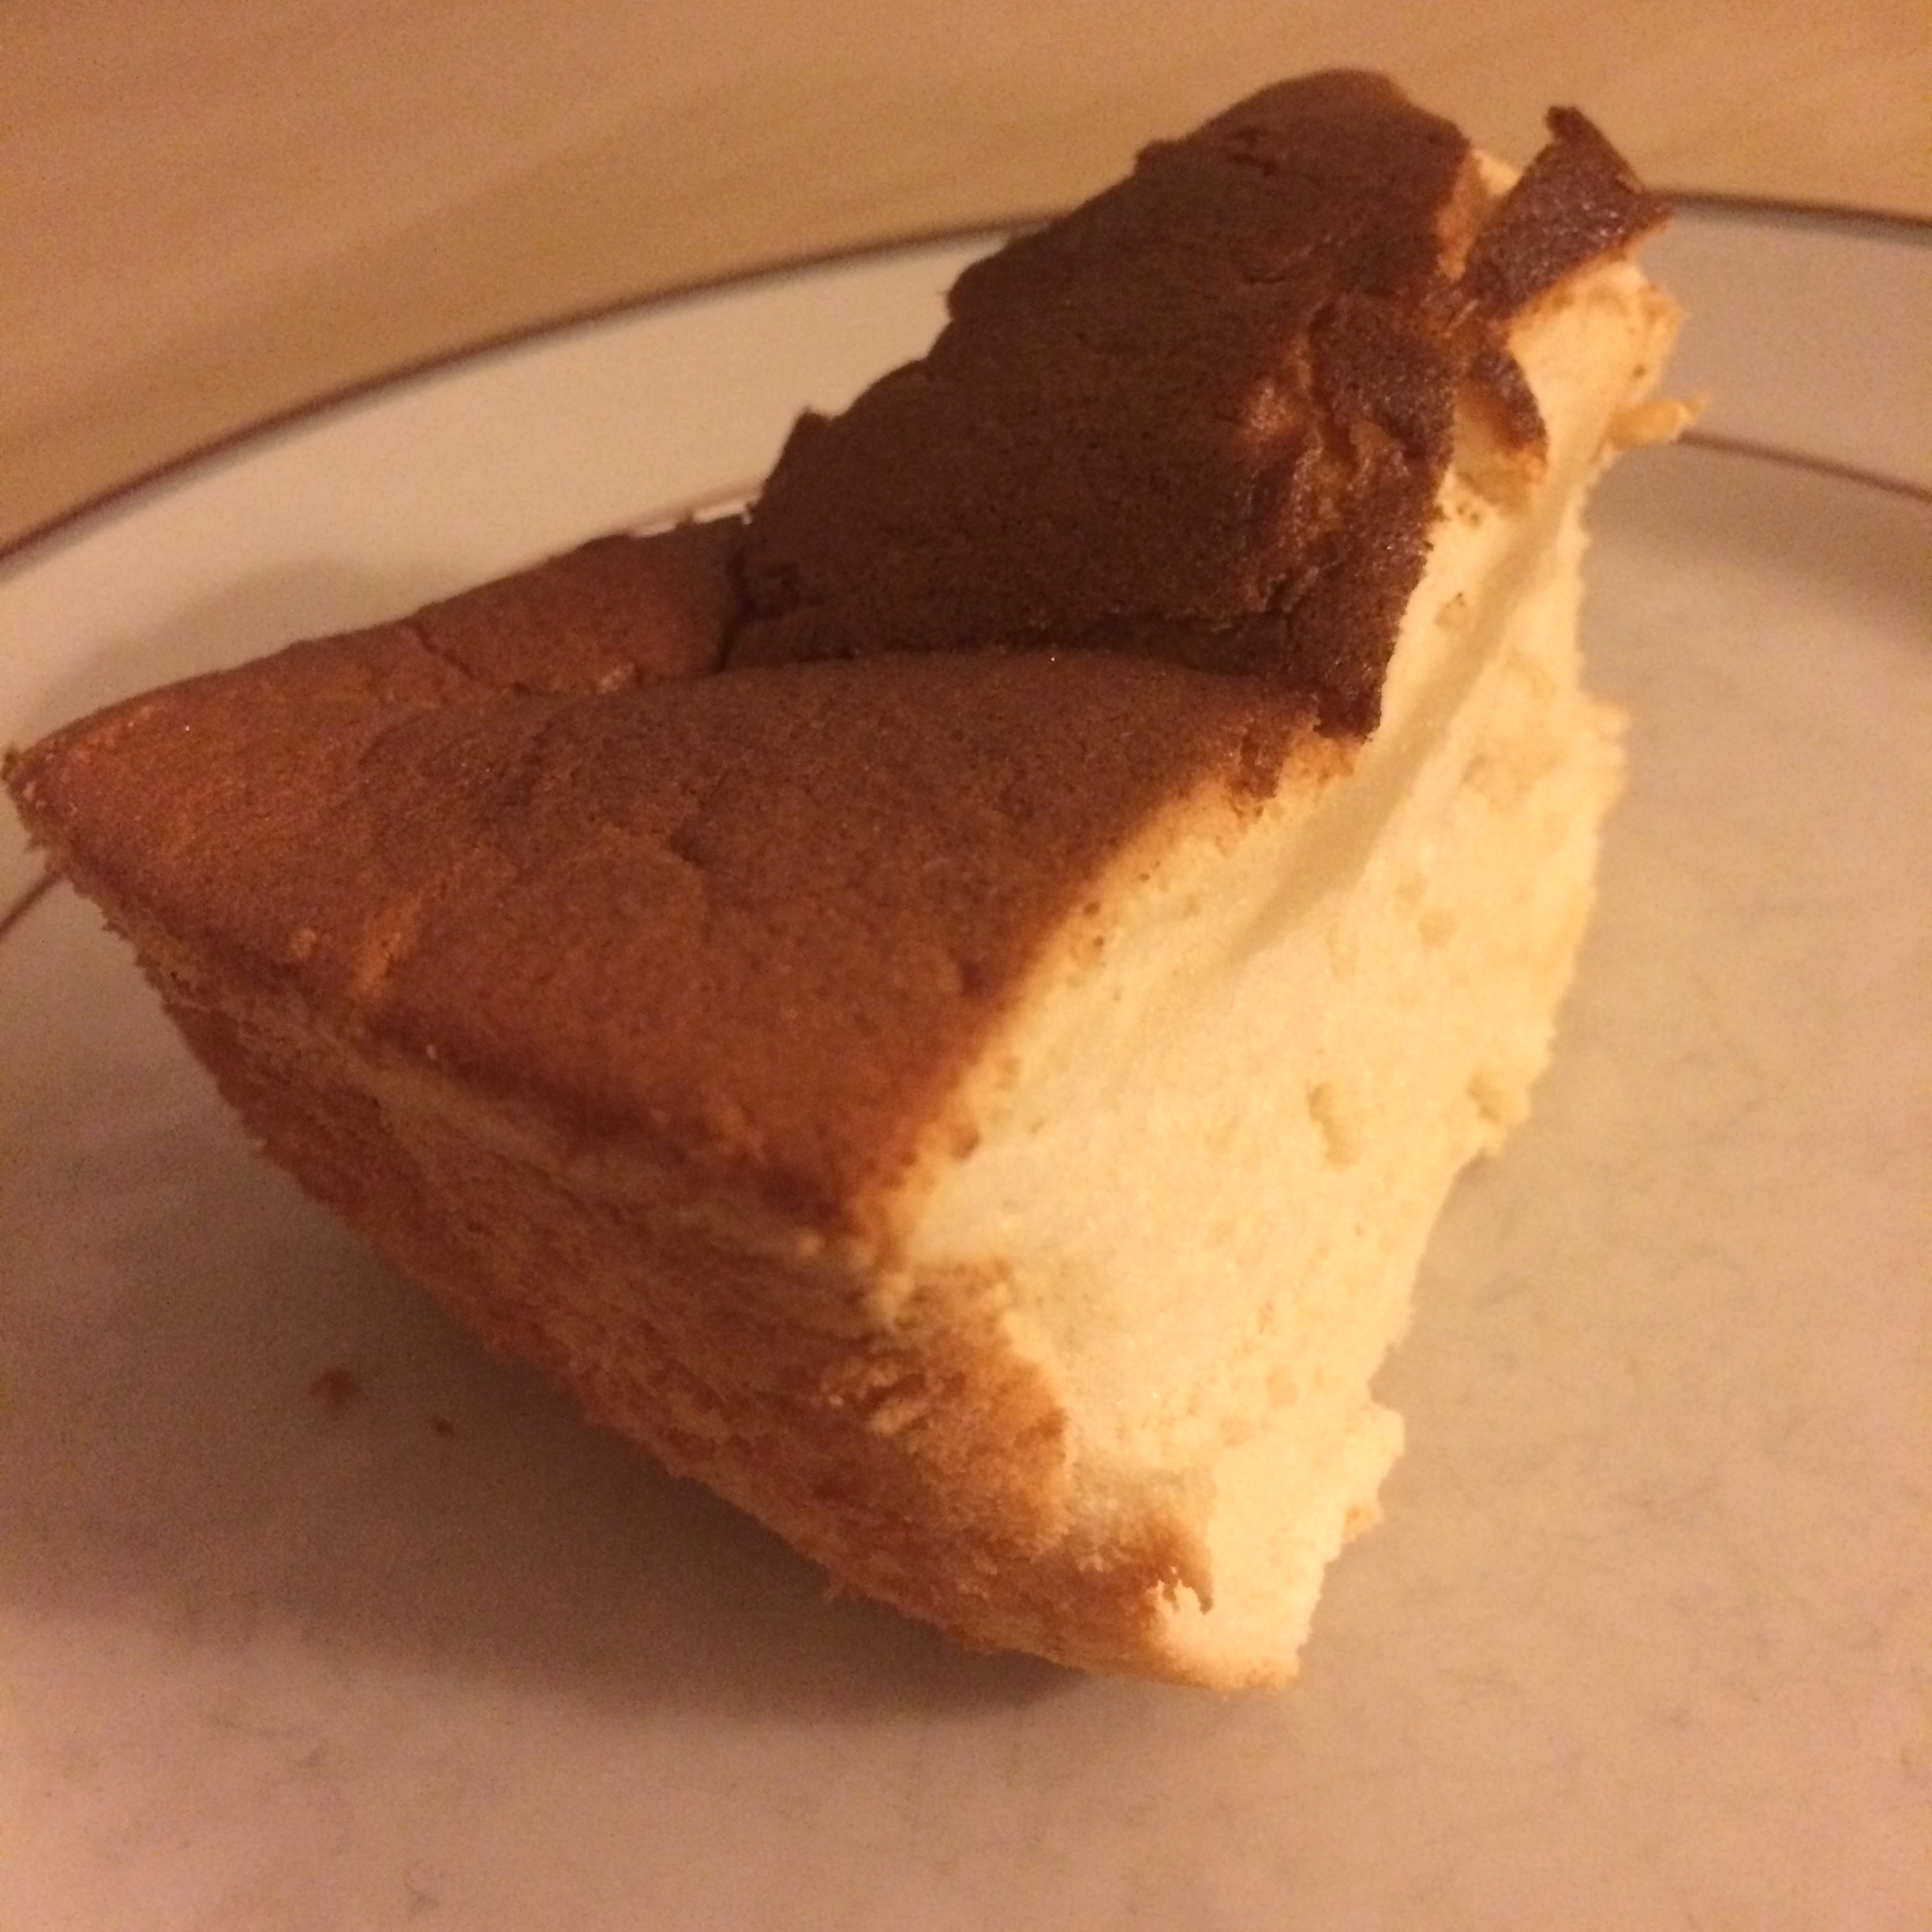
Are pretty much death by chocolate in a skillet. In the best way. I took these brownies that are super dark, fudgy and dense and refined sugar free and dairy free and gluten free and DELICIOUS….

… and then I trashed them up with paleo caramel and coconut and more chocolate and they became a fairly evil dessert. I use evil in a complimentary way, of course.

IMG_4629

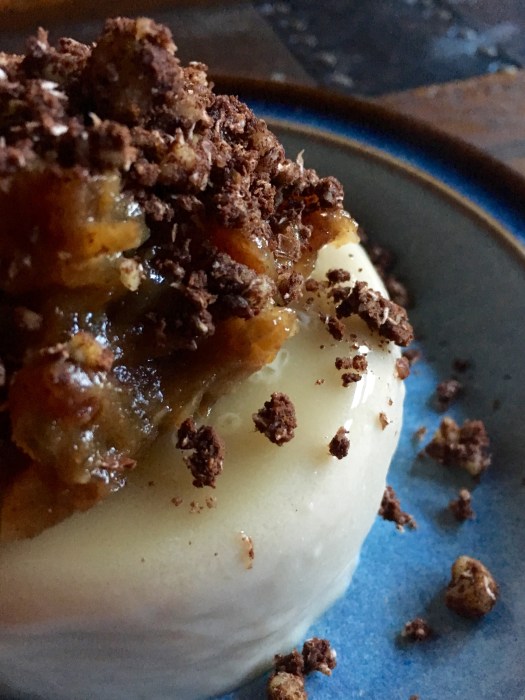
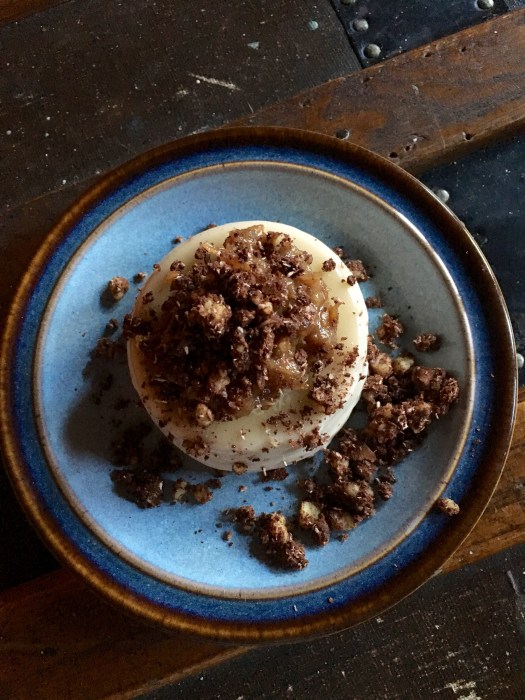
Topped with paleo gelato, they just about sent me over the edge (I was not eating these alone either, and I was not the only one accusing them of delicious death by chocolate). Good thing I was watching a movie on the floor so I didn’t really have to move very much after I finished them.

IMG_4630

But really. They’re amazing. Just pace yourself when eating, ha.

IMG_4619

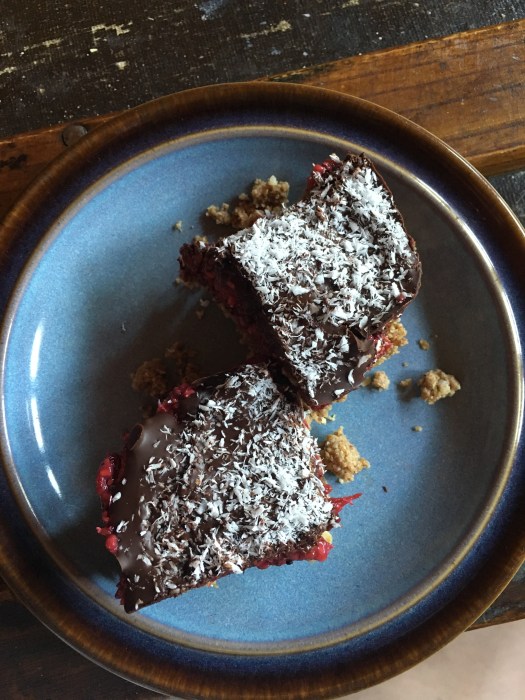
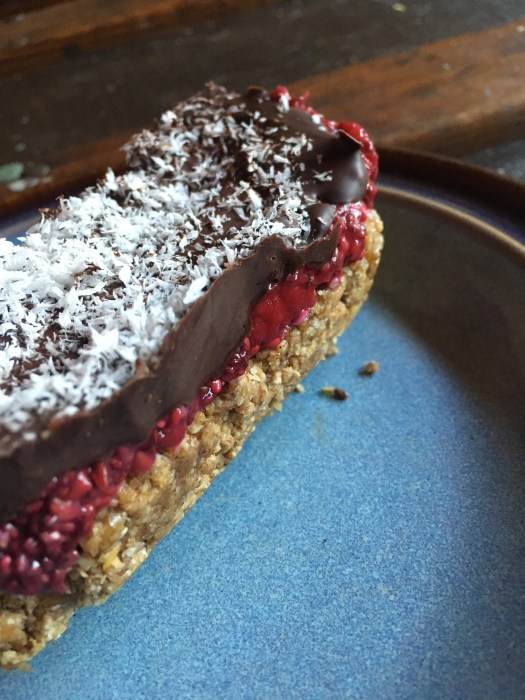
Coconut Caramel Brownies

Gluten free, refined sugar free, dairy free. Fudgy, dark brownies with a deep dark chocolate taste — these are not for the faint of heart or for those who prefer a cakier brownie. No way man; eat these if you love dark chocolate in all its forms. The coconut caramel and coconut flakes take them over the top. Serves: a lot. Yield: 1 8″ cast iron skillet or an 8″ square baking pan.

Use the recipe below for the brownies: Deep Dark Flourless Brownies 

  • 6 tbsp coconut oil
  • 4 oz extra dark chocolate [mine was 77%]
  • 2 oz dark chocolate [mine was 63%]
  • 2 eggs
  • scant 1/4 c coconut sugar
  • 2 tsp vanilla extract
  • 1/4 c unsweetened cacao powder
  • 3 tbsp arrowroot starch
  • 1/4 tsp fine sea salt
  • a handful of extra dark chocolate chips

1 batch of paleo caramel (I used this one from Bakerita, here — it is DELICIOUS)

  • much easier to make this ahead of time and refrigerate until needed — I made it the day before. It will also thicken up in the fridge the longer it sits.

For toppings: flaked coconut, shredded coconut, melted chocolate if desired

Preheat the oven to 350, and grease an 8″ cast iron with coconut oil or line an 8 by 8 pan with foil.

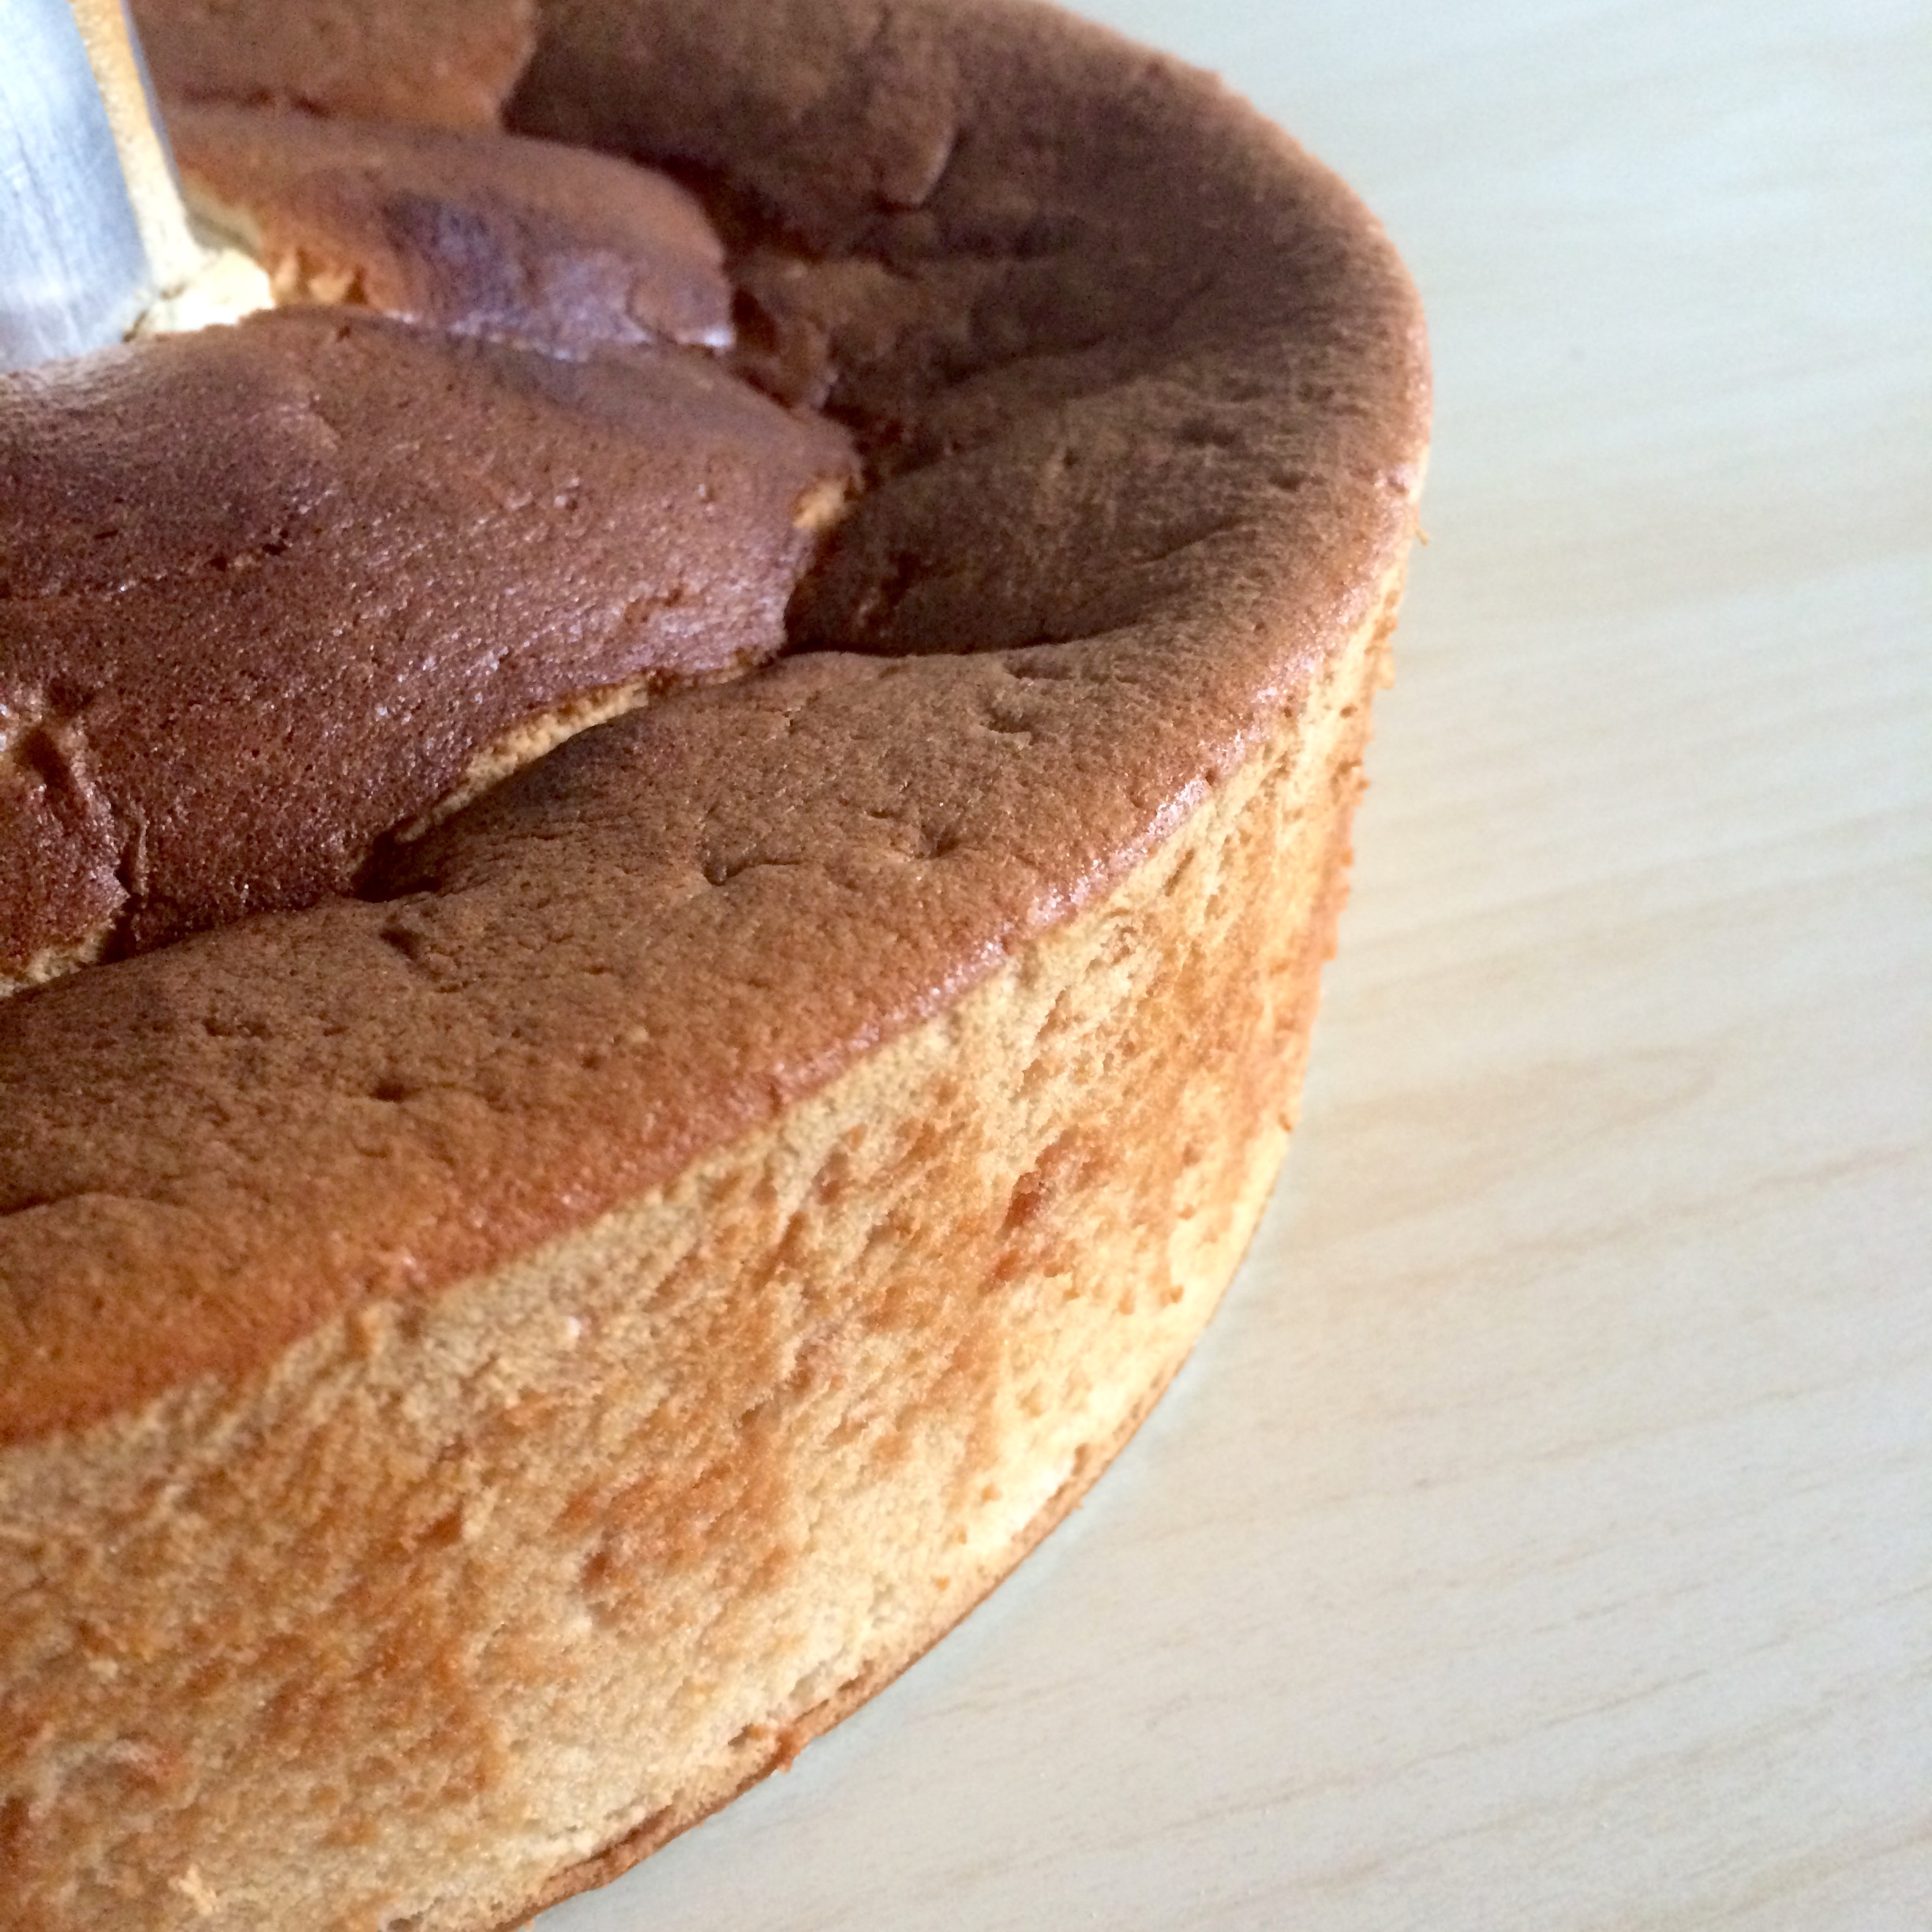
In a saucepan over med-low, melt coconut oil+extra dark chocolate+dark chocolate until smooth, stirring occasionally (you can also do this in the microwave, stirring at 30 sec intervals if you are feeling supremely lazy). In a biggish bowl, use an electric mixer to beat the eggs, coconut sugar, and vanilla until pale and smooth, about 2 minutes. After that’s all good, beat in the coconut oil-chocolate goodness until incorporated. In a small bowl, combine cocoa powder, arrowroot powder, and sea salt; then slowly use the mixer to beat that into the rest of the mix. Don’t overmix, just make sure there aren’t any pockets of cocoa powder. The batter should be thick and smooth. Stir in the extra chocolate chips. Spread the batter into the prepared pan.

Drizzle about 1/3 to 1/2 of the cooled caramel onto the brownie batter, and use a knife to swirl it together. You’ll end up with streaks and pockets of caramel, which are delicious– don’t feel like you need to completely stir it into the batter.

Bake for 30 minutes in an 8″ skillet (it’s thicker, so test accordingly) or for just about 25 minutes in an 8 by 8 pan, until a tester comes out clean. Let cool completely before topping.

Once cool, drizzle remaining caramel sauce over the top and excessively top with all the coconut. Toast the flakes if you like, or toss them on un-toasted – I did half and half and both were delicious. Melted chocolate drizzle is also a nice touch!

Slice. Eat. Devour. Might I suggest eating them in delightful company, since good food is so much better that way?! Also because a chocolate coma is more fun when you’re in good company.

IMG_4631

Master Status.

IMG_4531

oh hey! I DID IT! I’m actually DONE!

A masters degree in 10 months? Not too shabby.

IMG_4532

Somehow, that isn’t computing in my brain… I still feel like I need to be doing something. I’m sure you know the feeling? But… I don’t! I’m taking a mini break from adulting, so the biggest decisions I have to currently make are a) am I going to go work out (answer: pretty much always yes) and b) what will I eat afterward?

IMG_4536

My presentation went well, and it felt really good to end on a high note! I’m officially a master? Or something. Ha.

IMG_4535

But! I now have more time and mental energy to blog and make interesting things, which is just lovely. I got a notification today that my bloglet is 5 years old today! I can’t believe it. It’s growing up so fast!! *sniff* … or maybe that means I’m just getting old; that’s probably more likely.

SO! For mutti’s (rather belated) birthday dessert, I got fancy. Coconut milk panna cotta (dairy free, paleo, vegan, refined sugar free) with date caramel and walnut cookie crumble. So good! And actually fairly simple, when it comes down to it — there are just a lot of parts, but they come together with a minimum of fuss.

IMG_4533

Coconut Panna Cotta with Date Caramel and Walnut Cookie Crumble

Dairy free, paleo, vegan, refined sugar free, gluten free — everything EXCEPT taste free. Because these are delicious! And they really don’t heat up the house much if you’re making them on a day that it’s stupid hot outside (not like I did that or anything). Yield: 3 panna cotta servings (I chilled mine in small coffee cups; about the size of normal ramekins only deeper) + extra caramel and crumble left over after serving. Recipe lightly adapted from Kiss my Bowl, here!

For the panna cotta:

  • 1 can full fat coconut milk, well shaken
  • 1/3 c pure maple syrup
  • 2 tsp agar flakes*

*agar powder is no doubt better, but all my Whole Foods carried was the flakes, and they worked fine

For the date caramel:

  • 1 c pitted medjool dates, soaked
  • 1 tsp vanilla
  • 1 heaping spoonful of almond butter**

**mine is salted; I like the salty-sweet combo so you may want to add a pinch of salt if yours isn’t

For the walnut cookie crumble:

  • 1/2 c raw walnuts
  • 4 tbsp cocoa powder / cacao powder
  • 1/2 tsp vanilla
  • splash of maple syrup
  • pinch of salt

In a saucepan over medium heat, warm the coconut milk until it steams. Whisk in the maple syrup and bring just barely to a boil. Whisk in the agar flakes and let cook for just about 5 minutes, still barely boiling/high simmering. Remove from heat and let stand in the pan, whisking occasionally, for another 5 minutes. Once cooled slightly, pour into molds of choice (I used small coffee mugs that are deeper and slightly less wide than a standard ramekin; ramekins are just fine if you have them!). Let cool on the counter until your fridge can handle it, then let them set up in the fridge for at least an hour.

While the panna cottas are chilling, use a food processor or a vitamix to make the date caramel. Pour the dates and a few tablespoons of their soaking water into the implement of choice, add vanilla and almond butter, and blend till smooth (or chunky. you do you!). Store in a jar in the fridge until needed.

I made the cookie crumble in the same vitamix as the date caramel without cleaning it overmuch, which worked totally fine. Add walnuts, cocoa powder, vanilla, maple, and salt and whiz away until it’s crumbly. Store in a jar in the fridge until needed!

The panna cottas should be firm to the touch on top and have lost most of their jiggle by the time they’re ready. Run a knife around the edge of the ramekin or coffee cup, and they should flip right out onto a plate. Top with excessive amounts of date caramel and cookie crumble for maximum effect, and indulge accordingly!

Any leftover date caramel (who are you?!) and cookie crumble keeps well in the fridge for at least a week (but I dare you to make it last that long).

IMG_4537

One week…

IMG_4493

I did it!!!

IMG_4460

IMG_4470

IMG_4480

Well, almost. I walked this weekend, which means there is only one more advent calendar baked good between me and me officially having my masters. That and one presentation… as one of my cohort peeps so accurately said “It’s like going back to the Dursleys after spending a year at Hogwarts”. TRUER WORDS NEVER SPOKEN. Sheesh. Nothing like getting hooded and walking in your graduation to go right back to editing your slides for the looming presentation… but whatever. Almost there!

IMG_4476

One more week.

IMG_4499

And in the meantime, I have baked goods. Or rather, a no-bake treat since it’s bloody hot out and I’m not about to turn on the oven. But if I have to work on practicum stuff, you better believe I’m going to have something interesting to eat.

IMG_4498

Fast, easy, and delicious. These kind of remind me of a gourmet PB&J…. except better! And they’re cold. Which is bueno when it’s so hot outside, and you want a treat that feels more like real food (ie. me every day).

IMG_4500

So! Next time I blog I will be DONE DONE DONE DONE.

IMG_4501

Hayley Scott, Master of Public Health. Hmm… that has a nice ring to it :)

IMG_4471

Almond Butter Raspberry Chia Bars

Gluten free, vegan, refined sugar free. Healthy fats, antioxidants, and chocolate. YAY! All the good things. Yield: 1 loaf pan. Recipe lightly adapted from This Rawsome Vegan Life, here!

IMG_4496

  • 1 c rolled oats
  • 1/4 c ground flaxseed
  • 1/2 c almond butter (mine was salted)
  • 1 tbsp maple syrup
  • 1 tsp vanilla extract
  • 1/2 tsp cinnamon
  • 1 c frozen raspberries, thawed
  • 4 tbsp chia seeds
  • 1/3 c extra dark chocolate chips
  • 1 tbsp unrefined coconut oil
  • unsweetened shredded coconut, for garnish

In a smallish bowl, mash together thawed raspberries and chia seeds. Let sit while you make the rest of the bar crust.

Line a bread pan with parchment paper. In a vitamix or food processor, process the oats until they become flour. Toss into a bowl with the flaxseed, almond butter, maple, vanilla, and cinnamon. Stir (or use your hands, it’s more fun) everything together until it all comes together. Press all this goodness into the prepared pan. Set aside for a hot minute.

The raspberry-chia jam should have thickened by this point. Spread it on top of the almond butter-oat mixture in the prepared pan.

In another smallish bowl, melt chocolate chips and coconut oil until melty enough that you can stir it all together sans lumps. Spread this on top of the raspberry layer in the pan, then top with shredded coconut if that’s your thing. Toss it all into the fridge for about an hour before slicing and serving!

Store in the fridge.

IMG_4495

Two Weeks: Brownies are obviously called for.

IMG_4326

The advent calendar of baked goods continues! TWO MORE WEEKS. Actually, less than two weeks. Let’s get to days, shall we? 13. And that includes weekends.

Version 2

Also, the to-do list is finally getting smaller, which might account for the two types of baked things that emerged this weekend.

And eggs! Always eggs. These were especially pretty though, so… here they are.

IMG_4328

I exercised my math skills and made 3/4 of a brownie recipe this weekend, because a) I’m just cool like that and b) I was using my favorite skillet and I decided that a 1/2 batch doesn’t appropriately fill up the skillet and c) more brownies is ALWAYS the answer. This isn’t a new recipe, but these are probably just my favorite brownies, pretty much ever. Big claim, I know… but I think if I had to pick one brownie recipe for the rest of forever, there is a really good chance it would be these.

And they disappeared in short order (though I did have help…)

This is the recipe I love so much — I suggest just making a double batch (I list the 1/2 batch measurements here) because they’re just THAT good. Gluten free, grain free, refined sugar free, full of healthy fats and… nearly three kinds of chocolate. WINNING.

That elusive last piece…

IMG_4327

And then in the midst of presentation preparations (PowerPoint for DAYS), I needed a study break so I made a small batch of chocolate chip cookies… because, cookies. I wasn’t even really craving cookies, but just to stand up and look at something that was NOT a computer or a powerpoint slide…. and then I ended up with cookies. Solid choice.

IMG_4334

The cookie recipe is from Living Healthy With Chocolate, here! I didn’t alter it aside from using 1/4 c date sugar instead of coconut and added ~1 tbsp maple syrup.

IMG_4332

They’re delicious! And they’re vegan which was important because I was feeling the need to eat a few bites of the dough…

IMG_4333

It’s the homestretch! Let’s see if we can’t squeeze in at least one more baked thing between now and June 3. Ready… GO.

IMG_4331

Sometimes caramel is the only thing that will do

IMG_4300

Three weeks. But who’s counting?! Not me, obviously…

Two weeks till I graduate, three weeks from today till I’m done done done! I feel like my posts of late are kind of like some version of a baked goods advent calendar until I’m done with my Master’s degree. Is that a thing?! Well whatever, I just made it a thing.

IMG_4297

I’m taking study breaks with baked goods! This week’s offering could  not be more different than the last post — that one was fruity and light, this one is shut-the-front-door dense, caramel-y, gooey, rich, and decadent (in the best way, of course). All while being paleo (it’s sweetened with maple so not strict paleo), vegan, free of the glutens, and full of healthy fats and real food! Because, well, because. Because real food is good for you! And it tastes better anyway, right? Right.

IMG_4302

Might I point out this also makes a great side dish for breakfast… alongside eggs and salad and leftover caponata. Don’t question. Just do it!

IMG_4298

Highly recommend to consume this in front of Monty Python and the Holy Grail with excellent company for full brain-rejuvenation effect and happy taste buds.

And that is officially all I got on the anecdote front. Brain is in maxed out mode, I think it’s time for bed. Yes, I know it’s 8:45 on a Friday night. Nope, I’m not sorry at all.

Happy Weekend!

IMG_4293

Vegan Salted Caramel Skillet Blondies

Vegan, paleo, gluten free, refined sugar free. Dense, fudgey, gooey, and delicious. Yield: 1 8″ cast iron skillet, which feeds however many you decide (1? 2? a dinner party? you do you). Lightly adapted from With Salt and Wit, here!

For the caramel:

  • 1/3 c almond butter
  • 1/4 c maple syrup
  • 1/4 c coconut oil, melted

For the blondies:

  • 1.5 c almond meal (or flour, also fine)
  • 1/4 tsp baking soda
  • 1/2 tsp fine sea salt
  • heaping 1/2 tsp cinnamon
  • 1 flax egg (1 tbsp ground flaxseed + 3 tbsp water)
  • 1/8 c coconut oil, melted
  • 1/8 c unsweetened applesauce
  • scant 1/4 c maple syrup
  • 2 tsp vanilla
  • heaping 1/4 c extra dark chocolate chippies

Preheat the oven to 350, and bust out your trusty little 8″ cast iron skillet! No need to grease it, such is the wonder of cast iron and the use of caramel under the blondie batter…

Mix the flax and water in a small bowl and let sit until gelled, about 5 minutes.

In a large liquid measuring cup (one of those pyrex ones works nicely) or other tall thing, vigorously whisk the almond butter, maple and coconut oil for the caramel until combined. You can do this in a blender if your almond butter is particularly thick — mine was runny enough to make a bicep workout feasible (and I decided I was too lazy to wash the blender later). Pour the caramel into the skillet and set aside.

In a larger bowl, combine almond meal, baking soda, sea salt, and cinnamon. Stir to combine. Add in flax egg, melted coconut oil, applesauce, maple, and vanilla. Stir until combined (shouldn’t take too long). Toss in chippies and give it one last good stir. Pour the batter into the caramel — you may have to smooth it out a little, and it will cause the caramel to creep up the sides. All good!! The caramel forms a nice crust for the gooey blondies, which turn out almost like cookie dough. Don’t worry too much about it spreading out perfectly, I promise it will be delicious.

Bake until the top is firm and the caramel is crackly on the edges. I checked mine at 20 minutes, then let it go for another 5 minutes since the blondie wasn’t as firm as I wanted. Final bake time was probably closer to 30 minutes. It helps to bang the skillet on the stove a bit to get the batter and caramel to settle. Once done to your liking, remove from oven and let sit for a few before annihilating.

Absolutely delicious with paleo gelato, or whatever floats your boat! Store any leftovers in the fridge.

Sincere apologies for the strange coloration on the photo below; I have no idea what happened and sadly grad school nonsense takes priority over having a proper photo shoot for the last remaining piece of blondie. Le sigh. Three weeks!

IMG_4306

IMG_4302

Crisp = dessert, then breakfast

IMG_4231

Woah woah woah I graduate a month from yesterday! Wheeeeee almost time to decorate my mortar board. Because I care not that I’m getting a masters and that any display of creative originality might be frowned upon for grad ceremonies; any flat, otherwise boring surface is acceptable for yogic doodle decoration and glitter. Also, it’s probably time to make a dent in that giant pile of work I have to do between now and my practicum presentation but…. nah. I made crisp instead.

Because… CRISP!

IMG_4230

Infinitely more fun than papers and literature review and and and.. ew. Someone make all that go away so I can enjoy my crisp in peace, mmk?! Great.

IMG_4232

This one is full of springy, fruity deliciousness. Good for the soul and the bod — brightly colored (food should be fun!) and full of whole-food nutrients. Because all desserts should be able to do double duty as breakfast! Obviously.

IMG_4239

And with that… I’m back to work. Because even that little respite couldn’t last long (waaah).

Let’s get to it. Happy weekend!

IMG_4233

Vegan Raspberry Crisp with Meyer Lemon and Coconut

Fruity, lemony, springy, delicious, and good for your bod! All you could want out of a dessert / breakfast / fruity whole food shenanigan. Full of whole grains (oats), healthy fats (coconut and almonds), antioxidants (raspberries) and all kinds of textural fun. Vegan, gluten free, refined sugar free. Yield: one 8 by 8 pan. A Wait are those Cookies original!

For the fruity goodness:

  • 4 c raspberries (frozen is totes fine; just thaw them first)
  • 2 tbsp tapioca starch
  • 2 tbsp pure maple syrup
  • 1 tbsp meyer lemon juice*
  • 1 tsp vanilla extract

For the crispy fun:

  • 1 c almond meal
  • 1 c rolled oats**
  • 1/4 unsweetened, shredded coconut
  • 1/2 tsp fine sea salt
  • zest of one meyer lemon*
  • 3 tbsp pure maple syrup
  • 1/4 c melted coconut oil

*regular lemon will do but Meyers are SO fabulous; find them if you can!

** gluten free if desired

Preheat the oven to 350 and locate your trusty 8 by 8 pan that you make EVERYTHING in. Or maybe that’s just me…

In a large bowl, toss together raspberries, tapioca, maple, meyer lemon juice, and vanilla extract. Once it’s all combined, spread this evenly into the bottom of the 8 by 8.

In another largish bowl, stir together almond meal, oats, sea salt, and lemon zest. Add in maple syrup and melted coconut oil, and stir until combined, mashing out the largest lumps. Spread this goodness evenly over the raspberries in the prepared pan, and bake for 30-40 minutes, until the crumble topping is golden brown and the filing is bubbly and juicy (omg yum). Let sit for a few before annihilating. Leftovers (ha) store best in the fridge and are excellent for breakfast, just saying.

Top with any kind of iced dessert of choice – i.e.. vegan paleo gelato, dairy deliciousness, whipped coconut cream?! The sky’s the limit. You do you!

IMG_4236

Lousy weeks = Angel Food Cake (Science. Obviously)

IMG_3068

Sooo…. Hi! It’s been awhile.

You can thank grad school for that (and for being a royal pain in my butt). My stomach was being a real winner today too, rude. On the bright side, one of the things it seems to tolerate with a minimum of fuss is this cake! Probably because angel food is basically egg whites and air and fluff, in the best possible combination. I’ve always loved angel food — I asked for it for a birthday cake at some point when I was a kid, and I’ve always thought it was delicious.

IMG_3060

It’s fun to make, too! Egg whites are my favorite piece of kitchen chemistry. I love watching them go from foamy… to glossy… to peaks! I never get tired of it. And besides, even though I am the one who hardly ever uses a mixer unless I really have to, angel food gives me the chance to get out my beautiful red kitchenaide stand mixer! Wheeeeee! It looked so happy to see me. And don’t tell me inanimate objects don’t have feelings… KITCHEN APPLIANCES totally do. They feel neglected and sad when you just leave them to languish in the pantry… which is also why I love my pegboard so much. It means that my pots and pans and whatnot can hang out and watch the action from their corner (and egg me on. It’s like “use me!!! I am so great for making eggs!!! … constant ruckus from the peanut gallery).

IMG_3061

But actually.

IMG_3066

I will stop anthropomorphizing my appliances for the time being in order to get back to the cake. But admit it… if you love to cook and bake, your favorite pans and appliances become your friends. Don’t try to deny it, I know you. You know where they stick, how they heat, if they affect the consistency of whatever you’re baking… they’re like friends!

But also, in other news…

Mother Nature puts on some pretty amazing shows:

IMG_3051

Day 4 of the Drawing Challenge! Favorite Place… this one was easy :)

IMG_3008

And E and I had a fun date night at the British pub Fox and Goose, in the historic R district of Sacto. Fun fun!

IMG_3018

But. Back to the regularly scheduled programming…

THIS CAKE! IS AMAZING!

Yep. still obsessed with this app.

And is gluten free, refined sugar free, and beyond delicious. When I made this, I actually ended up with a much denser consistency than angel food usually has (I have reason to suspect my oven; firstly, it is wee. It’s like half the size of a normal oven, so consequently all of my sheet pans are quarter sized. I feel like a Barbie. But also I do believe it runs hot and heats unevenly. Further research is required; until then it’s an interesting challenge) — but I don’t care, because it is AMAZING! It’s almost… custardy. But also kind of fluffy?! If you can possibly have custard and fluff at the same time, this is it. Mine got a tad overdone on the top half, and I actually pulled it out far sooner than it was supposed to go (hence the suspicion  that my oven runs hot), since it was done and browning quickly. It didn’t rise as much as they normally do, but it has that custardy wonderfulness so E and I definitely don’t care. Add to that, it’s tummy friendly and lower in sugar than most angel food cakes, so it just wins all around.

IMG_3055

That all being said, I highly recommend making it on a Friday afternoon when your week has been rather wretched and you just need some cake. Not that I speak from experience or anything. Nope. Not me..

IMG_3064

Grain Free Maple Angel Food Cake

Made of arrowroot starch, this cake is tummy friendly for IBS, gluten-free, grain free, and paleo. It’s also refined sugar free and lower in sugar than most angel food cakes, which is a bonus in my book for sure. Recipe from Deliciously Organic, here! I didn’t change a thing, as it was perfect as is. Yield: 1 cake (standard angel food pan).

  • 12 egg whites (I used 1 carton = to 10 whites + 2 whites from whole eggs for convenience)
  • 1 tsp fresh lemon juice
  • 1/4 tsp fine sea salt
  • 1.25 tsp cream of tartar
  • 1 tbsp pure vanilla extract
  • 3/4 c maple sugar, divided
  • 1 c arrowroot starch
  • whatever toppings float your boat for serving — I made a simple raspberry compote and topped it with a little shredded coconut

Preheat the oven to 350, and get out your *un-greased* angel food tube pan. You might want to put a cookie sheet down below the cake pan in the oven to account for any leakage — my tube pan tends to leak just a bit out of the bottom. Adjust the rack for the cake to be in the middle of the oven.

In the bowl of a stand mixer, beat the egg whites with the lemon juice on medium high until foamy. Add salt, cream of tartar, and vanilla, and continue beating on medium high until soft peaks form, about 1 to 2 minutes.

With the mixer running on medium, slowly add 1/2 c of the maple sugar, a spoonful at a time. Sift the remaining maple sugar and arrowroot starch into a small bowl, and, with the mixer still running, slowly add this to the mixer bowl. Once it’s all added, whip on medium high until completely incorporated (you may need to scrape the sides of the mixer bowl, I did). Pour the batter into your tube pan, and bake for 35-45 minutes*, until the top is golden brown and the cake is puffed.

*Normal ovens are probably done at a minimum of 40 minutes. Mine was excessively brown at 35, and done, though not as puffy as it could be.

Remove the cake from the oven, and immediately invert over the neck of a wine bottle to cool completely — about 1 to 1.5 hours. Cooling it upside-down helps maximize loft! Once the cake is completely cooled, run a knife around the inside of the pans to loosen the sides, and pull the cake + the removable bottom out of the pan. Run a knife along the bottom between the pan and the cake to loosen it fully, then lift off to the serving plate. Decorate at will!

Angel food cake keeps well at room temp for a day or two if it’s not too hot or humid where you are. I’m keeping mine in the fridge and it’s totally fine — cover it with an inverted bowl and it will stay good for several days in the fridge.

Enjoy your perfect bits of cake fluff!

IMG_3058

Because the end of summer session deserves WAFFLES

IMG_2801

YOU GUYS.

I survived summer session!!! Donedonedonedonedone. And now I get a very well deserved week and a half to sit on my butt or go do jazzercise or reorganize the apartment which is slowly starting to look less like the home of the box-people, or quite probably some combination of the above.

IMG_2804

And I also get to COOK. And maybe even BAKE, now that the weather in Davis has decided that it will deign to be somewhere under 100 degrees. It might only be somewhere between 95 and 98, but I tell you what — that is a hell of a lot better than walking out in 107 and feeling like you’ve been punched in the face by a wall of heat. Also, incidentally it feels like walking into a hairdryer set on high. Groooosssss. BUT! This week is supposed to be under a hundred, so perhaps it’s time to test run the teeny tiny oven in my apartment.

IMG_2795

Side note. I have noticed, in subsequent kitchen explorations of my apartment, that everything is sloped. Literally EVERYTHING. My bar counter slopes one way, the stove slopes the other. Which is super fun when you’re making eggs and they all decide to run together in the back of the pan, in one giant egg party blob. I foresee some hilarious cooking adventures ensuing, not to mention some slightly crooked cakes.

IMG_2798

This was also in evidence last night when E and I made waffles (because Friday night = breakfast for dinner, obviously) and the waffle batter all ran to one side of the waffle iron, creating very interesting effects and only mild spillage / escaping batter. They were still delicious, because also BACON and walnuts and banana jam and paleo and maple and grass fed butter and zucchini (I had to have something green. It would be out of character if I didn’t). And sorry if the pictures are garbage. I promise these waffles are DELICIOUS, which is why my pictures are lame because I really just wanted to eat them… Pictures of the fully loaded waffle were dinner last night, and the halfsie waffle with banana slices was second breakfast today. WINNING.

IMG_2805

Also, one random thing… Kira and I are doing a 30 / 60 day drawing challenge! (30/60 because LIFE and we may not actually be able to do it in 30 days… margin for error). SO! Day 1. Drawing Self. I am supremely out of practice with drawing people / faces / self… not to mention that self portraits are HARD! But I declare it a credible effort, so here you go. Just one more way to keep myself accountable to finish this thing!

IMG_2800

Happy Weekend! Make waffles, eat, be happy with your crooked kitchen and slightly janky stove.

IMG_2797

Paleo Blender Waffles with Bacon and Banana Jam

Gluten free, paleo, refined sugar free, high fiber, grain free, fast and easy. Makes a delicious dinner when paired with bacon and walnuts (because bacon, duh) and banana jam. Recipe adapted from the Roasted Root, here!

IMG_2806

For the waffles:

  • 4 eggs
  • 1/4 c coconut flour
  • 1/2 c tapioca starch
  • 3/4 c unsweetened hemp milk
  • 1 tsp vanilla extract
  • 1 tbsp maple syrup
  • heaping 1/4 tsp cinnamon
  • 1/4 tsp sea salt

For the banana jam:

  •  2 ripe bananas, all spotty: mashed
  • 1/2 tsp cinnamon
  • splash of hemp milk

For serving: cooked bacon, chopped into little pieces, chopped walnuts, shredded unsweetened coconut, grass fed butter, almond butter, and coconut butter (or some crazy combination of all of that).

Let’s waffle: preheat your waffle iron, and brush it with a little bit of coconut oil. I had no problems with these sticking, but only you know the character of your waffle maker! In a blender, combine all ingredients and blend until smooth. Once the waffle iron is hot, you know the drill…. pour about 1/4 to 1/3 c of batter into the waffle iron (the batter is super thin and that’s fine—just pour straight out of the blender) and cook until either the indicator light for doneness comes on (I estimate roughly 3-4 minutes per waffle for mine—I like them browned), or until you can lift the lid and take them out with no sticking. Keep warm in a low oven until serving, or just eat immediately! These also freeze and reheat in the toaster extremely well.

While the waffles are cooking, assemble all the delicious other things (toppings are the whole reason we eat waffles, yes??)…

For the banana jam, mash up the bananas with a splash of hemp milk and some cinnamon. Preheat a small skillet over medium heat, and cook the bananas until they firm up a little and lose some of their water content. They should caramelize just a little on the bottom of the pan, and you’ll know they’re done when you start smelling the delicious banananess of it all. Serve on top of the waffles for extra delicious.

IMG_2807

baconbaconSHORTCAKEbaconbacon

IMG_2611

Helllooooooo, I made you something with BACON!

And maple, and blueberries, and none of those sneaky little glutens. Tsk tsk.

Gluten free maple bacon shortcakes with vanilla blueberries!

IMG_2610

I know I know, for those of you who know me on fb or instagram, you already saw this nonsense. But life is life, and this is the first time I’ve had five minutes to sit down and actually write something.

Today also happens to be the last day of my job! Sad :( I will definitely miss everyone. But that also means that I leave for camp on Friday (wheeeeee!!!!!) and then grad schools starts four days after I get back from camp. Heeelllpppppp where has the time gone?! Jeez. To compensate for the ridiculousness that is my schedule right now, I seized a free hour on Sunday and made shortcakes! Also because I always seem to have this habit of baking right before camp, and that just couldn’t be ignored.

And also, bacon.

IMG_2609

Maple and bacon are a match made in heaven, and then you add shortcakes and blueberries and maybe ice cream, and then you have nirvana. Or at least something really close…

IMG_2603

Side note. Most annoying thing ever is when your long skirt gets trapped under the wheels of your desk chair. Grrrr.

Back to food.

And a doodle!

IMG_2595

And trolls!! These are the cutest little guys ever. And no, I don’t think they’re creepy.

IMG_2593

But actually, let’s go back to food…

IMG_2604

Gluten Free Maple Bacon Shortcakes with Vanilla Blueberries

Gluten free, egg free, and possibly dairy free (mine weren’t, but you could always sub coconut oil for the butter). The bacon flavor isn’t overwhelming, but it adds a nice savory note that contrasts the sweet of maple and blueberries. These stay fairly flat, but I found I could slice them easily with a paring knife. Yield: 5 large shortcakes. Shortcakes adapted from From Jessica’s Kitchen!

Shortcakes:

  • 1.5 c white rice flour, plus more for rolling
  • 1/4 c tapioca starch
  • 1/4 c ground flaxseed
  • 1 tbsp baking powder
  • very scant 1/2 tsp fine sea salt
  • 1 c unsweetened hemp milk (or other non dairy bev)
  • 1/2 tbsp melted butter
  • 1.5 oz salted butter, chilled + diced
  • 1.5 oz chilled bacon grease
  • 3 tbsp maple syrup*
  • 2 tsp vanilla extract

*more to taste if you want… mine were lightly sweet

Blueberries:

  • 1 pint of blueberries (or more — I used 1 pint for three of us, but the next night I used fresh ones as I used all of the sauce)
  • a good splash of vanilla
  • 1/2 tbsp chia seeds

Preheat the oven to 350, and line a baking sheet with parchment paper.

In a large bowl, whisk together rice flour, tapioca starch, flaxseed, baking powder, and sea salt. In a liquid measure, stir together melted 1/2 tbsp of butter and hemp milk. Using a fork, or a pastry cutter, or your fingers (my preferred method), cut the butter and bacon grease into the dry ingredients, until it resembles coarse sand and the butter/bacon grease chunks are evenly distributed. Stir in hemp milk/butter, followed by maple syrup. Mix just until combined.

Flour a clean work surface, and turn out the dough. Pat it into a circle about an inch thick, and use a cookie cutter (my method) or a biscuit cutter or a knife or whatever to make the shortcakes. Transfer them to the prepared baking sheet, and bake for 14-16 minutes, or until lightly golden. Transfer to a cooling rack to cool completely, or eat warm.

While the shortcakes are baking, cook the blueberries over medium heat in a small saucepan. Once they have gone all saucy and delicious with a few berries still left whole (roughly 5-10 minutes, I never actually time this), remove from heat and stir in vanilla and chia seeds. It will thicken as it cools.

Serve shortcakes with blueberry sauce and any type of ice cream / non dairy dessert / coconut cream that rocks your world!

IMG_2608

Actually yes, I do eat something besides barz.

IMG_2518

Before you say anything, I am totes aware that the last billion recipes on here are bars. I knoooow. I’m working on that, obviously not very successfully… One day, in the hopefully not to distant future, I will get off my bar train and blog about something different. And you’ll be so shocked, I’ll have to come over there and pick you up off the floor. But until that day… Barz.

IMG_2516

So….. I wasn’t necessarily going to blog about these, but then I ate one and discovered how deep, dark, datey and delicious they were, and decided they were too good not to share. Besides, they’re much fudgier than a lot of my barz recently, so you know. Variety is the spice of life, right? Right. But dates and dessert and chocolate and tahini also make life spicy, so why not eat those too?

Also because spicy life = great life.

IMG_2527

And also because I wrote the last two sentences yesterday, and I ate a brownie last night and they only get better hanging out in your fridge, so there are really no reasons not to make them (unless of course there is no food processor readily accessible… sadly these aren’t one that you could hack, unless your by-hand mashing and blending abilities are on par with some kind of superhero. Even I, who avoids using appliances if at all possible, busted out the food processor on this one). SO! Brownies! That are phenomenally good for you and also delicious. Can’t beat that.

IMG_2522

Okay so further ALSO: it was a billion degrees here this past weekend, but I really needed brownies, so I stupidly ran the oven (no bake treats were just not going to cut it). I also stupidly decided that peeling an entire can of chickpeas was a good idea. I know I know, I sound like a crazy. But here’s why: I’d heard forever that peeling your chickpeas makes for smoothy smooth homemade hummus. And having been extremely put off and irritated by the grittiness of my previous batches of homemade hummus, I decided that standing in my million degree kitchen on my day off pinching the skin from each individual chickpea was a good idea. Um, just no. But I can happily report that my hummus is SPECTAC. And it has beets in it, so it’s pink…which obviously ups its superiority factor. Incidentally, I was also out of lemon juice and had to pinch hit with limes. Amazingly, it’s some of the best hummus I’ve had in awhile AND it is silky silky smooth. So unfortunately the peeling method does work. I might be convinced to do it again… maybe. Just not when it’s a thousand degrees out and all I want to do is lay on the air vent like my cat.

IMG_2511

And one further aside, that is completely unrelated. I (just for laughs) calculated my average fruit and veg intake on a standard work day (lunch varies; dinner varies but my overall veggie intake during the week is pretty standard each day). An article I saw sparked my curiosity — it was a pictorial essay of different combinations of fruit / veg that meet the official recommendations; and my first thought was, ‘wait. that’s IT?!’, which made me want to see what my intake looks like within the official guidelines. According to the government website calculator, I am supposed to eat 2 servings / cups of fruit per day, and 3 servings / cups of veg a day. At which point I calculated mine for the day (and it’s only 2 pm. I haven’t even had dinner yet, which will contain at least another cup of veggies, and then there are dates in my dessert)… and I’m at 3.5 servings / cups of fruit, and 4.5 servings / cups of veg. Sooooooo….. yeah. I’m basically a piece of produce. And plant-powered!

IMG_2526

And a bit of freehand, just cause!

IMG_2509

Tahini Date Brownies

Gluten free, vegan, refined sugar free and flour-free deliciousness! Whole food ingredients to show your bod how much you love it. Recipe makes one 8 by 8 pan. Inspired by Graceful Kitchen, here! In case you’re interested in this stuff, like I am, tahini is an excellent source of calcium, vitamins / minerals, and omega 3’s + unsaturated (good!) fat; dates are generally just fabulous for you (assorted vitamins / minerals / too many bennies to list); and dark chocolate + unsweetened cocoa powder = minerals, flavonoids, and antioxidants. In sum… eat whole-food brownies, absorb nutrients, be happy.

IMG_2520

  • 1 15 oz can of white beans, drained and rinsed
  • 1 c packed + pitted medjool dates*
  • 1/2 c tahini
  • scant 1/4 c pure maple syrup
  • 2 tsp vanilla
  • heaping 1/4 c unsweetened cocoa powder
  • 2 tsp baking powder
  • 1/4 tsp fine sea salt
  • 1/4 c extra dark chocolate chips
  • optional…. sort of: 1 – 2 squares of chili-spiced chocolate, for a bit of subtle heat

*If the dates get hard, a 15 minute soak in boiling or very hot water usually softens them enough so that they won’t murder the food processor… Also, the date soaking water can be used in smoothies! Mmm. Or to cook oatmeal… or anywhere you need a little liquid sweet.

Preheat the oven to 350, and lightly grease an 8 by 8 pan (or use parchment. These are sticky, so if you want more evenly sliced bars, I would recommend the parchment route. Otherwise, I didn’t have a problem getting them out sans paper).

In the food processor, combine drained beans, dates (soaked if necessary; drain before adding), tahini, maple, and vanilla. Process for a few seconds, to get the dates broken up. Add cocoa powder, baking powder, and salt, and process until the batter is nearly completely smooth. I left a few chunks of dates in mine, but I draw the line at chunks of beans, no thanks. Stir in chocolate chips and chopped chocolate, and spread the batter into the prepared pan (it’s thick, so just go for the rustic look). Bake for 29-32 minutes, until the top is mostly firm and a tester comes out clean. These are very fudgy (and they’re vegan), so if you want to underbake them for super-goop, go ahead! Mine were perfect and sufficiently fudgy at 30 minutes. Let cool completely in the pan before slicing. Store in the fridge (I cover the pan with foil till they’re mostly gone, then transfer them to a tupperware).

IMG_2519