Kelp noodles are ridiculously distracting

IMG_6320

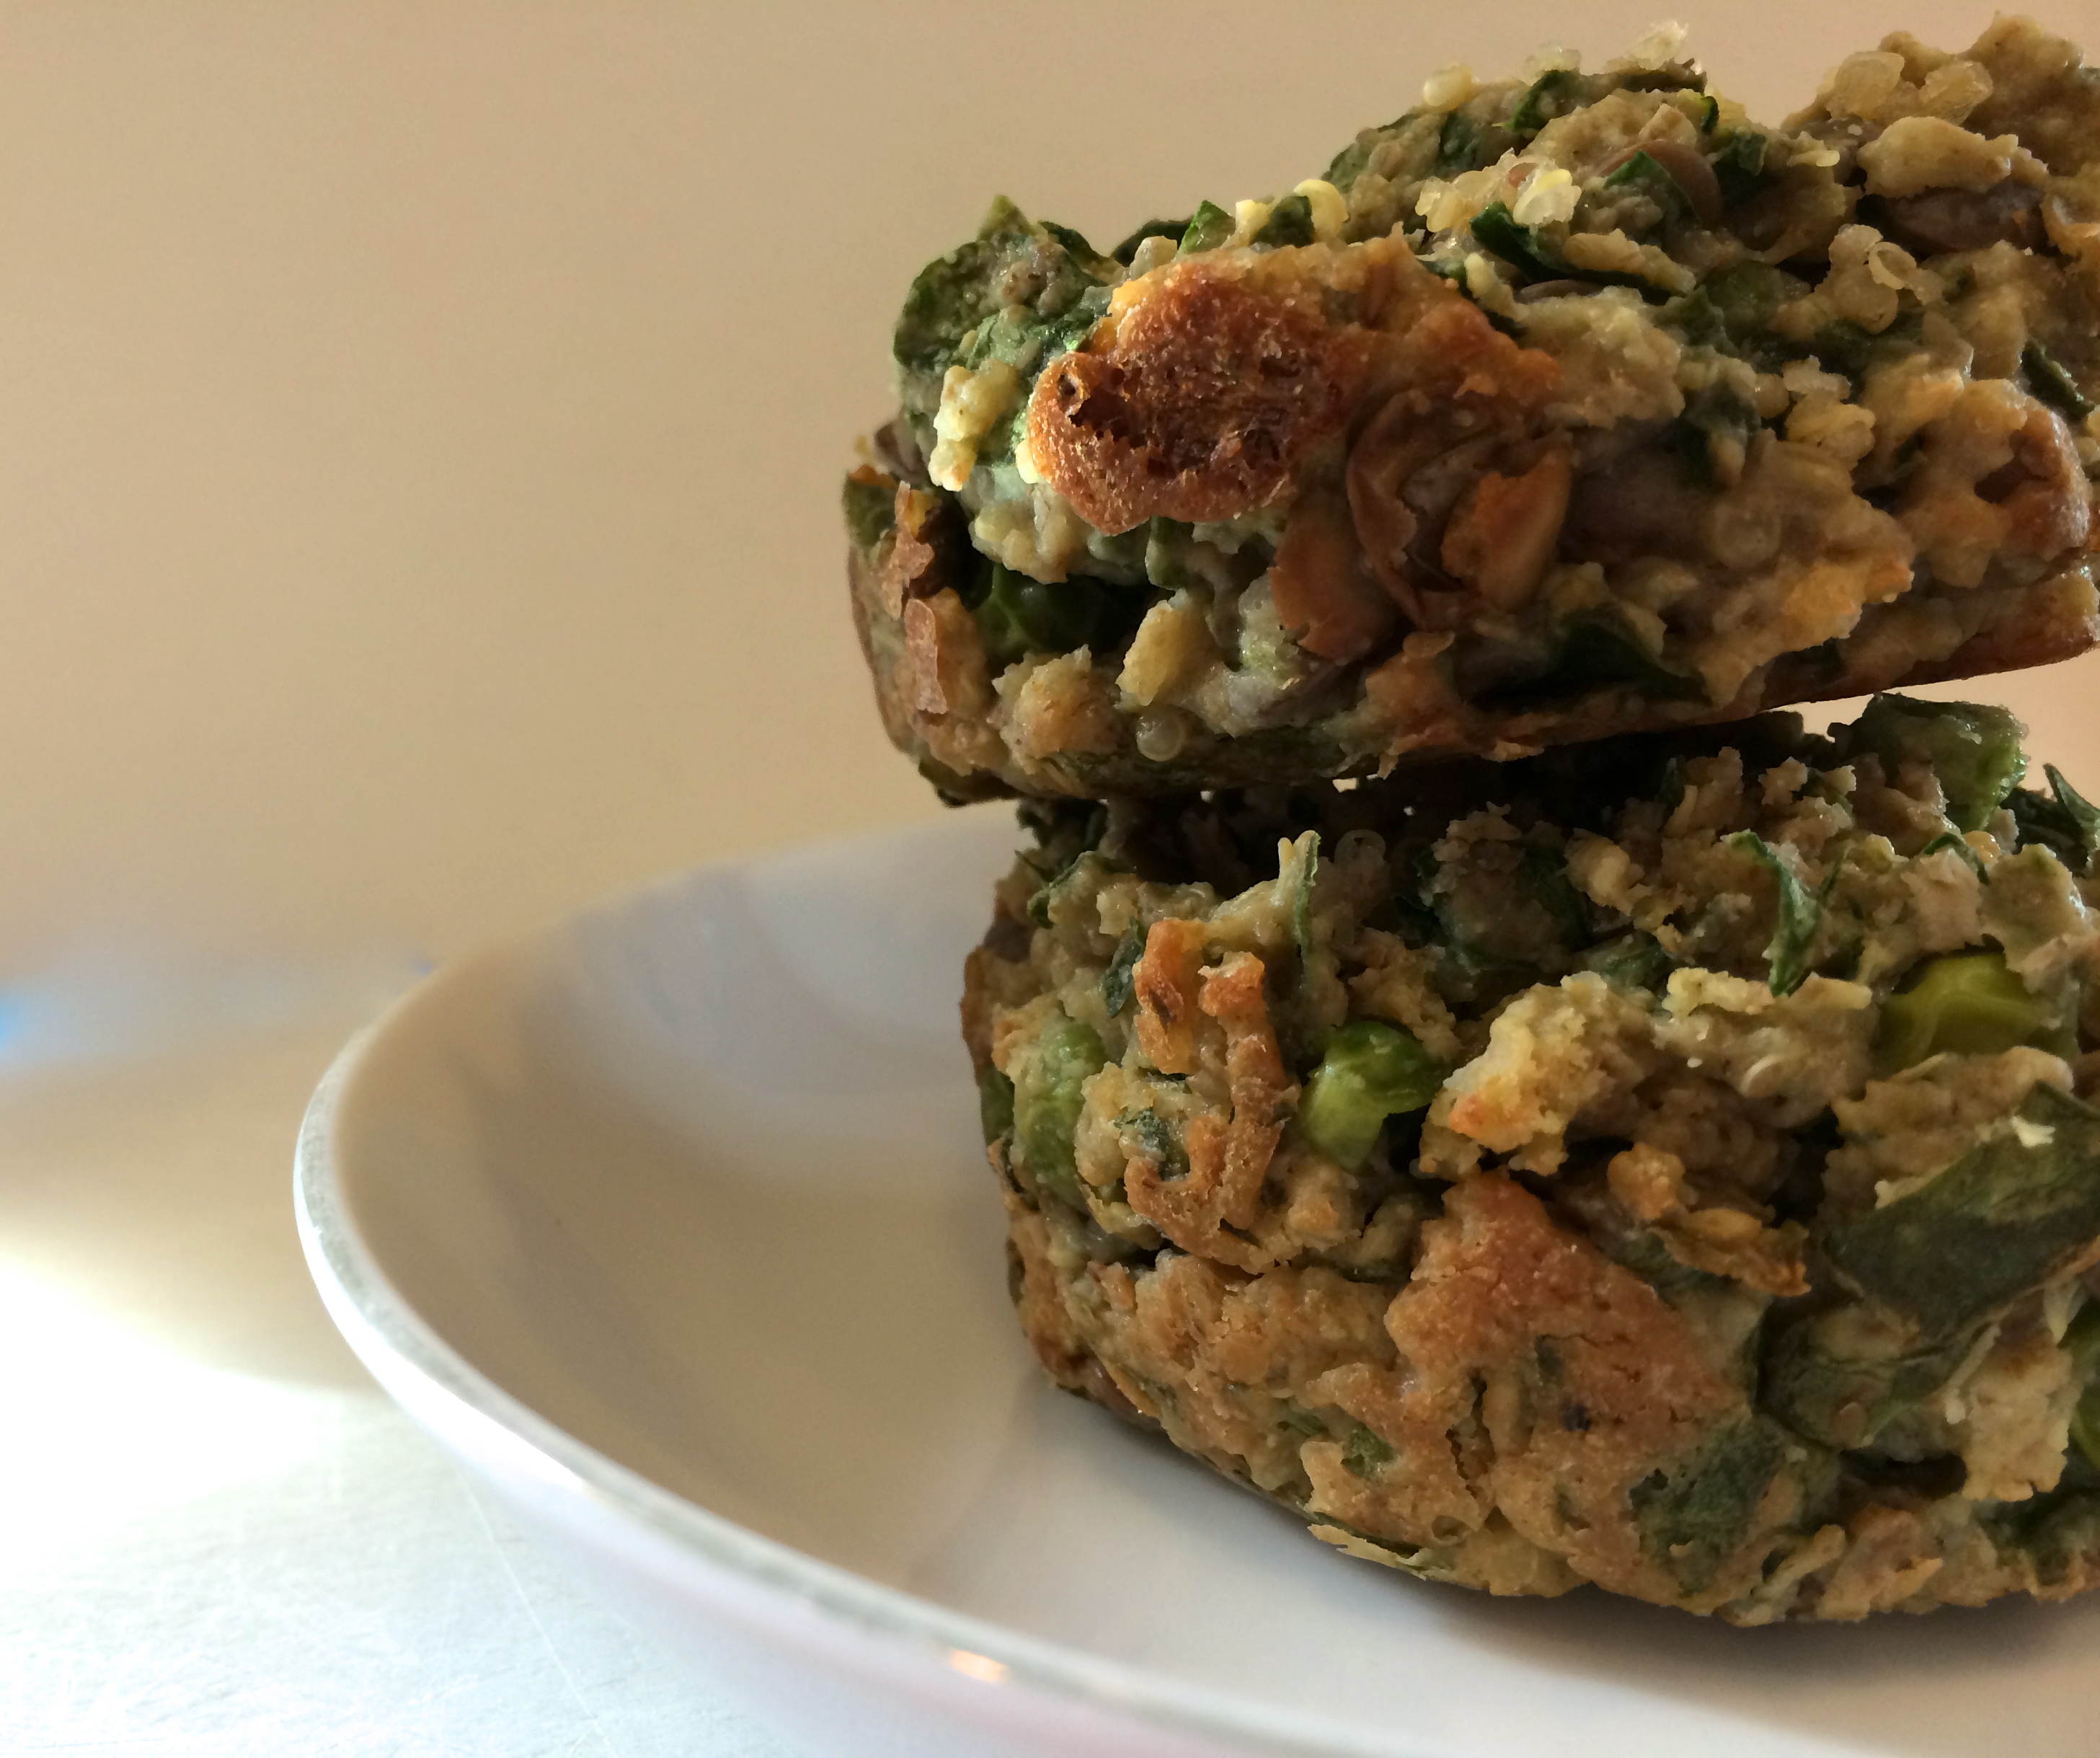
I really freaking love kelp noodles like WAY TOO MUCH.

I want to eat them all day, every day.

Which is weird, given that they pretty much taste like… nothing. It’s like eating noodley nothing.

IMG_0327

So maybe… I’m really obsessed with the almond butter sauce. Realistically that’s probably it, given my history of obsession with anything nut butter related. Sheesh. I’m so predictable.

Whatever. Kelp noodles+almond butter = AMAZING.

IMG_6325

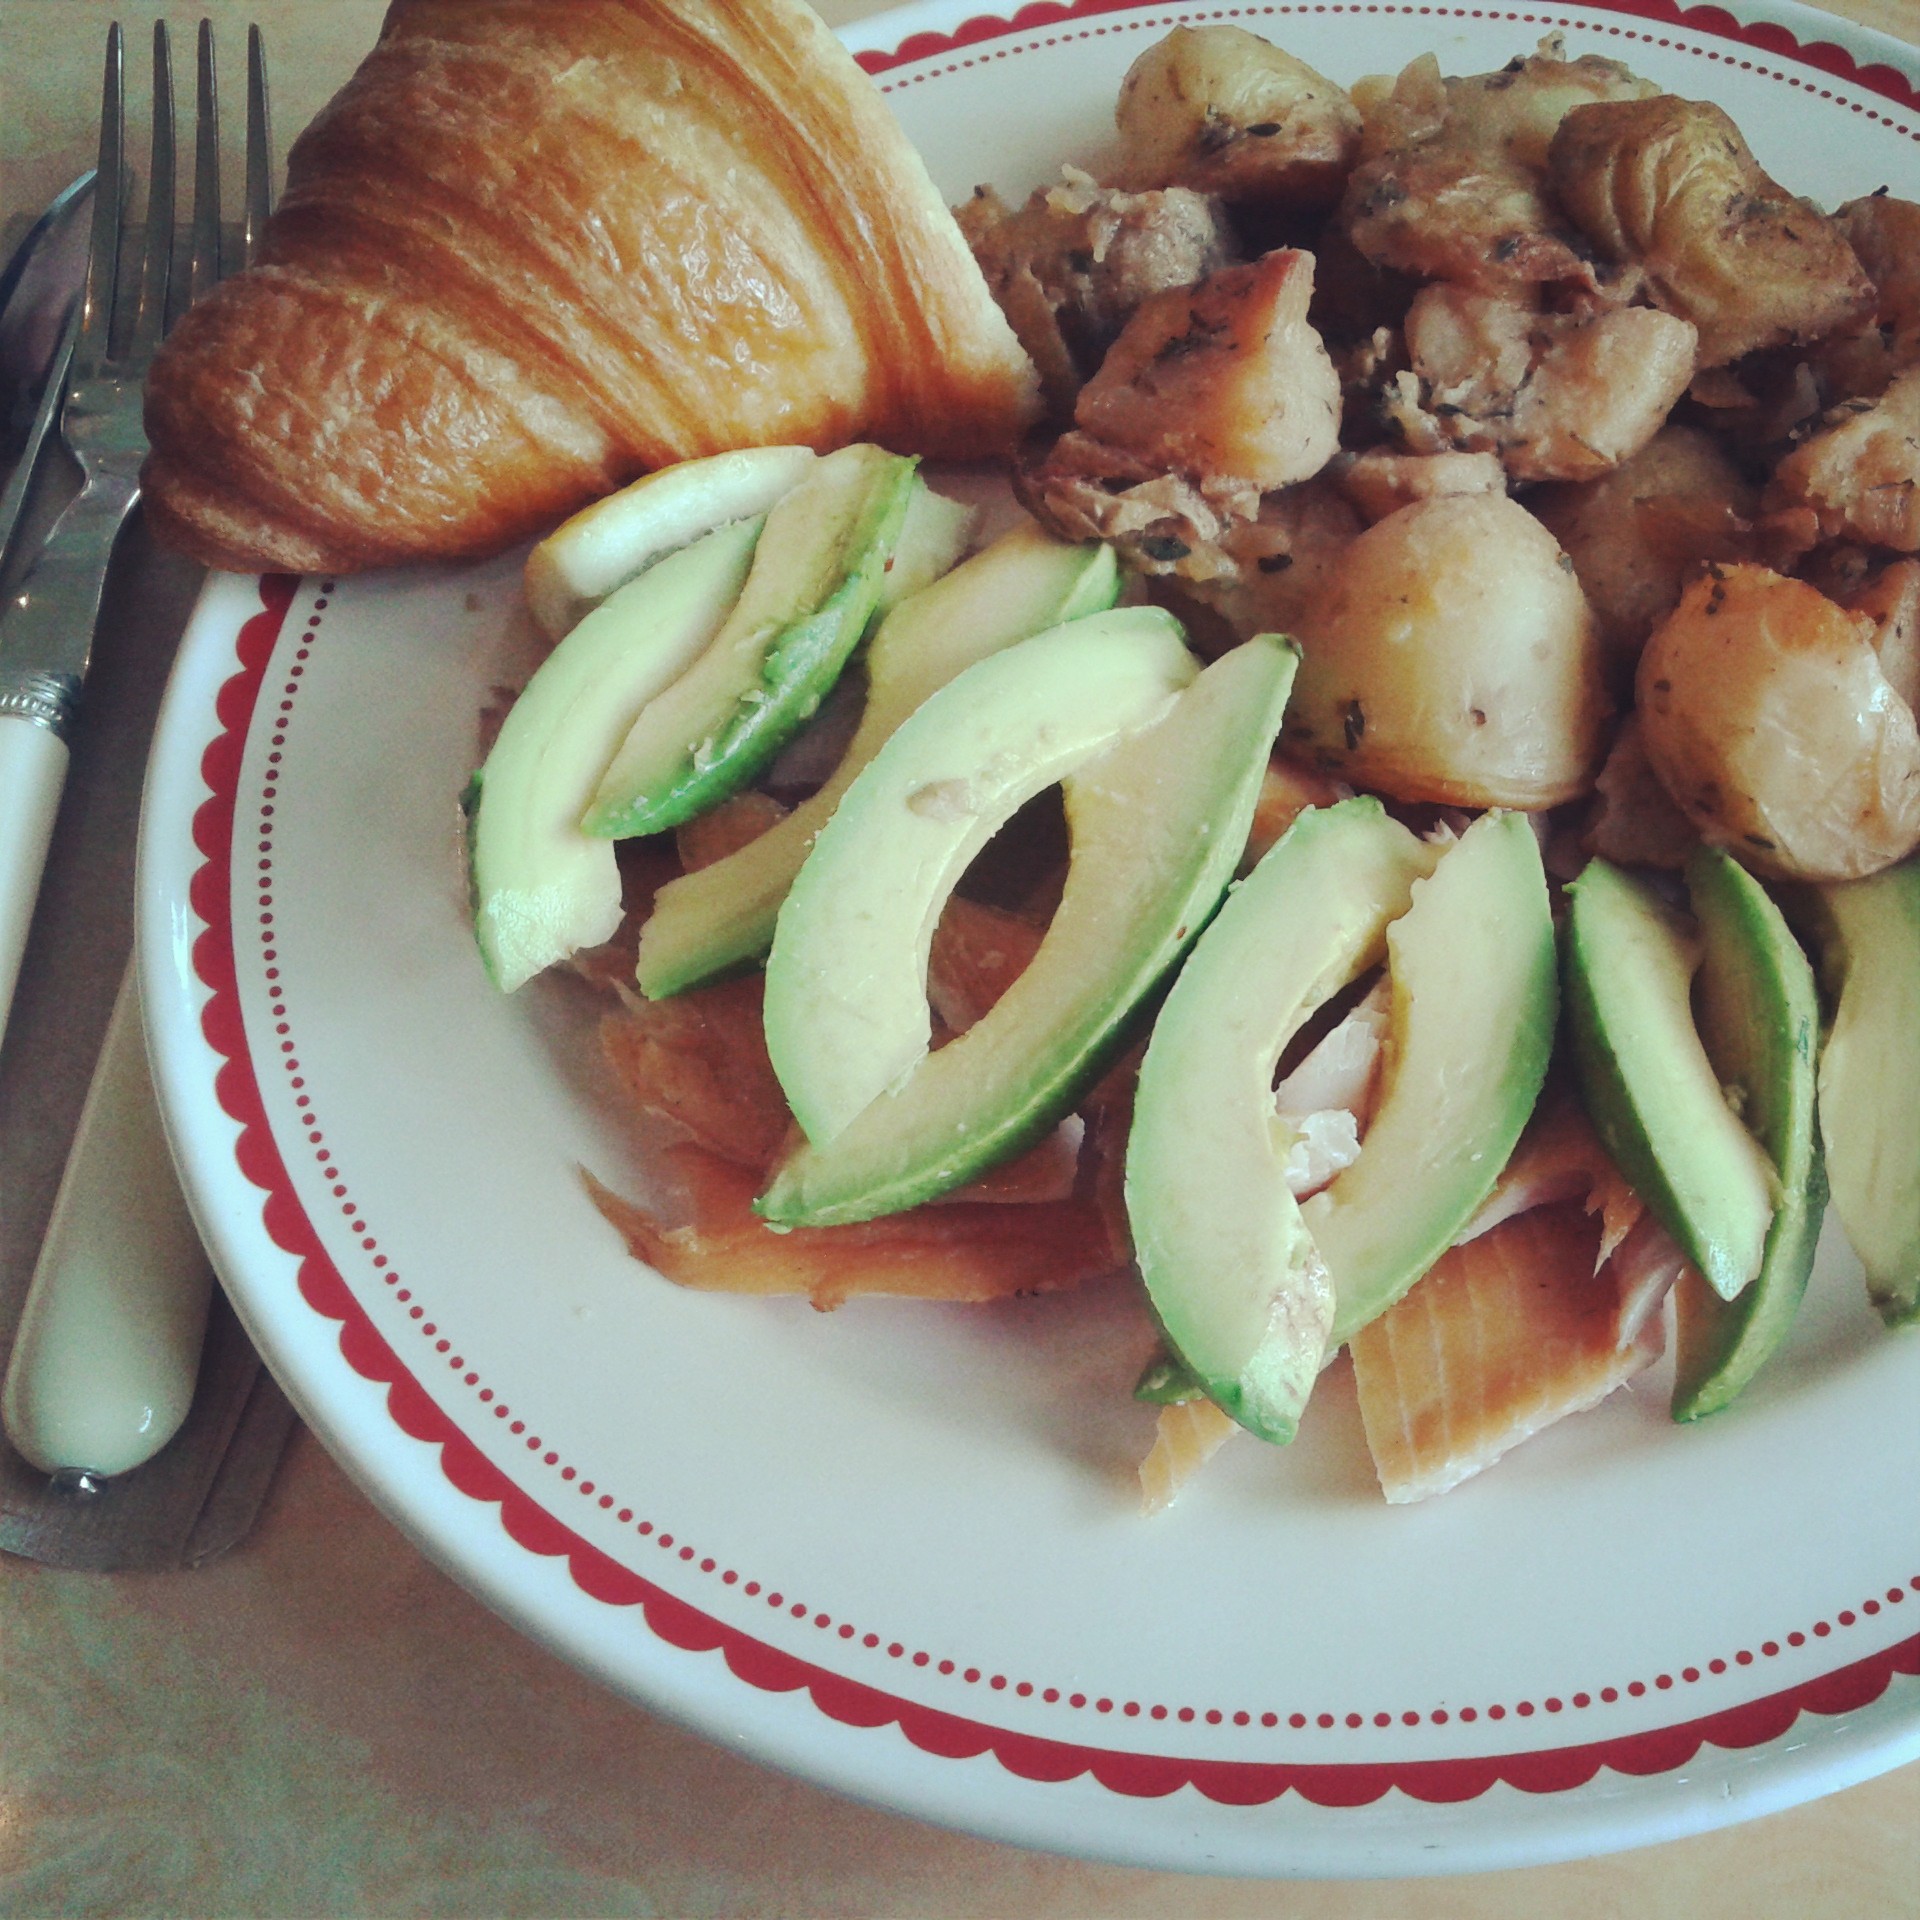
But actually this post is about banana bread. Um. Non sequitur? Sorry, I was just really excited about my leftovers for lunch today… and I’ve been working too much and my I think I lost my brain somewhere between my last six days of work in a row and here. Has anyone seen it? It’s lumpy.. and grey…

Right. Anyway. Banana bread. Not just any banana bread though—this is grain free, refined sugar free, and has CHOCOLATE in it. So I mean, obviously. What are you doing still standing there?? Why aren’t you in your kitchen making this immediately?
Good. I see you trotting off towards your bowls. My pictures have apparently had their desired effect…

IMG_6324

Sorry if there’s drool on your keyboard, I take no personal responsibility for that.

IMG_6318

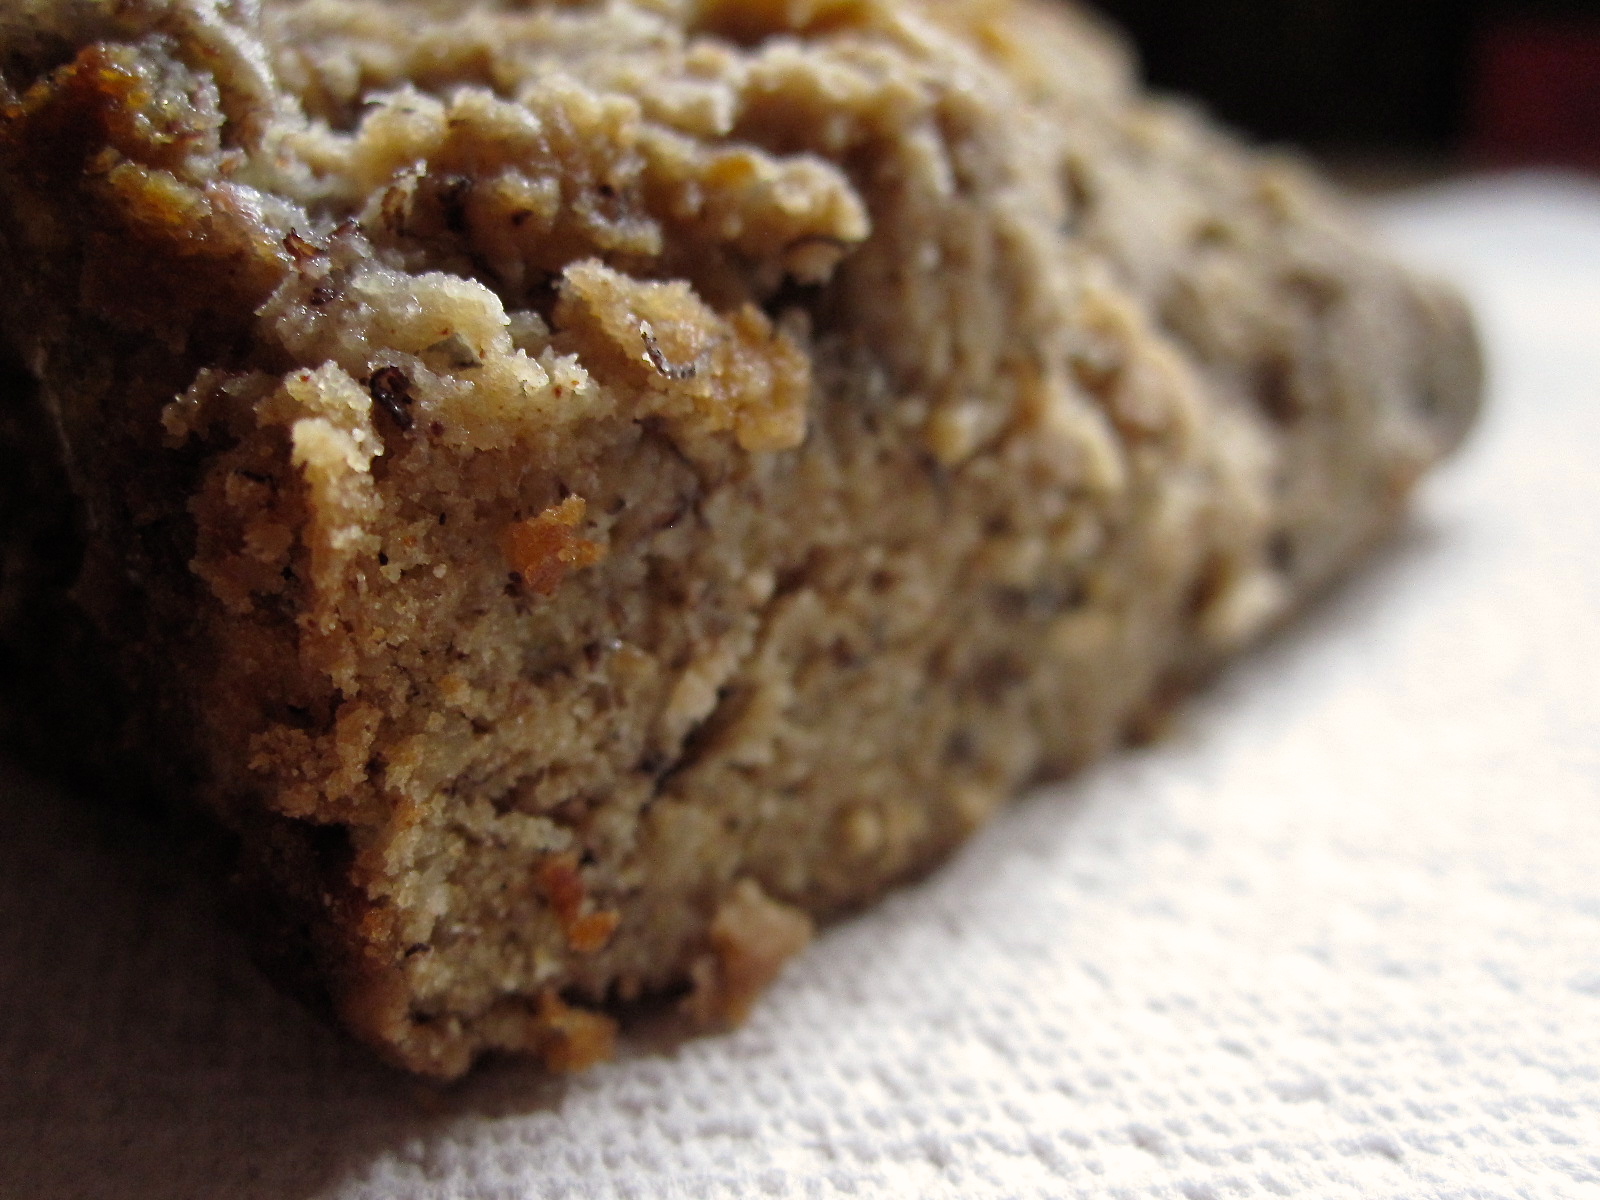
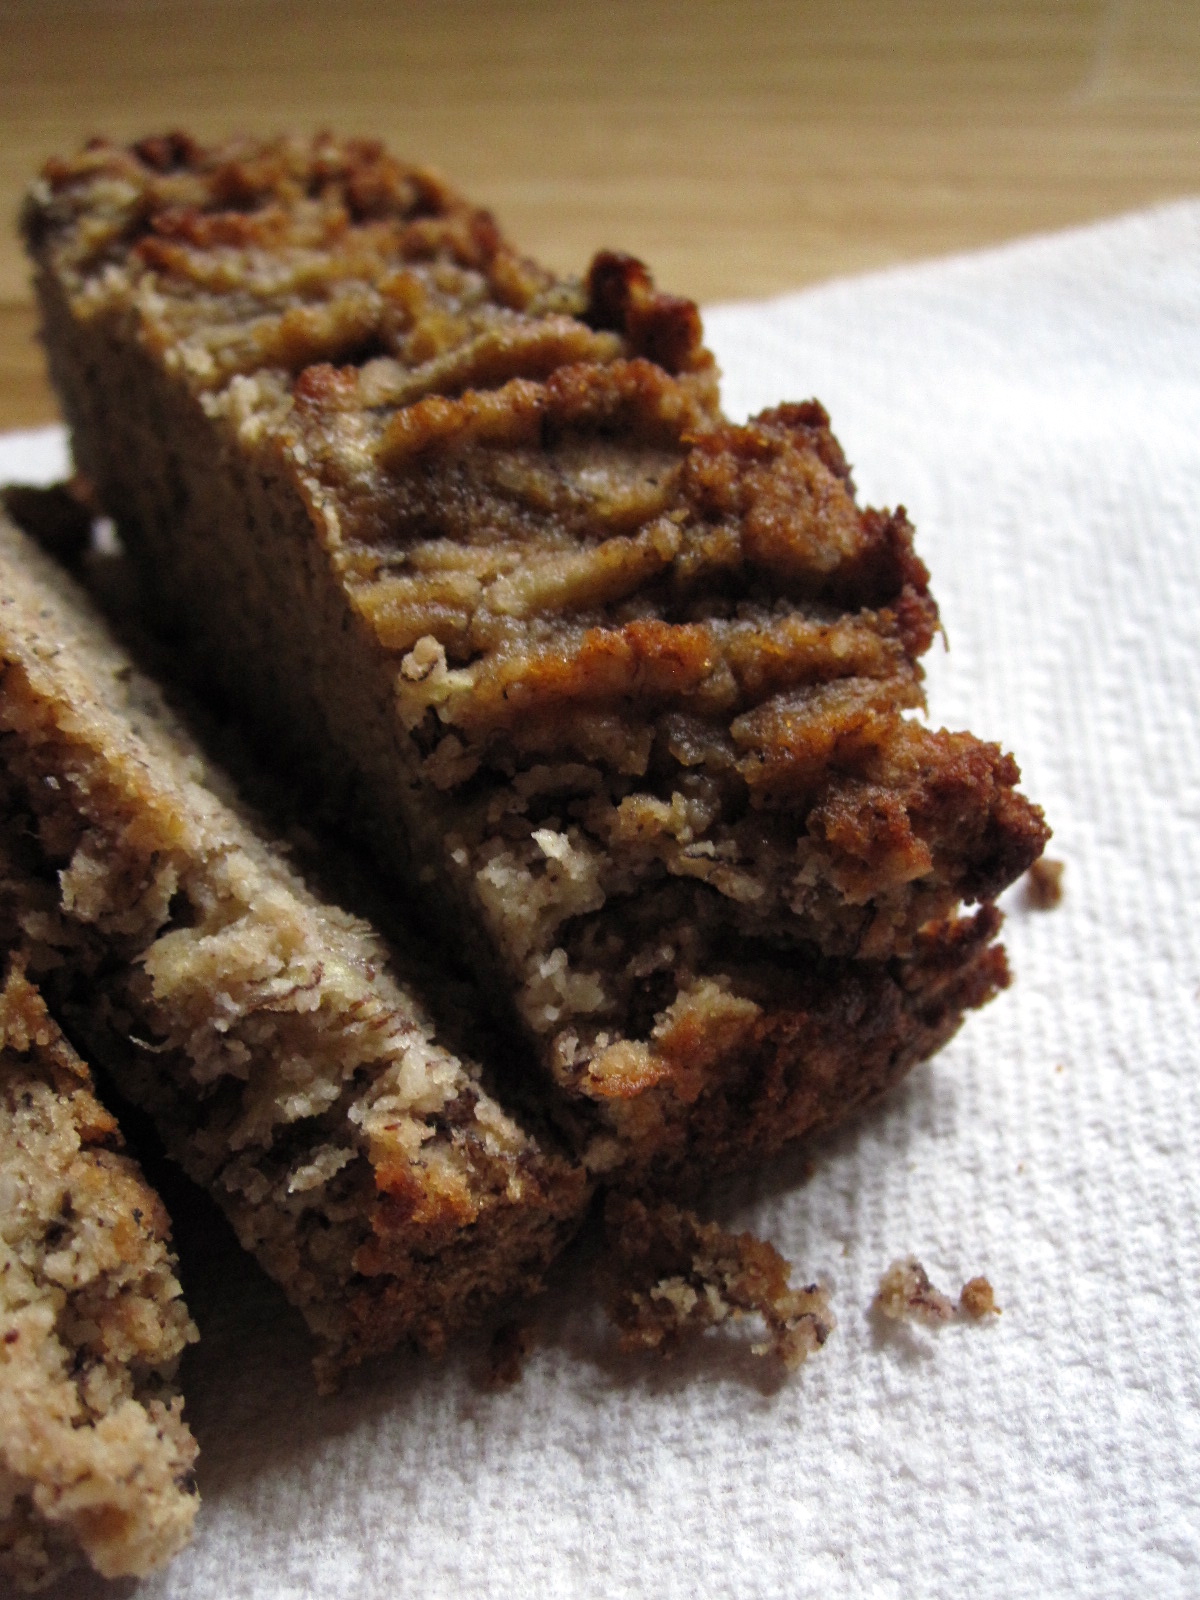
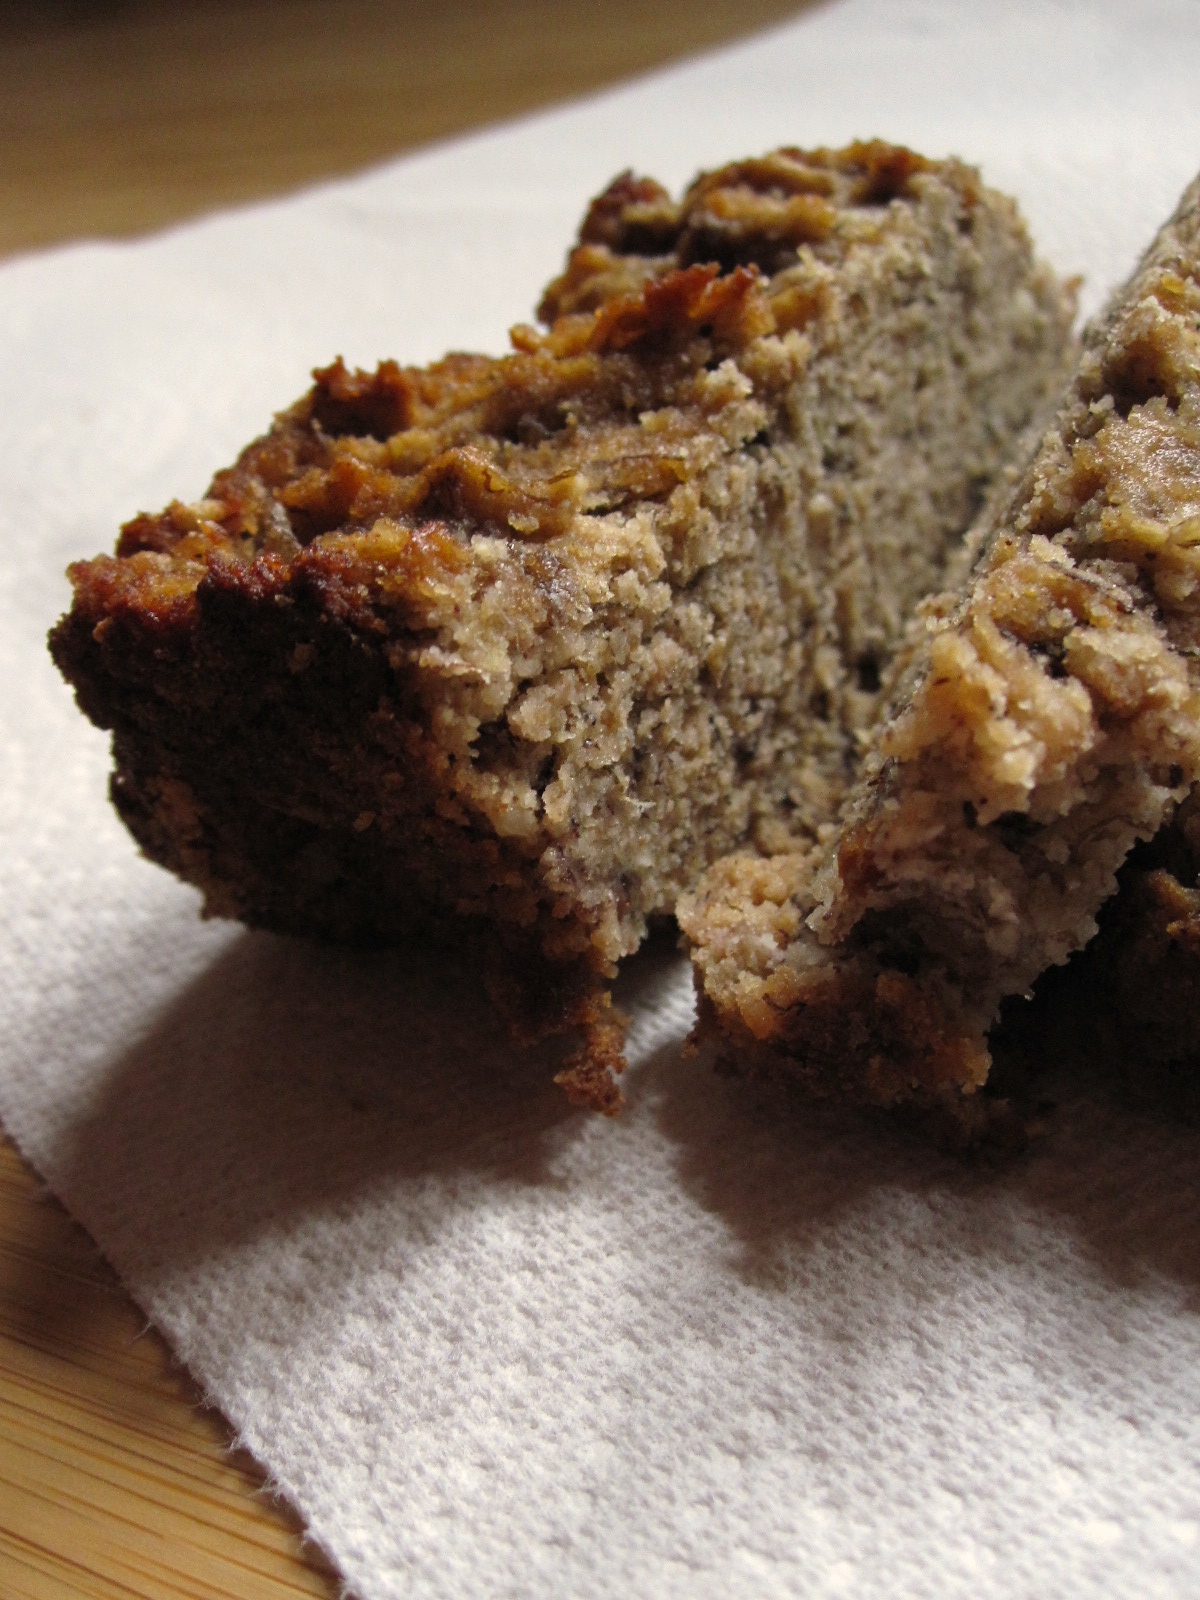
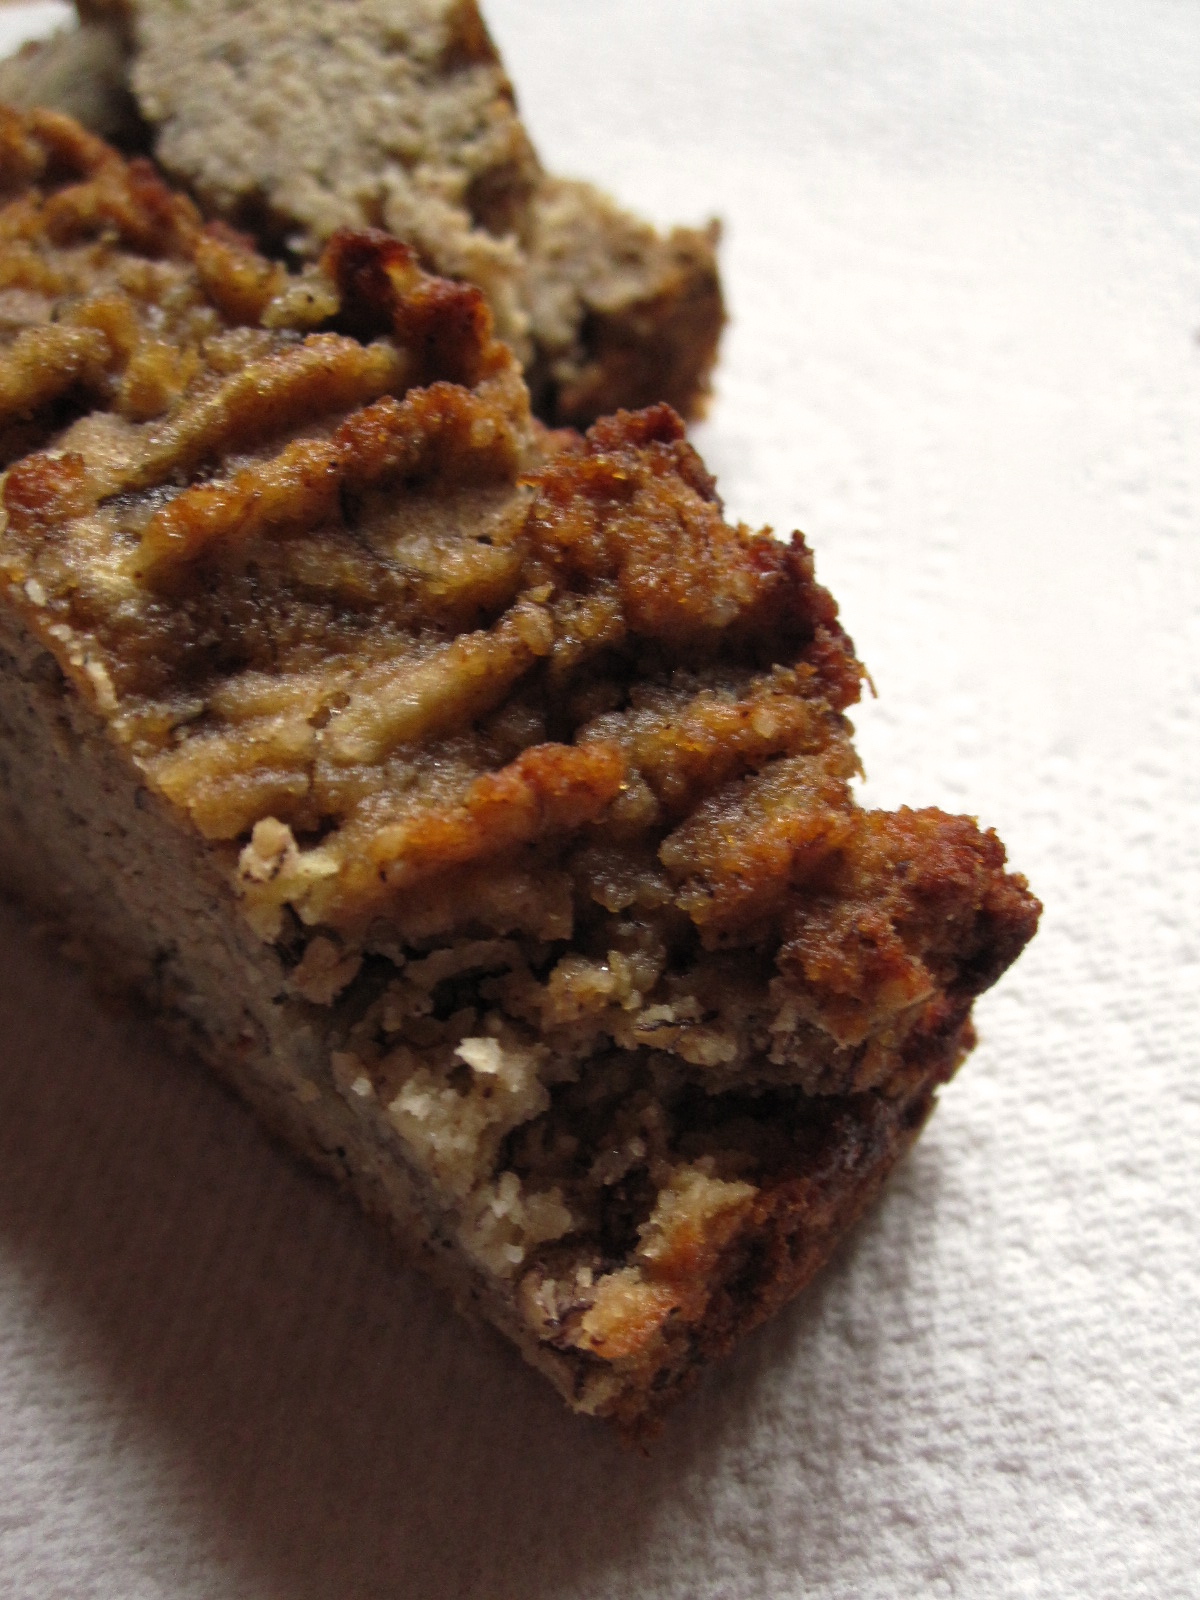
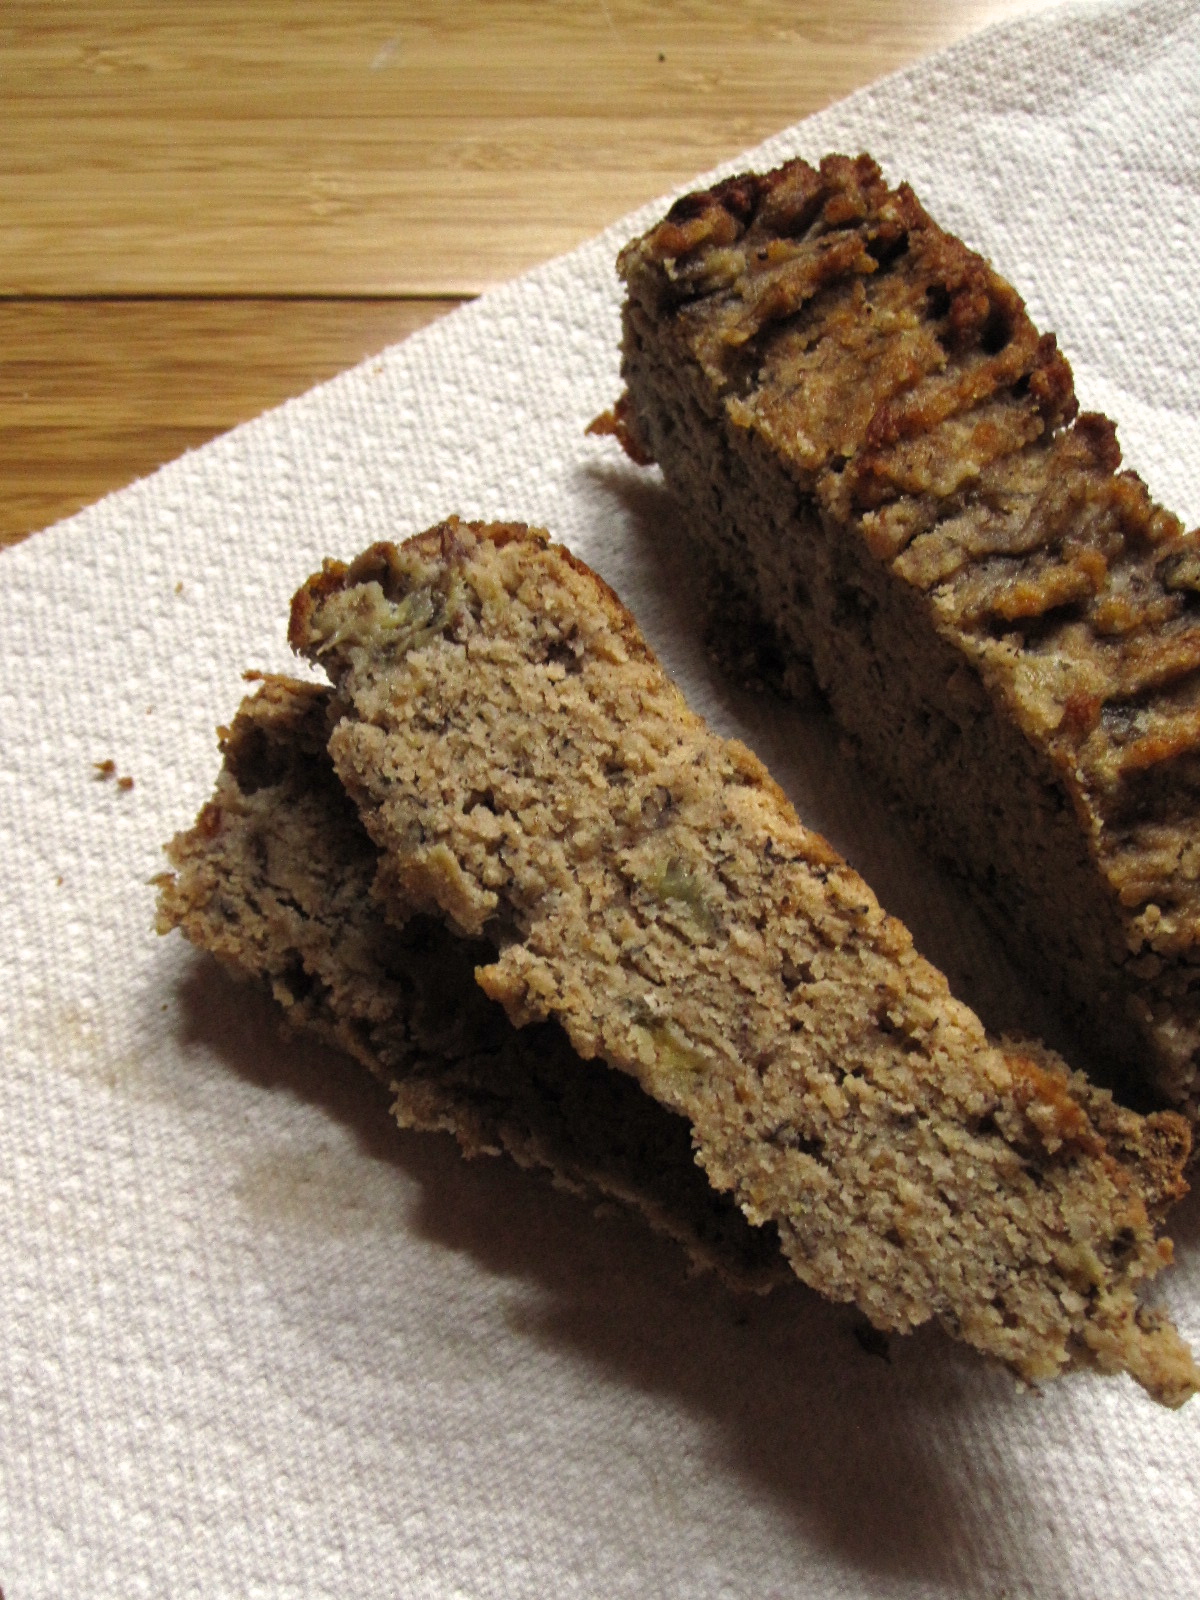
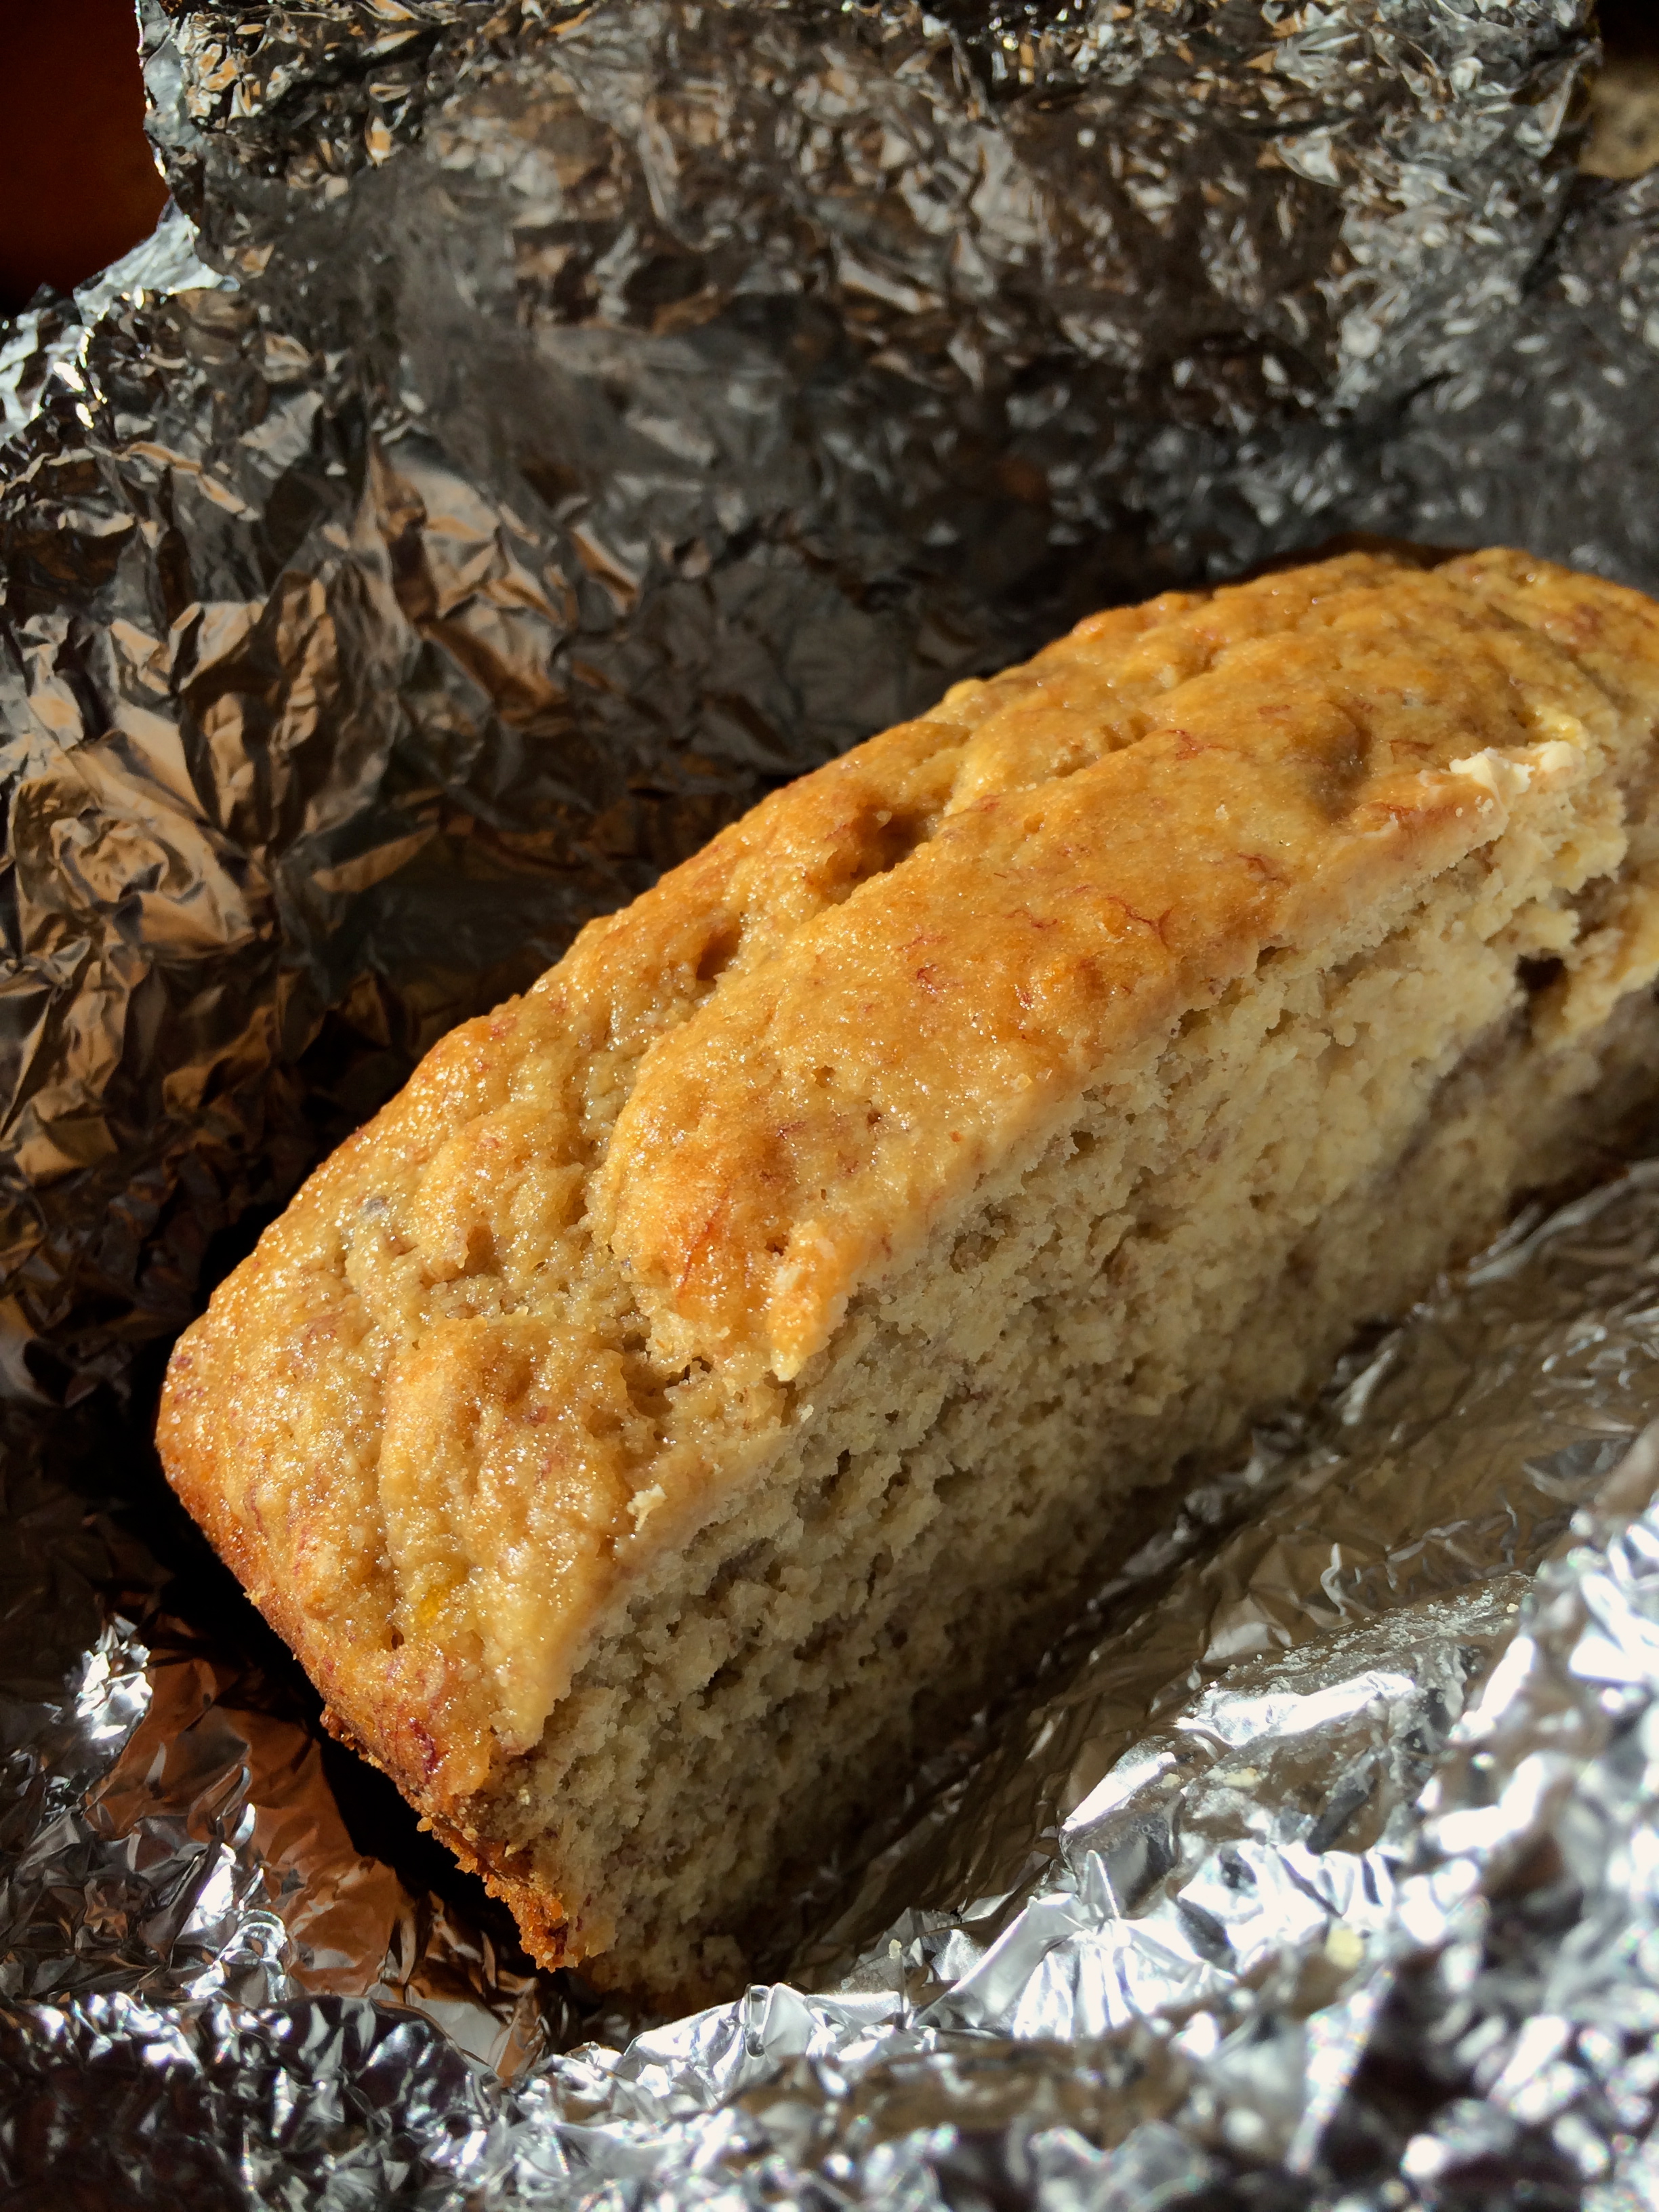
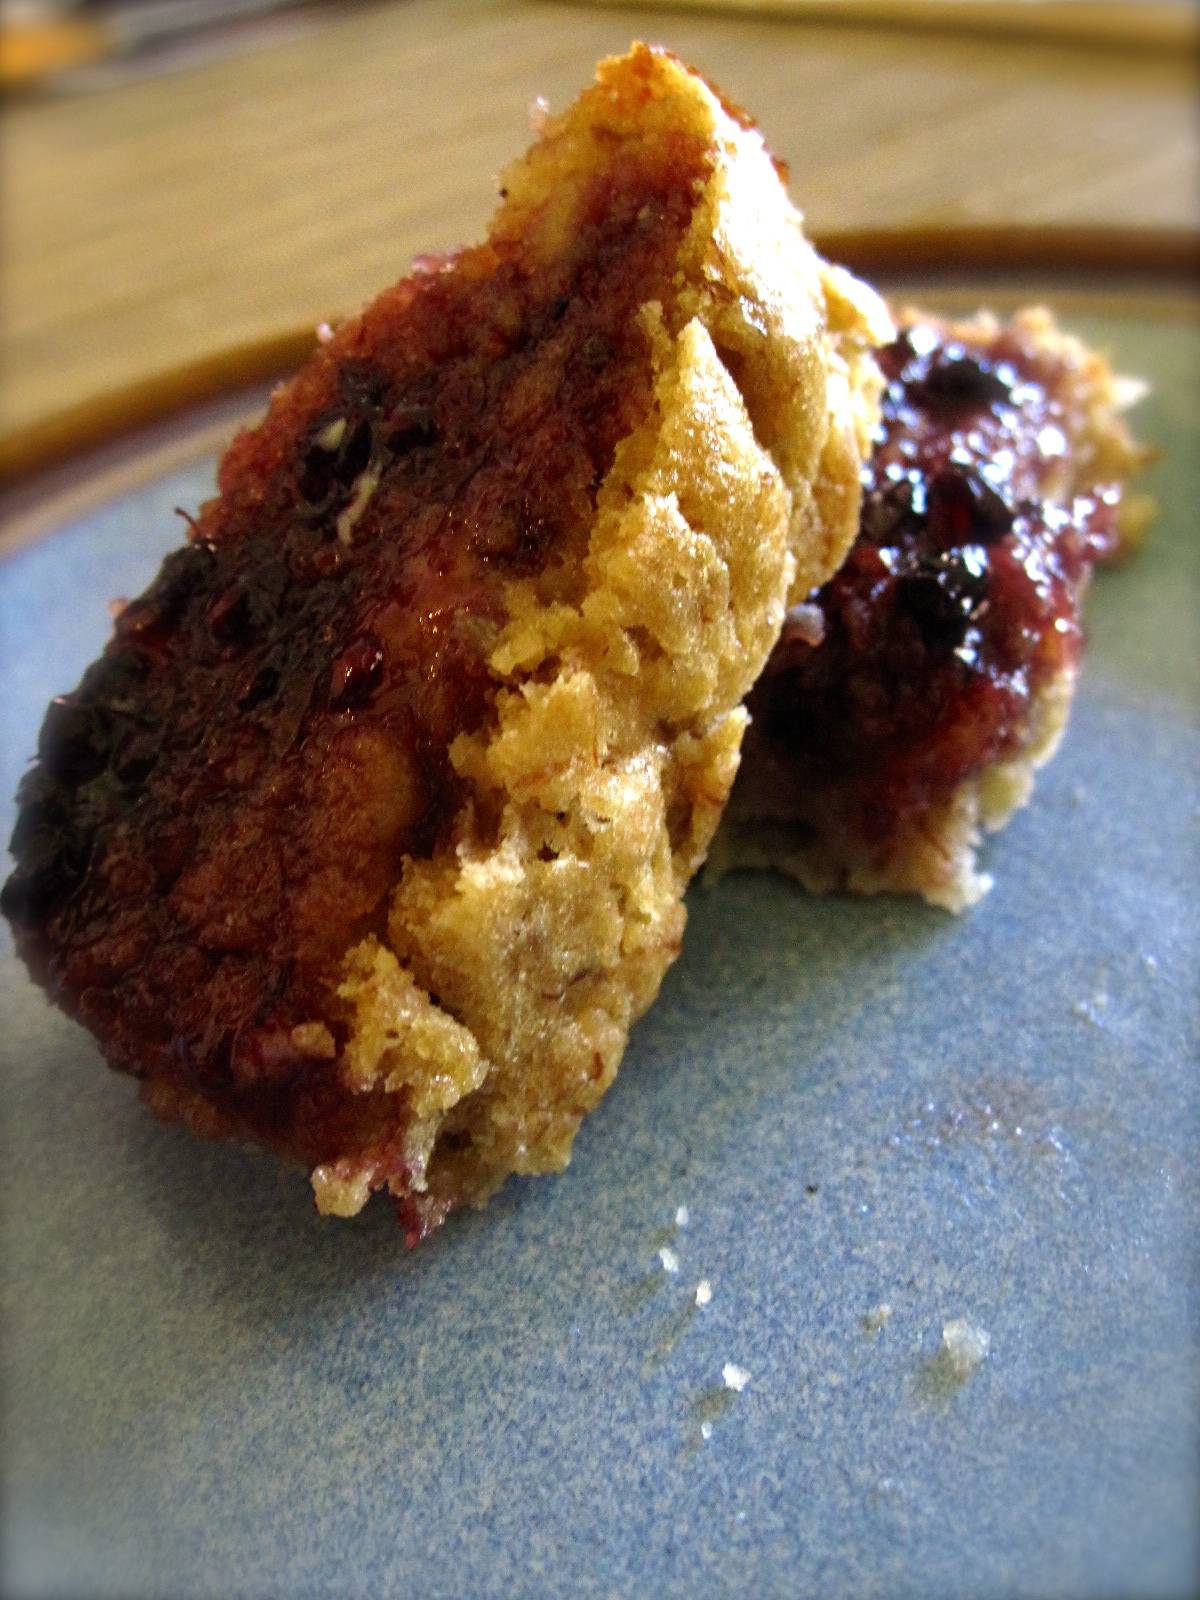
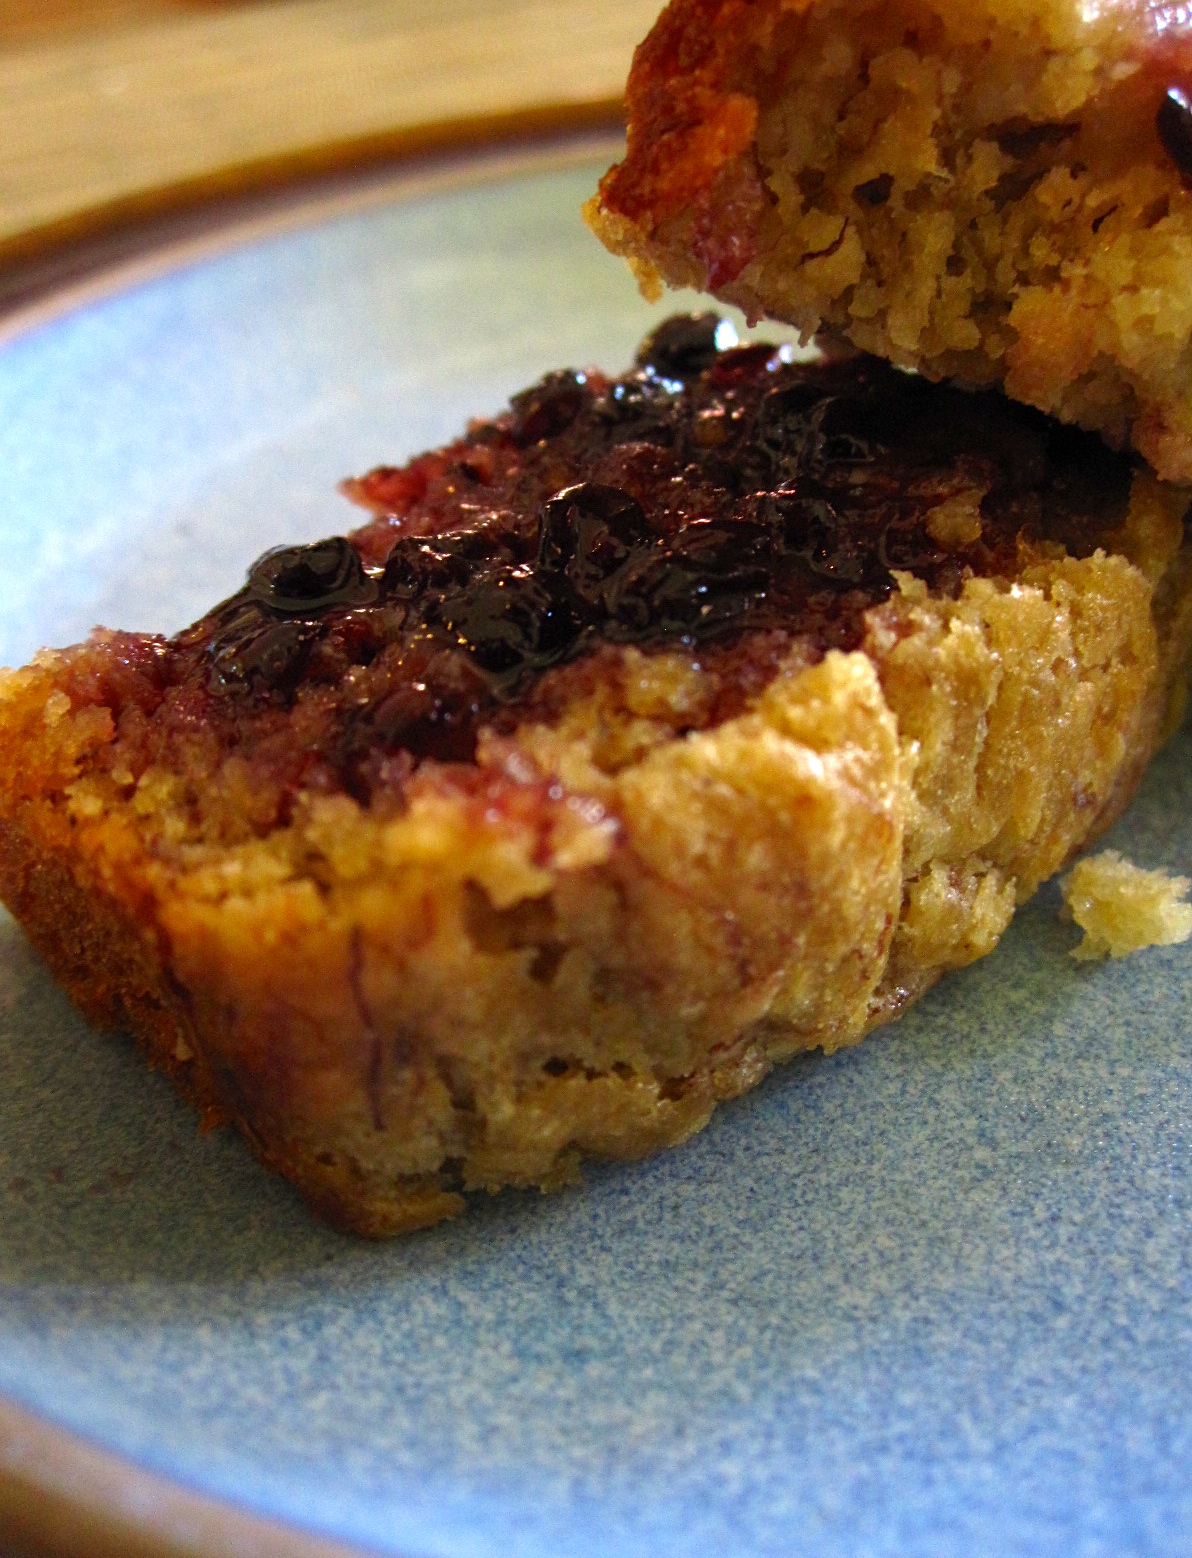
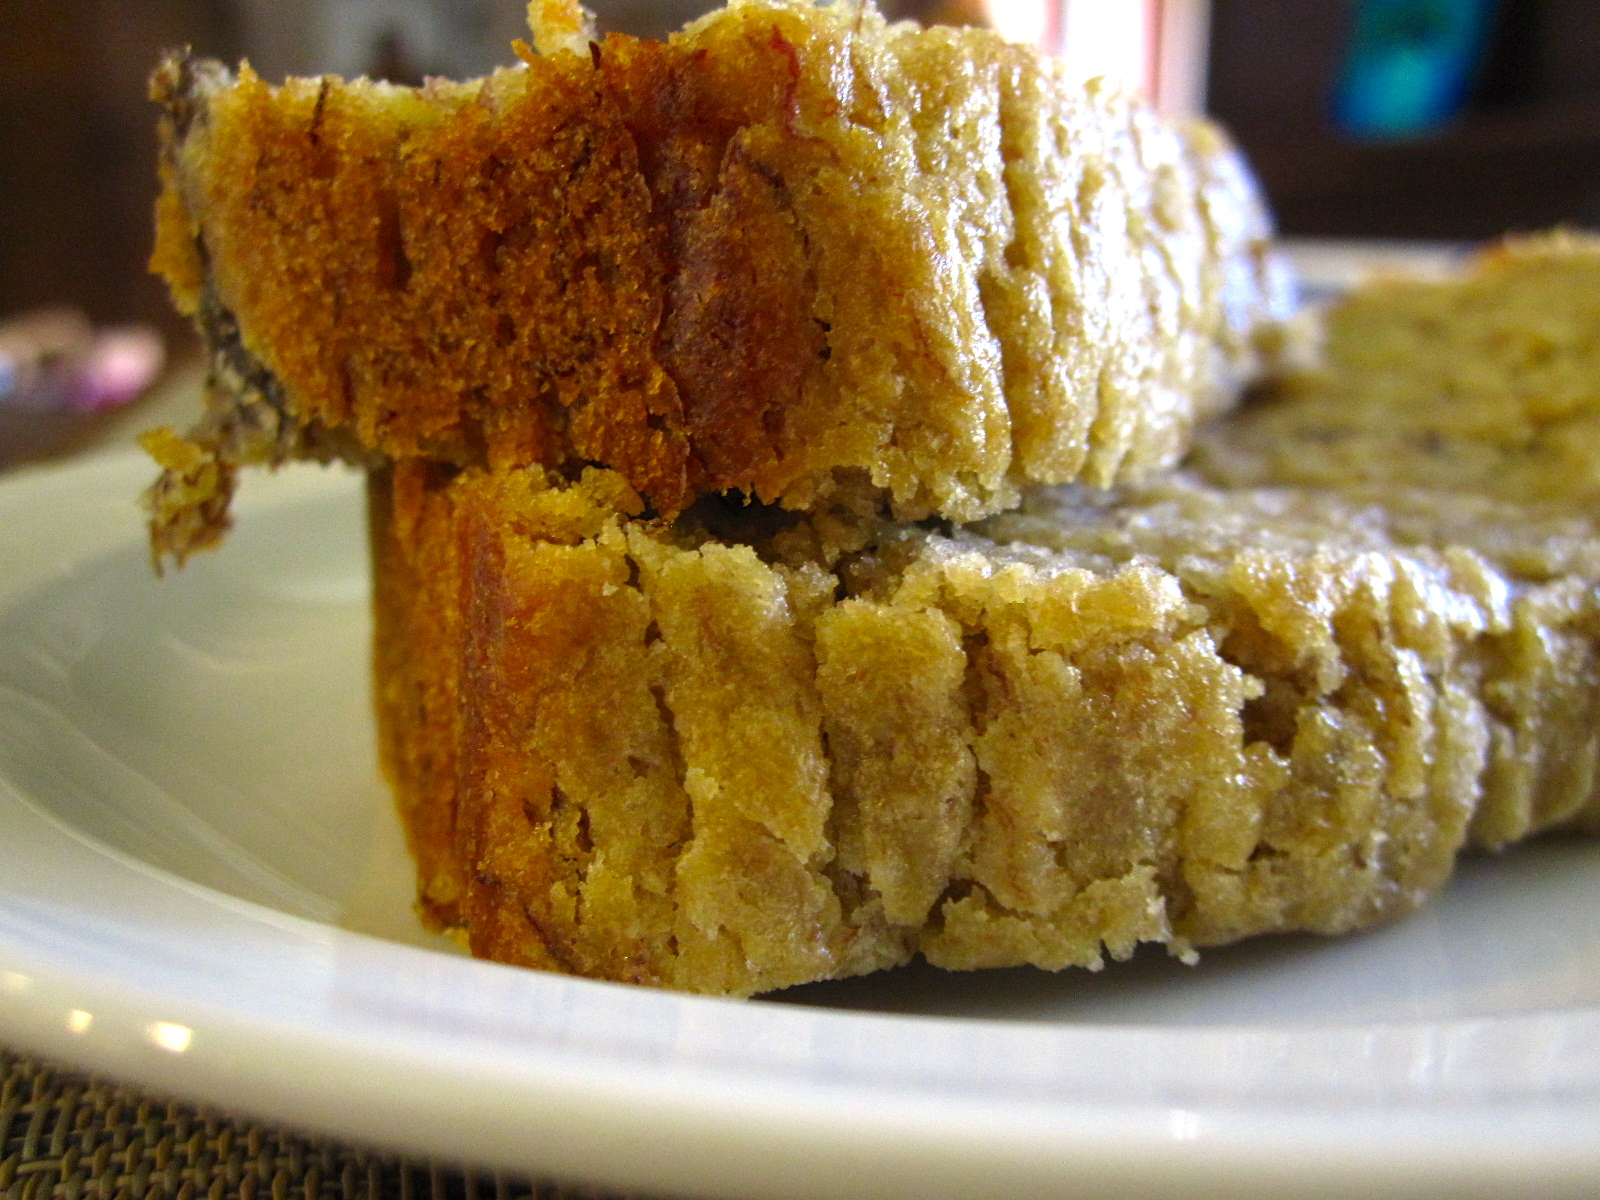
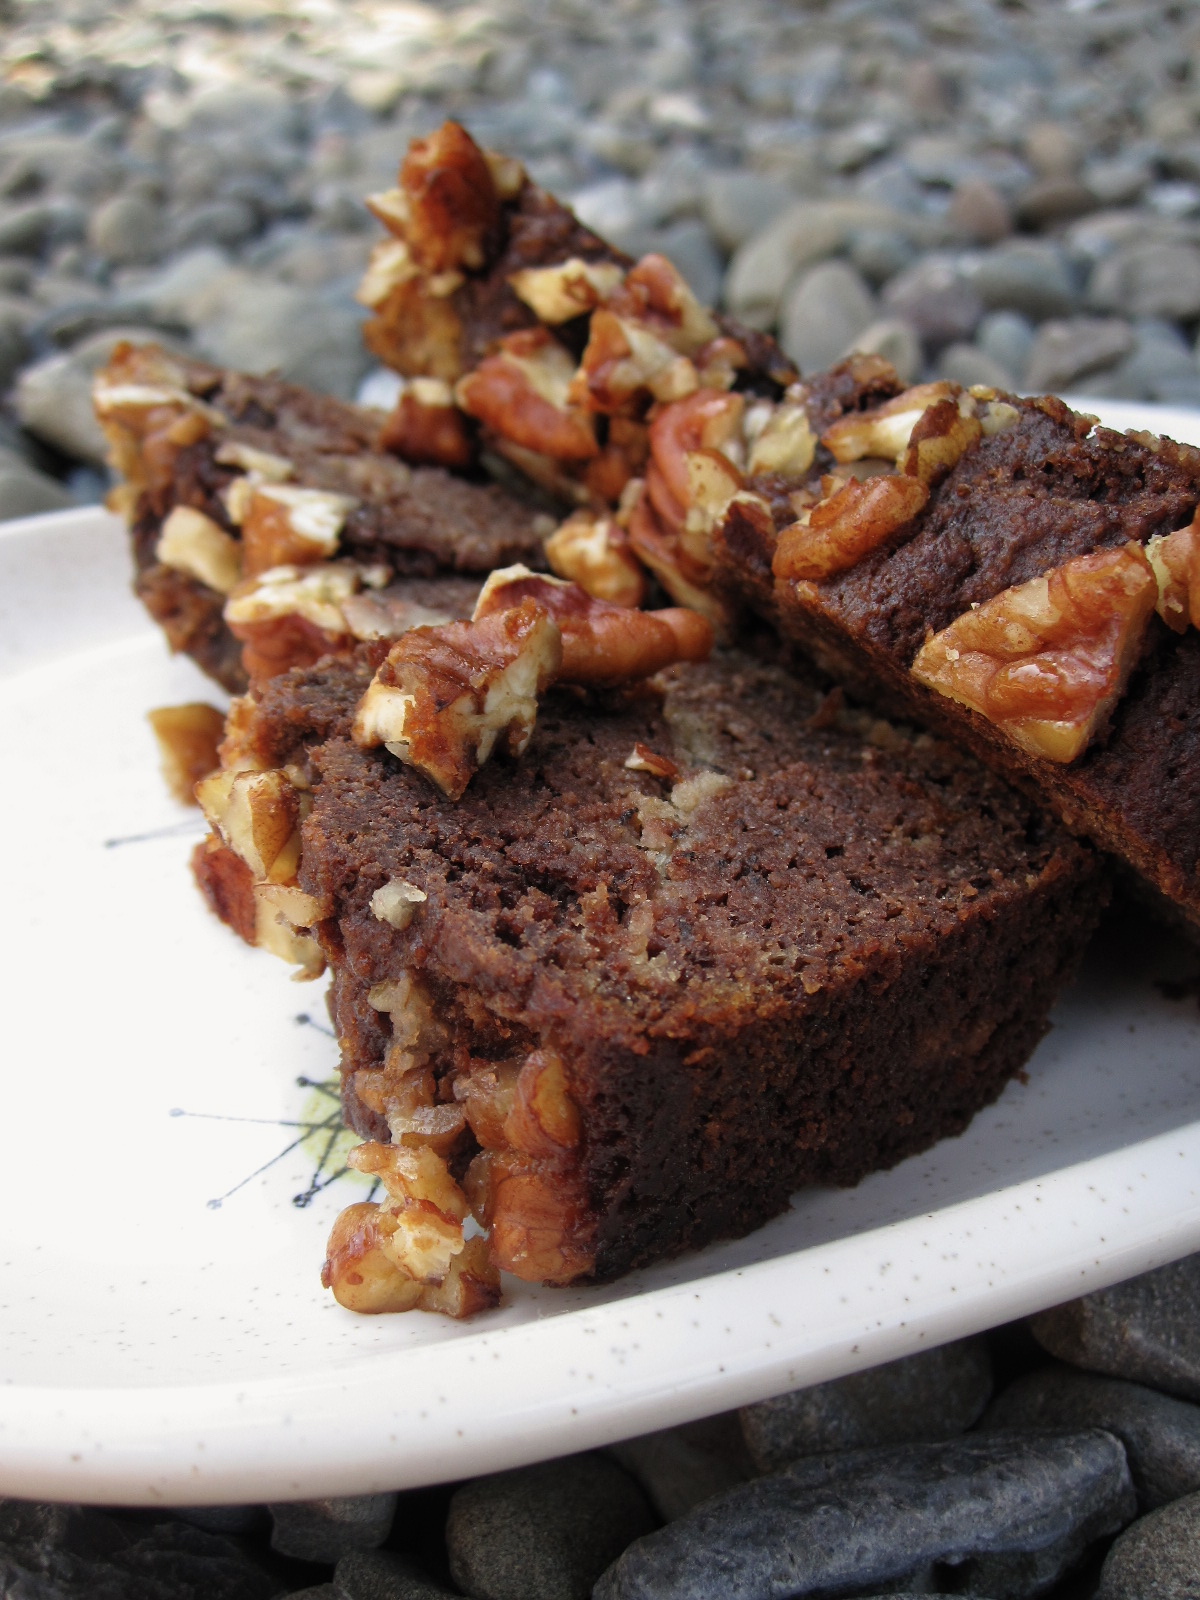
This went over quite well with its audience: dense with a  good crumb, equal parts chocolatey and bananay… not too sweet but just sweet enough. Excellent with ice cream, if I do say.

IMG_6317

Grain Free Swirled Chocolate Banana Bread

Recipe adapted from My little jar of spices, here! Yield: 1 loaf. Grain free, gluten free, refined sugar free.

  • 3 very ripe bananas (the blacker and more disgusting the better), about 2 cups mashed
  • 2 c almond flour
  • 1/3 c ground flaxseed
  • 1.5 tsp baking soda
  • 3 tbsp salted butter, melted
  • 2 tbsp raw honey
  • 1 egg
  • 1 tsp vanilla extract
  • 2 oz extra dark chocolate, 70% or above
  • 2 tbsp coconut oil
  • 3/4 c pecans, chopped
  • 1 tsp raw honey

Grease a loaf pan (I use coconut oil), and preheat the oven to 350.

In a largeish bowl, whisk together almond flour, flaxseed, and baking soda. Set aside. In a small saucepan over low heat, melt butter and honey together until incorporated, stirring constantly until the mixture is a bit thickened. Remove from heat. In a medium bowl, mash the bananas until you get most of the lumps out. Whisk in egg and vanilla, followed by the butter-honey mix. Whisk to combine. Pour all of this biz into the dry ingredients, and stir until just combined.

In a microwave safe bowl, melt dark chocolate and coconut oil together, stirring occasionally. I usually do mine on 30 second bursts, stirring in between. Divide out half of the batter and stir in the chocolate.

Drop the batter into the loaf pan, alternating between chocolate and banana. I used heaping spoonfuls of each, swirling the tops sightly as I went (really, there is no wrong way to do this. Pretend it’s art!). In a small bowl, combine 1 tsp honey and chopped pecans until mixed. Toss this evenly on top of the batter, spreading it out so it’s all even and pretty. Bake for 45-50 minutes, or until a tester comes out clean. (Mine was perfect at 50) Let cool in the pan completely, and store in the refrigerator. I just left mine in the pan for 3 days, and it was totally fine.

IMG_6319

Wednesdays are BANANAS

IMG_6201

It’s Wednesday… time to go BUHHNAHHNUHHSS!!

IMG_6200

Or something like that.

But first: a little throwback Wednesday to get things started off right. These were my shoes as a baby:

IMG_0090

And we wonder why I turned out like I did?! Ha. Evidence. I’m sure my current state of affairs also has quite a bit to do with the fact that as a baby, I looooved tofu and bananas mashed up together. Yeah. I’m not too sure about that combination these days either…

And then there’s this, which is a throwback to like.. yesterday. Or maybe breakfast. Because apparently quite a few of my meals start off looking like this:

IMG_0100

Huge pile o’greens. Are we surprised? No, not really. ANYway…

IMG_6202

Banana bread!! Only this time its grain free, for peeps who either don’t wanna or can’t have gluten or grains. I like grains and gluten (bread. obvi) but I also really like new things, so this happened. And I am sooo glad it did because it is also delicious, and as I’ve said many times I really don’t have time for things that aren’t delicious. It also happens to be refined sugar free, which I love. Actually… there aren’t ANY added sweeteners in this, period—all the sweetness comes from buhhnahhnuhss! Awesome. Just make sure you use some really dead bananas—mine were pretty nasty looking but they found bliss in their next incarnation as bread, so everybody wins.

IMG_6205

Grain Free Banana Bread

Makes one loaf. Grain free, gluten free, refined sugar free, dairy free, paleo. It’s high in healthy fats and fiber (yay!), and very satisfying. I think that covers just about everything! Recipe only slightly tweaked from Heather’s French Press, here!

IMG_6203

  • 1/2 c almond flour
  • 1/2 c coconut flour
  • 1/4 c ground flaxseed
  • heaping 1/2 tsp cinnamon
  • 1 tsp baking soda
  • 1/2 tsp salt
  • 4 ripe bananas, mashed (mine were smallish)
  • 2 eggs
  • 1 tsp vanilla extract

Preheat the oven to 350, and thoroughly grease a loaf pan (Or use parchment— my bread stuck like WHAT so obviously I was lazy with greasing and should have used parchment. Whoops. Whatever, it created “crumbs” and then I got to eat them all).

In a bowl, whisk together almond flour, coconut flour (sifted if chunky), flaxseed, cinnamon, baking soda, and salt. In a larger bowl, mash bananas, then vigorously whisk them together with the eggs and vanilla. Pour wet into dry and stir until just combined. This batter (because of the coconut flour) is very thick—it won’t pour like typical banana bread. I smooth mine out with a spatula and then give it fork marks on top for fun. Smooth the batter out in the prepared pan, then pop it into the oven and bake for 45 minutes. A tester should come out clean when it’s done. Let it cool for a few in the pan, then turn it out onto a cooling rack to cool completely.

Store in the fridge! I found that it got better and better the longer it lasted (which sadly wasn’t that long…)

IMG_6207

IMG_6208

A snapshot of my random (and undeniably fab) life

Welcome to Random Friday! I have several nice lifeish photos hanging out on my phone and they need a home. And I figured I would accompany them with several hilarious anecdotes about my life, because… well, why not? My blog, my rules. And besides, I’ve heard y’all think I’m funny so I thought I’d brighten up your Friday. Ready… GO!

IMG_0019

Purple nails and letters from Avis deVoto and Julia Child. Because I’m awesome. And because this is the pile on my end table: reinforcing my own stereotype or something?!

IMG_0025

I love it when my chocolate loves me back!

IMG_0022

Somehow yesterday morning I managed to get roughly 1.5 cups of raw (which then became cooked) spinach, half a zucchini, a carrot, a quarter cup of wild blueberries, and a quarter cup of applesauce into my oatmeal. If that isn’t impressive, I don’t know what is… take that, five-a-day! I think this is a new record, even for me…

Of course there was also the obligatory chia seeds, almond butter, shredded unsweetened coconut, cinnamon, nutmeg, and a teeny bit of maple. Maybe a little bee pollen. And yes. There were, in fact, oats in there too. Sadly it was too delicious and I ate it too fast for there to be a picture. Next time..

Mmmm. And it was DELICIOUS. Naturally. I don’t bother starting off my days with undelicious things. Why bother? Life is way too short for that.

IMG_0060

And then I added lentils to my go-to quinoa cakes. INSPIRED. Why has this never transpired before?!

IMG_0058

AND THEN. I’ve been replacing whole wheat flour with lots of other favorite alternatives lately… but my favorite is sprouted quinoa flour in this banana bread. It’s already my fave bbread recipe, but it gets that.much.better with quinoa flour. Besides, I get rave reviews from several of my gastronomically-inclined peeps so I know it’s not just in my head…

IMG_0057

Crystalized ginger is really pretty.

IMG_0065

And the obligatory cat-napping photo… Jessie doesn’t want you to disturb her napping human! Alternatively… the napping human is hogging too much of the pillow…

IMG_6676

Wise kitty of the forest.

IMG_0053

Soup is just an excuse for bread, don’t try to deny it!

IMG_5832

Soooooop.

And bread.

IMG_5837

Because obviously you can’t have soup without some bready, carby side dish. We all know that soup is really an excuse for bread, let’s be real here.

But mmmmm, soup. I do love it (but I DO NOT love photographing it. Ugh). ESPECIALLY now that I have this fabby immersion blender!! Which means that I can dispense with all that silliness of attempting to blend soup in a food processor (no, I don’t own a normal blender), which is a dumb idea as a) soup is hot. Hot things expand and b) food processors aren’t watertight (rude). So instead of soup going slightly all over the counter, now I can just bust out the trusty immersion blender, stick it in the pot of soup buzz buzz buzz and low and behold!! Creamy soup, no mess required. Genius.

IMG_5836

Also. I bought a spiralizer. Possibly the BEST decision I have ever made. And also possibly the most fun kitchen utensil ever created.

See?

IMG_5805

Reeeeealllyyyy looooooong zucchini noodles! So much fun to play with. Obviously avoided if you do the smart thing and cut the zucchini in half first, but why spoil your fun? Incredibly long noodles are so much more entertaining. And delicious, especially when you top them with bison pasta sauce and other delicious things. Unfortunately, it was slightly too delicious and there went that before I managed to take a picture of anything besides the noodles. Whoops! Next time.

IMG_5812

Anyway. Let’s get seasonal! Hellooooo autumn, you’re my favorite. The day I made this, I ate three sources of beta carotene in one day. No eye problems for me!
This soup is very easy, comes together in a snap, and is (naturally) delicious. The muffins are awesome too, likewise easy and delicious. In fact, if you time it right, you can bake them while the squash is simmering, then blend your soup and have everything hot at the same time. Wheee!

IMG_5830

Ginger-Coconut Butternut Squash Soup

Serves 4, with leftovers. Recipe inspired by Whole Foods, here! Gluten free, can be vegan with veggie broth.

  • a generous drizzle of olive oil
  • 1 butternut squash, peeled, deseeded and diced (yield: 4 c diced)
  • 1 onion, diced
  • 1 large carrot, diced
  • 2 persian cucumbers, diced
  • 1 tsp fresh ginger, grated or diced
  • 3.5 c veggie or chicken broth
  • 1/2 c light coconut milk (out of the can)
  • 1/2 tsp sea salt
  • pepper to taste
  • pepitas, for garnish!

Heat olive oil in a large soup pot over medium heat. Toss in onion, carrot, and cucumbers, and let cook until the onion is translucent (about 5ish minutes). Add ginger, let cook a few minutes more. Finally, add stock, squash, coconut milk, sea salt, and pepper, bring to a boil, then reduce to a simmer and let cook, covered, until the squash is fork-tender (about 30 minutes). Once squash is soft, use an immersion blender to puree soup to desired consistency. An upright blender is fine too, just make sure the soup is cool enough.
Garnish with pepitas just before serving!

IMG_5835

Pumpkin Cornmeal Muffins

My yield was 10, in my so-called ‘jumbo’ muffin tins. I never fill them all the way, but these muffins came out a totally normal size. High in vitamin A, low fat, refined sugar free, and whole grain! Recipe adapted from Running to the Kitchen, here!

  • 1 c whole wheat pastry flour
  • 1 c cornmeal
  • 1 tsp baking soda
  • 1/2 tsp salt
  • 1/2 tsp cinnamon
  • 1/4 tsp nutmeg
  • 3 tbsp coconut sugar
  • 1 egg
  • 1/2 c unsweetened almond milk
  • 1/4 c lowfat plain yogurt
  • 1 tbsp butter, melted (I use Kerrygold Irish butter)
  • 1 c pumpkin puree

Preheat oven to 375, and lightly grease muffin tins (I use coconut oil).

Whisk together whole wheat pastry flour, cornmeal, baking soda, salt, cinnamon, nutmeg, and coconut sugar. In a smaller bowl, whisk together egg, almond milk, yogurt, melted butter and pumpkin puree. Combine wet into dry, mixing just to combine. Pour batter into the prepared pan, and bake for about 15 minutes (a tester should come out clean, and the tops should be slightly browned). Let cool for a few before turning out onto a cooling rack.
I’m sure these keep well, but ours didn’t last that long!

Happy Tummy Conga Lines

IMG_5705

YOU. GUYS.

I know I have like umpteen zillion banana bread recipes on the blog, but seriously. Ignore the other ones (well, not really–they have their merits too.. just for today!)

THIS is my favorite. Hands down, I’ve-already-eaten-two-slices-and-am-heading-for-another-one-someone-stop-me kind of bread. Like, half the loaf is gone (I’ve had help, let’s be real here).

IMG_5708

And besides that, it is FAB with blackberry jam. Especially when that jam is handmade and acquired from a lovely local source. I’ve never put jam on banana bread before now but I’m probably not going back. Ever.

IMG_5702

Luckily for me, not only is this one a fast and easy one to whip up, but it’s full of healthy for me things like coconut oil and buunahhnuhhsss and whole grains and honey.  Good thing too that we had literally two bunches of dead bananas spread out between the fridge and the freezer and they were looking so sad and dead and brown… clearly they needed to go into something delicious like this. They’re much happier now, they wanted me to tell you.

Go make your dead bananas happy. Bake them into something that then makes your tummy do a happy dance! Mine is, we could have a tummy conga line. Umm yeah okay this is getting out of hand with talking bananas and gastrointestinal conga lines, but seriously. Make, eat, love!

IMG_5706

Why is it gone?!

Coconut Oil and Honey Banana Bread

If you’re not a coconut fan, don’t worry! There’s no coconut flavor noticeable in the bread—I used refined coconut oil for baking, as it can take high heat. This bread is SUPER hydrated (remember, we don’t use the m word), but not squishy. It’s the perfect balance between hydrated and dense, with a nice crumb. It only has a 1/4 c of honey added, so make sure your bananas are deady-dead-dead. The deader the bananas, the sweeter the bread! Mine were literally black. So gross…until they aren’t! This makes one loaf, and the recipe is (ever so slightly modified) from Relishing It, here! SO happy I found it.

  • 1/3 c refined coconut oil
  • 1/4 c honey (mine was local, yay!)
  • 2 eggs
  • 1 tsp vanilla
  • 1.5 c mashed, dead bananas (I used about 5)
  • 1.75 c whole wheat pastry flour
  • 2 tsp baking powder
  • 1 tsp sea salt
  • a few sprinkles of chia seeds (can be left out)

IMG_5699

Preheat the oven to 350, and lightly grease a loaf pan (I use more coconut oil).

In a mediumish bowl, whisk together flour, baking powder, sea salt, and chia seeds. In a smaller bowl, have fun mashing up all of your dead bananas and trying not to be too disgusted by how brown they are. Ahem, moving on…

Stir together coconut oil and honey until they’re creamy and mixed. Slightly beat eggs and then stir them in as well, followed by vanilla. Mix lightly until combined, then stir in dead banana mashup. Adding the dry ingredients a bit at a time, stir them in until the dry is just incorporated–don’t over mix! No one wants tough buhhnahhnuhh breadz.

Pour the batter into the prepared loaf pan, and pop it into the oven for just about 45 minutes—mine came out at 45 but probably could have gone for a few more. Let cool in the pan for a bit, then turn out onto a cooling rack to cool completely. I’m sure it stores well, but as mine is rapidly disappearing I’m sure we’ll have no issues on that front…

IMG_5712

Apparently I love veggies. Who knew?!

IMG_5668

Stuffing things is fun!

It’s somehow very rewarding to encapsulate your dinner into a tidy little package. Or into a pepper, whatever. And it’s even better when there’s cornbread involved because seriously, when does cornbread NOT make things better?! Right, never, that’s what I thought.

But ick. Why do I always end up making things like this when it’s disgustingly hot outside? It’s like I’m hardwired to automatically want things that require baking as soon as it gets above 90. Because heating your oven to 425 on a day when it’s still over ninety after 5 pm is SUCH a great idea… not. I just love opening the oven door to be subjected to a massive blast of heat… not to mention sticking my face anywhere near it to check and see if things are done.

IMG_5674


Ughhhh. Is it fall yet? Because I have an abundance of winter squashes that snuck into our garden and I need to use them. And they usually rudely require ovens. Or at least sometimes. But it’s also too hot for soup and I sadly don’t have an immersion blender (anyone have an extra they want to chuck my way? Anyone? Anyone? … Bueller?) which makes soup making messy.

Okay. Enough whining because I can’t do anything about the weather and these stuffed peppers were delicious!! Easy and healthy too, so obviously they should go at the top of your to-make list immediately. Maybe just wait until it’s not ninety in the shade…

IMG_5661

Apparently I love veggies. Who knew?! I “discovered” this after I chopped up a metric ton very meticulously… there was a massive pile of greens in there too (natch) that didn’t make it into the picture (sneaky little suckers).

IMG_5671

Bean and Green Stuffed Peppers with Cornbread

Serves 3, with leftover bean/green mixture and cornbread (mostly because I looooove leftovers). Recipe from… the inside of my slightly disorderly brain! The cornbread is my favorite recipe—SO FREAKING GOOD. A little crumbly but properly hydrated (we know how I hate the ‘m’ word), and slightly sweet. So delicious combined with the beans and greens, and crammed inside a pepper. Vegan, full o’ veggies, refined sugar free, and whole grain. Wheeee!

For beans+greens:

  • 3 largeish bell peppers, de-seeded
  • 1 can pinto beans, rinsed and drained
  • 1 can black beans, rinsed and drained
  • 3-4 c mixed greens (I used spinach, chard, kale)
  • 1 zucchini, finely diced
  • bell pepper remnants from around the stems (waste not, want not!)
  • a handful of mushrooms, finely diced
  • a pinch of nutritional yeast
  • ~1 tbsp tahini
  • salt and pepper to taste
  • olive oil

For cornbread [lightly adapted from this bomb recipe, at Eat Well, Party Hard, here!] [refined sugar free, vegan]

  • 1 c cornmeal*
  • 1 c whole wheat pastry flour*
  • 1 tbsp baking powder
  • 3/4 tsp sea salt
  • 2 flax eggs (2 tbsp ground flax+6 tbsp water)*
  • 1/4 c coconut oil, melted*
  • 1/6 c maple syrup (1/4 if you like a sweeter bread)*
  • 1 c non-dairy milk (I use rice milk usually)*

*Always organic!

IMG_5666

For the peppers, bring a large pot of water to a boil. Once boiling, drop in peppers and cook until they’re soft, about 10-15 minutes. Remove from water and place in a casserole dish, and set aside.

IMG_5664

For the cornbread: Make flax eggs and set aside. In a large bowl, whisk together dry ingredients. In a smaller bowl, combine melted coconut oil, maple syrup, and rice milk. Add wet into dry, stir in flax eggs, and mix until just combined. Set batter aside temporarily.

Preheat oven to 425.

In a largeish sauté pan, heat a glug of olive oil over medium, and add diced zucchini, bell pepper remnants, and mushrooms. Sauté for a few minutes, then add greens and continue to let them cook (you may need to cover the pan to let the greens reduce in size a bit). Add more olive oil if needed. Stir in both types of beans, then nutritional yeast, tahini, and salt and pepper to taste. Let cook over low for 5-10 minutes, enough to let the oven finish preheating.

Fill the cooked peppers about 3/4 of the way with the bean mixture, then top with a layer of cornbread batter.  I had leftover cornbread batter, so I baked it separately into my two 6″ cake pans. Use whatever pan you have on hand, or else bake it on top of the remaining beans (sans peppers). I let my peppers go for 17 minutes, until a tester came out clean from the cornbread layer. The cornbread usually bakes for 15 minutes in a dark pan, but these went a bit shorter as they were smaller volume. Test as you go! Mine took about 10-15 minutes total, as I put them in with the peppers at first.

Serve hot!

IMG_5680

Soup is like my problem child

IMG_5607

Hello invisible internet friends!

I made soup for you, and I apologize in advance because I HATE photographing soup. It can look all cute and aesthetic, and then I stare at it through a camera lens and my first response is always…

Ew.

I LOVE soup. Why is it so annoying to photograph?! You would think that a bowl of chunky veggies and lumpy lentils… oh. Wait. That’s right. Lumpy is not generally considered aesthetic. Problem child.

IMG_5610

Well, whatever. Pictures may be lacking but soup and flatbread are incredibly aesthetic to my stomach, so there. We already know I love lentils an any form, so obviously it’s a give that I love lentil soup. And really we all know that soup is just an excuse for a carby side (ie, BREAD, wheee!!).. and thusly that bread is a convenient conveyance for butter, what a glory. Bread+butter= doesn’t get much better. Oh, right, and add in the side of soup to nicely round things out for a balanced type meal.

In other news, I have eaten some delicious croissants and trout and avo lately… (it was too pretty not to share!)

IMG_20130806_112851


Annnnddd  I made what appears to be the world’s tiniest buckwheat cookie. Sorry it kind of looks like… a turd?! It was delicious, promise.

IMG_5606

This soup is also delicious, have I neglected to mention that?! It also comes together in about 20 minutes, or less depending on if you puree (which I did not… lack of immersion blender, blender of any sort, and a leaky food processor notwithstanding). If you like cumin-type flavors, put this on your dinner list… now!

IMG_5613

Simple Lentil Soup

I ate this with the Sri Lankan roti flatbread I’ve made before, here. The soup recipe is lightly adapted, courtesy of Sukarah, here! We got three dinner servings out of it, plus a small bit of leftovers.

  • 1 c red lentils, rinsed and drained
  • 4-5 carrots, chunked/diced
  • 4 c water
  • 1 cinnamon stick
  • a glug of olive oil
  • 1 onion, diced
  • 1 tsp ground cumin
  • 1 tsp salt
  • 4 c fresh spinach, rinsed

Combine lentils, carrots, water, and cinnamon stick in a large-ish soup pot, and bring to a boil. Once boiling, reduce to a simmer, covered, and let simmer until the lentils are cooked, about 15 minutes (they will have absorbed most of the water, but there should be some liquid still left).

In a sauté pan, toss in olive oil and heat over medium. When heated, add in onions and sauté until translucent. While onions are going, chuck in spinach to sauté/wilt. Add cumin and salt, and continue sautéing until onions begin to brown slightly.  Remove from heat. Once finished, add onions/spinach to the lentils, and let simmer for a few minutes more. Remove from heat when ready to serve.

At this point, you can puree it for a creamy texture, or leave it chunky as I did. I like chunks… and, as I said, I have some slight gadgety issues at the moment that prevent mess-less pureeing… soooo… good think I like chunks.

Serve hot, preferably with some sort of bread!

IMG_5614

Carbs are my friends.

IMG_5441

I love carbs.

You know, I used to have a teeshirt back in middle school (high school? Don’t remember) that said “I [heart] carbs!” above a food pyramid composed completely of… carbs. Inspired, that’s what that is.

IMG_5437

If I was to make up a pyramid for the carbs I eat now… hmm… Bottom layer: creamy oatmeal!! And other grains like amaranth and millet. Second layer: definitely toast. Bread, of all kinds. Toast bread… crusty, ciabatta-type stuff, olive and walnut, etc. etc. And then the third layer: flatbreads and tortillas! Because I don’t eat those quite as often. And then the little pointy part [eat sparingly, haha yeah right]: whole wheat croissants from La Boulange and… animal crackers [because I only eat them once in blue moon]. But only Barbara’s oatmeal kind, I’m rather particular. Yessss. Pyramid of carbs. Such a fabulous idea.

So! Because carbs are my friends… I made flatbread again! Except this one is different than the last one and my cat didn’t express interest…

IMG_5440

This one is a Sri Lankan recipe called roti. Super easy to make and so delicious, I made a half batch due to lack of coconut and made 6… annnddd they disappeared within about 10 minutes of actually making them. I think we can safely assume that they were delicious. Especially with butter. Mmm. Butter makes everything better. Maybe that should go in my pyramid somewhere… my pyramid of carbs and butter. Or according to Regina George they’re the same thing: “Is butter a carb?!” haaa.

(Veggies would obvs be in my pyramid too but you’ve heard me expound enough about how it’s ridiculously challenging to keep me in vegetables so let’s just stick to carby wonderfulness).

Anyway. Make these flatbreads! They’re good either savory or sweet, and I’m sure they would be fab with curry,  but too bad we ate them all before I could make anything to eat them with. Whoops.

IMG_5449

Sri Lankan Whole Wheat Roti

Delicious recipe lightly adapted from Curry and Comfort, here! I made a half recipe and got 6 of various sizes; the full recipe (posted below) should yield 9-11.

  • 3 c whole wheat pastry flour
  • 1 tbsp coconut oil
  • 1 c shredded unsweetened coconut+milk bev for soaking
  • 1 c cool water
  • salt to taste
  • a bit more coconut oil for cooking

In a small bowl, soak coconut shreds in your milk bev of choice—I would have used coconut milk if I’d had one open; I used rice milk. Use enough milk to just moisten them, but not too much–you don’t want it soupy, just hydrated! Set aside.

Sift whole wheat flour (or don’t, if you’re lazy like me) into a bowl, and add melted coconut oil and salt. Stir in soaked coconut. Start adding water a little at a time until a dough forms. It should be about the consistency of play-dough!
Heat a cast iron skillet over medium high heat with a bit of coconut oil in the bottom. When it’s hot, pat the dough into flattish little shapes (Try not to play with it too much, as tempting as it is…. no one wants tough roti), and pan fry them until they brown on both sides. Serve warm with butter! Or curry, or whatever you have on hand. I think they’re best immediately, but I’m sure they would be just as good reheated.

IMG_5438

Beans, beans, they’re good for your heart!

IMG_4443

Happy December! I love this month. It’s so… festive! And crowded. Sheeesh. Working retail has given me a lovely perspective on people’s shopping habits. Holiday shopping in this country is truly absurd. Where do all these people come from? And where do they hide during the off season??

Alrighty. So I mentioned in my last post that I’m off eggs, and gluten free (due to a variety of things, mostly circulation related. It’s a long story, you can ask me if you’re curious). This means that I’m basically vegan in addition to gluten free. Except I can have dairy and meat. Weird, I know, but just roll with it.

IMG_4433

Um. Yeahhhh. About that. I’m dealing, but it’s requiring a bit of concentration on my part, so that I don’t accidentally consume something I’m not supposed to. At least I was already used to vegan baking, so that switch isn’t too much effort. It’s the gluten free biz that’s killing me—I freaking LOVE BREAD. Arrggg. Ah well, for now it’s only two weeks (and hopefully NOT longer). We’ll see.

IMG_4439

Anyway, at least it’s pushing me to discover new alternatives and diversify my bloglet! I’m trying to keep my costs to a minimum, so that means finding affordable gluten-free flour substitutes. Some I’m familiar with, some not… I promise to only share the tasty ones on here. The flatbread I’m sharing today definitely qualifies as tasty (and cost effective, it only has 4 ingredients!), and ridiculously versatile. It’s made with chickpea flour, which I’ve never used before but is high in protein and fiber (obvi, as it’s made from beeeeeeans!). It’s actually one of the most nutrient-dense flours around: it’s high in folate, potassium, phosphorus, magnesium, thiamin, iron, copper, and manganese. Whew! Besides all that, this flatbread has good fats from olive oil. Oh. AND it’s tasty. What more could you want? Yum yum yum. Called Torta di Ceci, this recipe is Italian in origin. I just love it, as you can eat it with pretty much anything (especially cheese, mmmm)—gluten free pizza crust? I think yes.

La la la…. beans, beans, they’re good for your heart, the more you eat the more you… Well. I’m sure you can fill in the rest of that cute little ditty.

IMG_4430

Torta di Ceci (Italian Chickpea Cake)

Recipe gratefully borrowed from this awesome blog: In Pursuit of More. Makes one sheet, or about 20 playing-card size servings. Plan for a little bit of time, as it needs to sit for 3 hours (at least) before baking. I made mine mid day, so that I could bake it in time for dinner.

  • 2.5 c chickpea flour (also called gram flour, or garbanzo flour)
  • 3.5 c water
  • scant tsp of salt
  • pepper to taste (I like a lot)
  • 1/4 c olive oil (extra virgin cold press, ideally the best quality you can)

Measure out the chickpea flour into a largeish bowl. Slowly pour in the water, whisking continuously to prevent lumps. Once you’ve poured all the water in, add salt and pepper, and give it a few minutes of whisking to make sure it’s smooth. Cover and let sit on the counter for at least three hours.

Preheat the oven to 350.

Skim off any foam from the surface of the batter, with a slotted spoon. Pour the olive oil into a large rimmed baking sheet (mine was about 18″ by 13″ ), tilting the pan so that the oil covers the bottom. When the oven is finished preheating, pour the batter into the prepared pan, in a layer about 1/4″ thick. Carefully transfer to the oven (amazingly I did this without causing a massive disaster), and bake for 30 minutes, until golden. When done, let cool in the pan for a few minutes before serving.

This bread is best hot or warm, and reheats fabulously. I’ve been storing mine in a glass tupperware in the fridge, which seems to work fine. I like mine reheated and sprinkled with cheese. Mmmm.

IMG_4427

Turkalurk and friendy musings

Turkalurk time. Obviously I have to do a Thanksgiving post, with Thanksgiving being… you know… FOOD related. But guess what?! Something waaay more exciting than Thanksgiving happened on Thanksgiving: I got to see one of my best friends, who I haven’t seen in fifteen years! Yep, you read that right: fifteen.

We’re adorable. I know, you’re just jealous.

We were best friends in second grade (for 9 months) and then she moved back to Korea. But we’re awesome, and we stayed friends. And then she nicely said she’d come visit me over here on the west coast when she was studying abroad. Wheeeeee friendy time! That meant I got to be all touristy and show her around the city. AND we got to hang out with our second grade teacher, who is beyond fabulous and one of the most wonderful people I know.

So we had mega fun and I was busy busy working the Black Friday madness of shopping. WHY people shop that day is beyond me, don’t you want to just stay home and digest your turkey? Whatever.

Anyway. So here are your pumpkin biscuits, courtesy of my Thanksgiving linner (lunch-dinner, get it?). They’re vegan, ish. Because I’m currently off eggs due to some egg/gluten allergy testing, which is LAME: you’ll likely be seeing some allergy-friendly posts coming your way.

Side note. Why is it that both my cats reach up to paw my face when I’m blogging?? Tonight it’s Jessie: is she taking lessons from Nosh?!  I’m assuming this means they’re miffed I don’t feature them in every post… or that they’ve been learning from Simon’s cat…

Enough of my tangents! Here is the recipe :)

Pumpkin Biscuits

Recipe ever so slightly adapted from Crepes of Wrath! My yield was 14 biscuits, but they were rather flatish… if you want fluffier ones, I suggest not rolling the dough out as thin as I did. I chilled mine for a bit before baking due to lack of oven space (that freaking turkalurk always takes FOREVER), so that may have affected their rise a bit.

These are fabulous with a bit of goat cheese and cranberry sauce. They’re lightly sweet but pair well with either savory or sweet—I ate some with dinner and then  made a dessert napoleon for later with ice cream and whipped cream + cinnamon. Food repurposing for the win!

  • 2 c whole wheat pastry flour, plus a bit for rolling
  • 1.5 tbsp sugar
  • 2.5 tsp baking powder
  • 1/2 tsp cinnamon
  • scant 1/2 tsp salt
  • 5 tbsp cold unsalted butter, chopped into smallish pieces*
  • 1 c pumpkin puree
  • 1/4 c light coconut milk
  • 2 tbsp molasses
  • 1 tsp honey

*vegan with Earth Balance or other vegan butter

Preheat the oven to 400, and line a baking sheet with parchment paper.

In a bowl, combine dry ingredients: flour, sugar, baking power, cinnamon, and salt. Cut in the butter using your implement of choice (I like a pastry cutter, but two forks work just as well) until the mixture resembles coarse sand. In a larger bowl, mix together pumpkin, coconut milk. molasses, and honey. Add liquid to butter/flour mixture, and stir until just combined. Sprinkle a bit of flour over your work surface and roll out the dough to about an inch thickness, using a biscuit cutter (or a cookie cutter, if you’re jank like me) to make biscuity-type shapes. Transfer to baking sheet, and continue with the scraps until you have no leftover dough.

Bake for 12-15 minutes (mine were done at 13), until golden. Let cool for a few minutes on the baking sheet, then serve warm!