Upgrading the childhood favorites, one cookie at a time

IMG_5734

As you can see, I’m having quite a bit of fun riffing on things that I used to eat as a kid, except making them… edible. Because I don’t know about you, but if I try to eat conventional graham crackers now, they taste like cardboard. STALE cardboard… which is about as bad as it can get, in my book.

IMG_5736

So this is fun! Real food ingredients that you can pronounce and have fun eating. Because these taste almost like the “real” thing, but BETTER! Wheee!

Graham crackers. What an ubiquitous little kid snack (um. And adult?! Hellooooo).

IMG_5744

My grandma used to keep them in the cupboard above her fridge, probably because it was high enough up to be out of the reach of small Hayley (though why the baking drawers with chocolate chips and butterscotch chips were at child level I’ll never know—I got really good at swiping handfuls of ‘baking morsels’ every time I went into the kitchen… although sometimes it was with my grandma’s consent, ha). Anyway. She ALWAYS had graham crackers. And I loved them. Crunchy-soft, subtly sweet. Besides that, I have called my grandma Gram for as long as I can remember, and gram=graham! Get it?? Like Gram Crackers? The crackers that Gram always has? Do you see? Perfect.

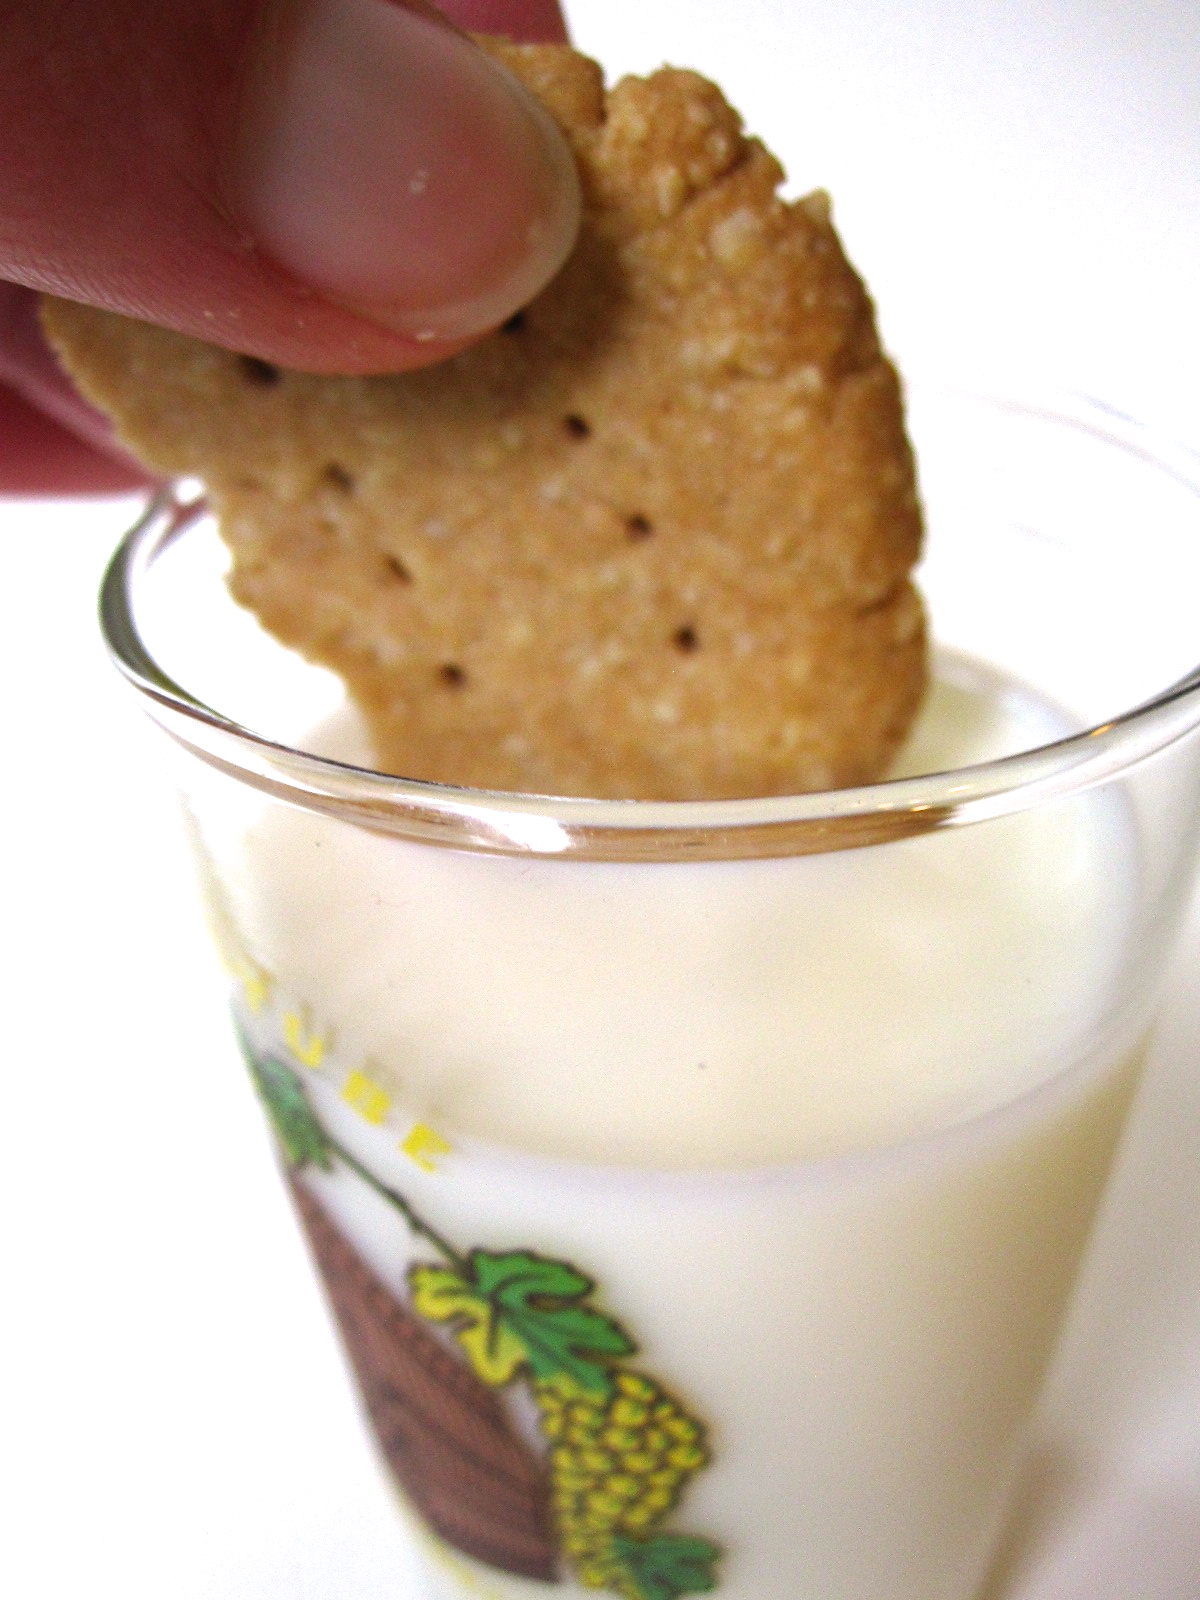
My dad and I used to eat them for lunch sometimes with milk. We’d get out a really nice plate, put a glass of milk in the center, and then break up about two sleeves worth of crackers nicely and place them around the edge of the plate. And then sit outside, preferably, in the sun, companionably dipping graham crackers.

IMG_5738

Middle school meant that I was obsessed with the cinnamon graham sticks, except my mom would never buy them (actually… thanks mom! In retrospect that was an excellent choice you made), so I would always eat them over at my friend’s house… with applesauce. For some reason that was our thing and we would literally go through a box in one sitting. Whoops. I do have to say, they were startlingly good dipped in applesauce. Weird.

Later in life (ie college) I started buying organic ones and eating them with nut butter and dark chocolate for dessert. Sort of like a deconstructed s’more, except better as I don’t care for marshmallows… so this just leaves you with the good parts… carbs and chocolate! Yessss.

IMG_5747

SO anyway. Lots of good memories associated with these little guys, besides the fact that I like the way they taste. BUT. I don’t really like that they come in a package, even if they are organic. SO. I’ve started making my own! It’s WAY more fun, AND I know exactly what’s going in them. Solving for nostalgia and taste, all in one fell swoop.

IMG_5748
Milk in a shot glass. So classy.

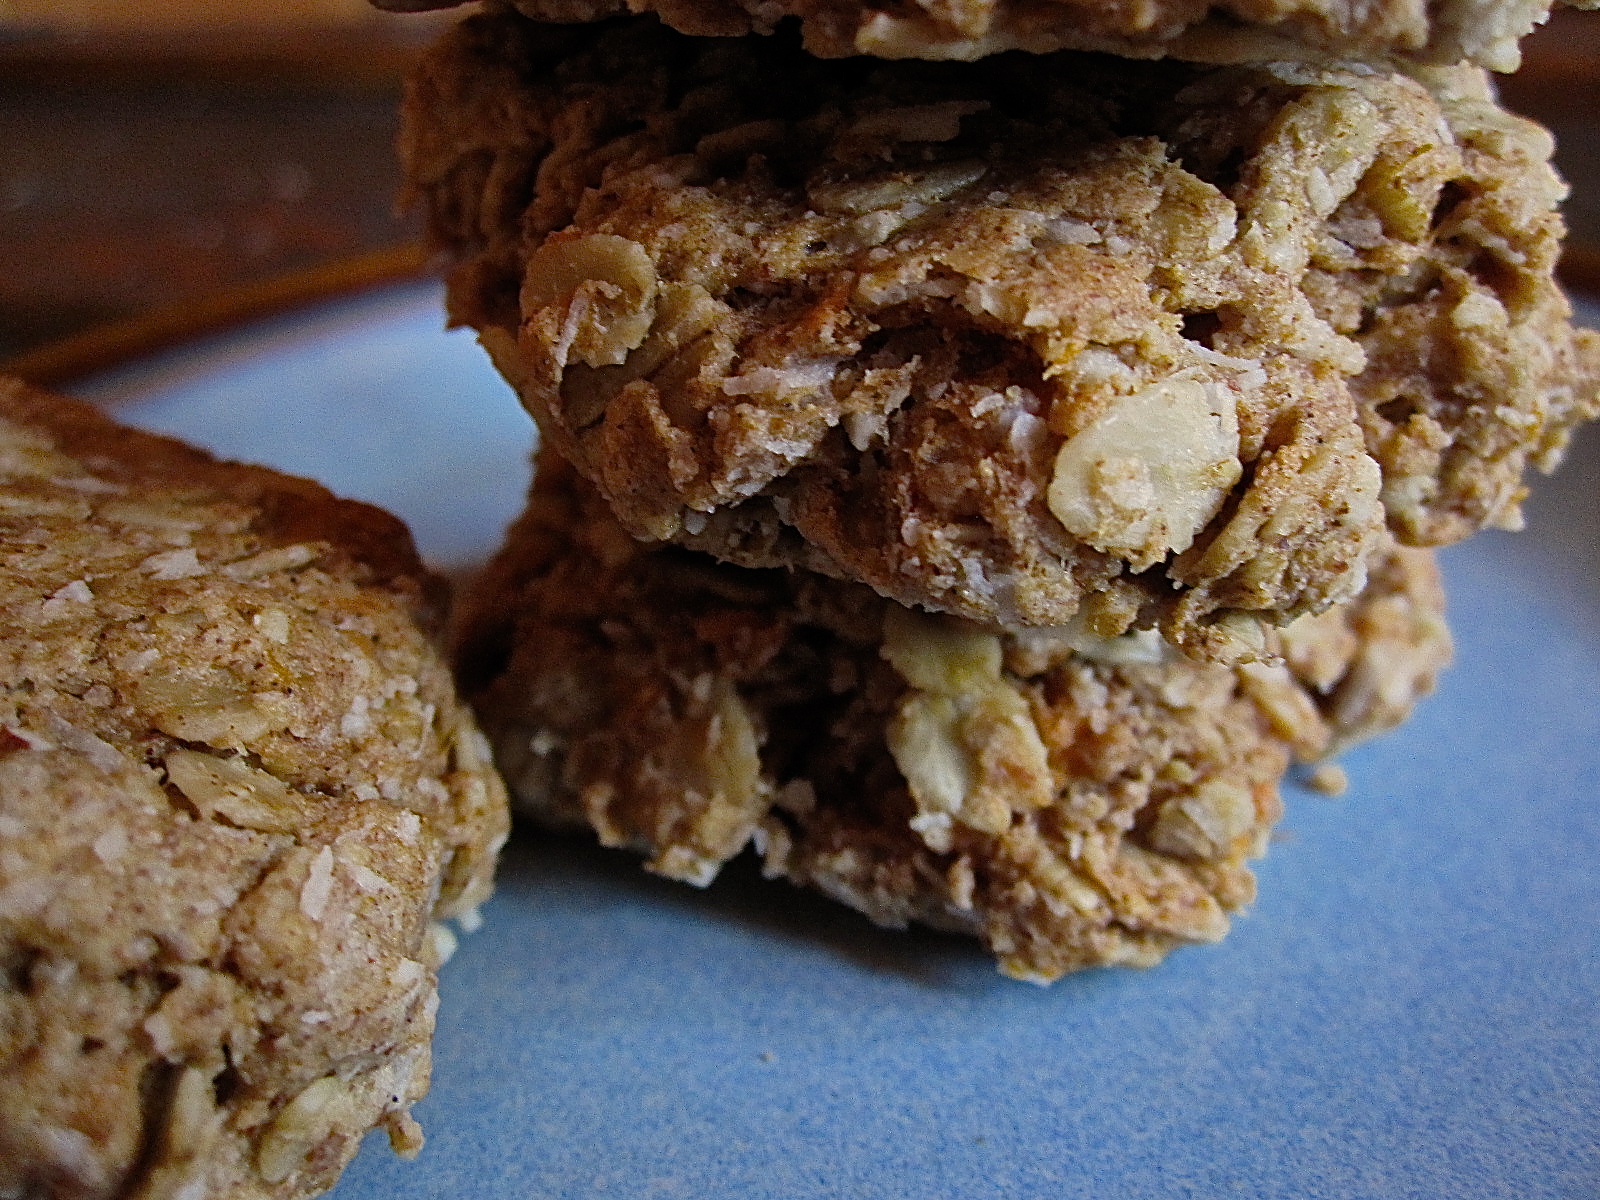
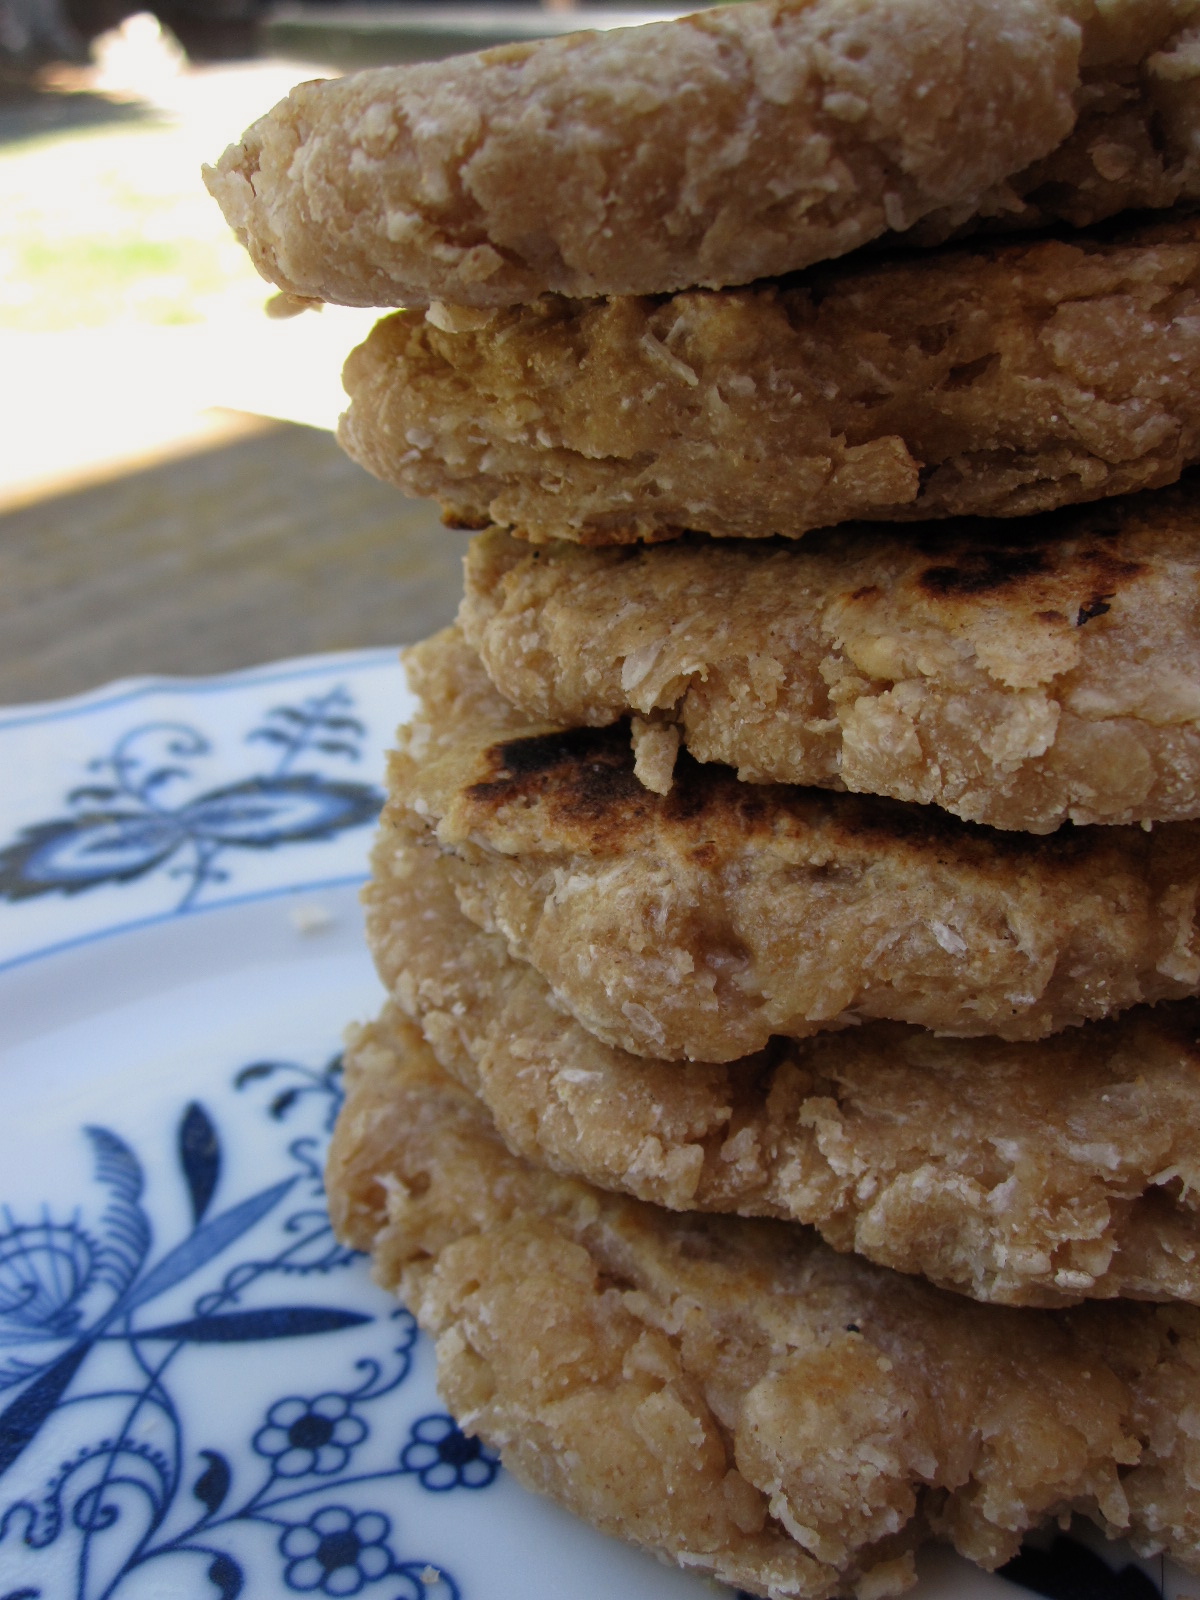
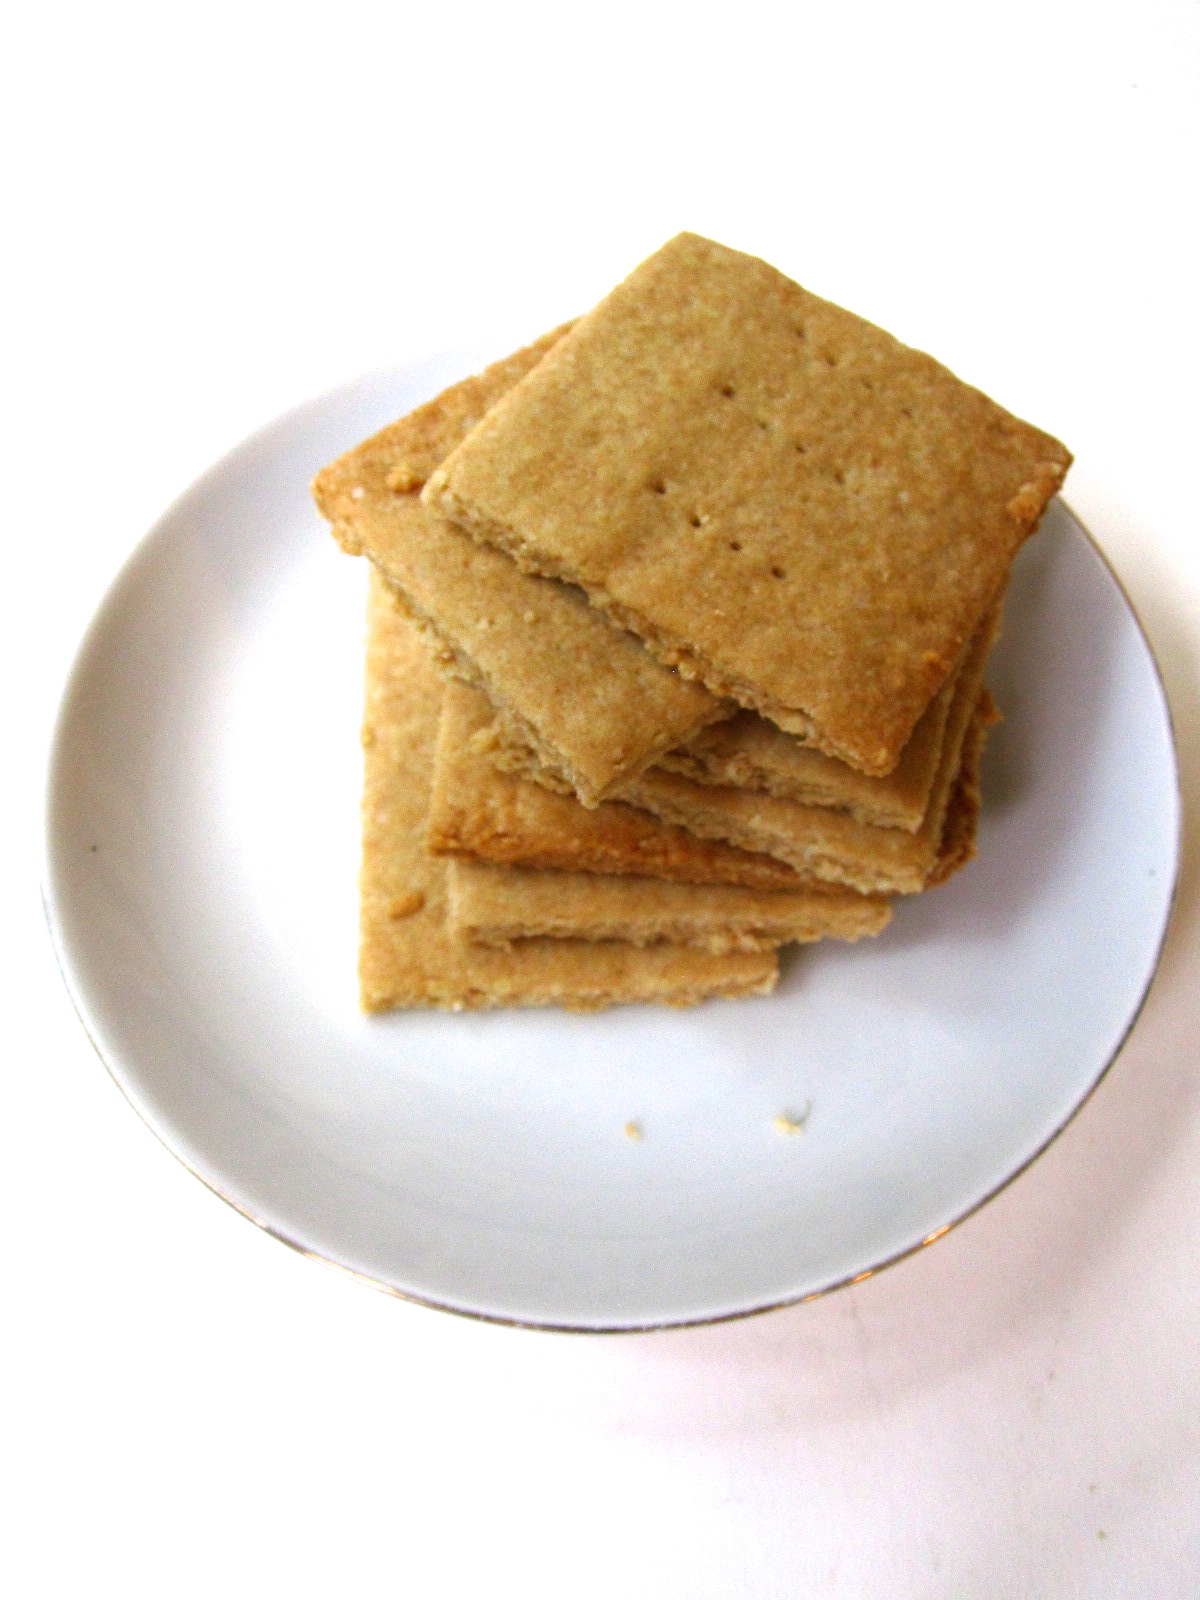
Homemade Graham Crackers

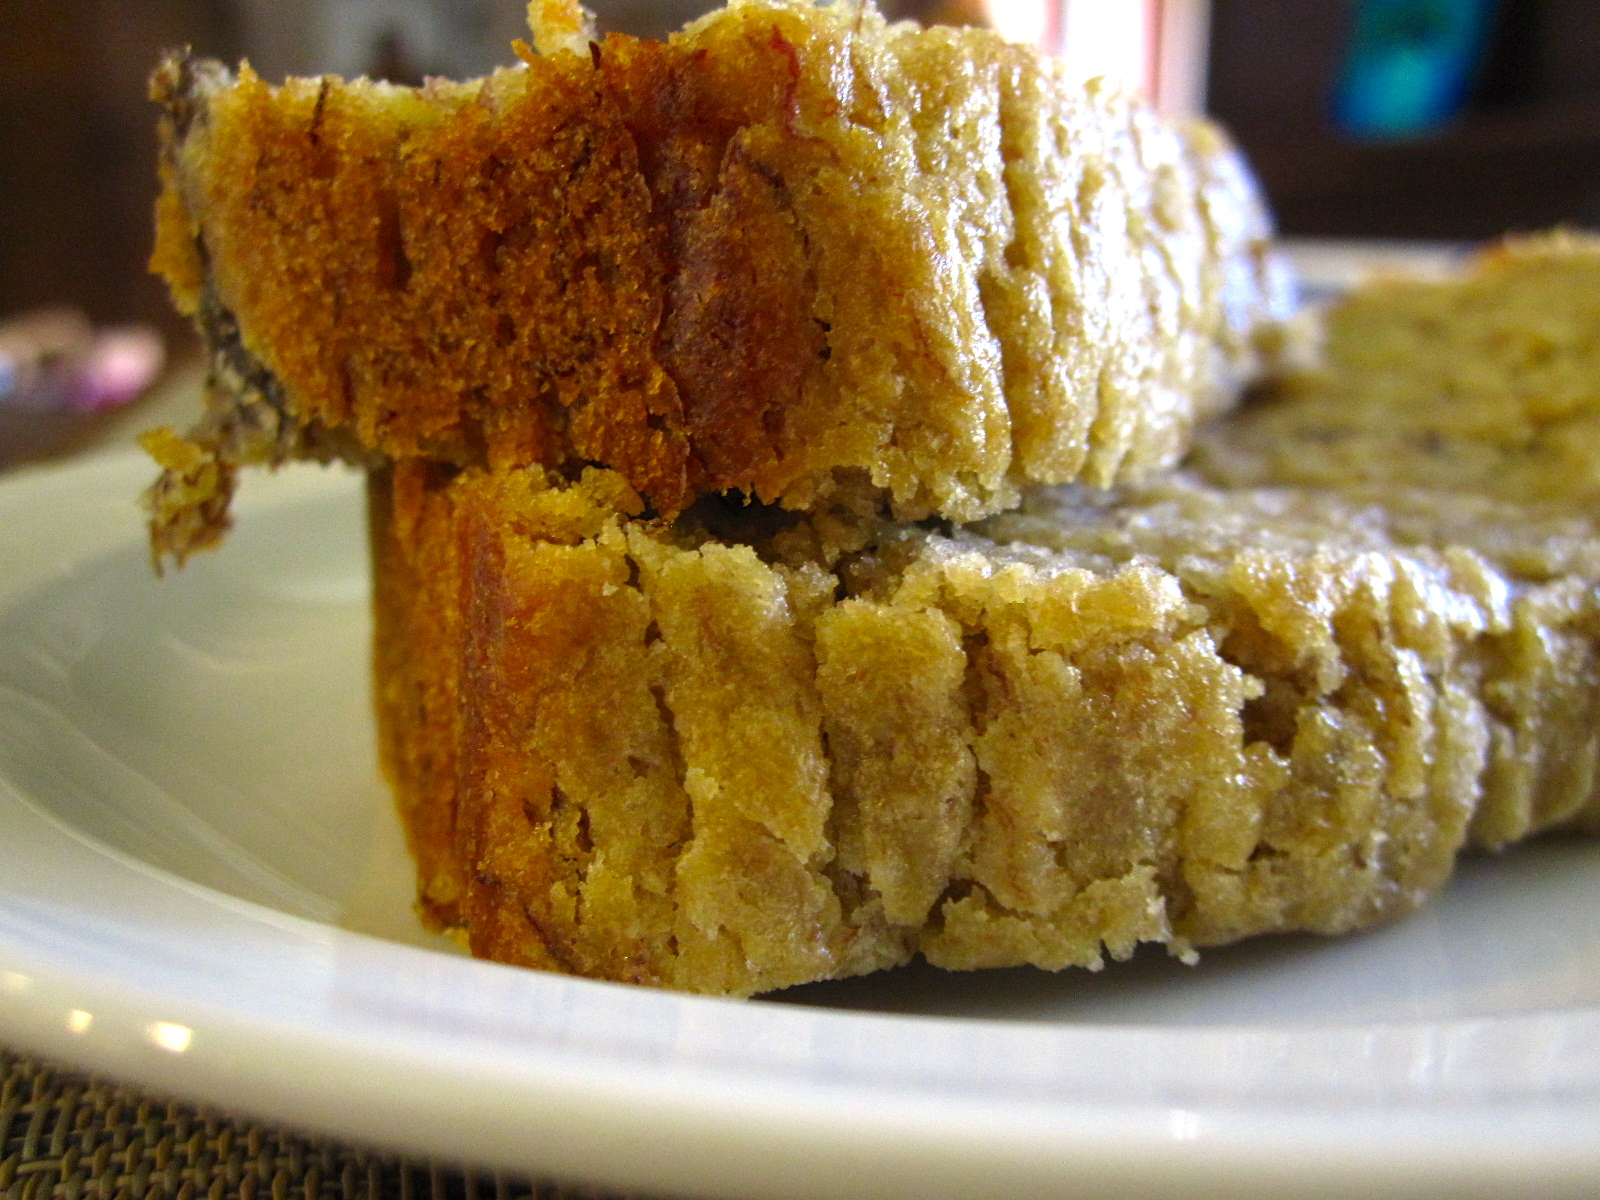
Recipe from Salt&Smoke, here! I adapted it only very slightly. I made two batches, one with coconut oil and maple syrup, and one with butter and honey. The butter ones browned a slight bit more, due to the honey, but they’re both delicious. I think the coconut oil one is actually my favorite—you can’t taste the coconut, but something about the almond flour/coconut oil/maple/vanilla combo really tastes like graham crackers to me. I think my next project will be adding cinnamon to the batter, to make cinnamon crackers!!

I got a yield of 20 from the coconut oil batch, and 23 from the butter batch. They’re about 2″ by 2.5″ (ish).

  • 1 c almond flour
  • 1 c whole wheat pastry flour
  • 1/2-1 tsp sea salt (I used fine grain with 1 tsp, if you’re using coarse, use 1/2!)
  • 1/2 tsp baking powder
  • 1/4 tsp baking soda
  • 5 tbsp refined coconut oil or butter (I used unsalted)
  • 4 tbsp maple syrup or raw honey
  • 1 tsp vanilla
  • a small splash of almond extract*

*I only used the almond extract in the butter/honey version, and to me it is barely noticeable

Preheat oven to 350.

Combine dry ingredients in a medium sized bowl, and stir until combined. In a small bowl, combine coconut oil or butter, and maple or honey, and microwave (I’m lazy—you can also use a saucepan) until melted and combined. Stir in extract(s). Pour wet into dry, and stir until mixed.

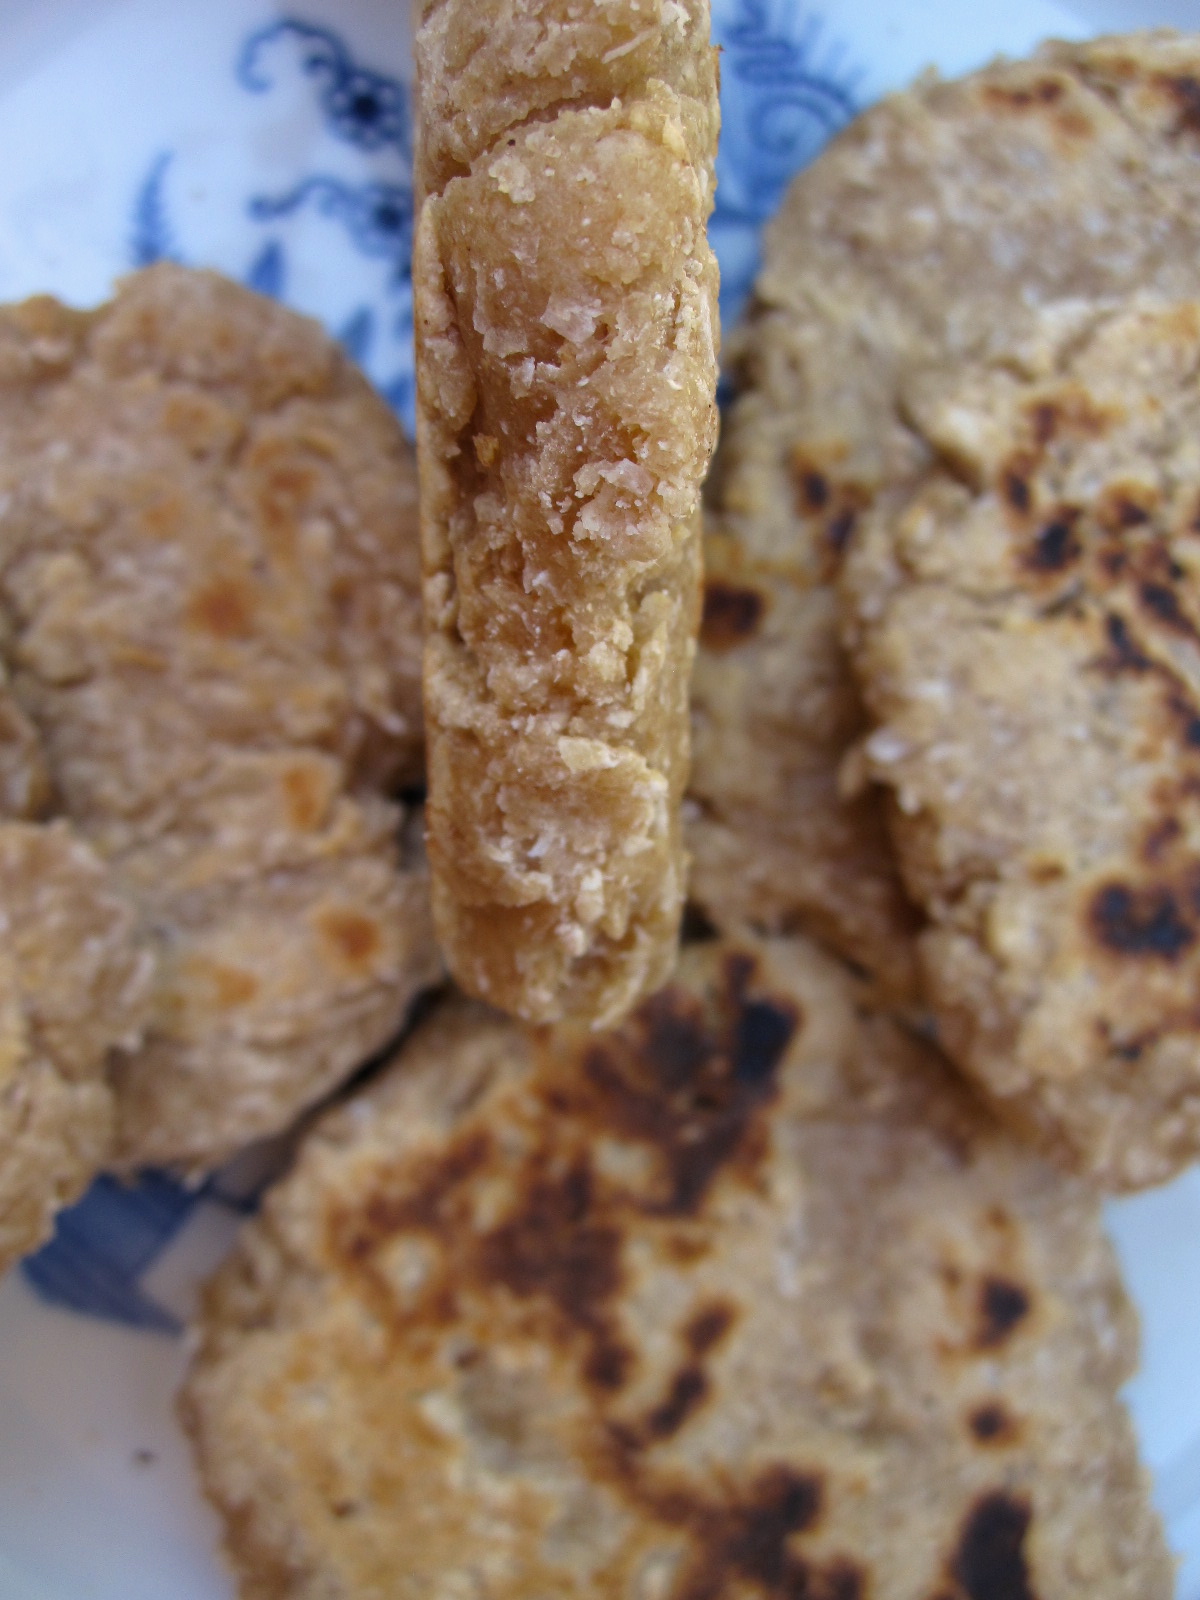
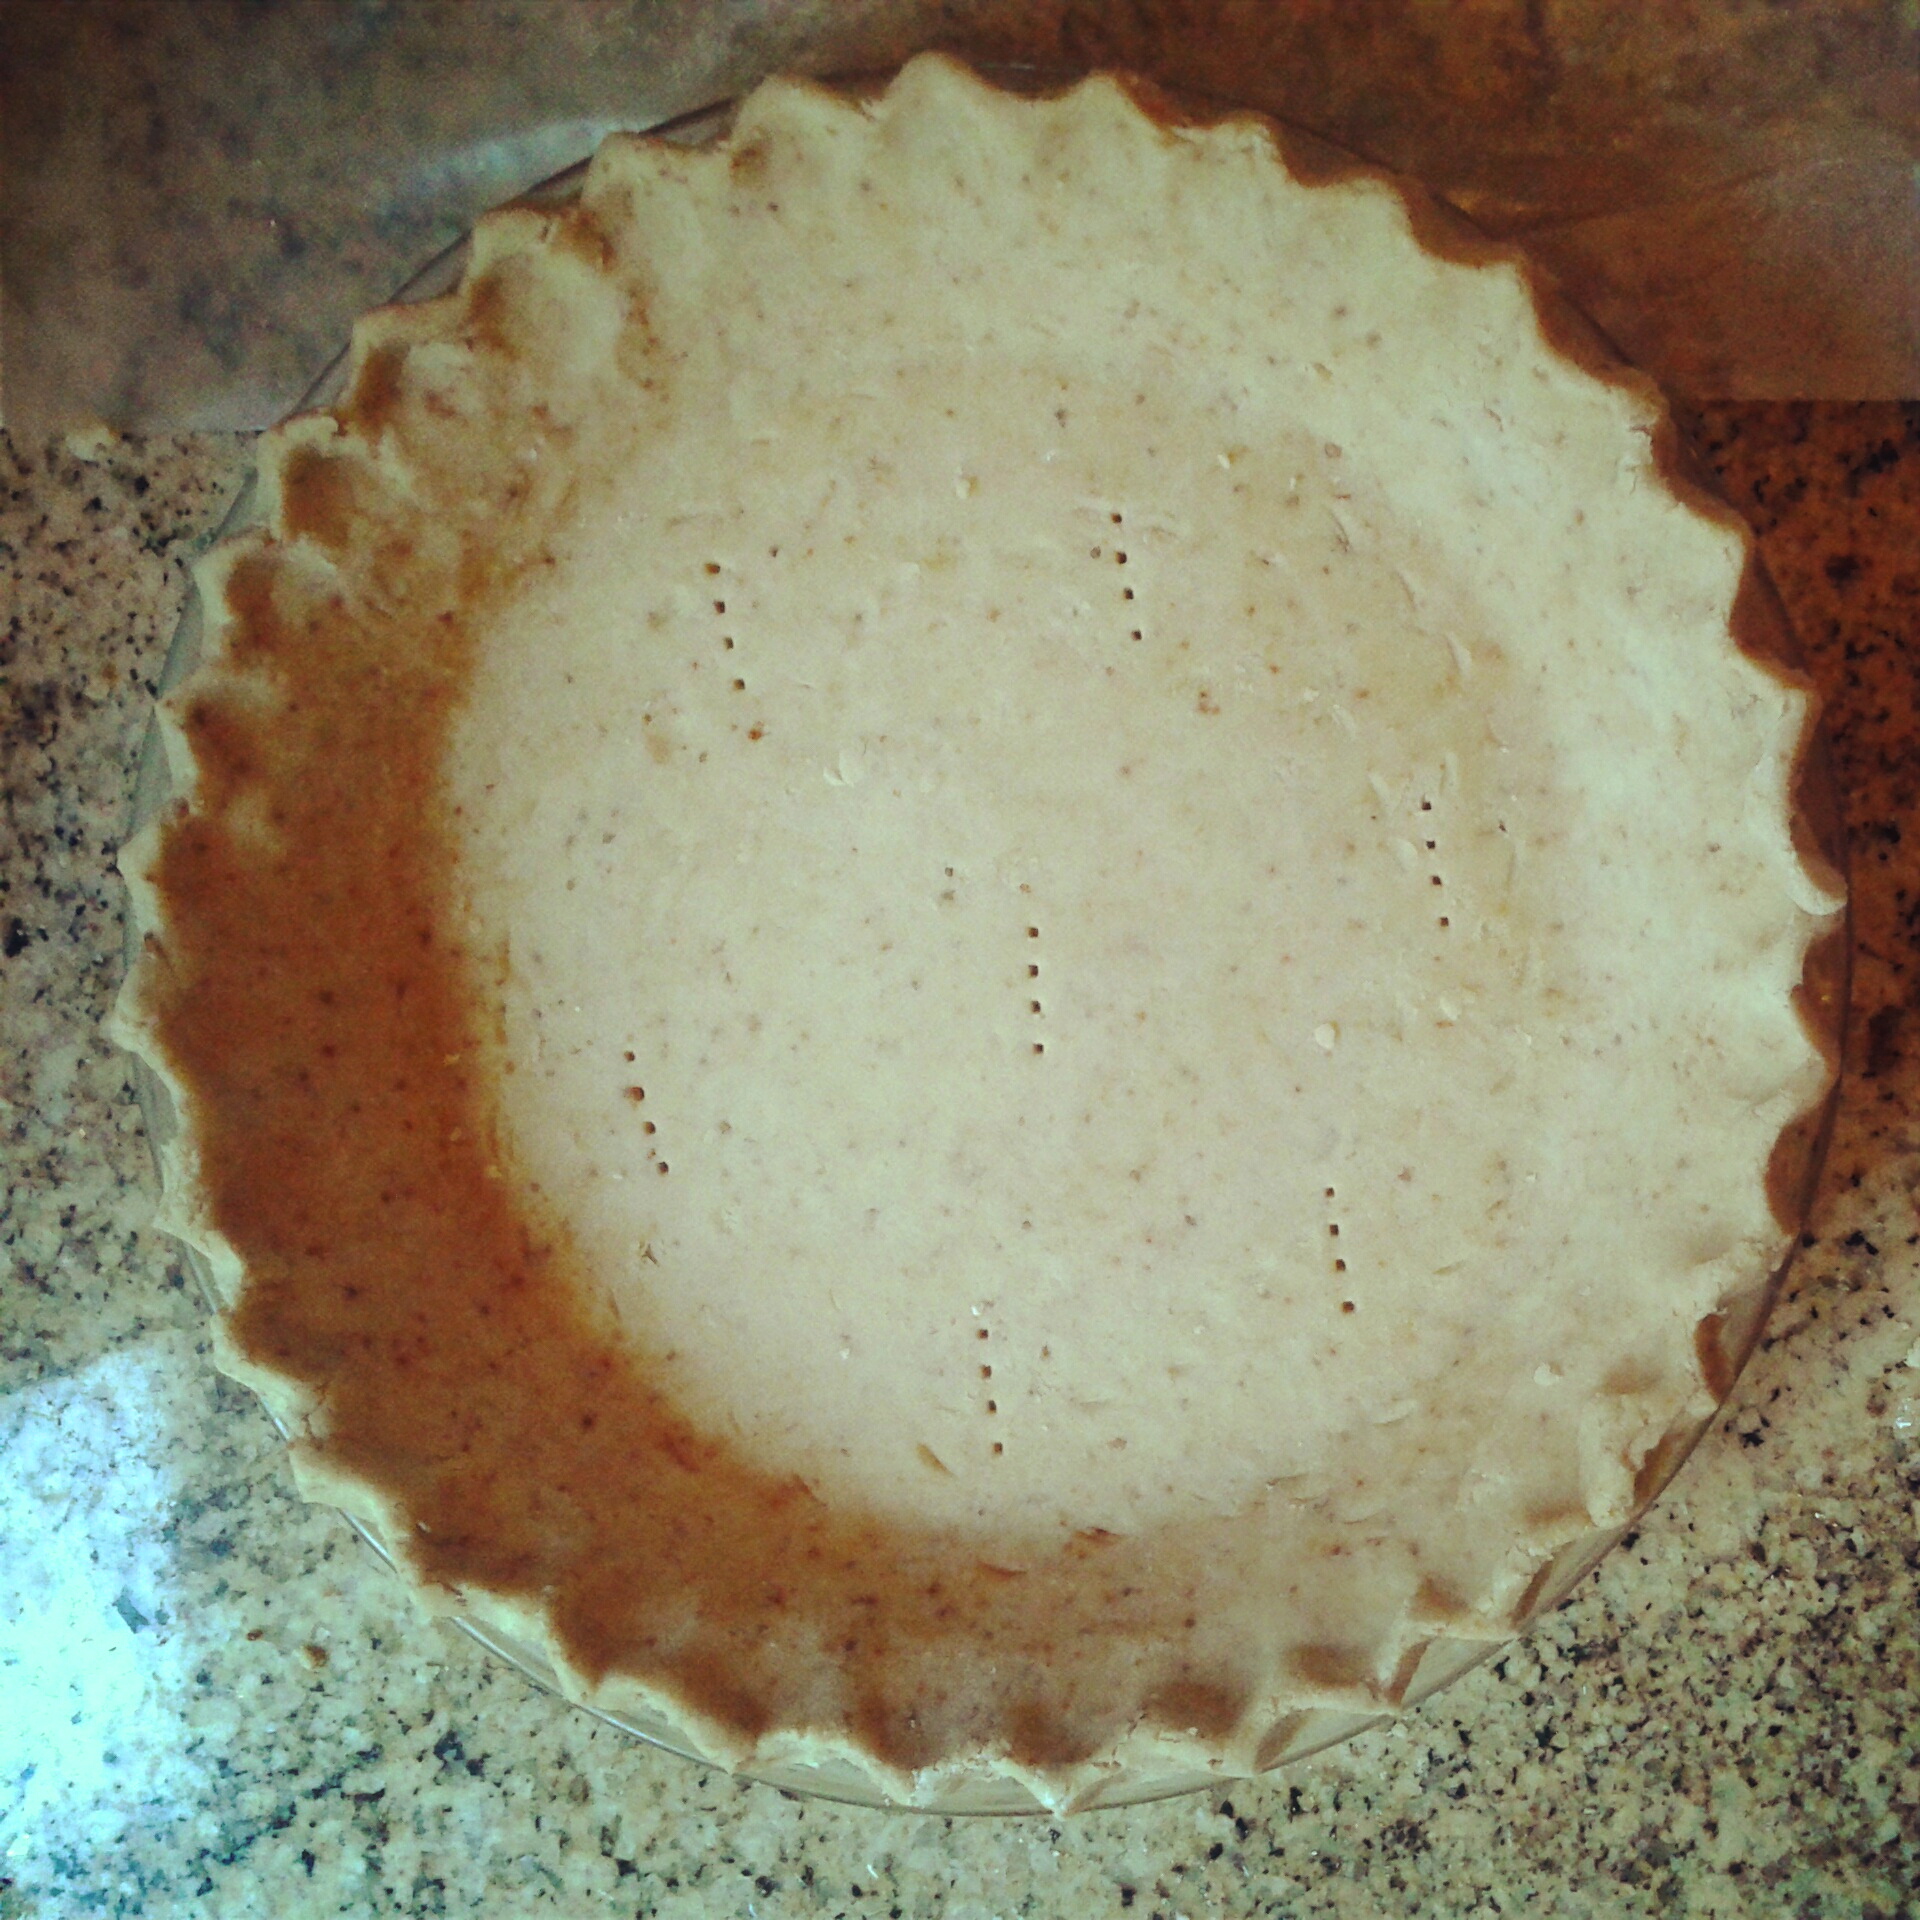
Roll dough out between two pieces of parchment paper, approximately the size of your cookie sheet. I rolled mine out to about 1/8″ thick—-go thinner if you want really crunchy cookies. Score into rectangles using a butter knife, then get fancy and poke little holes in the tops with a fork (because graham crackers aren’t complete without fork marks, duh). I trimmed the excess dough off the edges and re-rolled it into more squares and a few circles.

Bake for 13-15 minutes, until lightly golden. I took both batches out around 13, let them cool on the sheet for a few minutes, then moved the parchment paper to the cooling rack.

IMG_5751

Happy Tummy Conga Lines

IMG_5705

YOU. GUYS.

I know I have like umpteen zillion banana bread recipes on the blog, but seriously. Ignore the other ones (well, not really–they have their merits too.. just for today!)

THIS is my favorite. Hands down, I’ve-already-eaten-two-slices-and-am-heading-for-another-one-someone-stop-me kind of bread. Like, half the loaf is gone (I’ve had help, let’s be real here).

IMG_5708

And besides that, it is FAB with blackberry jam. Especially when that jam is handmade and acquired from a lovely local source. I’ve never put jam on banana bread before now but I’m probably not going back. Ever.

IMG_5702

Luckily for me, not only is this one a fast and easy one to whip up, but it’s full of healthy for me things like coconut oil and buunahhnuhhsss and whole grains and honey.  Good thing too that we had literally two bunches of dead bananas spread out between the fridge and the freezer and they were looking so sad and dead and brown… clearly they needed to go into something delicious like this. They’re much happier now, they wanted me to tell you.

Go make your dead bananas happy. Bake them into something that then makes your tummy do a happy dance! Mine is, we could have a tummy conga line. Umm yeah okay this is getting out of hand with talking bananas and gastrointestinal conga lines, but seriously. Make, eat, love!

IMG_5706

Why is it gone?!

Coconut Oil and Honey Banana Bread

If you’re not a coconut fan, don’t worry! There’s no coconut flavor noticeable in the bread—I used refined coconut oil for baking, as it can take high heat. This bread is SUPER hydrated (remember, we don’t use the m word), but not squishy. It’s the perfect balance between hydrated and dense, with a nice crumb. It only has a 1/4 c of honey added, so make sure your bananas are deady-dead-dead. The deader the bananas, the sweeter the bread! Mine were literally black. So gross…until they aren’t! This makes one loaf, and the recipe is (ever so slightly modified) from Relishing It, here! SO happy I found it.

  • 1/3 c refined coconut oil
  • 1/4 c honey (mine was local, yay!)
  • 2 eggs
  • 1 tsp vanilla
  • 1.5 c mashed, dead bananas (I used about 5)
  • 1.75 c whole wheat pastry flour
  • 2 tsp baking powder
  • 1 tsp sea salt
  • a few sprinkles of chia seeds (can be left out)

IMG_5699

Preheat the oven to 350, and lightly grease a loaf pan (I use more coconut oil).

In a mediumish bowl, whisk together flour, baking powder, sea salt, and chia seeds. In a smaller bowl, have fun mashing up all of your dead bananas and trying not to be too disgusted by how brown they are. Ahem, moving on…

Stir together coconut oil and honey until they’re creamy and mixed. Slightly beat eggs and then stir them in as well, followed by vanilla. Mix lightly until combined, then stir in dead banana mashup. Adding the dry ingredients a bit at a time, stir them in until the dry is just incorporated–don’t over mix! No one wants tough buhhnahhnuhh breadz.

Pour the batter into the prepared loaf pan, and pop it into the oven for just about 45 minutes—mine came out at 45 but probably could have gone for a few more. Let cool in the pan for a bit, then turn out onto a cooling rack to cool completely. I’m sure it stores well, but as mine is rapidly disappearing I’m sure we’ll have no issues on that front…

IMG_5712

Out of coconut?! What? No. This is a travesty.

IMG_5429

So yeah. You remember that day that I made the roti flatbread? Right.

I made cookies that day too! [I had a very productive day]

And guess how long it took us to eat all of that delicious carby goodness?

Yep. Like six hours.

Let me see… I made roti around 11… and they were gone by 12:30. And then I made the cookies around 11:30 and they were gone by 8 pm. Okay okay so more like 8 hours but do you see my point?! Delicious. Granted, there were four of us and I made half batches due to lack of coconut, but even so. Impressive, wouldn’t you say?

Besides, these are good for me so obviously this is an excuse to make them again…

IMG_5434

Sweet Potato Coconut-Almond Cookies

Recipe lightly adapted from the legit blog Mangia!, here! I made a half batch and got 11 cookies, but I’ll post the full recipe here. These are deeelicious. Healthy fats, beta carotene, and whole grains. Winner, winner.

  • 2 flax eggs (2 tbsp+6 tbsp water)
  • 1 sweet potato, mashed (I microwaved mine, laaaazy)
  • 1/2 c unsalted almond butter
  • 2 tbsp coconut oil, melted
  • 3 tbsp maple syrup (I use grade B)
  • 1 tsp vanilla extract
  • 1/2 c almond flour
  • 1.5 c rolled oats
  • 1/2 c whole wheat pastry flour
  • 1/2 tsp baking powder
  • 1/2 tsp baking soda
  • 1/2 tsp salt
  • 1/2 tsp cinnamon
  • 1/2 c unsweetened, shredded coconut\

Preheat oven to 350, and line a baking sheet with parchment paper.

Make your flax eggs and set them aside to gel. In a smallish bowl, combine mashed sweet potato, almond butter, coconut oil, maple, and vanilla: stir until just combined. In a larger bowl, whisk together almond flour, oats, flour, baking powder and soda, salt, cinnamon, and coconut. Pour wet into dry, and stir until the batter is incorporated (I added a tablespoon or two of water to help it all come together). Drop dough by the spoonful onto the prepared baking sheet, and flatten slightly. Bake for 11-12 minutes (Mine were done perfectly at 11, with slightly golden tops). Let cool on the sheet for a few minutes before moving to a cooling rack!

IMG_5431

Carbs are my friends.

IMG_5441

I love carbs.

You know, I used to have a teeshirt back in middle school (high school? Don’t remember) that said “I [heart] carbs!” above a food pyramid composed completely of… carbs. Inspired, that’s what that is.

IMG_5437

If I was to make up a pyramid for the carbs I eat now… hmm… Bottom layer: creamy oatmeal!! And other grains like amaranth and millet. Second layer: definitely toast. Bread, of all kinds. Toast bread… crusty, ciabatta-type stuff, olive and walnut, etc. etc. And then the third layer: flatbreads and tortillas! Because I don’t eat those quite as often. And then the little pointy part [eat sparingly, haha yeah right]: whole wheat croissants from La Boulange and… animal crackers [because I only eat them once in blue moon]. But only Barbara’s oatmeal kind, I’m rather particular. Yessss. Pyramid of carbs. Such a fabulous idea.

So! Because carbs are my friends… I made flatbread again! Except this one is different than the last one and my cat didn’t express interest…

IMG_5440

This one is a Sri Lankan recipe called roti. Super easy to make and so delicious, I made a half batch due to lack of coconut and made 6… annnddd they disappeared within about 10 minutes of actually making them. I think we can safely assume that they were delicious. Especially with butter. Mmm. Butter makes everything better. Maybe that should go in my pyramid somewhere… my pyramid of carbs and butter. Or according to Regina George they’re the same thing: “Is butter a carb?!” haaa.

(Veggies would obvs be in my pyramid too but you’ve heard me expound enough about how it’s ridiculously challenging to keep me in vegetables so let’s just stick to carby wonderfulness).

Anyway. Make these flatbreads! They’re good either savory or sweet, and I’m sure they would be fab with curry,  but too bad we ate them all before I could make anything to eat them with. Whoops.

IMG_5449

Sri Lankan Whole Wheat Roti

Delicious recipe lightly adapted from Curry and Comfort, here! I made a half recipe and got 6 of various sizes; the full recipe (posted below) should yield 9-11.

  • 3 c whole wheat pastry flour
  • 1 tbsp coconut oil
  • 1 c shredded unsweetened coconut+milk bev for soaking
  • 1 c cool water
  • salt to taste
  • a bit more coconut oil for cooking

In a small bowl, soak coconut shreds in your milk bev of choice—I would have used coconut milk if I’d had one open; I used rice milk. Use enough milk to just moisten them, but not too much–you don’t want it soupy, just hydrated! Set aside.

Sift whole wheat flour (or don’t, if you’re lazy like me) into a bowl, and add melted coconut oil and salt. Stir in soaked coconut. Start adding water a little at a time until a dough forms. It should be about the consistency of play-dough!
Heat a cast iron skillet over medium high heat with a bit of coconut oil in the bottom. When it’s hot, pat the dough into flattish little shapes (Try not to play with it too much, as tempting as it is…. no one wants tough roti), and pan fry them until they brown on both sides. Serve warm with butter! Or curry, or whatever you have on hand. I think they’re best immediately, but I’m sure they would be just as good reheated.

IMG_5438

Happy Birthday, Bloglet!

IMG_5141

Happy Birthday, little Bloglet!!

My little baby bloglet is TWO years old this week!! (I say this week as I’m really not sure what day I started, and wordpress isn’t telling and I’m far too lazy to look back at my posts, whoops).

I feel like a proud parent! It’s so cute. To celebrate, I made… pie!!! (of course). I love my bloglet. Pie equals love. Therefore (QED?!), because I love my bloglet, I have made it a pie! And then I get to eat said pie, so everybody wins. Mmm, warm pie. Happy birthday, little two year old bloglet! Thank you for giving me an excuse to make pie (right. As if I ever needed an excuse to do that), even if it was a thousand degrees the day I made it and my dough got all sticky. Note to self: hot weather = sticky things = use mo’ flour! Whatever, got the crust in the dish in one piece so sticky is clearly sooo not a big deal.

IMG_5136

There has been such a massive amount of change over the two years I’ve been writing this, I’m so thankful I’ve had this as a creative outlet. It’s hard to believe it’s been two years since I started! 142 posts, lots of snark, and some epic fails later, I can look back with quite a bit of pride! Lots of growth to be had if you check out the early pictures (actually, do me a favor and let’s ignore those, shall we?) versus the later ones. Lots more invisible internet friends! You know I love you. Some things haven’t changed though: I’m still as irreverent and alternative awesome as I’ve ever been (wait. Probably even more than I was…you can be the judge of that ;) and the food is still delicious. I think. Most of the time!

IMG_5134

For now, here’s a list (because I love them) of things I’m loving right now:

1) Gottschalk’s Symphonie romantique, “La nuit des tropiques”! Love love love.

2) Monarch of the Glen. Ob.SESSED.

3) Whole wheat english muffins. Like that’s ever going to change…

4) ALLL the grains and seeds (bird food. whatever): barley, amaranth, millet.

5) LENTILS! Enough said. I eat them for breakfast (I heard that and saw that eyeroll. Let’s not be judgy, you wouldn’t love me unless I did weird things like that, riiiight?!)

6) Reading several books at once. I think my current total is 4. And yes, I will finish them all ;)

7) Raw honey and cinnamon on toast. How have I not discovered this before now?

8) Single crusted pies. That way, you get smacked in the tastebuds by summer’s gloriousness!

IMG_5129

Anyway. Random things that were on my mind, and now they’re on yours. Muahha! Next thing you know you’ll be eating lentils for breakfast…

IMG_5138

Marionberry-Peach Pie

Makes one 8″ pie. The crust is the same one I’ve used before, coconut oil-whole wheat. It’s delicious and easily the fastest and least irritating pie crust I’ve ever made. Even when it’s ridiculously hot in your kitchen, it still cooperates with only minimal fussing. Oh yeah, and it’s absolutely delicious as well!

Crust: 1 whole wheat coconut oil crust, 8″

For the filling*:

  • 1 bag frozen peaches (I cut up the slices a bit because they’re usually really chunky)
  • 2 bags of frozen marionberries
  • 1/4 c whole wheat pastry flour
  • 1 tbsp tapioca (I use quick-cooking)
  • 1/2-1 tsp cinnamon
  • 3 tbsp honey

*I used the amount of fruit that would fill my pie dish—the pie was 8″ single crusted, and I didn’t want the filling to sink too much so I threw in an added bag of berries. In my relatively shallow pie pan it was perfect!

Prepare pie crust of choice and preheat oven to 425.

In a large-ish bowl, toss together peaches, marionberries, flour, tapioca, cinnamon, and honey. I usually thaw my berries/fruit slightly, since honey tends to be difficult when it hits frozen things—it mixes a bit better when the fruit is slightly thawed. Once everything is combined, pour filling into the prepared pie crust, and bake for 15 minutes. Lower the oven temp to 350, and bake for about another 45 minutes, until the juices are bubbling and the crust is lightly browned. Remove from the oven and let cool a bit (but serve warm!).

IMG_5145

Transcendental Pie.

IMG_20130508_110027

Oh little bloglet, I do love you. I wasn’t even going to post today, but I suppose the bloglet muse struck…

AND I have this pie. Oh my goodness.

IMG_5098

There are no words. So, you get pictures.

IMG_5092

Actually, there are words. Words like family. Sunshine. Warm fruit. Warm weather. Nostalgia. Long evenings, dusky twilights. Memories. Summers that felt endless. Fresh. Happiness. Peace. Soul.

IMG_5097

Pie.

IMG_5090

Pie to me seems older than many traditional desserts or foods… it’s one of those intrinsically ‘family’ foods. When I make it and eat it, I feel a connection to generations of female family members who made pie before I did, and fed it to their loved ones. This is why I make pie by hand, not with a food processor or any other technical kitchen implements. I like just using a simple pastry cutter, and my mom’s wooden rolling pin. So simple, yet I think it makes the best pie. Why is it that the simplest things are so often the best? Probably because we get so much more out of the taste sensation than delicious food: nostalgia and taste receptors go hand in hand. To me, pie is generations of strong women. It makes me proud to feel connected to them in a physical way—those strong, wonderful, loving women who came before me.

So this pie is an homage to them: I am proud to derive my lineage from such a long line of fantastic women and their pies!

Happy early Mother’s Day to my mama, and to all of the wonderful mothers in this world!

IMG_5099

Simple Peach Pie

I know this is the second peach pie recipe on the blog, but um… I LOVE peach pie. So I’m giving you choices! This one is slightly healthier than it’s predecessor, not like that particularly matters when it comes to pie. But actually, this is my favorite of all of the pies on here! Simple, and delicious. The crust comes together easier than anything, and the filling is easy as well. Since it wouldn’t be a Hayley post without some nutritional tidbits, of course I have to add a note about the healthy fats from the coconut oil crust, and the blood-sugar regulating properties of cinnamon. Peaches are fruit, fruit is good for you… Whole wheat crust! And minimally processed sweeteners, from unrefined sources. Wheee!

Crust recipe lightly adapted from The Joyful Pantry, here! I made 1/2+1/4 of the recipe, as I wanted cut outs for the top. My pie pan was a shallow 8″, and I had just enough left for a few decorations. The measurements below are for a double crust, makes two 8″ crusts.

IMG_5096

Make pie. Eat. Love.

Crust:

  • 3/4 c coconut oil
  • 2 c whole wheat pastry flour
  • 1 tsp salt
  • 1.5 tbsp coconut sugar
  • 5-6 tbsp ice water

Filling:

  • 2 bags frozen organic peaches (I think between 2-3 c sliced)
  • 1/4 c honey
  • 1.5 tsp cinnamon
  • 1 tbsp whole wheat flour
  • 1 tbsp quick cooking tapioca

Preheat the oven to 400.

In a  bowl, whisk together flour, salt, and coconut sugar. Using a pastry cutter, cut in the coconut oil until the mixture resembles coarse sand. Add in ice water, a tablespoon at a time, until you can form a dough (I like to do this part with my hands). Gather the dough up into a ball, then roll out on a floured surface (I like waxed paper, as it makes it easier to flip the crust back into the pie dish). Once it’s larger than the circumference of the dish, flip the dough carefully back onto your pie dish, and press into place. Poke the bottom a few times with a fork, and crimp the edges so it looks pretty!

Combine peaches, honey, cinnamon, flour, and tapioca in a large bowl. Give it a few stirs… see? I told you this was easy. Pour this into the prepared pie dish, top with whatever kind of crust you’d like (double, lattice, cutouts, whatever), and then pop it into the oven. Bake for 30 minutes uncovered, then use foil to tent it and prevent excess browning, baking it for another 30 minutes. The filling should be bubbly when done, and will thicken as it cools.

Let cool a bit before slicing, but not too much… pie should be eaten warm!

IMG_5088

Haha, what leftovers??


Pie.

IMG_4943

Pie.

I love that word. It’s so simple, but it brings with it so many positive associations! Fruit. Ice cream. Family. Eating al fresco. I’m sure you have your own; those are mine. Besides all that, I love that I can pack a dessert full of fruit and then call it good for me… and then call it snack. And breakfast. And maybe lunch. Why not? Fruit+whole grains+healthy fats = a balanced(ish) meal, happy tummy, and happy soul.

IMG_4946

This post is rather short, as I’ve been a bit under the weather. I also loooove the photos, so this time, less is more!

IMG_4941

Life is short. Eat pie. Be happy!

Simple Blueberry Pie with a Coconut Oil Crust

I used the coconut oil crust recipe from Food 52, here, with only a slight modification (ww flour, always!). I wanted to use coconut oil, since it provides a nutritional bump in healthy fats (among other things like antioxidants, antimicrobials, and a host of other wonderful things). I always struggle with pie crust, partially from lack of patience and practice, and also probably because I’ve never used a trusted recipe. I really liked this one though—not only did it come together relatively easily, but it also was quite probably the best-tasting crust I’ve ever made. Winner. I’ll be making this one again, when I can get my hands on some peaches :)

I used blueberries I’d frozen in the summer—if you use frozen fruit, no need to thaw it first.

IMG_4938

Whole Wheat Coconut Oil Crust

  • 2.25 c whole wheat pastry flour
  • 1 tsp salt
  • 1 tbsp coconut sugar (or other granulated sugar)
  • 1/2 c coconut oil, cool enough to be solid
  • 1/3-1/2 c ice water

You can do this by hand, or use a food processor if you want to save time, like me. Food processor method: toss flour, salt, and sugar into the processor and pulse to combine. Add in solid coconut oil, and pulse again. It should start to come together when you pinch a bit. Pulse in 1/3 c ice water, until the dough starts to come together even more; adding ice water a tablespoon at a time until it holds together. You should be able to hold a handful without it disintegrating into crumbs. A few crumbly bits are okay, but it should be relatively easy to form it into a ball to roll out.

Flour your work surface and rolling pin. Toss dough onto the freshly floured surface (or, if you’re smart, onto wax paper so you can pick it up easily… definitely remembered that trick *after* I rolled it all out on the counter, oops), and roll it out until it’ll fit into your pie dish of choice. I used a deep-ish one, so I had enough crust left over for a few decorations but not for a lattice.

Gently lift crust into the pie pan, and crimp the edges so it looks nice! Prick the bottom a few times to prevent sogginess (no one wants that). I baked mine immediately—if you’re going to wait a bit, wrap the ball of it in plastic wrap and store it in the fridge, letting it come to room temperature before rolling it out.

IMG_4937

Blueberry Biz!

  • enough blueberries to fill your pie pan of choice. I probably had 1.5-2 c, and could have used a bit more if I’d had them.
  • squirt of lemon juice (about half a lemon’s worth, mine were Meyer lemons, hooray!)
  • 2-3 tbsp brown sugar, depending on berry sweetness
  • 1/6-1/4 c whole wheat pastry flour*

*apologies for the indefinite measurements… when I make pie filling, I usually don’t measure and taste as I go!

Preheat oven to 425, and make sure you have your prepared pie crust lurking around on hand somewhere.

Toss blueberries with lemon juice, brown sugar, and flour in a large bowl. Add blueberries into the prepared pie crust. If you have leftover crust and want to roll it out so that you have an excuse to play with cookie cutters, by all means do so! Place little pieces of crust on top of blueberries, and pop the entire thing into the oven for 15 minutes on 425, then lower the temp to 350 for another 45 minutes. Pie is done when the juices are a little bubbly and the crust is browned. I like my blueberries to have more body and be less like soup, so I took mine out at the hour mark. Let cool for a bit before slicing! Pie stores well in the fridge for the next day’s breakfast… and is reeeeally good with whipped coconut cream. Just sayin’. (I used a can of Trader Joe’s Coconut Cream, chilled it for a few hours, scraped off the cream and whipped it with an electric mixer. I added just a hint of vanilla and maple syrup).

IMG_4947

IMG_4949

And one more… just because I happened to make this on Pi Day, and seriously, who doesn’t like extra pictures of pie??

IMG_4944

I really do actually eat vegetables. Promise!

IMG_4876

And now for something completely different in the cookie realm!

Because obviously I haven’t given you nearly enough cookie recipes lately (um. lies?!) And because I’m pretty sure said no one ever there’s such a thing as too many cookies. And if they did, whatever, we obviously can’t be friends. Schaaaawwrryyy! Cookies are the number one principle of my personal philosophy. Life is sometimes tricky, it’s better if you eat a [healthyishkindasortamaybe] cookie!

I think cookies might actually be one of my favorite things to make. Oh really, you say? As if the blog title alone doesn’t prove that!

Cookies on cookies on cookies. One would think this is all I eat…

IMG_4877

Um. I promise I eat vegetables! Like, I actually eat a ridiculous  amount of vegetables. And fruit. And eggs. Ask my mother, she claims it’s difficult to keep me in vegetables… I just… LOVE… SPINACH! Hoooomg. Among other things. I’ve gotten really good at putting spinach where it doesn’t necessarily belong but is undeniably delicious. Like maybe in the banana scramble I made today. So bizarrely wonderful and so perfect for St. Patrick’s day. Hmm. Shield your eyes if you abhor green things, that just might be the next post.

SO anyway. Cookies. Best eaten any time of day, with or without a milk-type beverage.. Eat three, and call me in the morning. Seriously, if medical practitioners gave out this kind of advice, I think the world might be a slightly more magical place.

So now instead of cruncy-hippie-granola raw cookies, you get [somewhat less crunchy but still kind of, whatever I’m still kind of granola] vegan salted caramel chocolate chip cookies! Cue yummy sound. Did I just make the yummy sound? … No. That was definitely you. Oh no? Well.. if it wasn’t *YOU*, and it wasn’t *YOU*… and it wasn’t *ME*…

IMG_4881

Vegan Salted Caramel Chocolate Chip Cookies

Recipe unintentionally adapted from Keepin’ it Kind. I made biggish cookies and ended up with about 15 or 16, but depending on size you could conceivably make up to 24ish… if you use a smaller scooping technique. Don’t judge, I’m rather a fan of large cookies! These are fab cookies, and the dough is just as good (number one perk for vegan baking: dough eating adventures).

I didn’t have coconut sugar, though next time I’ll be using that as my caramel wasn’t quite what was intended visually. It got the point across though, and tasted amazing! That being said… you *can* make these with regular sugar, as I did, but coconut is preferred (and keeps them slightly less refined).

IMG_4875

Let’s make tasty things:

  • 3/4 c sugar (see above note)
  • 1/2 c water
  • 1 c full-fat coconut milk
  • 1/2 tsp sea salt
  • 1 large ripe banana, mashed
  • 1 tbsp coconut oil (mine is the unrefined variety that smells like coconut)
  • 1 tsp vanilla extract
  • 1.5 c whole wheat pastry flour
  • 1 flax egg (1 tbsp ground flaxseed+3 tbsp water)
  • 1/2 tsp baking soda
  • 1/4 tsp sea salt
  • 1/3 c dark chocolate chippies

To do so, we…

Make caramel!
Pour sugar and water into a smallish saucepan. Whisking frequently, bring it to a boil. Reduce heat to low/simmering, and let it reduce until the water is reduced by half. If you use coconut sugar, the water should be dark brown; if using regular sugar, it’ll be lighter in color. Keep whisking, as it has a tendency to bubble up. Slowly whisk in coconut milk and continue whisking for 10-15 minutes or until (if using coconut sugar) the mixture thickens and is a dark brown. If you’re like me and you attempted regular sugar, it’ll look grey. Not the most gorgeous color, but delicious. Promise. The mixture will thicken as it cooks, more so with coconut sugar than regular. Stir in the salt, and remove from heat. Let it cool while you do the rest of the cookies, or you can store the caramel in a jar in the fridge (it keeps for several weeks, tightly sealed).

Onward! Cookie time:

Mix up your flax egg and let it sit for a bit to thicken.
Mash up the banana, toss in slightly meltedish coconut oil, and use a mixer to beat until fluffy. Whisk in vanilla extract and 2/3 c caramel sauce (save the rest for later). Once the flax egg sets up, whisk that in.

In a larger bowl, whisk together flour, baking soda, salt. Add dry ingredients to wet, stirring until just combined. Fold in chocolate chips, and slightly flatten the dough into the bottom of your bowl. Pop it into the fridge and let it chill for about a half and hour.

Preheat the oven to 350, and line two baking sheets with parchment paper.

Remove the dough from the fridge and make several cuts through it with a knife. Drizzle the caramel sauce over the dough, without mixing it in. Drop blobs of dough onto the prepared cookie sheets (whatever size you deem necessary for that particular day…), leaving the streaks of caramel running throughout. The dough will be a bit wet with all that, but just roll with it. Bake cookies for 8-12 minutes (I know that’s a huge range, but I did mine on convection so they ended up going a bit longer. Check at 8, and go from there!) Because of the caramel, the cookies can look a bit underdone, but they should be solid to the touch when done—check the bottoms if you’re not sure. Let cool on the baking sheets for a few minutes, and then transfer to wire rack.

Do yourself a favor and eat one warm out of the oven!

IMG_4878

One awkwardly dead banana and what to do with it

IMG_4721

Banana bread bites.

Somewhere between a cookie, banana bread, and… a scone? Muffin? A skookie? Or a brone? Or a mookie?

Clearly my brain has gone on holiday, can you tell?

IMG_4727

Either way, these are delicious! Vegan, refined sugar free (and low sugar), whole grain, high in fiber, and full of potassium and antioxidants. I can’t even really call it a cookie because it’s so healthy… but then you can have a cookie for a snack and feel good about it, so errrybody wins. And I win, because I’ve been buying an excess of bananas so that I can let some go all mushy and disgusting. This is all on account of Vacuum Vati, you see. I thought I ate a lot of bananas?! Apparently it’s genetic. Sheeeesh. If I didn’t buy extras and explicitly forbid him from eating them, there would never be any banana bread/bites/cake/cookies around here. And that would just be sad. So obviously I just circumvent this by buying an extra bunch and doodling on their skins to designate them off limits. MY DEAD BANANAS! MINE!

IMG_4724

I am, of course, very nice. How, you say? Welll… I share the PRODUCT of the hoarded bananas! I may be territorial regarding my dead bananas, but there are always several lucky recipients of the buuhhnahhhnuhhh creation. I think these went over well…. there are currently two left. *Pause for effect*… I made them yesterday. Obviously time to make something else, wouldn’t you think?

Except now I have one awkwardly dead banana and I’m not sure what to do with it. It needs friends. Does anyone care to donate their dead bananas? Anyone? Anyone? …Bueller?

IMG_4730

Vegan Banana Bread Cookie Pucks

Recipe adapted ever so slightly from Minimalist Baker (fabby blog!), here! The recipe makes about 18 little puck thingies… about 2-3″ across. Freaking delicious. Good for you. There is absolutely nooo reason why you shouldn’t trot off to your kitchen and make these… (unless, that is, you haven’t properly hoarded and defended your dead bananas).

IMG_4725

  • 2 ripe (read: dead) bananas
  • 1 tsp baking soda
  • 1/2 tsp baking powder
  • pinch of salt
  • 2 tbsp ground flaxseed
  • 1 tsp vanilla extract
  • 1/4 tsp pure almond extract
  • 2 tbsp smooth almond butter (I used Maranatha unsalted)
  • 1.5 tbsp grade B organic maple syrup
  • 1.5 tbsp olive oil
  • 1 c whole wheat pastry flour
  • 3/4 c rolled oats
  • 1/4 c dark chocolate chips

In a bowl, mash the two dead bananas so they can become delicious. Toss in baking powder, soda, salt, flaxseed, extracts, almond butter, maple, and olive oil, and stir to combine. Add in flour, oats, and chocolate chips, and once more stir to combine everything. The dough should be thick and a bit sticky. Cover the bowl with whatever’s handy, and refrigerate while the oven is preheating.

Preheat the oven to 375, and line a baking sheet with parchment paper. Once the oven is done, grab your chilling dough, and drop heaping tablespoons onto the sheet, with a bit of room between (though I was able to get all 18 on one sheet). Slightly flatten the tops. Bake for 9-10 minutes, until the tops are set. Don’t let them brown, as you want them hydrated and soft! Let cool on a rack for a bit, then store in a tupperware for about five seconds before they all get eaten.

IMG_4733

Tarting (torte-ing?!) it up

IMG_4682

Holy moly.

Gooey chocolate deliciousness.

IMG_4683

But. If I didn’t tell you… could you guess what this decadent wedge holds? Well… if you know me, I’m sure you have a decent idea… just take  a minute to think it over and then get back to me.

Okay.

Did you think?

Did you guess vegetables?!

Because if you did… you’re right! And maybe the green peeking out of that first picture was kind of a giveaway… whatever. Get a little more specific: perhaps two servings of vegetables, and about two servings of fruit?! And it’s dessert. Cholesterol free, vegan, and delicious dessert. Make this for your friends when they’re skeptical that vegan = delicious.

IMG_4693

Besides, when I do things like this, I get to eat things like this as a reward:

0

See? Life is all about balance (and trx handstands, natch). As Oscar Wilde so wisely said: “everything in moderation, including moderation!”. I do have to say though, this torte requires less moderation than usual since it’s so freaking good for you. Chocolate= antioxidants. Zucchini= veggie (veggie = by definition, healthy, obvs). Banana= potassium. Whole wheat flour = whole grain fiber. Almonds = healthy fats! Wheeeee!

IMG_4687

Chocolate Zucchini Torte

Recipe gratefully adapted slightly from Kohler Created, here! Next time I would perhaps leave out or reduce the oil, as the cake is definitely hydrated (you see I avoid that ‘oist’ word) enough with all the produce crammed inside.

  • 2 c whole wheat pastry flour
  • 1/2 c unsweetened cocoa powder
  • 1 tsp baking soda
  • 1/2 tsp baking powder
  • 1/4 tsp salt
  • 1/8 c canola oil
  • 1/4 c unsweetened applesauce
  • 1/3 c granulated sugar
  • 1/2 c brown sugar
  • 1 tsp vanilla extract
  • 1/2 tsp ground coffee
  • 1.5 ripe bananas, mashed
  • 4 tbsp water
  • 1/4 c unsweetened almond milk
  • 2 c zucchini, finely grated
  • 1/2 c dark chocolate chips

For topping: 3 tbsp brown sugar + 1/2 c chopped almonds

Preheat the oven to 360. Grease and flour a 9″ cake pan.

In a largeish bowl, sift flour, cocoa powder, baking soda and powder, and salt. In another bowl, combine oil, applesauce, sugars, vanilla, and coffee. Beat vigorously (use those biceps!) for a few minutes… or use a mixer. In a smallish bowl, mash bananas, then add water. Add bananas, beat to combine, then add milk.

Combine 1/2 c of the flour mix to the grated zucchini and chocolate chips. Slowly beat in the remaining flour into the banana bowl, until incorporated. Stir in zucchini and mix thoroughly. The batter should be thick (and delicious). Pour into the prepared pan, top with brown sugar+almonds, and bake for about 45 minutes, until a tester comes out clean. Cool in the pan before attempting to slice! This cake is even better the next day (promise!), if you can make it last that long…

IMG_4689