Endless galettes

Hi friends!

I actually made this last weekend but then never got around to posting… I’ve been working on a new painting in my off hours, and that is happily taking up most of my (creative) free time. I’ll share it here when I’m finished!

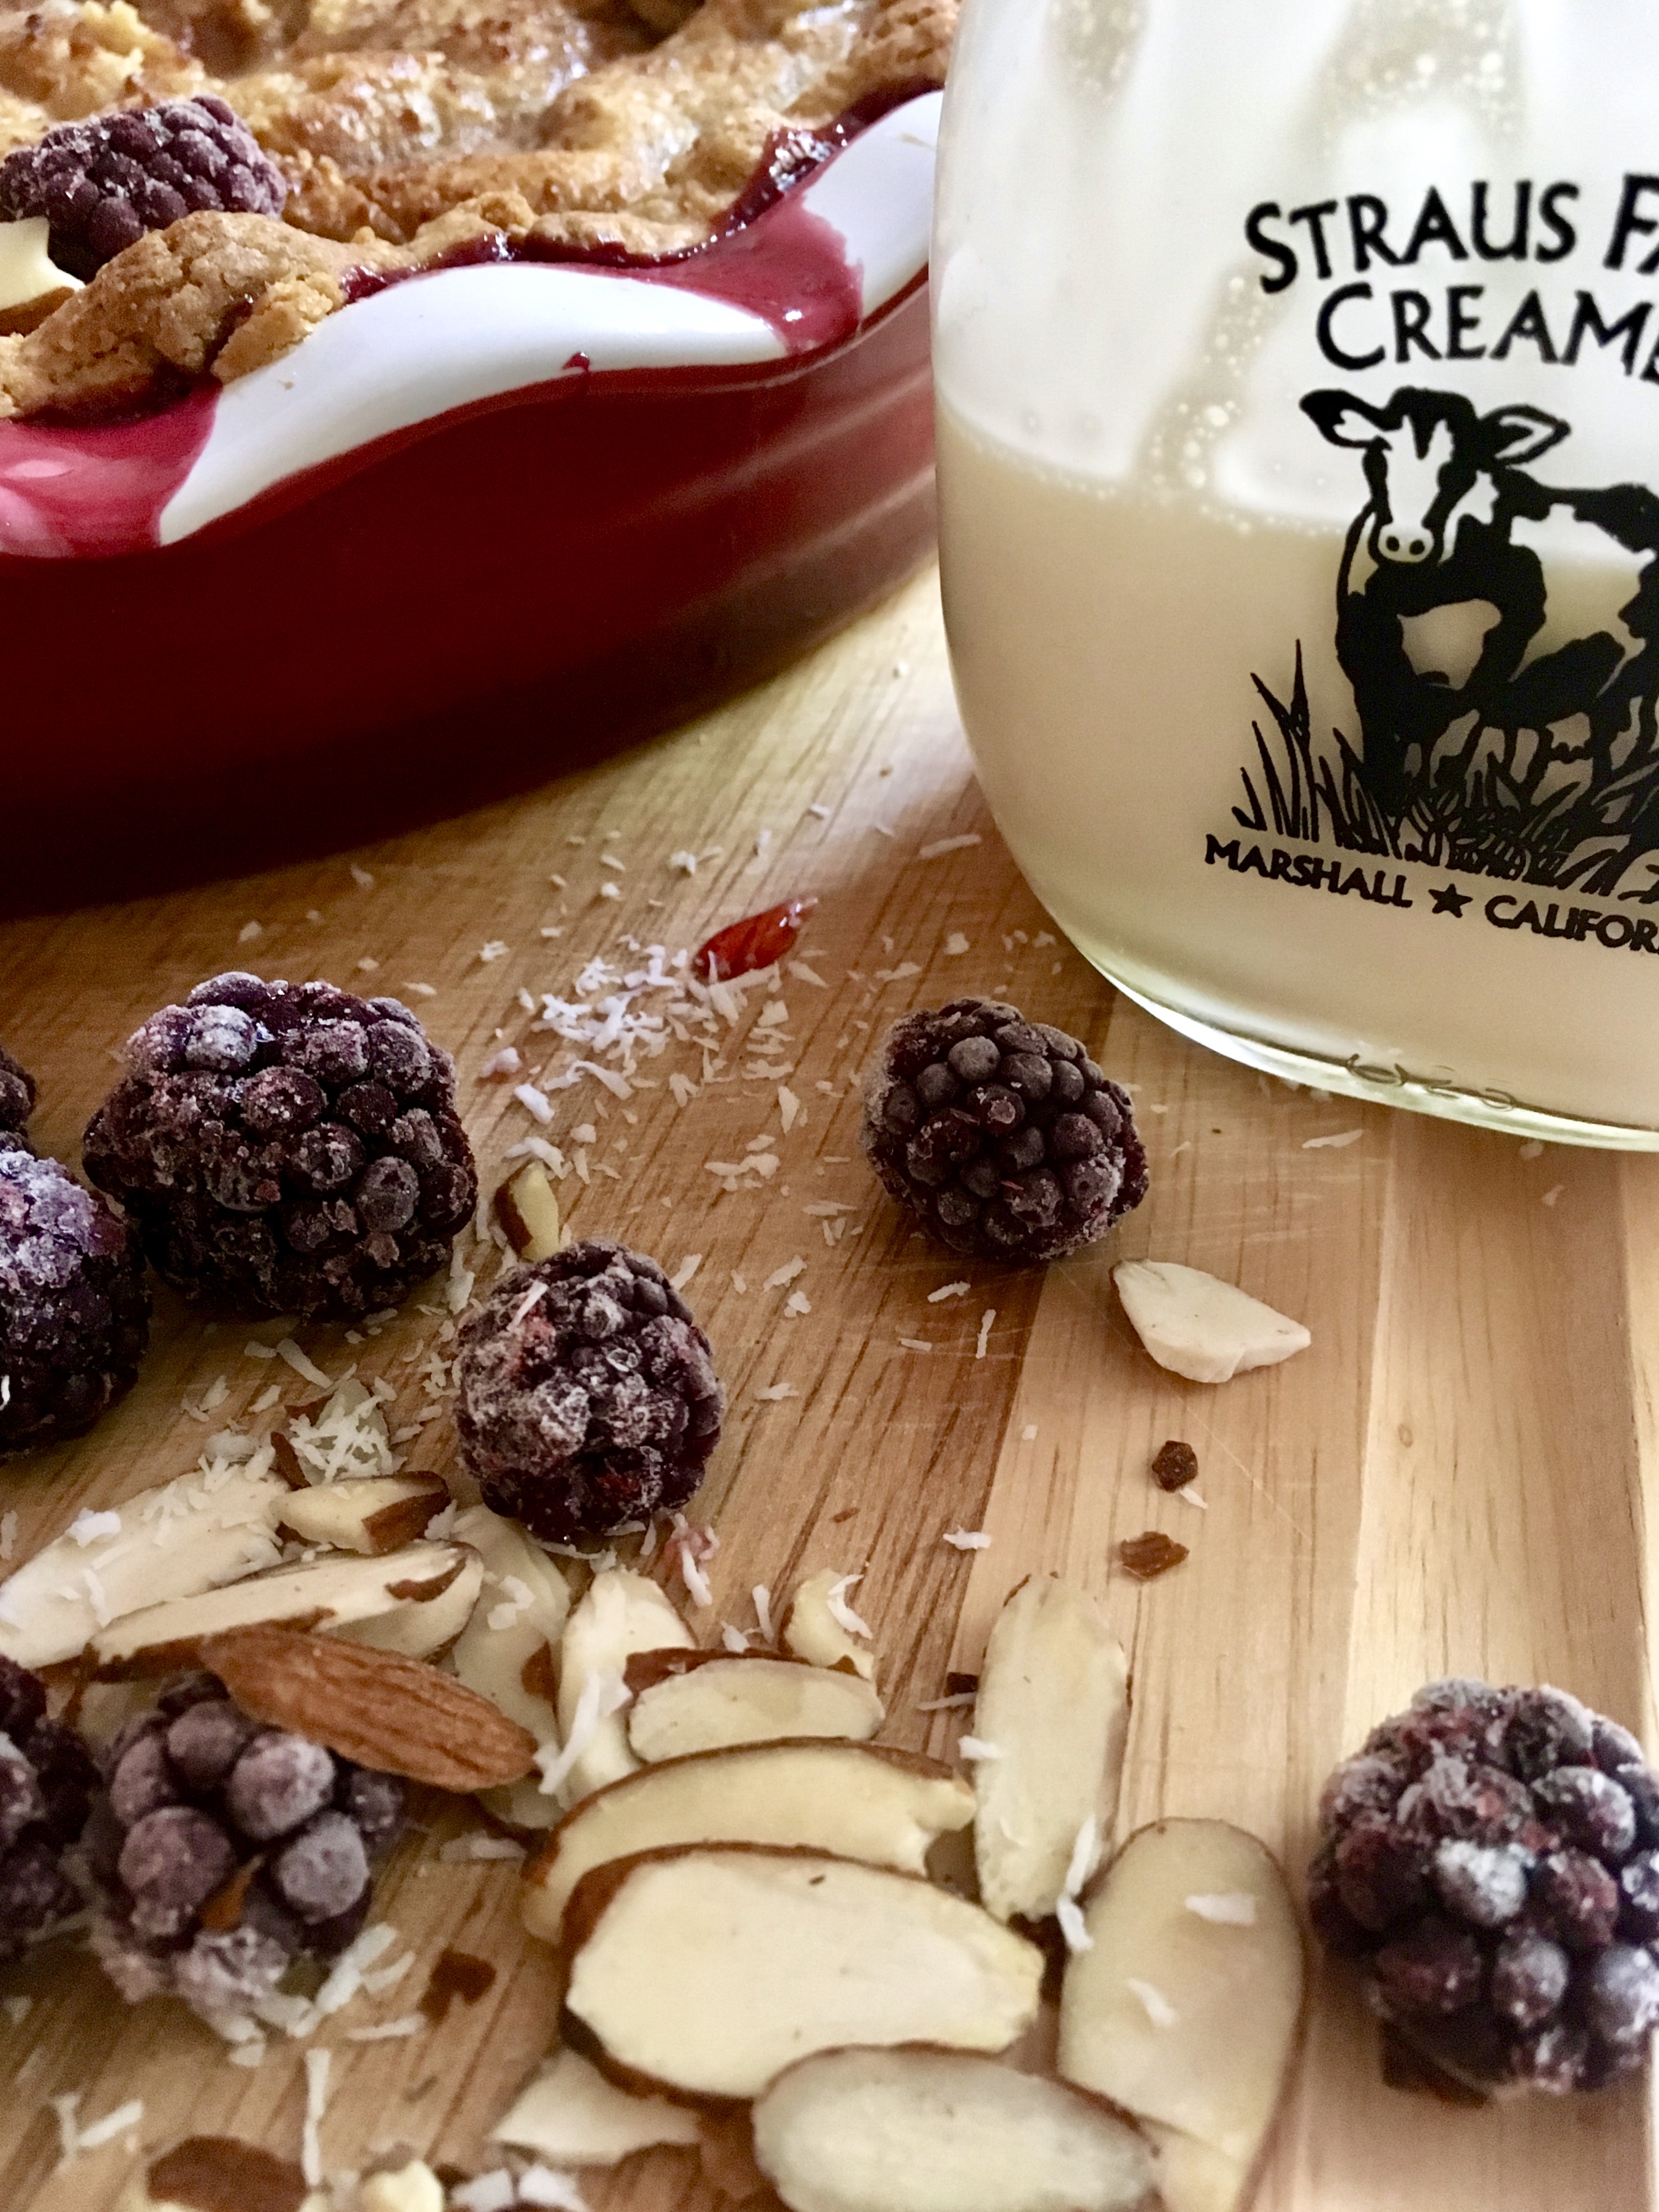
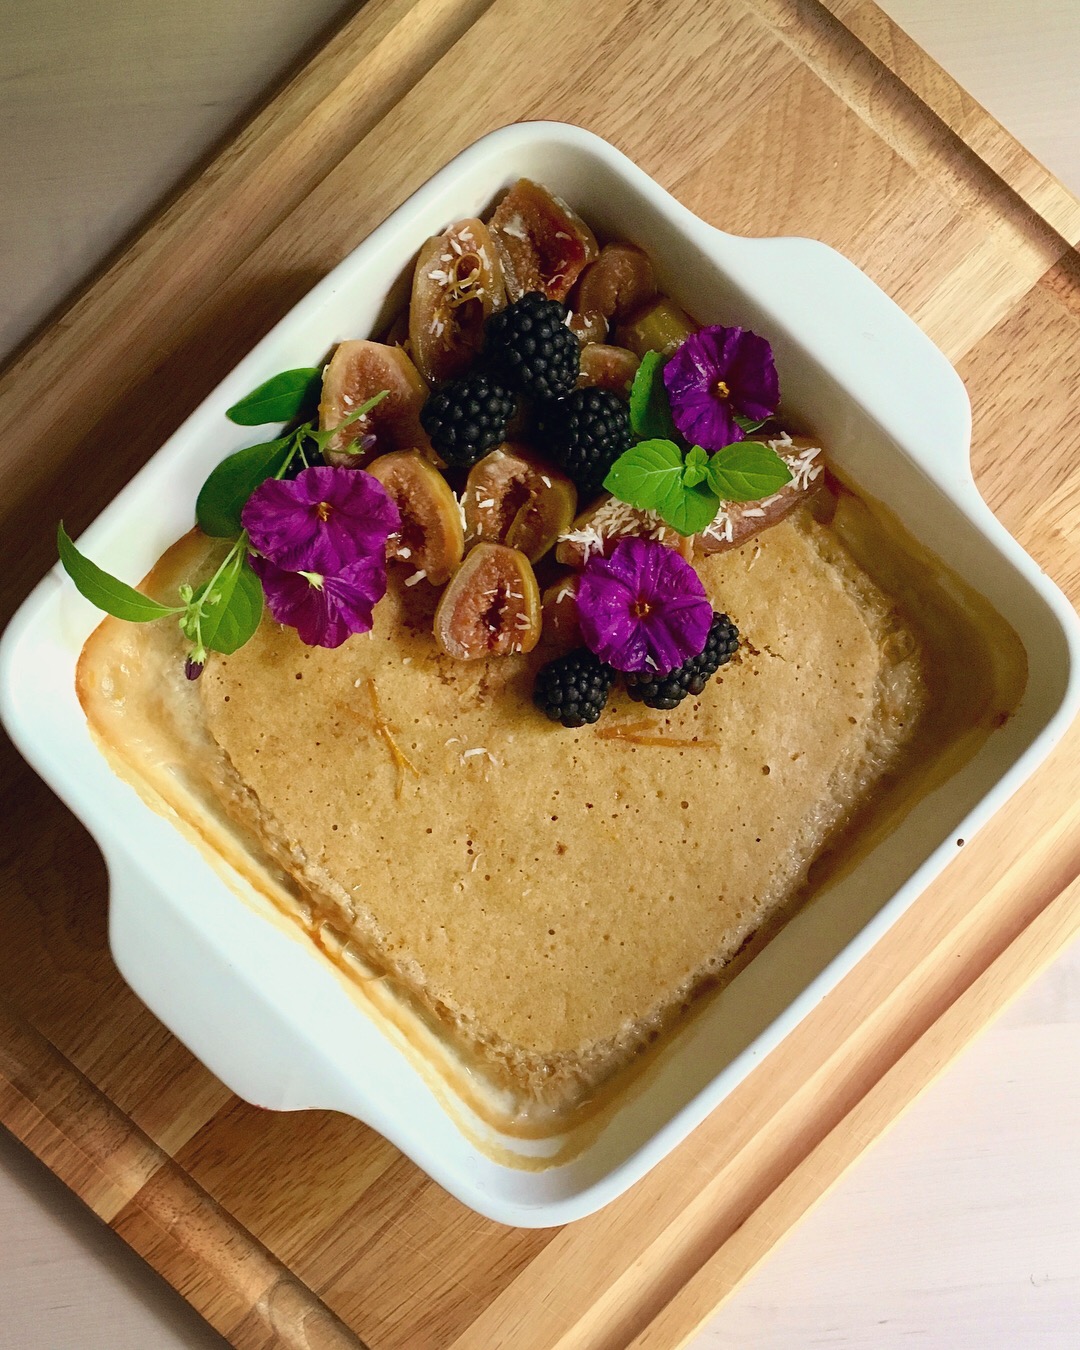
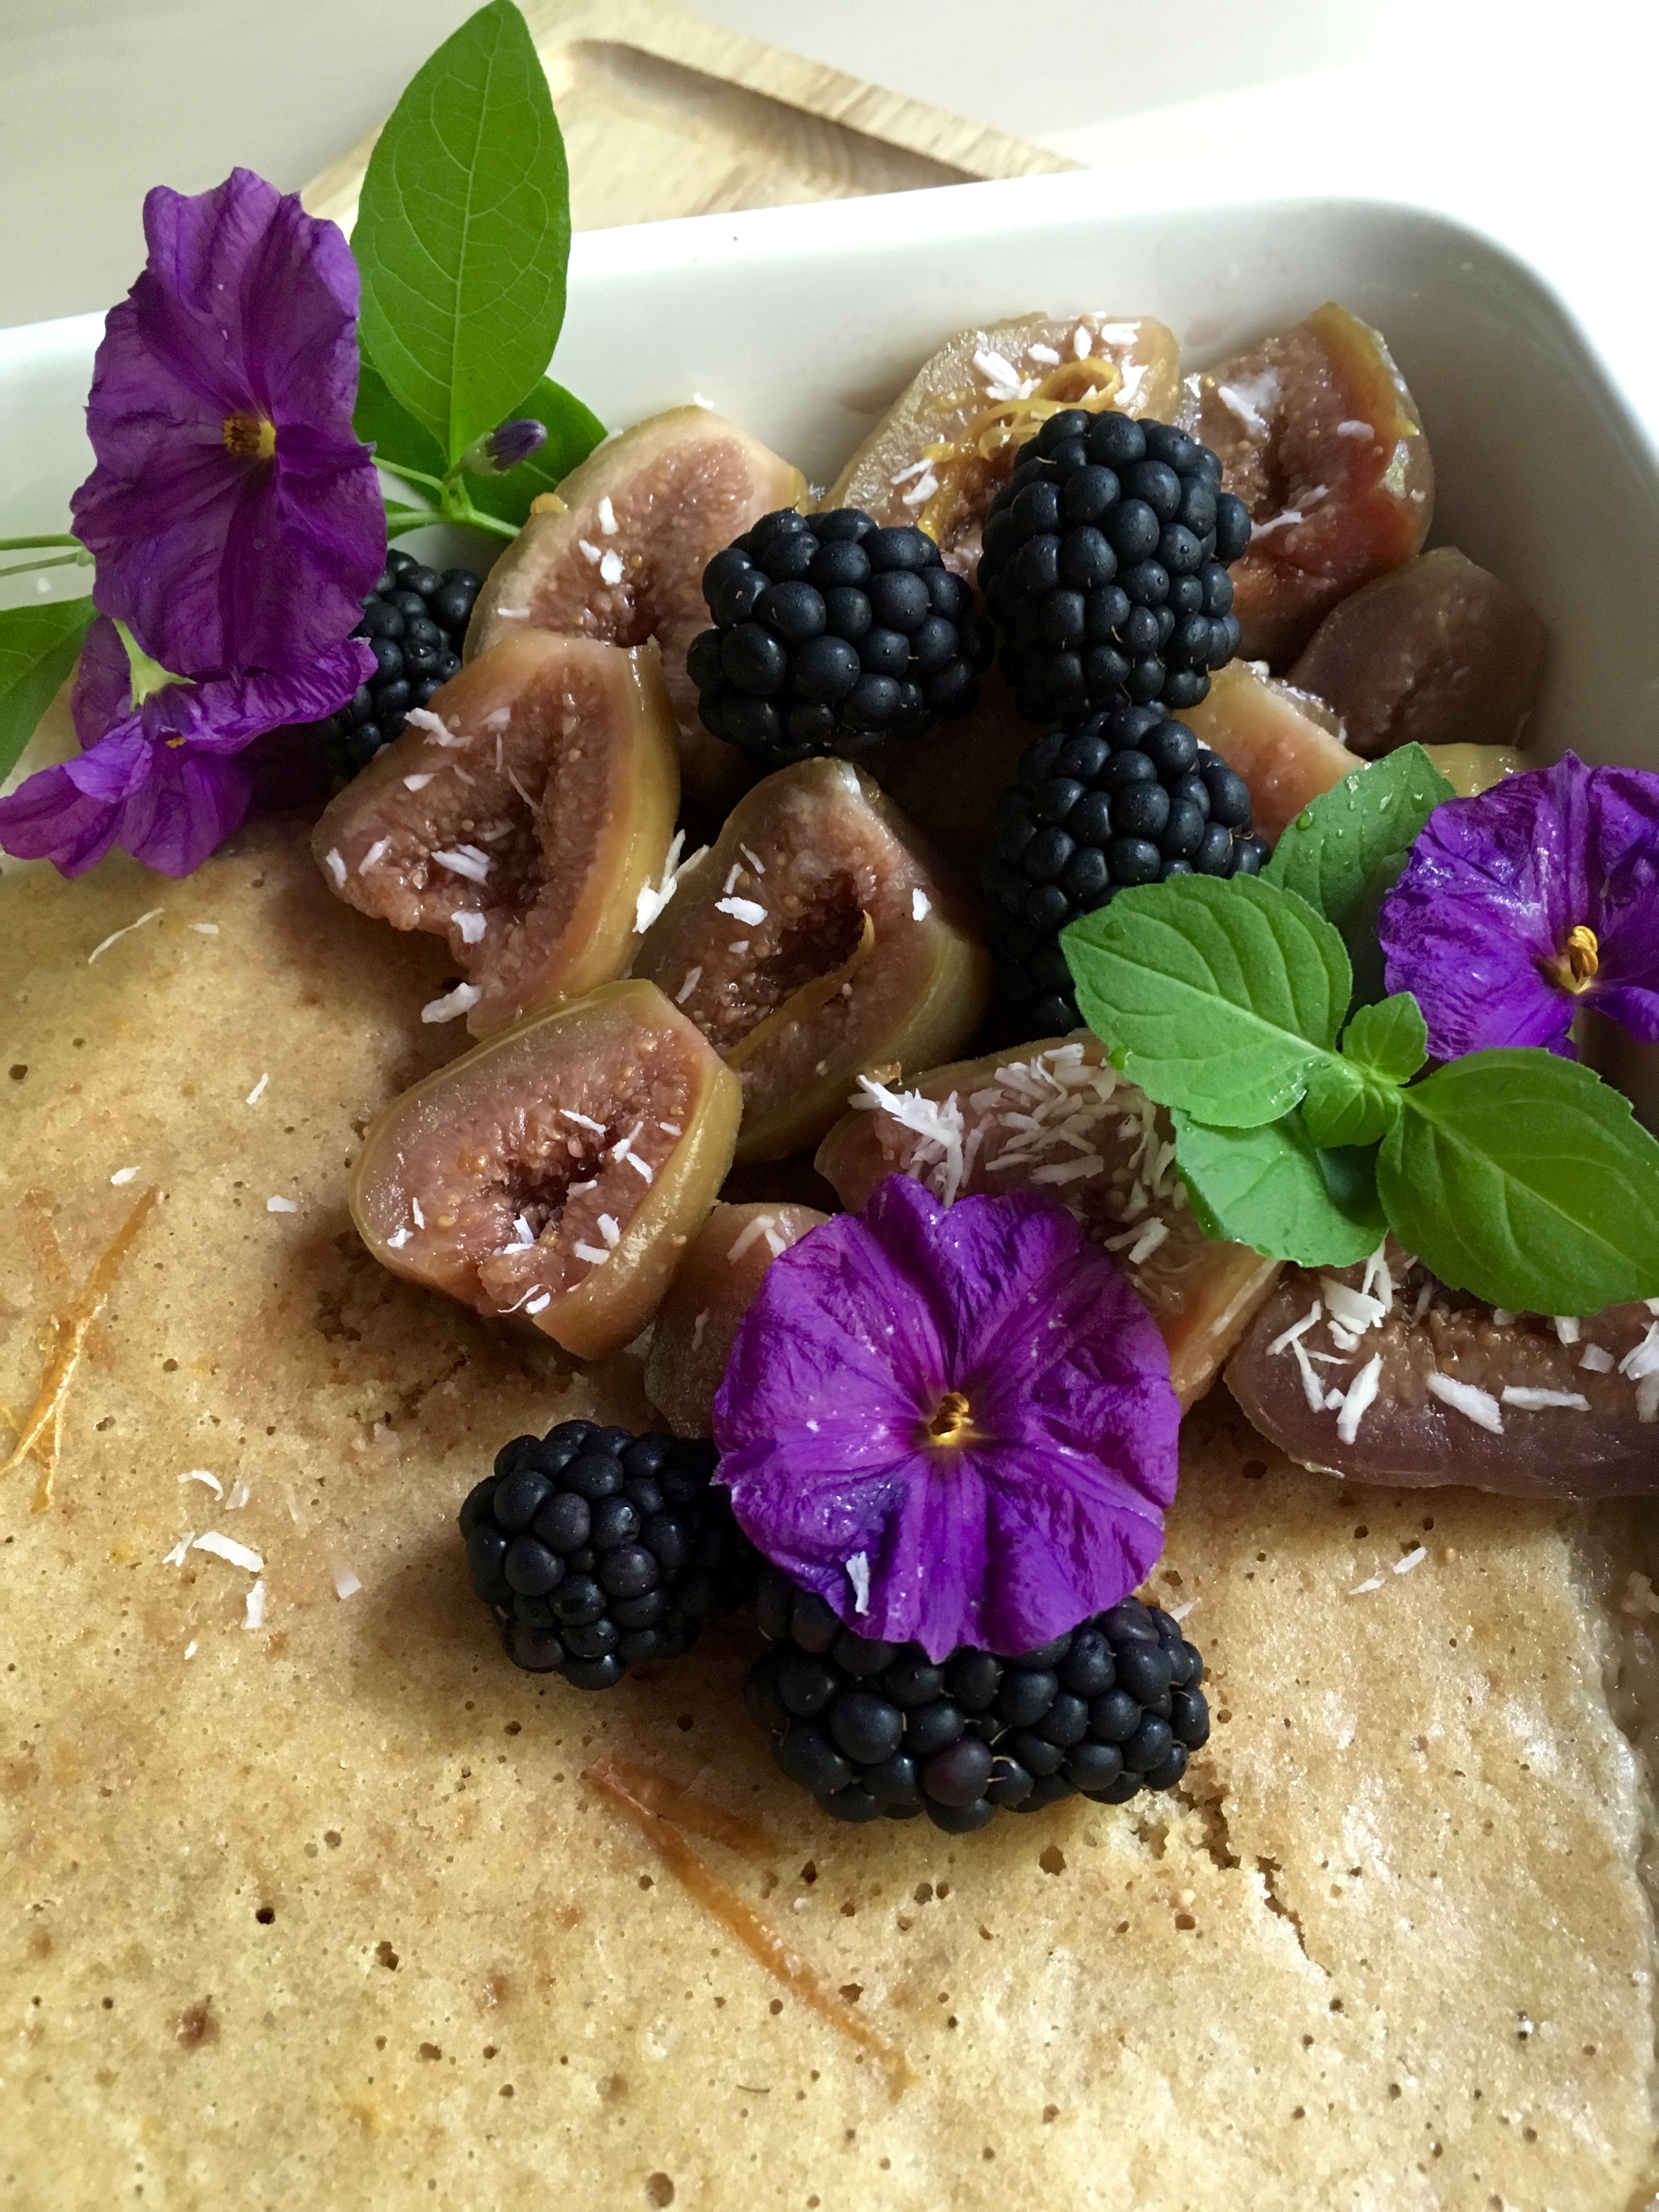
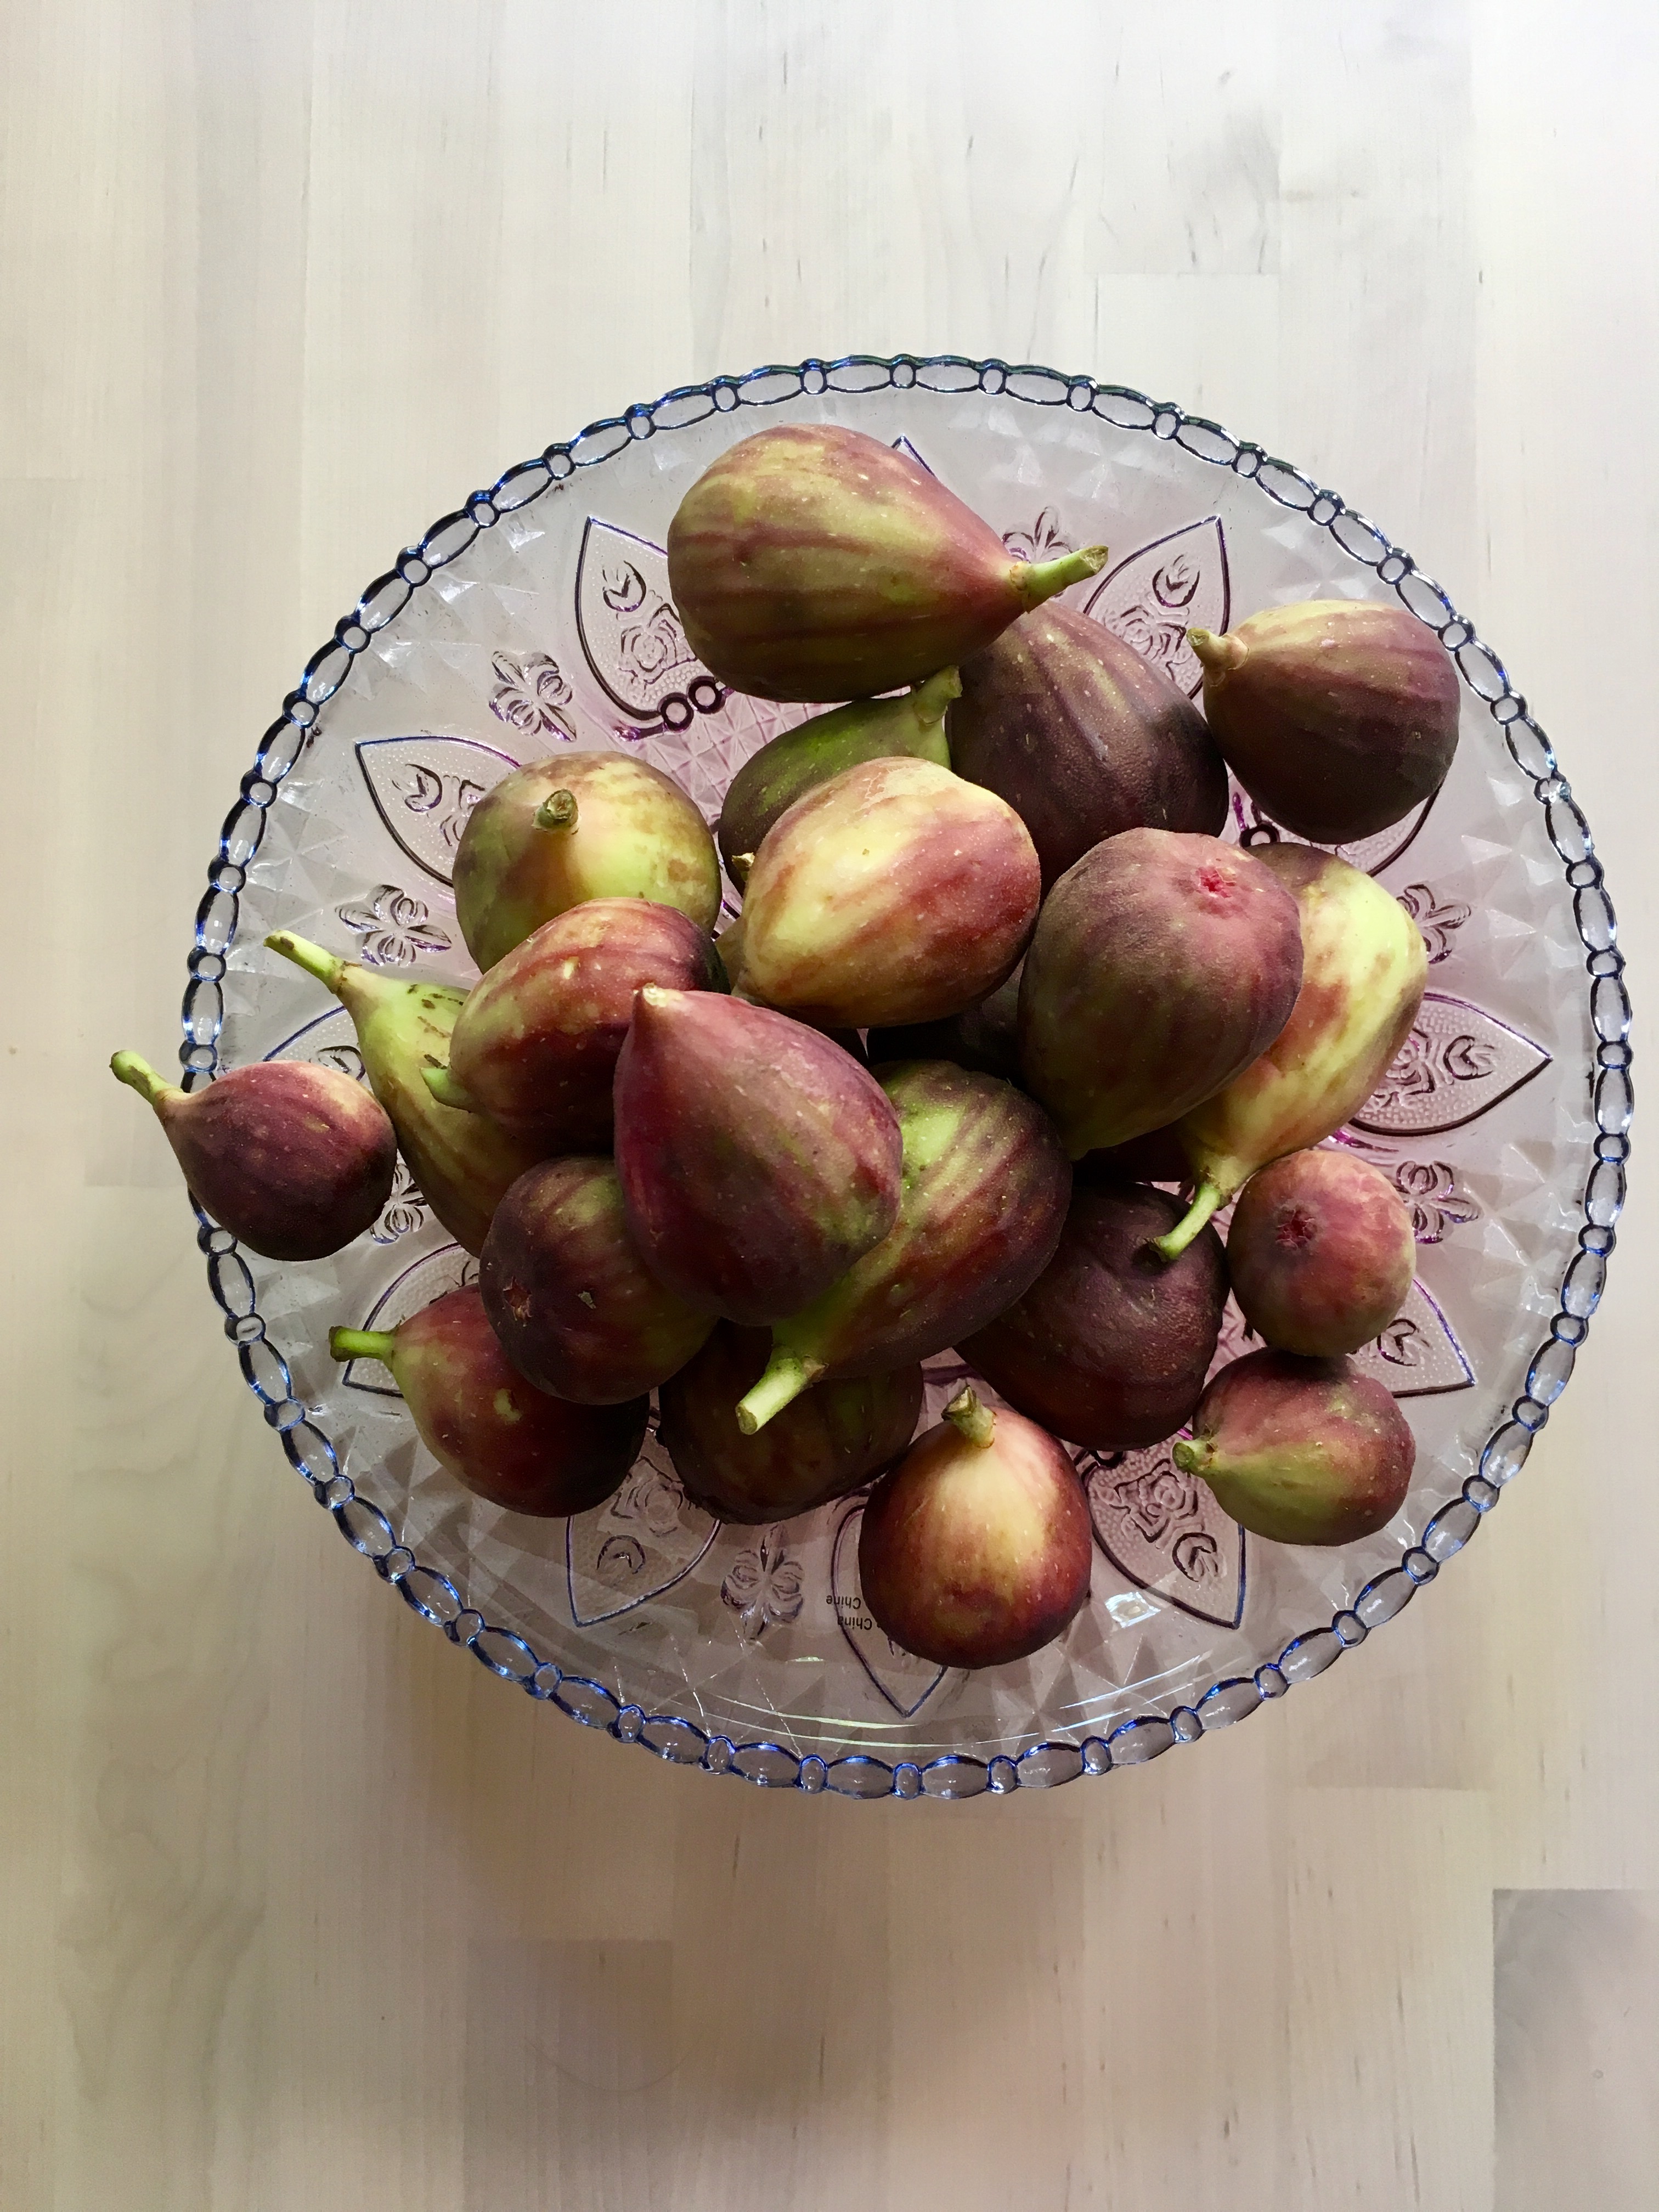
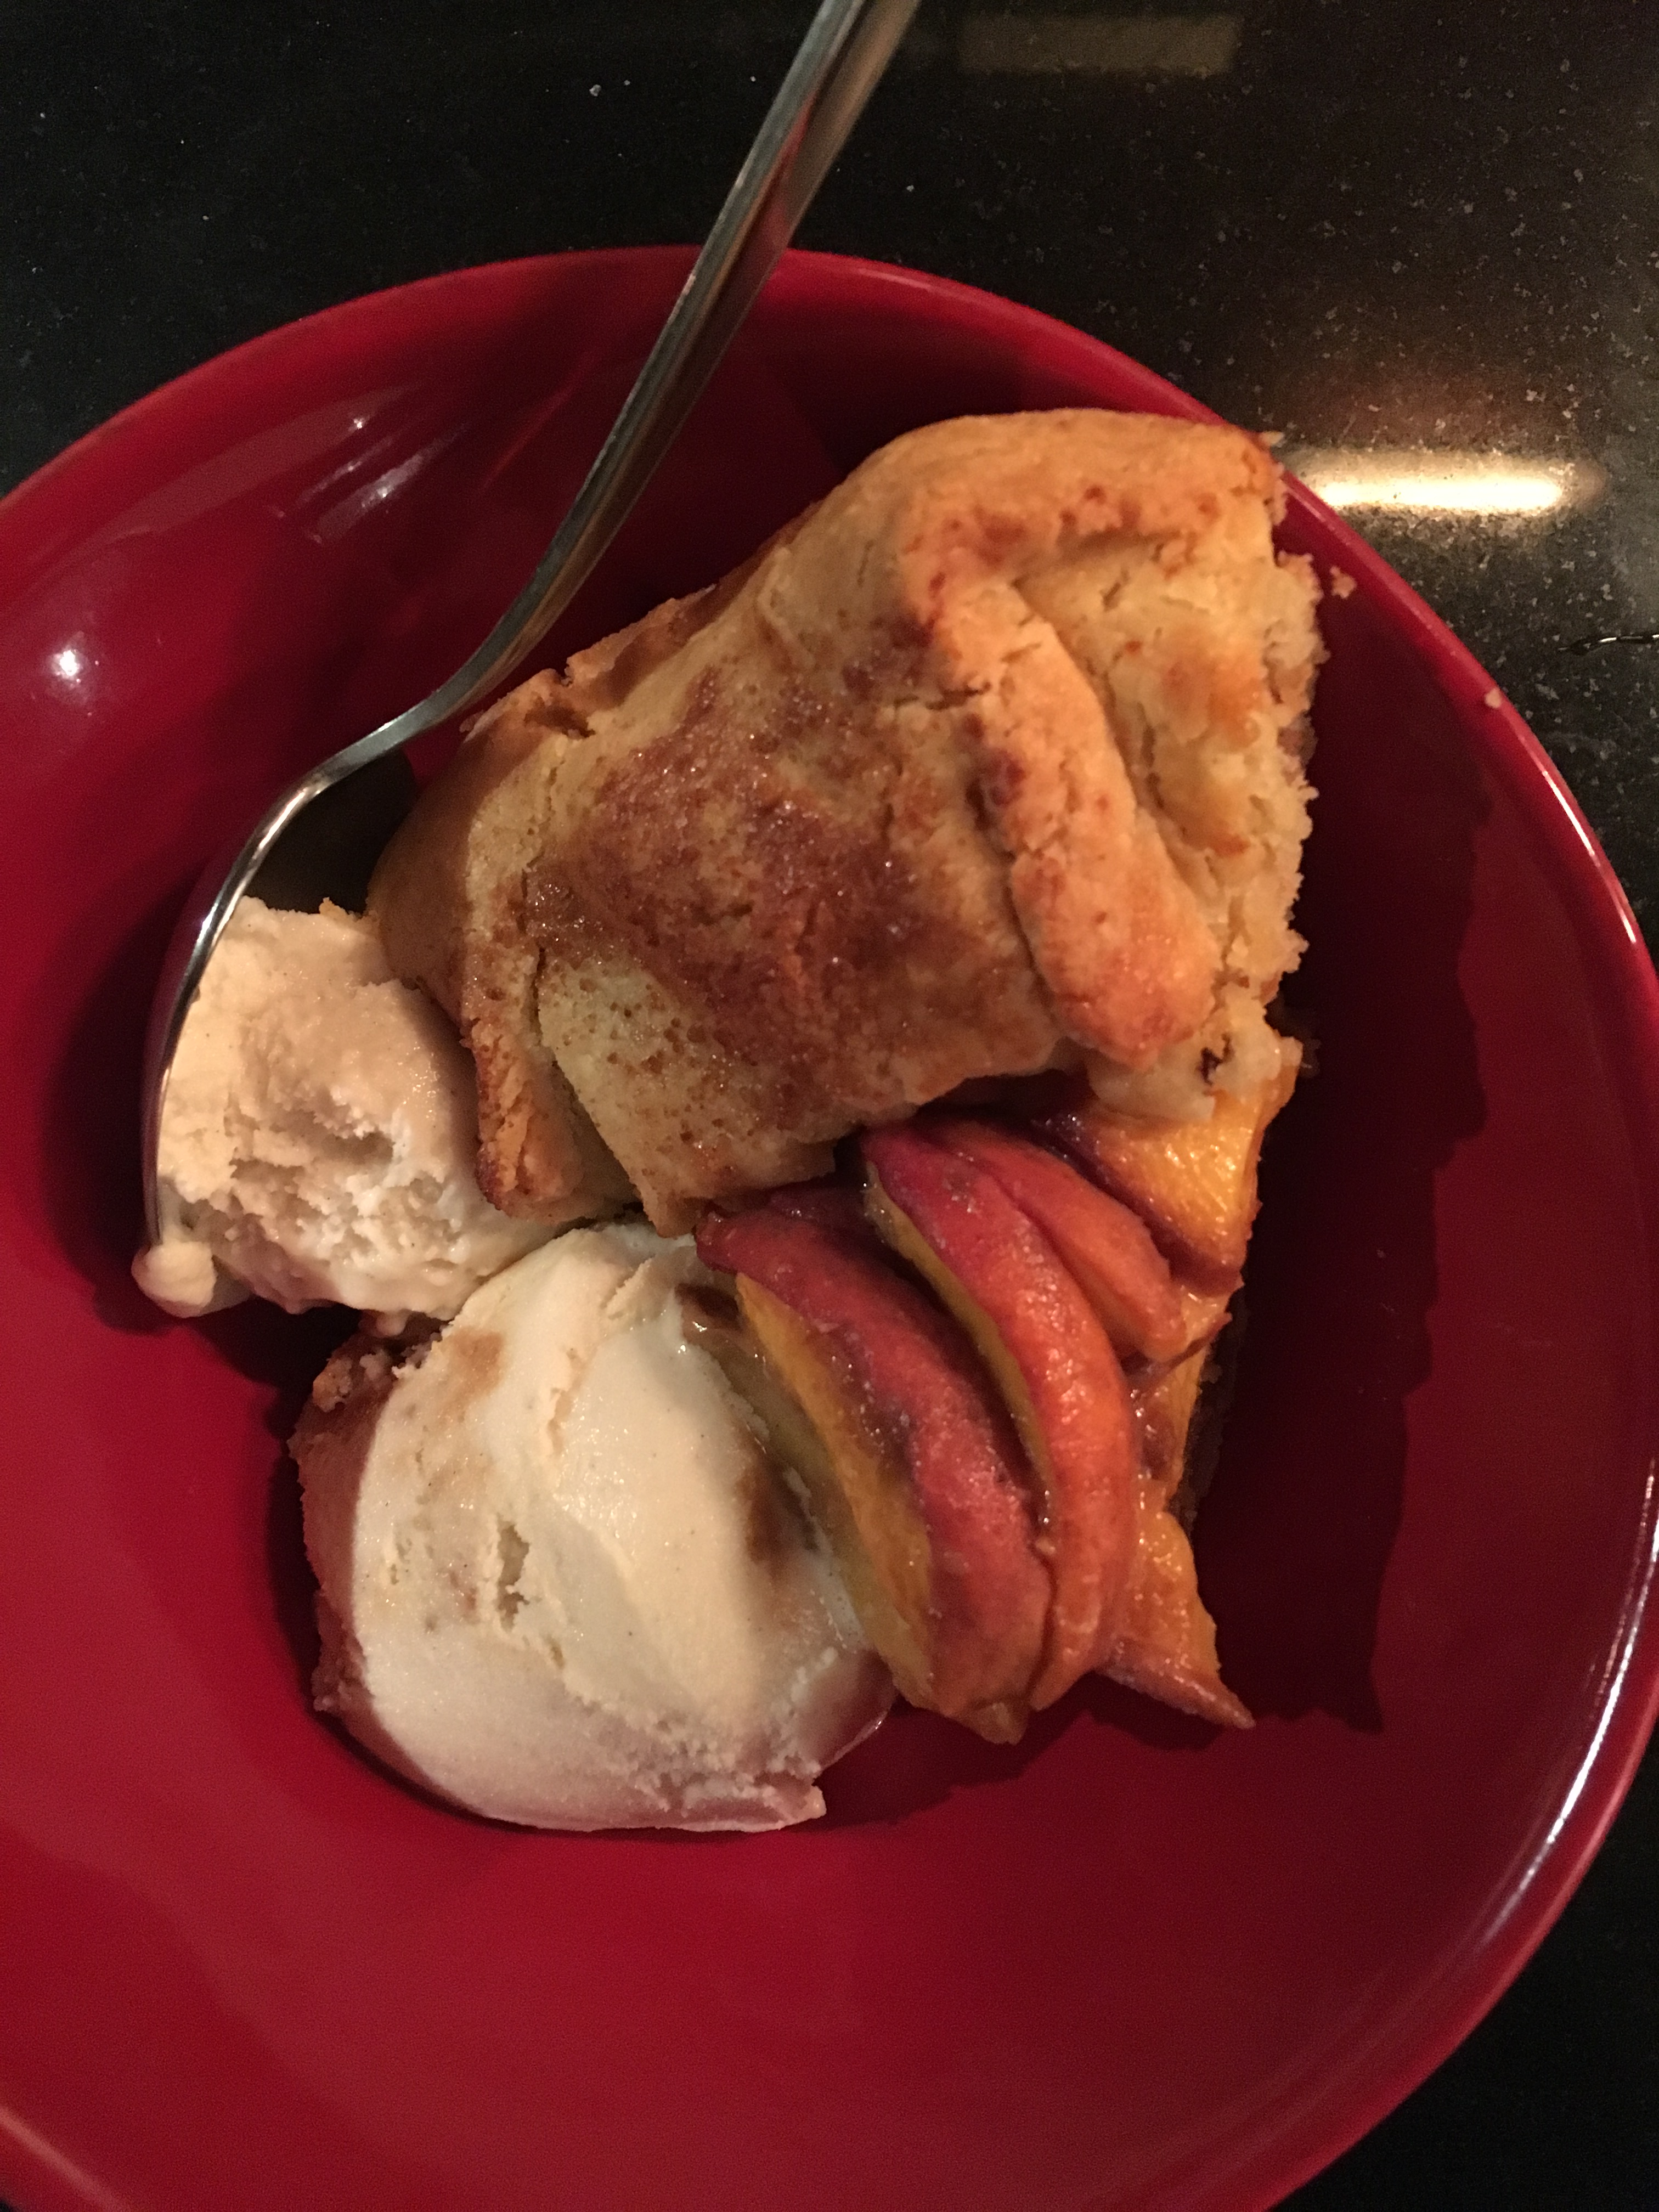
This weekend is VERY chill – no baking actually, so obviously I treated myself to a favorite croissant instead. This galette was too good not to share though, so here it is. I love the rosemary addition for something slightly savory and pleasantly herb-y – it goes extremely well with vanilla ice cream, but is just as good on its own. Since we’re just starting to work our way out of the stone fruit season out here on the west coast (yayyy time for FIGS), I’m trying to make the most of them.

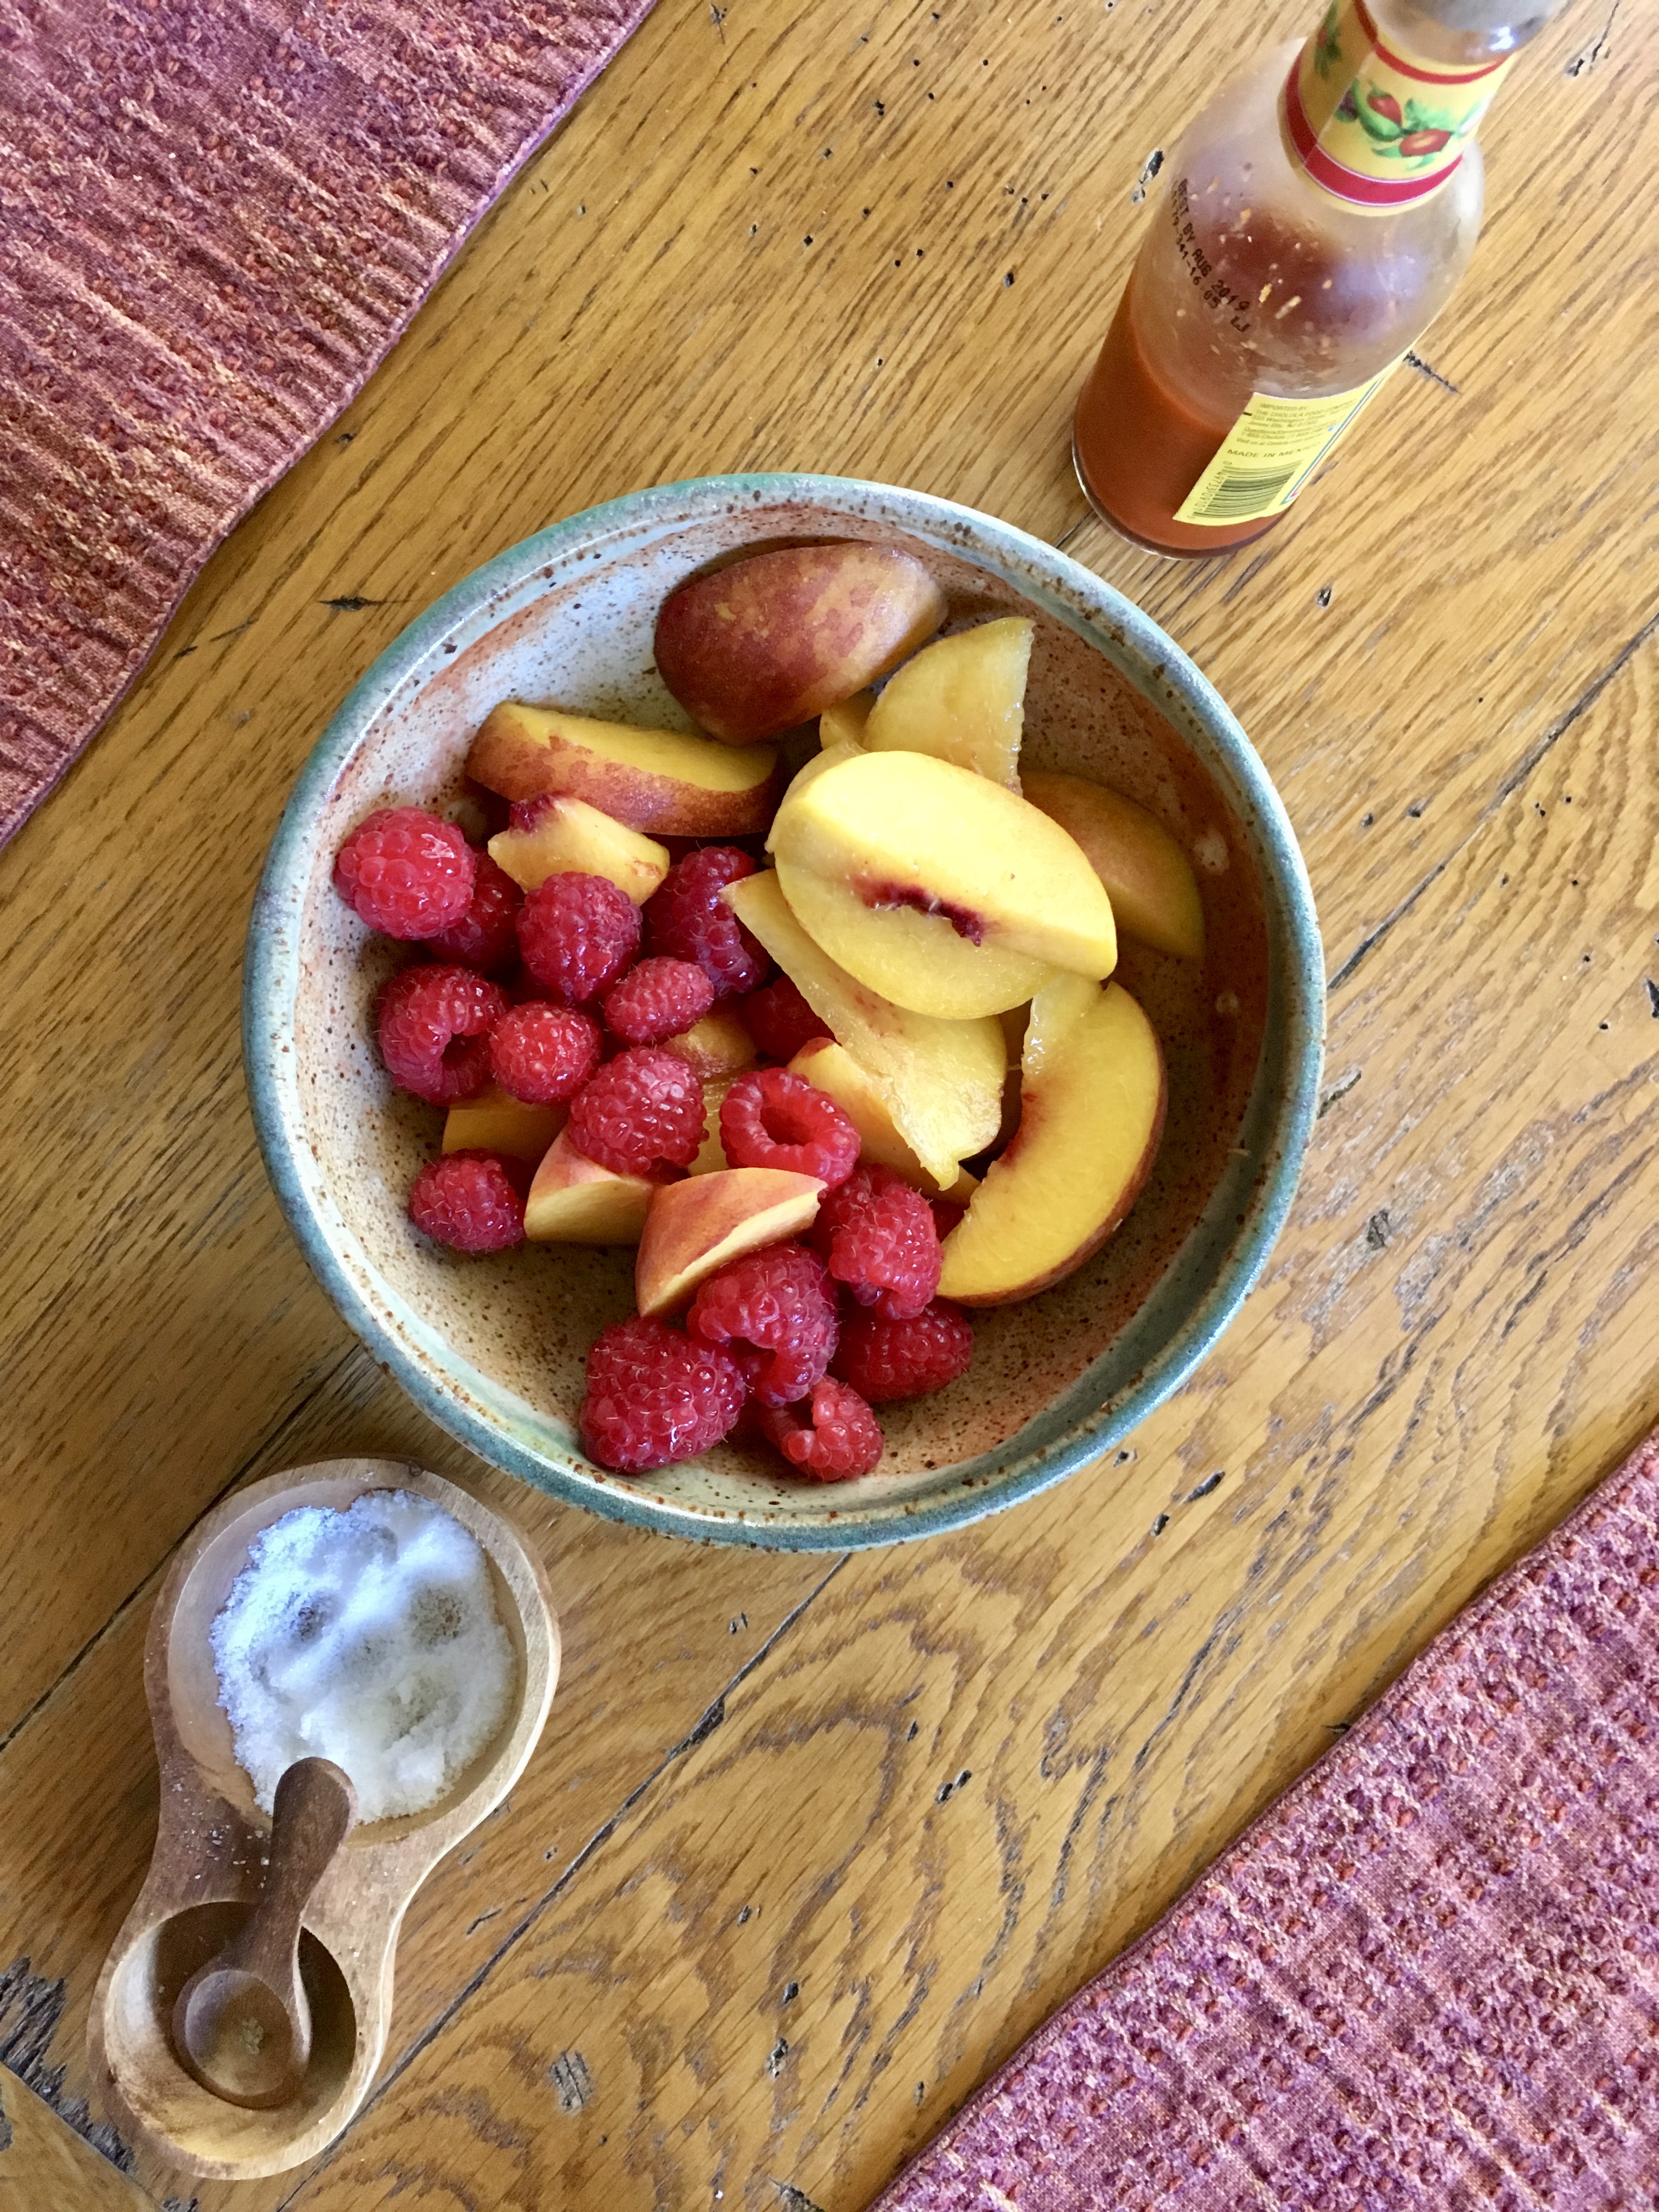
This was made with peaches from a local farm, actually – I got lucky and found some perfectly ripe ones in the market. I say lucky since I hadn’t been planning ahead, and was shopping the day before I made this… usually that’s no dice unless I can get to the farmer’s market.

Let’s see, what else is new..

Heading up the coast this week to spend some quality time with C for my birthday! He tells me there is an oven where we’re staying, so we’ll see what kind of baking shenanigans I’ll get up to. I’m looking forward to lots of hiking and quiet time on the coast.

from a swim earlier this week – the light was just so pretty

I hope it is equally gorgeous outside where you are – it’s just the right combination of sunny/foggy/cool/warm here in SF so I’ve spent most of the day outside. Happy weekend!

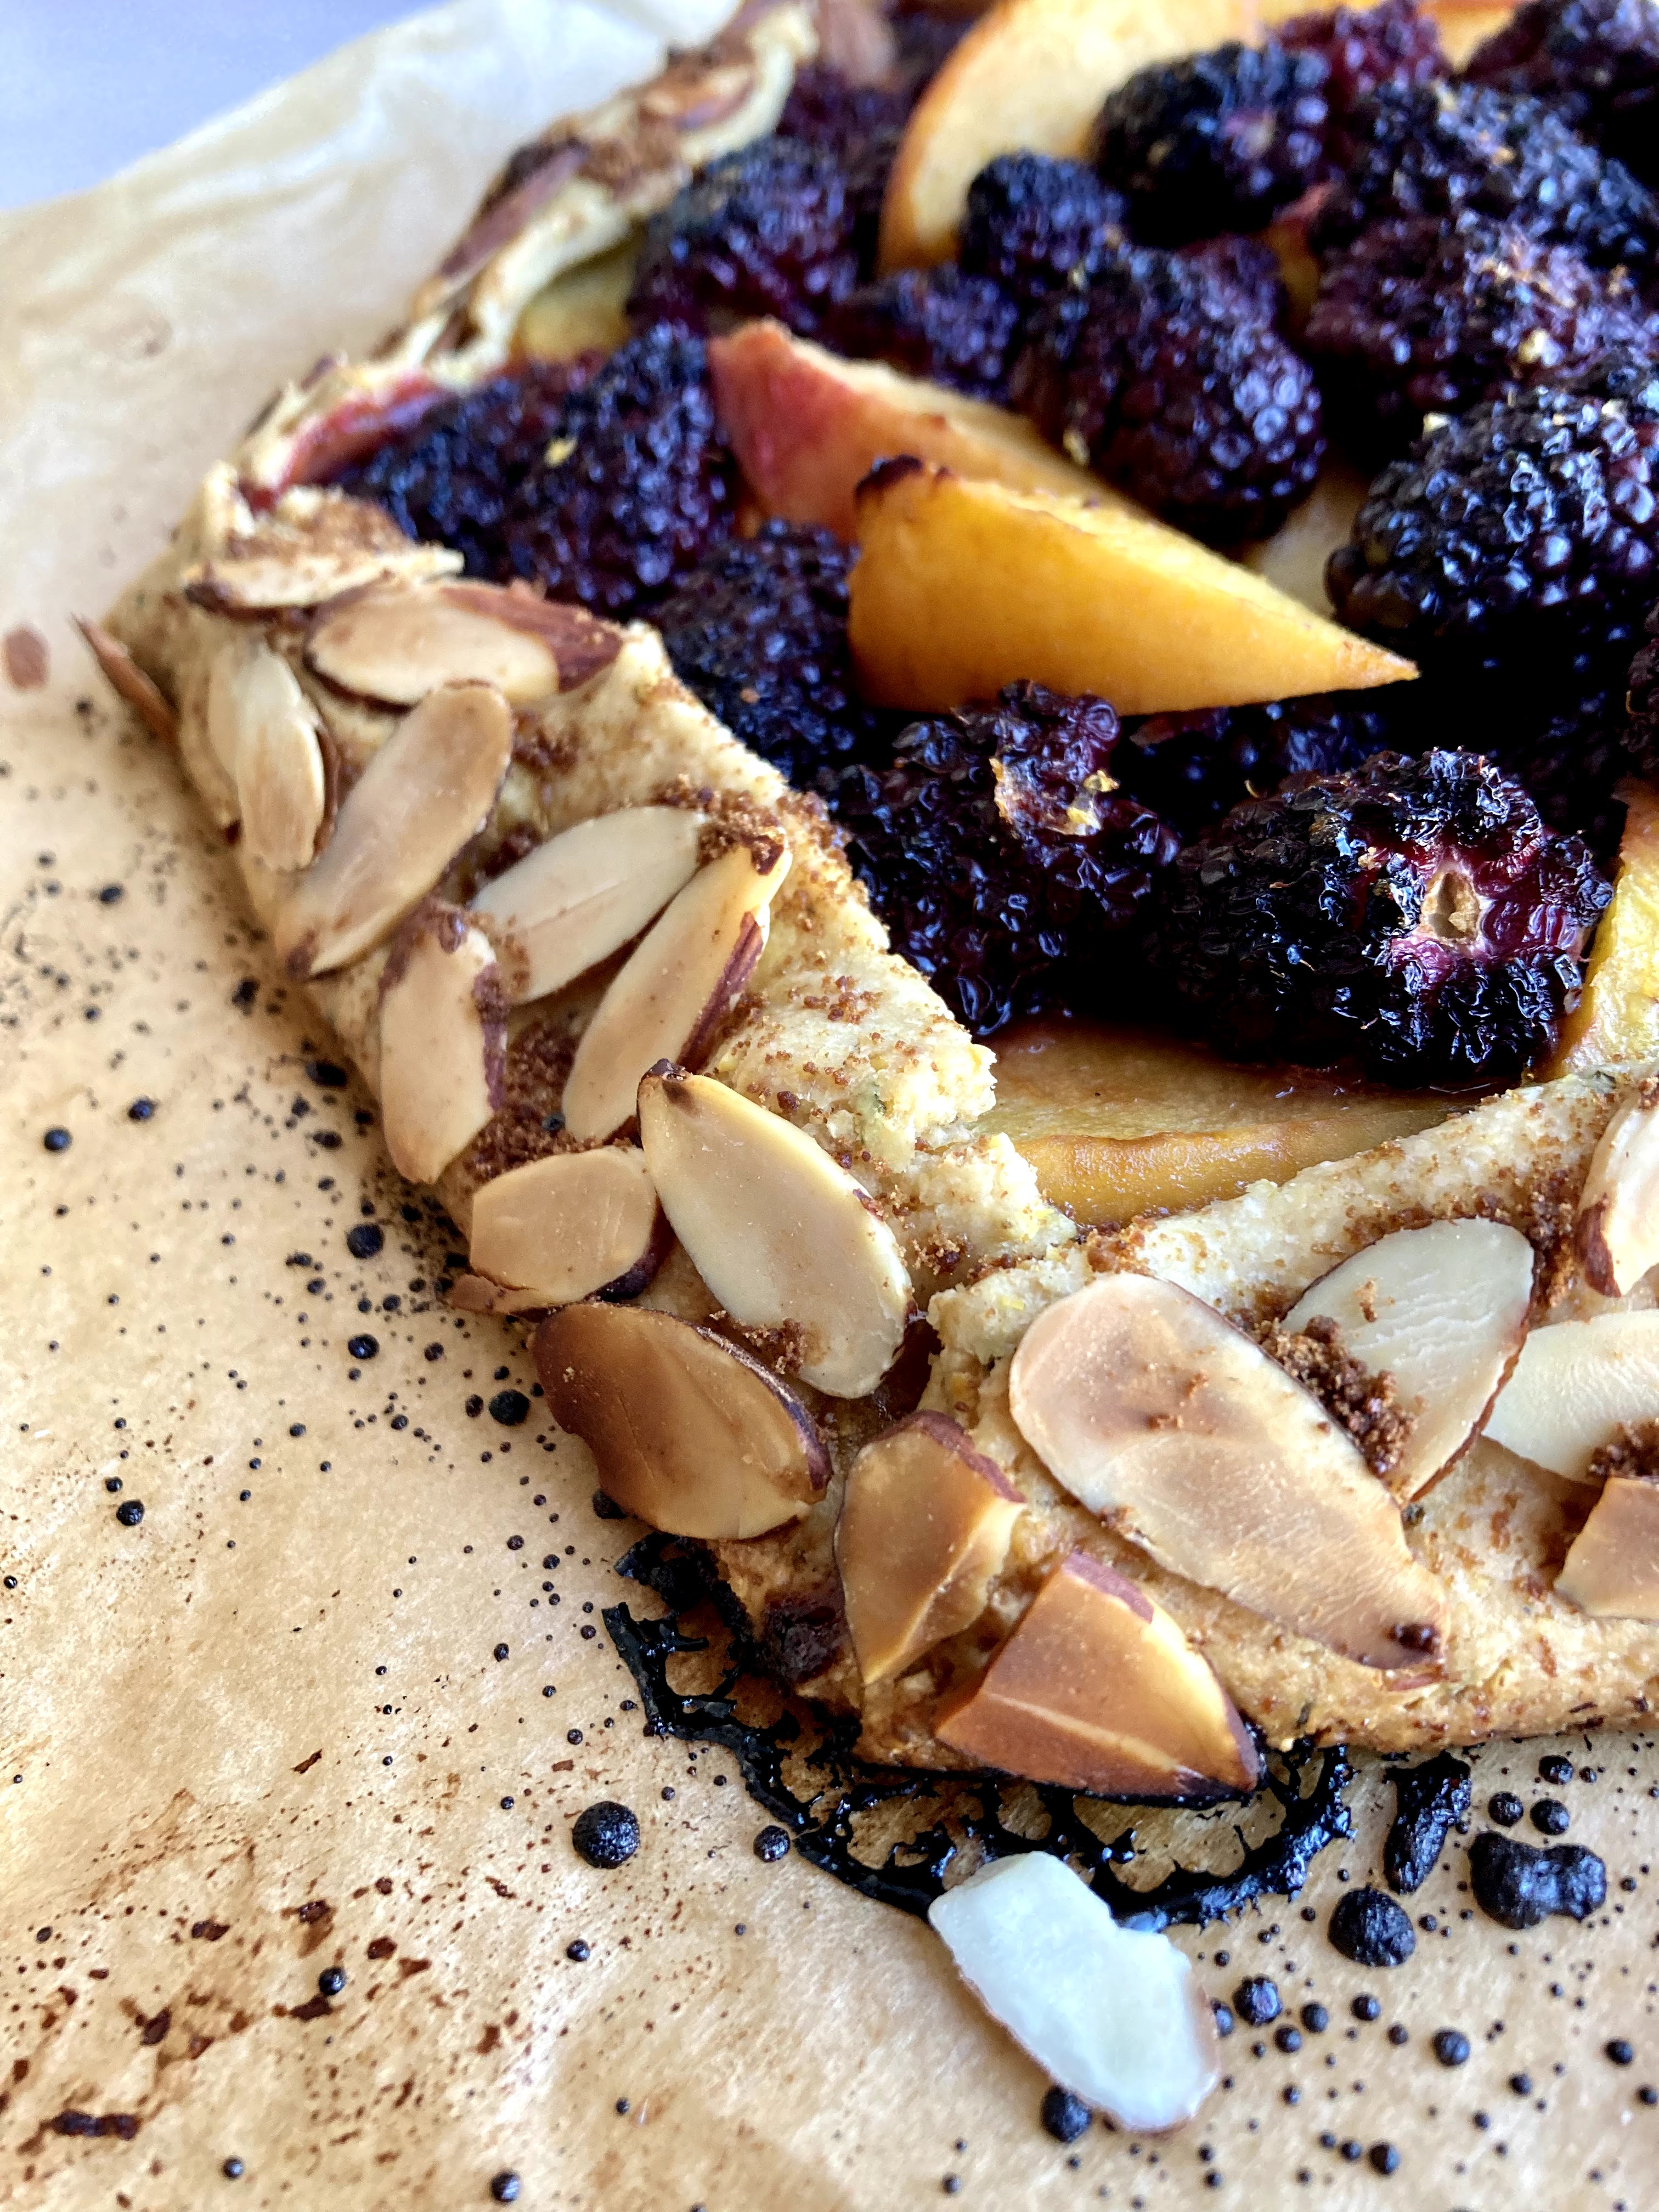
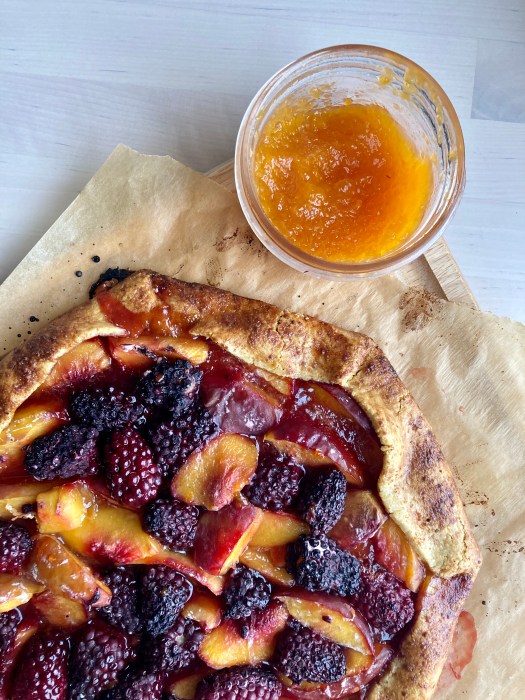
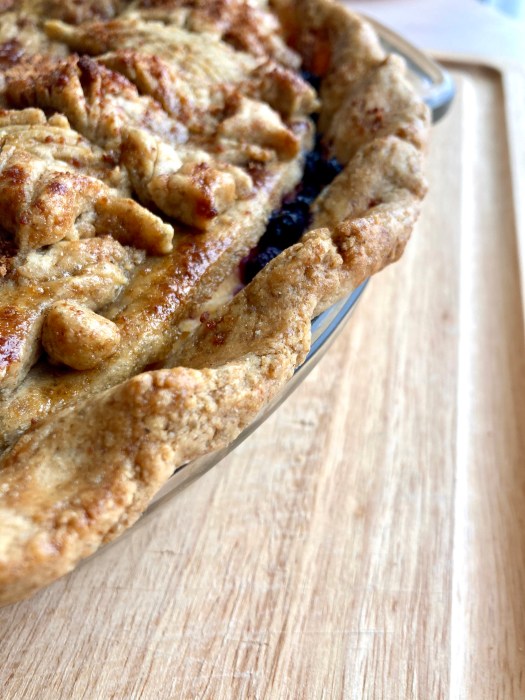
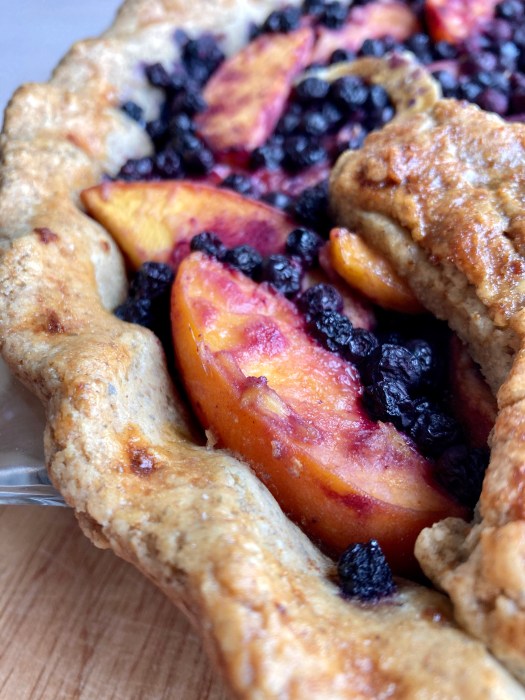
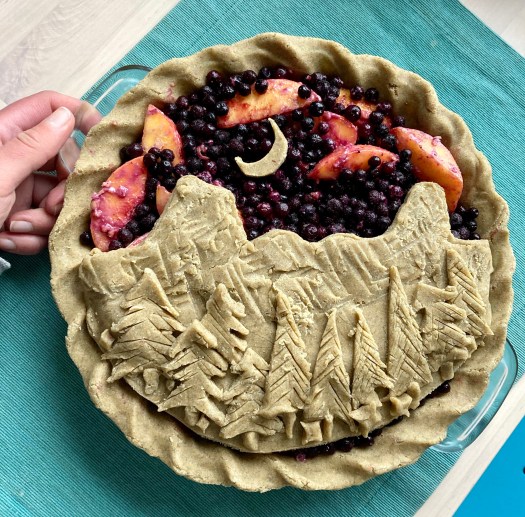
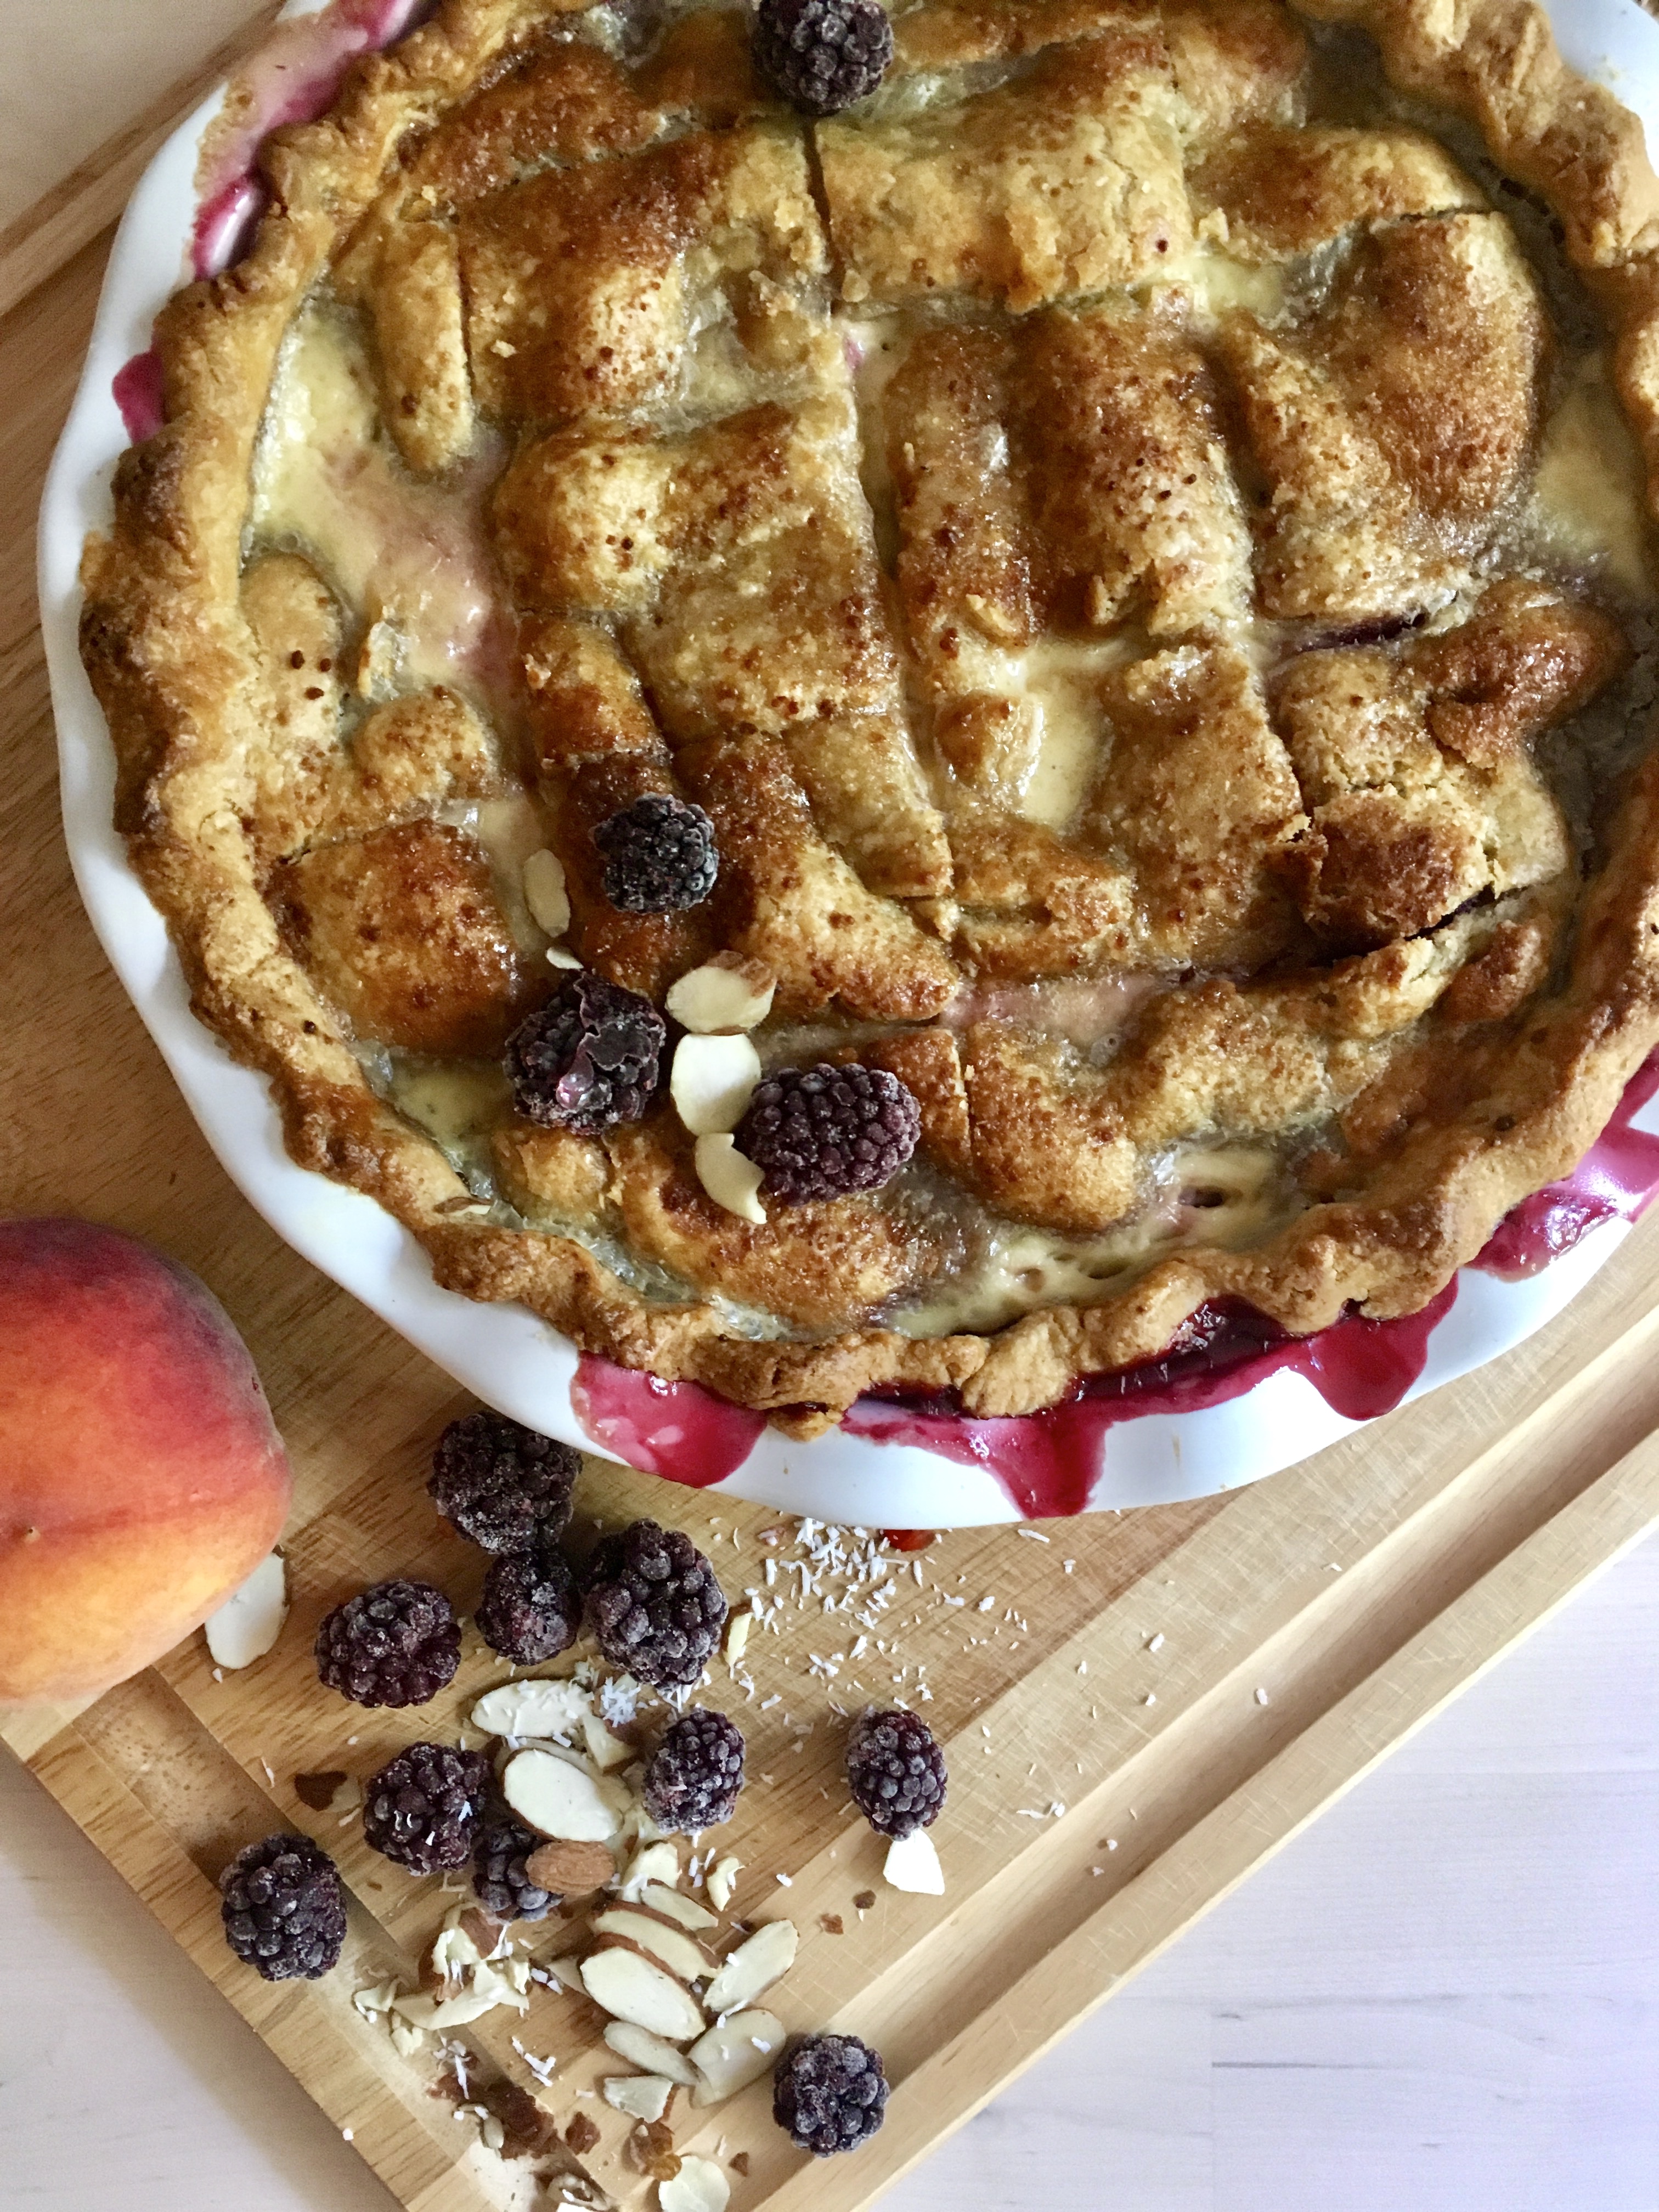
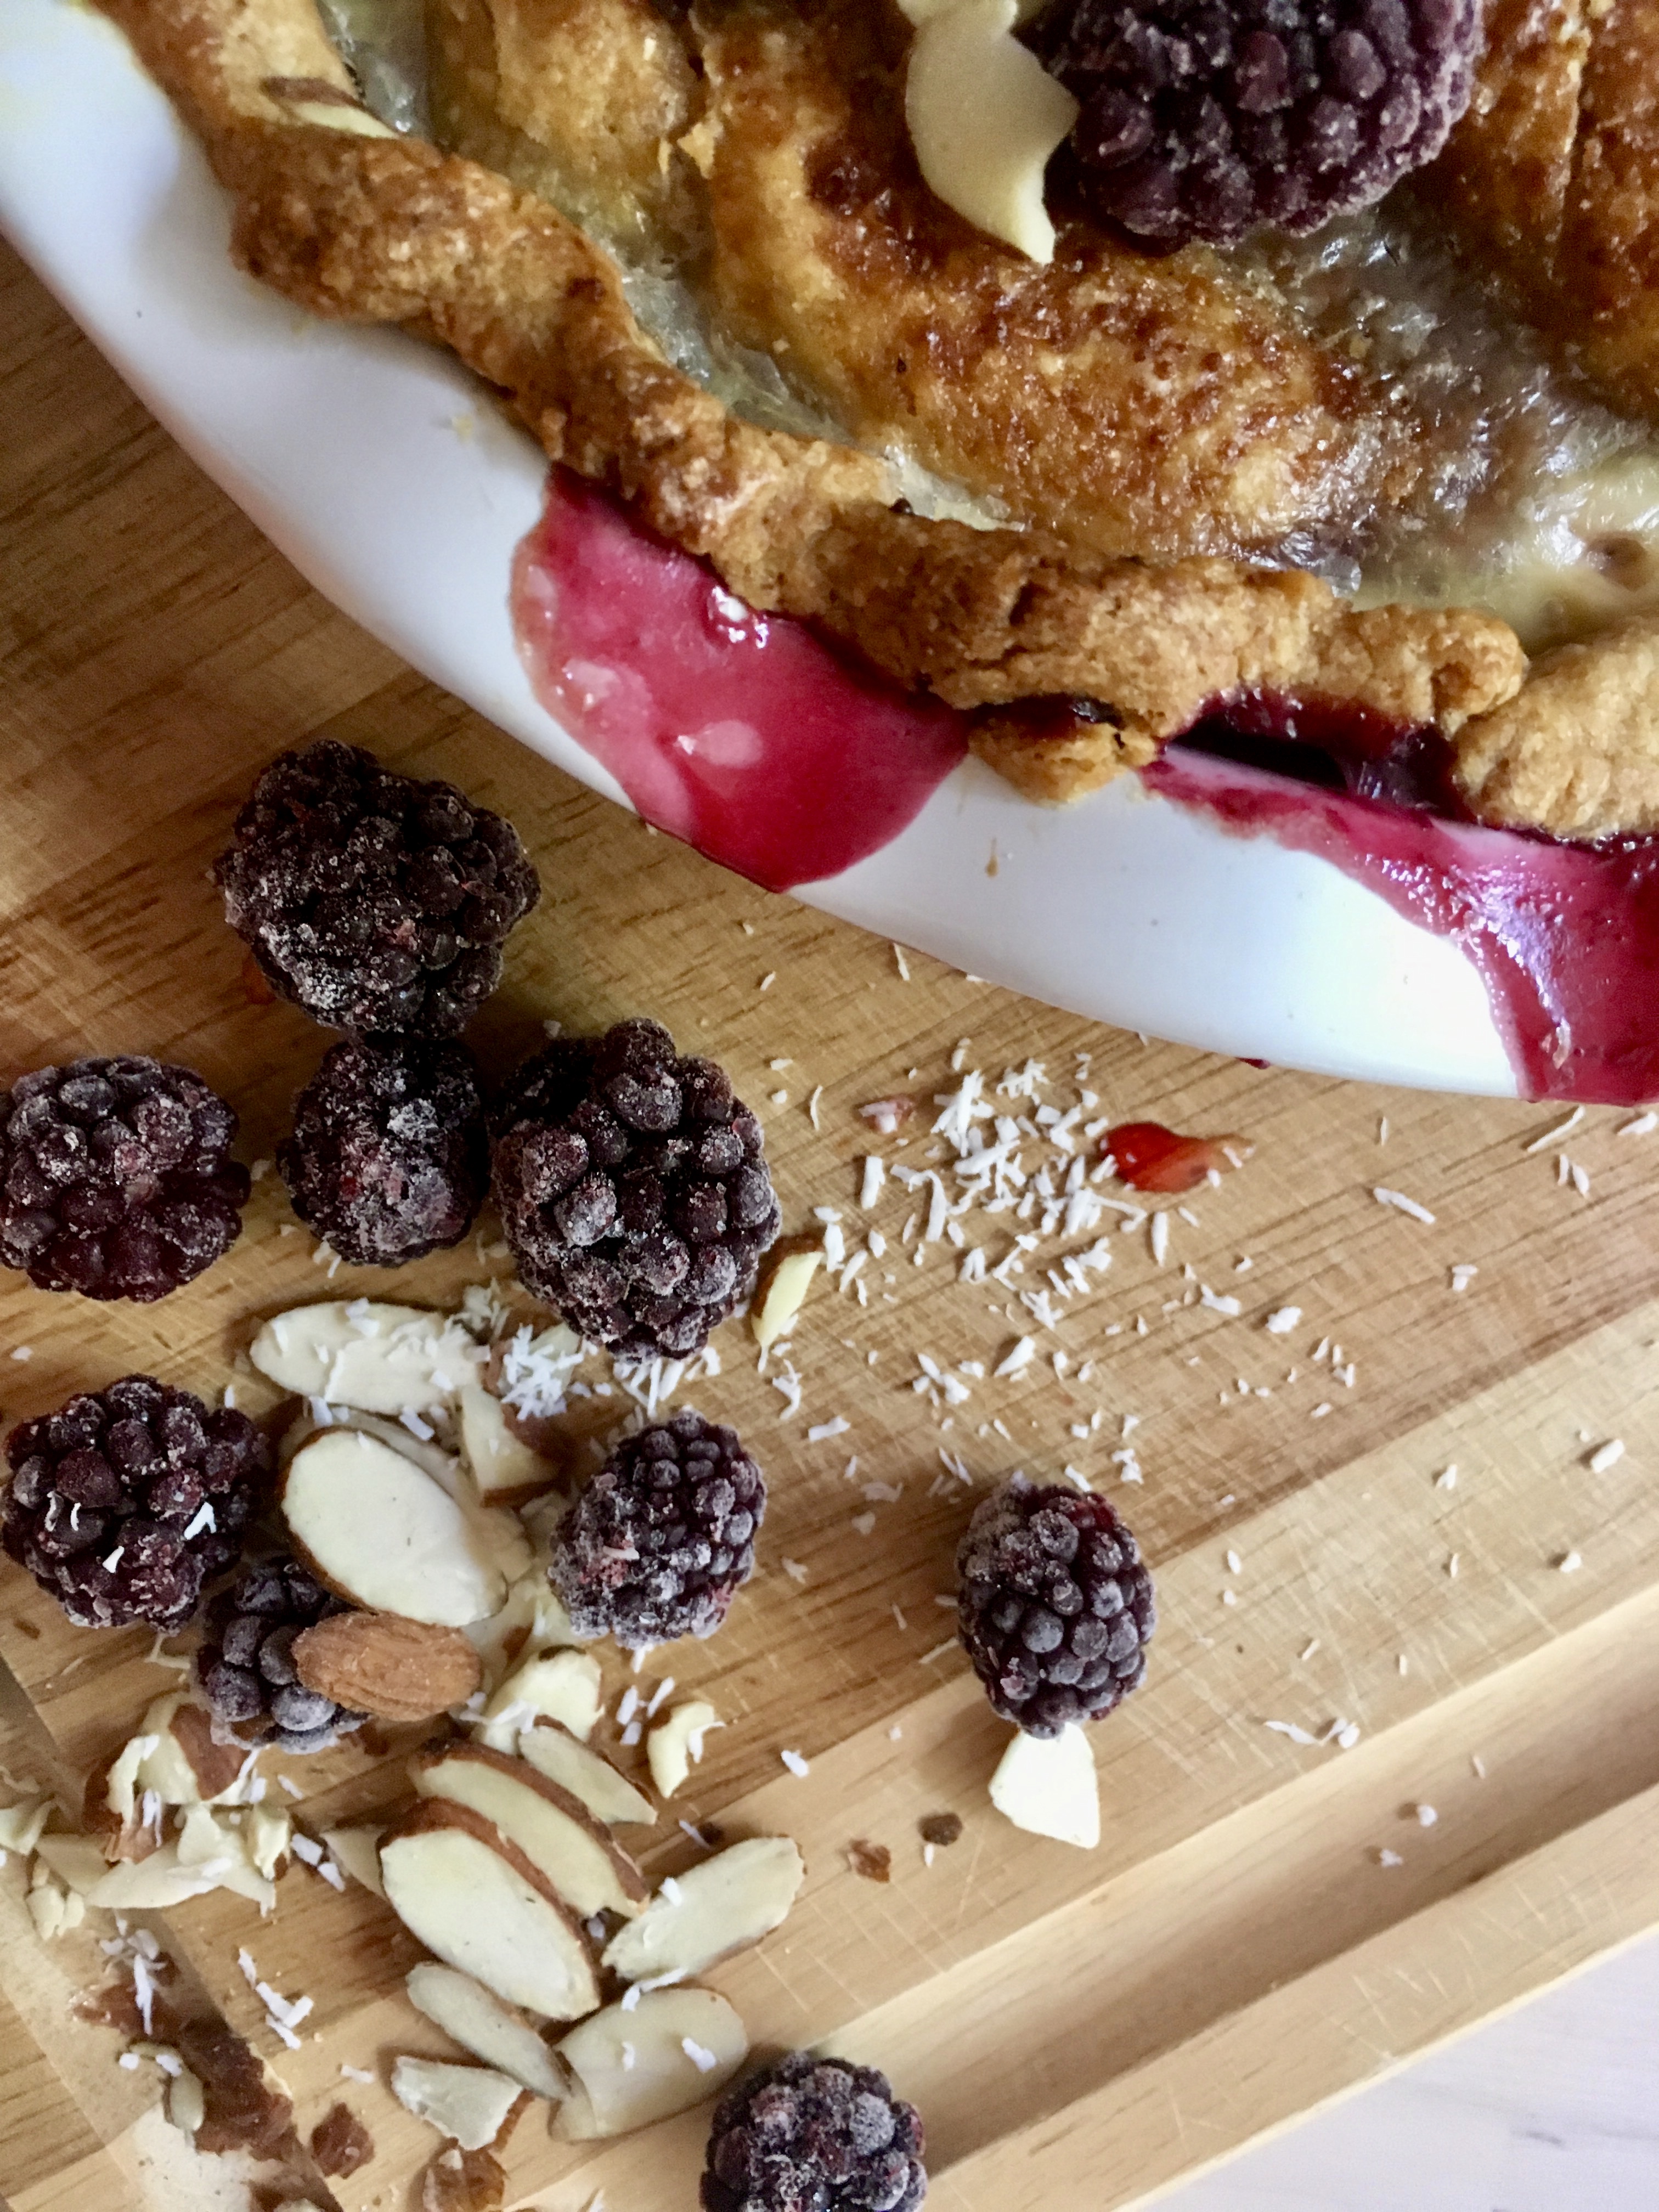
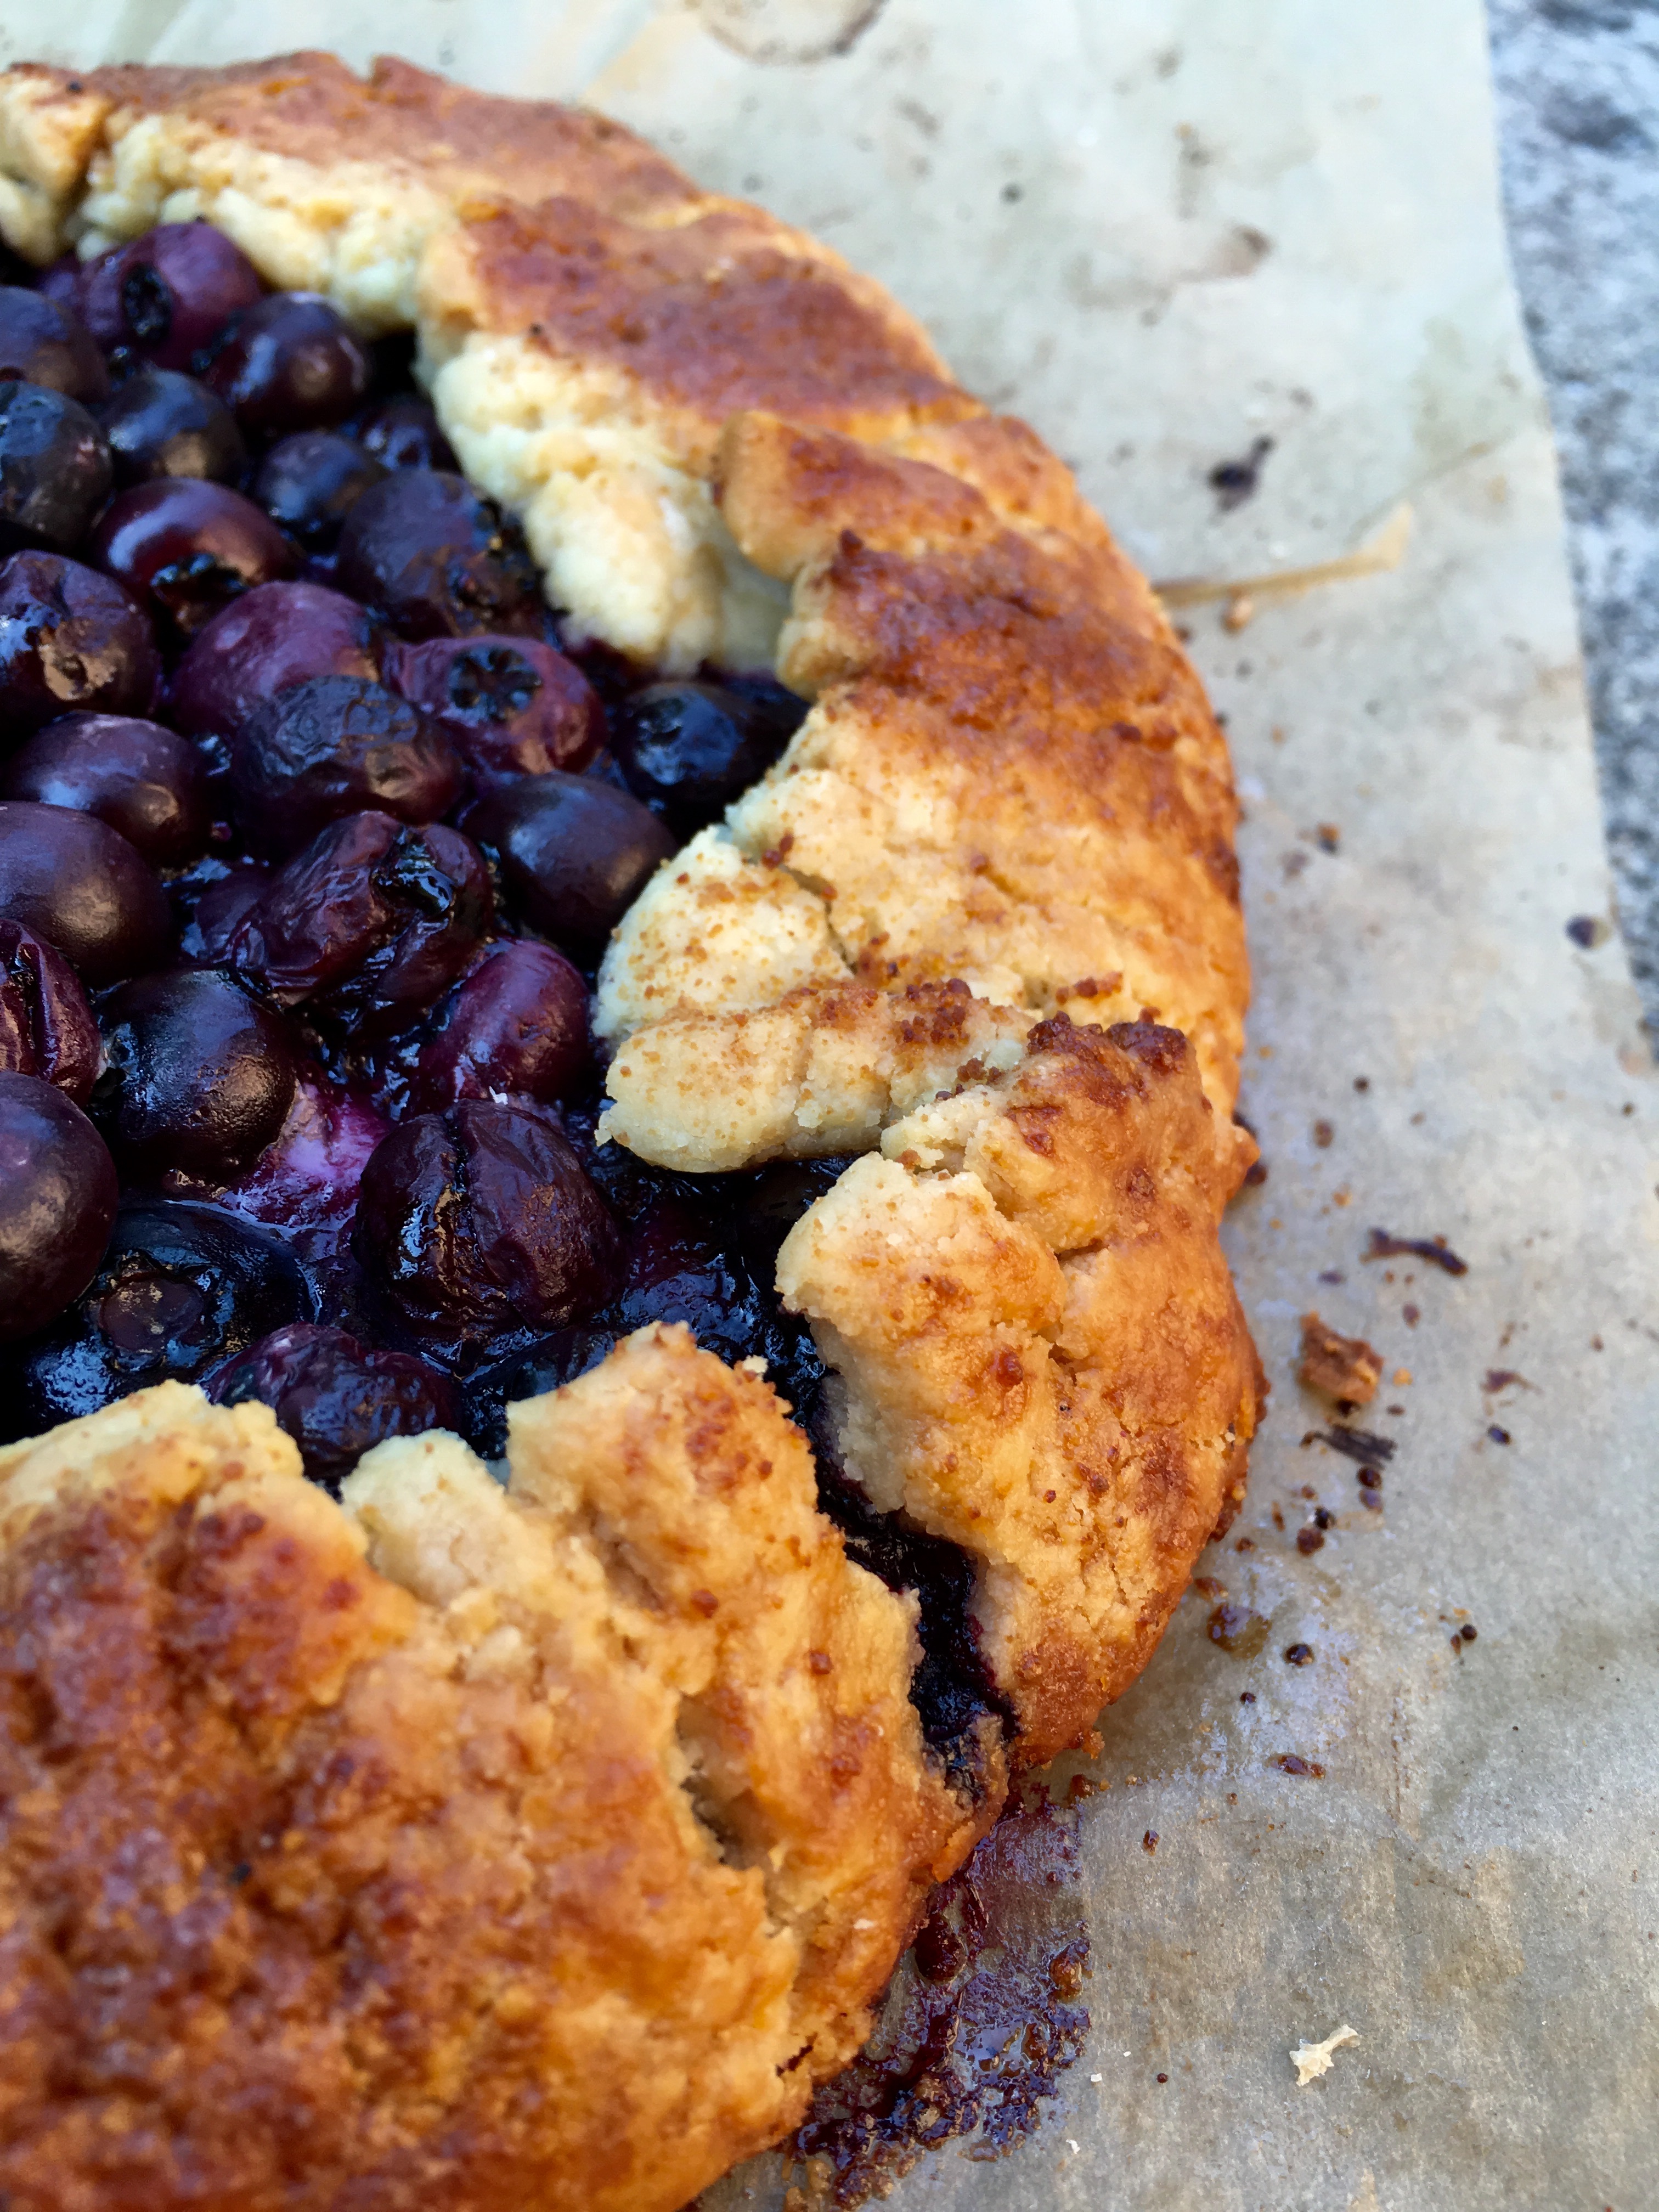
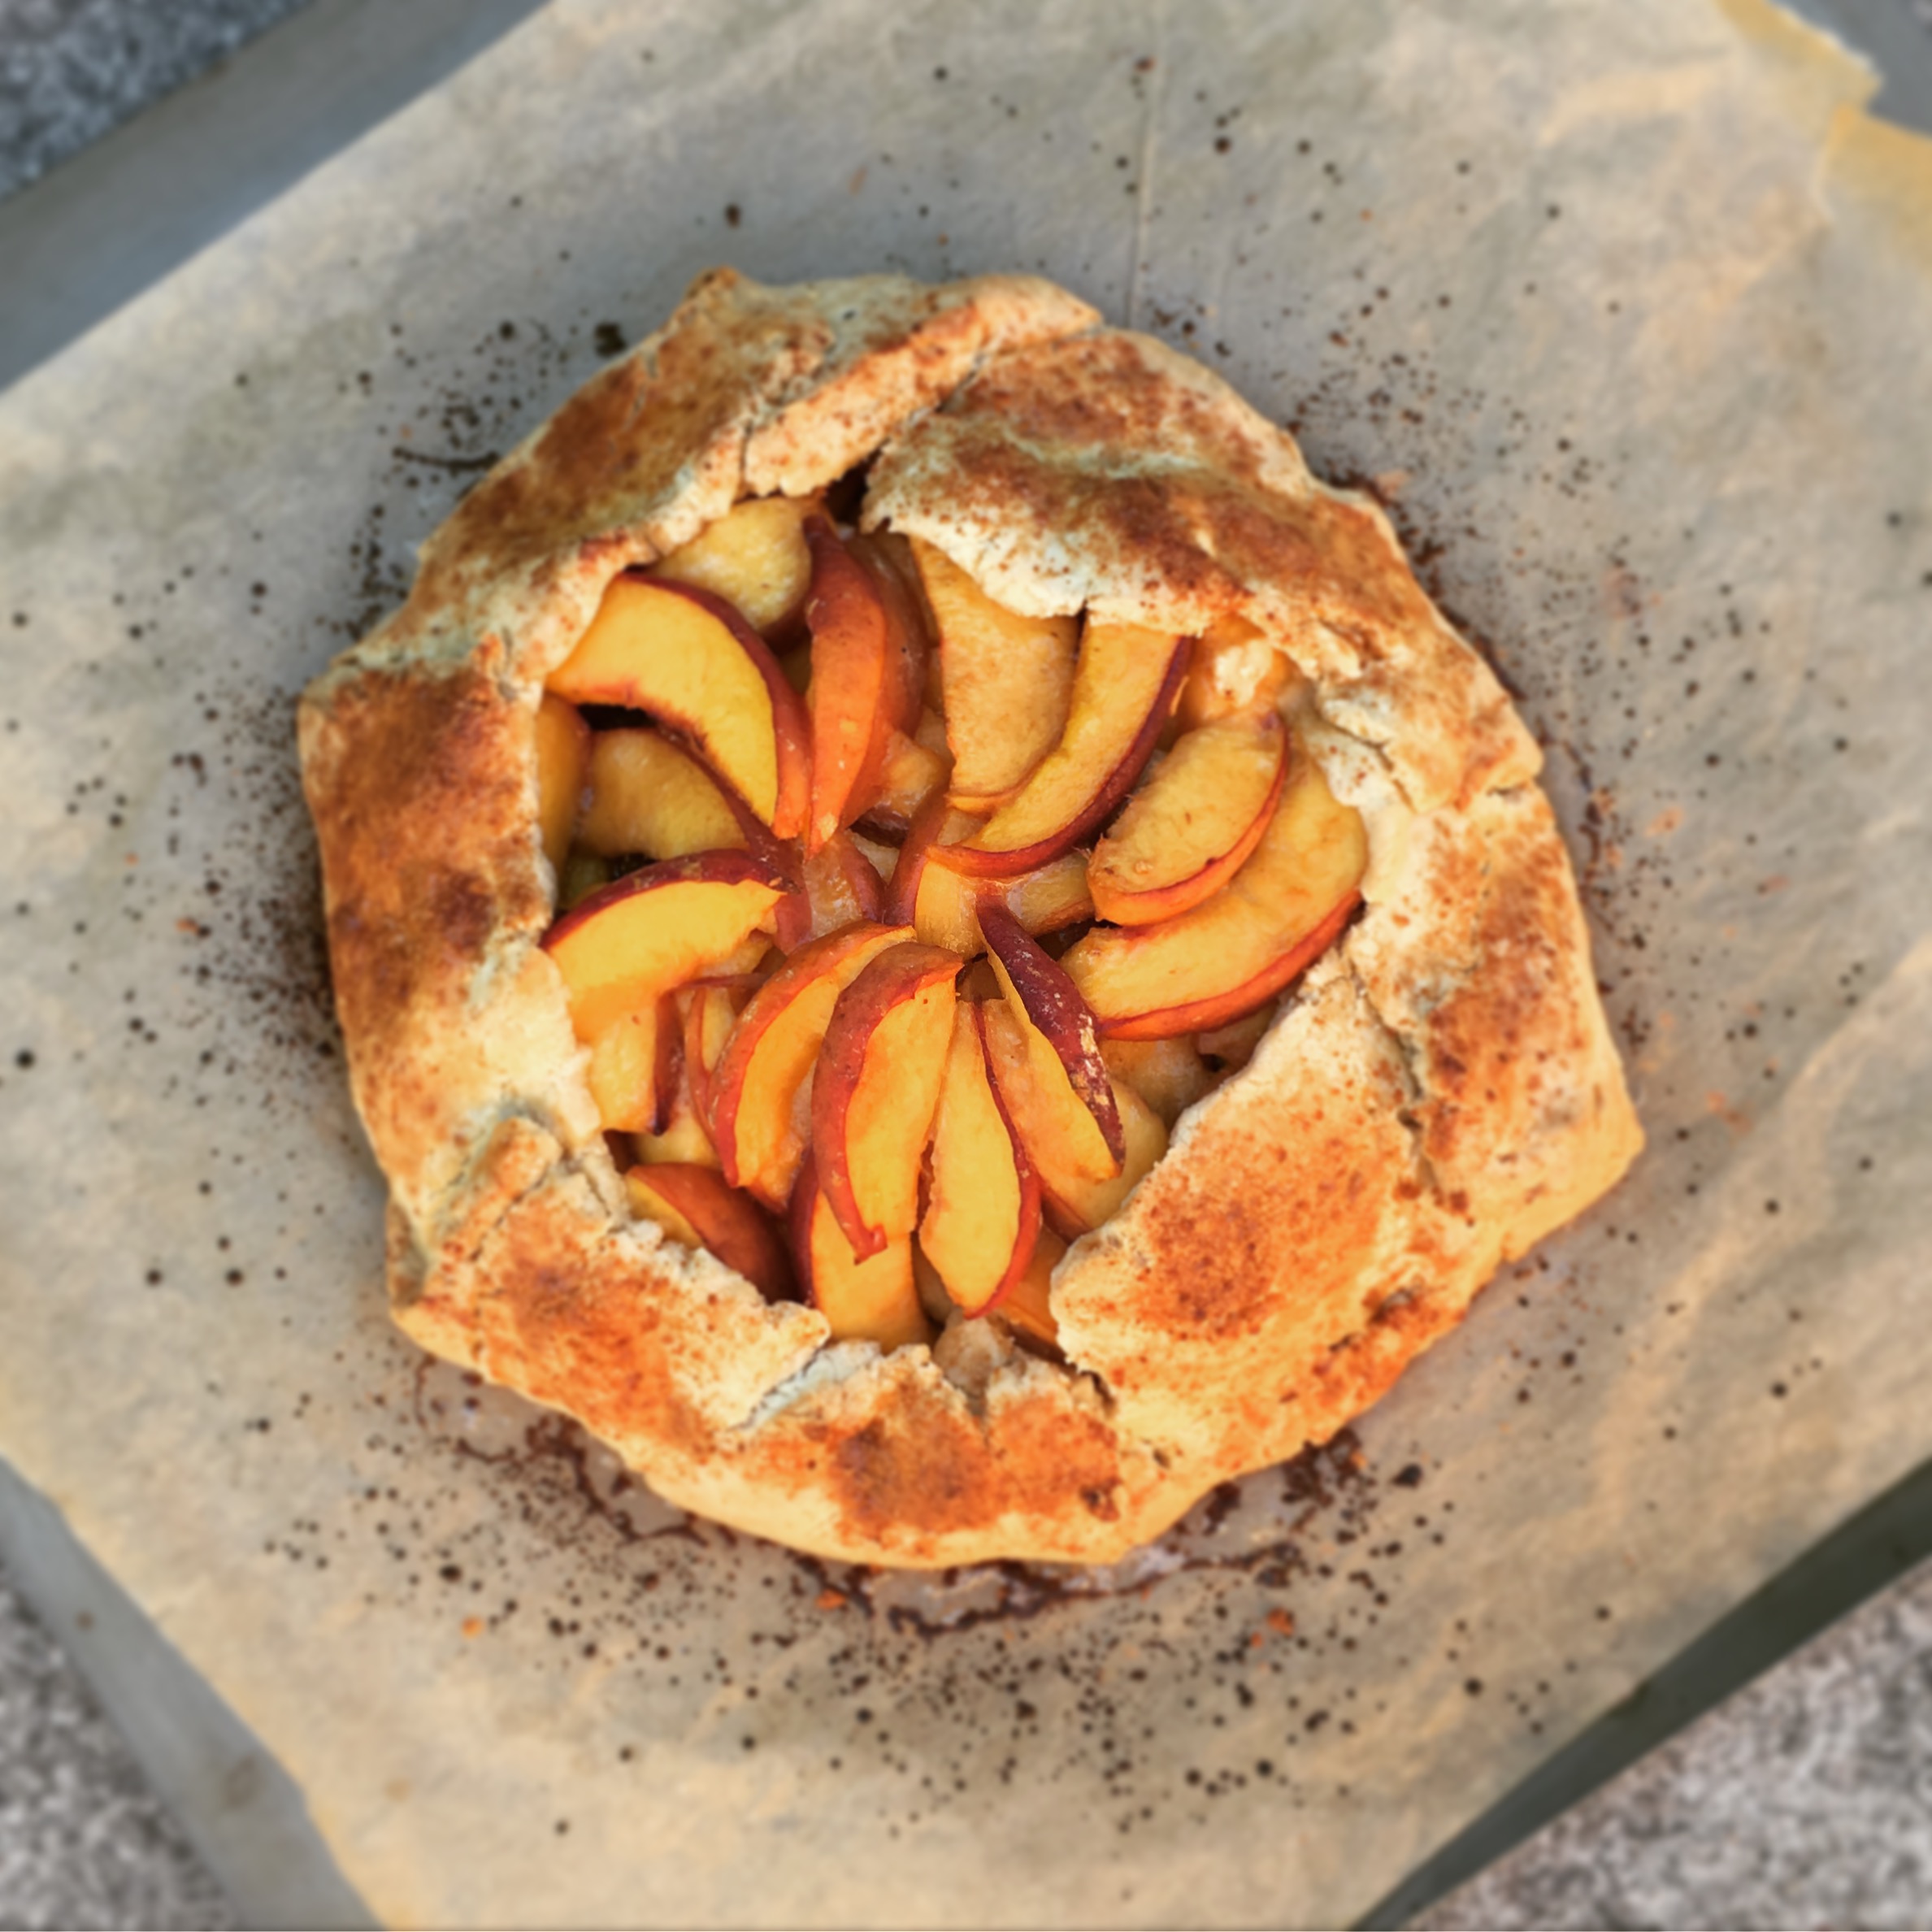
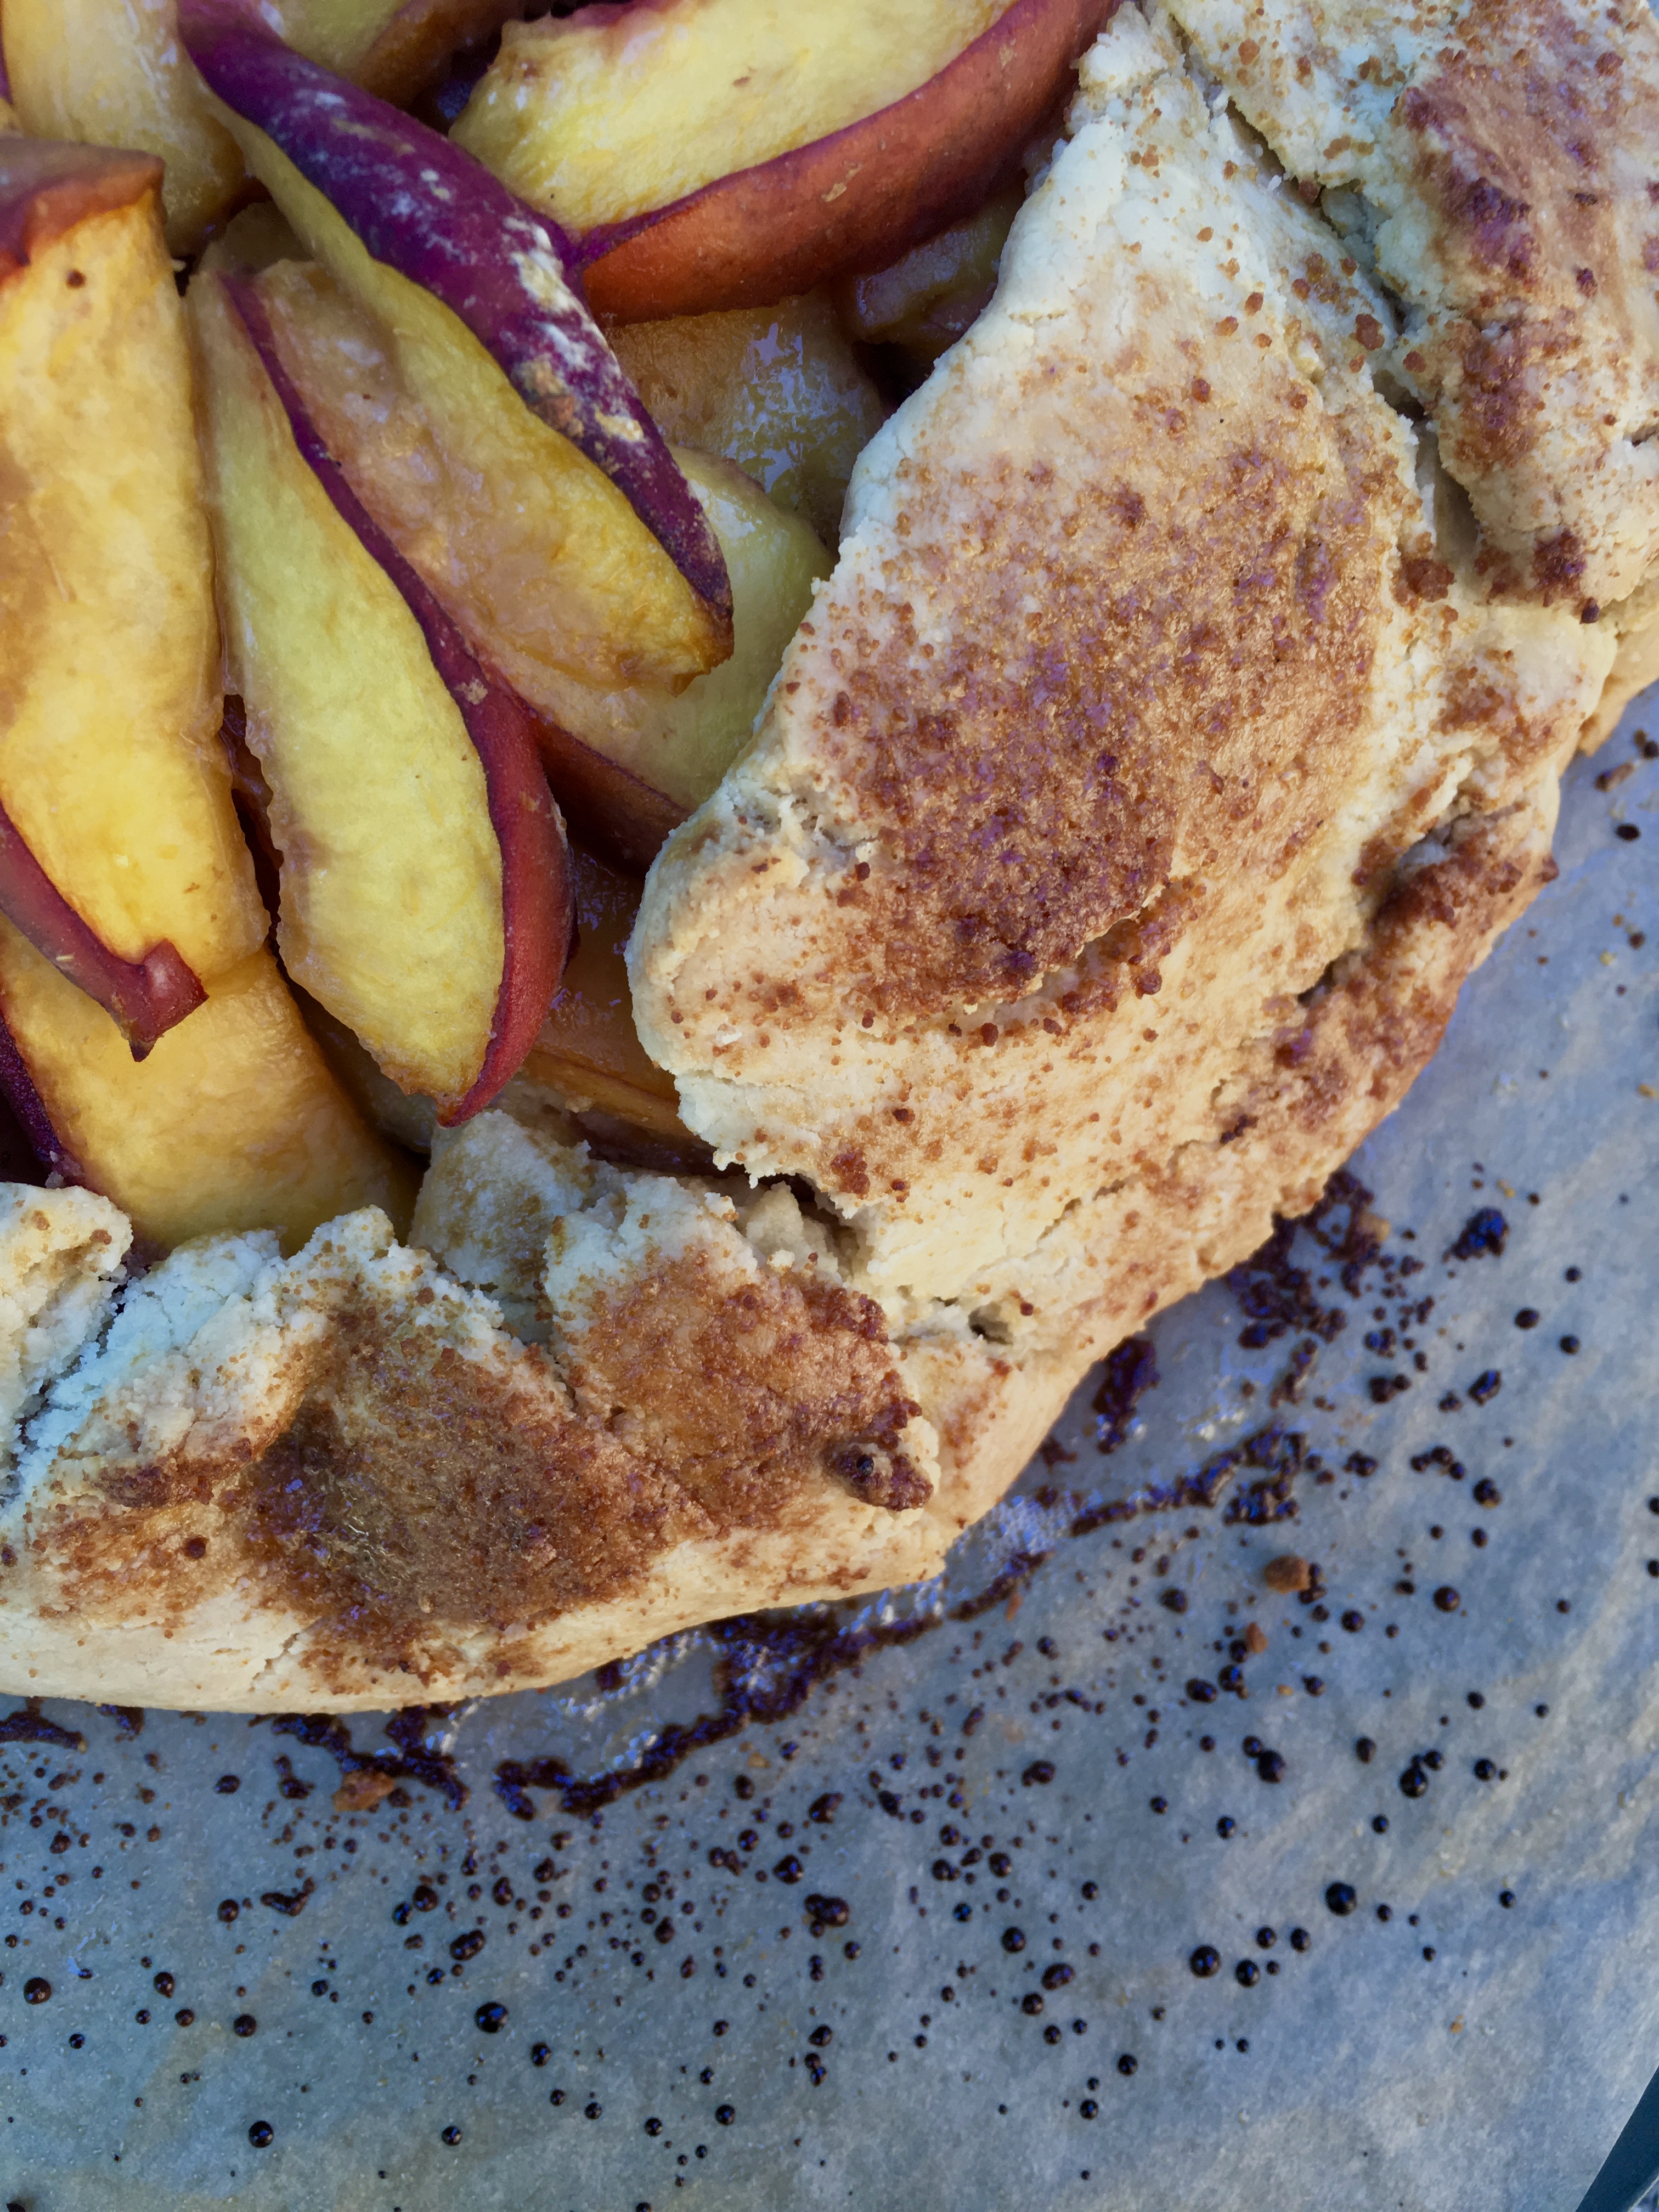
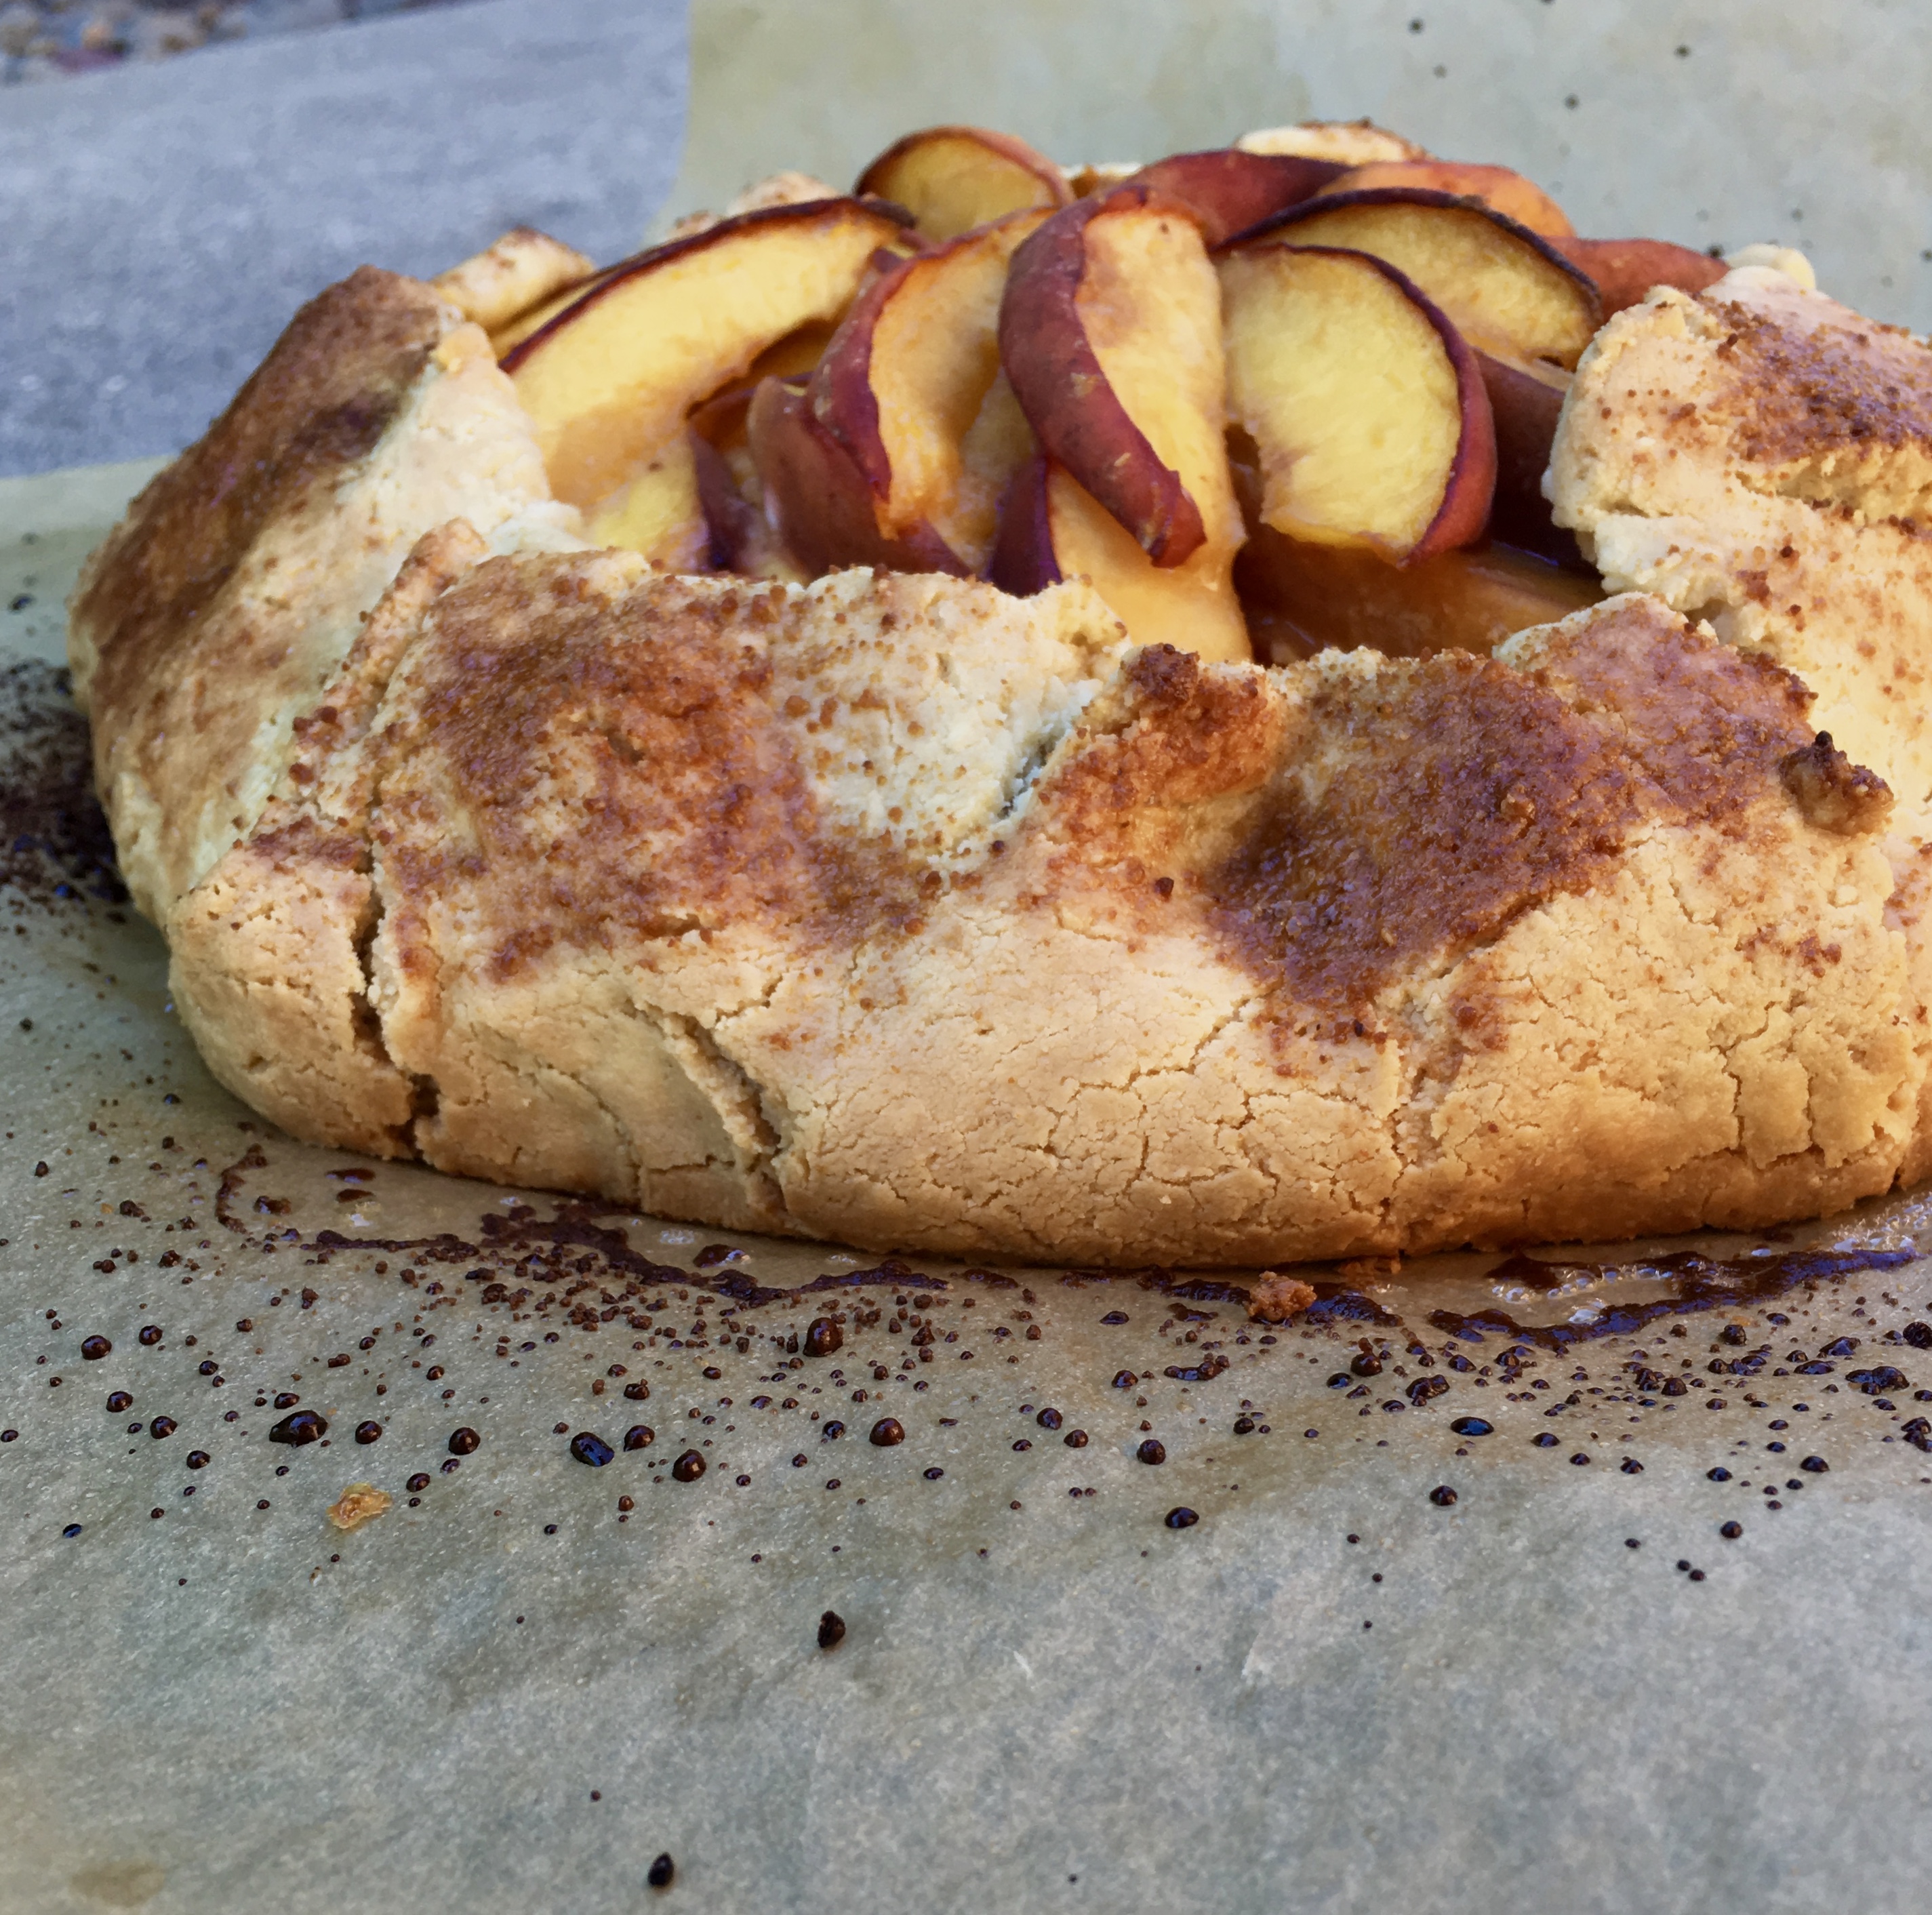
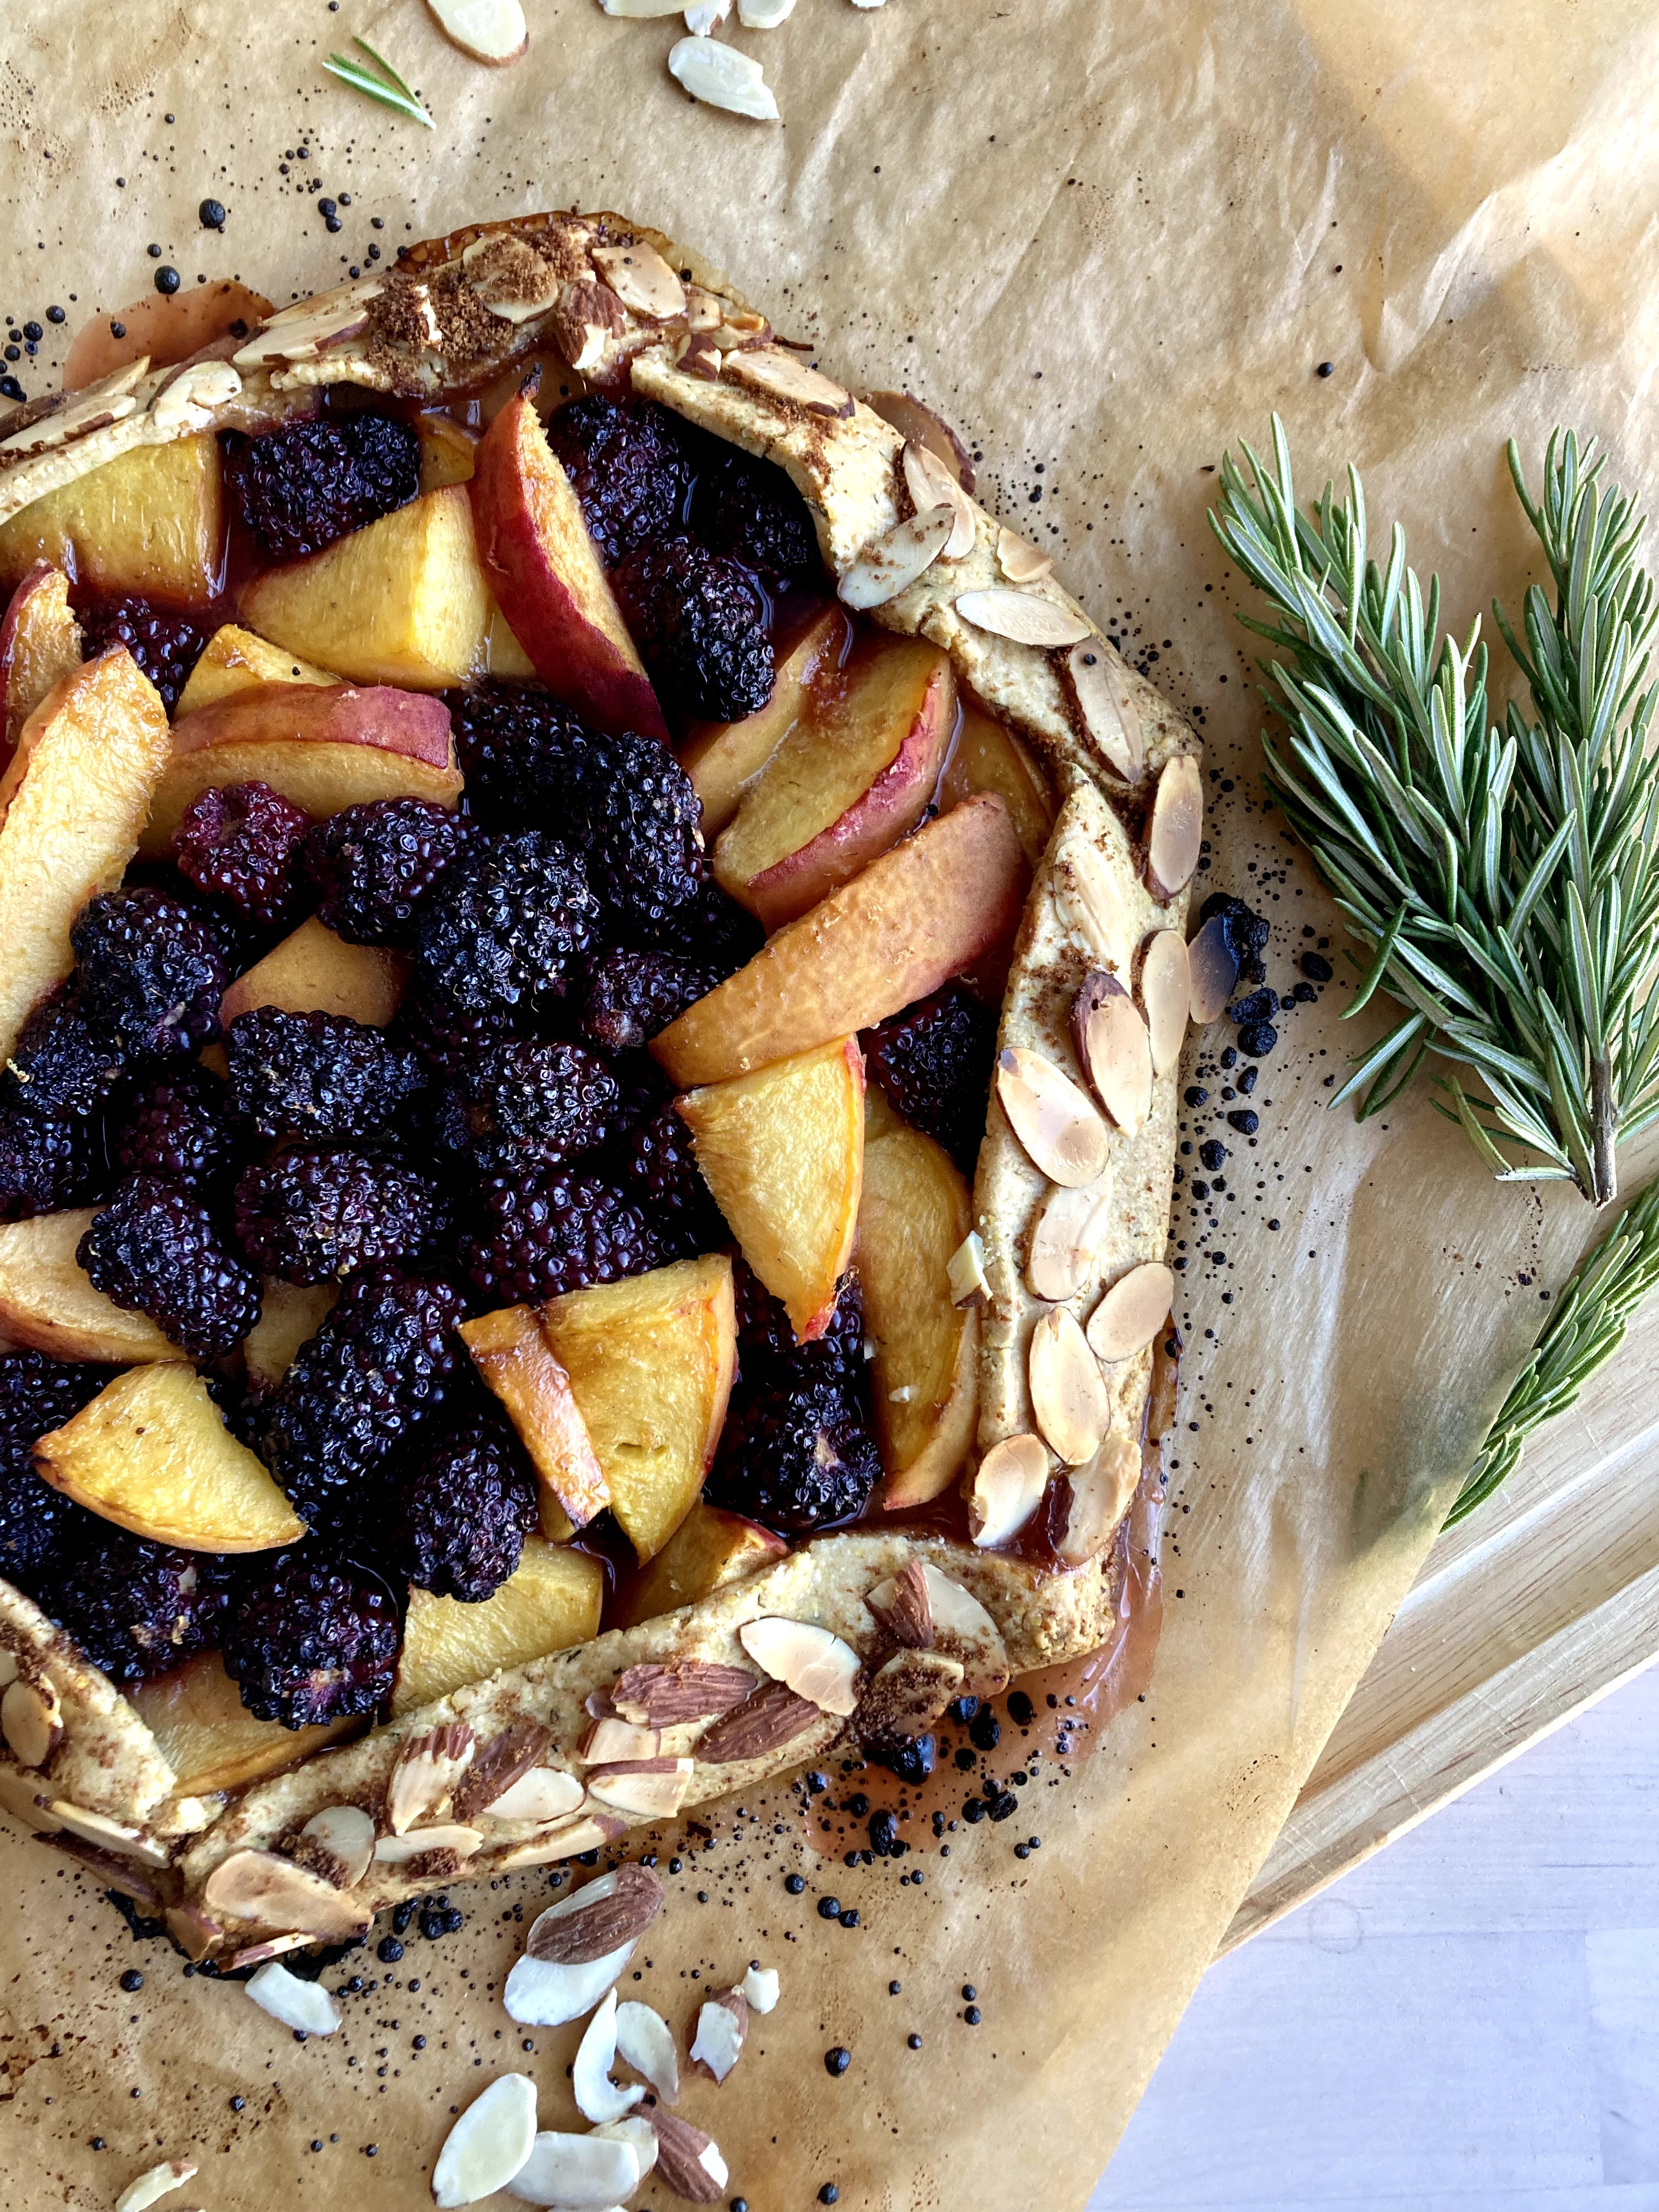
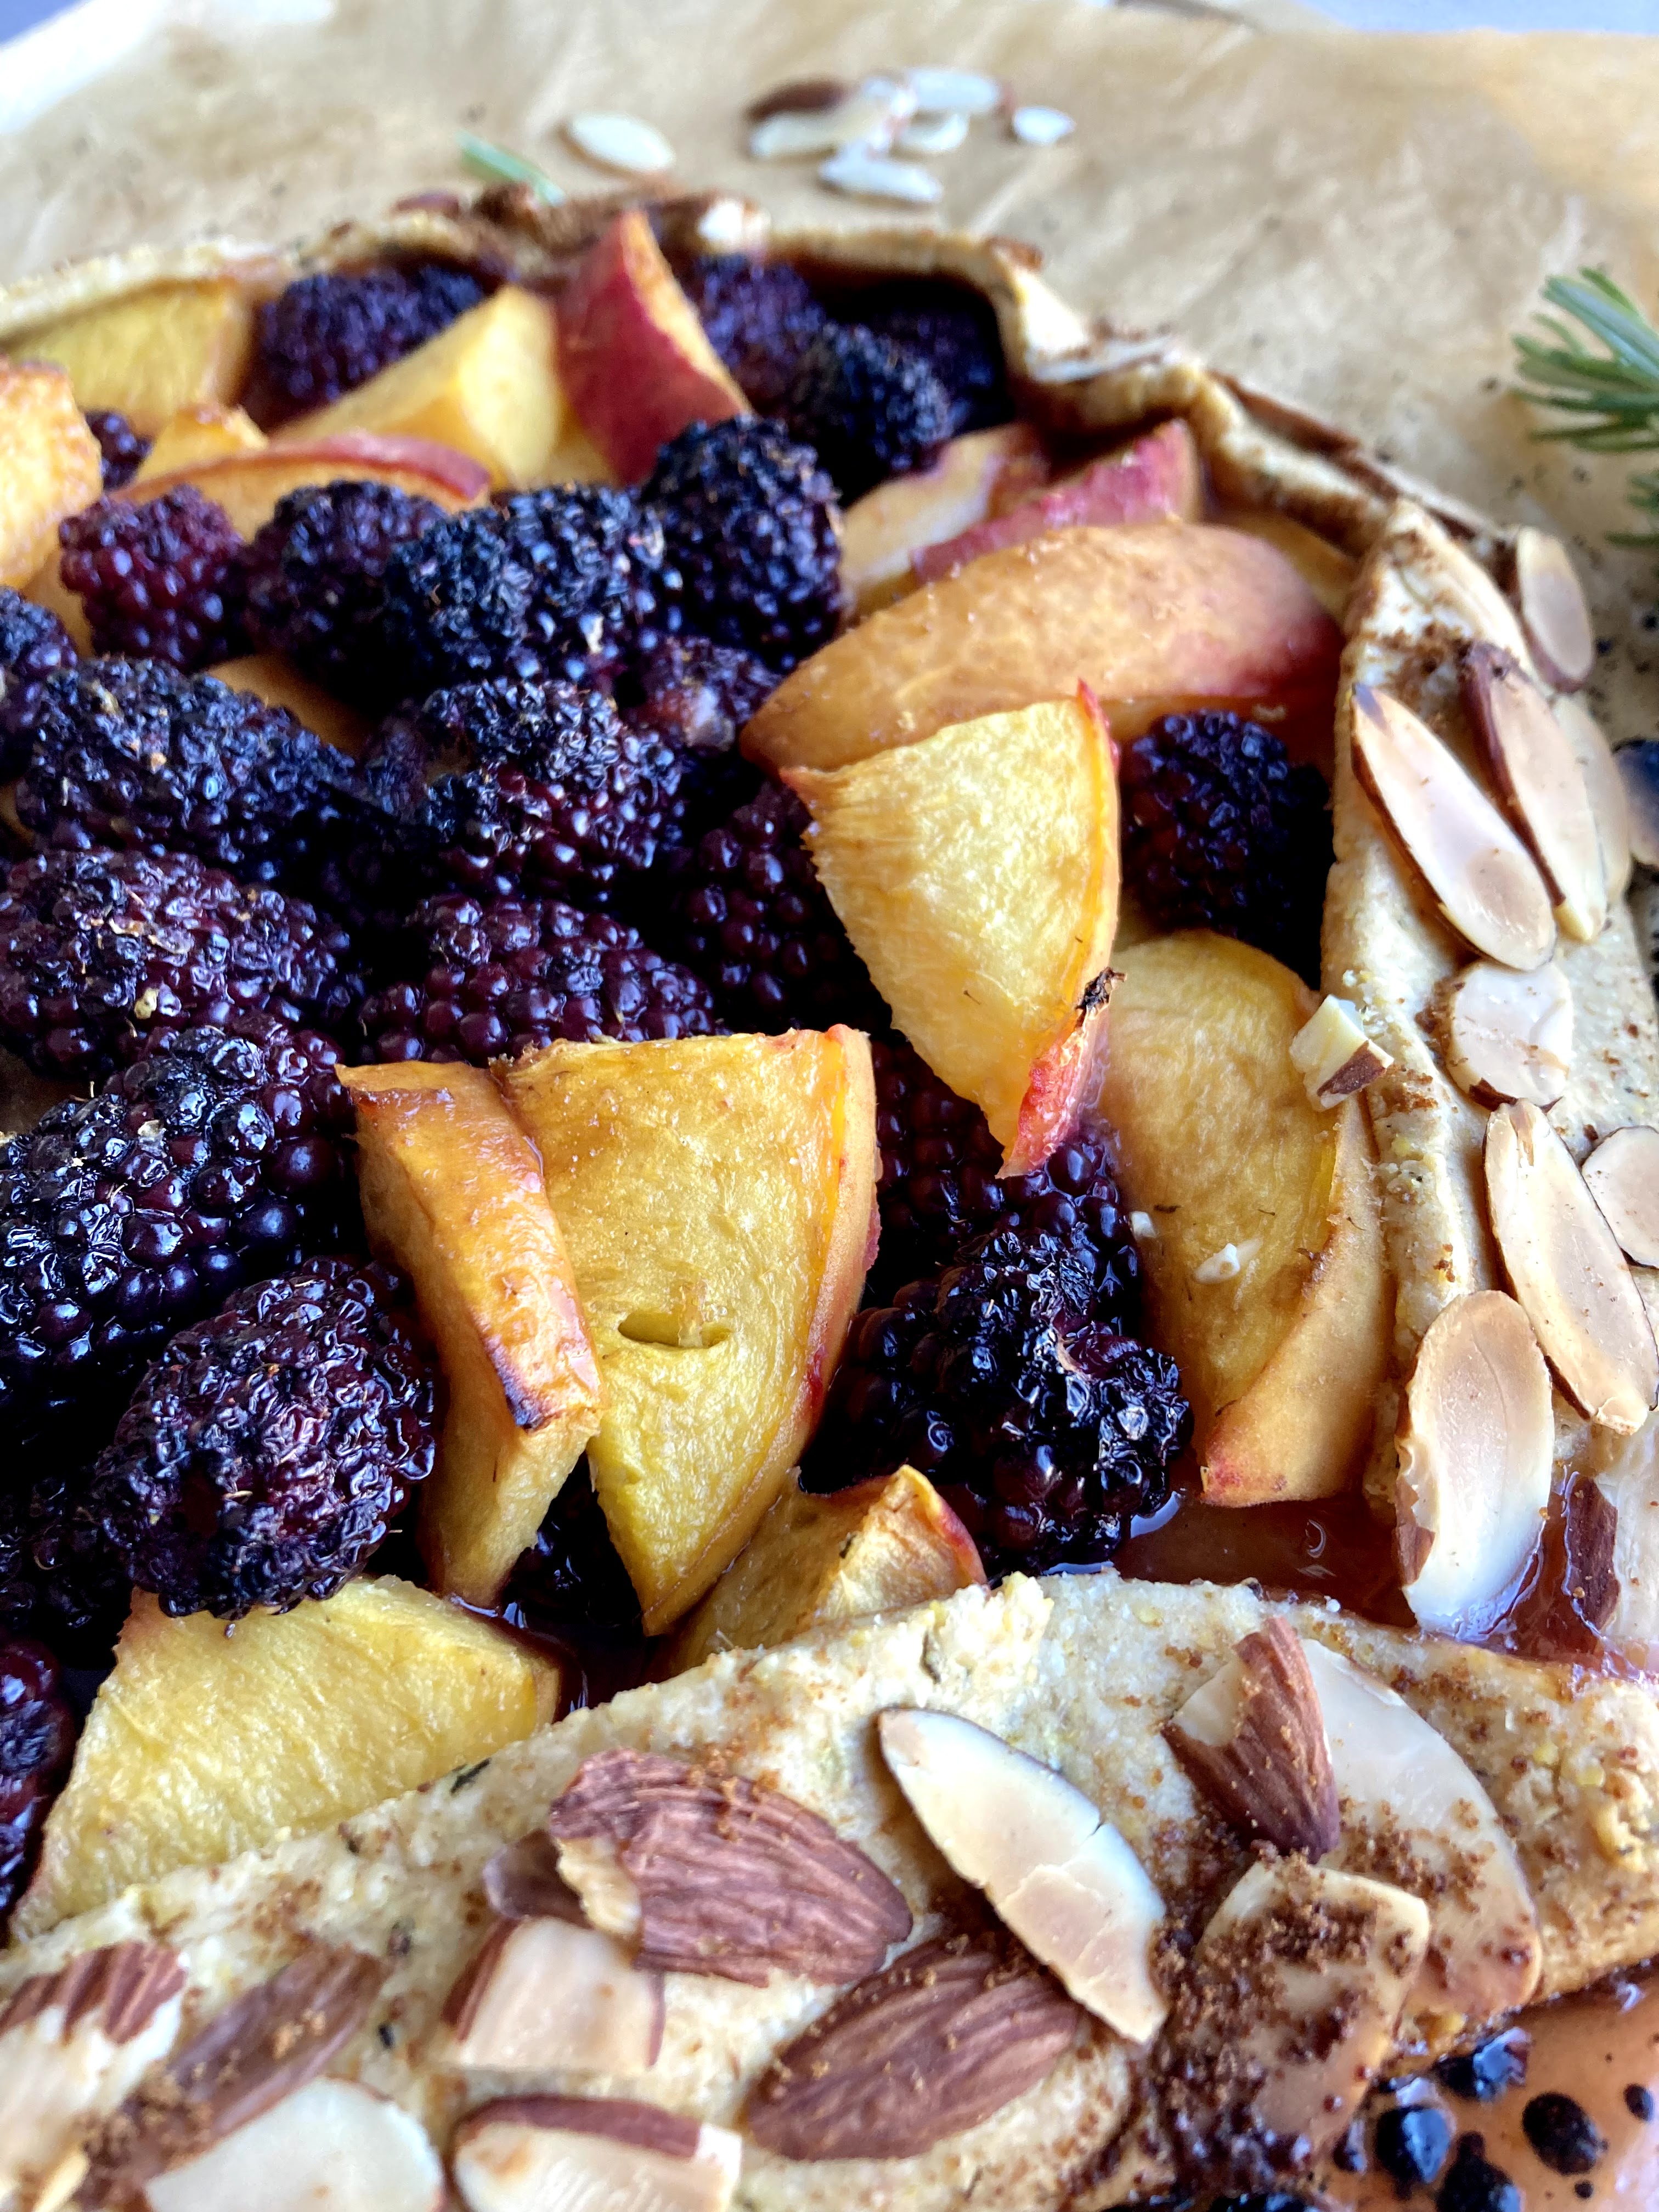
Blackberry, Peach and Rosemary Almond Galette

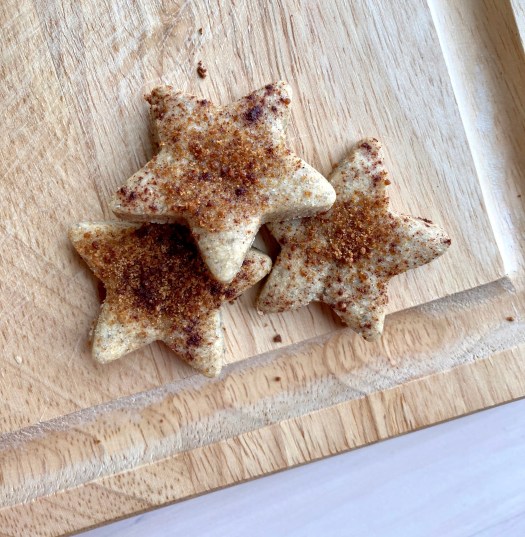
Whole grain, refined sugar free – yet another endless riff on late summer galettes. I love the rosemary here for a slightly herb-y addition; it’s excellent with ice cream or on its own. Yield: 1 galette; serves several. A Wait are those Cookies original.

for the crust:
1 c whole wheat flour
1/2 c cornmeal
1/2 tsp sea salt
2 tsp fresh rosemary, very finely chopped
4oz/1 stick of unsalted butter, cubed
1 tsp vanilla
1/2 tsp almond extract
2-3 tbsp ice water
slivered almonds, for decorating

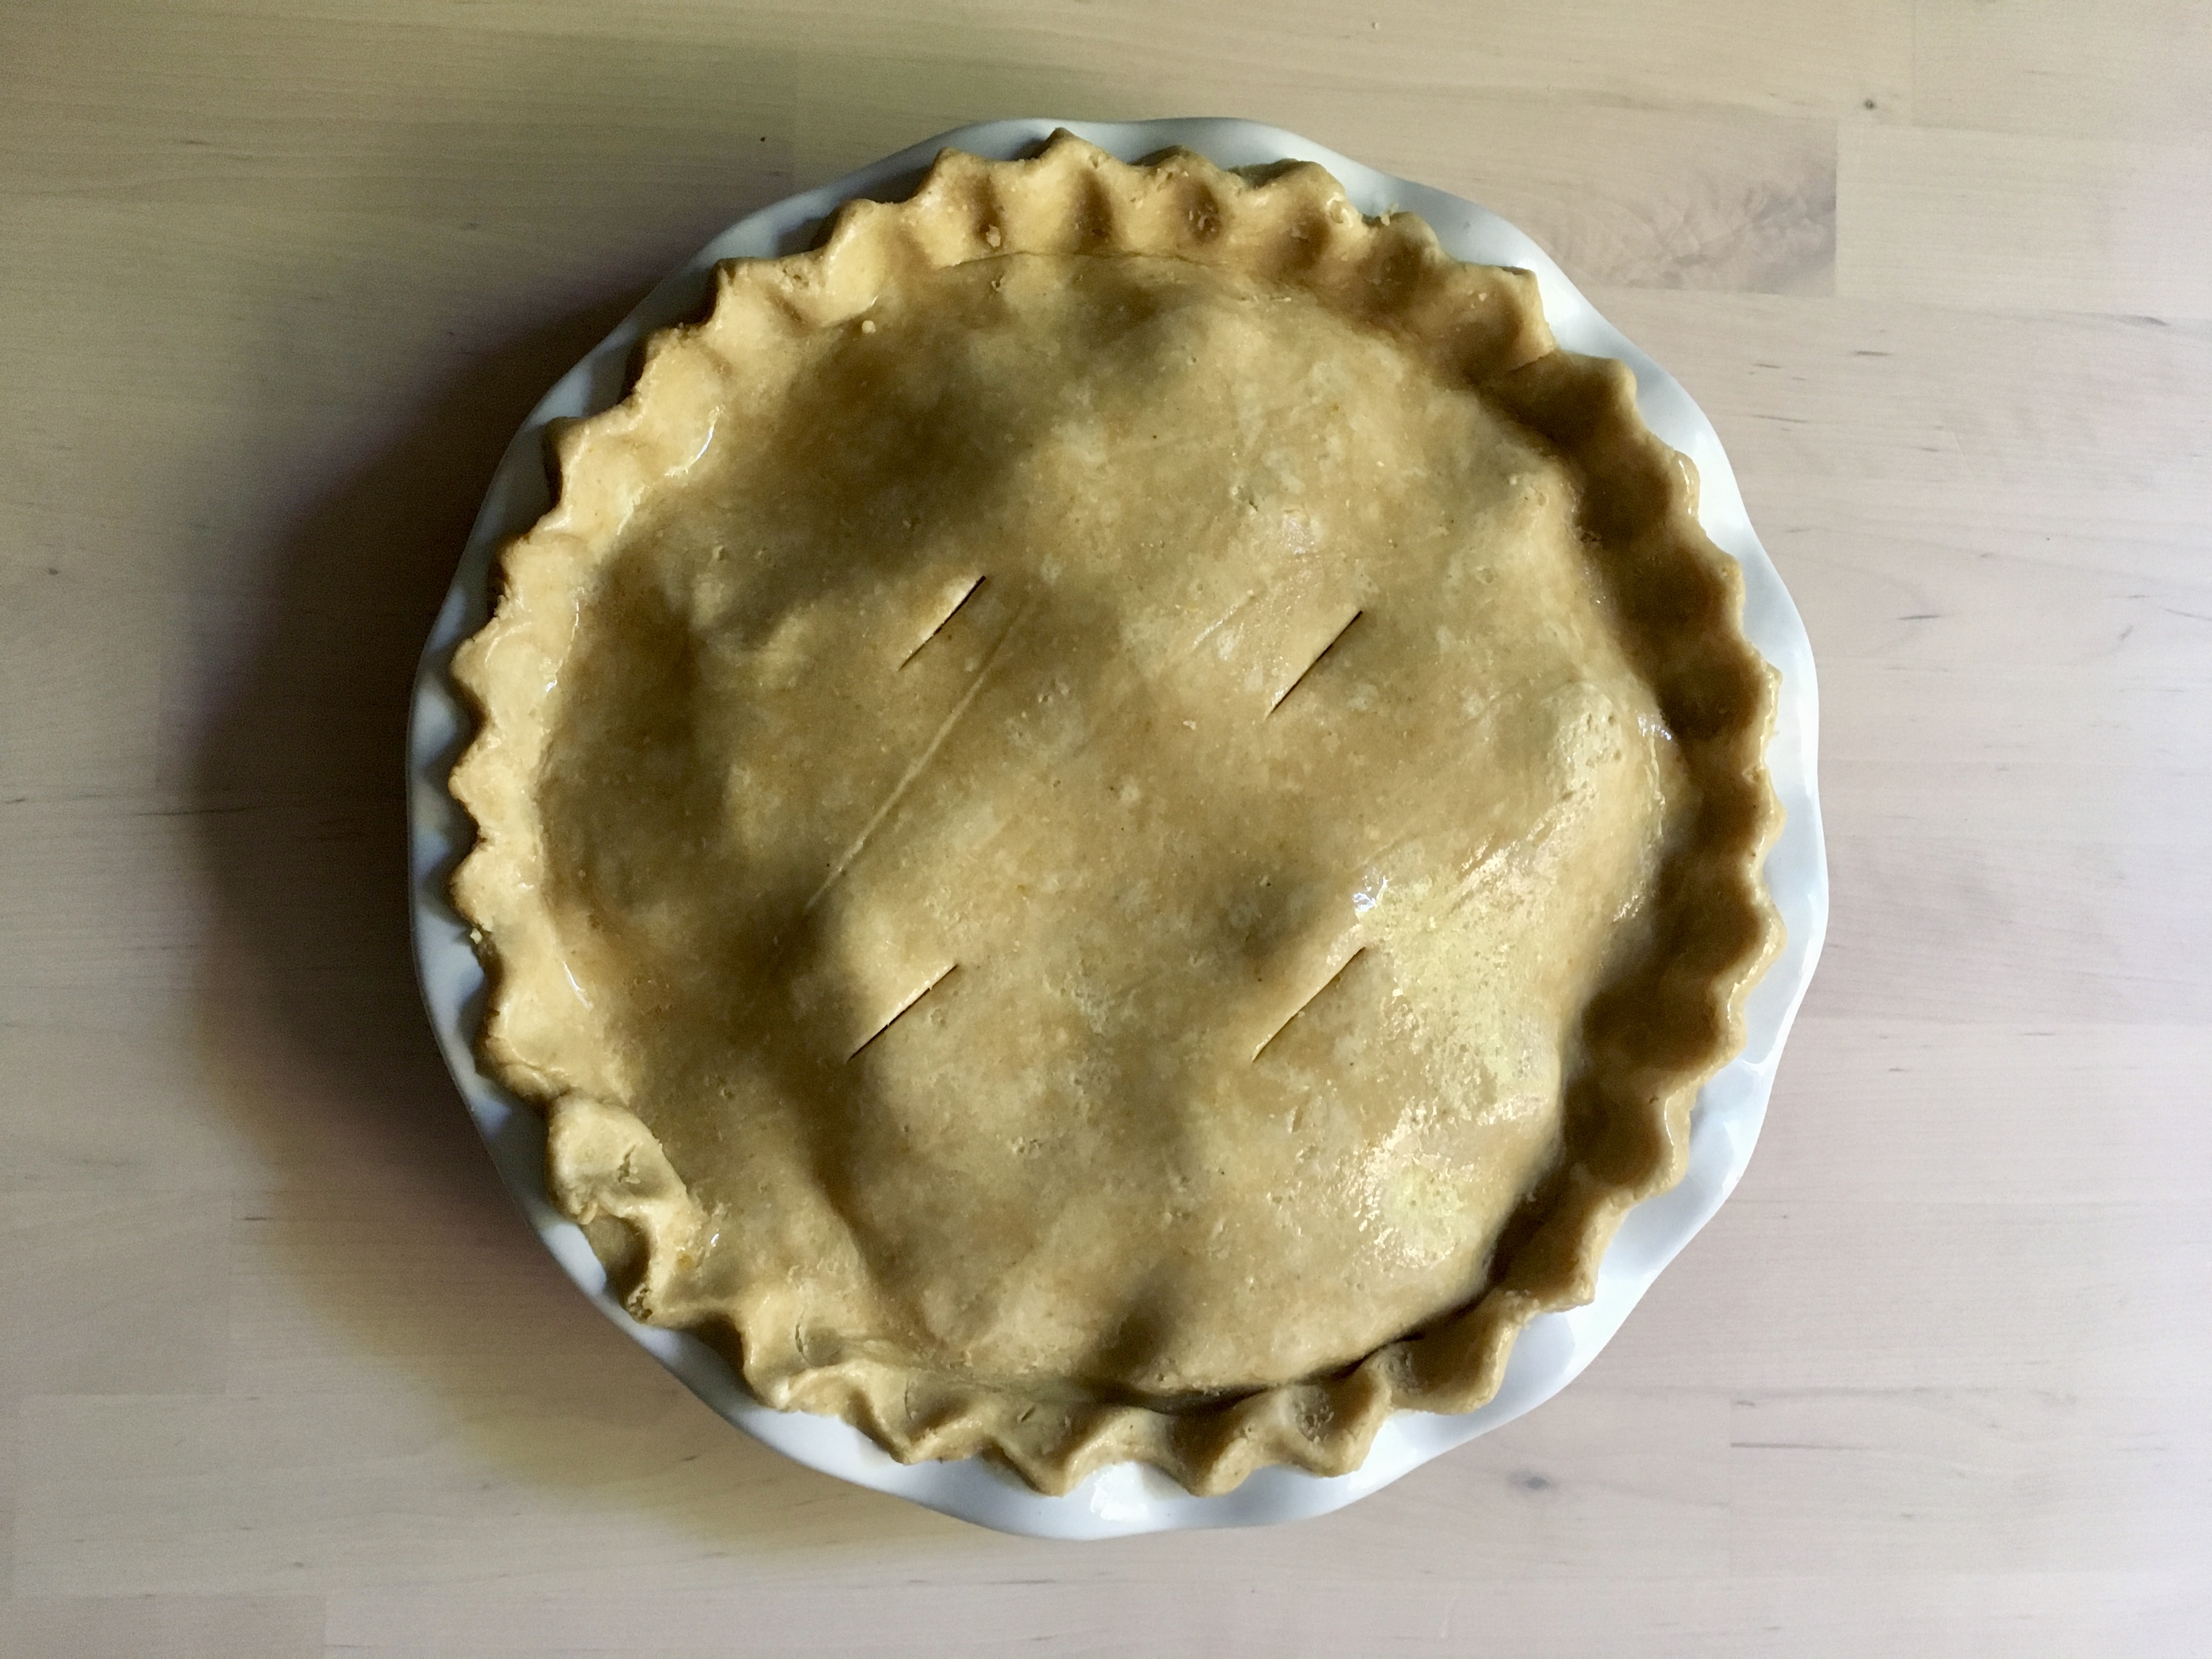
In a food processor, pulse together whole wheat flour, cornmeal, sea salt and rosemary. Add in cubed butter and pulse until it resembled coarse sand. Add vanilla and almond extracts, then the ice water 1 tbsp at a time until the dough starts to come together. Turn it out onto a board and knead it into a ball. I like to roll it immediately since it’s most pliable – typically I haven’t had trouble with this dough sticking. I roll it between two sheets of parchment paper and use the bottom one to bake the galette on; makes an easy transferral method between cookie sheet & cooling rack. If you’re not rolling immediately, stuck it in the fridge on a plate. Can be made ahead the night before if need be – let it sit on the counter for a bit before rolling it out if it’s been refrigerated.

for the fruit:

peaches, sliced (I used roughly 2 large ones)
2 c blackberries (fresh or frozen)
2 tbsp apricot jam (I like St. Dalfour’s as it’s sweetened only with fruit juice)
1 tbsp half and half or cream, for brushing on the dough

Preheat the oven to 425. Roll out the dough between two pieces of parchment paper until it’s about 1/4″ thick. Spread the jam in a thin layer over the middle of the dough. Pile the fruit in the center, leaving a border of about 3″. Fold up the sides of the dough over the fruit. Brush the dough with an half and half or cream, pat the slivered almonds onto the sides and sprinkle with a little coconut sugar. Dot fruit with butter if you like, though it’s not strictly necessary. Pop in the oven and bake for 35-40 minutes, until the crust is lightly browned. Remove to a cooling rack and let cool completely before slicing and serving. Store leftovers in the fridge overnight – it’s great for breakfast :)

Galette: A bright spot in the smoke haze

Wow. What a week. It felt positively apocalyptic / end of times here in SF, and that was only because of the smoke.

It honestly feels weird to be writing something as pithy as a blog post about baking when the entire west coast is on fire / newly homeless / hazardous air quality / struggling… it doesn’t seem right, this much hardship.

And yet, I guess in some ways normalcy is a good thing too; this blog is a routine for me and the routine of baking-photographing-saying hi to all of you virtually is comforting, in its own way.

In that vein, I’m sharing this galette today – it was made and eaten to celebrate a going-off-to-college for one of C’s nieces in the quaranpod. Such a great evening of family, amidst the crap air and even crappier times we’re currently living in – a bright spot in the haze.

I’m keeping this short today; mostly because of my own weird mood. I’m sending ALL the love to my PNW fam & friends; I hope hope hope you are all safe and doing okay, despite the circumstances.

When you get a chance, bake. I find it rests my overactive mind for a minute, and allows me to enjoy sharing something tangible with others. Sending love and thoughts of RAIN.

Nectarine, Blackberry and Apricot Galette

Whole grain, refined sugar free. An endless riff on my usual galette; if you need a gluten & grain free crust, here you go! A Wait are Those Cookies original. Yield: 1 galette; serves several (in this case, it served our quaranpod of 8; with a small piece leftover for brunch).

for the crust:
3/4 c whole wheat flour
1/2 c cornmeal
1/4 c almond flour
1/2 tsp sea salt
4oz/1 stick of unsalted butter, cubed
1 tsp vanilla
1 tsp almond extract
1/2 tsp almond extract
2-3 tbsp ice water

In a food processor, pulse together whole wheat flour, cornmeal, almond flour & sea salt. Add in cubed butter and pulse until it resembled coarse sand. Add vanilla & almond extract, then the ice water 1 tbsp at a time until the dough starts to come together. Turn it out onto a board and knead it into a ball. I like to roll it immediately since it’s most pliable (see below for tips) – typically I haven’t had trouble with this dough sticking. I roll it between two sheets of parchment paper and use the bottom one to bake the galette on; makes an easy transferral method between cookie sheet & cooling rack. If you’re not rolling immediately, stuck it in the fridge on a plate. Can be made ahead the night before if need be.

For the fruit:

Nectarines, sliced (I used roughly 4 large ones)
heaping 1c blackberries
2 tsp tapioca starch
1 tbsp maple
zest & juice of one lemon

1/4 c apricot jam (preferably homemade by a friend ;)

In a large bowl, toss together sliced nectarines, blackberries, tapioca, lemon juice/zest and maple.

Preheat the oven to 425. Roll out the dough between two pieces of parchment paper until it’s about 1/4″ thick. Spread the jam in a thin layer over the middle of the dough. Pile the fruit in the center, leaving a border of about 3″. Fold up the sides of the dough over the fruit. Brush the dough with an egg wash and sprinkle with a little coconut sugar. Dot fruit with butter if you like, though it’s not strictly necessary. Pop in the oven and bake for 35-40 minutes, until the crust is lightly browned. Remove to a cooling rack and let cool completely before slicing and serving. Store leftovers in the fridge overnight – it’s great for breakfast :)

it had a hull breach

Heat waves, crisp & a melted brainbox

370316f1-f1b4-40b0-8540-4ca0756c8bf6
Oof. I meant to post this days ago but we’ve had 100 degree heat in SF for the last three days with no marine layer, so no nighttime cooling…. and of course none of us have AC here so basically we’re all cooked. Oh yeah and unhealthy air quality means windows shut against whatever little breeze there might be. It’s been a gnarly last couple days – full disclosure, I read an entire book and laid in front of a fan at c’s pretty much all day the last two days. Which I hate, not being able to be active. 

Anyway! I made this Saturday morning early before it got too nasty outside. Highly recommend mint in everything, especially when it’s hot out! Excellent with ice cream also, obviously. My only outing yesterday was a walk for ice cream at 8p and it was unbelievably hot, but ice cream is a NECESSITY in this weather. It was worth it in the end.

Not sure I have too much interesting pith to write today… my brains feel cooked.

Kind of amazing how exhausting the last few days have been, between the air quality & the heat. I’ve been hiding out in c’s basement since basically Saturday evening… hopefully my plants aren’t too pissed when I go home. Southwest exposure in a fourth floor apartment is amazing till it isn’t. Anyway. Crisp! From my unbelievably hot kitchen to yours, which is hopefully less gnarly.

Blackberry, Peach and Mint Crisp with Dark Chocolate

A Wait are those Cookies original. Yields a 9×9 or 8×8 crisp, serves several with leftovers. Refined sugar free, gluten free.

3 c blackberries (fresh or frozen)
2 peaches, sliced
1 bunch of fresh mint, finely chopped
2 tsp tapioca starch
1 tbsp maple
1/4 c water
2 tsp vanilla

1 cup old-fashioned oats (use certified gluten-free oats for a gluten-free crisp)
½ cup firmly packed almond meal
½ cup chopped walnuts
1/4 c unsweetened shredded coconut
2 tbsp maple syrup
¼ teaspoon fine sea salt
2 tsp vanilla extract
4 tablespoons unsalted butter, melted
4 tbsp plain whole milk yogurt
1/4 c chopped dark chocolate

Preheat the oven to 350.
Toss blackberries, peaches and sliced mint into your baking dish of choice (my dish is 8×8, 2 qt capacity; 9″ square or 9″ deep pie dish would also be fine). In a liquid measuring cup, whisk together the maple and water until combined. Add the tapioca starch, and whisk to combine. Pour the mixture over the fruit and toss to combine. Bake for 20 minutes.

While the filling is baking, make the crisp. In a mixing bowl, stir together the oats, almond meal, chopped walnuts, shredded coconut, maple, and salt. Mix in the vanilla, melted butter and the yogurt. Stir until everything is mixed thoroughly. Stir in chocolate.

Once the filling has baked for 20 minutes, stir it and and redistribute evenly in the dish. Plop spoonfuls of the crisp topping evenly over the filling – no need to pack it down. Return the dish to the oven and bake for 25 to 30 more minutes, until the filling is bubbling around the edges and the top is golden.

Let the crisp rest for 5 to 10 minutes before serving. Serve with vanilla ice cream, obviously! Keep leftovers, covered, in the fridge for 2-3 days (yeah right – would take some major feat to make it last more than overnight..)

Camp + Pie

Hi friends :)

More pie! Told ya I’d be on the pie train for awhile…. this is a little camp love in pie form. The place that holds a not insignificant piece of my heart in its high Sierra beauty and the faces of my camp family.

Spent a great weekend up at camp with C awhile back but I don’t think I ever shared pictures – here are a few faves. Replacing the siding on one of our original buildings (they date to 1936 when the camp was built) plus some of Mother Nature’s most gorgeous looks.

I decided last night it was high time to make a camp-themed pie, and it turns out intricate pie crusts are the perfect activity for a smoky Saturday morning. Unlike some of my other fancy pie crusts, I did this one without drawing a template first – proof positive that pie dough is more forgiving than you think!

But back to pie. This one is full of late summer peaches and wild blueberries, plus a hefty dose of fresh ginger for a spicy kick. I added dark rye flour to the crust for a twist on my standard whole wheat crust – I love rye, and so does C, so this is a nice spin on the usual. Not overwhelming, but a subtle little somethin’ somethin’.

I do find that the straight whole wheat pastry flour crust is slightly easier to handle, so if you’re new to pie crust or maybe just not feeling it, using all whole wheat is awesome too.

As per usual, I’m 100% sure this is going to be eaten tonight with ice cream – I’m an a la mode girl, for SURE – and tomorrow morning for breakfast, because is it even worth making pie if you don’t eat it for breakfast?! Nope, I think is the answer you’re looking for.

I hope everyone is staying safe, what with everything going on in the world right now. Sending pielove from my corner of the internet straight into your kitchens :)

Gingery Peach and Wild Blueberry Pie on a Rye Crust

Nothing like late summer pie. Wild blueberries, peaches, and fresh ginger in a dark rye and whole wheat crust. A Wait are those Cookies original. Yield: 1 9″ pie; serves several.

for the crust

1.5 c whole wheat pastry flour
1 c dark rye flour
1 scant tsp fine sea salt
8oz unsalted butter (2 sticks), cubed & cold
2 tsp vanilla extract
4-6 tbsp ice water

for the filling

4-5 peaches, sliced
2 c wild blueberries
2 tsp fresh ginger, finely minced
2 tbsp maple
1/4 c whole wheat flour
1 tbsp tapioca starch
zest & juice of 1 lemon
1 tsp vanilla

In a large bowl, stir together all the filling ingredients. Let sit while you make the dough.

In a food processor (or by hand, but I actually love using the food processor for this dough; it comes together in a snap and keeps it from getting overworked), pulse together flours and salt. Add in cubed butter, and pulse until the mixture looks like coarse sand. Add in ice water – I start usually with four tbsp, then add a tbsp at a time until the dough comes together in a ball.

Turn it out onto a floured surface, divide it in half and and roll it out – I prefer to roll and then chill, since the dough is easier to work with that way. You’ll roll out a circle that’s slightly larger than the top of your pie plate, to make for crimping excess. Lay the dough into the dish, tucking the edge underneath and crimping it as desired. Do whatever you want with the top crust! Shapes, traditional top crust, lattice, whatever. Once the bottom crust is in, stick the whole dish into the freezer for 5-10 minutes while you roll out the top (helps prevent shrinking). No need to cover since it’s not in there very long.

Preheat the oven to 425, and bring out the chilled bottom crust. Pile in the fruit, lay on the top crust, and dot the fruit with butter. Brush the top crust with an egg wash and sprinkle with a little coconut sugar if you like (I like the color). Bake for 10 minute at 425, then lower the temp to 350 and bake another 35-40 minutes, until the crust is golden brown and the fruit is bubbly. Remove from the oven and let cool before slicing and serving.

Birthday Pandowdy!

IMG_0834

I had a birthday!

fullsizeoutput_1c30

It was lovely – C and I hiked, went to the symphony for some Stravinsky and ate a bunch of good things (like matcha verbena ice cream omg yum) and this thing! He also gave me some beautiful flowers – all around it was a wonderful birthday!

fullsizeoutput_1c4e

fullsizeoutput_1c53

fullsizeoutput_1c5b

fullsizeoutput_1c05

fullsizeoutput_1c5c

fullsizeoutput_1c56

fullsizeoutput_1bf3

fullsizeoutput_1c5a

Of course, true to form, I made my own birthday dessert! No surprises there, I don’t think. I haven’t had much of a chance to bake (other than a wedding cake, which was SO fun) lately, so it felt good to get this out – I’m overdue!

fullsizeoutput_1c6e

Besides, I love pandowdies – they are pie’s unfussy cousin! So very easy, and so fun. Another excuse to play with your food! Cutting up the crust and flooding it with cream is my favorite part – it’s simultaneously soothing and satisfying.

fullsizeoutput_1c2e

I sliced and froze a bunch of peaches over the last month while they were at their peak – frozen peaches do really well in this, as long as you don’t thaw them first – which makes for even easier baking, since you just toss them in some lemon zest and a few other things and go! The only bit of this that requires more planning is the crust refrigeration, but it can be made the night before or just an hour before, so you have some flexibility.

fullsizeoutput_1c42

I highly recommend this for breakfast after hiking – it’s filling and delicious without being overly heavy. Pair it with some whole milk (not like I speak from experience or anything!) and go to town. Whole grain, refined sugar free – as C said, this is no namby pamby fruit situation! We’re just into the tail end of peach season – enjoy it while it lasts!

fullsizeoutput_1c34

Enjoy the rest of your week!

fullsizeoutput_1c32

Swamped Peach and Blackberry Pandowdy

No namby pamby fruit here! This is a very fruit-foward dessert, so make it with the ripest, most perfect fruit you can find! Best for late summer/early autumn peaches. Whole wheat, refined sugar free goodness. Pandowdies are the unfussy cousin of pie – no bottom crust nonsense here! Yield: 1 9″ pandowdy, serves 6-8.

For the crust:

1.25 c whole wheat pastry flour
1/4 c cornmeal
1 tsp sea salt
zest of 1 lemon
9 tbsp unsalted butter, cubed into small pieces
3-5 tbsp ice water

Add whole wheat flour, cornmeal, sea salt, and lemon zest to a large bowl and stir to combine. Add in butter, toss to coat, and use your fingers or a pastry cutter to cut in the butter until a coarse mixture forms and the butter chunks are the size of peas (I prefer to use my fingers for this since I a) like the feeling of having my hands in flour and b) have greater control over butter-chunk sizing). Add ice water 1 tbsp at a time until the dough just begins to hold together when pinched between two fingers. It’ll look a little crumbly, but that’s fine.

Toss the dough out onto a clean counter or wax paper (I prefer the counter method; less fuss), and use a bench scraper to gather the dough into a rough rectangle. Using the heel of your hand, smear the last fourth of dough away from you, against the counter. Repeat until you smear all the dough (see? playing with your food!), then gather the dough back into a rectangle and repeat, smearing it all away from you. The dough should be cohesive by this point, so gather it up into a disc, wrap in plastic, and stick it in the fridge for at least an hour, or up to overnight.

For the filling:

3 c peaches, sliced*
1.5 c blackberries*
1 tsp vanilla
1/4 tsp almond extract
1.5 tbsp arrowroot starch
juice & zest of 1 lemon
1 tbsp maple syrup
egg white & 1 tbsp coconut sugar for glaze

1 egg yolk
3/4 c heavy cream
1 tsp vanilla

*I used some that I had frozen earlier; if you do as well, bake them straight from frozen instead of letting them thaw beforehand

In a large bowl, combine the peaches and blackberries. Add 1 tsp vanilla, arrowroot, lemon juice, and maple, and toss to combine. Pour all this goodness into your pie plate or skillet of choice – 9″ pie plates are fine as long as they’re the deeper variety; a 10″ cast iron skillet would also work well.

Preheat the oven to 400. Roll out the dough to be roughly circular (no need to be perfect here, like I said – pandowdies are pie’s unfussy cousin), and lift the dough onto the fruit. Tuck in the edges, leaving a rim of dough between the edge of the pie dish and the fruit – I crimped mine because I’m an overachiever and I also had extra dough, but no need to do that. Make a few slits for steam to vent, brush the top with egg white and dust with coconut sugar. Pop the whole beautiful thing into the oven for 40 minutes; best if you line the rack beneath with foil or a large baking sheet – the juices runneth over!

In a liquid measuring cup with a spout, measure the cream, beat in the egg yolk and 1 tsp vanilla, and let it sit at room temp.

Once you hit the 40 minute mark, take the pandowdy out, and use a sharp knife to break up the crust, thus ‘dowdy-ing’ its looks (now begins the really fun part). Carefully pour the cream into the new breaks in the crust, filling each – some of the cream will pool under the crust, and some will sneak out on top, which is fine. Just be careful not to drown the whole crust! Go slow, and fill each vent/break. Stick the pandowdy back in the oven, and bake for another 10 minutes, until the cream is just set and barely jiggles in the center. Let cool completely before serving; it will be gloriously juicy and delicious so might I suggest serving it in bowls? Ice cream is… optional, sort of, if you’re out of cream; otherwise, this can be served even swampier with extra cream poured over the top. You do you!

Store any leftovers (who are you) covered in the fridge, but make sure to save some for breakfast. You’ll thank me later!

fullsizeoutput_1c1a

fullsizeoutput_1c66

Gettin’ figgy with it

IMG_1297

My morning yesterday was perfect: zesting meyer lemons early in the morning, to the sound of rain in the leaves and thunder overhead, under cloudy skies.

IMG_1160

Well, it would have been extra perfect with a latte, but no such luck!

IMG_1298

I LOVE the rainy weather we’ve been having – we don’t get summer storms all that often out here, so I’ve really been enjoying them (minus the super muggy nights – I could really do without that). We’ve also had cooler days, hooray! No more turning my apartment into a sauna by virtue of turning on my oven…

IMG_1262

A few shots from life lately… My last series of weekend snapchats was so stereotypically Bay Area Californian, I had to laugh at myself. Latte –> poolside lounging (with sci-fi novel, obvs) –> whole foods flower display –> sushi….

IMG_1225

IMG_1226

IMG_1227

IMG_1229

However. This is a food blog (well, okay… dessert & baking blog these days), so let’s back to the topic at hand!

IMG_1264

This pudding cake is really fun to make – it totally looks like it’s not going to work when it goes in the oven (fingers crossed, beseeching the baking gods) – the cake batter sinks into the pudding underneath and you think to yourself “OMG THIS IS NOT GOING TO WORK AND I WILL BE SCREWED!” but then… you put it in the oven 25 minutes, try to walk away and ignore it….

IMG_1268

Lo and behold, when you take it out, there is CAKE on top of your PUDDING SAUCE! Borderline baking miracle right there, just the sort of thing to make you feel like you’ve won your day, even when it’s only 7am.

IMG_1158

Happy almost-weekend!

IMG_1261

Meyer Lemon Vanilla Pudding Cake with Port Roasted Figs

Refined sugar free and whole wheat. I reduced the sugar heavily & used maple for unrefined-ness, because of personal proclivities… Lightly sweet, super fun concept where the cake bakes into a pudding bath, basically. Essentially it becomes a self-saucing cake, which looks like it won’t work, but it does! Adapted from King Arthur Flour, here. Yield: 1 8″ cake, serves 2-5 (but really 2, for dessert & breakfast w/ a few snacking leftovers…)

The port roasted figs are also a great way to use an abundance of figs if you can’t eat them all fresh – they freeze well, and can be kept into the dark winter months when you want some figgy goodness!

For the roasted figs:

  • 1 lb fresh figs (however many you need or want!)
  • 1 tbsp honey
  • 1 tbsp coconut sugar
  • 2 tbsp port wine
  • zest from 1 meyer lemon

Preheat the oven to 400, and procure a baking sheet. Slice the ends off each fig, and then halve them. In a large bowl, toss the halved figs with honey, coconut sugar, port, and lemon zest, then place them cut-side down on the baking sheet.

Cover the baking sheet with foil, and roast for 20 minutes. They will be soft, with more liquid – if you want them drier, bake for 30 minutes, uncovered. When done, carefully remove the foil (watch out for steam!) and let them cool completely. Store in an airtight container in the fridge for a week, or freeze – I’d say use them within 3 months if you freeze them, for best quality.

For the sauce:

  • 1 tablespoon tapioca starch
  • 1 1/2 cups whole milk, divided
  • 3 tablespoons maple
  • 1 teaspoon vanilla
  • 1/8 teaspoon salt
  • zest of 1 meyer lemon, finely chopped
  • 2 tsp meyer lemon juice

For the cake:

  • 1 cup whole wheat pastry flour
  • 1/4 c maple syrup
  • 1 tbsp coconut sugar
  • 1.5 teaspoons baking powder
  • 1/2 teaspoon fine sea salt
  • 1 large egg
  • 3/4 cup whole milk, minus 2 tbsp
  • 3 tablespoons unsalted butter, melted
  • 1 tablespoon vanilla extract
  • zest of 2 meyer lemons, finely chopped
  • 3 tbsp meyer lemon juice

Preheat the oven to 350°F. Butter an 8″ square pan (I used a ceramic baking dish with nice results).

To make the sauce: place tapioca in a saucepan and add 2 tablespoons of milk, stirring until no lumps remain. Add the remaining milk, maple, vanilla, salt, and lemon zest. Heat, stirring occasionally, just until the mixture simmers, about 5 minutes. It will thicken slightly but no more than that. Pour the mixture into the prepared pan.

To make the cake: in a largish mixing bowl, whisk together the flour, baking powder, and salt. In another bowl, whisk together the egg, milk, butter, vanilla, lemon zest and lemon juice (Or, if you’re me and baking at 6 am and kind of sleepy, just dump it all in one bowl – it’ll turn out just fine). Add to the dry ingredients and mix just until moistened. Pour the batter into the prepared pan over the sauce. It will kind of puddle into the sauce, which will creep up around the sides, and you will look at it and think that this will never work, but stick with me! Promise.

Bake the cake for 25 minutes, or until a toothpick inserted in the center of the cake comes out clean. The top of the cake will be golden brown, with some bubbles from the pudding that has crept up around the edges. Remove from the oven, cool for 15 minutes, and serve warm, OR refrigerate until ready to serve. Reheat briefly before serving (or just leave at room temp for a few hours). Store covered leftovers in the fridge & eat for breakfast (it’s essentially breakfast food anyway: maple, milk & whole wheat…) Serve with roasted figs, warmed.

IMG_1265

The only acceptable summer blues

IMG_4839

Hi! I made galette again because it was so good last time I just couldn’t stay away. Besides, it’s still gloriously late summer so I will stay happily buried in late summer fruit desserts until seasonality dictates otherwise.

These are the only acceptable kind of summer blues!

FullSizeRender 6

I also sojourned up to Portland for a minute last weekend and caught up with all the PNW buds and did ALL the EATING. No really. ALL of it. Rather glad to be back to eating my kale and eggs, I will say — love traveling and love eating but omg I need a break after awhile! So now I’m back and galetting around, blah blah the usual.

FullSizeRender 5

I may have gone a little overboard in my excitement of finding an enormous (2 pound!) clamshell of organic blueberries at whole foods for a reasonable price…. apparently they disappeared about 2 hours later too so obviously it was meant to be and my excitement is warranted. There were 2 full cups of blueberries in this thaaang, which meant that I was more than slightly concerned with its structural integrity. However! The crust held its own (barely) and all the goodness stayed contained within its slightly leaky exterior. Galette structural engineering for the win.

FullSizeRender 2

For those who love lemon and blueberry, this is for you. Flaky crust, jammy blueberries and tart lemon curd. Late summer shenanigans don’t get much better than this! Messy, beautiful and delicious, just like summer should be.

IMG_4837

Grain Free Blueberry Galette with Lemon Curd

Grain free, gluten free, paleo, and refined sugar free! Easy to put together and obviously delicious or I wouldn’t be shoving these photos into your inbox. Yield: 1 largish galette; about 9″ across. Serving size is up to your discretion… like the last one, this one was dessert and breakfast with a bit of leftovers for 2. No shame.

FullSizeRender 3

For the crust:

I used the same one as I did for the last peach galette I did; but omitted the almond extract.

  • 1.5 c almond flour
  • 1/2 c tapioca starch/flour
  • 1/4 tsp fine sea salt
  • 6 tbsp salted butter
  • 1 eggs, divided
  • 1/2 tbsp coconut sugar
  • scant tbsp vanilla extract (yes, that is a tablespoon!)

Glaze:

  • 1 tbsp coconut sugar for sprinkling over the crust
  • 1 egg, lightly beaten for the egg wash
  • a few small chunks of butter to dot the top of the fruit

For the paleo lemon curd: I used meyer lemons for this recipe here from What the Fork blog (which was absolutely delicious); any lemon curd recipe will work just fine; here is a traditional one that I made a billion years ago that is also spectacular (just excuse the horrendous pictures). Make this a day before (or earlier in the day) so that it has time to cool completely before you put it into the galette. It will thicken / not run all over the place, and you’ll thank your foresight.

For the blueberry filling:

  • 1.5 c fresh blueberries
  • 2 tbsp tapioca starch
  • 1 tbsp coconut sugar
  • 2 tsp vanilla extract
  • 1 tbsp lemon juice

For the crust: In a food processor or high-power blender (I used a Vitamix), pulse almond flour, tapioca starch, salt, and butter, and pulse to combine until it looks like coarse meal. Add in egg, coconut sugar, and vanilla extract and pulse just until combined. Turn out onto a piece of plastic wrap, shape into a disk and chill in the fridge for at least an hour, or up to overnight.

While the crust is chilling (or a day before, which I found to be easier), make the lemon curd! See links for recipes.

Once the dough has chilled, toss the ingredients for the filling into a large bowl: blueberries, tapioca, coconut sugar, vanilla extract, and lemon juice; toss to coat and incorporate.

Preheat the oven to 375, and roll out the dough into a circle between two pieces of parchment. It should be uniformly thick; about 1/4″ but no thinner. Slide the dough and the bottom piece of parchment paper onto a baking sheet. Spread a thick layer of lemon curd in the middle of the dough, leaving about a 2″ border all around. Pile the blueberry filling onto the lemon curd, and carefully fold the edges of the crust up around it, sealing any cracks that happen. Some juices will probably leak out when you bake it, but that’s no big deal. Brush the crust with the beaten egg wash, and sprinkle with a bit of coconut sugar. Dot the tops of the blueberries with a few small chunks of butter. Bake for 35-40 minutes – mine is usually always perfect at 35; the crust should be lightly golden and firm to the touch.

Remove from oven and let cool on the baking sheet for about 10 minutes; then slide the whole piece of parchment+galette onto a cooling rack to cool completely. Serve with extra lemon curd and vanilla gelato! Galette leftovers keep on the counter overnight and make a fabulous addition to breakfast; if you keep leftovers any longer I would store them in the fridge. Store any leftover lemon curd in the fridge!

FullSizeRender 4

Late summer galettes and camp shenanigans

IMG_4745

Hello! Long time no see.

Mostly because it’s summer so I had to do this:

IMG_7122

IMG_4718

IMG_4715

IMG_7119

IMG_4721

IMG_7219

Step off the grid for 10 days to reconnect, laugh, love and play in the dirt at my favorite place on earth. Two Sentinels will always be my mountain home, and there is nothing like my camp family!

IMG_4738

But now I’m back! And because it’s late summer, all the fruit desserts are called for. Especially galettes, because there is something about the rustic pie dough thing that is so forgiving and accepting of whatever fruit you have on hand that reminds me of late summer. Besides that, galettes play much nicer than pie in the sandbox: less time in the oven, less fussy dough (usually) and less crimping, fussing, and general worries about ice cold this and that and the other thing. Which is mostly why I love them, but also because they’re delicious (and I am totally not hating on pie; I love it equally!! But I also love not dying in a hot kitchen, so there’s that).

IMG_4742

This galette made the perfect dessert with a spot of ice cream, and then a rad breakfast accompanied by eggs and kale… you really can’t go wrong here.

IMG_4739

Grain free, lightly sweetened, almondy crust surrounds almondy peaches and a homemade almond paste. Very little sweetner actually goes into this, since the peaches are so sweet on their own. Pretty much any summer fruit can go into this, but I love the combination of peach and almond!

IMG_4740

Hopefully you have some late summer produce hanging around, begging to be made into a galette. Trust me, it’s a good plan. Definitely recommended to eat this for breakfast… Happy baking!

IMG_4737

Grain Free Almond Peach Galette

Grain free, refined sugar free, and paleo! Yay! Minus chilling time, the actual galette making comes together in a snap. Lightly sweet: the perfect vehicle to highlight late summer produce that is so sweet on its own. Yield: 1 galette; serves two for dessert and breakfast with leftovers, or somewhere between 6-8 peeps. Your call on how much you feel like sharing… Crust recipe lightly adapted from Running to the Kitchen, here! The almond paste and filling are Wait are those Cookies brainchild. Happy eating!

For the crust:

  • 1.5 c almond flour (not meal; you want the finer flour variety)
  • 1/2 c tapioca flour
  • 1/4 tsp fine sea salt
  • 6 tbsp salted butter, chopped
  • 1 egg
  • 1/2 tbsp coconut sugar
  • scant 1/2 tsp almond extract

For the almond paste*:

  • 1/3 c almond flour
  • 1/4 c almond butter
  • 3 tbsp maple syrup
  • 1 tsp vanilla extract
  • scant 1/2 tsp almond extract

*disclaimer: didn’t measure when I made this… so these are best guess estimates! Taste as you blend, and adjust the flavor as you like!

For the filling:

  • 3 peaches, thinly sliced
  • 1 tbsp tapioca flour
  • 1/2 tsp almond extract
  • 1/2 tsp vanilla extract
  • 1/2 tbsp coconut sugar

Last little beautification elements:

  • 1 egg, beaten
  • 1-2 tsp coconut sugar
  • 1 tbsp butter, chopped

Let’s make galette!

In a food processor or high-power blender (I used a Vitamix), pulse almond flour, tapioca starch, salt, and butter, and pulse to combine until it looks like coarse meal. Add in egg, coconut sugar, and almond extract and pulse just until combined. Turn out onto a piece of plastic wrap, shape into a disk and chill in the fridge for at least an hour, or up to overnight.

In the (cleaned) blender or food processor, combine the ingredients for almond paste: almond meal, almond butter, maple syrup, vanilla, and almond extract. The texture should be pretty thick, and should stick to itself when you press it between your fingers. Add more almond butter or flour, and adjust sweetness accordingly. Set aside once made.

Once the dough has chilled, preheat the oven to 375. Slice the peaches, and toss in a largish bowl with tapioca, extracts, and coconut sugar. Roll out the dough between two pieces of parchment paper, keeping the circle to about 1/4″ thickness. Peel off the top piece of parchment, and slide the rolled out dough on its parchment onto a baking sheet. Top the dough circle with the the almond paste, spreading it to about 2″ from the edge. Pile on the peaches, keeping them towards the center if possible. Begin folding up the sides, creasing them together as you go – if the dough is cracking, that’s okay (you can crimp the cracks back together; remember: galettes are forgiving and rustic!); you can use the bottom piece of parchment to help fold up the sides. Top the exposed peach filling with dots of butter, and brush the edges of the dough with the beaten egg. Sprinkle a little coconut sugar around the sides.

Bake for 35-40 minutes until edges are golden brown — mine came out just fine at 35 minutes, so check accordingly. Let cool for a few minutes on the baking sheet, then carefully slide the whole galette onto a cooling rack to let it cool completely. Serve with your fave ice cream or whatever of choice! Keeps well covered in foil on the counter; mine didn’t last longer than about 2 days so I can vouch for it at least that long!

Galette in situ:

IMG_4743

IMG_4744