Pie Therapy

I’m all for transparency in this blogspace…. so to be completely honest, this last week was ROUGH. Autoimmune flareup (for lack of a better way to put that… we still don’t know exactly what is wrong) caused massive amounts of emotional and physical distress. Fun! No. Actually not fun.

Thankfully, I have an amazing support system… both from phone calls with family and close friends checking on me, and actual surprise deliveries of flowers and ice cream from the favorite human. What a guy. He’s really the best (and I’m 100% sure he’s not reading this so I can be mushy and not get him all embarrassed, ha)

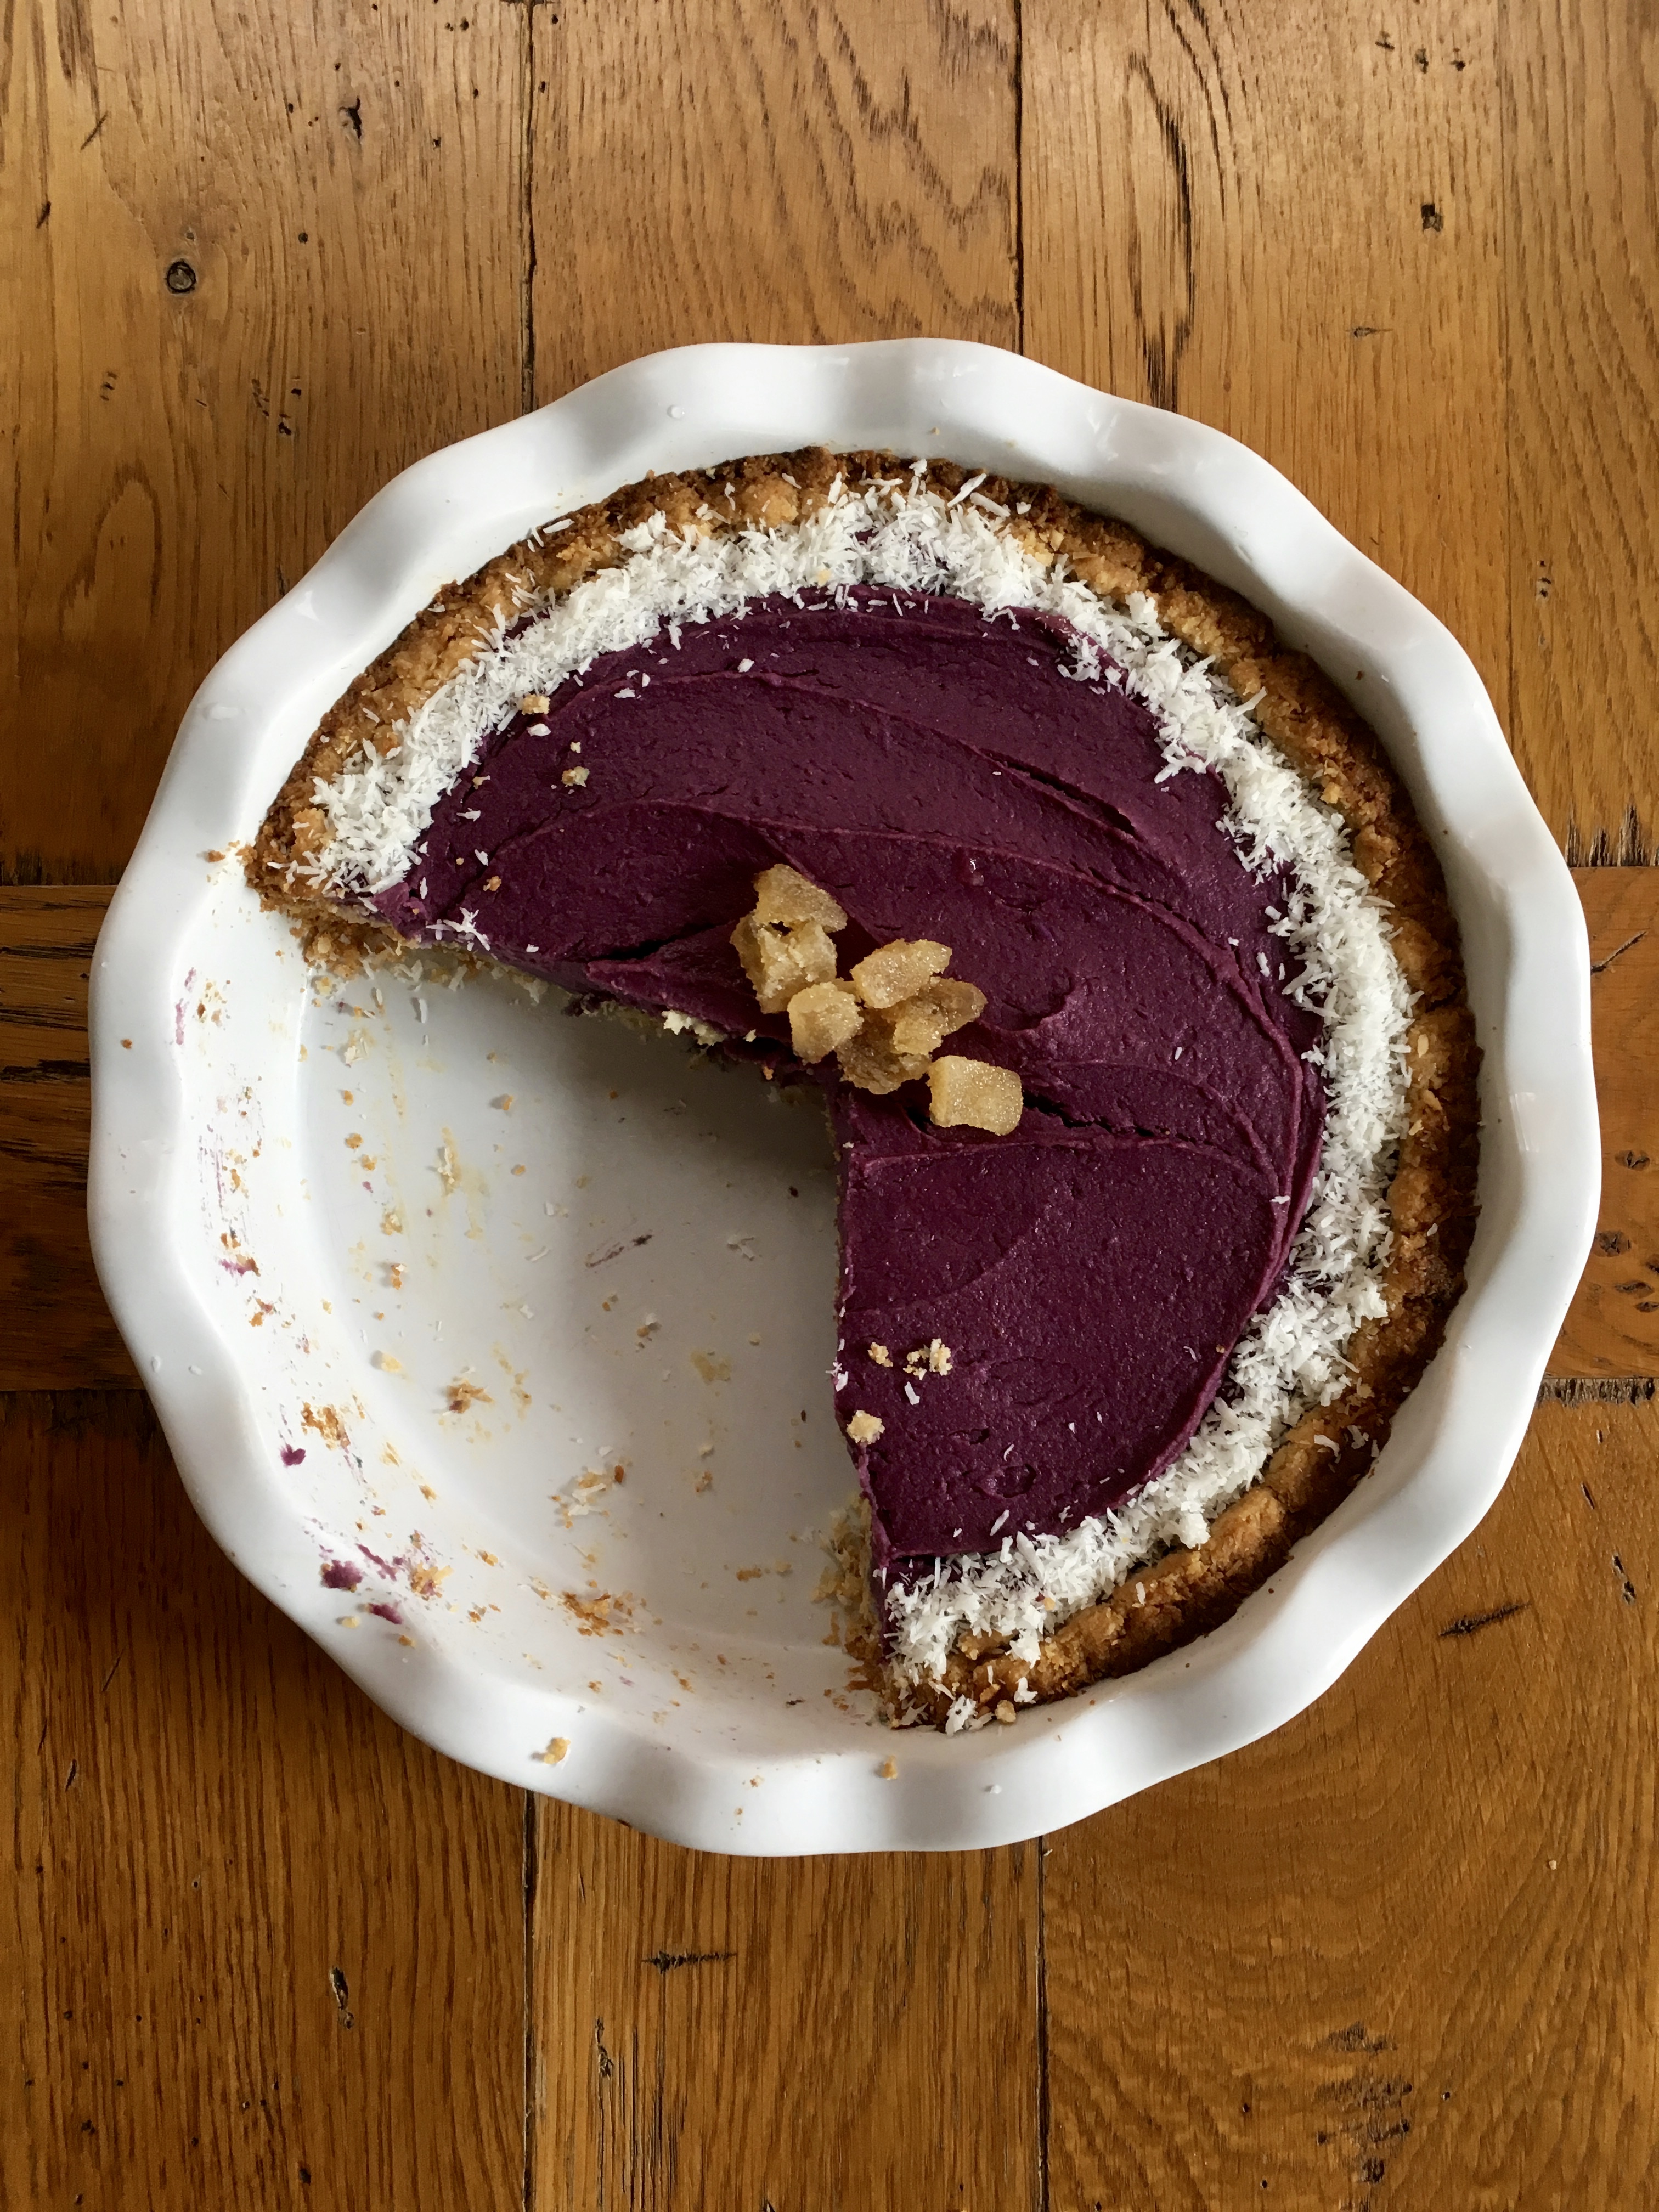
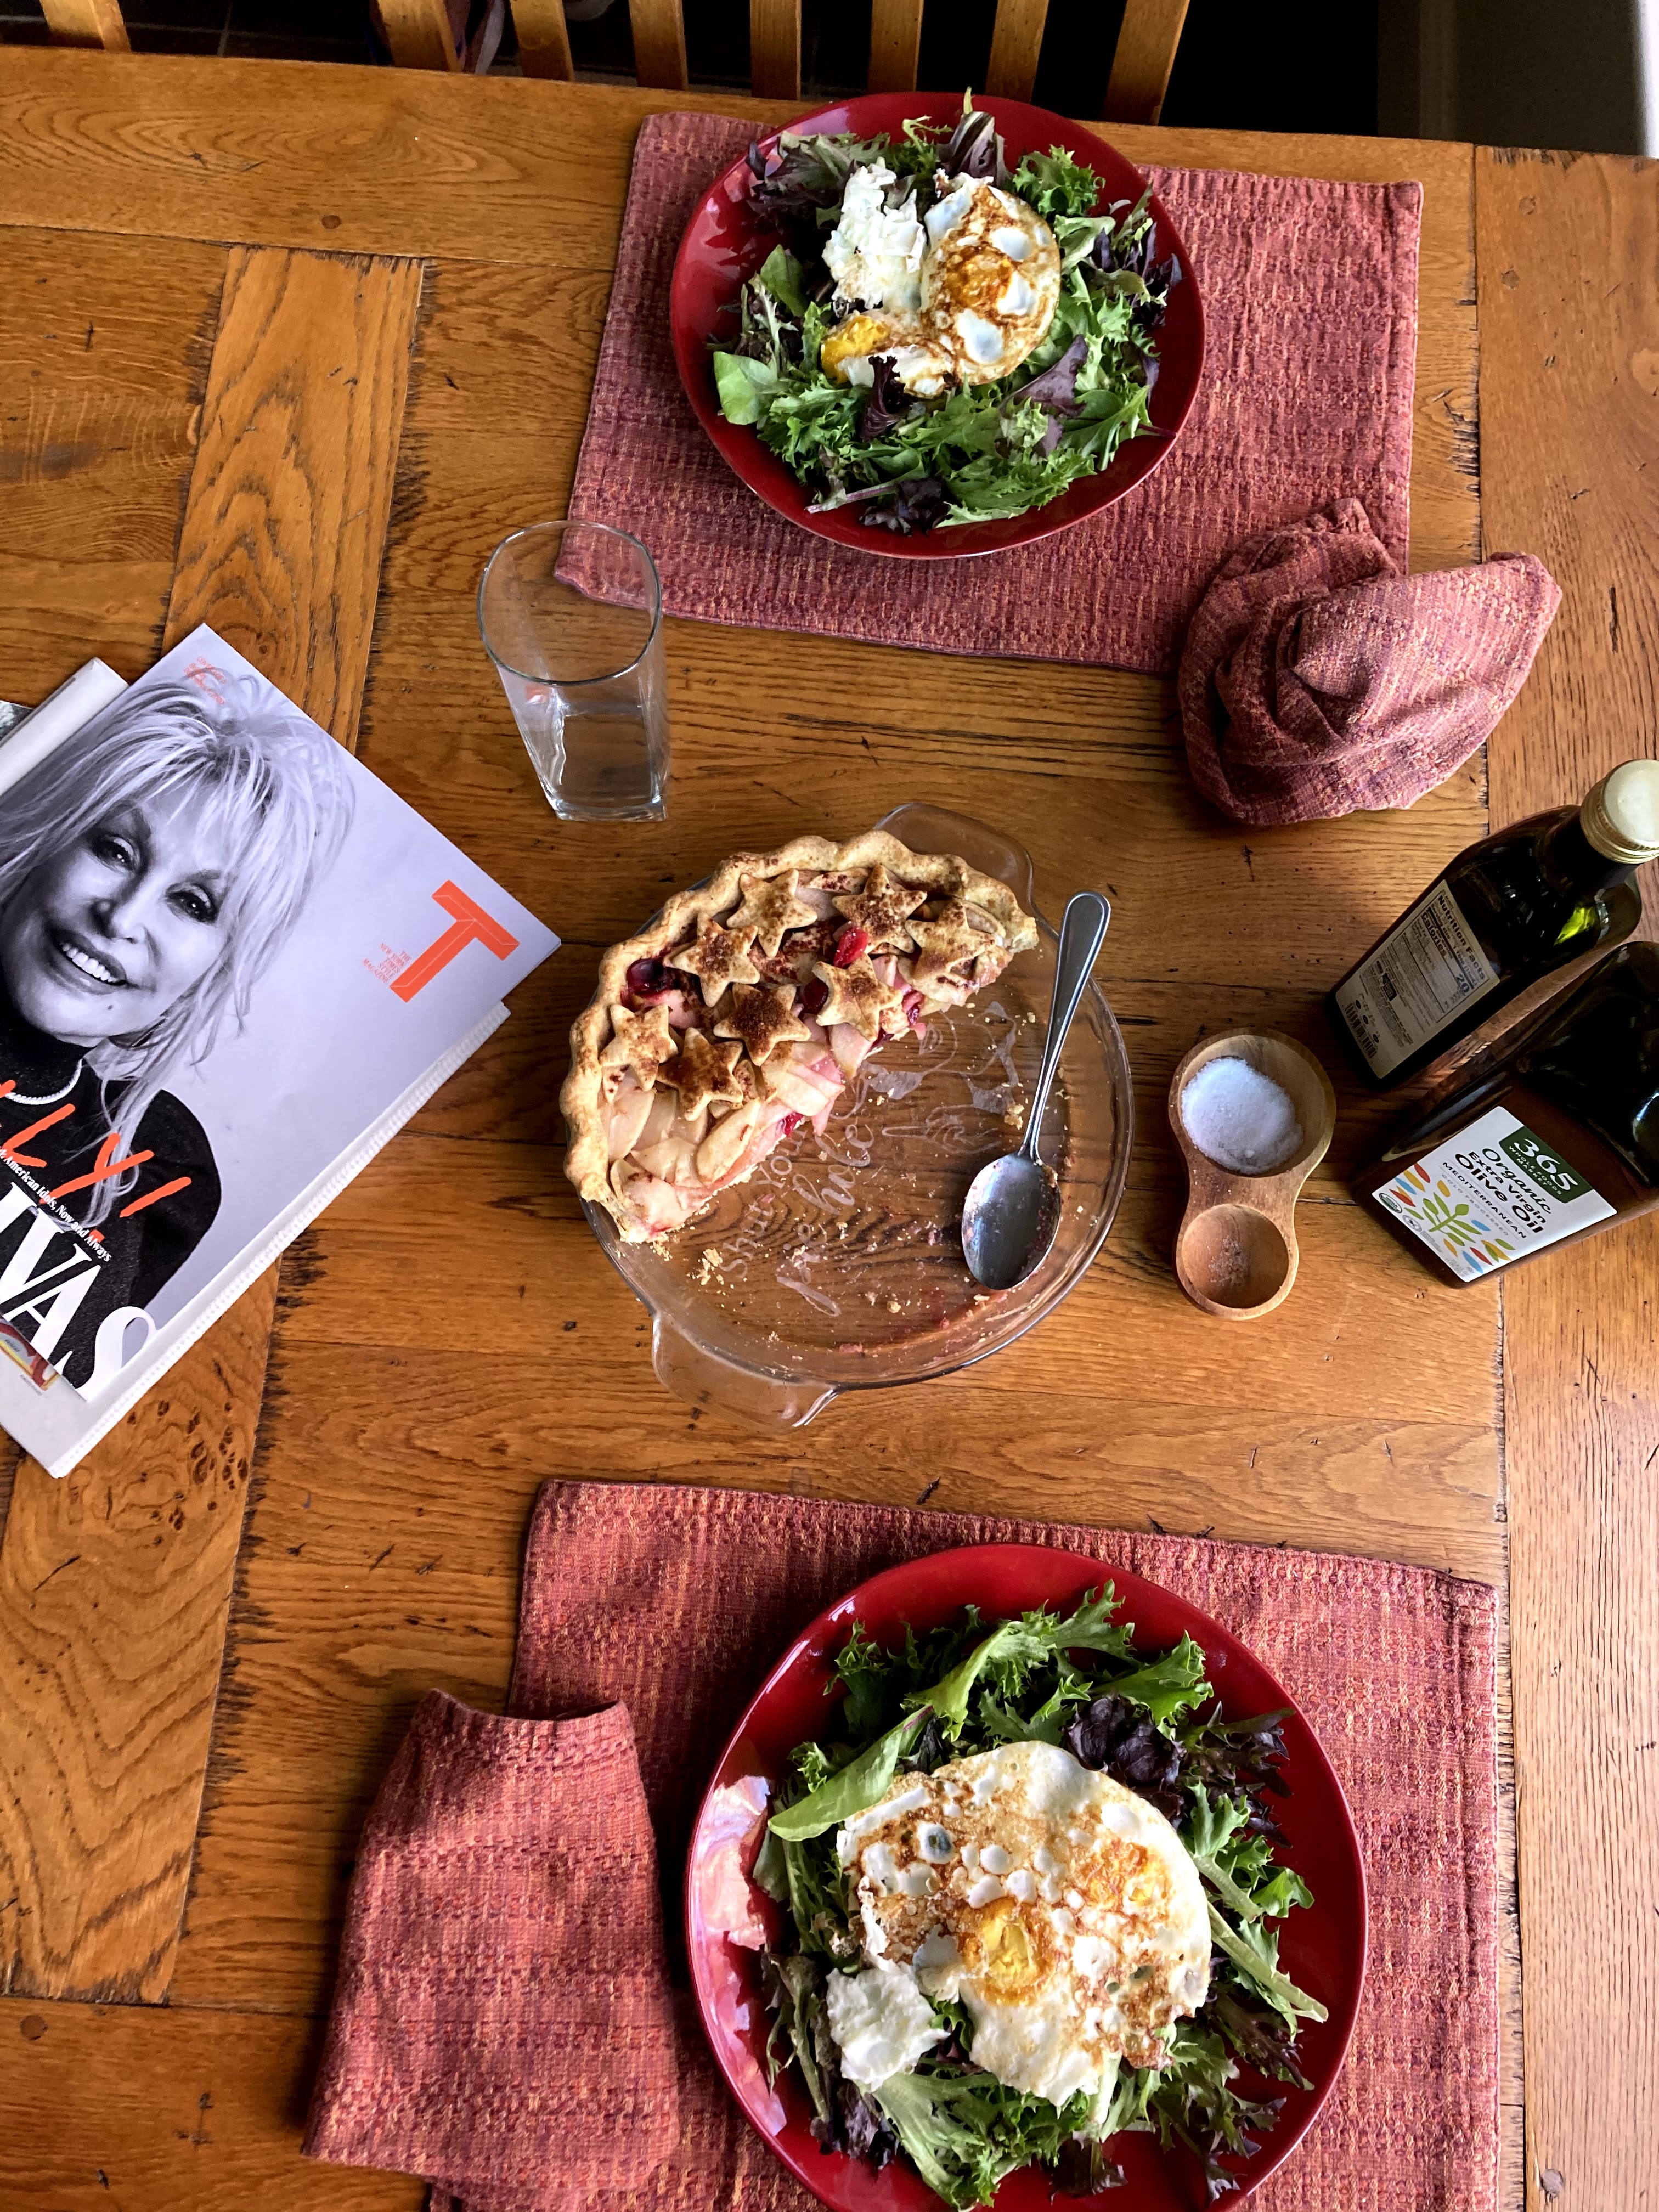
The flare is still going but I’m doing my best to just be zen. Or try to, anyway. Pie helps. Pie is kind of a meditation in itself, plus the ultimate end product is delicious, so that helps too. C and I also did a massive workout today which doesn’t help me ignore the symptoms, but does help me feel better in my body so that’s a start. We finished it and then had trouble with our forks and fine motor control, so you KNOW it was good. I had to just point the fork at my face and hope the food didn’t fall off… much laughter ensued.

brunch with dolly

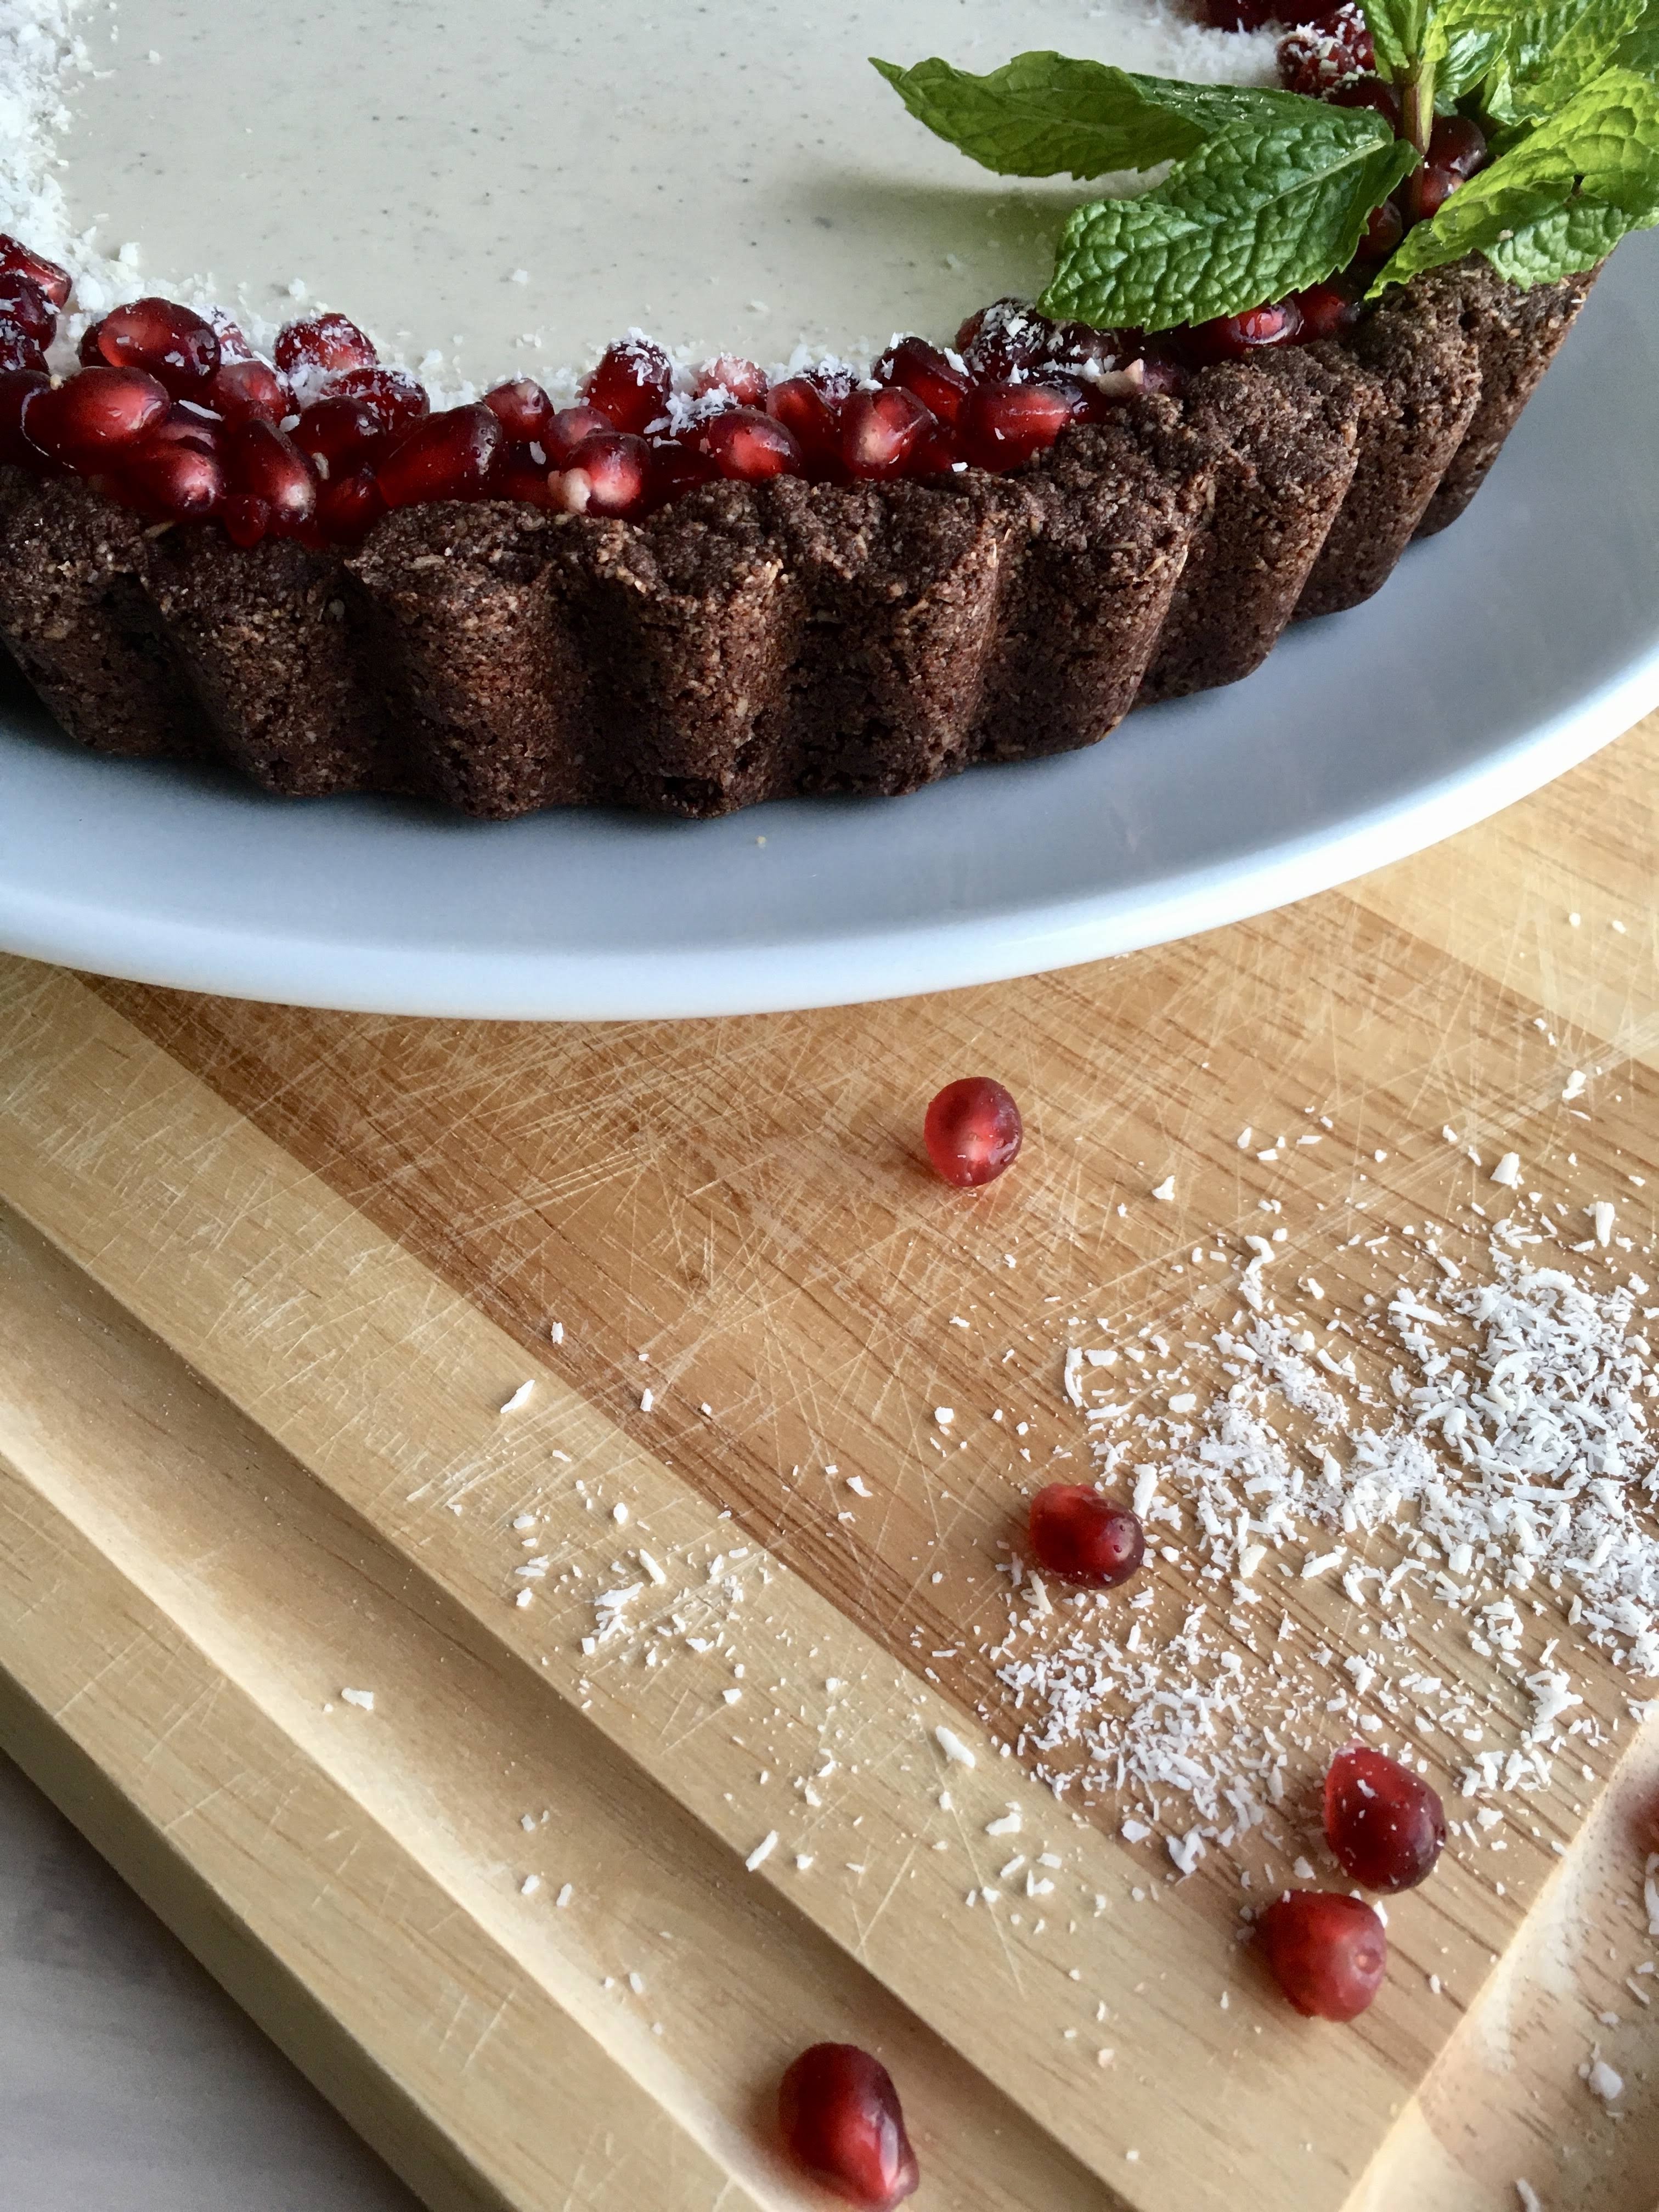
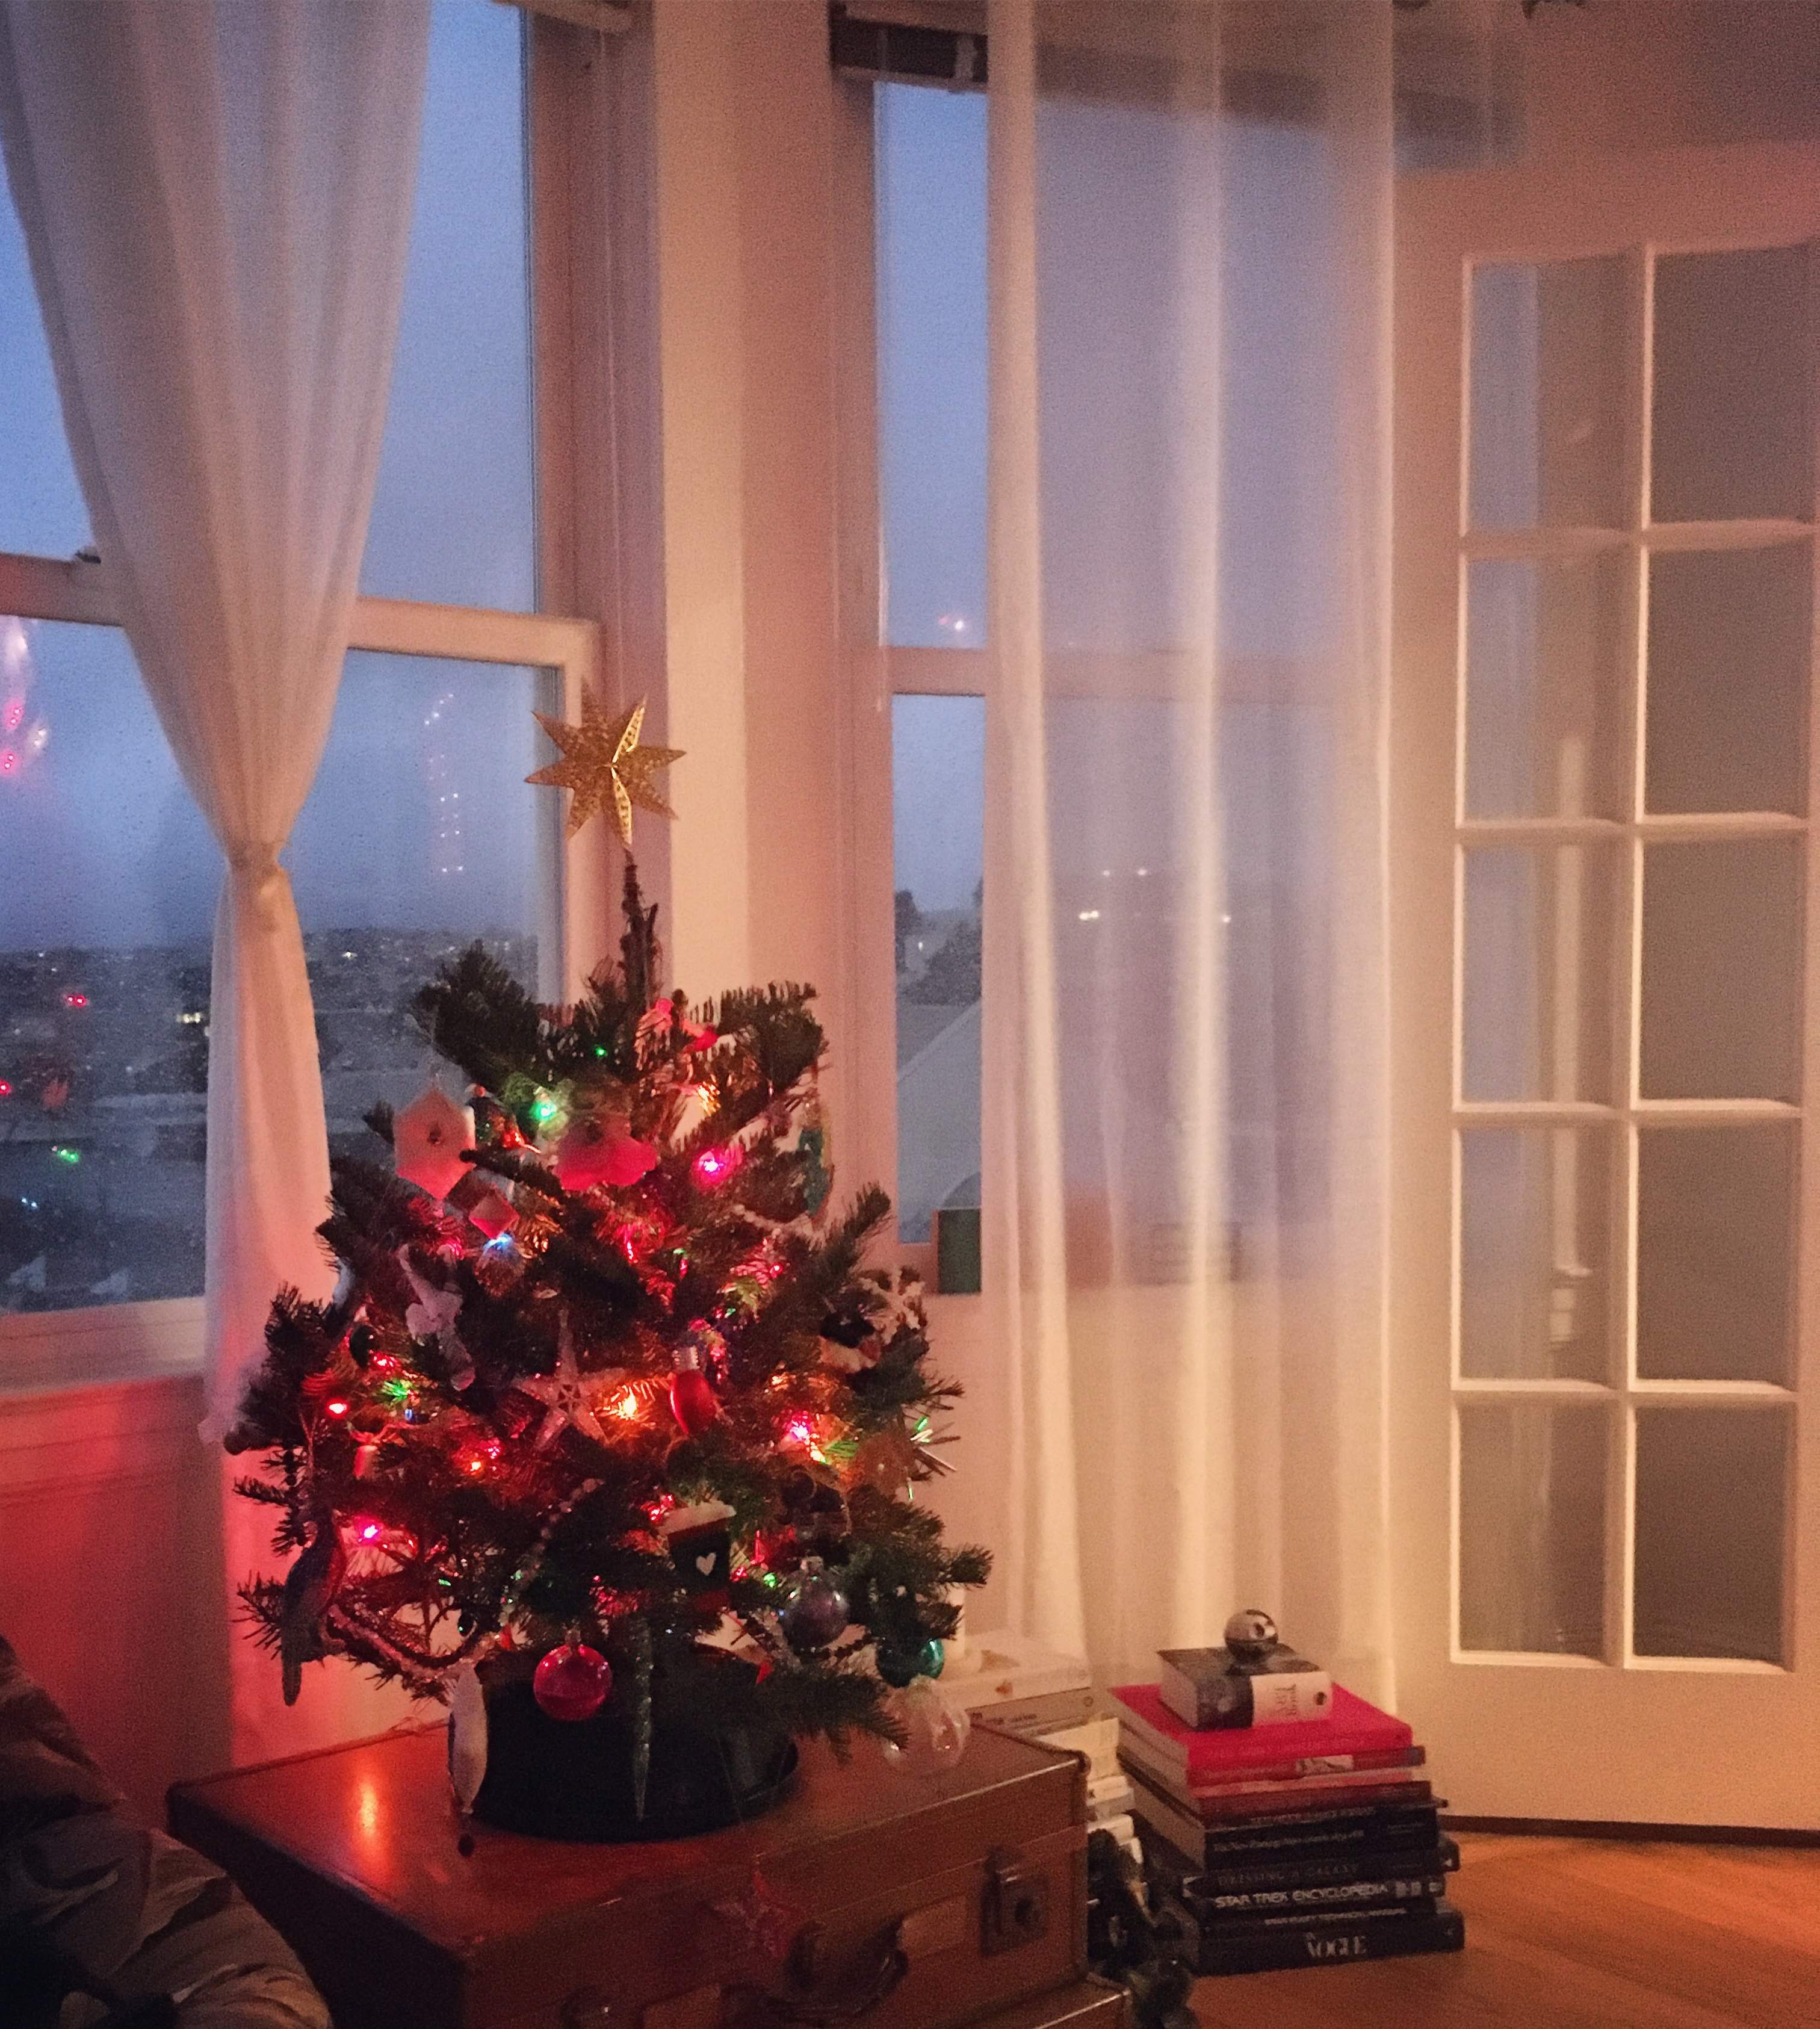
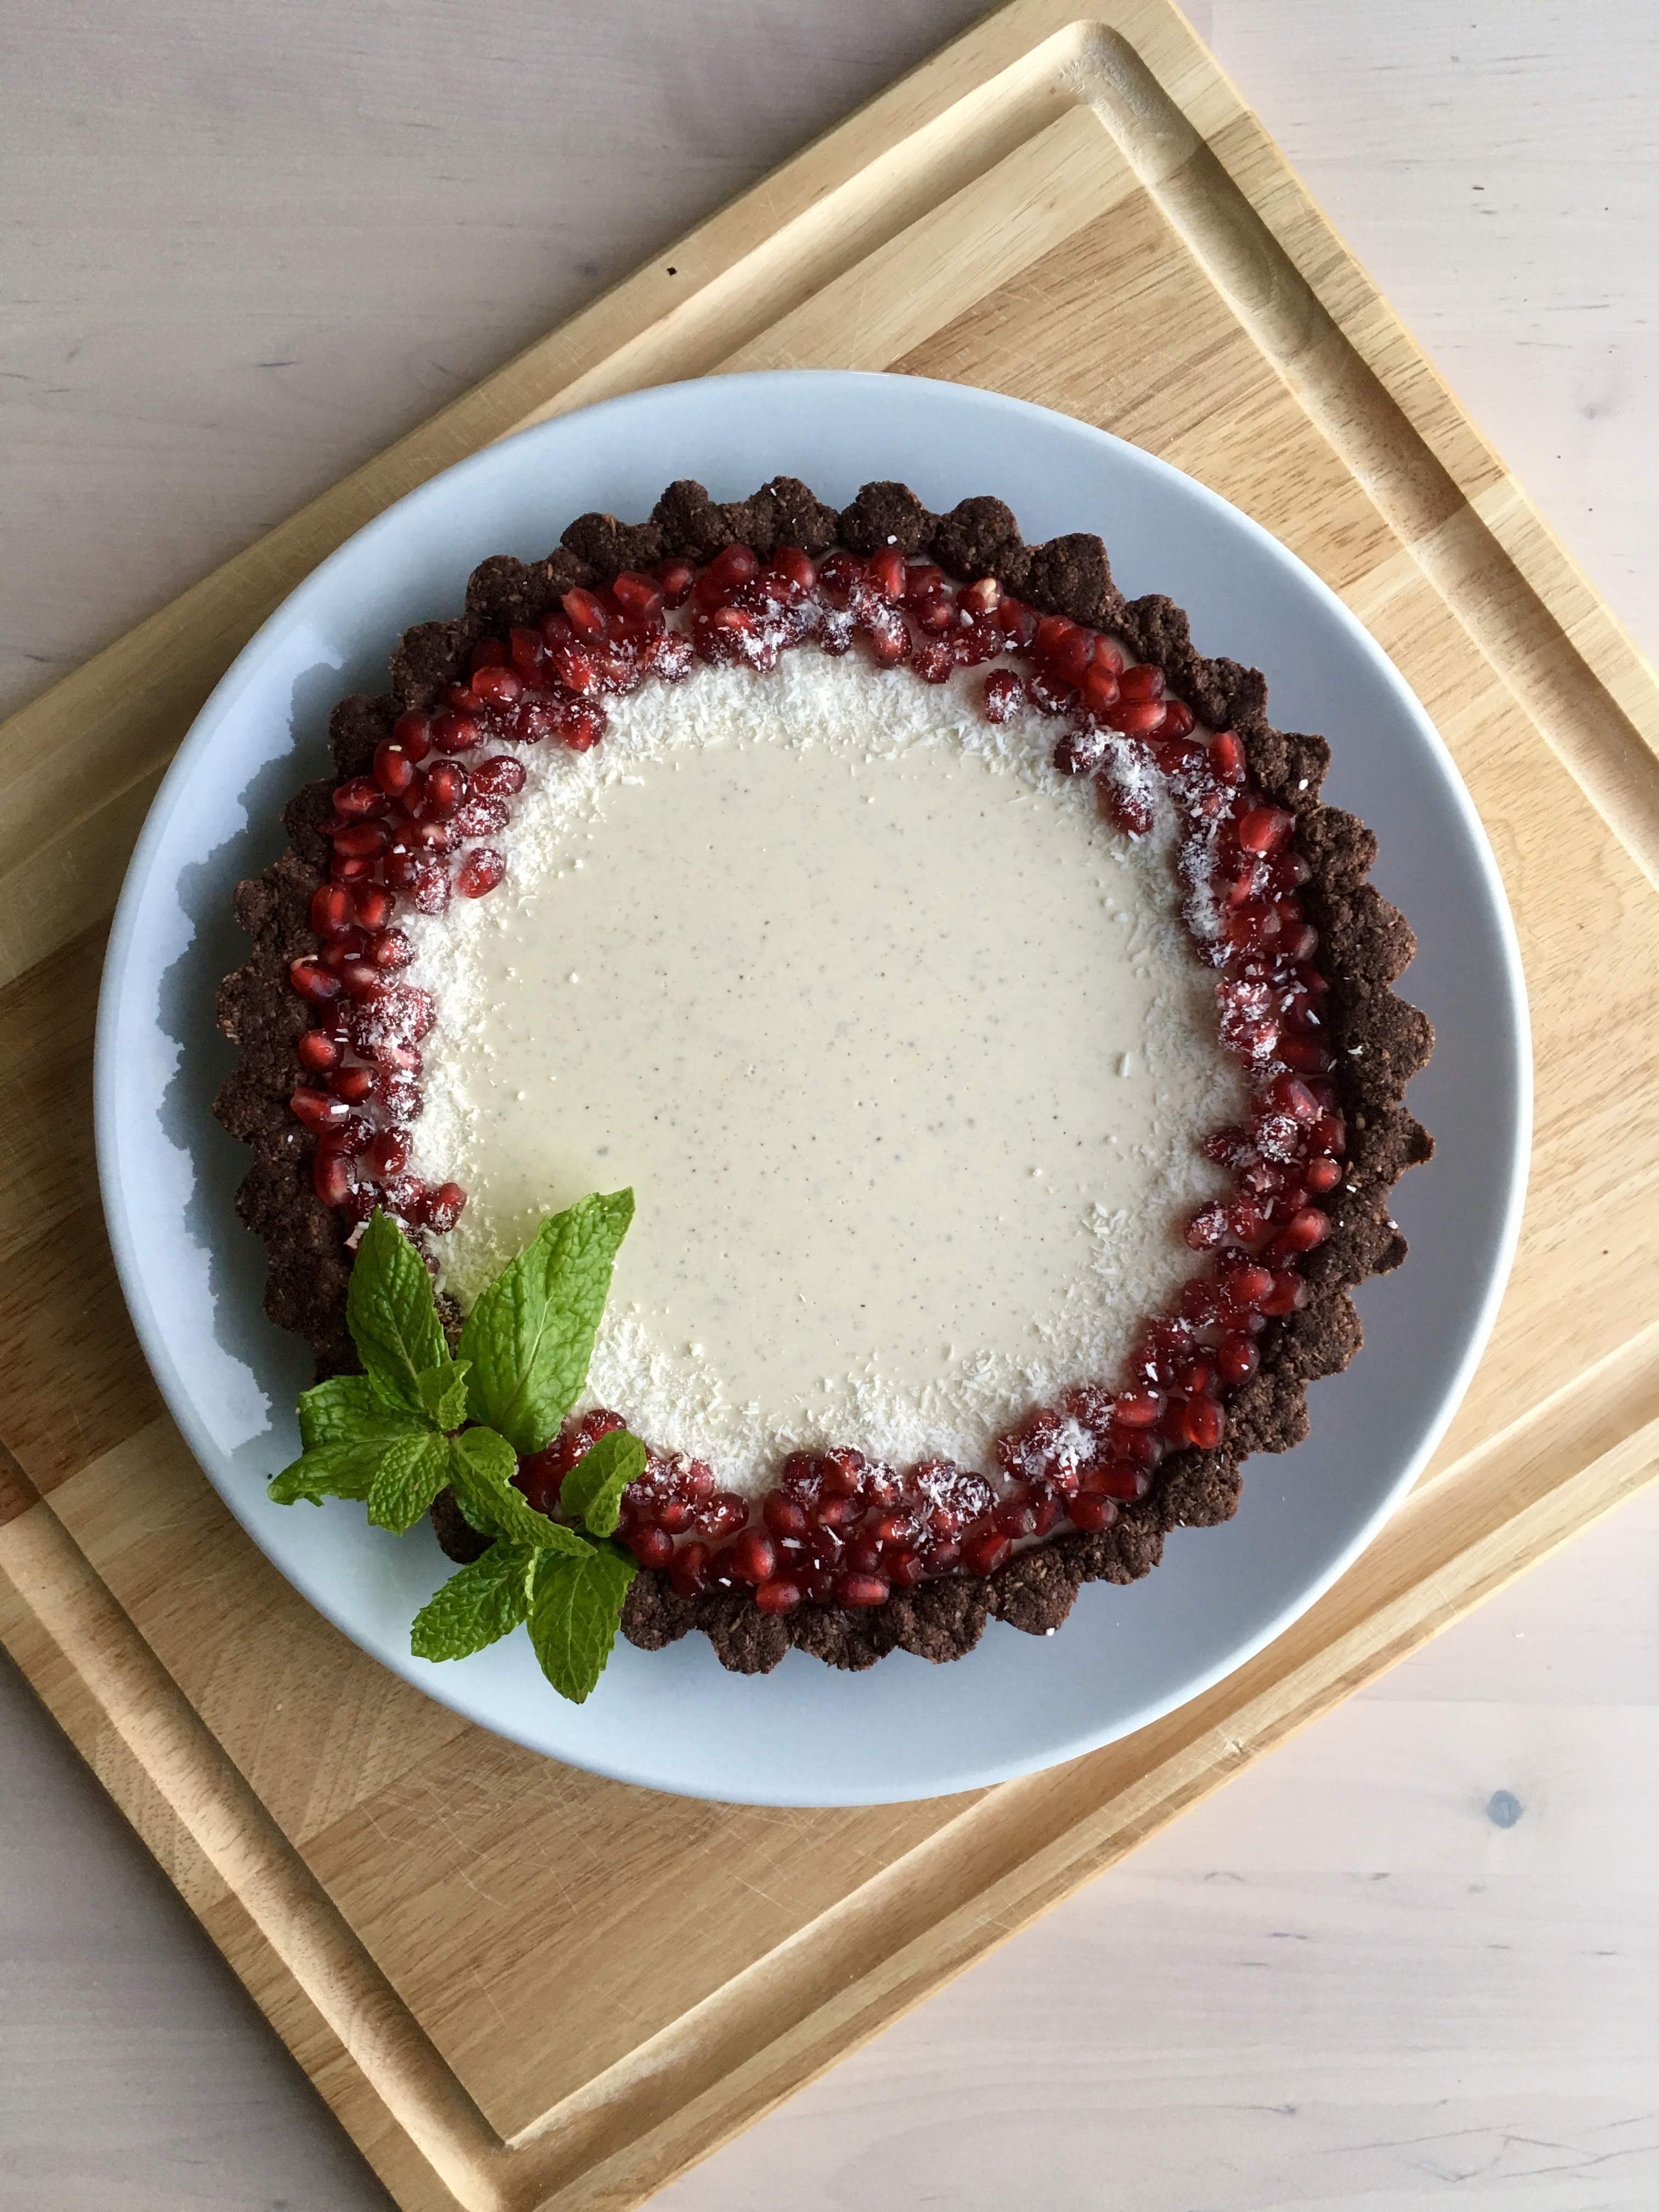
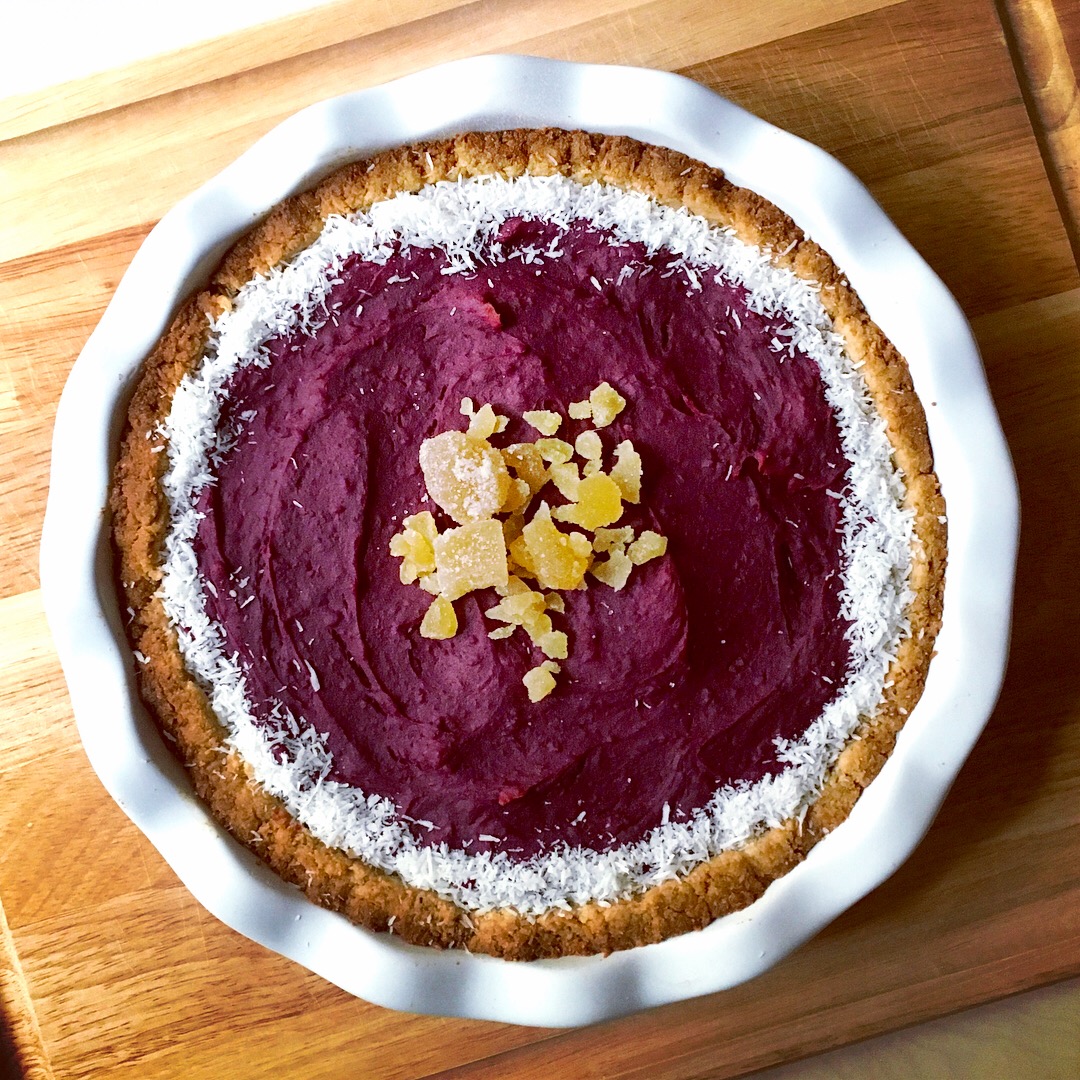
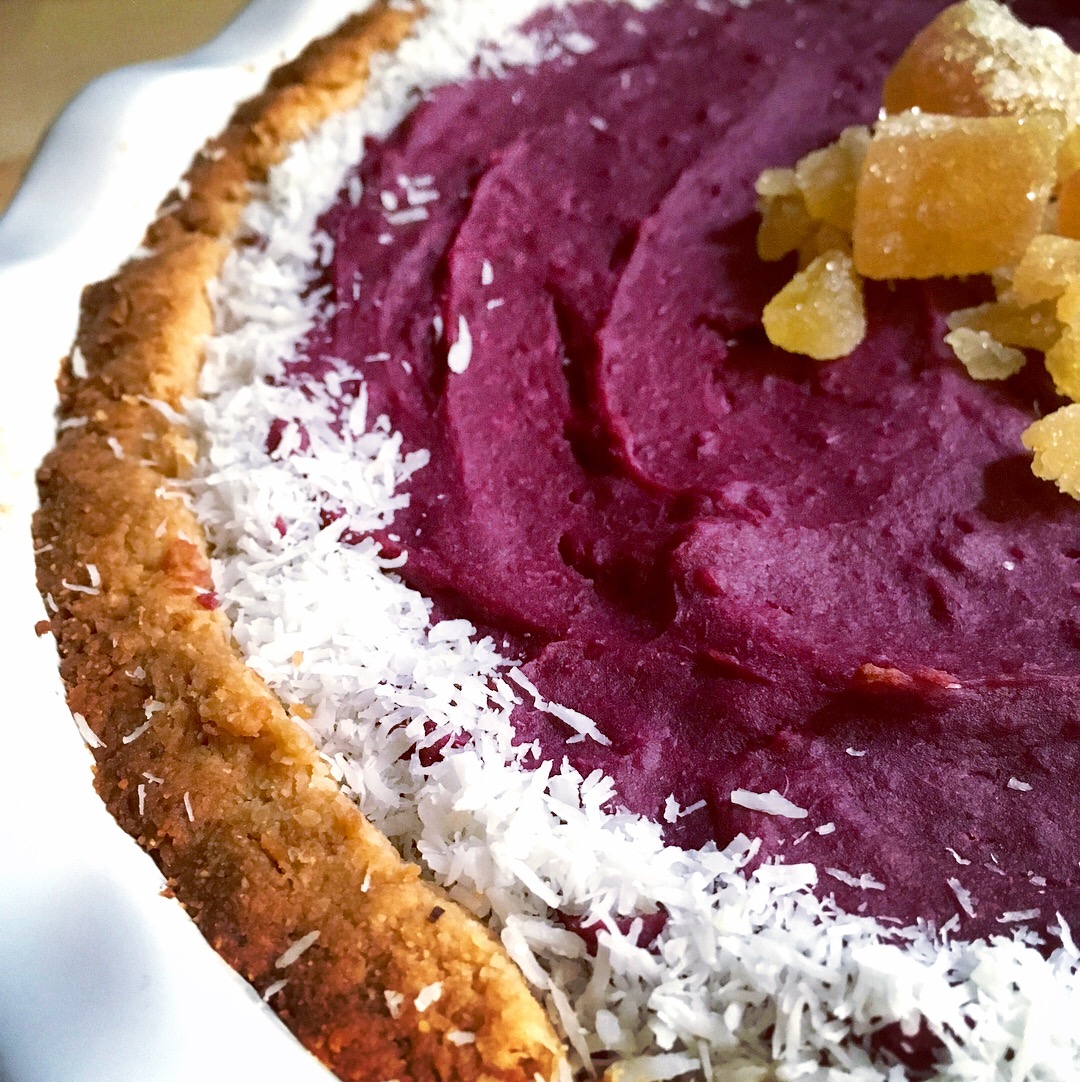
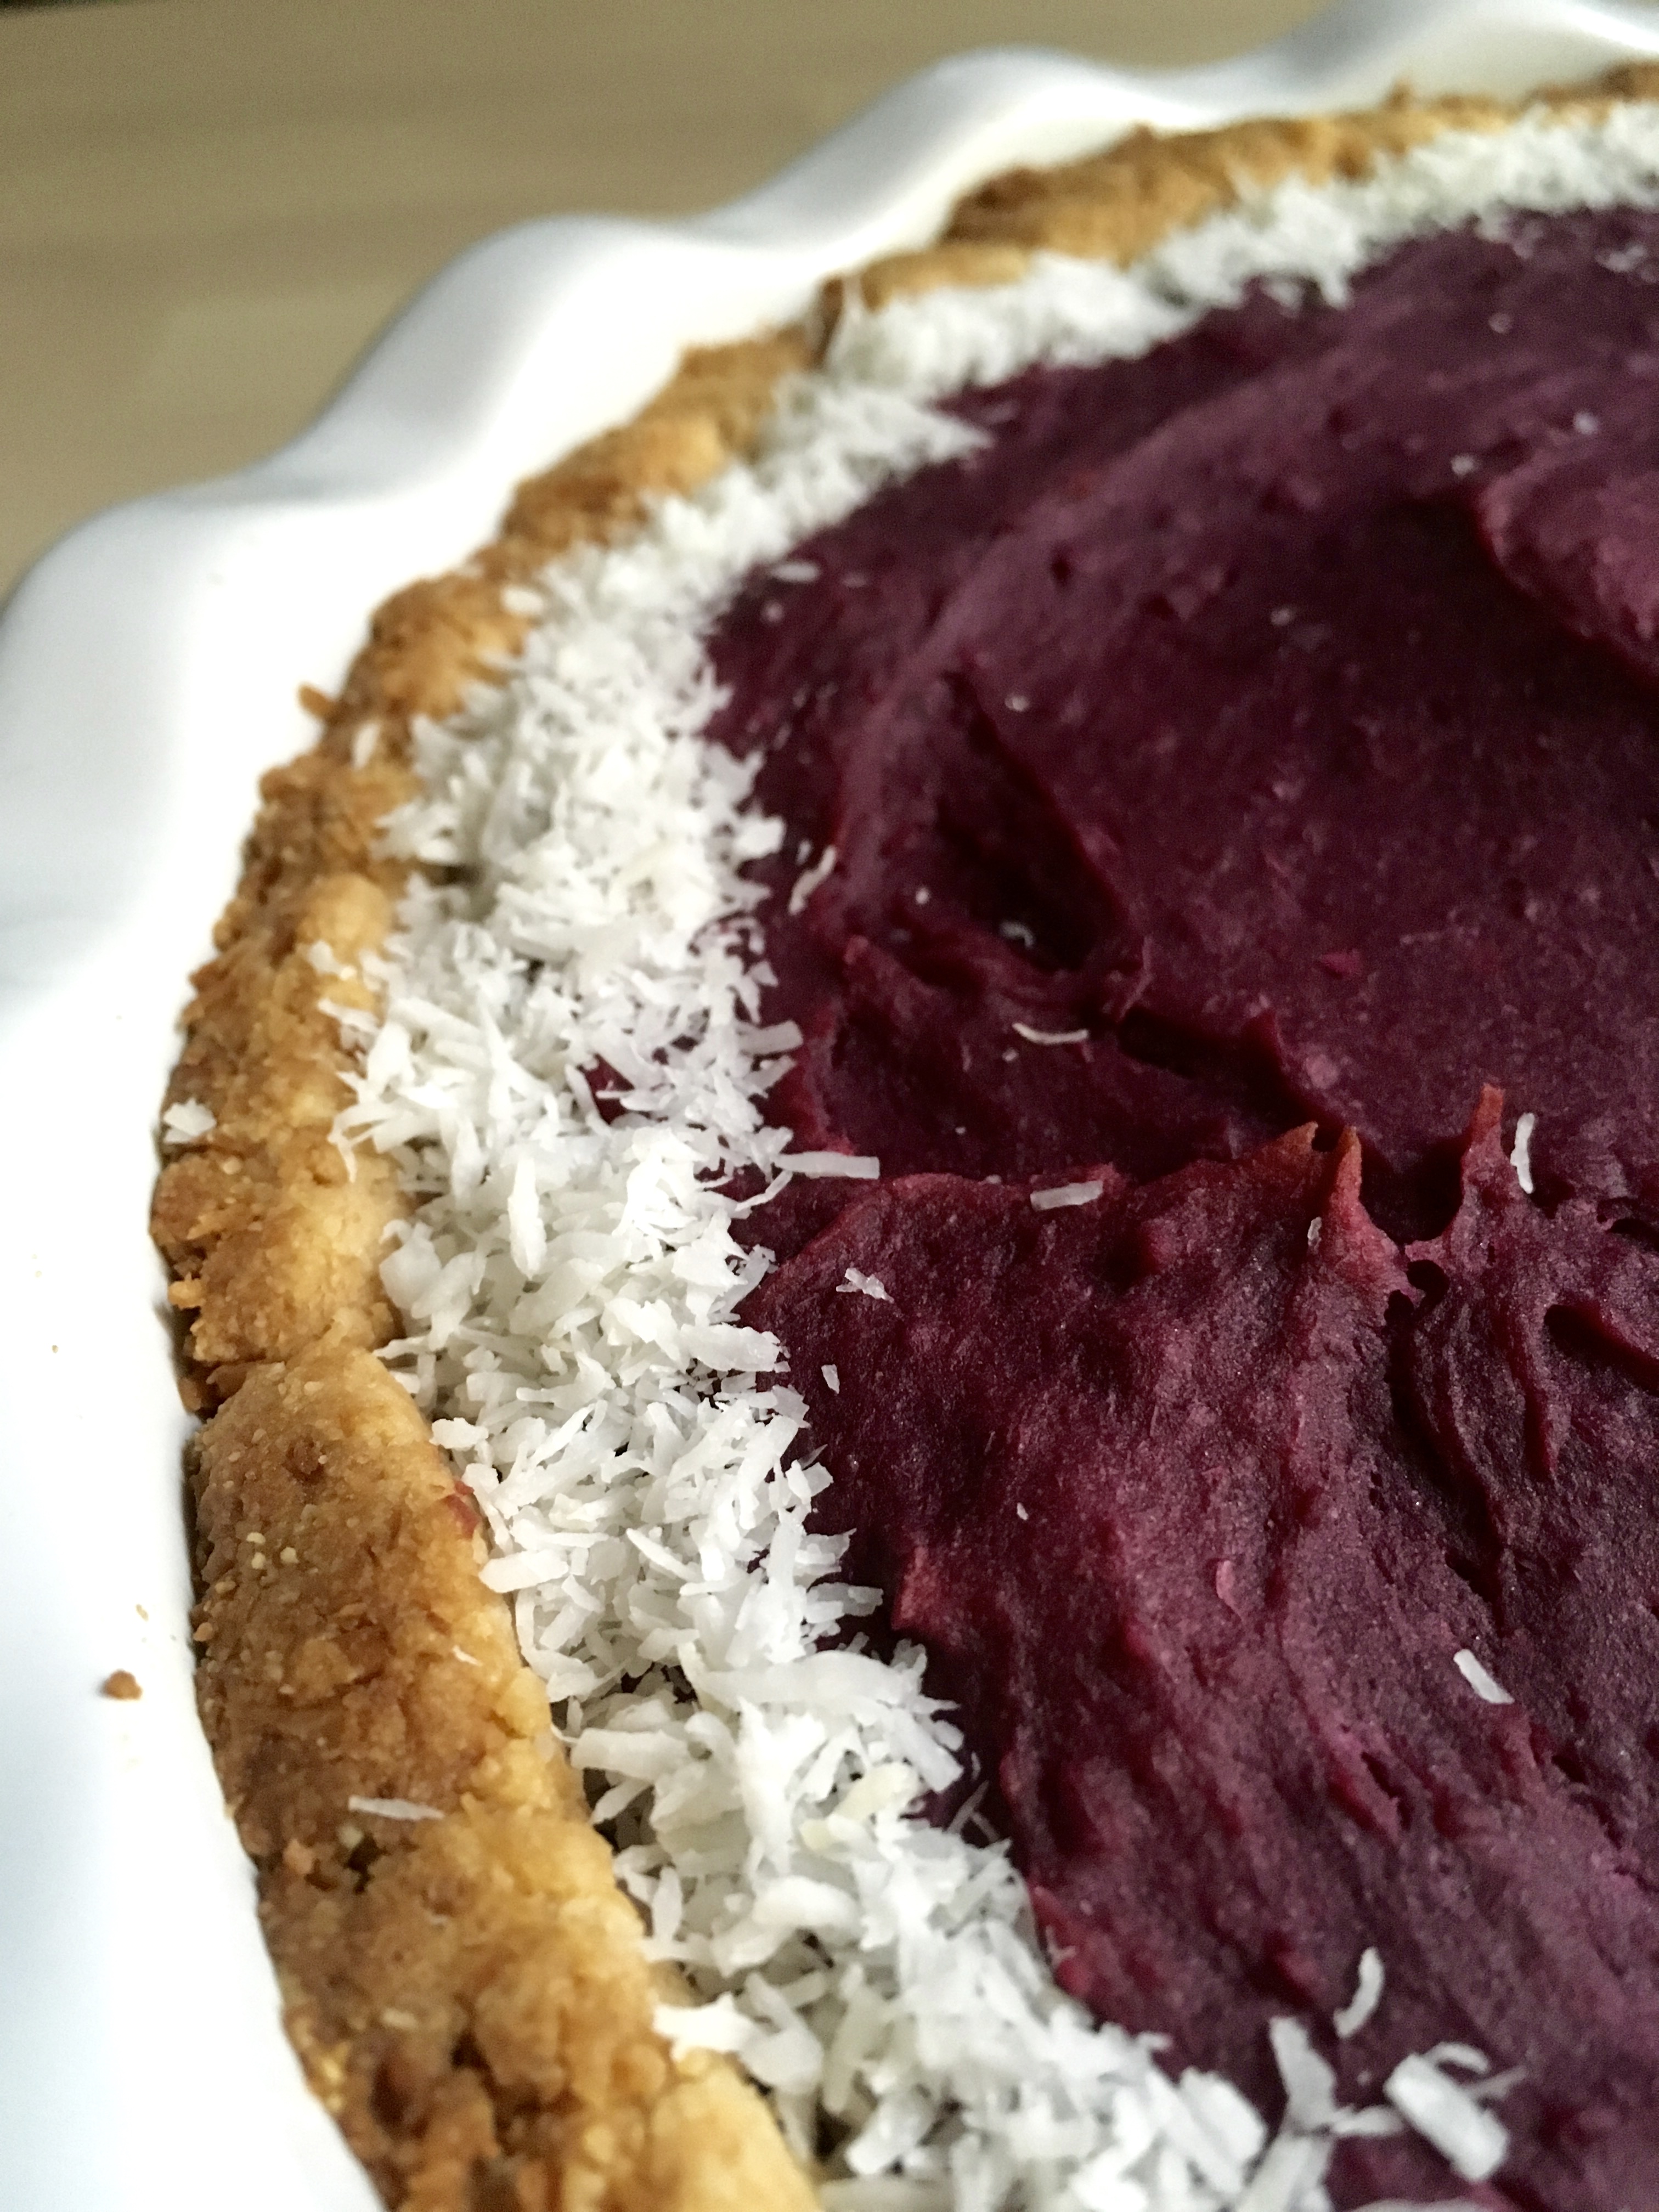
In other news, it’s December – wowow weird, how did that happen. I am trying to stay in the mood with appropriately seasonal stuff, even if this year is totally festivity mood-killing. I did put up lights though (period detailing of picture rails for the win, makes an excellent spot for lights and ornaments, since I didn’t want to deal with the hoohaw of getting a tree) and I’m making all the cranberry things, like this pie.

one of the most soothing things I do on a regular basis

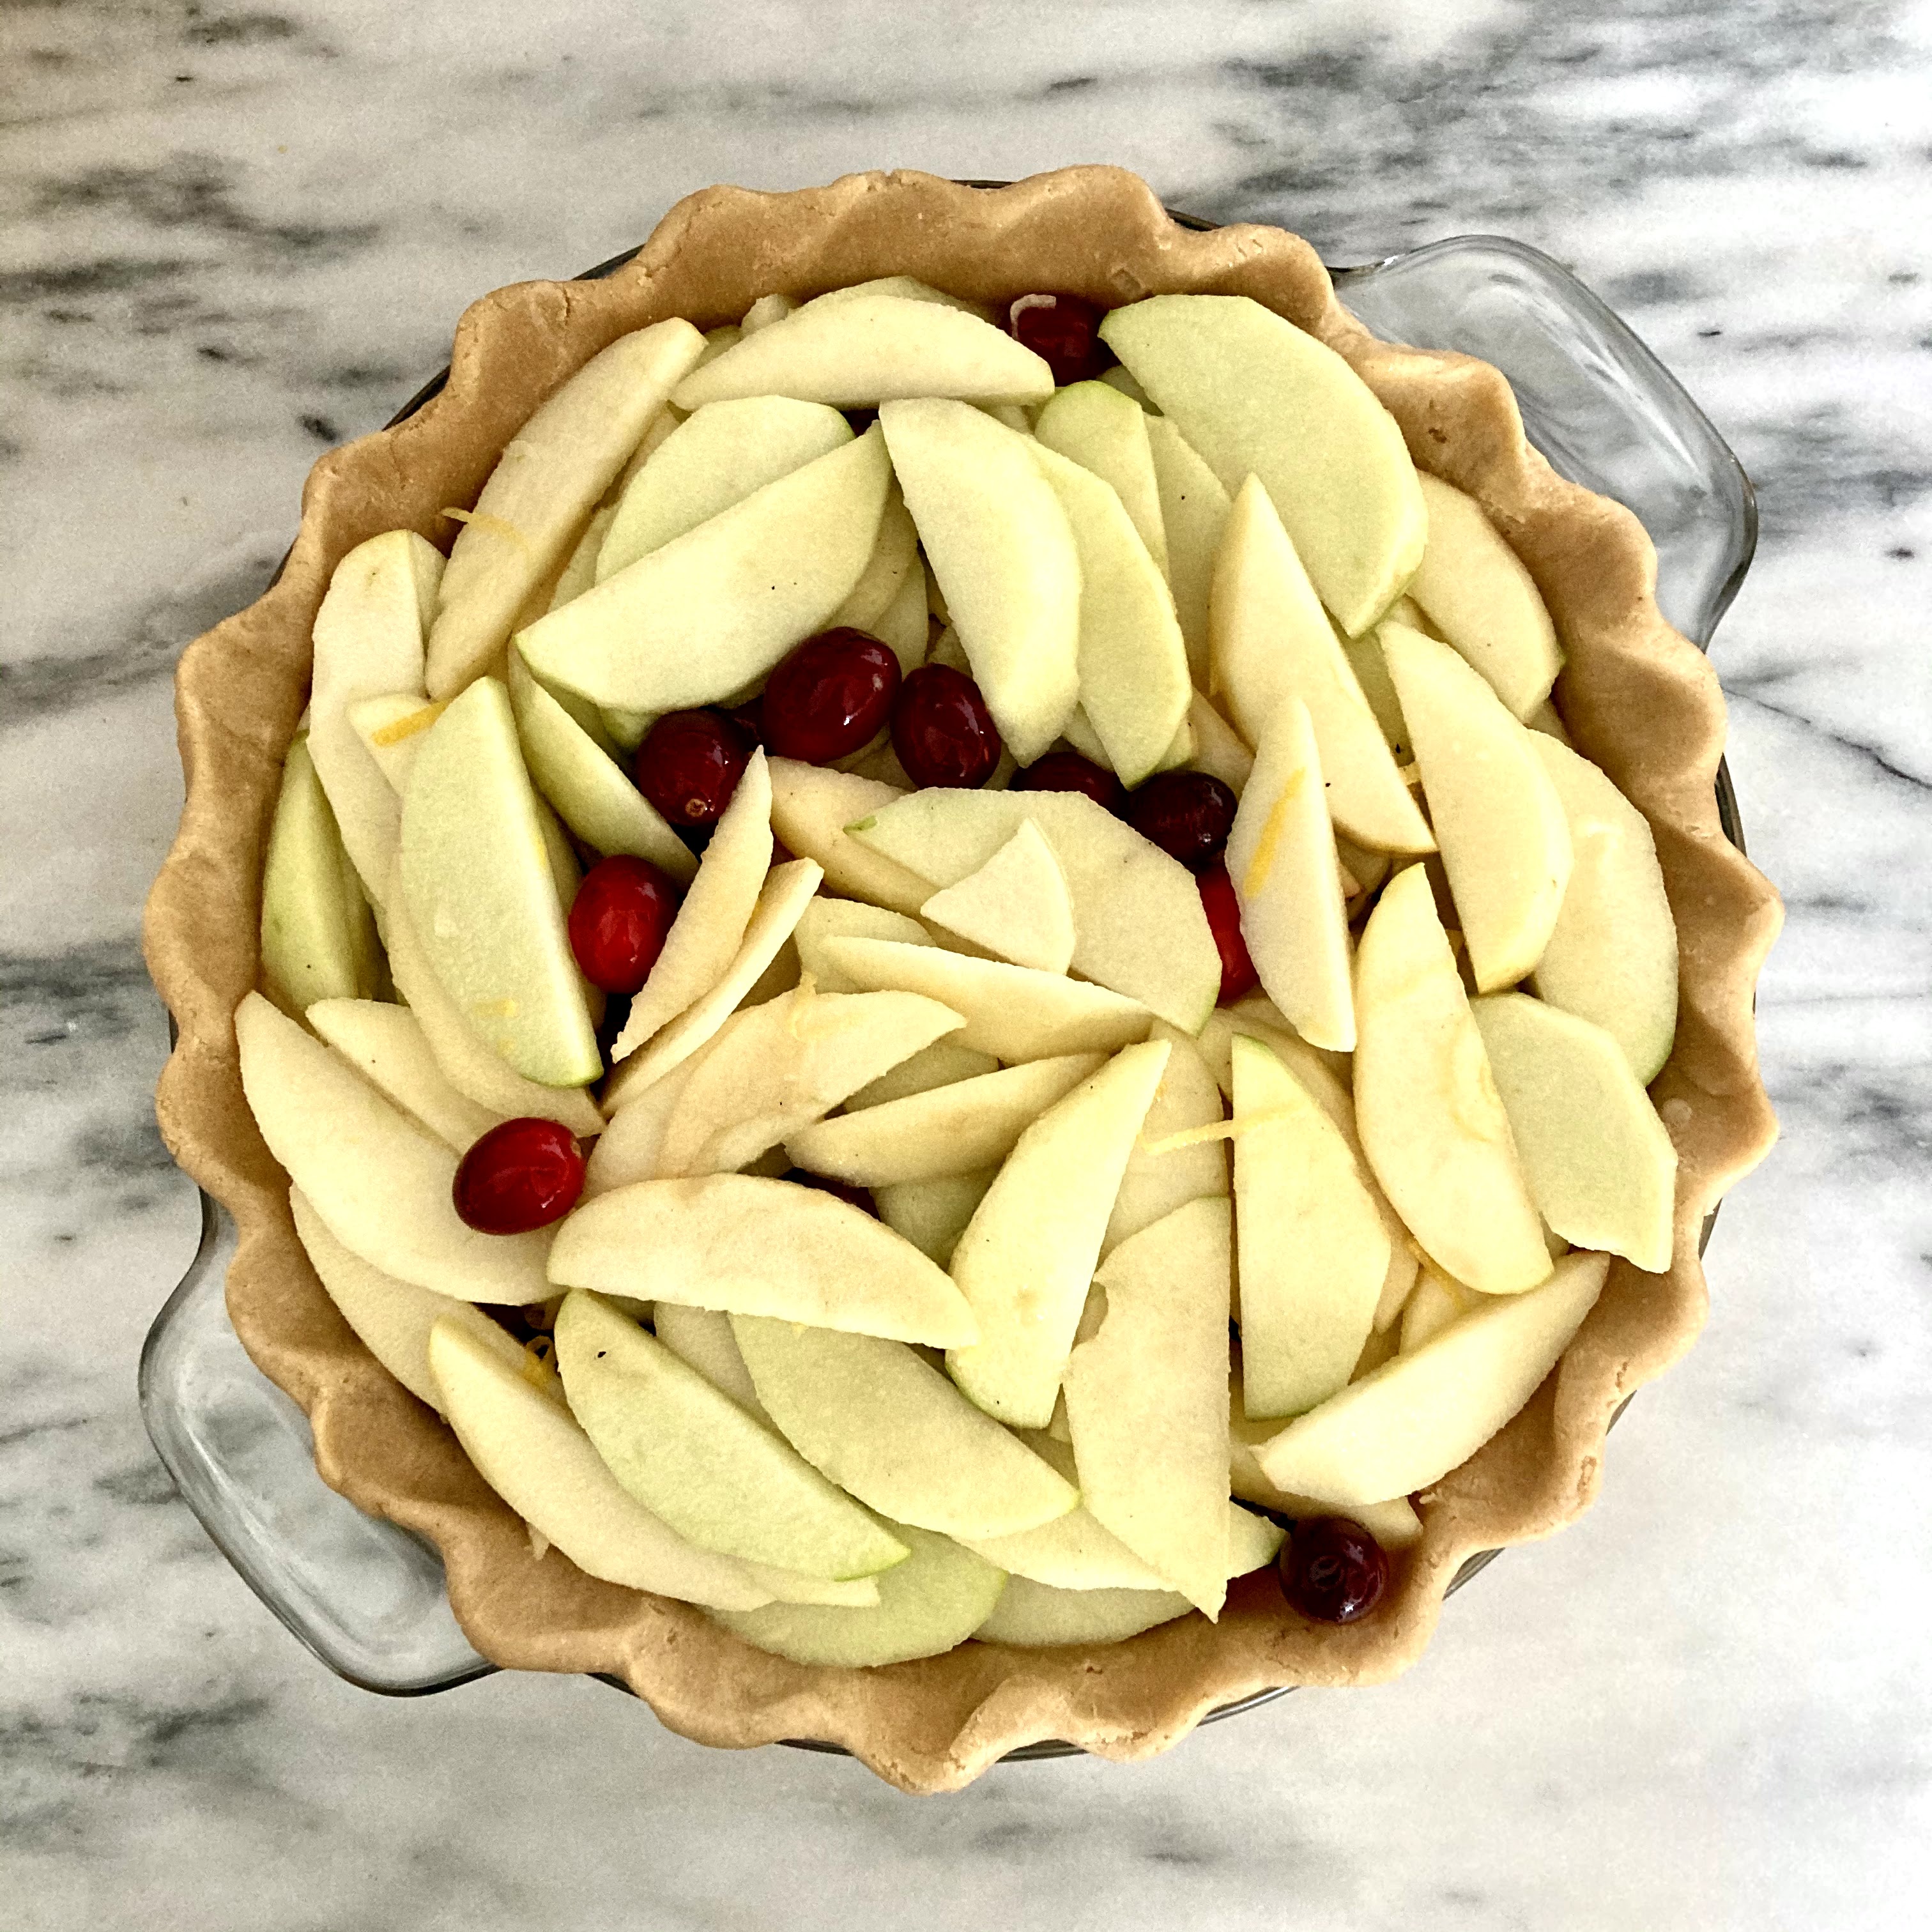
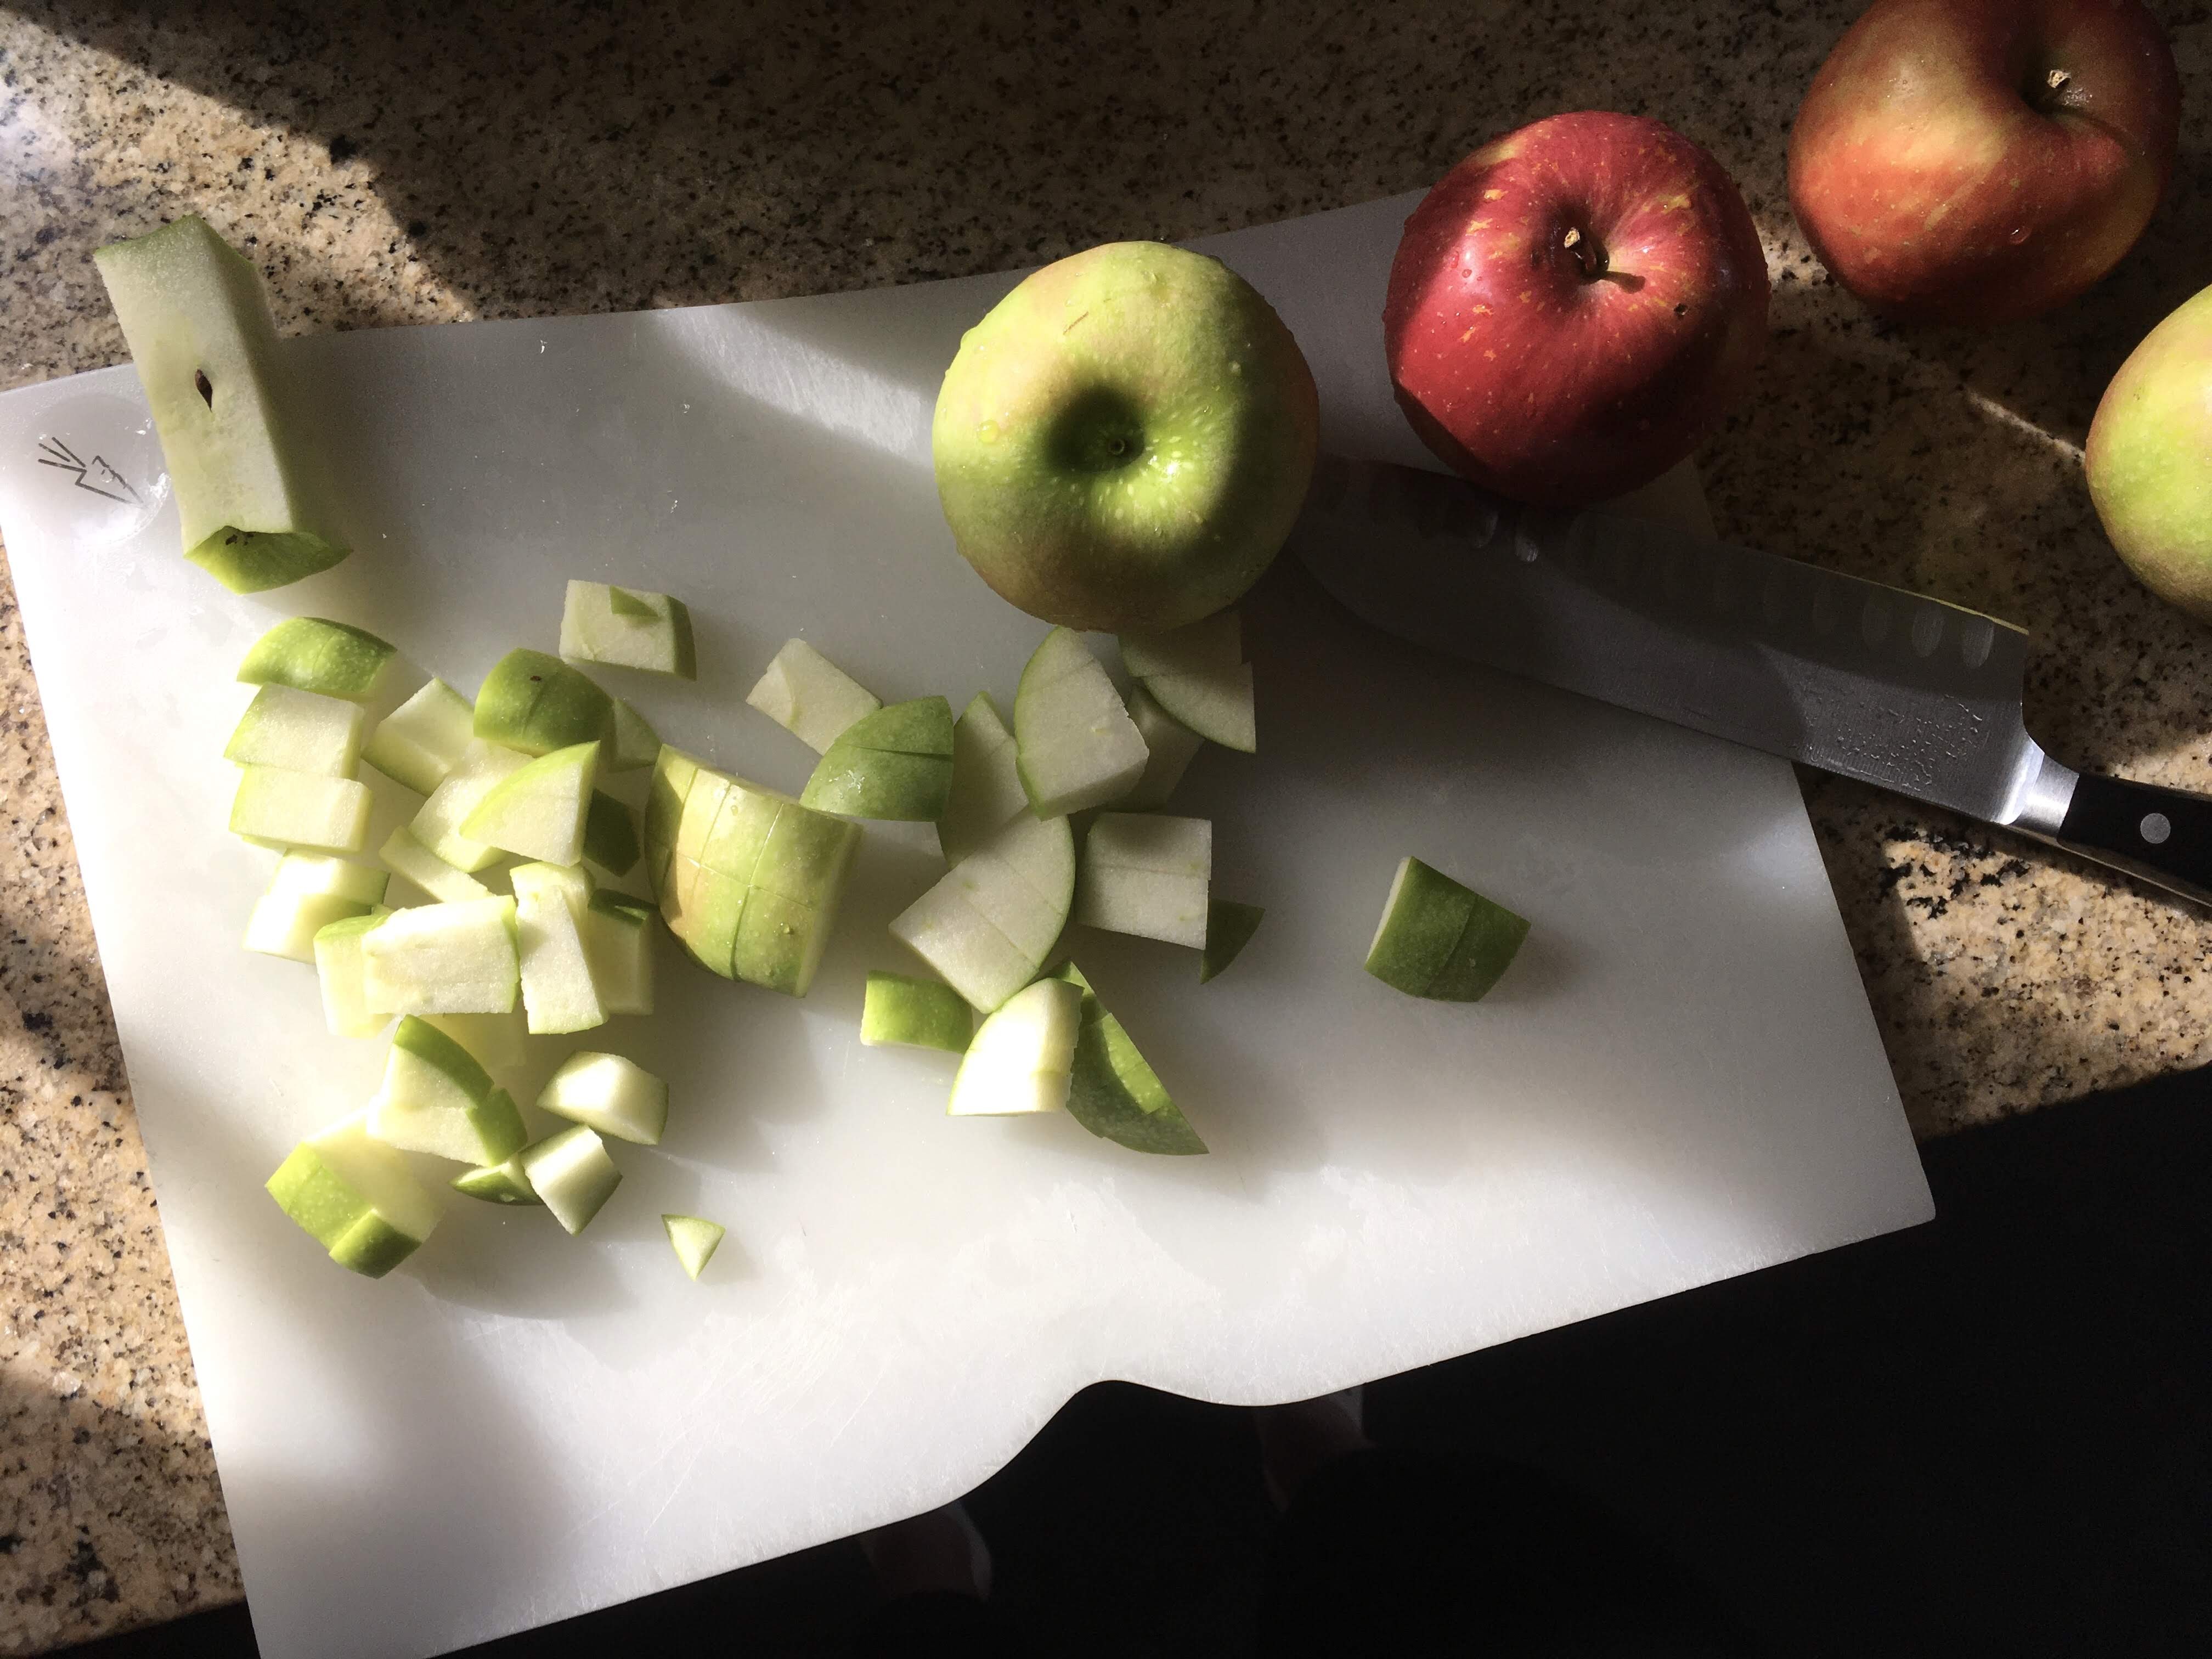
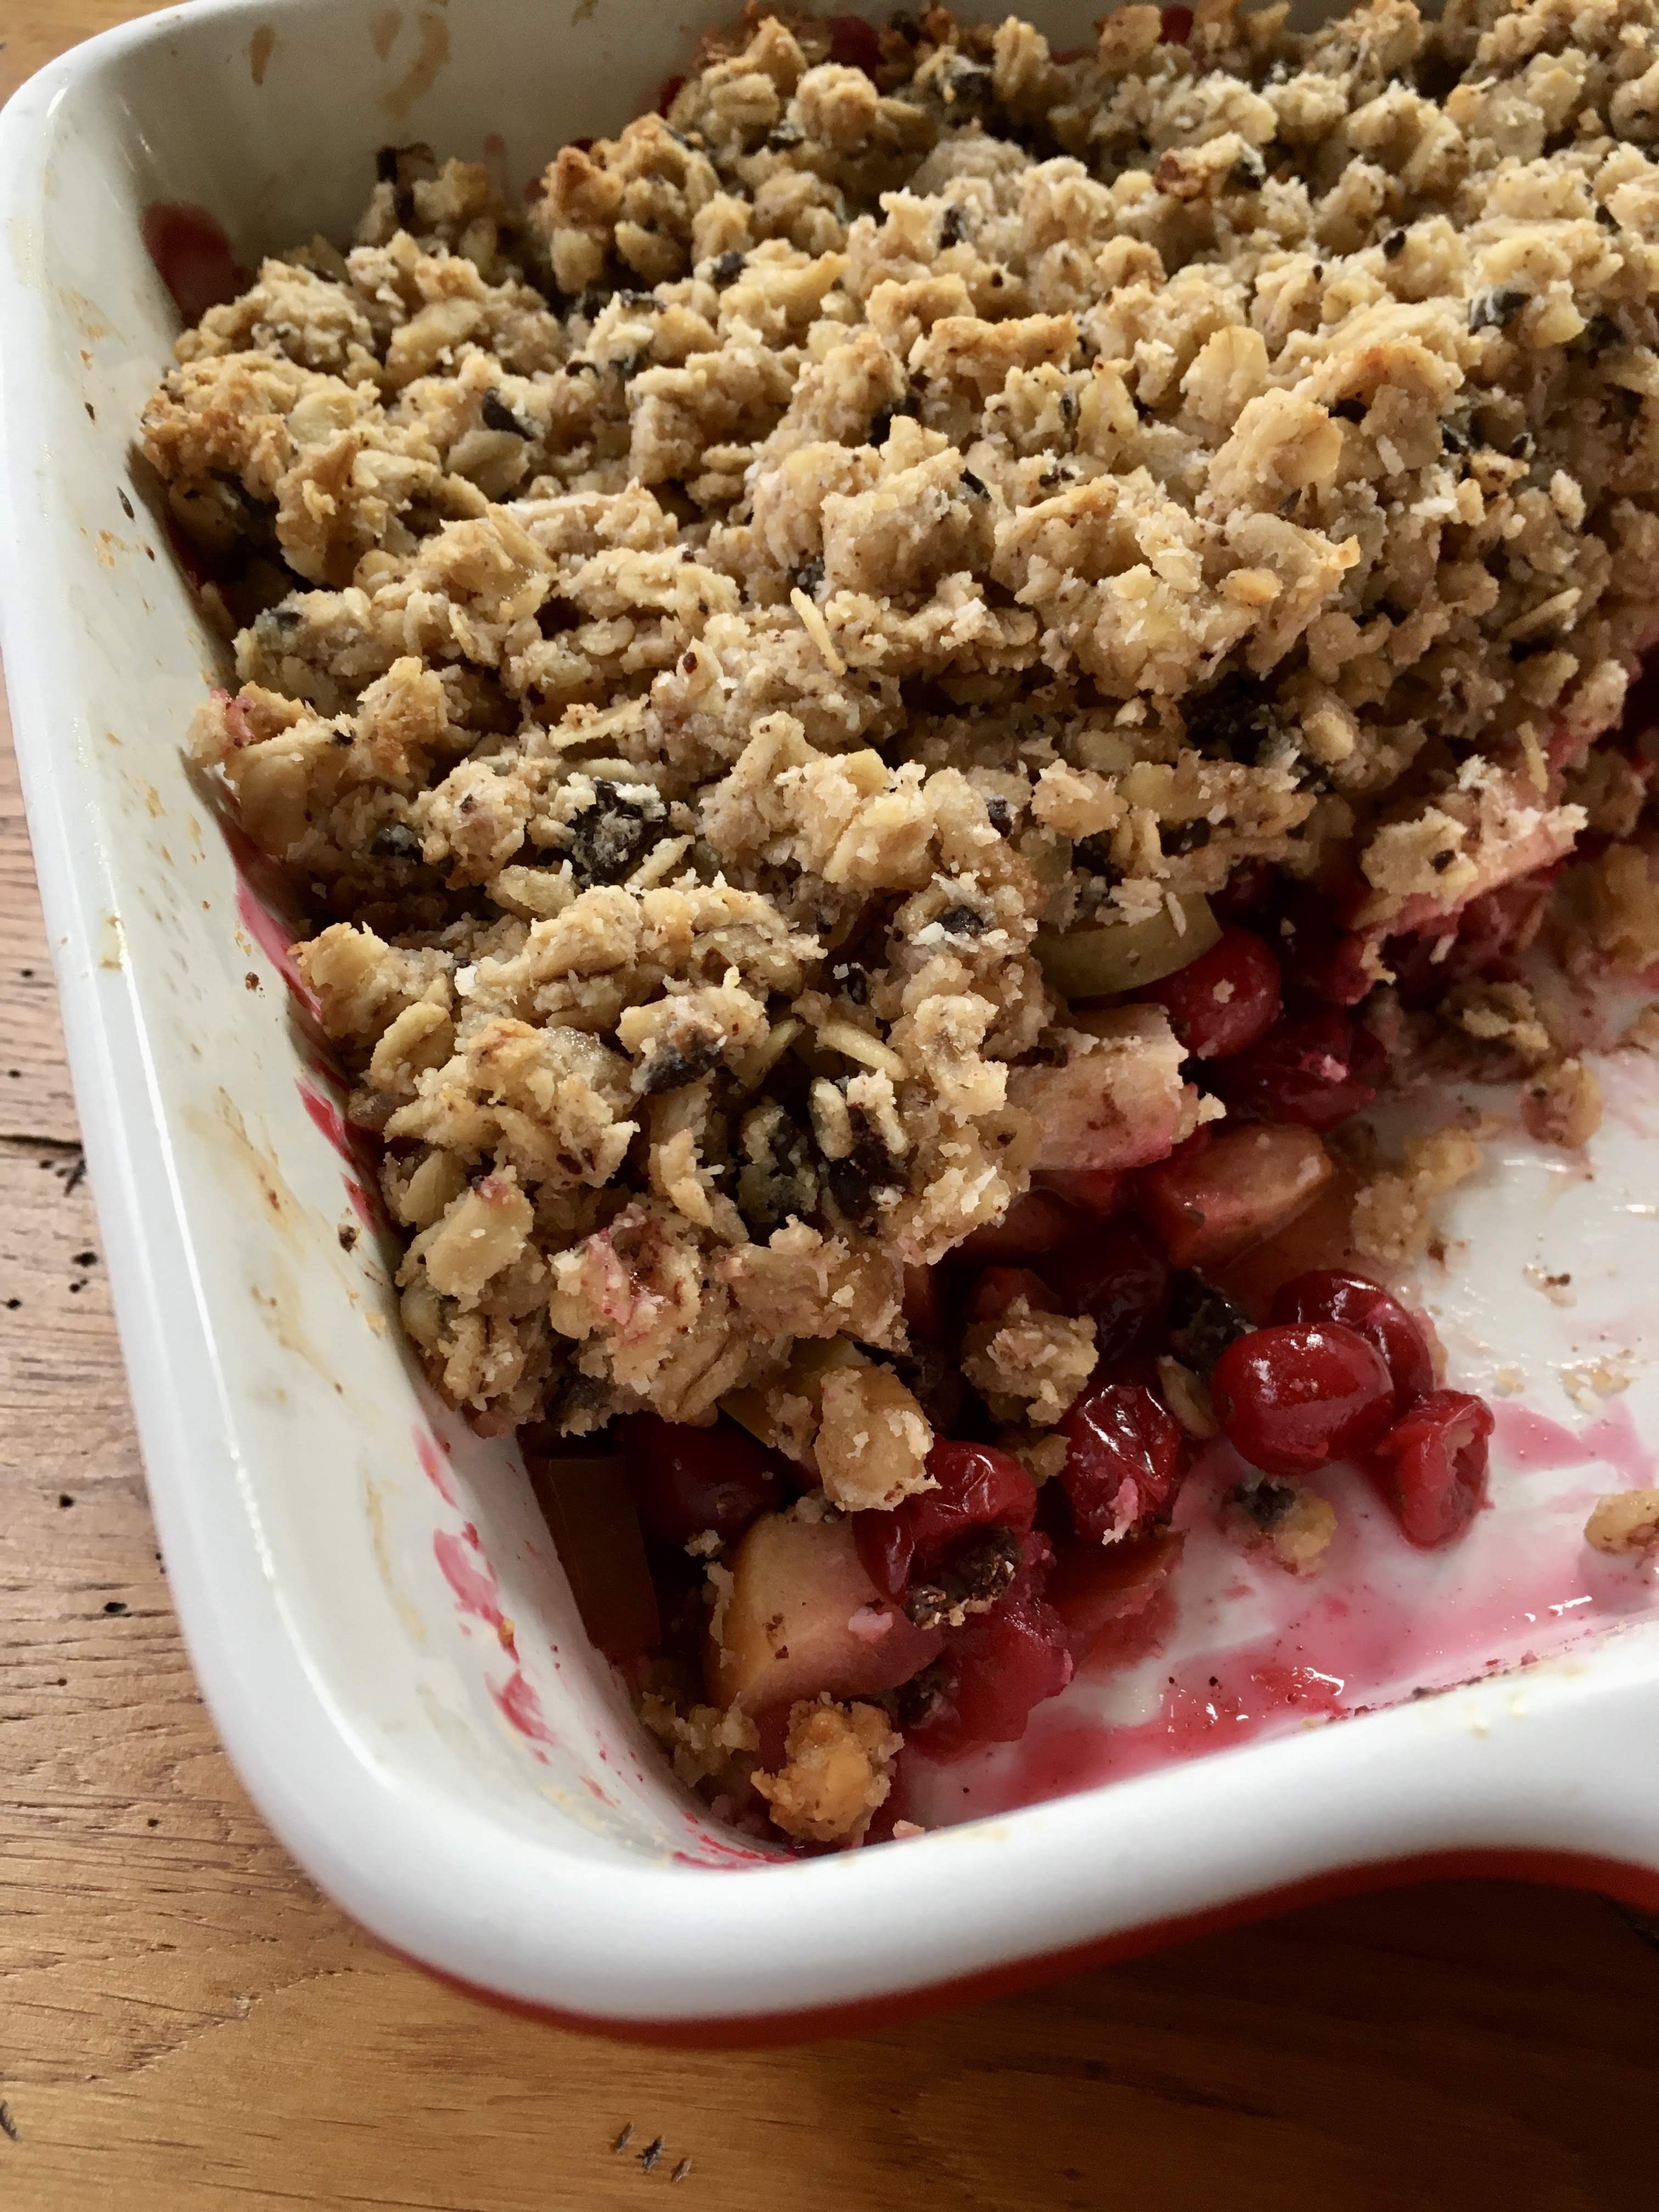
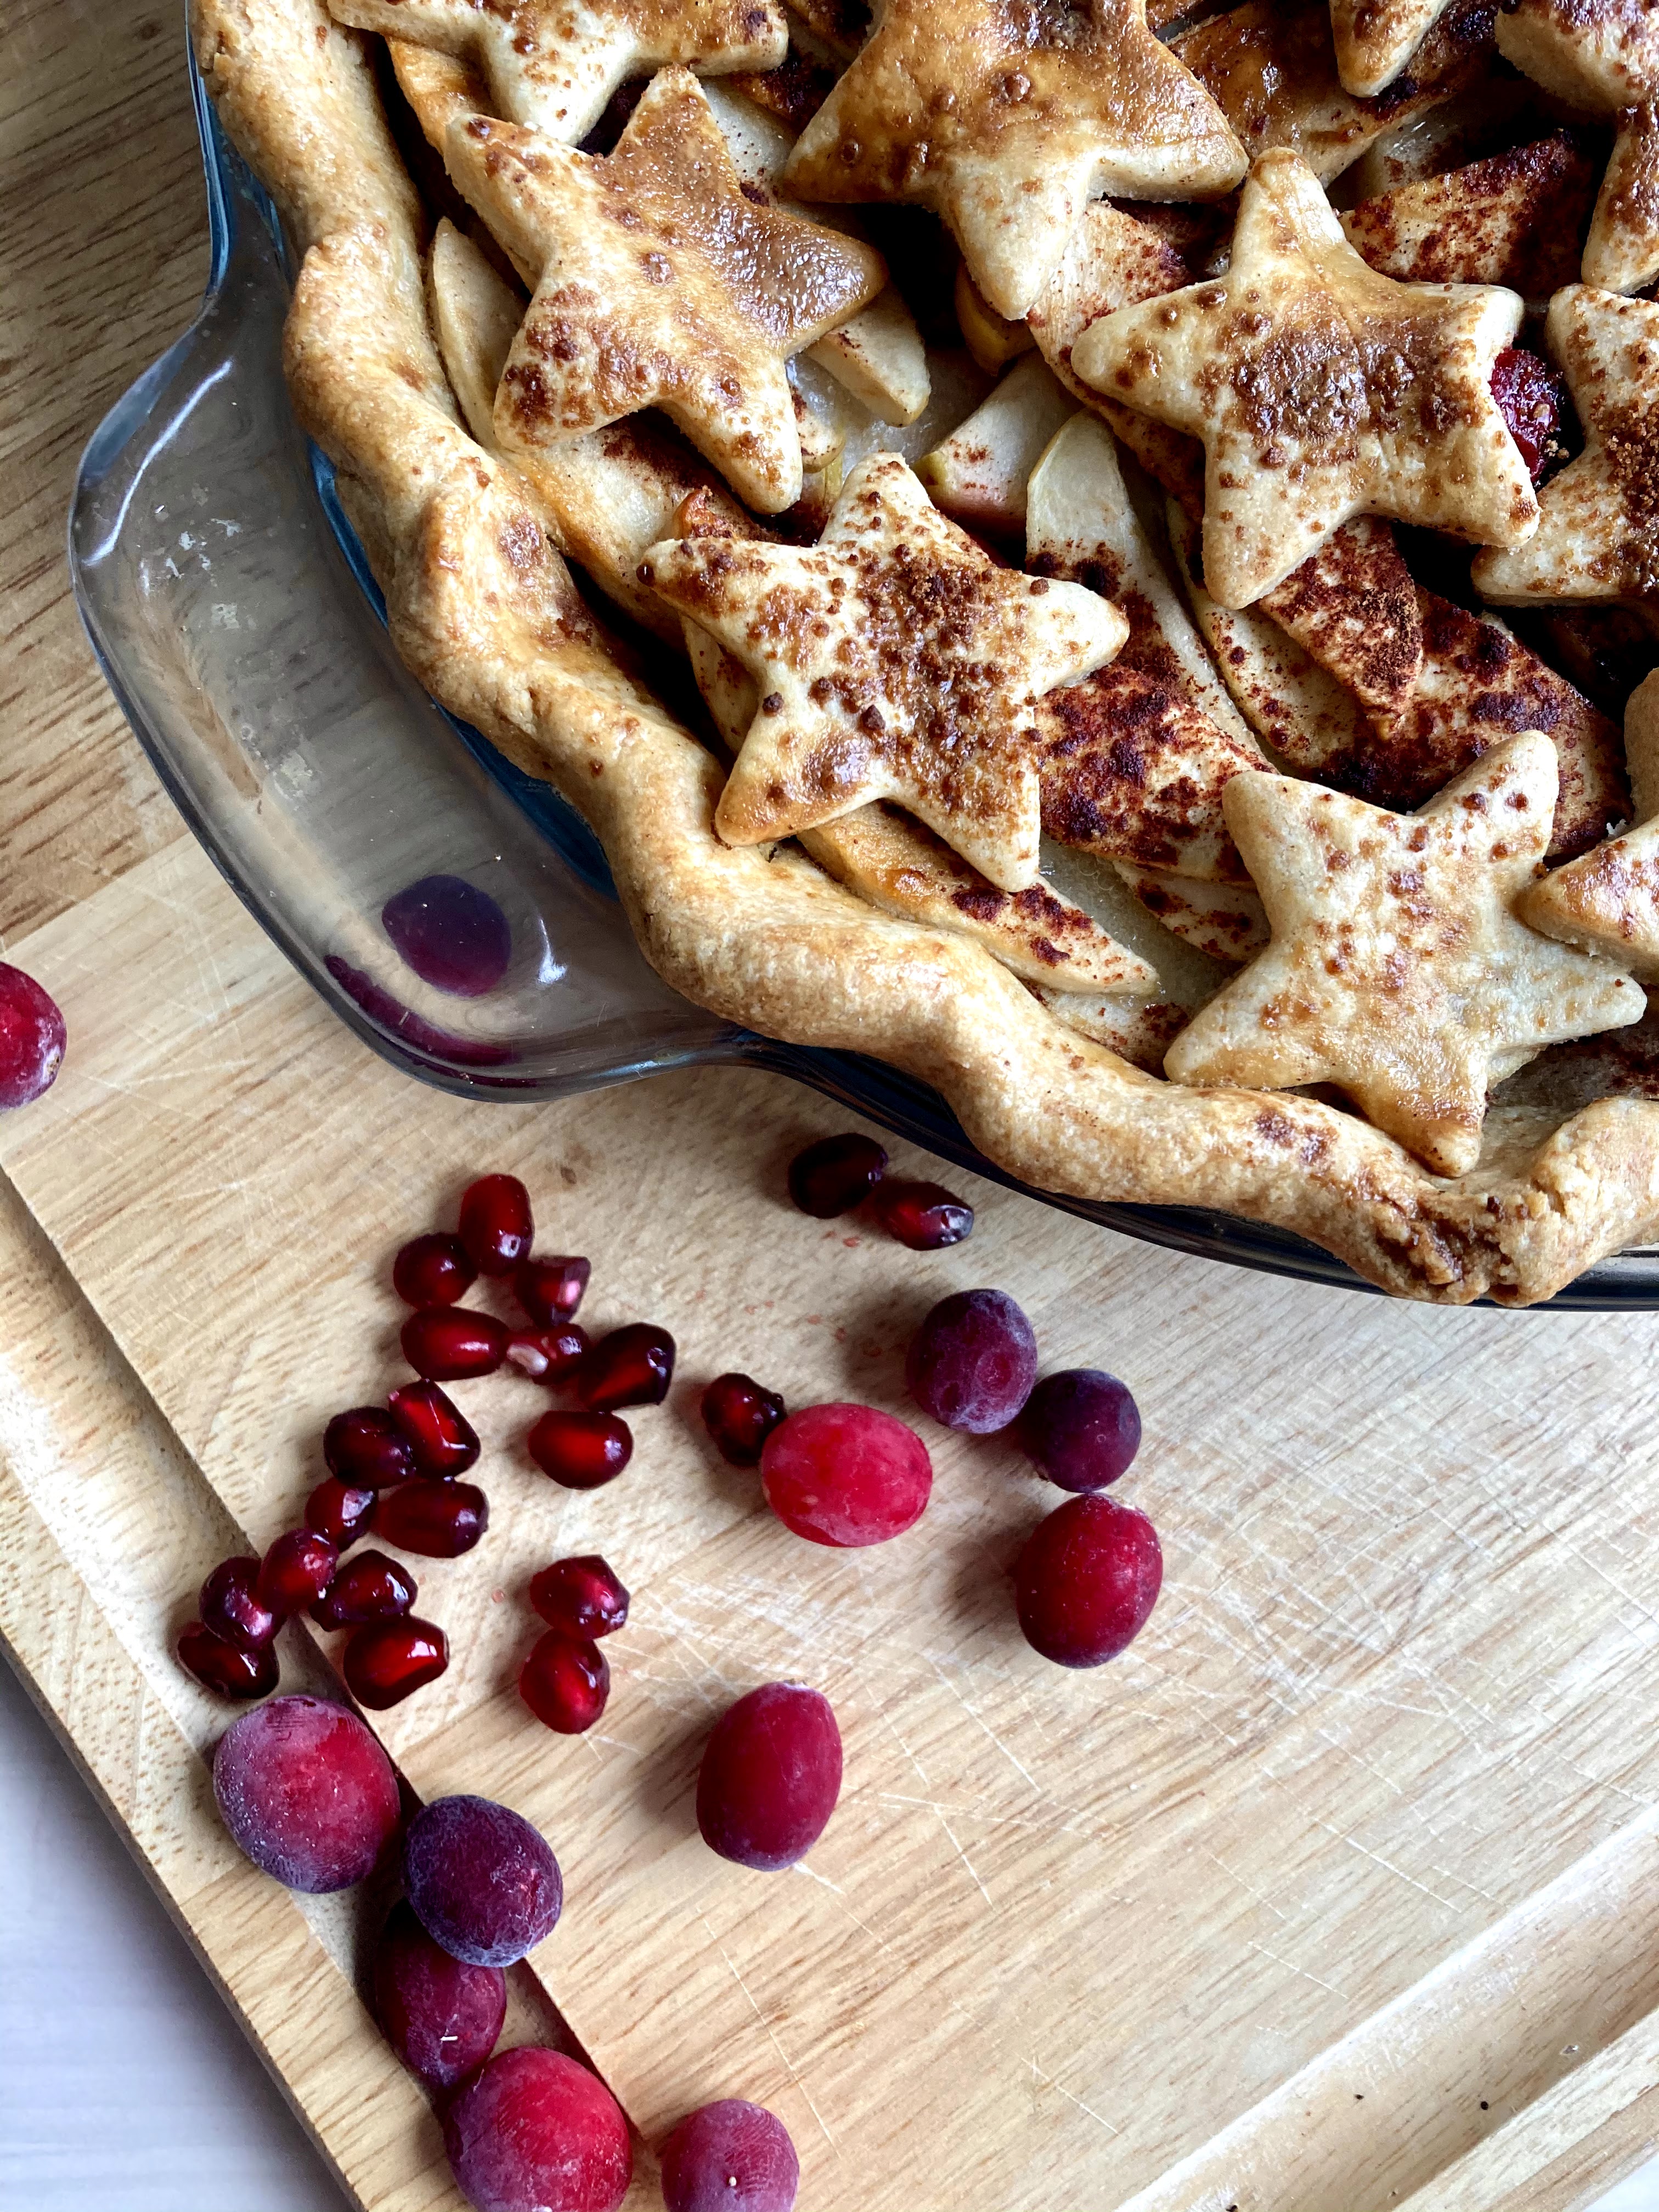
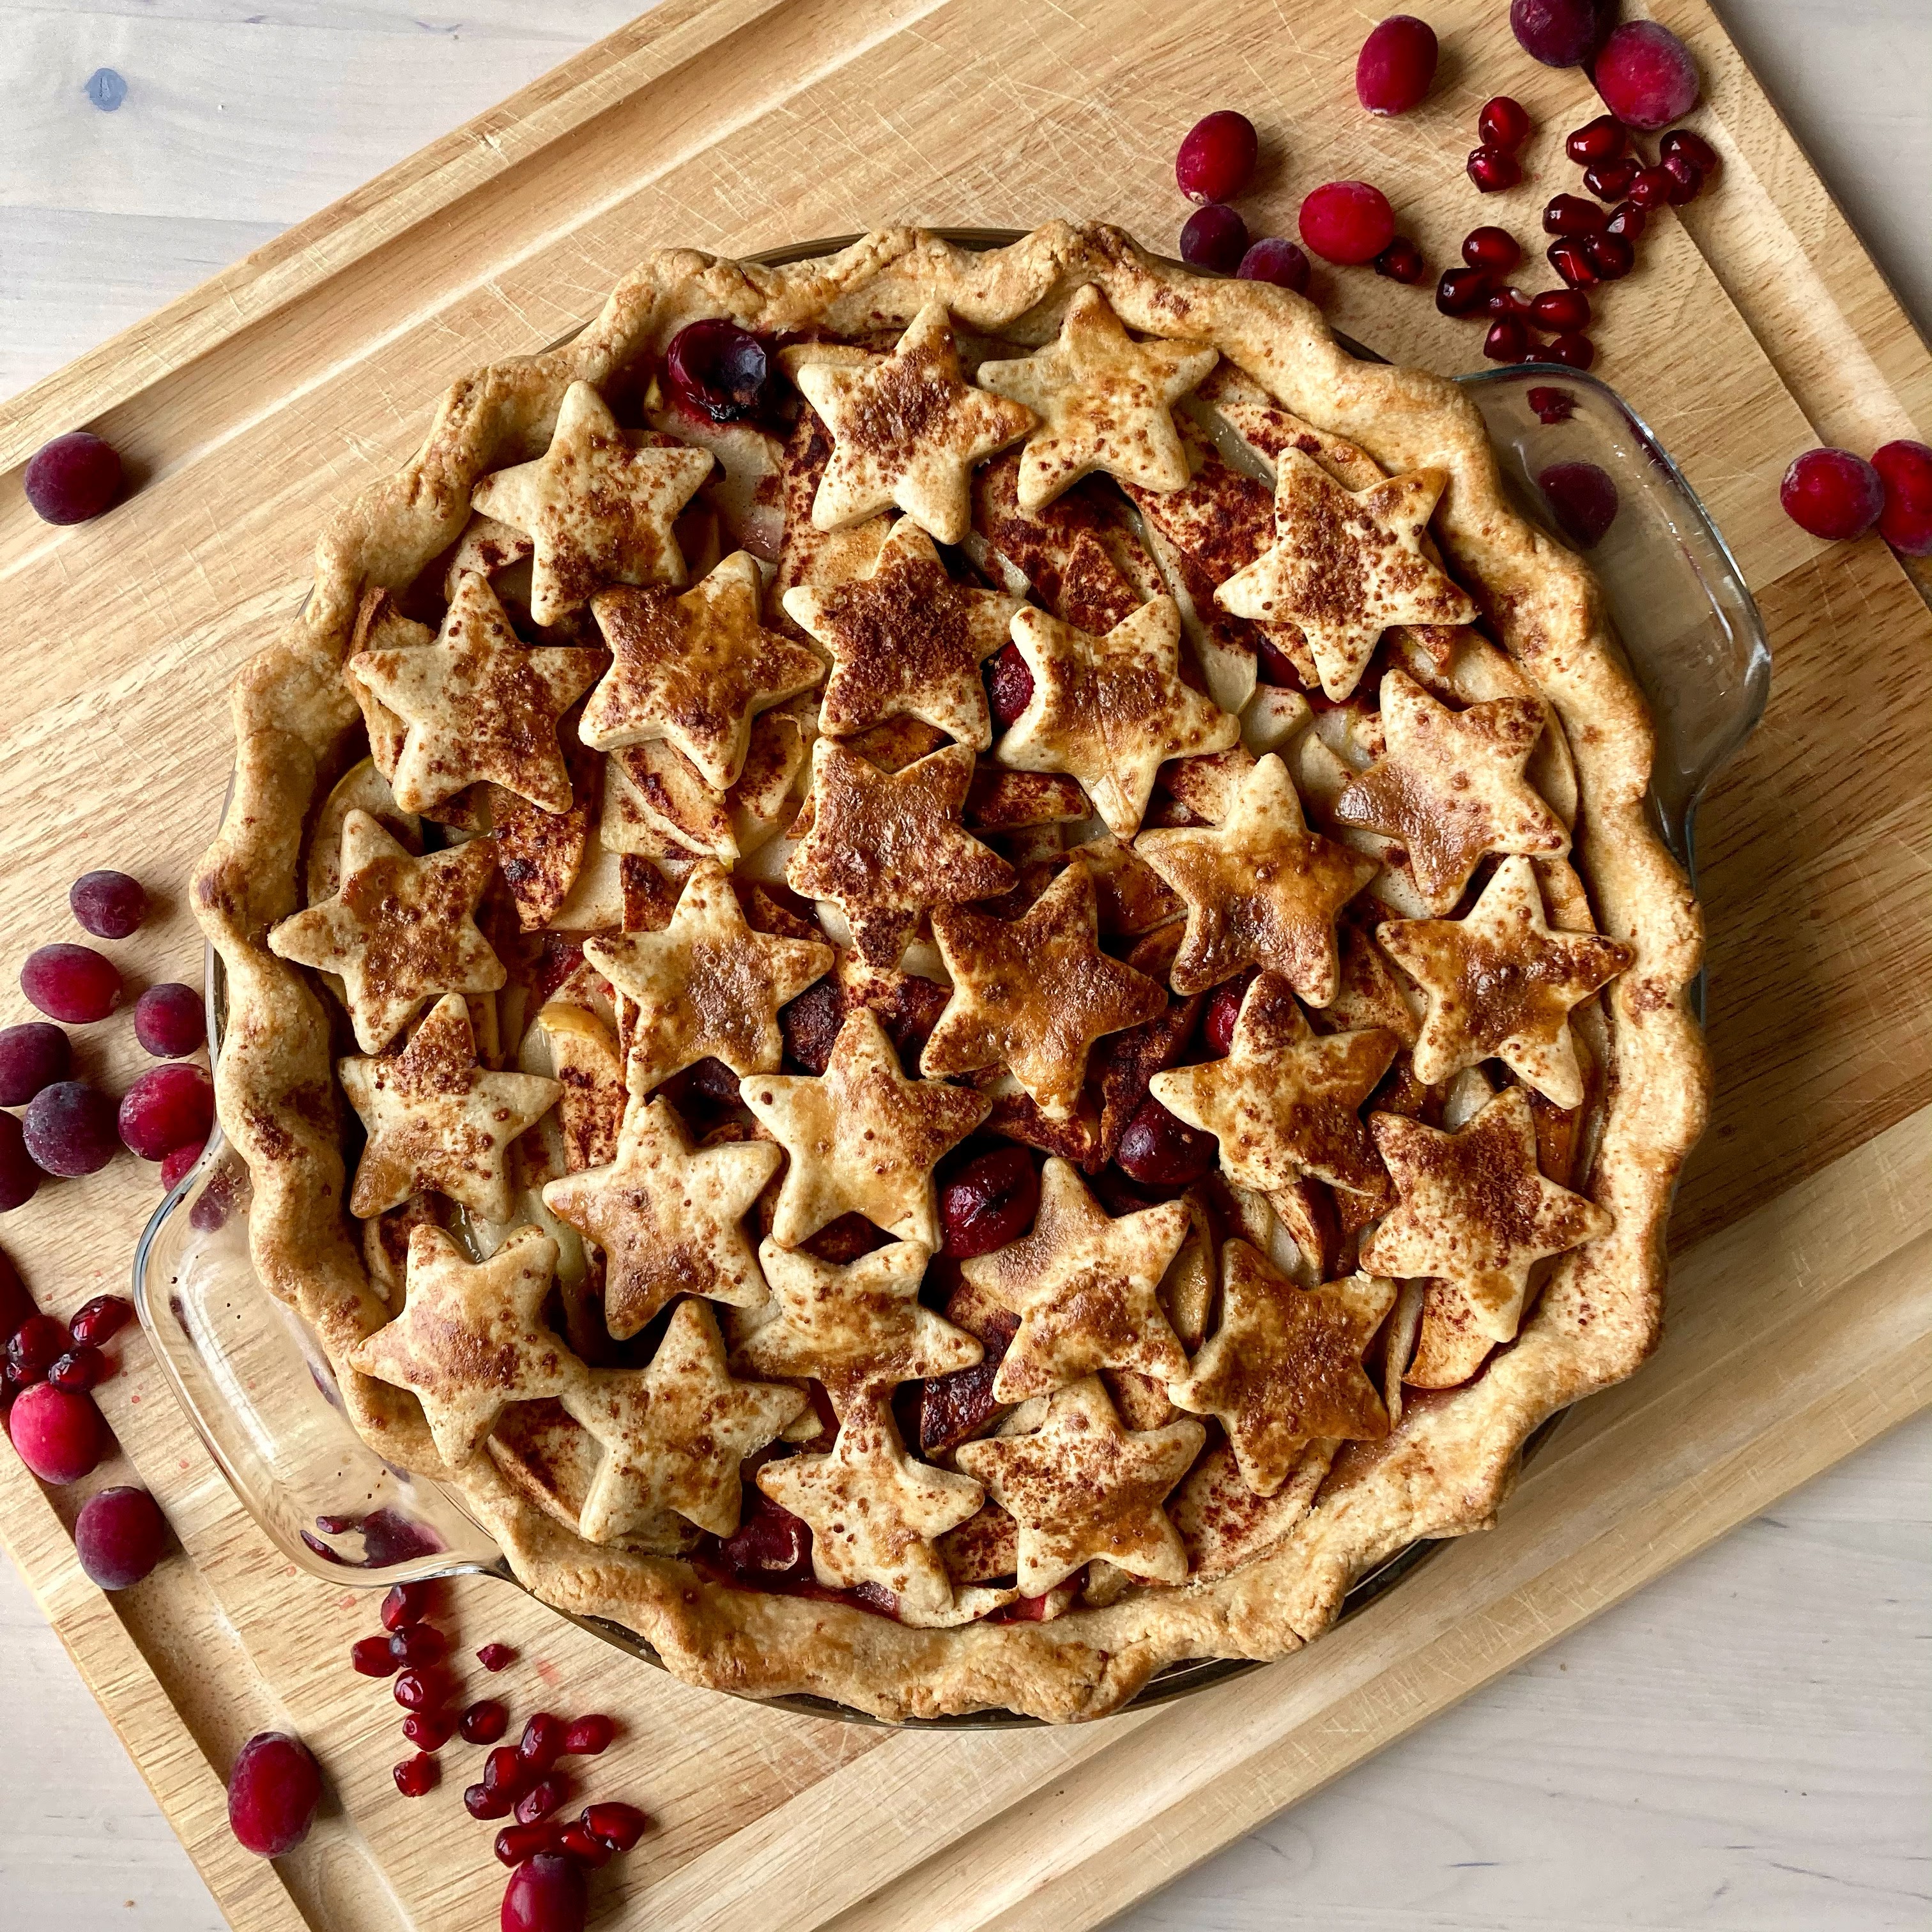
I love apple pie but I don’t really make it much, oddly enough. I’m trying to rectify that – here’s a start! Whole wheat crust, apples + cranberry filling, super simple, super good. This was dessert and also post-workout “breakfast” at 130p (ha. to be fair, we got up late too) – in my opinion, it was even better the second day. It’s also refined sugar free and only has about 2 tbsp of maple in the entire thing – a win for those who love apple pie but don’t love how gloppy and sweet it can sometimes be. I went light on the cinnamon to really focus on the fruit, and am very happy with the result.

oops. janky crust.

Unrelatedly, we’ve had some beautiful sunsets lately, like this:

Here’s hoping the rest of this month is better than the beginning, at minimum on the autoimmune front. Sheesh. In the meantime, you can find me in front of my humidifier. Send thoughts of fog and rain my way, please.

Apple & Cranberry Pie

Refined sugar free & whole grain. The filling is paleo & gluten free, so if you need or want a grain free/gluten free crust, feel free to swap in your fave! A Wait are those Cookies original. Yield: 1 pie, serves two hungry people for dessert & breakfast, with a slice leftover (we did not eat nearly half a pie in one sitting. nope. I don’t know what you’re talking about)

shut your pie hole dish courtesy of bestie heather who GETS ME

for the crust

2.5 c whole wheat pastry flour
1 scant tsp fine sea salt
8oz unsalted butter (2 sticks), cubed & cold
4-6 tbsp ice water

for the filling

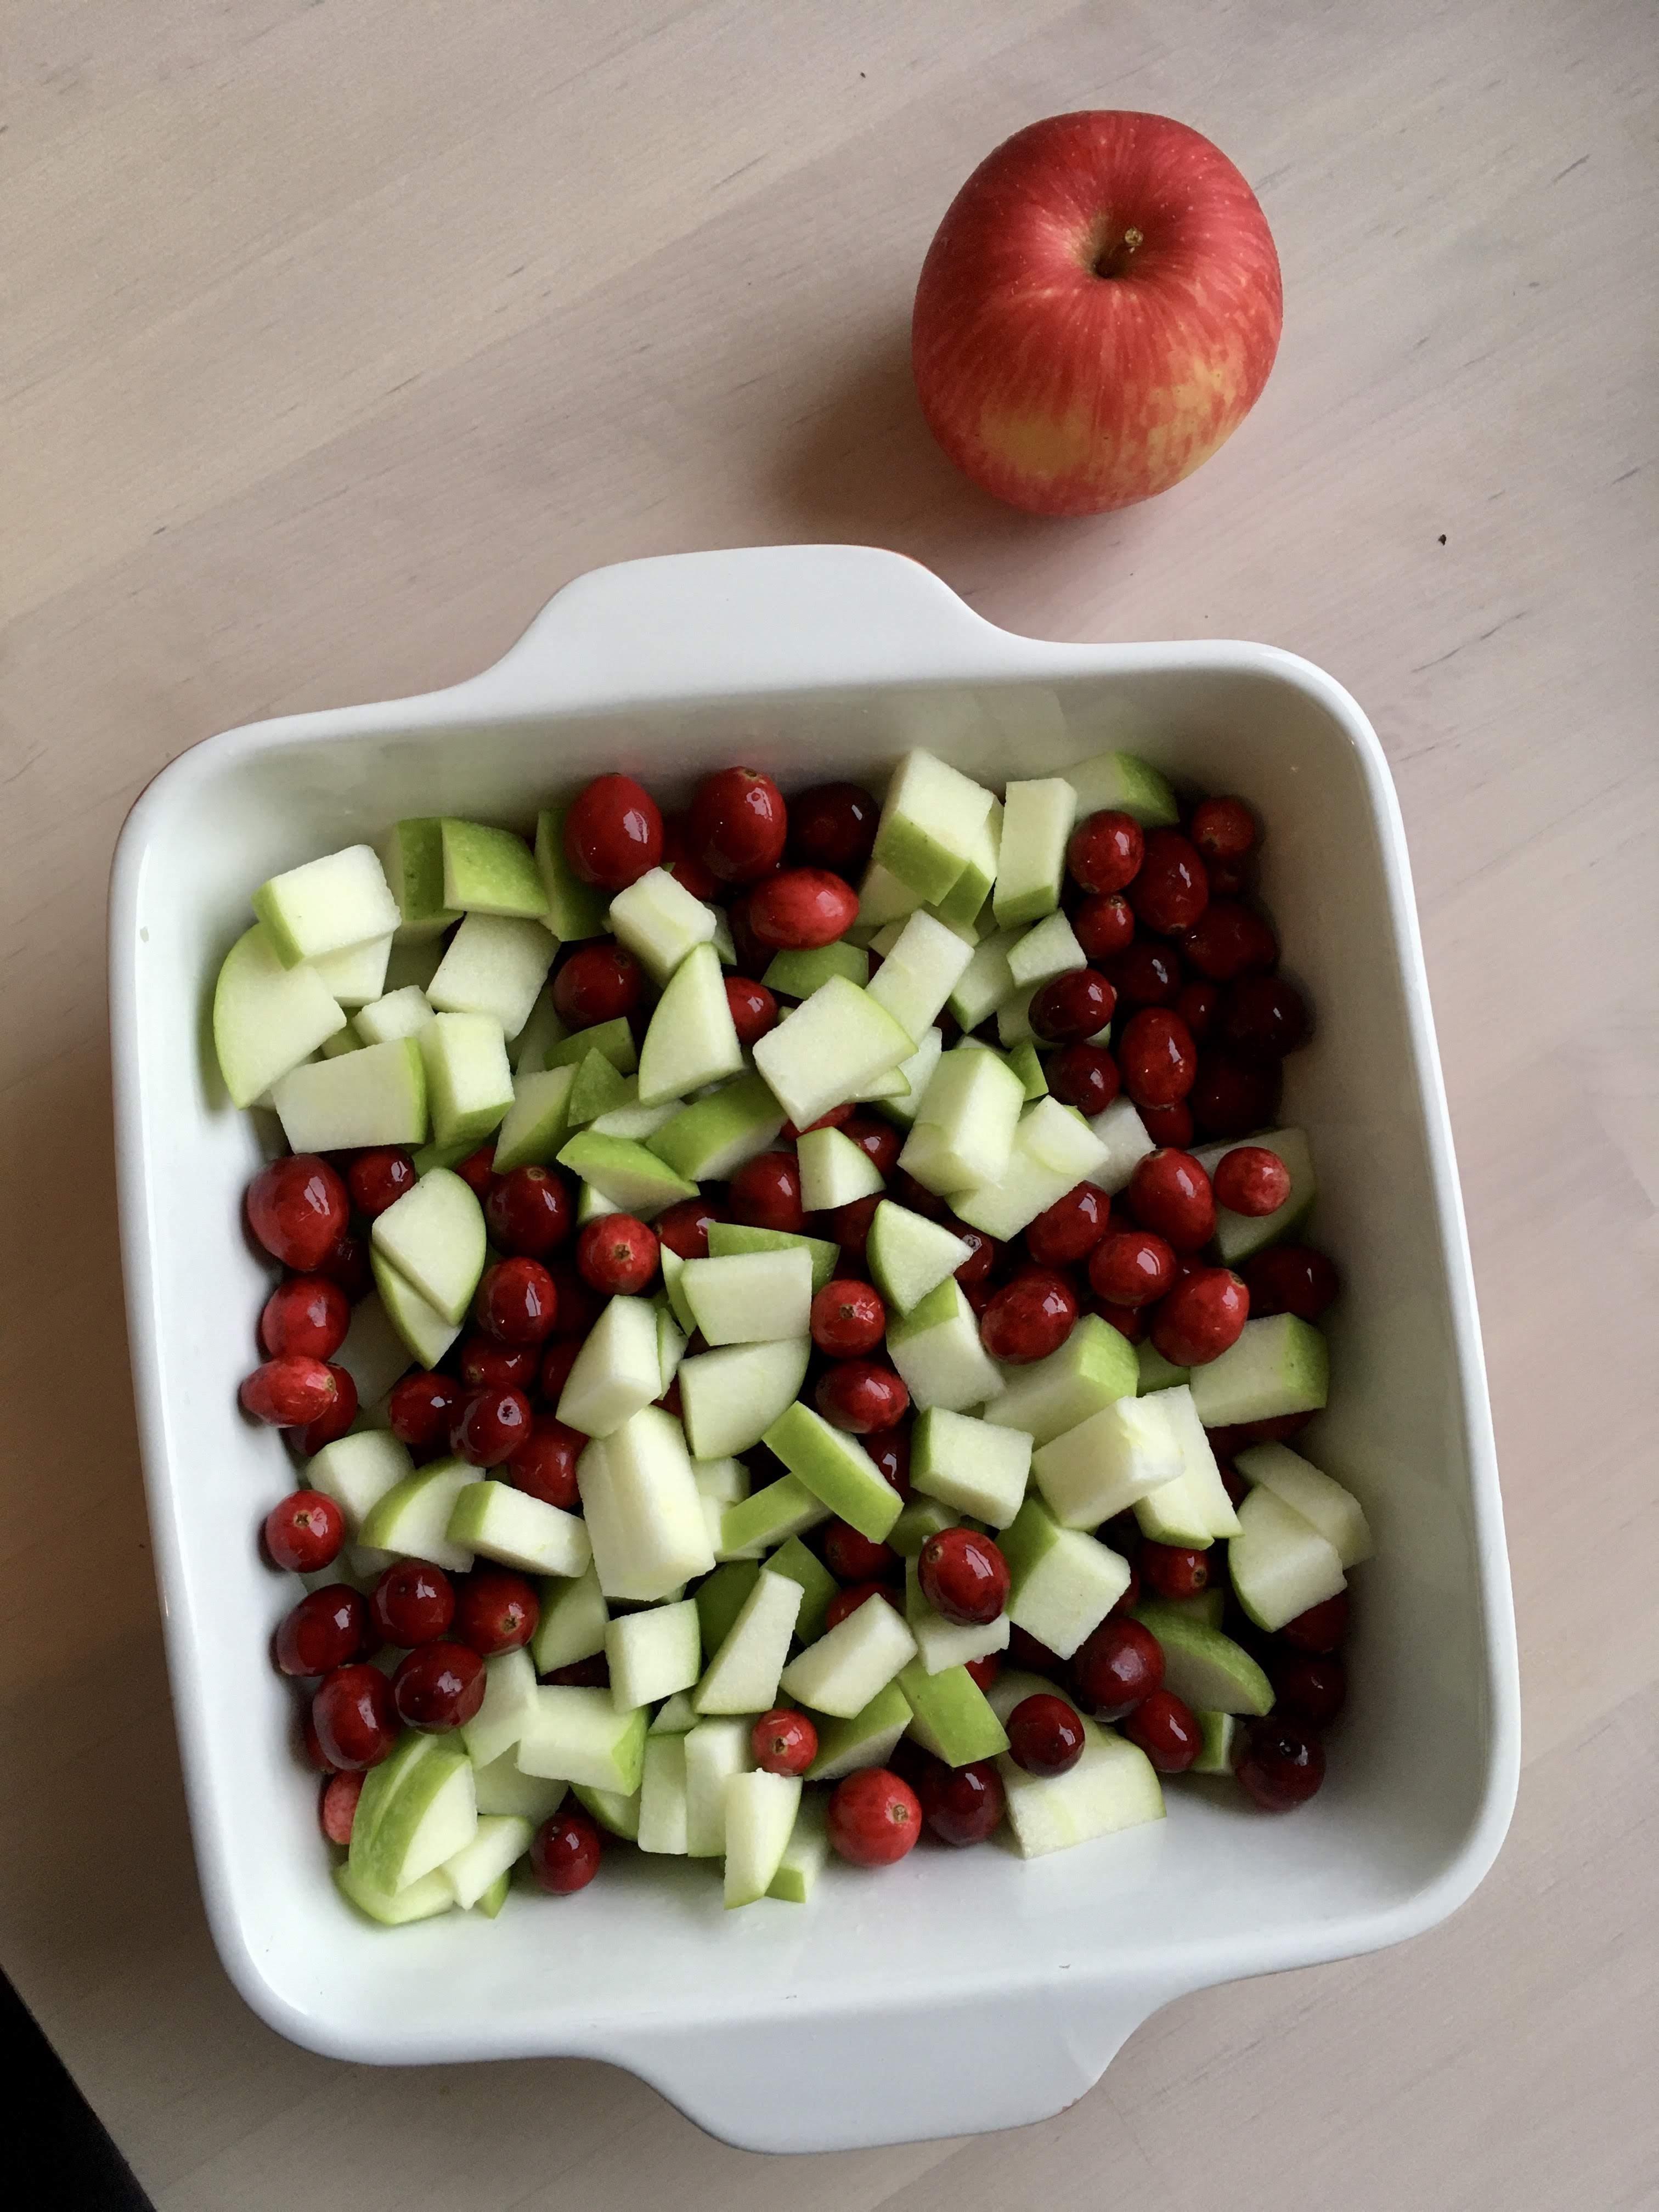
6-7 apples, peeled & thinly sliced (mine were on the small side; adjust accordingly if yours are large. I used half granny smith & half gala)
1/2 c cranberries, fresh or frozen
2 tbsp maple
2 tbsp tapioca starch
zest & juice of 1 lemon
2 tsp vanilla extract
1 tsp cinnamon

to beautify the crust

milk of some sort (I used half and half; non dairy is totally fine also – whatever you have)
sprinkle of coconut sugar

In a large bowl, stir together all the filling ingredients. Let sit while you make the dough.

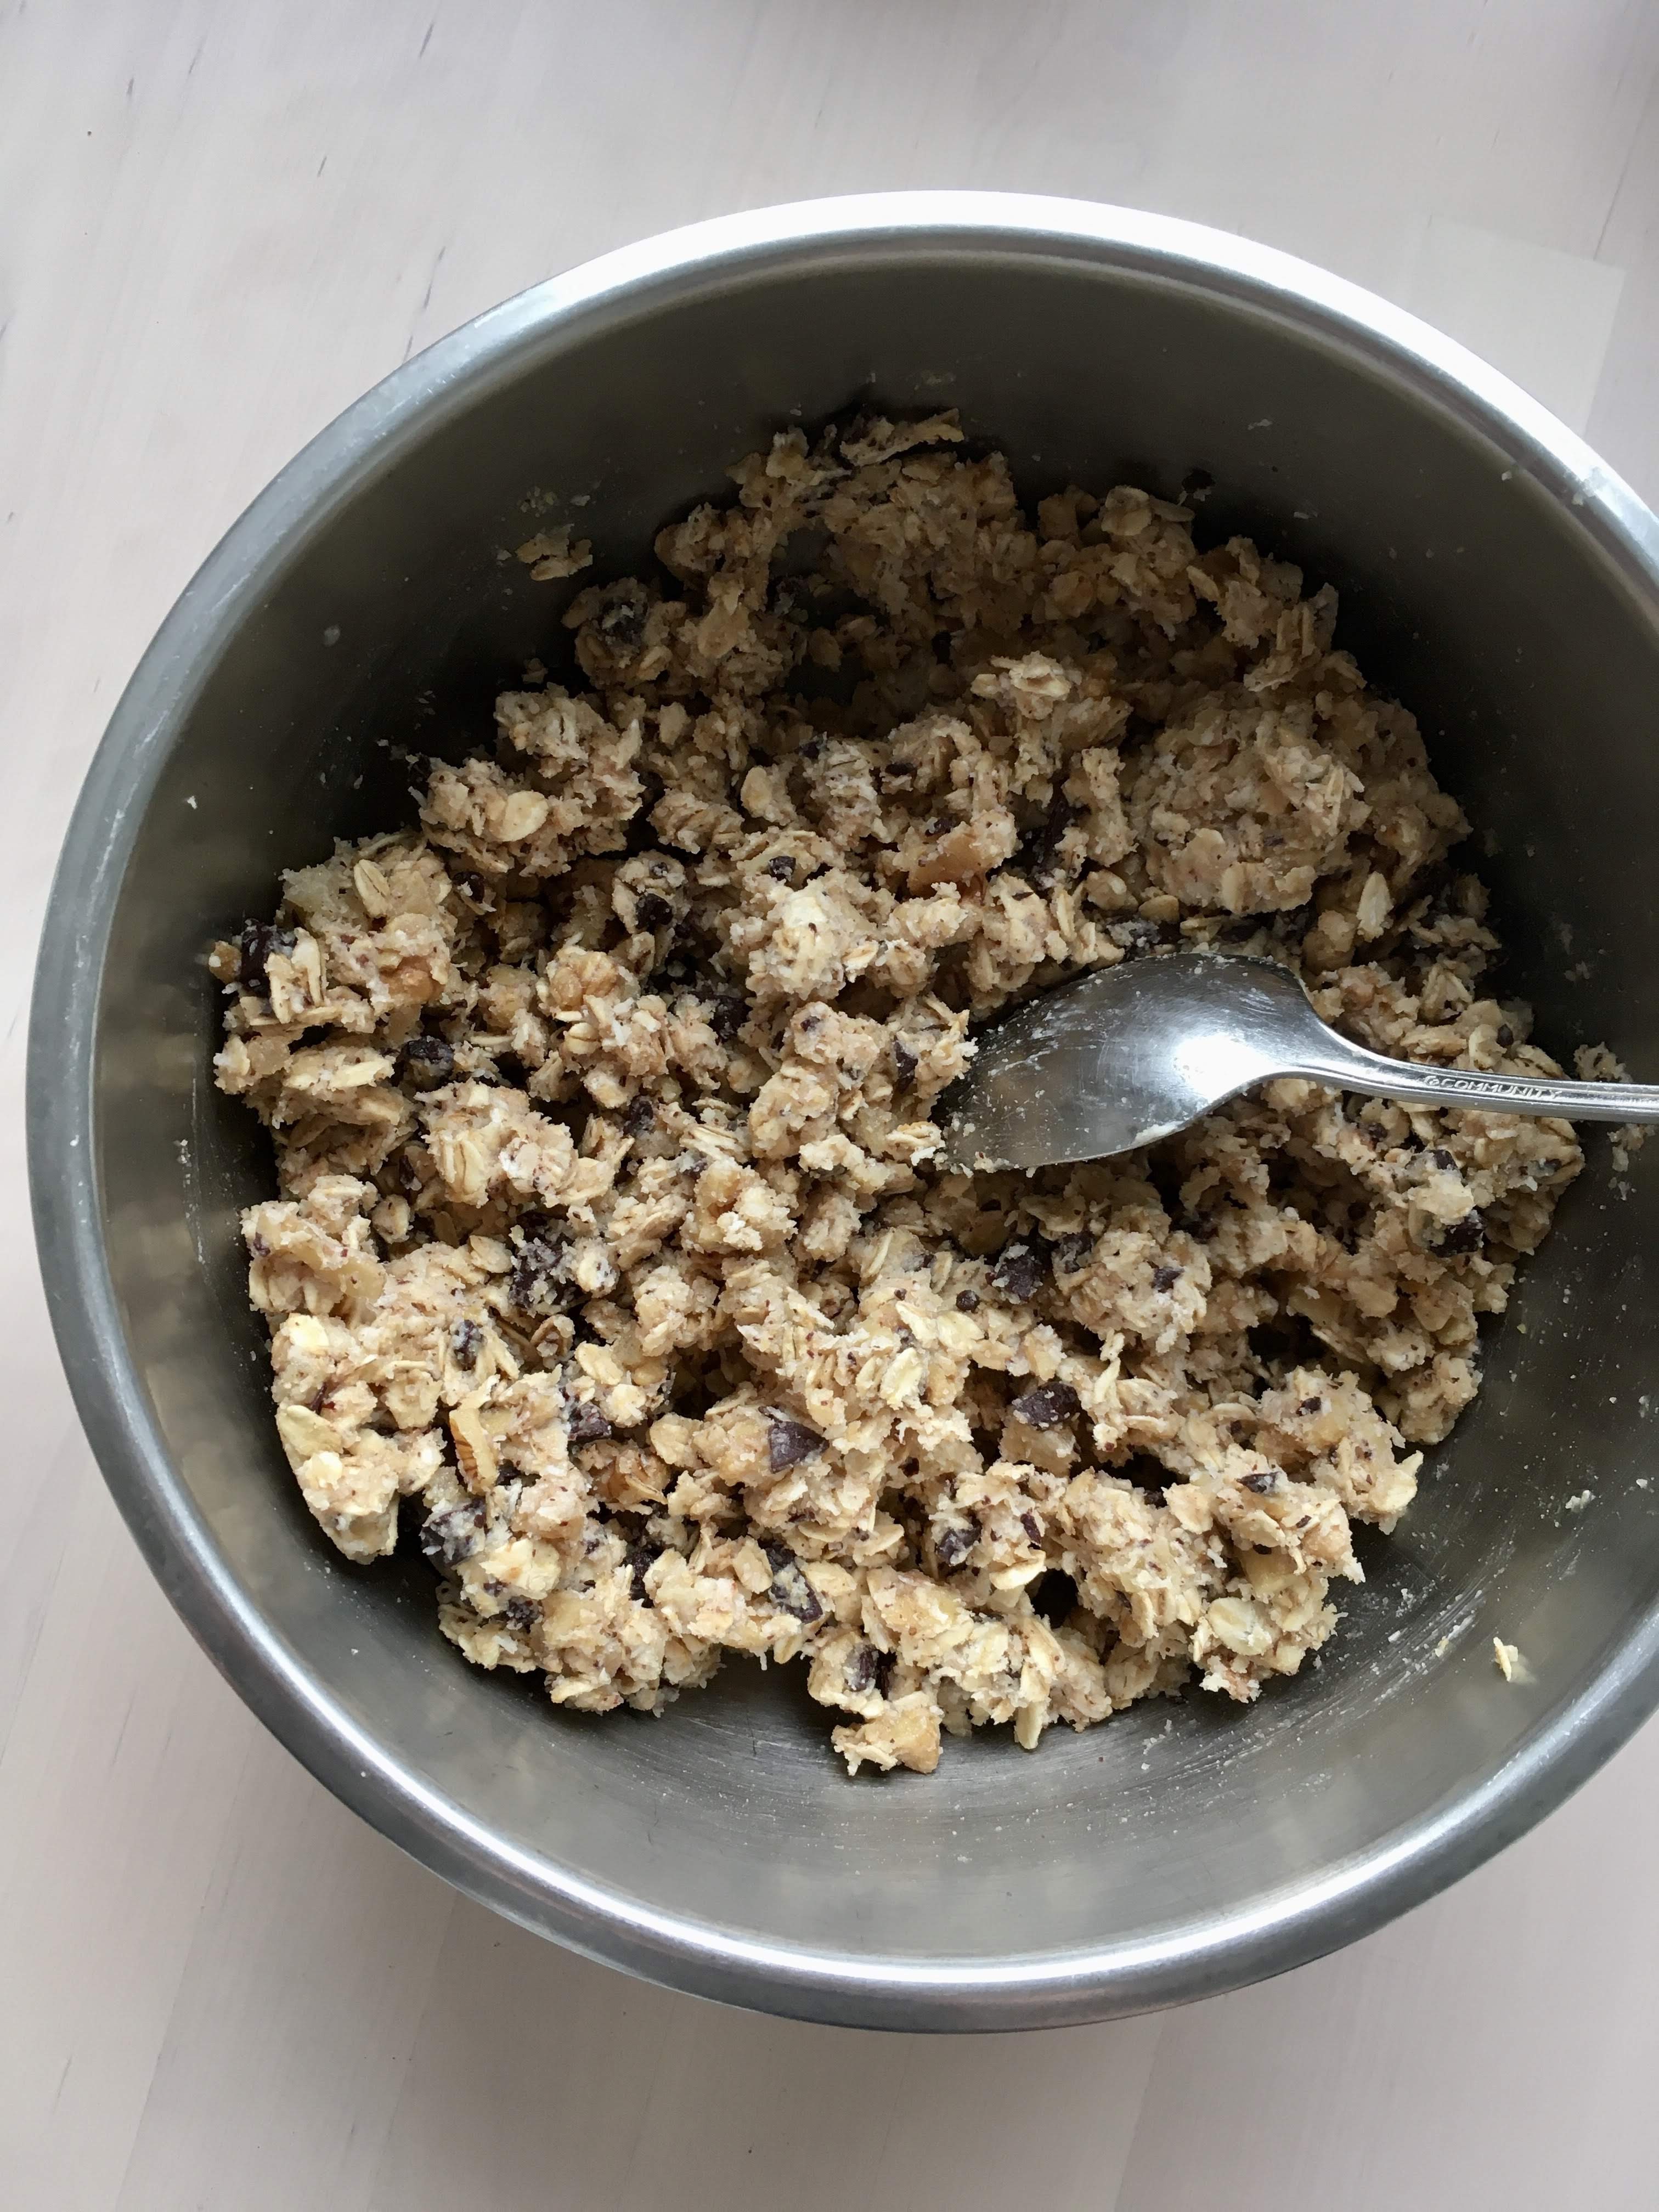
In a food processor (or by hand, but I actually love using the food processor for this dough; it comes together in a snap and keeps it from getting overworked), pulse together flour and salt. Add in cubed butter, and pulse until the mixture looks like coarse sand. Add in ice water – I start usually with four tbsp, then add a tbsp at a time until the dough comes together in a ball.

Turn it out onto a floured surface, divide it in half and and roll it out – I prefer to roll and then chill, since the dough is easier to work with that way. You’ll roll out a circle that’s slightly larger than the top of your pie plate, to make for crimping excess – you should aim to have about a 1″ overhang. Lay the dough into the dish, tucking the edge underneath and crimping it as desired. Do whatever you want with the top crust! Shapes, traditional top crust, lattice, whatever. I used a small star cookie cutter for this one. Once the bottom crust is in, stick the whole dish into the freezer for 5-10 minutes while you roll out the top (helps prevent shrinking but honestly I almost always forget to do this and my crusts are fine… so… shrug. it’s good to do if you remember). No need to cover since it’s not in there very long.

Preheat the oven to 425, and bring out the chilled bottom crust. Pile in the fruit – make sure to really pack it down so there is no space between the apple slices. Typically you can fit much more than you think you can – and you’ll want it to be slightly convex on the top, to account for the fruit decreasing in volume as it cooks. Lay on the top crust pieces, and dot the fruit with butter. Brush the top crust with milk of choice and sprinkle with a little coconut sugar if you like (I like the color). Bake for 10 minute at 425, then lower the temp to 350 and bake another 65-70 minutes, until the crust is golden brown and the fruit is bubbling like crazy. Remove from the oven and let cool at least an hour, preferably more, before slicing and serving (I made mine in the mid morning and we ate it after dinner; it sliced perfectly). Keep leftovers in the fridge, covered – keeps well overnight.

naked pie.

Happy holidays from my kitchen to yours!

img_1786

Hello internet friends! Happy Holidays!!

img_1821

I have bonus things for you today – TWO recipes!

img_1616

I’ve now made three desserts in 24 hours and am feeling quite pleased with myself. One for my fam (since there are only three of us) and two for C’s fam, since there are going to be considerably more than 3 at dinner, ha.

img_1784

Besides, I made this crisp a few weeks ago for C and I and it was bit of a cluster because I lost power while it was in the oven, and then lost the daylight to photograph while waiting for the power to come back on…. so though I wanted to put it up here, I only had photos of half eaten crisp. Which has some kind of aesthetic (obviously I put them up, you’ve seen them) but I needed more than that for a legit post.

img_1822

img_1792

img_1630

So! I made it again for Xmas Eve dessert with my parents, because it was delicious, and now I have a few more actual photos.

img_1617

But, bonus – I also made this mint panna cotta tart with cacao coconut crust for tomorrow’s dessert, so why not feature that too! It turned out too pretty not to share. It’s actually the same as the one I made last year at this time – couldn’t resist the mint again, and it just looks so festive.

img_1789

img_1787

img_1778

I hope your holidays are filled with all kinds of good things, delicious food, and loved ones. Happy holidays from my kitchen to yours! Merry and bright <3

07da0c4a-9ea8-47ee-a5a0-c0da202cee48

Mint Panna Cotta Tart on a Cacao Coconut Crust

Minty fresh and chocolatey, perfect for a holiday dinner. Yield: 1 9″ tart, serves several. A Wait are those Cookies original. Grain and gluten free, refined sugar free. For dairy free, swap out coconut milk & yogurt for the cream.

Recipe HERE.

img_1774

Apple and Cranberry Pecan Crisp

I have successfully used both walnuts and pecans for this – both are delicious. I choose to chop up a chocolate bar in order to get the finer shards of chocolate, but chocolate chips would do if that’s all you have on hand. Totally adaptable to whatever is in your pantry! Yield: 1 9″ crisp (it was doubled for these photos); serves several. A Wait are Those Cookies original. Gluten free, refined sugar free & easily dairy free with a sub of coconut oil or vegan butter + coconut yogurt.

img_1823

1 bag of fresh cranberries (fresh or frozen are both fine)
3 apples (I prefer Granny Smith and / or Lady Alice), chopped
2 tbsp maple syrup
2 tap tapioca starch
1/4 c water
2 tsp vanilla

1 cup old-fashioned oats (use certified gluten-free oats for a gluten-free crisp)
½ cup firmly packed almond meal
½ cup chopped pecans
1/4 c unsweetened shredded coconut
1/8 c maple syrup
¼ teaspoon fine sea salt
2 tsp vanilla extract
5 tablespoons unsalted butter, melted
3 tbsp plain whole milk Greek yogurt
1/4 c dark chocolate, roughly chopped
a handful of crystalized ginger, chopped

Preheat the oven to 350.
Toss apples & cranberries into your baking dish of choice (my dish is 8×8, 2 qt capacity; 9″ square or 9″ deep pie dish would also be fine). In a liquid measuring cup, whisk together the maple and water until combined. Add the tapioca starch, and whisk to combine. Pour the mixture over the fruit and toss to combine. Bake for 20 minutes.

While the filling is baking, make the crisp. In a mixing bowl, stir together the oats, almond meal, chopped pecans, shredded coconut, maple, and salt. Mix in the vanilla, melted butter and the yogurt. Stir until everything is mixed thoroughly, then stir in chopped ginger and chocolate.

Once the filling has baked for 20 minutes, stir it and and redistribute evenly in the dish. Plop spoonfuls of the crisp topping evenly over the filling – no need to pack it down. Return the dish to the oven and bake for 25 to 30 more minutes, until the filling is bubbling around the edges and the top is golden.
Let the crisp rest for 5 to 10 minutes before serving. Serve with vanilla ice cream, obviously! Keep leftovers, covered, in the fridge for about five days (yeah right. It would take some kind of major feat to make it last that long)

img_1615

Panna cotta that is mint to be

fullsizeoutput_1fed

Happy holidays!

fullsizeoutput_2000

I had a delightful holiday with both my fam and C’s. He and I took a 6ish mile hike yesterday with fam; the weather was just beautiful and it felt great to get outside.

IMG_0777

IMG_0721

IMG_0767

fullsizeoutput_1ff2

I’m keeping it short and sweet today – I made this panna cotta tart for xmas dinner with the fave human’s family; it got rave reviews from both kids and adults, which totally makes it a win in my book!

fullsizeoutput_1ffd

fullsizeoutput_1ff5

It’s relatively simple to put together and keeps very well when made ahead – I made it 24 hours before serving, which was just perfect (the panna cotta needs to set up anyway, so that’s ideal).

fullsizeoutput_1ff6

I’m currently navigating the last few work days of the year in this weird no-space between Christmas and New Years (grudgingly, mind you), while I wait for a few more days off and some relaxation time. I’m already plotting my NYE dessert, of course.

fullsizeoutput_1fff

I hope you’re happily relaxing with loved ones! I highly recommend to feed them panna cotta tart :)

IMG_0761

Mint and Vanilla Bean Panna Cotta Tart on a Chocolate Crust

Mint and chocolate: a match made in heaven. Only lightly sweet but a big crowd pleaser (this one got rave reviews from both kids and adults!). Infuse the cream the day before you plan to make the tart. Keeps well wrapped in the fridge overnight; I made it 24 hours before serving. Gluten and grain free; refined sugar free. Yield: 1 9″ tart; serves several! A Wait are those Cookies original.

For the crust:

1.75 c almond flour
1/3 c unsweetened cacao powder
1/4 c unsweetened shredded coconut
heaping 1/4 tsp sea salt
1/2 tsp baking soda
2 tsp vanilla extract
2 tbsp pure maple syrup
4 tbsp coconut oil, melted
~1/4 c chopped dark chocolate

In a large bowl, stir together almond flour, cacao powder, coconut, sea salt, and baking soda. Add in vanilla, maple, and melted coconut oil and stir until completely combined. The dough will look crumbly, but you’ll be able to press it together with your fingers.

Preheat the oven to 350, and lightly grease a tart pan with coconut oil. Press the crust into the plate and up the sides with a spoon or your fingers, creating a smooth edge (or not, your call!). Poke the bottom with a fork a few times, and bake for 15 minutes.

Let cool for a few. Melt the dark chocolate and pour it into the bottom of the tart shell. Use a spoon or a brush to smooth it out. Let cool completely to set the chocolate.

Infused cream*:

1 c cream
1/4 loosely packed fresh mint leaves

Coarsely chop fresh mint with a very sharp knife, without crushing or bruising them. Stir them into cold cream, cover, and refrigerate 8 to 12 hours.

Strain the cream, pressing on the solids to extract as much cream as possible. Discard the leaves. If you’re not using the cream immediately, cover and refrigerate it until needed.

*the infused cream makes just shy of a cup; you’ll be adding more cream for the rest of the panna cotta (see below) – use all of the infused cream + another 3/4 c for a total of 1.75 c

For the panna cotta:

1 package unflavored powdered gelatin
1.75 cup mint-infused heavy cream, divided*
1.5 tbsp vanilla bean paste
1.5 tsp peppermint extract
1/4 cup maple
Scant 1/4 tsp sea salt
1/4 cup plain greek whole-milk yogurt
Pomegranate, coconut and mint for garnish

*See above note; I used 1 c infused cream + 3/4 non-infused cream

In a small bowl, sprinkle the gelatin over 1/4 cup of the cream. Let stand without stirring until the gelatin is moistened, about 10 minutes.

Pour the remaining 1.5 cups of cream into a small saucepan. Add maple, and salt. Bring to a simmer over medium heat, stirring consistently. Remove from the heat, whisk in peppermint extract and vanilla paste. Add the gelatin mixture and stir until completely dissolved, about 3 minutes. Cool until lukewarm, about 5 minutes. Whisk in the yogurt until well blended. Pour the panna cotta mixture into the cooled tart shell. Place in the refrigerator until set, approximately 4 hours.

Store in the fridge – keeps well overnight for breakfast the next morning :)

fullsizeoutput_1ffe

Let’s get crackin’

fullsizeoutput_1eb0

Oh heavens, the holiday market shopping madness has already begun! I rather forgot this was the last weekend before Thanksgiving… Whole Foods is already at full-tilt insanity. It’s all good though, I don’t think I need to go back until after the holiday (ha. famous last words).

fullsizeoutput_1eae

It’s time for all things pumpkin, sweet potato, apple, and cranberry! I love the run of late autumn/holiday seasonal baking. I will say though, things can get a little one-note with all of the cinnamon-nutmeg-ginger combinations out there, which is why I especially love this pie. It’s light on the spice, but the cinnamon and ginger are present just enough to give it that seasonal vibe. Plus, it’s purple! Naturally! What’s not to love.

This thing obviously cracked like crazy (it cooled too fast in my apartment…might, *ahem* be a little cold in here?!) but I’m embracing its imperfections! It was delicious, and, like human beings, is unique and imperfect in its own way.

fullsizeoutput_1eb1

Interestingly, it lightened up a lot in color after baking – see below photo! That was taken just over 24 hours after baking. The lighting is a bit different of course, but it was fun watching the color change.

IMG_0407

C and I both loved this one, a LOT. So much so that it might make another appearance this week for Thanksgiving! We’ll see. Regardless, we ate it for dessert and of course for breakfast, as we hibernated away from the bad air.

fullsizeoutput_1eb8

I was traveling in SoCal for work last week and avoided some of it, but we’re still under a big blanket of smoke. The sunsets have been incredible, but that’s small comfort when outside is essentially verboten.

IMG_0340

IMG_0330

fullsizeoutput_1e91

My heart just breaks for those displaced by the terrible fires to the north of us and my beautiful state – we are on our 10th day of extremely unhealthy air quality and choking smoke in the Bay Area, and I can only imagine what it’s like closer to the fires. Sending all the good vibes to those who need them, though I know that isn’t nearly enough.

fullsizeoutput_1eb3

Hold your loved ones, and bake them things – it is always the little kindnesses that are the most appreciated!

fullsizeoutput_1eb6

Purple Sweet Potato Cheesecake Tart on a Chocolate Coconut Crust

Perfect for the holidays! Only lightly sweet – as always – and I love the purple sweet potatoes for their natural color. This comes together in a snap; you can always use regular sweet potato puree, or even pumpkin. This is kind of like a cheesecake, but uses yogurt instead of cream cheese for a lighter dessert. Yield: 1 9″ tart, serves 6-8 realistically or two really hungry people for dessert & breakfast the next morning :) Filling is adapted from the Roasted Root, here!

fullsizeoutput_1eac

For the crust:

1.75 c almond flour
1/3 c unsweetened cacao powder
1/4 c unsweetened shredded coconut
heaping 1/4 tsp sea salt
1/2 tsp baking soda
2 tsp vanilla extract
2 tbsp pure maple syrup
4 tbsp coconut oil, melted
1/4 c dark chocolate, melted

In a large bowl, stir together almond flour, cacao powder, coconut, sea salt, and baking soda. Add in vanilla, maple, and melted coconut oil and stir until completely combined. The dough will look crumbly, but you’ll be able to press it together with your fingers.

Preheat the oven to 350, and lightly grease a tart pan with coconut oil (you can also use a pie pan; I like the tart pans with removable rings). Press the crust into the plate and up the sides with a spoon or your fingers, creating a smooth edge (or not, your call!). Poke the bottom with a fork a few times, and bake for 15 minutes.

For the filling:

1 cup pureed purple sweet potato*
1 cup whole milk, plain yogurt (I use Straus European style – it’s pretty runny)
3 eggs
1/4 c pure maple syrup
1 teaspoon pure vanilla extract
2 tablespoons tapioca flour*
1-1/2 teaspoons ground cinnamon
1/8 teaspoon allspice
½ teaspoon ground ginger
1/4 teaspoon kosher salt

* I boil them; you could also roast & mash them – either way is fine!

Add all of the ingredients for the filling to a food processor or blender and blend just until combined. Pour into the prepared crust and bake at 350 for 25-30 min until the center is set. Let cool completely, then refrigerate until serving.

Keeps well overnight in the fridge; probably best eaten within two days of baking, but I really doubt ours will even last that long :)

Walking in a mint-ery wonderland

IMG_2111

Happy holidays!

fullsizeoutput_10e5

As much as certain elements of this time of year drive me bananas (having to throw elbows in the grocery store to retrieve the last piece of whatever, extra lines everywhere, no parking, where do all these extra people come from?!), I do undeniably love the run-up to the holidays.

Everything looks festive, even traffic light reflections in wet pavement. And of course I love the excuse to have a tiny conifer in my living room.

fullsizeoutput_10d5

Let’s not overlook holiday baking! Heaven forbid.

fullsizeoutput_10ae

Fun fact! This is actually a giant panna cotta tart. It didn’t really occur to me while I was making it – I was just thinking, la la la cream tart la la but then I got curious and did some googling. I had forgotten that cream stabilized with gelatin is technically panna cotta… so, there ya go! Panna cotta tart, if that’s even a thing.

This one is even grain and gluten free! I suppose you could make this with coconut milk to make it dairy free, but I haven’t tried that yet (next time!) – partially because I have a massive weakness for cream.

fullsizeoutput_10e6

Heavy cream reminds me of being a kid and pouring a bit over my cereal – my grandmother used to do this, and after my dad told me that, I always lurked around waiting for leftover cream to appear the fridge. As I recall, my favorite combination was a giant bowl of honey nut cheerios with about 3/4 milk and 1/4 cream.

fullsizeoutput_10e3

Now I’ve leveled up and adult-ed my cream: it gets baked into cream biscuits, set into a panna cotta tart, or poured into my coffee (omg heaven).

fullsizeoutput_10c5

I love this dessert though: it looks like a mini winter wonderland! Walking in a mint-er wonderland? Ha. And it’s delicious. It actually took a minute to grow on me, but then I couldn’t get enough. Minty, chocolatey & slightly tart from the yogurt-cream panna cotta, it’s a perfect holiday dessert when something light is called for. I couldn’t resist the pomegranate, both for flavor and texture, but also for color. They are always so pretty!

fullsizeoutput_10dd

fullsizeoutput_10d9

Happy holidays! Share this with loved ones, since it’s so much better enjoyed in good company :)

fullsizeoutput_10e9

fullsizeoutput_10b2

Mint Cream Tart on a Dark Chocolate Coconut Crust

Grain free, gluten free, refined sugar free! A perfect wintery dessert, especially since it even *looks* festive. You can even make the whole thing the night before, since gelatin-based things like to hang out in the fridge for awhile. Lightly minty, slightly tart from the yogurt, balanced nicely by dark chocolate. Who doesn’t love mint and chocolate?! This is really a giant panna cotta in a crust, if we want to get technical. Mint cream adapted from Martha Stewart, here; the rest is my brainchild. Yield: 1 9″ tart, serves… two ;) Kidding! 2-8, realistically.

For the crust:

1.75 c almond flour
1/3 c unsweetened cacao powder
1/4 c unsweetened shredded coconut
heaping 1/4 tsp sea salt
1/2 tsp baking soda
2 tsp vanilla extract
2 tbsp pure maple syrup
3.5 tbsp coconut oil, melted

Preheat the oven to 350, and lightly grease a 9″, deep pie plate with coconut oil. Alternatively, you could use a tart ring with a removable bottom – I needed to transport mine so opted for just keeping it in a less fussy dish.

In a large bowl, stir together almond flour, cacao powder, coconut, sea salt, and baking soda. Add in vanilla, maple, and melted coconut oil and stir until completely combined. The dough will look crumbly, but you’ll be able to press it together with your fingers.

Press the crust into the plate and up the sides with a spoon or your fingers, creating a smooth edge (or not, your call!). Poke the bottom with a fork a few times, and bake for 17 minutes.

For the filling:

2 cups heavy cream
1/4 cup maple sugar*
6 stems peppermint or spearmint, plus more for garnish
1 tsp vanilla extract
2 tsp peppermint extract
1/2 teaspoon fine sea salt
1/3 c dark chocolate, melted
1 tablespoon unflavored gelatin (one envelope)
1/2 cup cold water
1/2 cup whole milk greek yogurt, plain
pomegranate arils

*I use maple sugar here because it’s lighter in color than coconut or maple syrup, and I wanted to preserve the lightness of the cream filling. But any granulated sweetener would be fine, just keep in mind the filling color may darken.

Make the filling: Bring cream, sugar, mint, and salt to a simmer in a medium saucepan. Remove from heat, and let cool completely, about 30 minutes.

In a double boiler or in the microwave, heat the 1/3c dark chocolate until completely melted. I am lazy and use the microwave method: 30 second intervals, and stir in between until everything is melty. If you’re using a double boiler, stir continuously until the chocolate is melted.

With a pastry brush (or a spoon, totally fine – this is what I used), coat the bottom the crust with an even layer of melted chocolate. Refrigerate (or leave on the counter in your freezing apartment) until chocolate sets, about 10 minutes.

Sprinkle gelatin over water in a small bowl. Let stand until softened. Remove mint from cream mixture, and bring cream mixture to a simmer. Whisk in softened gelatin until it dissolves. Remove from heat, and stir in the yogurt. Pour filling into the prepared crust (if there’s leftover, pour it into a ramekin or two & save for later!) Carefully transfer to the refrigerator. Chill, uncovered, until set, at least 4 hours (or overnight). Garnish with mint stems, pomegranates, and sliced almonds if you’re feeling fancy. Slice and serve!

Chocolate dipped mint leaves are easy too: wash and pat dry nice-looking mint leaves, and dip in melted chocolate. Lay on a parchment lined baking sheet, and freeze until needed.

Keep leftovers covered in the fridge for a day or two.

fullsizeoutput_10df

fullsizeoutput_10dc

I only have (pies!) for you

IMG_1737

Could someone explain to me what happened to October? I blinked, and then… here we are. ALSO it’s already less than two weeks till Thanksgiving?! Um…. wat.

IMG_1738

But regardless… I have PIE!

IMG_1710

And it’s PURPLE pie!

IMG_1708

Because really, how could something like this not make you happy? That color just makes me smile every time. As does the fact that it’s grain & gluten free, dairy free, refined sugar free, vegan & paleo so errrybody can enjoy – because also, despite all the ‘free’ in its name, it is also delicious (NOT taste free. ha!)

IMG_1734

Maybe consider it if you’ve got friends or fam with some dietary stuff and they’re coming for Thanksgiving? I’m 100% sure they’d love you for it.

It’s been raining! I love love love the sound of rain – it so soothing, no matter what kind of day I’m having. Baking when it’s raining is one of my favorite things – I love that even though my apartment’s galley kitchen doesn’t have windows, I have a big window on the wall facing the entrance to the kitchen, which lets in light and rain sound. It’s perfect! Besides, my little one-butt kitchen is exactly the right size for my baking shenanigans.

IMG_1735

In other news, pretty coffee and some opera (shocking, I know…NOT).

IMG_1695

IMG_1696

IMG_1733

I’ve made this pie twice in three days – it’s that good! Full disclosure: the first time I made it, I took the first bite straight out of the pie dish: fork, meet pie. I NEVER do that, since I’m all about the presentation, but you know what? Sometimes it just has to happen.

IMG_1714

IMG_1729

Happy Saturday! I’m loving the beautiful fall weather over here – the leaves are gorgeous, the air is crisp, and I had purple pie, eggs & kale for breakfast with the best company: life is wonderful! Happy baking!

IMG_1709

Purple Sweet Potato Pie on an Almond Coconut Crust

Gluten & grain free, refined sugar free, dairy free, vegan, paleo. Crust is a Wait are Those Cookies original, filling is adapted from The Endless Meal, here! Yield: one 9″ pie, serves 2 or several! ha.

For the crust:

  • 1.75 c almond flour
  • 1 c unsweetened shredded coconut
  • heaping 1/4 tsp sea salt
  • 1/2 tsp baking soda
  • 1 tbsp vanilla extract
  • 1/4 tsp almond extract
  • 2 tbsp pure maple syrup
  • 4 tbsp coconut oil, melted

Preheat the oven to 350, and lightly grease a pie plate with coconut oil.

In a large bowl, stir together almond flour, shredded coconut, sea salt, and baking soda. Add in vanilla, almond extract, maple, and melted coconut oil, and stir until completely combined. The dough will look crumbly, but you’ll be able to press it together with your fingers. Press the crust into the plate and up the sides with a spoon or your fingers, creating a smooth edge (or not, your call!). Poke the bottom with a fork a few times, and bake for 15 minutes. Remove and let cool for a few minutes, but keep the oven on if you’re making the whole thing at once.

For the filling:

  • 2 large purple sweet potatoes, peeled & sliced into 1″ pieces (about 3 cups worth)
  • 3/4 c full fat coconut milk
  • heaping 1/4 c maple syrup
  • 1.5 tbsp tapioca starch*
  • juice of 1/2 a lemon (~1tbsp)
  • 1 tablespoon vanilla extract
  • 1/4 tsp almond extract
  • 2 teaspoons ground cinnamon
  • 1 teaspoon ground ginger
  • heaping 1/4 teaspoon ground nutmeg
  • 3/4 teaspoon fine salt

*full disclosure: I made this twice in three days & totally forgot the tapioca starch the second time. It’s actually not essential – the filling set up fine without it.

While the crust is baking, make the filling!

In a medium saucepan, boil the sweet potato slices until fork tender. Drain and let cool for a few minutes. Add them to a food processor (or high powered blender) and pulse a few times to puree. Add in coconut milk, maple, tapioca, lemon juice, vanilla, and almond extract, and pulse to combine. Add cinnamon, ginger, nutmeg, and sea salt, and pulse until combined. The filling should be thick! Pour/spoon/spatula it into the prepared crust, smooth the top (or not, you do you!), and bake at 350 for about 45 minutes – the crust should be golden brown and the pie should be set, but with just the slightest bit of jiggle in the middle. Remove and let cool completely before serving (preferably with ice cream or whipped cream of choice, either dairy or non dairy). I prefer to make this earlier in the day and refrigerate until serving, to give the filling ample time to set up.

Top with crystalized ginger & extra coconut if desired!

Keep leftovers covered in the fridge – it will last for a few days, provided all of it doesn’t get eaten first!

IMG_1703

IMG_1711