Nuts for texture

IMG_5901

My favorite part of Indian food is the dessert.

Once (not that long ago… ahem, possibly less than a month), my family went out for Indian food at this ridiculously delicious place in LA… and I was goaded encouraged to order dessert before dinner… and then a dessert for after dinner. And I thought, why not?! Because I always get so full with naan and curried goodness and end up eating dessert anyway, and then I can’t move for a week. Or maybe a few hours but it feels like a week.

IMG_5894

So this time I got smart!! A bowl of kheer to start the dinner… and a bowl to end it. A proper way to do things, if you ask me.

IMG_5902

Anyway. This isn’t exactly like the kheer you find in Indian places—it’s made with quinoa and rice milk rather than white rice and dairy (which obviously gives it a nutritional bump), but it’s close enough that I love it anyway. Give me some textural, lumpy puddingy thing and I’m totally sold. Seriously. I can’t stand mousse or regular pudding, but tapioca?! Oh yes. Rice pudding? In a heartbeat. Bread pudding? Bring it. You see? Nuts for texture.

Besides, this one is gluten free, refined sugar free, and full of protein! Why *wouldn’t* you eat this for dessert?! It’s perfect, provided you’re nuts for texture like me :) (or maybe just nuts, that’s a distinct possibility)

IMG_5898

Quinoa Kheer

Recipe adapted from A Brown Table, here! My fambam was in a pudding mood so it served three…
Gluten free, high protein, refined sugar free, and dairy free (if you sub in vegan butter)! What’s not to love?

  • 1.5 c cooked quinoa
  • 1 tbsp butter (mine is Kerrygold Irish butter, salted)
  • 4 dates, roughly chopped
  • 1/4 tsp ground cardamom
  • 3 c unsweetened almond milk
  • 1.5 tbsp coconut sugar
  • 1 tsp honey
  • chopped pistachios for garnish

Melt butter over medium heat in a thick-bottomed saucepan. Add chopped dates and cardamom, and saute for just about a minute. Toss in quinoa, almond milk, coconut sugar, and honey, stirring to combine. Bring to a boil, stirring frequently, then reduce to a simmer. Let it simmer, uncovered, until the liquid has reduced significantly (you’ll be able to tell—it will become thicker, with a more puddingy consistency. It will still thicken as it cools, so I stopped mine when it was reduced by about a 1/3). Stir frequently as it simmers, as the milk will scald if left too long. Let cool at room temperature, then stick it into the fridge for another hour or two. Serve chilled with chopped pistachios!

IMG_5900

Happy Birthday, Bloglet!

IMG_5141

Happy Birthday, little Bloglet!!

My little baby bloglet is TWO years old this week!! (I say this week as I’m really not sure what day I started, and wordpress isn’t telling and I’m far too lazy to look back at my posts, whoops).

I feel like a proud parent! It’s so cute. To celebrate, I made… pie!!! (of course). I love my bloglet. Pie equals love. Therefore (QED?!), because I love my bloglet, I have made it a pie! And then I get to eat said pie, so everybody wins. Mmm, warm pie. Happy birthday, little two year old bloglet! Thank you for giving me an excuse to make pie (right. As if I ever needed an excuse to do that), even if it was a thousand degrees the day I made it and my dough got all sticky. Note to self: hot weather = sticky things = use mo’ flour! Whatever, got the crust in the dish in one piece so sticky is clearly sooo not a big deal.

IMG_5136

There has been such a massive amount of change over the two years I’ve been writing this, I’m so thankful I’ve had this as a creative outlet. It’s hard to believe it’s been two years since I started! 142 posts, lots of snark, and some epic fails later, I can look back with quite a bit of pride! Lots of growth to be had if you check out the early pictures (actually, do me a favor and let’s ignore those, shall we?) versus the later ones. Lots more invisible internet friends! You know I love you. Some things haven’t changed though: I’m still as irreverent and alternative awesome as I’ve ever been (wait. Probably even more than I was…you can be the judge of that ;) and the food is still delicious. I think. Most of the time!

IMG_5134

For now, here’s a list (because I love them) of things I’m loving right now:

1) Gottschalk’s Symphonie romantique, “La nuit des tropiques”! Love love love.

2) Monarch of the Glen. Ob.SESSED.

3) Whole wheat english muffins. Like that’s ever going to change…

4) ALLL the grains and seeds (bird food. whatever): barley, amaranth, millet.

5) LENTILS! Enough said. I eat them for breakfast (I heard that and saw that eyeroll. Let’s not be judgy, you wouldn’t love me unless I did weird things like that, riiiight?!)

6) Reading several books at once. I think my current total is 4. And yes, I will finish them all ;)

7) Raw honey and cinnamon on toast. How have I not discovered this before now?

8) Single crusted pies. That way, you get smacked in the tastebuds by summer’s gloriousness!

IMG_5129

Anyway. Random things that were on my mind, and now they’re on yours. Muahha! Next thing you know you’ll be eating lentils for breakfast…

IMG_5138

Marionberry-Peach Pie

Makes one 8″ pie. The crust is the same one I’ve used before, coconut oil-whole wheat. It’s delicious and easily the fastest and least irritating pie crust I’ve ever made. Even when it’s ridiculously hot in your kitchen, it still cooperates with only minimal fussing. Oh yeah, and it’s absolutely delicious as well!

Crust: 1 whole wheat coconut oil crust, 8″

For the filling*:

  • 1 bag frozen peaches (I cut up the slices a bit because they’re usually really chunky)
  • 2 bags of frozen marionberries
  • 1/4 c whole wheat pastry flour
  • 1 tbsp tapioca (I use quick-cooking)
  • 1/2-1 tsp cinnamon
  • 3 tbsp honey

*I used the amount of fruit that would fill my pie dish—the pie was 8″ single crusted, and I didn’t want the filling to sink too much so I threw in an added bag of berries. In my relatively shallow pie pan it was perfect!

Prepare pie crust of choice and preheat oven to 425.

In a large-ish bowl, toss together peaches, marionberries, flour, tapioca, cinnamon, and honey. I usually thaw my berries/fruit slightly, since honey tends to be difficult when it hits frozen things—it mixes a bit better when the fruit is slightly thawed. Once everything is combined, pour filling into the prepared pie crust, and bake for 15 minutes. Lower the oven temp to 350, and bake for about another 45 minutes, until the juices are bubbling and the crust is lightly browned. Remove from the oven and let cool a bit (but serve warm!).

IMG_5145

Transcendental Pie.

IMG_20130508_110027

Oh little bloglet, I do love you. I wasn’t even going to post today, but I suppose the bloglet muse struck…

AND I have this pie. Oh my goodness.

IMG_5098

There are no words. So, you get pictures.

IMG_5092

Actually, there are words. Words like family. Sunshine. Warm fruit. Warm weather. Nostalgia. Long evenings, dusky twilights. Memories. Summers that felt endless. Fresh. Happiness. Peace. Soul.

IMG_5097

Pie.

IMG_5090

Pie to me seems older than many traditional desserts or foods… it’s one of those intrinsically ‘family’ foods. When I make it and eat it, I feel a connection to generations of female family members who made pie before I did, and fed it to their loved ones. This is why I make pie by hand, not with a food processor or any other technical kitchen implements. I like just using a simple pastry cutter, and my mom’s wooden rolling pin. So simple, yet I think it makes the best pie. Why is it that the simplest things are so often the best? Probably because we get so much more out of the taste sensation than delicious food: nostalgia and taste receptors go hand in hand. To me, pie is generations of strong women. It makes me proud to feel connected to them in a physical way—those strong, wonderful, loving women who came before me.

So this pie is an homage to them: I am proud to derive my lineage from such a long line of fantastic women and their pies!

Happy early Mother’s Day to my mama, and to all of the wonderful mothers in this world!

IMG_5099

Simple Peach Pie

I know this is the second peach pie recipe on the blog, but um… I LOVE peach pie. So I’m giving you choices! This one is slightly healthier than it’s predecessor, not like that particularly matters when it comes to pie. But actually, this is my favorite of all of the pies on here! Simple, and delicious. The crust comes together easier than anything, and the filling is easy as well. Since it wouldn’t be a Hayley post without some nutritional tidbits, of course I have to add a note about the healthy fats from the coconut oil crust, and the blood-sugar regulating properties of cinnamon. Peaches are fruit, fruit is good for you… Whole wheat crust! And minimally processed sweeteners, from unrefined sources. Wheee!

Crust recipe lightly adapted from The Joyful Pantry, here! I made 1/2+1/4 of the recipe, as I wanted cut outs for the top. My pie pan was a shallow 8″, and I had just enough left for a few decorations. The measurements below are for a double crust, makes two 8″ crusts.

IMG_5096

Make pie. Eat. Love.

Crust:

  • 3/4 c coconut oil
  • 2 c whole wheat pastry flour
  • 1 tsp salt
  • 1.5 tbsp coconut sugar
  • 5-6 tbsp ice water

Filling:

  • 2 bags frozen organic peaches (I think between 2-3 c sliced)
  • 1/4 c honey
  • 1.5 tsp cinnamon
  • 1 tbsp whole wheat flour
  • 1 tbsp quick cooking tapioca

Preheat the oven to 400.

In a  bowl, whisk together flour, salt, and coconut sugar. Using a pastry cutter, cut in the coconut oil until the mixture resembles coarse sand. Add in ice water, a tablespoon at a time, until you can form a dough (I like to do this part with my hands). Gather the dough up into a ball, then roll out on a floured surface (I like waxed paper, as it makes it easier to flip the crust back into the pie dish). Once it’s larger than the circumference of the dish, flip the dough carefully back onto your pie dish, and press into place. Poke the bottom a few times with a fork, and crimp the edges so it looks pretty!

Combine peaches, honey, cinnamon, flour, and tapioca in a large bowl. Give it a few stirs… see? I told you this was easy. Pour this into the prepared pie dish, top with whatever kind of crust you’d like (double, lattice, cutouts, whatever), and then pop it into the oven. Bake for 30 minutes uncovered, then use foil to tent it and prevent excess browning, baking it for another 30 minutes. The filling should be bubbly when done, and will thicken as it cools.

Let cool a bit before slicing, but not too much… pie should be eaten warm!

IMG_5088

Haha, what leftovers??


Spinach. On. The. Ceiling?!

IMG_5071

Did I tell you that vaccuum vati found a piece of spinach on the kitchen ceiling the other day? 

Yeahhhh. That happened. How on earth did I manage that?! Welcome to my life: “Hello, my name is Hayley and I am obsessed with spinach!” I toooold you I put spinach where it didn’t belong, but um I had no idea it had gotten on the ceiling..?! I mean, I know I eat it multiple times a day, but that must have been some pretty ferocious chopping. You know, like Chopped Kitchen type of chopping.

IMG_20130505_122834

On. The. Ceiling. The mind boggles. 

Anyway.

IMG_5062

Today’s post has nothing to do with spinach and everything to do with apples. Mmm. Appleeesssssss. I feel like the witch in the Wizard of Oz when I say that… 

This tart is simple, good for your body, and good for your soul. It’s not very sweet–if you’re looking for a sweet dessert, this isn’t it. But I like it for a mid-meal snack post workout… or dessert, since I like mine less sweet anyway. I liked it with some added applesauce, and a few pieces of chopped date. It’s gluten free, vegan if you sub out the honey for maple, and contains no refined sugar. Hooray! I made it on a day that was cloudy and overcast, perfect for apples and baking. Simple, beautiful, and good for the soul. 

IMG_5058

And here. Happy Monday, here’s something beautiful! Have a wonderful day :) 

IMG_20130428_091907

Apple-Almond Tart 

Recipe lightly adapted from Tales of a Kitchen, here! This makes one full-sized tart/pie, depending on the pan you use. I would recommend a pie pan, as the crust is very crumbly—I don’t think it would come out of a tart pan too well. Next time I make this I think I’ll add dates to the crust instead of honey—I’d like it to be a bit crustier, less crumbly. But still delicious as is! Serves 8. 

IMG_5070

Laze around with me on a cloudy Sunday and produce the following:

  • 1 c oat flour
  • 1 c almond meal/flour (I grind my own from an equal amount of almonds in the food processor)
  • 1/2 c unsweetened, shredded coconut
  • 1 tbsp coconut oil
  • 1 tbsp honey
  • zest of one lemon
  • 3 apples, cored, peel on (I used fuji and daisy girl)
  • 1.5 tsp cinnamon
  • 1/2 tsp vanilla
  • 5-6 tbsp almond meal
  • 2 apples, finely sliced, peel on

Preheat the oven to 375, and lightly grease your pan of choice (I used a pie pan). 

In a large bowl, combine oat flour, almond meal, coconut, coconut oil, honey, and lemon zest. Mash it all together (ideally using your hands, it’s much more fun) until combined. Press the resulting mixture into the prepared pan, making sure it’s evenly distributed. Poke a few holes in the bottom with a fork, and bake for 9-10 minutes, until lightly browned. When done, set it aside to cool slightly.

While the crust is baking, toss cored apples, cinnamon, and vanilla into the food processor (or blender). Blend until a smooth puree is reached. Toss this into a bowl, and stir in 5 tbsp almond meal. If it’s not thick enough and is still a little watery, add another tbsp of almond meal. Pour the filling into the slightly cooled crust, and arrange the finely sliced apples in a pretty pattern (this is very soothing, I found). 

Bake for 30-35 minutes, until your house smells delicious and the apples are a golden brown. Let cool before slicing, and store in the fridge! Excellent with a little extra applesauce, or I’m sure whipped coconut cream would be delicious as well, if you can be that on top of things (unlike me). 

IMG_5060

Happy Earth Day! Go show Mother Nature some love.

IMG_5012

Okay so actually it’s been about a million years since I made these, but they were too good not to share! So better late than never, riiiiight?

You see, I’ve been mega busy doing awesome things like finding this:

IMG_20130418_090220

And being up at dawn to witness this (Happy Earth Day today, by the way! Go out and give a tree some love):

IMG_20130414_061602

Oh. And I spend an inordinate amount of time here. Whole wheat croissant+jasmine green tea = heaven.

2013-04-10 10.42.18

And doing other things like attempting to eat as much as I possibly can, whilst being off sugar (yep, that happened. Including dates! Amazing, I know. I’ve added dates back in now, but expect to see natural, non-refined sweeteners on here from now on in baked treats). Trust me though, I feel quite a bit better for having cut processed sugar out nearly completely (special occasions not withstanding! Birthdays. Duhhh).

IMG_5014

Busy busy busy.

But don’t worry, still eating ridiculous hippie-type things like eggy pumpkin messes and a mega huge ton of veggies. As per usual, nothing has particularly changed! Except maybe the consumption of avocado and liquid aminos and nutritional yeast has gone up… not that I even remotely thought that first one was even possible! Ha. Power to the AVO!! I’m sure another savory recipe is coming your way soon, watch this space for further developments!

But anyway. Cookies. Long time coming, I made these a few weeks back and they were simple, delicious, and good for you. What’s not to love?

And yes, I know they’re blue. Who *doesn’t* like some blue food now and again?! Especially when it’s naturally occurring… see? It’s kind of like mother nature is throwing a party for you, on your plate. A party of awesome, antioxidant-filled blueness. To which the free radicals in your body are NOT invited, by the way (and after you eat these cookies/blueberries, there will be less nasty free radicals to float around and cause problems anyway! Mother Nature always knows how to throw an awesome party).

IMG_5013

Blueberry Almond Coconut Cookies

Yield: about 11-12, mine spread out quite a bit and were on the flatter side. Soft, but delicious. Recipe lightly adapted from Ari’s Menu, here!

Healthy fats [almonds+coconut], antioxidants [blueberries], vegan, and gluten free! Winners all around.

  • 1.5 c almond meal
  • 1/4 tsp baking soda
  • 1 tbsp organic, non GMO cornstarch
  • dash of salt
  • 1/4 c maple syrup (I use grade B organic)
  • 1/3 c light coconut milk (canned)
  • 1 tsp vanilla extract
  • 1/2 c frozen organic blueberries

Preheat the oven to 375, and line a baking sheet with parchment paper.

In a large bowl, combine almond meal, baking soda, cornstarch, and salt. Add maple, coconut milk, and vanilla, and stir to combine. Gently fold in blueberries (this turns the batter blue. I’m in love). Drop by the spoonful onto your prepared cookie sheet, and bake for 12-14 minutes until set and golden (Mine went a little on the longer side—they’ll still be soft when done, so tap the tops to test them). Let sit for a few minutes (they’re delicate!), then remove to a cooling rack to cool completely. Store in an airtight container in the fridge.

IMG_5015

Pie.

IMG_4943

Pie.

I love that word. It’s so simple, but it brings with it so many positive associations! Fruit. Ice cream. Family. Eating al fresco. I’m sure you have your own; those are mine. Besides all that, I love that I can pack a dessert full of fruit and then call it good for me… and then call it snack. And breakfast. And maybe lunch. Why not? Fruit+whole grains+healthy fats = a balanced(ish) meal, happy tummy, and happy soul.

IMG_4946

This post is rather short, as I’ve been a bit under the weather. I also loooove the photos, so this time, less is more!

IMG_4941

Life is short. Eat pie. Be happy!

Simple Blueberry Pie with a Coconut Oil Crust

I used the coconut oil crust recipe from Food 52, here, with only a slight modification (ww flour, always!). I wanted to use coconut oil, since it provides a nutritional bump in healthy fats (among other things like antioxidants, antimicrobials, and a host of other wonderful things). I always struggle with pie crust, partially from lack of patience and practice, and also probably because I’ve never used a trusted recipe. I really liked this one though—not only did it come together relatively easily, but it also was quite probably the best-tasting crust I’ve ever made. Winner. I’ll be making this one again, when I can get my hands on some peaches :)

I used blueberries I’d frozen in the summer—if you use frozen fruit, no need to thaw it first.

IMG_4938

Whole Wheat Coconut Oil Crust

  • 2.25 c whole wheat pastry flour
  • 1 tsp salt
  • 1 tbsp coconut sugar (or other granulated sugar)
  • 1/2 c coconut oil, cool enough to be solid
  • 1/3-1/2 c ice water

You can do this by hand, or use a food processor if you want to save time, like me. Food processor method: toss flour, salt, and sugar into the processor and pulse to combine. Add in solid coconut oil, and pulse again. It should start to come together when you pinch a bit. Pulse in 1/3 c ice water, until the dough starts to come together even more; adding ice water a tablespoon at a time until it holds together. You should be able to hold a handful without it disintegrating into crumbs. A few crumbly bits are okay, but it should be relatively easy to form it into a ball to roll out.

Flour your work surface and rolling pin. Toss dough onto the freshly floured surface (or, if you’re smart, onto wax paper so you can pick it up easily… definitely remembered that trick *after* I rolled it all out on the counter, oops), and roll it out until it’ll fit into your pie dish of choice. I used a deep-ish one, so I had enough crust left over for a few decorations but not for a lattice.

Gently lift crust into the pie pan, and crimp the edges so it looks nice! Prick the bottom a few times to prevent sogginess (no one wants that). I baked mine immediately—if you’re going to wait a bit, wrap the ball of it in plastic wrap and store it in the fridge, letting it come to room temperature before rolling it out.

IMG_4937

Blueberry Biz!

  • enough blueberries to fill your pie pan of choice. I probably had 1.5-2 c, and could have used a bit more if I’d had them.
  • squirt of lemon juice (about half a lemon’s worth, mine were Meyer lemons, hooray!)
  • 2-3 tbsp brown sugar, depending on berry sweetness
  • 1/6-1/4 c whole wheat pastry flour*

*apologies for the indefinite measurements… when I make pie filling, I usually don’t measure and taste as I go!

Preheat oven to 425, and make sure you have your prepared pie crust lurking around on hand somewhere.

Toss blueberries with lemon juice, brown sugar, and flour in a large bowl. Add blueberries into the prepared pie crust. If you have leftover crust and want to roll it out so that you have an excuse to play with cookie cutters, by all means do so! Place little pieces of crust on top of blueberries, and pop the entire thing into the oven for 15 minutes on 425, then lower the temp to 350 for another 45 minutes. Pie is done when the juices are a little bubbly and the crust is browned. I like my blueberries to have more body and be less like soup, so I took mine out at the hour mark. Let cool for a bit before slicing! Pie stores well in the fridge for the next day’s breakfast… and is reeeeally good with whipped coconut cream. Just sayin’. (I used a can of Trader Joe’s Coconut Cream, chilled it for a few hours, scraped off the cream and whipped it with an electric mixer. I added just a hint of vanilla and maple syrup).

IMG_4947

IMG_4949

And one more… just because I happened to make this on Pi Day, and seriously, who doesn’t like extra pictures of pie??

IMG_4944

A whoopsa-too-much-milk almost-fail that wasn’t

IMG_4916

YOU. GUYS.

These cookies are… maybe the best thing I’ve eaten all week. And I really have been eating them all week (whatever, I know it’s Tuesday, my weeks are never normal so be nice to me and just assume I mean last week+the beginning of this week, okay good, now we’re straightened out… continuing on!), since I’ve made two batches. TWO. You know something is pretty freakin’ amazing if I make it twice. Not only twice, but IN. A. ROW.

Whaaaat.

Weird.

IMG_4918

Obviously you should trot off to your kitchen and make these immediately. Not only are these crazy delicious, but they also happen to be ridiculously good for you (okay. It’s still a cookie but if you are a fiend for cookies like me, you can be awesome and healthify when you can) and beyond simple to make. Toss some stuff in a food processor, push on. Push off. Toss in some more stuff. Blend. Stop blending. Add the last bit. On. Off. Throw on cookies sheet. Toss sheet in oven. Bip. Done! …Pause for baking. Attempt to let them “cool”. Do a bunch of push ups (okayyy, I suppose that bit is optional) Stuff face. Repeat.

It’s nice if you share. Or you can share with a caveat, like me, and make some slightly-more-massive ones for yourself and clearly separate them on the cooling rack. With a fork. See? Those two over there are on the “do not eat under penalty of mega cookie deprived wrath” side of the fork. The others are obviously fair game, but I never said I wouldn’t eat those too. Oh no.

IMG_4928

And yes… I know this is about my billionth cookie post in pretty much two weeks, *sighhhh*. Sooner rather than later I’ll get around to blogging about something else, but suffice it to say I a) about eat my weight in veggies everyday, b) I eat lots of cookies and c) my dinners have been quick, nutritious, and visually uninspiring these days. Sooo. Savory things. Eventually.

But right now… go make these cookies!! Seriously. I love you, invisible internet friends, would I steer you wrong?! … Correct answer: no. Cue subliminal messaging: coooooookiiiieeeesssss!!!

IMG_4921

Ridiculously Delicious Date Cookies

Recipe from Power Hungry, here! I got around 17-18 cookies each time.

The first time I totally goofed and doubled the milk. I do have to say, they are delicious that way and I think I might actually prefer them. I’ve made them twice, as I said, once with the goof and once as the recipe originally intended. While I love both, I think my vote is with the softer, flatter (for once!) doubled-milk variety. The original amount of milk yields a taller, slightly craggier cookie, with slightly chewier edges. Both are delicious. These cookies contain minimally processed ingredients and no refined sugar! They’re full of healthy fats (almond butter) and whole grains (oats), fiber (oats+flaxseed), omega-3’s (Flax), and antioxidants (dark chocolate!). Winner, winner, I just ate cookies for dinner. Juuuuust kidding… but seriously. It was a close call.

IMG_4929

Just for comparison, the cookies above are made with 1/2 c milk… and the ones in the eggplant bowl and at the end of the post are 1 c. Just in case you needed a visual like I always do.

Firstly, grab this:

  • 1 c rolled oats
  • 2 tbsp ground flaxseed
  • 1/2 tsp baking soda
  • 1 c semi-packed, pitted dates, roughly chopped
  • 1/2 c organic almond butter
  • 1/2-1 c milk bev (I used 1% milk)*
  • 1 tsp vanilla extract
  • 1/4 c dark chocolate chips

*depending on whether you want taller, chewier cookies (1/2 c), or flatter, softer cookies (1 c)

Secondly, do this:

Preheat the oven to 350 and line a cookie sheet (or two) with parchment paper.

Haul out your massively heavy food processor, and process oats until they are finely ground and flourlike. Add in flaxseed meal and pulse to combine. Add the dates, and pulse until they are finely chopped and incorporated. Toss in almond butter, milk and vanilla, and pulse to blend. Pour/spoon dough into a bowl and stir in chocolate chips. If you double the milk, the mixture will be more like batter than dough (It’ll spoon into little puddles). If you use 1/2 c milk, the dough will be much thicker– flatten the cookies out with a fork before baking. Bake for 10-11 minutes, let cool a few minutes on the cookie sheet (a bit more for the doubled-milk cookies, as they’re a little more delicate), then transfer to a cooling rack. I keep mine in the fridge for freshness. I’m sure they keep for a while, but honestly mine have lasted all of about three days… so good luck with that!

IMG_4923

I really do actually eat vegetables. Promise!

IMG_4876

And now for something completely different in the cookie realm!

Because obviously I haven’t given you nearly enough cookie recipes lately (um. lies?!) And because I’m pretty sure said no one ever there’s such a thing as too many cookies. And if they did, whatever, we obviously can’t be friends. Schaaaawwrryyy! Cookies are the number one principle of my personal philosophy. Life is sometimes tricky, it’s better if you eat a [healthyishkindasortamaybe] cookie!

I think cookies might actually be one of my favorite things to make. Oh really, you say? As if the blog title alone doesn’t prove that!

Cookies on cookies on cookies. One would think this is all I eat…

IMG_4877

Um. I promise I eat vegetables! Like, I actually eat a ridiculous  amount of vegetables. And fruit. And eggs. Ask my mother, she claims it’s difficult to keep me in vegetables… I just… LOVE… SPINACH! Hoooomg. Among other things. I’ve gotten really good at putting spinach where it doesn’t necessarily belong but is undeniably delicious. Like maybe in the banana scramble I made today. So bizarrely wonderful and so perfect for St. Patrick’s day. Hmm. Shield your eyes if you abhor green things, that just might be the next post.

SO anyway. Cookies. Best eaten any time of day, with or without a milk-type beverage.. Eat three, and call me in the morning. Seriously, if medical practitioners gave out this kind of advice, I think the world might be a slightly more magical place.

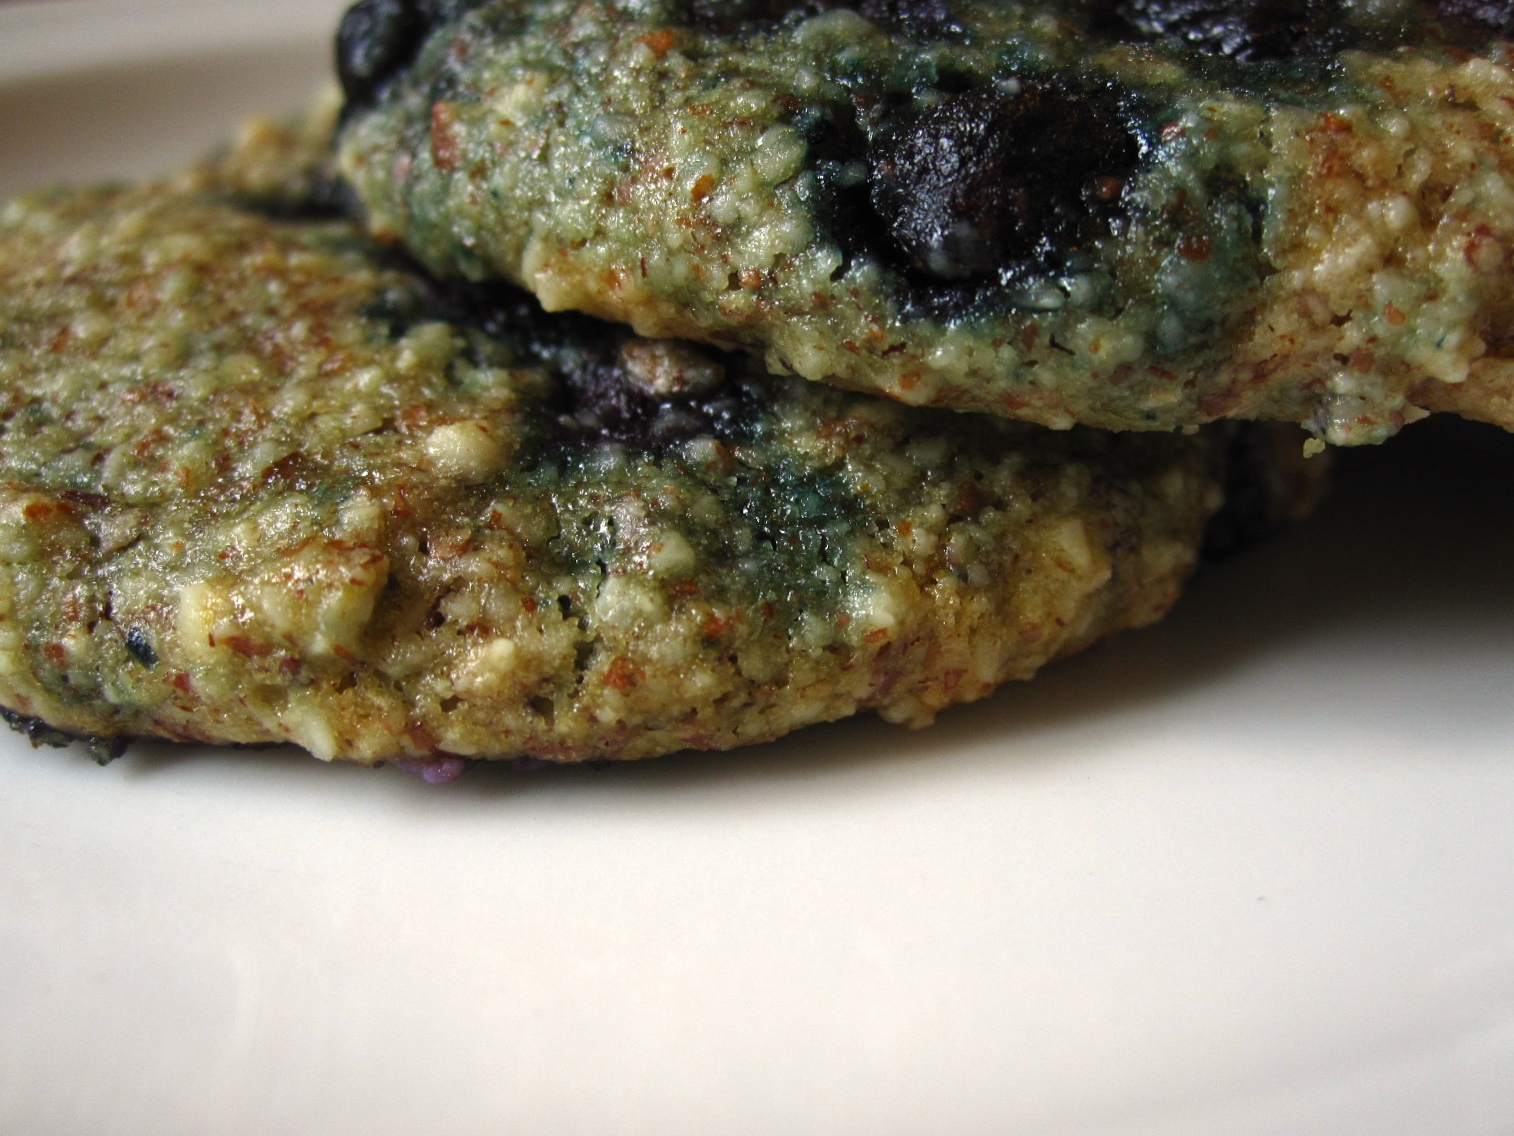
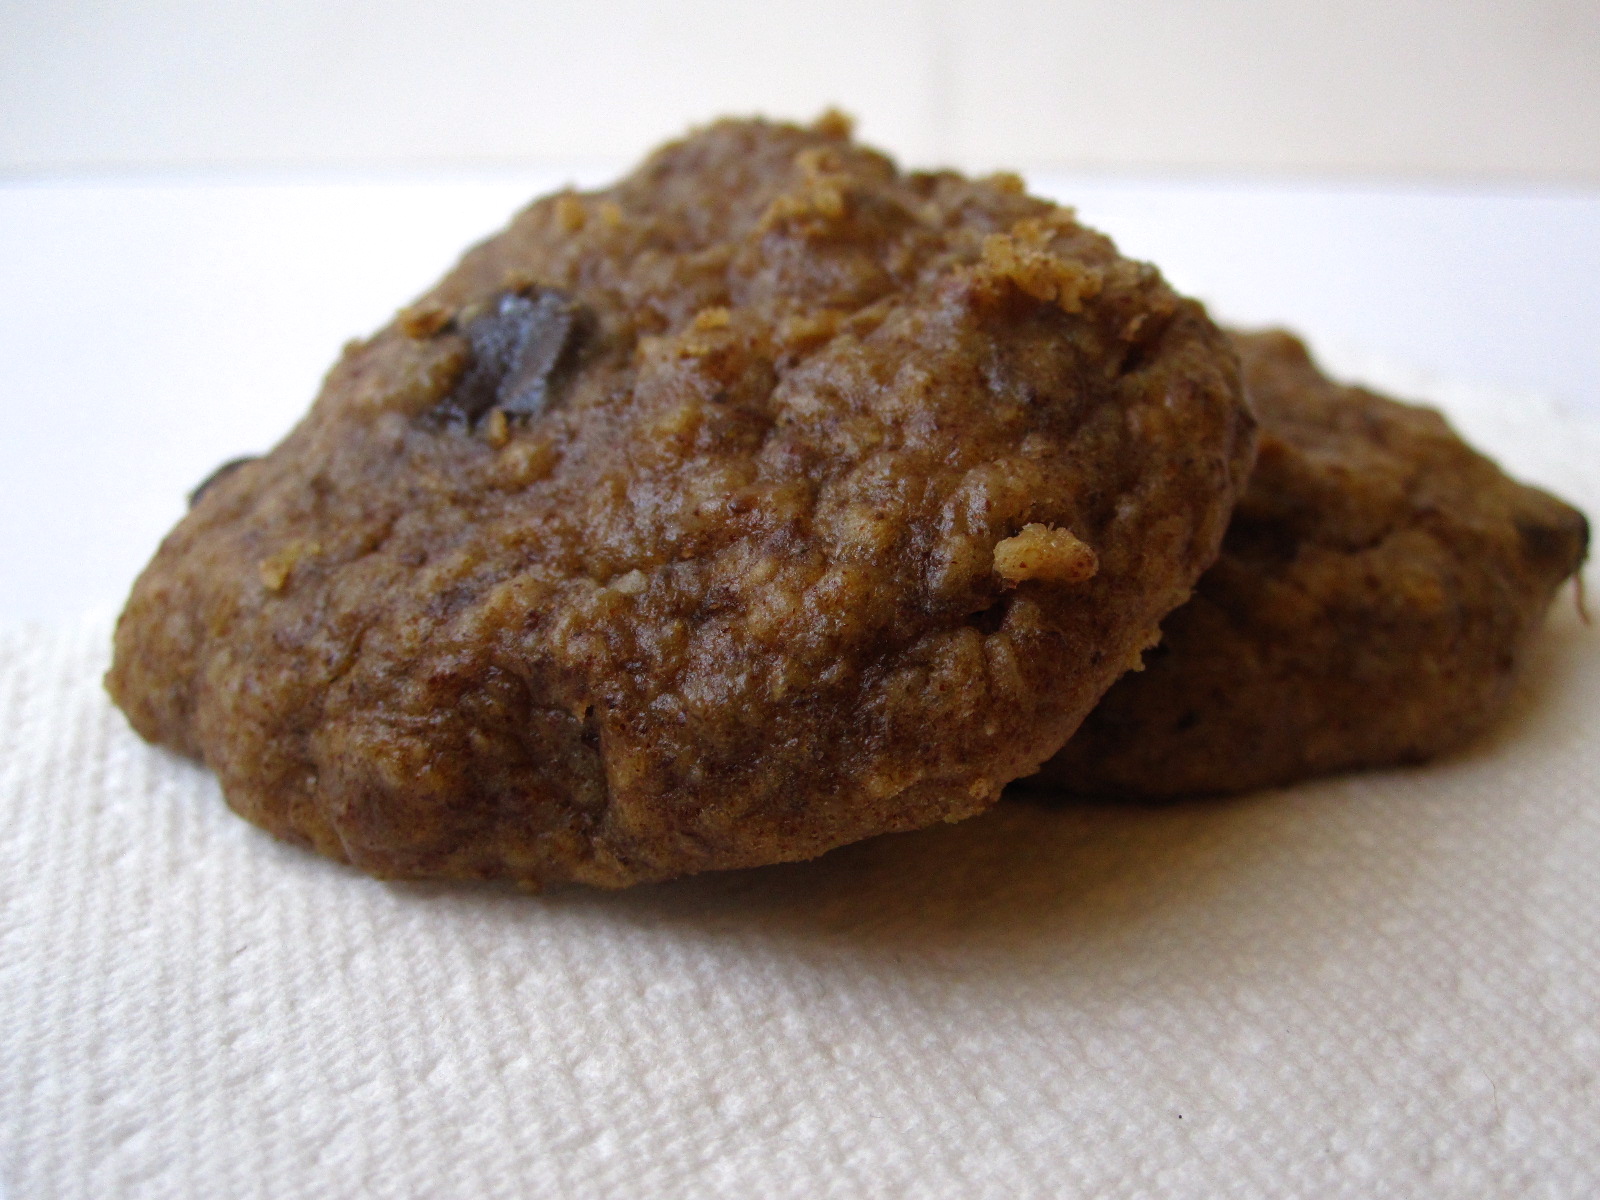
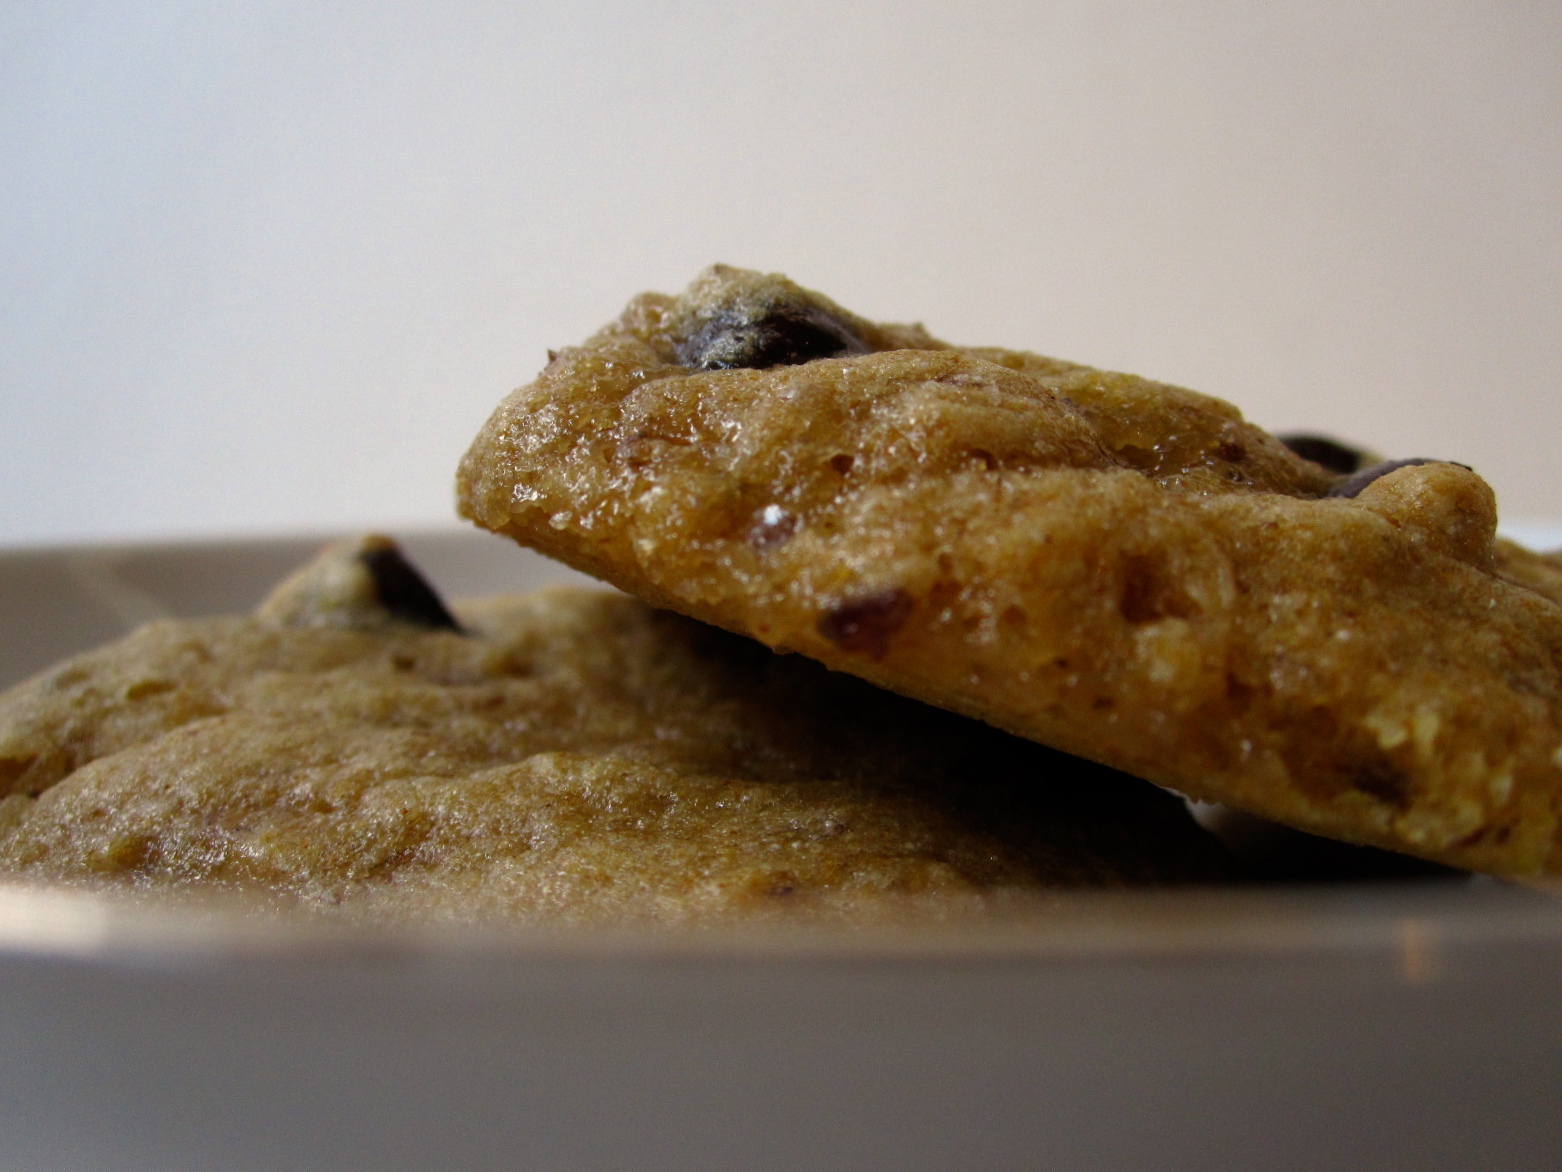
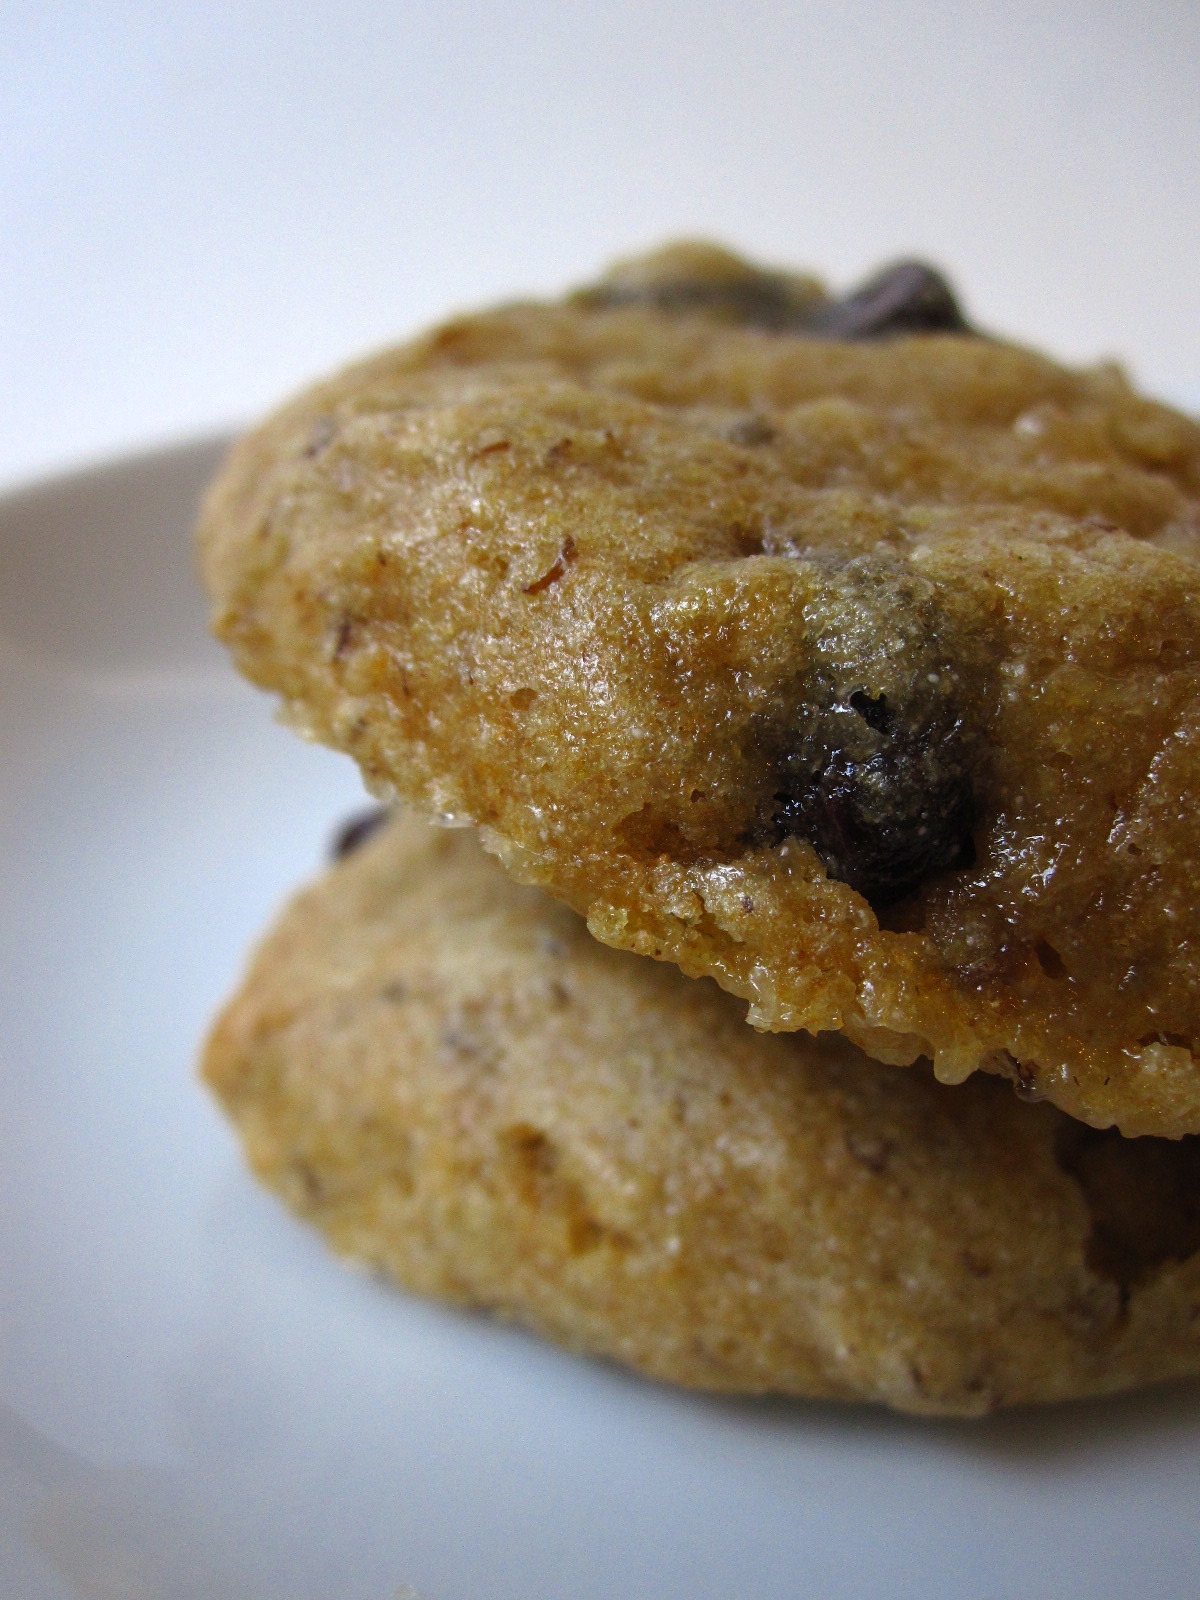
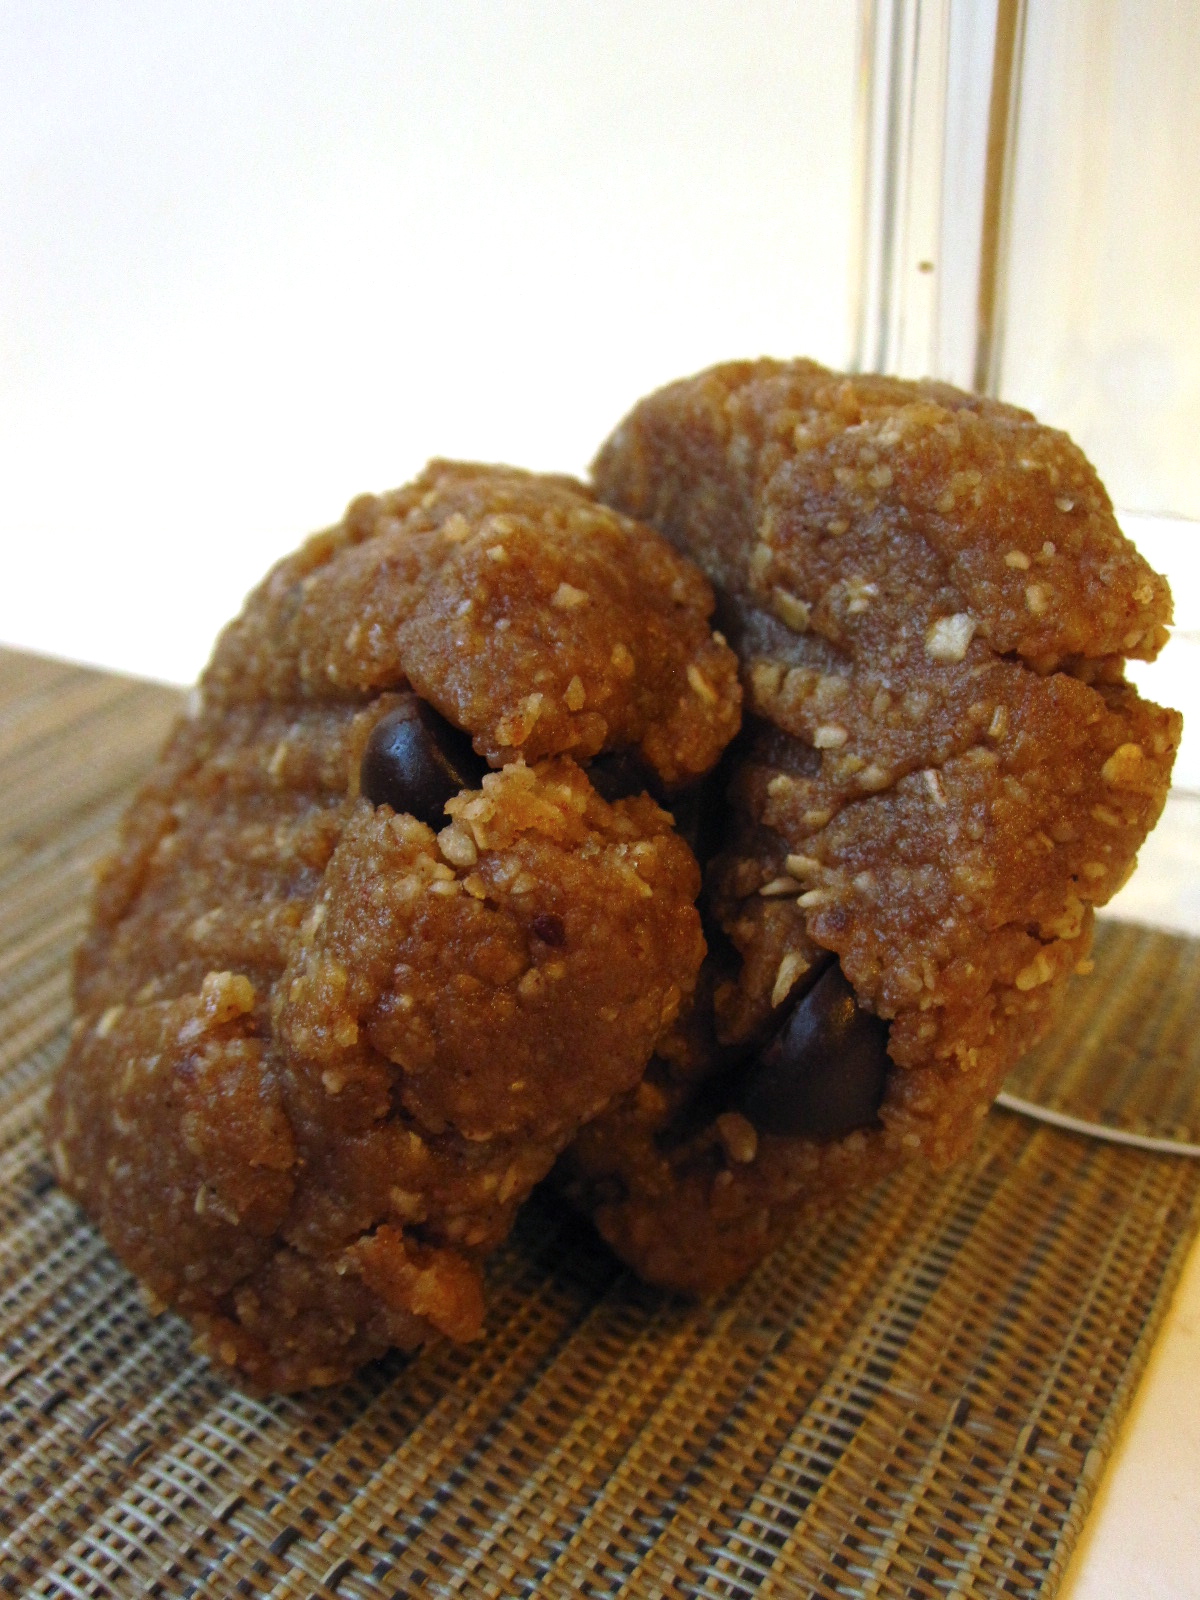
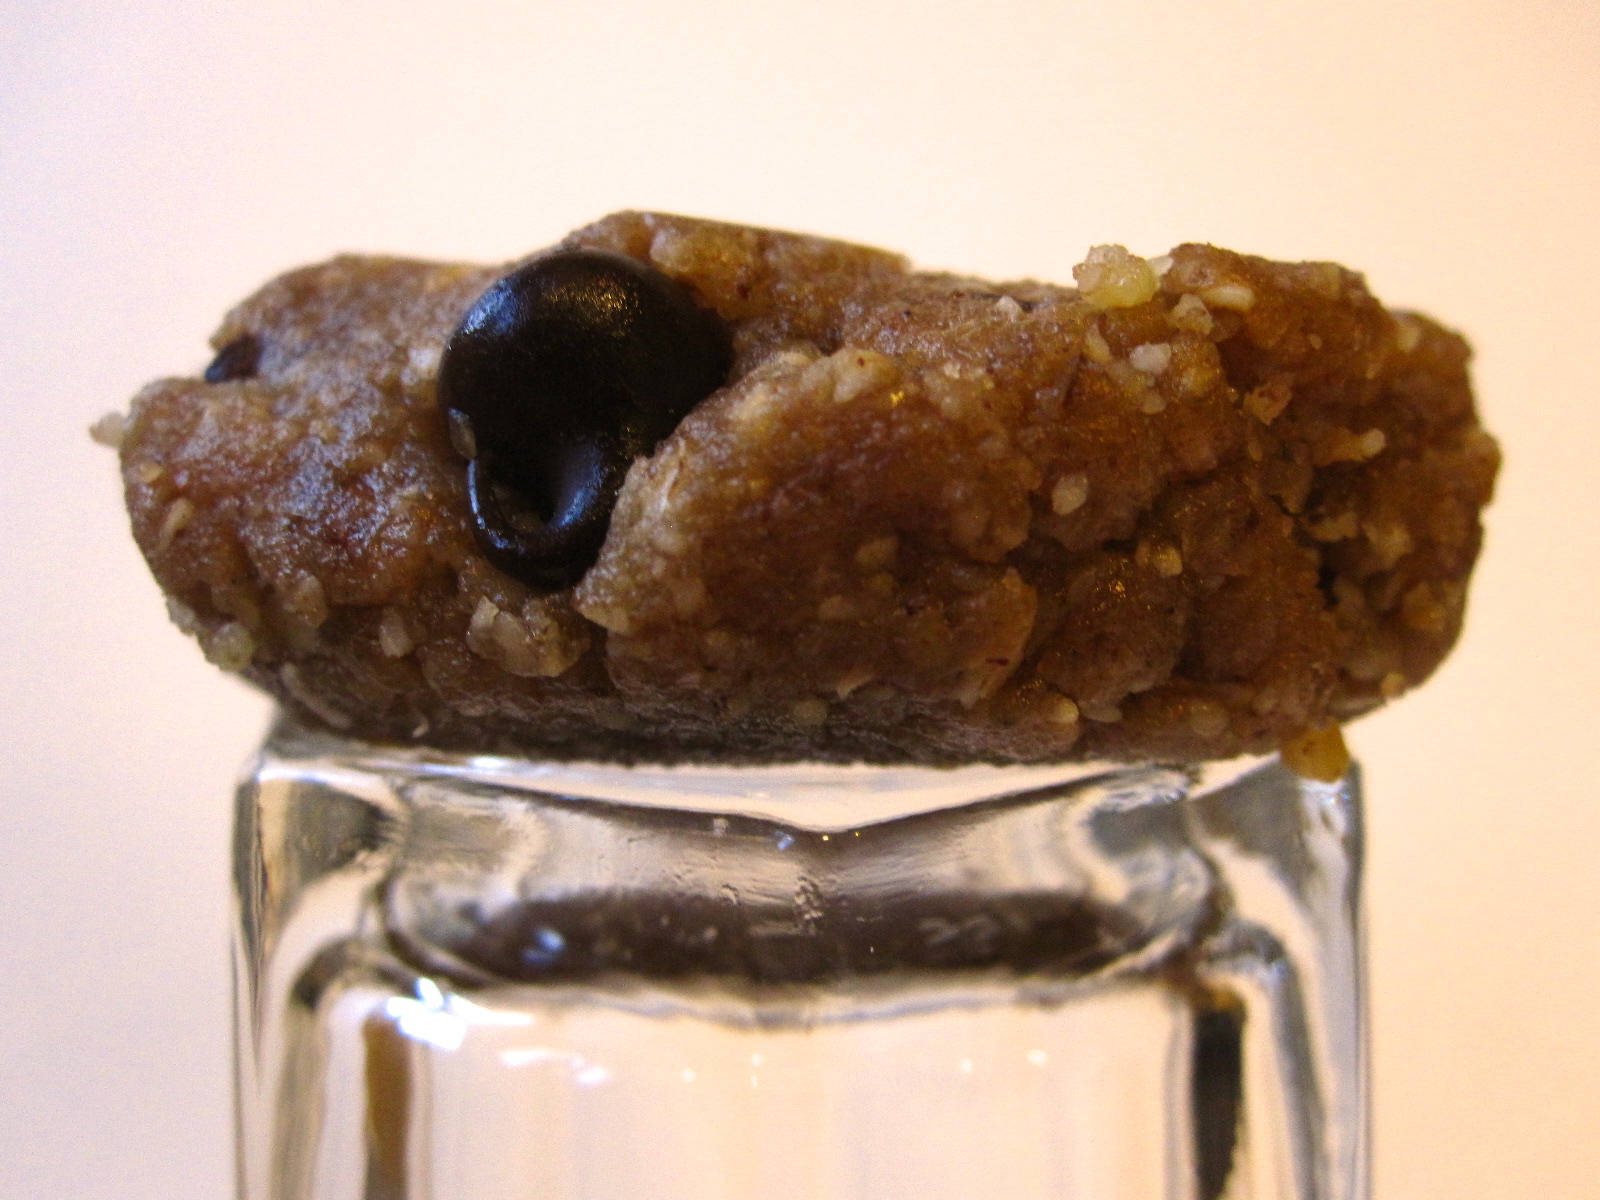
So now instead of cruncy-hippie-granola raw cookies, you get [somewhat less crunchy but still kind of, whatever I’m still kind of granola] vegan salted caramel chocolate chip cookies! Cue yummy sound. Did I just make the yummy sound? … No. That was definitely you. Oh no? Well.. if it wasn’t *YOU*, and it wasn’t *YOU*… and it wasn’t *ME*…

IMG_4881

Vegan Salted Caramel Chocolate Chip Cookies

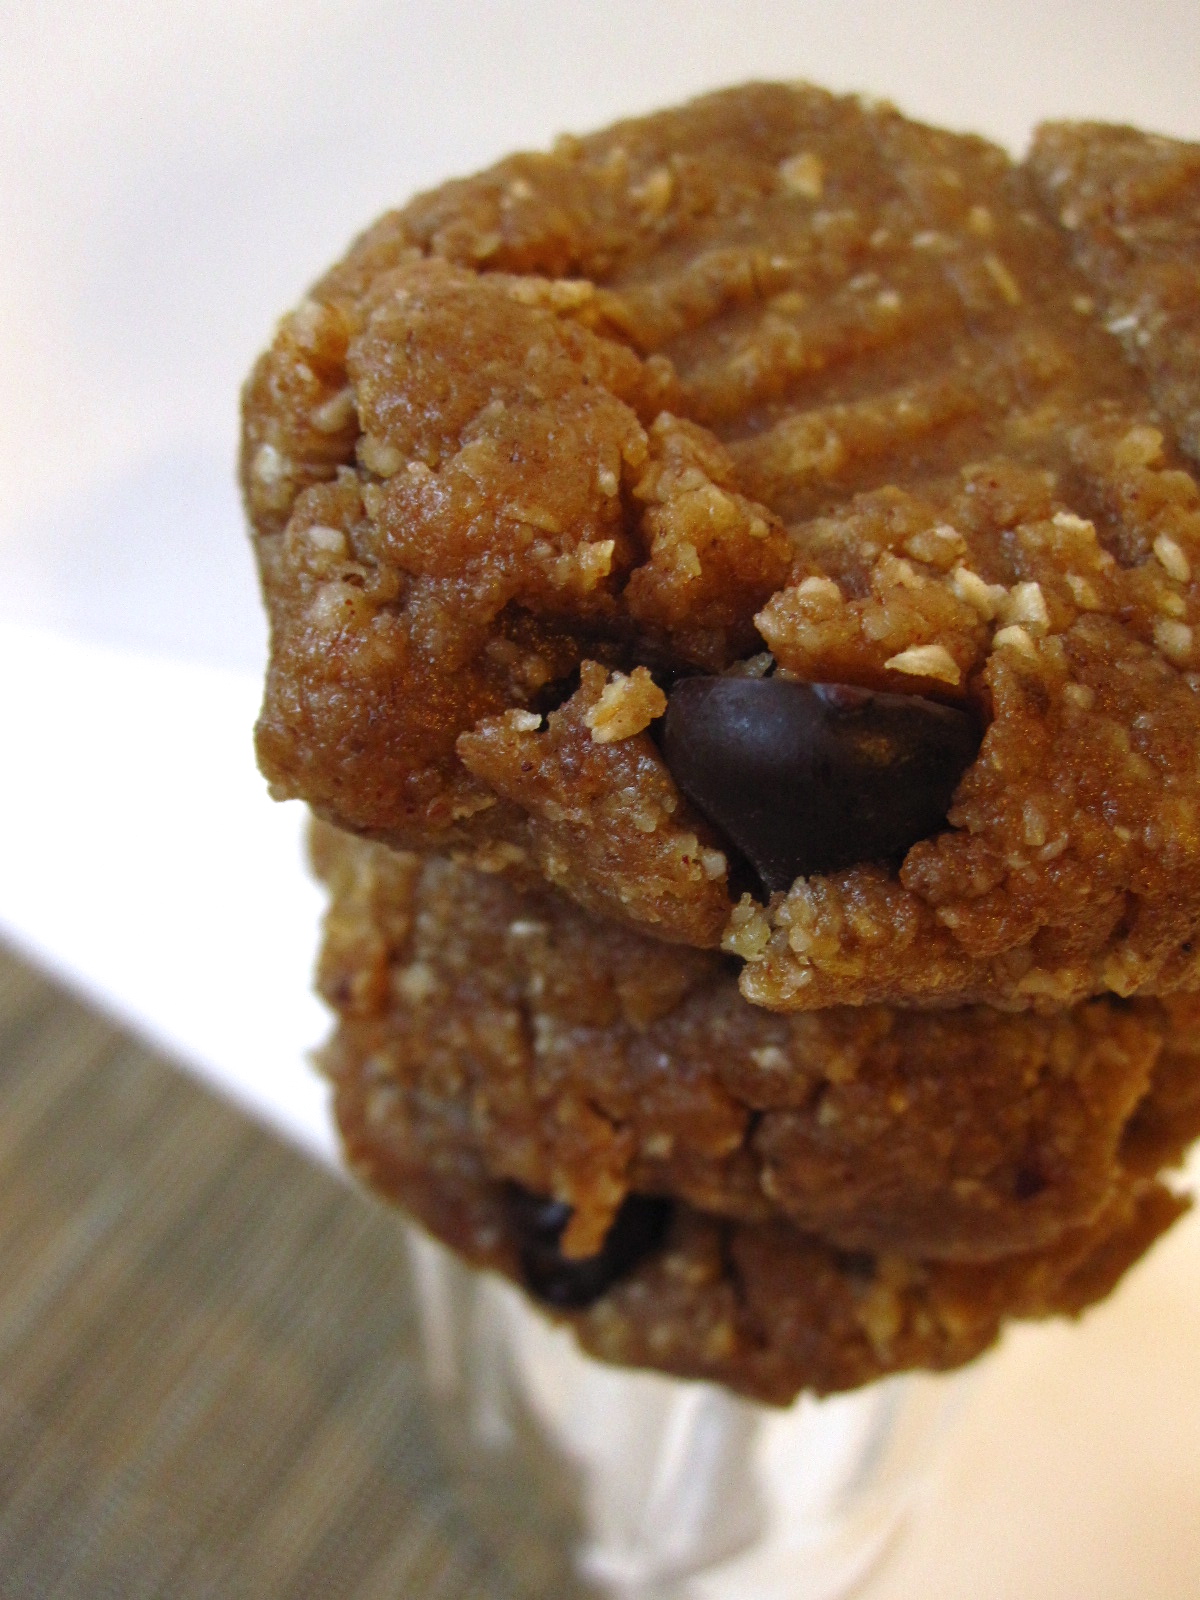
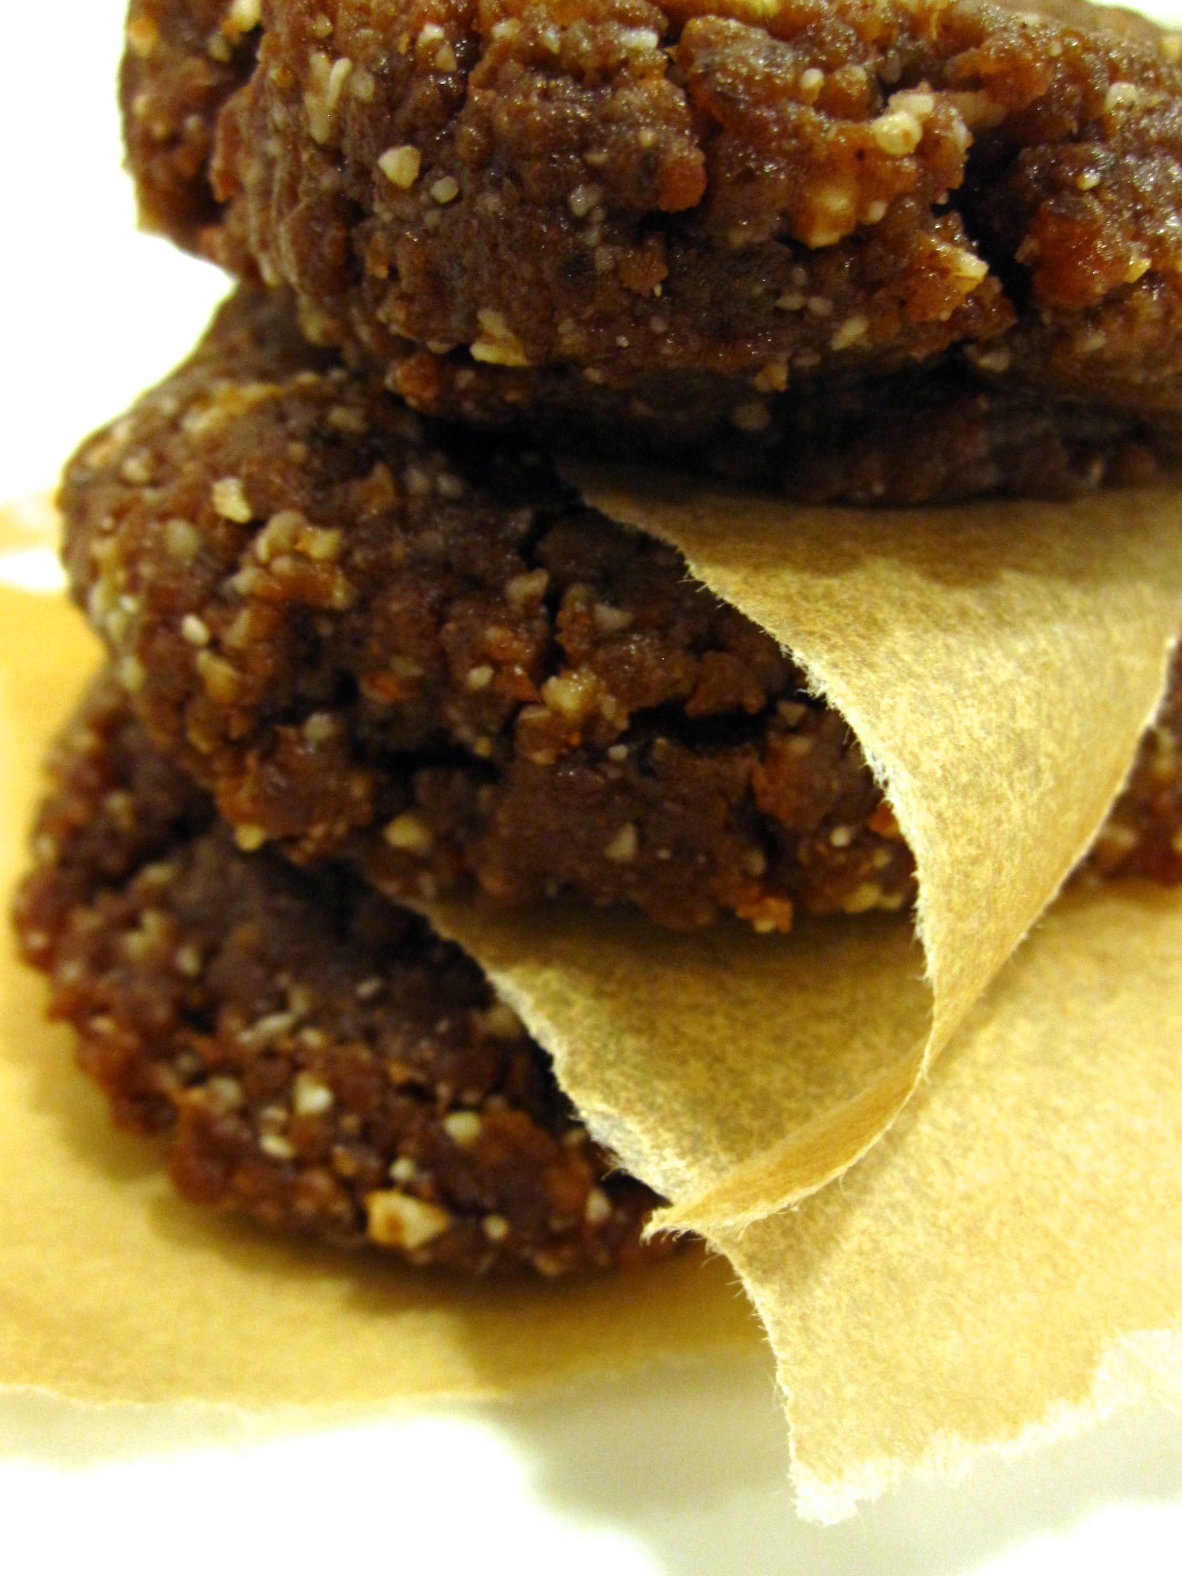
Recipe unintentionally adapted from Keepin’ it Kind. I made biggish cookies and ended up with about 15 or 16, but depending on size you could conceivably make up to 24ish… if you use a smaller scooping technique. Don’t judge, I’m rather a fan of large cookies! These are fab cookies, and the dough is just as good (number one perk for vegan baking: dough eating adventures).

I didn’t have coconut sugar, though next time I’ll be using that as my caramel wasn’t quite what was intended visually. It got the point across though, and tasted amazing! That being said… you *can* make these with regular sugar, as I did, but coconut is preferred (and keeps them slightly less refined).

IMG_4875

Let’s make tasty things:

  • 3/4 c sugar (see above note)
  • 1/2 c water
  • 1 c full-fat coconut milk
  • 1/2 tsp sea salt
  • 1 large ripe banana, mashed
  • 1 tbsp coconut oil (mine is the unrefined variety that smells like coconut)
  • 1 tsp vanilla extract
  • 1.5 c whole wheat pastry flour
  • 1 flax egg (1 tbsp ground flaxseed+3 tbsp water)
  • 1/2 tsp baking soda
  • 1/4 tsp sea salt
  • 1/3 c dark chocolate chippies

To do so, we…

Make caramel!
Pour sugar and water into a smallish saucepan. Whisking frequently, bring it to a boil. Reduce heat to low/simmering, and let it reduce until the water is reduced by half. If you use coconut sugar, the water should be dark brown; if using regular sugar, it’ll be lighter in color. Keep whisking, as it has a tendency to bubble up. Slowly whisk in coconut milk and continue whisking for 10-15 minutes or until (if using coconut sugar) the mixture thickens and is a dark brown. If you’re like me and you attempted regular sugar, it’ll look grey. Not the most gorgeous color, but delicious. Promise. The mixture will thicken as it cooks, more so with coconut sugar than regular. Stir in the salt, and remove from heat. Let it cool while you do the rest of the cookies, or you can store the caramel in a jar in the fridge (it keeps for several weeks, tightly sealed).

Onward! Cookie time:

Mix up your flax egg and let it sit for a bit to thicken.
Mash up the banana, toss in slightly meltedish coconut oil, and use a mixer to beat until fluffy. Whisk in vanilla extract and 2/3 c caramel sauce (save the rest for later). Once the flax egg sets up, whisk that in.

In a larger bowl, whisk together flour, baking soda, salt. Add dry ingredients to wet, stirring until just combined. Fold in chocolate chips, and slightly flatten the dough into the bottom of your bowl. Pop it into the fridge and let it chill for about a half and hour.

Preheat the oven to 350, and line two baking sheets with parchment paper.

Remove the dough from the fridge and make several cuts through it with a knife. Drizzle the caramel sauce over the dough, without mixing it in. Drop blobs of dough onto the prepared cookie sheets (whatever size you deem necessary for that particular day…), leaving the streaks of caramel running throughout. The dough will be a bit wet with all that, but just roll with it. Bake cookies for 8-12 minutes (I know that’s a huge range, but I did mine on convection so they ended up going a bit longer. Check at 8, and go from there!) Because of the caramel, the cookies can look a bit underdone, but they should be solid to the touch when done—check the bottoms if you’re not sure. Let cool on the baking sheets for a few minutes, and then transfer to wire rack.

Do yourself a favor and eat one warm out of the oven!

IMG_4878

Did British cavemen eat english muffins? If not, I refuse to be Paleo

IMG_4893

Sorry sorry for the blogging fail, I’ve been busy!! But to make up for all that, I have two wildly different cookie recipes to share with you. Never fear, all is right with the world when we have cookies.

IMG_4885

Hmm, some random musings first.

First and most importantly, I’m now a qualified TRX suspension trainer! Wheeeee!!! Now (after I practice forever and ever), I am certified to officially kick butt. I need business cards now, clearly. Get ready, world, I’m now certified and dangerous.

On a gastronomical level, I tried Welsh Rarebit for the first time when Mutti and I ventured down to Carmel by the Sea for the day. It’s… interesting. And no, it has nothing to do with rabbit, thank goodness. This, however was fantastic. How can you not love caramel and chocolate?!

2013-02-25 15.49.25

And then there is this enviously adorable picture of our feet on the beach.

IMG_20130225_175457

And then this awesome thingy that I can now do with my phone! Ridiculous photo editing triumphs! Totally unnecessary but hey, I love glitter so don’t judge.

2013-02-25 13.51.02

Okay so I suppose now I’ll share the cookies… because I spent 8 hours in TRX training, so obviously I earned a cookie (or a million. I was SO. HUNGRY). These cookies are amazing! Raw, vegan, and full of good things for you. No added or refined sugars, and they’re even gluten free! I’m kind of on a raw-date-nut-I’m-really-hippie-crunchy-to-the-core cookies, can you tell? These might even be paleo, maybe? I’m not sure, as I really like cheese and am not in fact well versed in the caveman diet as apparently cavemen didn’t eat cheese. Or english muffins. Maybe British cavemen ate english muffins? Whatever. To each his or her own eating proclivities, if you’re paleo, make these! If you’re not… make them anyway! Love food. Eat!

IMG_4899

Raw Chocolate Chip Cookies

I only slightly modified the recipe from The Sweet Life. Soooo good. I got 11 cookies out of mine, with a tiny ball of ‘dough’ left over to eat whilst making… These cookies come together in a snap, and set up easily in the fridge. Raw, vegan, gluten free, paleo, no refined sugars, no added sugars, good protein, and healthy fats. Um… you could go wrong how?!

IMG_4890

Firstly, you need:

  • 1/2 c dates, pitted puuuuhlease
  • 1.5 c raw walnuts
  • 1/2 c raw pecans
  • 1/4 c unsalted organic almond butter
  • 1/4 c rolled oats
  • pinch of sea salt
  • 1/4 tsp cinnamon
  • 1 tsp vanilla extract
  • small handful of dark chocolate chips

Secondly, do this:

Pit your dates. Please. Don’t murder your food processor…Process the dates (with maybe a teeny bit of water), until they’re smooth and form a bit of a paste. Add walnuts and pecans, and pulse again until smooth and slightly crumbly. Add in almond butter, oats, salt, cinnamon, and vanilla, and blend until smoothyish. The ‘dough’ should be crumbly but hold together when you press a bit between your fingers. If it needs a bit more sticking-together-power, add a tsp of water at a time until you get the consistency you want. Toss the dough out into a bowl, fold in chocolate chippies, and form it into balls or cookies or whatever (I like cookies with a fork pattern). Let set in the fridge for about an hour, and then consume with reckless abandon. I let mine sit on a plate for a bit, uncovered, then put them into a glass container.

Eat, in a wholly guilt-free and smartly indulgent manner. Eat the food you love… love the food you eat!

IMG_4888

Goodbye, moderation, hellooooo ice cream

Thursday things.

1. Apparently I make an excellent napping place:

IMG_5564

2. You know that Oscar Wilde quote I always toss around, “Everything in moderation, including moderation”…? Yeahhhhh. About that moderation thing. Out the window it went on Tuesday when I went to Fenton’s and ate this food coma-inducing wonder. Luckily I split it with Vacuum Vati or else I might be dead by now, ha. This was moderation in moderation in action:

IMG_20130219_154217

and then.

2013-02-19 15.08.49

muahahhaha.

3. And then last week I ate this: bourbon cornflake ice cream with bourbon caramel and tahitian vanilla ice cream with slivered, sweetened almonds. Thank you, Humphrey Slocombe, for sending me to gastronomical heaven.

IMG_20130213_151943

4. AVO!!! I made paleo cookies to use up the last of my coconut flour. They were… ehh. As much as I love coconut, I just can’t get past the sucks-all-the-moisture-out-of-your-mouth grittiness of coconut flour. It’s okay… but ehhhhh is really how I feel about it.

IMG_4854

5. I really like architecture. Juuuuust saying. Neo gothic seems to find me everywhere after my thesis, but I can’t say I’m sorry: it’s like finding an old friend wherever I go!

IMG_20130219_133618

6. OHMYGOSH. I made the ehhh paleo cookies. AND THEN. I made… these. They’re amazing and amazing for you. Make them. (Just as long as you’re not allergic to nuts please). I want them for second breakfast since it’s nine and I’ve had eggs and spinach already. Time for cookies, obviously…

IMG_4871

7. One last thing. Um… Downton Abbey?! Helloooo, what a horrible way to end the season. Couldn’t we have just had a nice ending to the SERIES, with everyone all happy and whatnot? Jeez. At least my favorite Machiavellian meddler is still alive and sarcastically kicking—I’d seriously have to quit watching the show if Maggie Smith left. I think I now have sympathetic post-partum depression. Ugh. At least Mad Men is starting up again in April (!!!)… I’ll attempt to fill the gaps between wildly addicting tv shows somehow… more baking perhaps?!

IMG_4865

Chocolate-Date Almond Butter Cookies (No Bake)

The recipe is from Vegetarian Ventures, here! Sooo glad I came across it, these are freaking amazing. Especially with date caramel on top! You can never have too many dates. These cookies are raw, no bake, and vegan (and gluten free!). They’re full of healthy fats, good protein, and antioxidants… annnndddd all they have is natural sugars! No added or refined anything, which means they’re a snack/breakfast/dessert you can eat and love! I got 11 2″ish cookies.

Whatcha need:

  • 1/2 c raw pecans
  • 1/2 c raw almonds (mine were already partly ground)
  • 1 c dates, pitted and soaked in water for about 15 minutes
  • 1/2 c unsalted organic almond butter (I used Maranatha)
  • 1 oz of dark chocolate, melted
  • 1/2 tsp cinnamon
  • 1/2 tsp nutmeg
  • 1/4 tsp sea salt for a garnish

This is beyond easy, no excuses:

After dates are finished soaking, chuck everything into a food processor, and blend until smooth. Mine went for probably about 3-4 minutes, or until the “dough” forms a bit of a ball. If needed, add a little bit of water (I didn’t and mine stay together fine). Here’s where you get to play with your food! Roll dough into little balls and smoosh them out into a cookie-like shape… make a crisscross pattern with a fork if you’re feeling fancy, and sprinkle with sea salt. Or leave them as balls, up to you! Store in the fridge, in a sealed container with wax paper between the layers. I let mine chill for a bit before eating—they solidify into sort of a fudgy-consistency. Soooo. Freaking. Good!

IMG_4870