Tis the season for festive desserts

fullsizeoutput_1f15

Happy December!

fullsizeoutput_1f0f

Time for the full-tilt holiday jungle madness to start. I do love this time of year though, even if it means that going to the store becomes an exercise in all kinds of patience. It’s so pretty though, with the cold weather, trees and lights everywhere, and the RAIN! We’ve been getting so much, and I just love it. Even the streetlights reflecting in the wet pavement look festive. Besides that, it’s the season for festive desserts and pretty baked goods! (not that I really need an excuse, but whatever)

fullsizeoutput_1f12

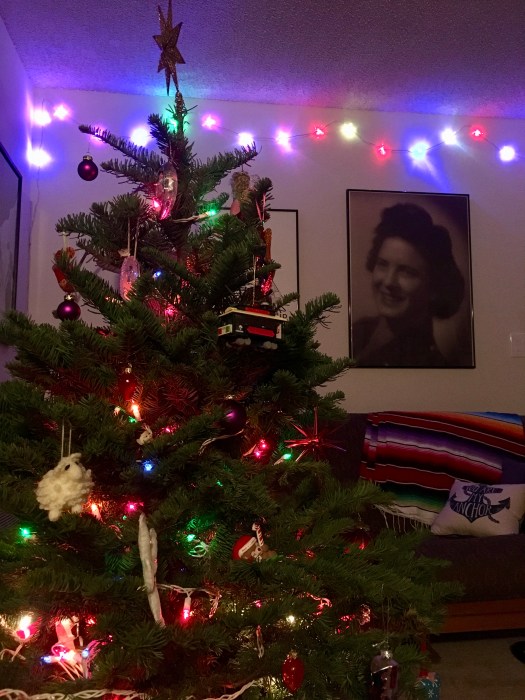
I just put up my tree! I am one of those “nothing Christmas-y before the first of December” people, but here we are – I happened to have time after seeing fave human yday to go grab a tiny tree, and it is currently brightening my living room.

fullsizeoutput_1efa

fullsizeoutput_1f0d

So! This tart!

fullsizeoutput_1ef6

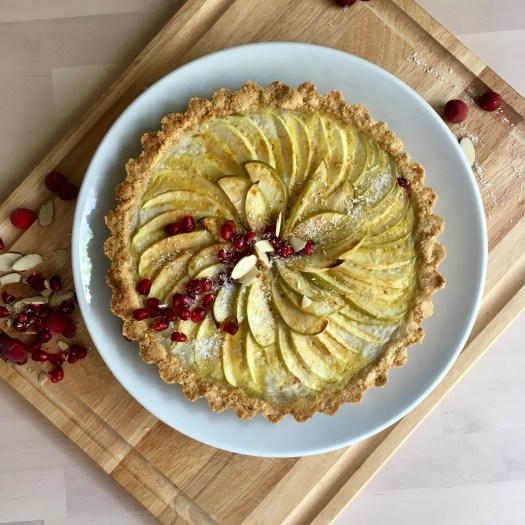
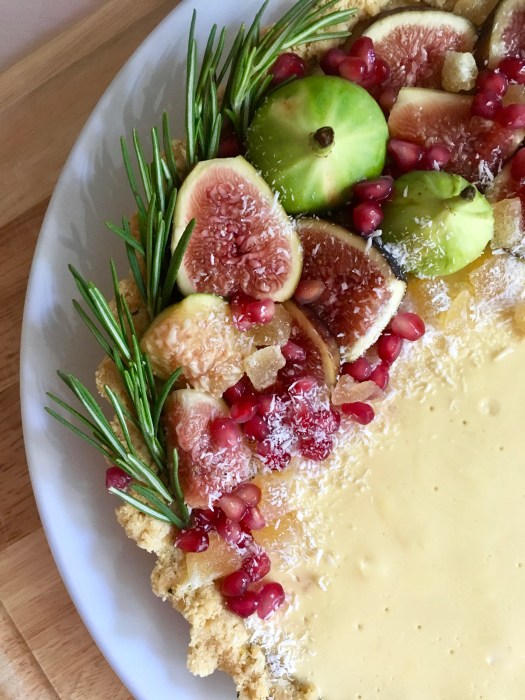
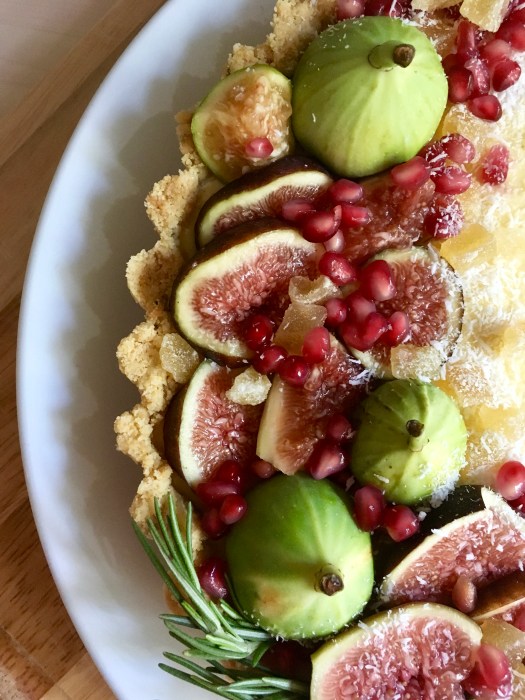
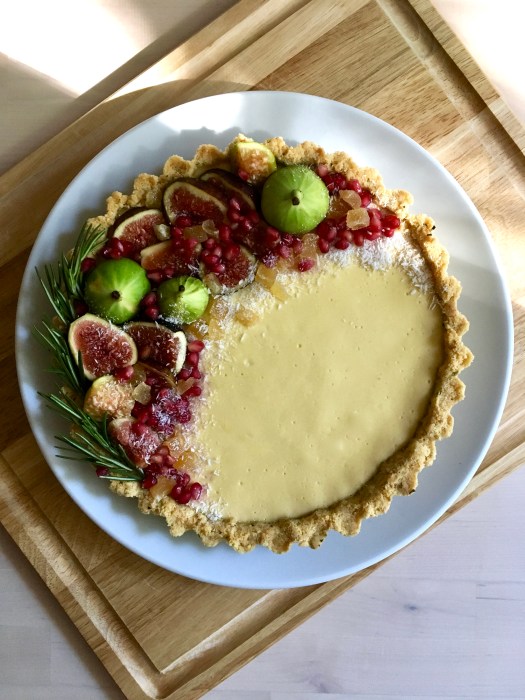
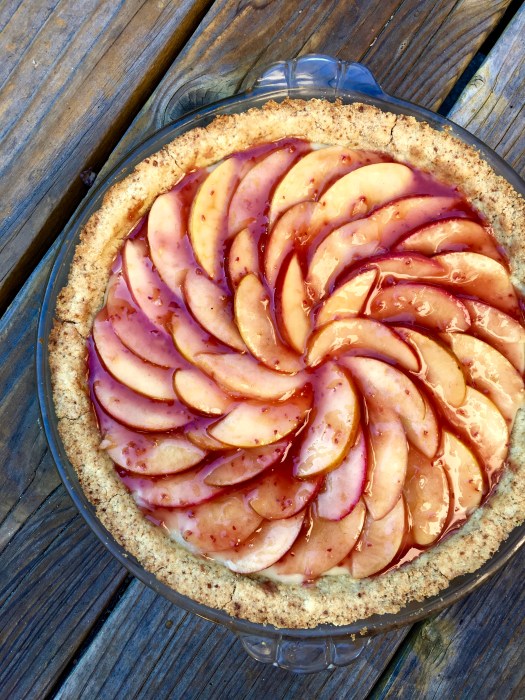
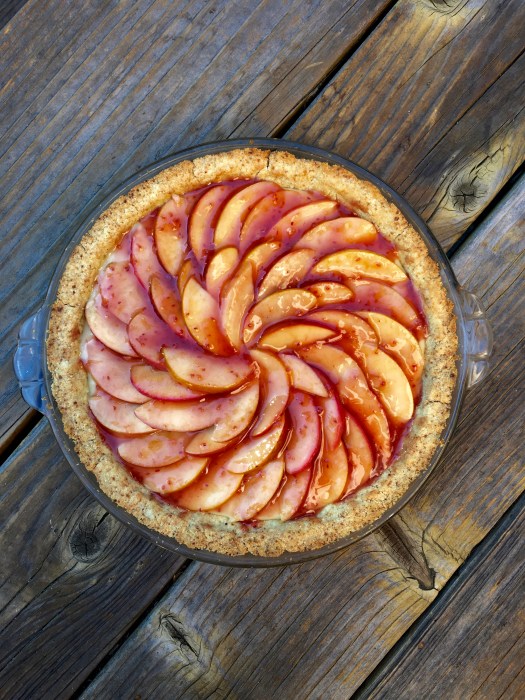
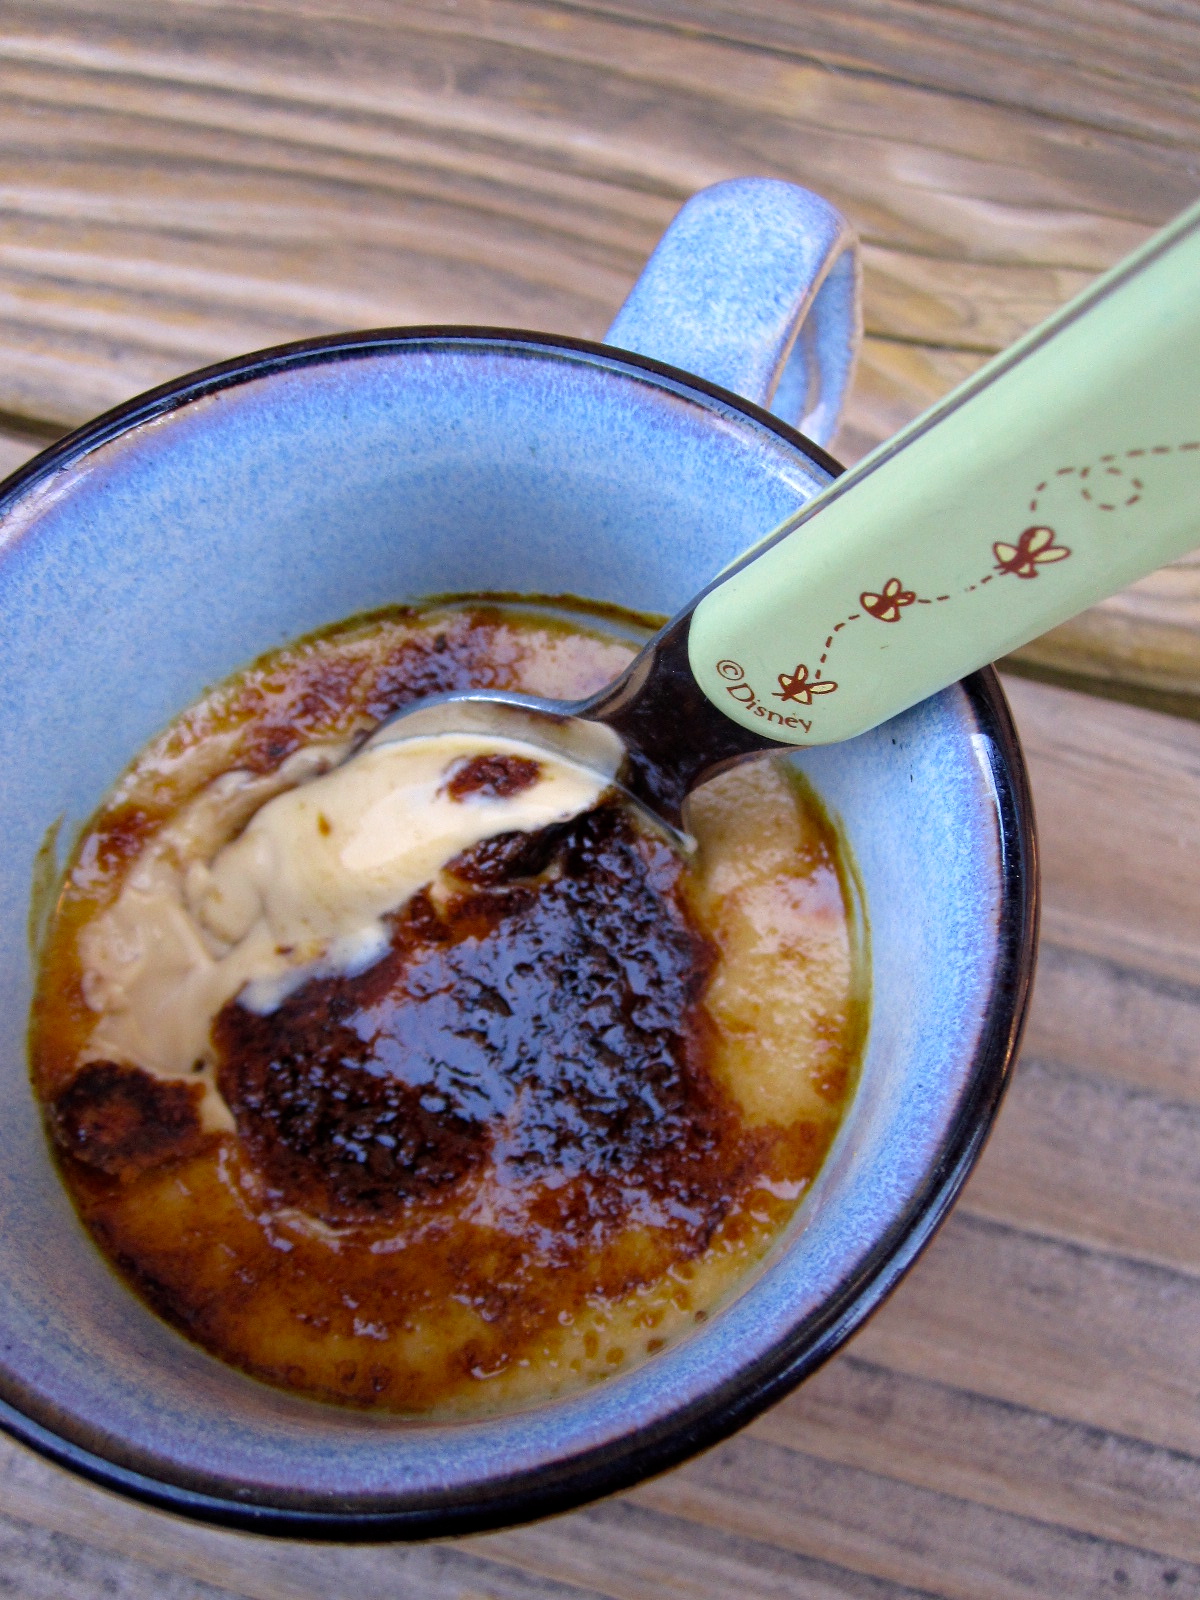
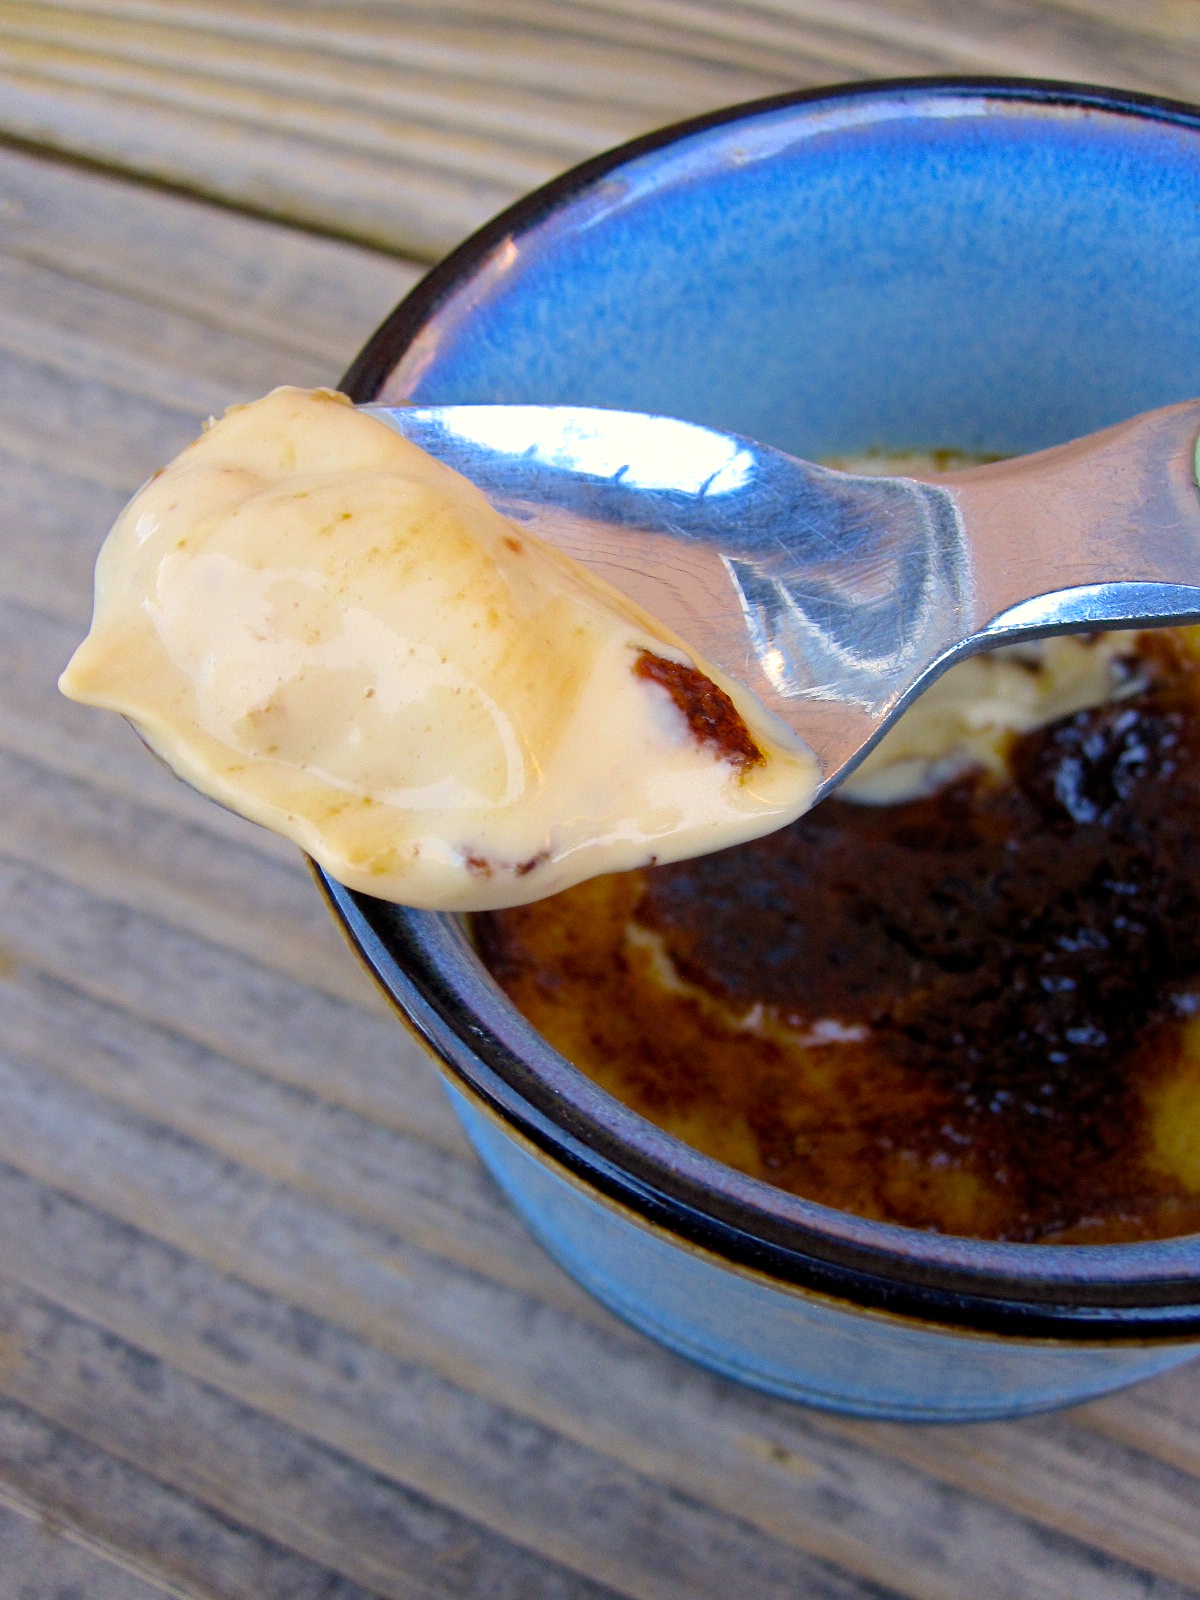
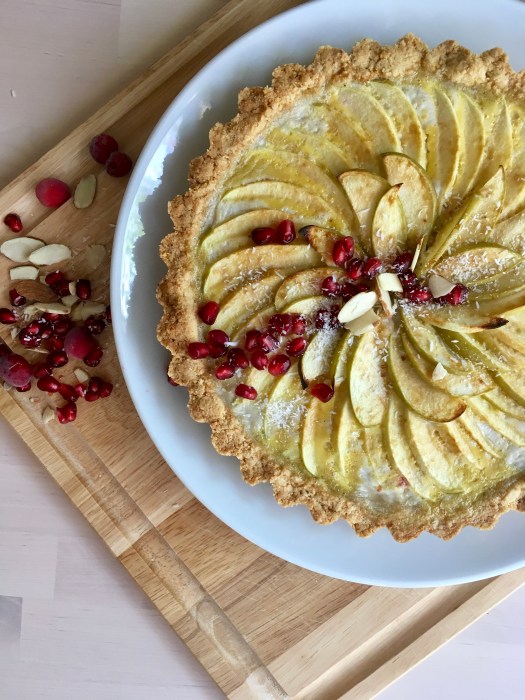
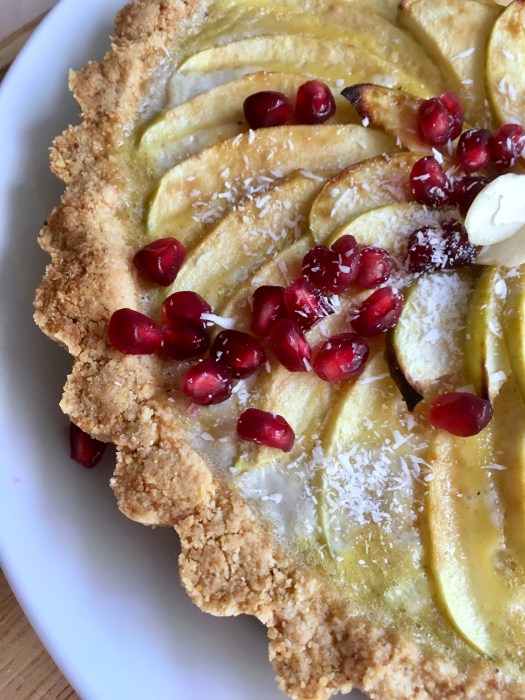
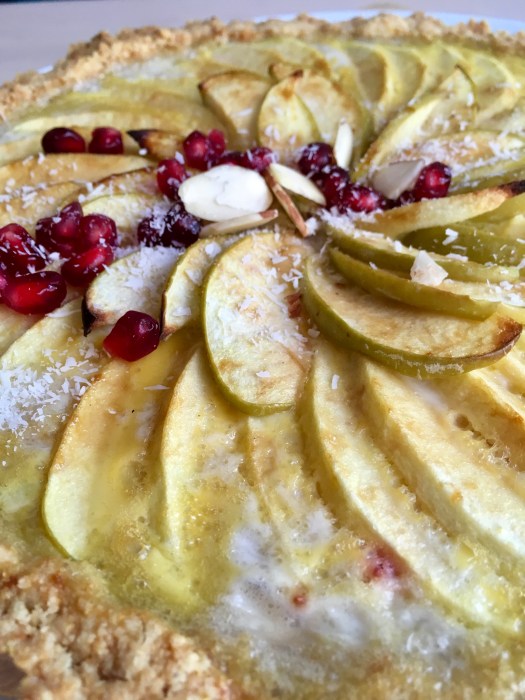
It immediately became a huge fave of C’s and mine; it is tart, but just lightly sweet enough – we both love cornmeal anyway so that part is an easy sell. For the filling, thinly sliced apples are layered over chunky cranberry compote and then everything is submerged in a really simple coconut custard before baking. It sounds complicated, but I promise it isn’t! As with almost everything I make, it is great for dessert with ice cream, and equally great for breakfast.

fullsizeoutput_1efe

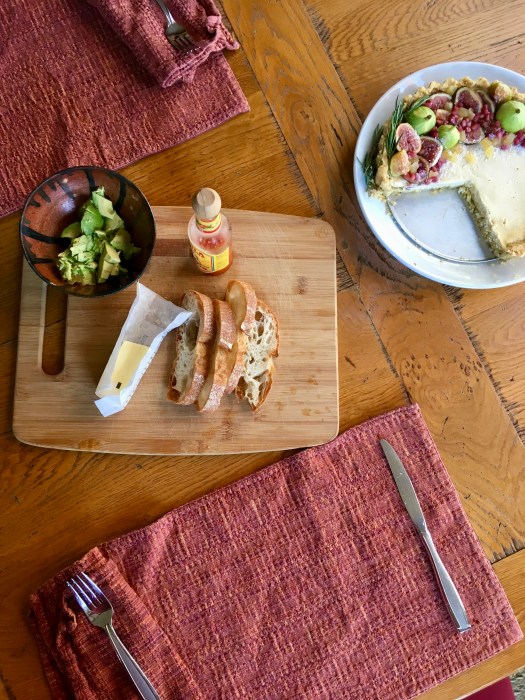
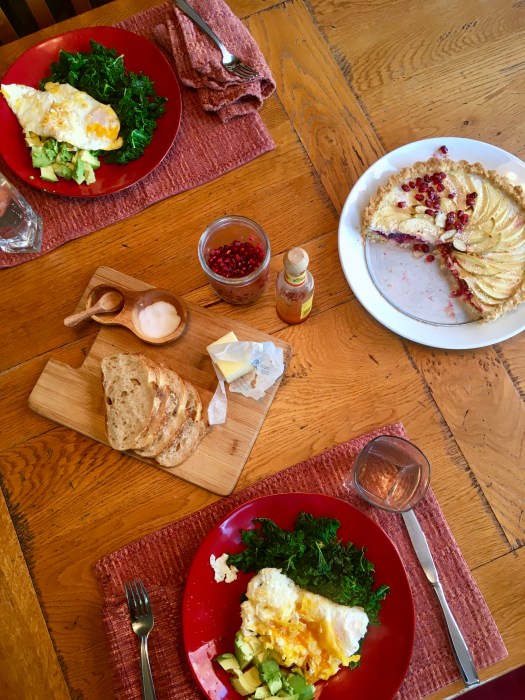
As per usual, C and I ate this as part of a very late brunch after hitting the gym for several hours – I was SO ready for all kinds of food at that point (and shaky! We’ve gotten back into climbing, and though my muscle memory is pretty good, my forearms and fingers are going through some serious reconditioning!)

fullsizeoutput_1f02

fullsizeoutput_1f1a

Happy holiday season! Do yourself a favor and whip up a quick cranberry tart: your tastebuds and your loved ones will thank you :)

fullsizeoutput_1f13

fullsizeoutput_1f06

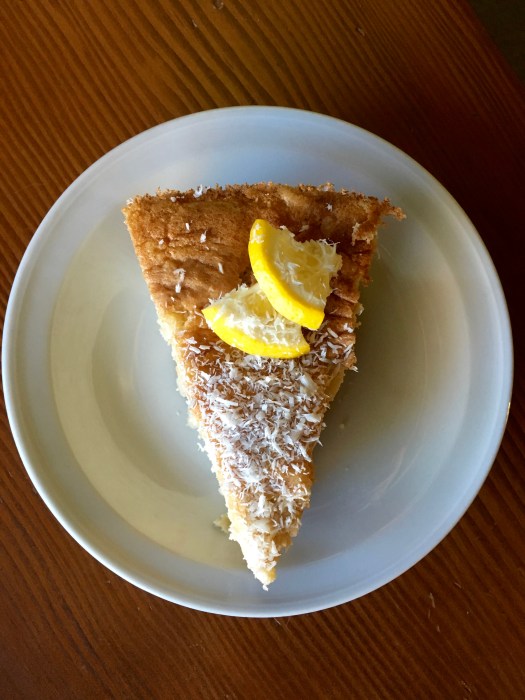
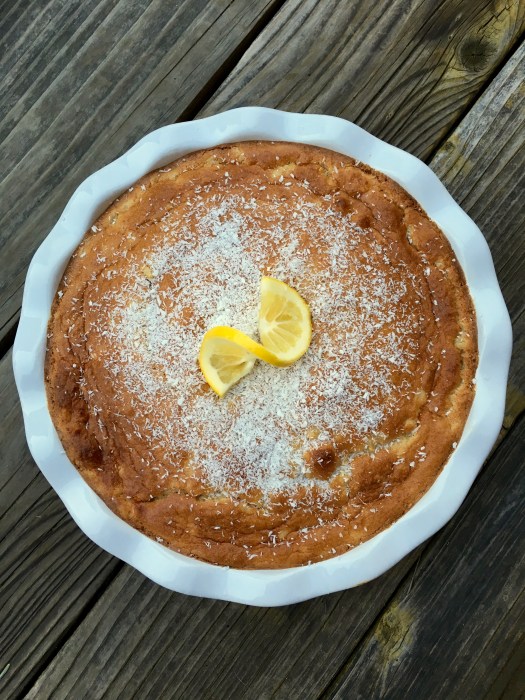
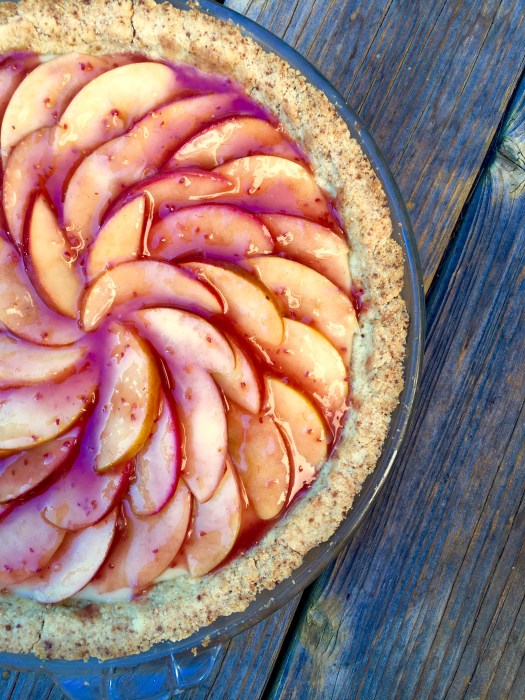
Apple Cranberry Custard Tart on a Cornmeal Coconut Crust

Tart, lightly sweet, and perfect for the holiday season. Thinly sliced apples are layered on cranberry compote, and a simple coconut custard is poured over the whole thing before baking. Gluten free, dairy free, and refined sugar free. Yield: 1 9″ tart, serves somewhere around 6. A Wait are Those Cookies original.

fullsizeoutput_1f0a

For the crust:

1.5 c almond flour
1/4 c unsweetened shredded coconut
1/2 c cornmeal
heaping 1/4 tsp sea salt
1/2 tsp baking soda
2 tsp vanilla extract
2 tbsp pure maple syrup
6 tbsp coconut oil, melted

In a large bowl, stir together almond flour, shredded coconut, cornmeal, sea salt, and baking soda. Add in vanilla, maple, and melted coconut oil, and stir until completely combined. The dough will look crumbly, but you’ll be able to press it together with your fingers.

Preheat the oven to 350, and lightly grease a tart pan with coconut oil. Press the crust into the plate and up the sides with a spoon or your fingers, creating a smooth edge (or not, your call!). Poke the bottom with a fork a few times, and bake for 15 minutes. Remove and let cool for a few minutes. Increase oven temp to 375.

For the filling:
2 cups fresh or frozen cranberries
1 tbsp maple syrup
zest of 1 lemon
1/4 tsp nutmeg
3 tsp vanilla extract, divided
1/4 tsp almond extract
2 eggs
1 teaspoon tapioca starch
1/2 cup full fat coconut milk
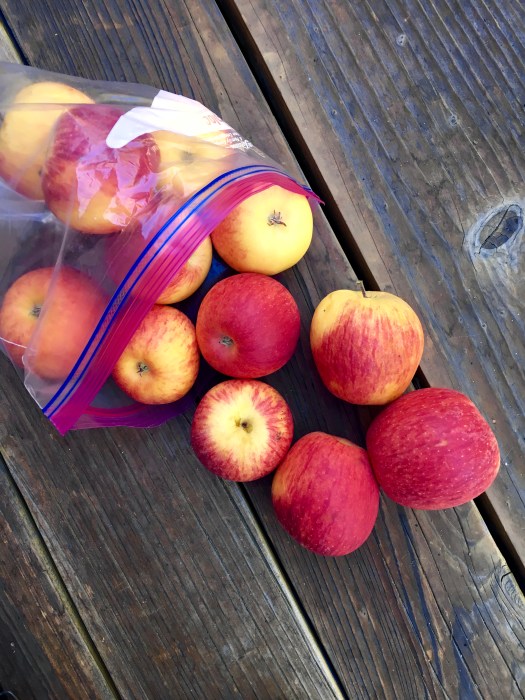
2 medium apples, peeled (optional), cored and thinly sliced*

* I used granny smith; pink lady or gala would be nice here too

Combine the cranberries, maple, lemon zest, and nutmeg in a small saucepan and cook over medium heat for 3 minutes or until cranberries pop and sauce thickens slightly. Remove from heat and stir in the almond extract and 2 tsp of vanilla extract. Let cool slightly.

Whisk together the eggs, tapioca starch, coconut milk, and 1 tsp vanilla.

Spread the cranberry compote over the bottom of the tart crust. Arrange the apple slices over the top, and pour custard over everything. Sprinkle with a bit of coconut sugar if desired, but totally optional.

Bake at 375 for 30 to 35 minutes until custard sets and apples brown. Let the tart cool for at least 10 minutes before removing it from the ring and cutting into it. Refrigerate if not serving immediately; keeps well in the fridge overnight.

fullsizeoutput_1f01

A figgin’ awesome tart (and some bad puns)

IMG_0053

Hello and happy weekend!

fullsizeoutput_1db2

We’re having beautiful fall weather over here today – it’s starting to cool down during the days (which I love) and the nights have been appropriately chilly. As such, I wanted to get on the last of fig season before they’re gone from the markets!

See fig. 1:

hahah see what I did there!! Figs?! Fig. 1?! Bahaha. Alright, I’ll stop torturing you… moving on.

fullsizeoutput_1da1

This tart is basically breakfast disguised as dessert. It has barely any added sweetener (maple) and it’s made of yogurt and eggs! C and I both LOVED the crust – I mean, we’re suckers for anything cornmeal anyway, but the combination of cornmeal and rosemary is just perfectly savory against the yogurt custard. I have a thing for rosemary in desserts anyway, so that was a given for me!

fullsizeoutput_1d9e

We had it both for dessert and breakfast (of course) – I loved it with ice cream, but it is equally delicious alongside eggs and kale for breakfast.

fullsizeoutput_1dbb

fullsizeoutput_1dbe

A few photos, just because they’re pretty, and I like to keep my little corner of the internet as visually appealing as possible! There is a lot out there these days – let’s keep this little spot happy.

fullsizeoutput_1db8

fullsizeoutput_1dc3

I can’t wait to get into the fall produce! I have some late season peaches that I froze and I feel I need to use, but apples and pumpkin are calling my name… we’ll see what sounds good by the time next weekend rolls around. In the meantime, I highly suggest you make this! It’s a very lowkey dessert – the filling comes together in about three minutes, and the whole thing (from crust to finish) takes just over 30 minutes in the oven.

fullsizeoutput_1da6

fullsizeoutput_1d9c

I love this time of year – the shorter days, earlier nights, and crispy air make me want to curl up at home with a good book and something in the oven.

fullsizeoutput_1da0

Yogurt Custard Tart on a Rosemary Cornmeal Crust

Lightly sweet – this is basically breakfast! The filling is made of greek yogurt and eggs with a bit of vanilla and almond extracts. The crust is wonderfully savory, with the cornmeal and rosemary – a perfect compliment to the custardy filling. It only requires just over 30 minutes in the oven, so it’s ideal for those times when you need a quick dessert – just make sure to let it set before slicing. Yield: 1 9″ tart. Serves: up to 8. The crust is a Wait are Those Cookies original; the filling is adapted from Food52, here.

For the crust:

1.5 c almond flour
1/4 c unsweetened shredded coconut
1/2 c cornmeal
heaping 1/4 tsp sea salt
1/2 tsp baking soda
2 tsp vanilla extract
1.5 tbsp pure maple syrup
7 tbsp coconut oil, melted
1 tbsp finely chopped rosemary

In a large bowl, stir together almond flour, shredded coconut, cornmeal, sea salt, and baking soda. Add in vanilla, maple, melted coconut oil, and rosemary, and stir until completely combined. The dough will look crumbly, but you’ll be able to press it together with your fingers.
Preheat the oven to 350, and lightly grease a pie plate with coconut oil. Press the crust into the plate and up the sides with a spoon or your fingers, creating a smooth edge (or not, your call!). Poke the bottom with a fork a few times, and bake for 15 minutes. Remove and let cool for a few minutes.

For the filling:
3 eggs
2 tsp pure vanilla extract
1/4 tsp almond extract
2 tbsp maple syrup
1.5 c (340 grams/12 ounces) plain full fat Greek yogurt
1 egg yolk, whisked with a tiny pinch of salt

In a medium bowl whisk the eggs and vanilla. Whisk in the yogurt. (The order in which the ingredients are mixed makes a difference in the smoothness of the filling, so it’s yogurt into eggs rather than eggs into yogurt!) When the crust is ready, remove it from the oven and turn the temperature down to 300°F. Brush the bottom of the crust with just enough of the beaten egg yolk to make a thin (moisture-proofing) coating. Return the crust to the oven for 1 minute to set the yolk. Remove the crust from the oven again. Scrape the filling into the hot crust and spread it evenly. Return the tart to the oven and bake until the filling is set around the edges but, when the pan is nudged, quivers like soft Jell-O in the center, 20-25 minutes. Check often in the last few minutes, as over-baking isn’t fun.

Cool the tart completely, in the pan, on a rack. Refrigerate if not serving within 3 hours. Top with figs, pomegranates, candied ginger, rosemary springs – anything that suits your fancy!

Store leftovers covered in plastic wrap in the fridge; keeps well overnight.

fullsizeoutput_1da8

Behold, fave human’s vision of the tart’s perfect angle:

fullsizeoutput_1dc4

fullsizeoutput_1db5

All the citrus, all the time

img_5531

Helloooo! Happy Friday :)

I have lemon for you today! Because I still haven’t gotten tired of the citrus theme – winter weather and citrus are just made for each other. Besides that, meyer lemons are perfect right now and I’d be crazy not to get on that (again).

img_5529

We’re also enjoying a break in the rain — though I do love rainy weather, it’s good to dry out a little in between and enjoy the sun. Today is absolutely beautiful: sunny weather for sunny dessert!

img_5518

I caught one of the brightest rainbows I’ve ever seen during the last rains!

img_5506

More SF series, of course:

img_5497

img_5509

But, back to dessert…

img_5521

I made torta di riso a few years back with blood oranges — this riff uses meyer lemons instead for a taste that is very citrus-forward. I love any rice based desserts so this is an easy sell for me, but regardless – the rice has a great chewy texture that contrasts nicely with the airy, eggy custard.

img_5511

This cake is Tuscan in origin I believe, and is usually described as a rice custard cake – completely appropriate. It’s lighter and fluffier than a baked rice pudding, but still has that all-important chewy rice-ness. Excellent for breakfast, if I do say so.

img_5524

A heads up – this is not for those who aren’t a fan of citrus or who prefer very sweet desserts! It is a very, very mildly sweet dessert, with more citrus-tart flavor profile than sweet. It was definitely a big hit over here, but we’re citrus & rice nuts so that goes without saying. Delicious with ice cream for dessert or a bit of jam for breakfast.

Happy baking!

img_5525

Meyer Lemon and Coconut Torta di Riso

Lightly sweet Tuscan rice custard cake. Gluten free, dairy free, refined sugar free. Delicious served with ice cream for dessert or jam for breakfast! Yield: 1 9″ pie plate; serving size is left to your discretion ;) Recipe adapted from my previous blood orange incarnation, here, and from Cafe Lynnylu, here!

For the cake:

  • 2 c full-fat coconut milk
  • 1/2 c light coconut milk
  • 3/4 c arborio rice
  • scant 1/4 tsp fine sea salt
  • 2 tsp vanilla extract
  • 1/3 c almond meal
  • zest of 2 meyer lemons (~2 tsp)
  • 2 tbsp meyer lemon juice
  • 1/3 c coconut sugar
  • 4 eggs, separated

Lightly grease your pie dish with coconut oil and set aside.

In a saucepan over medium heat, bring the coconut milk to a boil. Add in rice and salt, and reduce the heat to a simmer. Simmer for about 10 minutes, stirring occasionally. Then begin stirring continuously for another ~10 minutes, until the rice has absorbed the milk (the rice should be chewy but not underdone). Remove from heat and stir in vanilla. Let cool for a few minutes.

Preheat the oven to 400.

Add the rice to a larger bowl, and stir in almond meal, lemon zest and juice, and coconut sugar until combined. Whisk in egg yolks. In a non-reactive bowl (I use the bowl of my stand mixer, with a handheld electric mixer), beat the egg whites until they hold stiff peaks. Fold them into the rice mixture. Once incorporated, pour all this goodness into the prepared pie dish. Bake in the center of the oven for 30-35 minutes, until a tester comes out clean. If the top browns too quickly, cover it with foil. The cake develops somewhat of a crust as it bakes, so be sure to test the middle and make sure it’s done – the tester should come out clean, but sometimes it’s tricky to tell.

Let cool before serving and serve warm or at room temperature (or cold, I like it all three ways). Garnish with shredded unsweetened coconut and meyer lemon segments if desired. Leftovers keep well in the fridge, covered.

img_5527

Sometimes, dessert just needs to be an unashamedly sloppy, delicious mess

fullsizerender-5

This tart is a lesson in what dessert sometimes should be: an aesthetically pleasing, sloppy, delicious mess. Because sometimes dessert should just be eaten out of the pan it was baked or assembled in, with two spoons and happy grins. Or, you could attempt civilized plating (as I did) when you consume it for dessert, with a hasty decant into bowls topped with ice cream. Which is perfectly acceptable. Until the next morning when you peek at the custard tart that’s been hangin’ in the fridge overnight and notice that the custard has decided to attempt an escape outside its proscribed bounds, at which point you decide to eat it out of the pan with spoons. Wise and delicious decision!

img_4940-2

fullsizerender-2

Sometimes, you need a less than perfect dessert. Messy, delicious and less than perfect is exactly what this tart is. You’ve been warned! Indulge accordingly.

fullsizerender-7

In other news, I completed another year on this earthplane, and celebrated accordingly at Gary Danko! Nowhere else am I going to sit down to a four course dinner with two desserts. Shockingly, I didn’t even need a wheelbarrow to leave…. I consider this a success all around. Thanks to everyone who made my birthday weekend such fun! Y’all are so rad.

img_4931

Hmm, what else. It’s officially autumn! Which means apples, scarves, boots, and pumpkin. And baking. Except that the Bay has decided to have a heat wave these last few days, which means baking is totally off the table until it gets back down into the 80s, at least. Since when do I wear a dress and no jacket in San Francisco all evening?! Since never… until yesterday! Reason number one to eat messy, cool, creamy dessert that can be had with minimal baking and heating of the kitchen!

fullsizerender-4

More drawing! A wee bit of dome practice with the beautiful San Francisco city hall.

img_4937-2

Nighttime cityscapes are so beautiful.

img_4953-2

But back to the food!

This tart presents beautifully but once cut, devolves into a sloppy, delicious mess. But, fear not! Just grab a spoon and eat it straight from the pan. Messy and delicious, just how dessert should be.

img_4954

Maple Custard Apple Tart with Almond Crust

Lightly sweet, creamy and an appropriate amount of crust. Refined sugar free, grain free, gluten free, paleo & dairy free with one small swap (coconut oil for butter in the crust). Yield: 1 10″ pie pan of the deep variety; serves as many as you feel like sharing with. Recipe adapted from Hip Foodie Mom, here!

fullsizerender-3

For the crust:

  • 2.5 c almond flour
  • scant 1/4 tsp fine sea salt
  • 2 tbsp coconut sugar
  • 4 tbsp salted butter (or coconut oil), melted
  • 1 runneth-over tsp vanilla
  • 1 egg white

For the custard:

  • 1.5 c coconut milk (mine was light; use whatever you have)
  • 6 egg yolks
  • 1/2 c pure maple syrup
  • 1/4 c tapioca starch
  • 1/2 tsp fine sea salt
  • 2 tsp vanilla extract

For the apple topping:

  • 2 apples, finely sliced
  • 3 tbsp raspberry jam, thinned with a bit of water and lemon juice

Because the custard needs to sit and chill in the fridge after cooling for at least 2 hours, I made this a day ahead and let it hang out in the fridge overnight. The crust only takes about 15 minutes to bake, so the tart itself comes together quite quickly.

Preheat the oven to 400 and lightly grease a 9 or 10″ deep pie plate with coconut oil or butter. For the crust: in a large mixing bowl, stir together almond flour, salt, and coconut sugar. Add in melted butter or coconut oil, vanilla, and egg white, and stir until combined — I found it more fun and more efficient to use my hands at the end. Press the dough into the bottom of your pie plate of choice, poke the bottom a few times with a fork, and bake for 15 minutes. The crust should be lightly browned. Remove from the oven and let cool completely.

For the custard: in a medium saucepan, heat the coconut milk over medium, until small bubbles begin forming along the egg whites. In a medium bowl, whisk together egg yolks, maple, tapioca starch, and salt. Slowly temper the eggs by pouring the hot coconut milk into the egg bowl in a thin stream, whisking constantly until all the milk is incorporated. Pour this whole bowl of goodness back into the pot that was previously holding the coconut milk, and cook over medium-low heat, whisking constantly, until the custard begins bubble and thicken (you’ll know. it’ll go from watery to thick enough that your whisk makes tracks). Remove from heat, stir in the vanilla, and let sit until cool. Give it a good stir, and store in an airtight container in the fridge if you made it ahead.

Pour the custard into the completely cooled crust. Thinly slice 2 apples of choice, and drop them in a bowl of lemon water to prevent browning while slicing. In a small bowl, thin the raspberry jam with a few tbsp of water and lemon juice (I used the leftover from my apple-soaking water). Fan the apple slices across the surface of the custard, brush with the raspberry jam mixture to prevent excess browning. Cover and refrigerate if not eating immediately!

Keeps well overnight in the fridge, covered, but don’t expect it to stay in one piece! The custard is runny — best advice (and I definitely put this into practice) is to just eat it with a spoon, straight out of the pie plate. For breakfast! Keep any leftovers in an airtight container in the fridge.

fullsizerender-8

An ecstatic moment involving some brûlée-d sugar and a spoon

IMG_6148

Not paleo.

Definitely not dairy free.

And there is no way this is vegan.

IMG_6145

Sorry I’m not going to be a teensy bit sorry… ever.

Because what this is, is nothing short of…

SPECTACULAR.

IMG_6142

Guys. CREME BRÛLÉE. Please excuse all the capitals but really. I’m having an ecstatic moment that I actually made this.

I kind of had some weird ingrained impression that creme brûlée was something fancy I could only get in a fancyschmancypants restaurant. You know, like how english muffins are mysteriously, perfectly english muffiny until you make them? Or maybe that’s just me. Whatever, anyway this is all beside the point as usual.

Point being, I used to looooove creme brûlée when I was a kid. I remember ordering a flight of them at the Ahwahnee in Yosemite when I was fairly little and being excited that it came in three flavors… and then realizing that I apparently still liked vanilla best. I’m a vanilla girl, don’t mess. Why tamper with something already so delicious?? But anyway, I really don’t remember much creme brûlée in the intervening years. What was wrong with me?! And why haven’t I made this before now?? Not to give away any trade secrets or anything, but it’s actually relatively simple (as long as a water bath doesn’t scare you).

IMG_6150

But seriously. Besides being delicious, creme brûlée is so fun! I’m like Amelie, I like smacking the top with my spoon and making the sugar crack. The little things are so satisfying…

And speaking of satisfying. This is made with nothing besides cream, egg yolks, and a bit of sugar and vanilla. Go ahead. Indulge yourself, because really—you’re worth it!

IMG_6146

Coconut Sugar Creme Brûlée

Apparently I can’t get too far away from my attempt to bring at least a little healthy into everything—-this is technically refined sugar free! Wheee! It’s made with coconut sugar, which is lower in fructose (good), and which retains the minerals, short chain fatty acids, and antioxidants found in the coconut palm from which it comes (also good). Besides that, it’s delicious. It tastes caramel-y and a little earthy to me, and goes spectacularly with vanilla. The awesome recipe came from Grain-Free Goodness, here! Makes six small ramekins.

Acquire the following, and let’s embark on culinary shenanigans:

  • 2 c heavy cream (1 500 mL container; or I think mine was 437 mL or something weird, but ended up exactly 2 c)
  • 5 egg yolks
  • 2 tsp vanilla extract*
  • 6 tbsp coconut sugar+more for brûlée-ing

IMG_6147

Preheat the oven to 325, and boil a medium saucepan of water (or use a kettle if you’re lucky enough to have one). You’ll need the water for the water bath, so makes sure it stays at a boil until just before you need it. Procure whatever you’re making your creme brûlée in—-I used three ramekins and three oven-safe coffee cups that were about the same size as the ramekins. You’ll also need a big casserole dish (or two) with deep sides.

In a heavy-bottomed saucepan, heat the cream and the vanilla over low-medium (no higher!), stirring frequently. You want it to come just barely to a simmer, but none of that scalding business– none of that! Once it’s just barely at a simmer, pour it into something with a  spout, for ease of pouring later.

While the cream is heating, beat egg yolks with the coconut sugar until creamy. It should lighten in color when the sugar is fully incorporated. With the mixer running, pour a small bit of the hot cream into the egg yolks, beating the whole time so that the eggs don’t cook. Keep pouring small amounts and beating them in, until all the cream is incorporated (once about half the cream has been added, you can add more to the eggs at each pour, since the eggs are already tempered). Skim the froth off the top with a  spoon. Pour all this back into whatever pouring thing you used for the cream, and then pour equal amounts of it into the ramekins/cups of choice. Set all the ramekins into the casserole dish, and (CAREFULLY) pour the boiling water into the casserole dish, avoiding the ramekins (no one wants watery pudding). Make sure the water goes about halfway up the sides of your ramekins.

Bake until custards are *just* set—-they should be jiggly in the middle, but not liquidy when you touch them. The surface should be set, with the jiggle happening just below a thin skin of set custard. They’ll set up quite a bit when they cool, so don’t worry if they’re jiggly—they’re supposed to be! No over-cooked custards around here… I baked mine for half an hour (the ramekins), and then 35 minutes for the coffee cups, which were a little deeper. Check them every five minutes after a half hour, just to be safe.

Remove from the water bath and let cool on a cooling rack completely before covering in plastic wrap and chilling in the fridge. They should chill for at least several hours before serving (I did mine the day before I served them, as they keep well in the fridge for several days before you brûlée them).

IMG_6151

When you’re ready to eat them, you get to play with fire! Ha. Sprinkle a bit of coconut sugar on the top, attempting to evenly distribute it. You can use a kitchen torch (if you’re lucky and have one, unlike me… anyone want to send me one??) or an old spoon if you’re janky like me. If you use the spoon, heat it over a gas burner on your stove (holding it with an oven mitt just in case, thank you) until you can feel the heat coming off it when you hold a hand a bit away, then press it down onto the sugar. It will caramelize immediately! If the surface of your custard is big, you might need to repeat this a few times. Beware… your spoon will never be the same. But it might encourage you to make this more often, if you have a designated brûlée-ing spoon…

Eat immediately! These don’t keep for more than an hour after they’re brûlée-d, so do yourself a favor and get cracking! Hehe.

to be eaten with a Pooh spoon, obviously.

Tarting up February!

mmmm, CRUST!

I like to think I know myself pretty well, in terms of food-type oddities and  proclivities. As such, I know that February irritates me. It’s such a bleh month in the middle of everything, and there is a distinct lack of interesting produce. I’ve already gone nuts over squash, waaaay back in the fall… I love sweet potatoes but I eat them all the time anyway…and there is a depressing amount of fruit available. As in, local and seasonal fruit, if you please (Besides, strawberries in winter just look sad. All pale and anemic. I would much rather eat them in the summer, thankyouverymuch).

BUT.

I discovered a solution to this problem.

Waaay back in September, over Labor Day weekend, I procured some fresh peaches (thanks, Dave Lakey!). I fought the urge to eat them immediately, and instead sliced them up and threw them into the freezer. All neat and nicely labeled, I was determined that they would remain in there, until the dead of winter (aka February), when nothing grows and I was itching for some summer fruit. Genius, clearly.

Over the weekend, when I spent a bit more time thinking about/researching/drooling over pie and tart recipes than actually thesising, I realized the time for peaches had arrived! And oooooh was that a good decision…

THIS. Is what happened.

peeeeachesss!

Fresh peaches in February! Can you ask for anything better? It’s like summer in a bite. And a healthy bite, no less! The crust has healthy fats from olive and canola oil, and the custard is made with yogurt instead of cream. And fruit is the most important part! It’s totally justifiable to have this for breakfast.

okay, so the pictures of this weren't super fantastic... but the crust was beautiful! clearly my favorite part.

Peach Custard Tart

Crust is slightly adapted from the Garden of Eden blog, and the custard is adapted from Eating Well, here. Makes one 11” tart.

For the crust (most low maintenance tart crust EVER):

  • 1.5 c whole wheat pastry flour
  • 3/4 tsp salt
  • 1 tsp turbinado sugar
  • 1/4 c olive oil
  • 1/4 c canola oil
  • 2 tbsp milk of some kind (I used plain soymilk)
  • 1/2 tsp vanilla extract

In a bowl, stir together flour, salt, and sugar (no need to sift). In another small bowl, whisk together olive and canola oil, milk, and vanilla extract until combined. Add liquid into dry, and gently stir until just combined (be careful not to overstir). Gather this up and plunk it down into your tart pan (in the absence of a tart pan, a pie dish is fine)… then flatten the dough on the bottom and up the sides by pressing gently with the flats of your fingers (this is the fun part!). Try to get it to an even thickness all around and up the sides, about 1/8″.

messy, but delicious.

For the filling!

  • 4-5 peaches, sliced (mine were frozen. I ran them under cool water until I could separate them into slices, but didn’t defrost the completely to prevent peach mush)
  • 3/4 c turbinado sugar
  • 3/4 c lowfat plain yogurt*
  • 3/4 c milky beverage (soymilk again for me)
  • 2 eggs
  • 2 tbsp whole wheat pastry flour
  • 2 tsp organic cornstarch
  • 1 tsp vanilla extract
  • pinch of salt

*The original recipe called for greek yogurt… but Kira and I, being the frugal/practical types that we are, decided to try it with regular yogurt, since that was what we had on hand. Excellent decision, as it turned out deeelicious. Either type is fine!

This is ridiculously easy: dump all the above ingredients in a bowl (except peaches), and whisk until smooth. See? Easy.

I told you the crust was pretty!

Preheat the oven to 400. Arrange the peaches around the bottom of the crust (they don’t have to look pretty). Pour the custard over the top, and bake for 30 minutes. Remove from the oven and cover the edges with foil to prevent excess browning (I did a rather ineffectual job, but I like the rather caramelized edges, so… not a big deal!). Reduce oven temperature to 350, and pop it back into the oven for another 40 minutes to an hour. Mine was done at about an hour and 10 minutes—I checked it at 40, and then put it back in for 15 minute intervals. You want a knife to come out clean when inserted into the center. Let cool before eating, about an hour and a half, to make sure the custard has time to set.

This is EXCELLENT cold. In fact, I think it might be better cold the next day, once the flavors have had a chance to get to know each other. It is also excellent with a blob of vanilla ice cream, of course.

uh oh... evidence!