Squash Wrestling Champ

IMG_6950

You don’t even want to know my struggles yesterday involving a kabocha squash.

IMG_6948

Well…

Maybe you do. They’re kind of funny.

IMG_6946

Let me just preface this with a simple suggestion. Don’t ever ever ever go to jazzercise on circuit day and then expect to be able to wrestle open a kabocha squash for roasting purposes an hour later. Just don’t. It will end badly, with the knife stuck in the squash and your arms aching. Also that weird spot where your arm meets your body?? You know, not your armpit but in front of it?? Yeah. That is impossibly sore too, which means picking up squashes and putting them in the oven (as well as taking the heavy bottom of the food processor down from the ridiculous high place that it’s stored in), not to mention cutting them open, rather difficult. I FINALLY got that squash cut in half (a little unevenly but don’t you judge me) after quite the struggle. We’re talking two hands on the knife, full body weight bearing down on the stupid thing trying to make things happen. Safely, naturally. Those squash don’t give up easily, let me tell you…

I think I might actually be sore-er today due to squash wrestling yesterday. For reals.

IMG_6956

IMG_6947

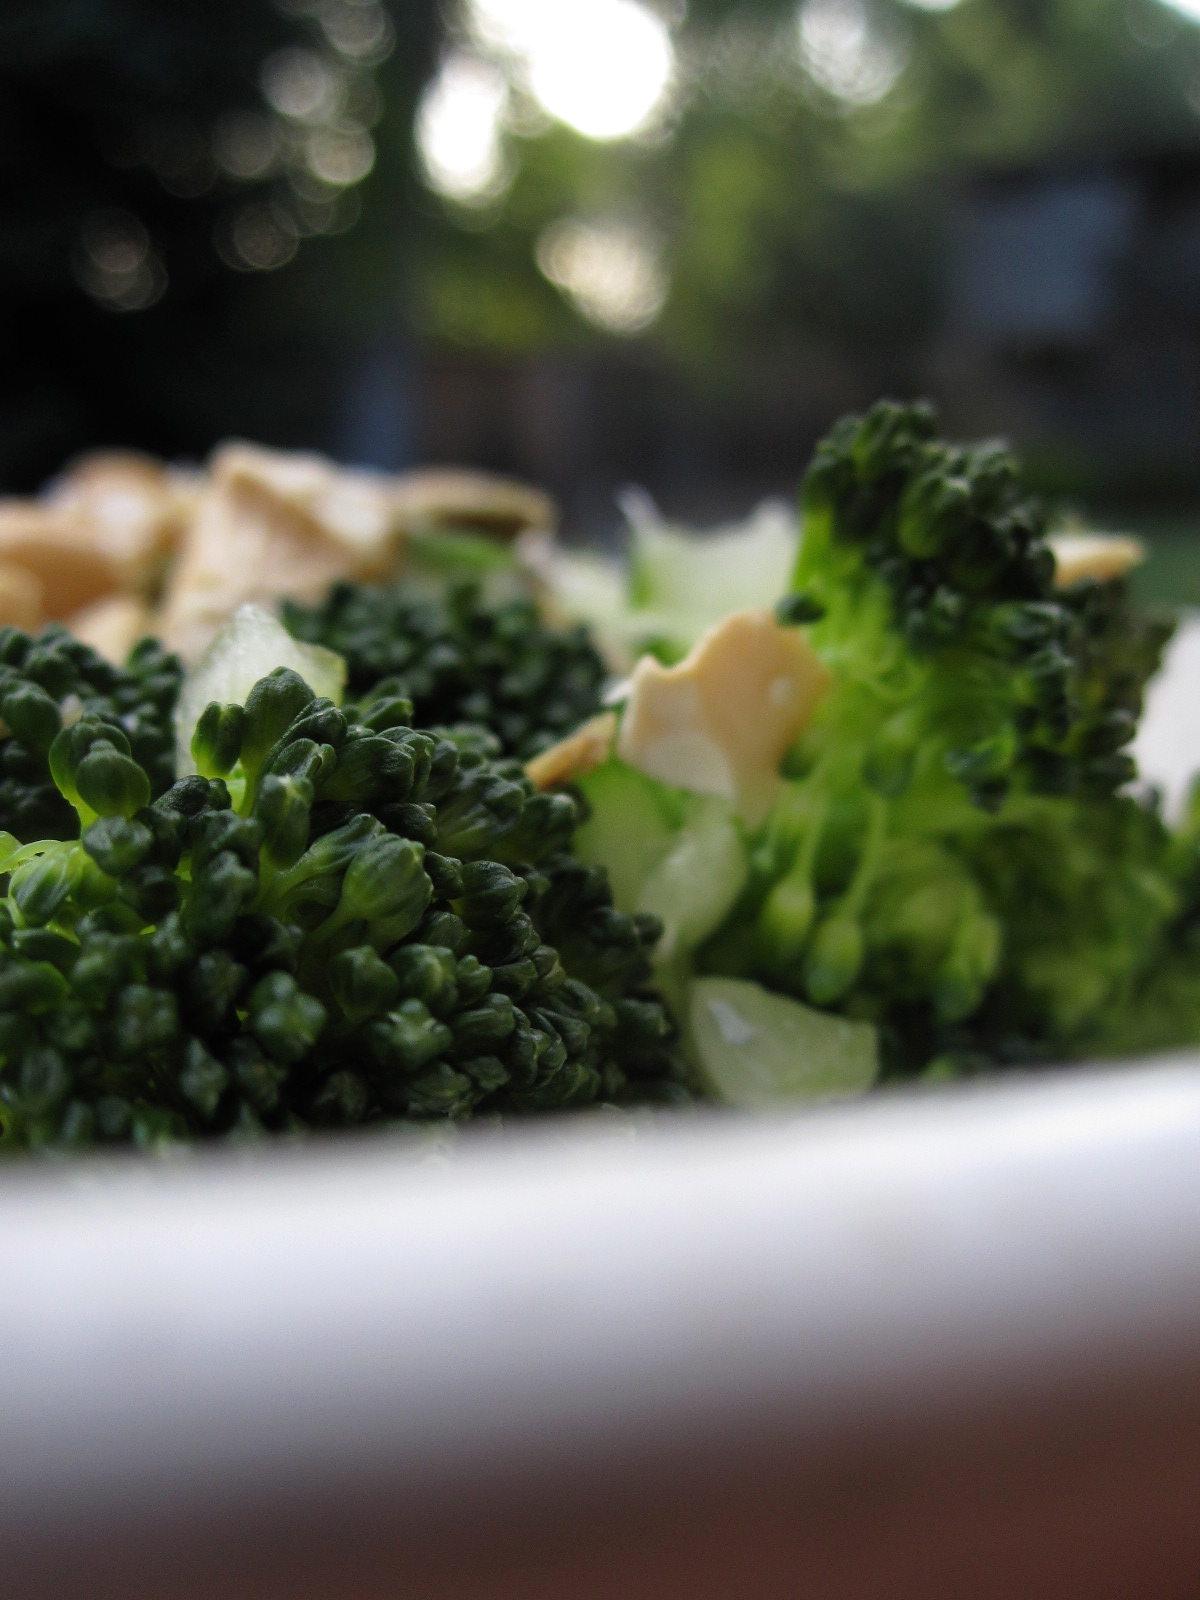
Also I made so many things yesterday!! Day off + too much studying+ in between forcing myself to study + fall + pumpkin = bopping around in the kitchen all day! Which I love. Hello, kale chips out of the dehydrator, roasted and curried kabocha squash soup, and gluten free, vegan, date sweetened pumpkin cookies!!

IMG_1340

Aside from all that, I have some other pretty pictures of stuff [food. obvs]:

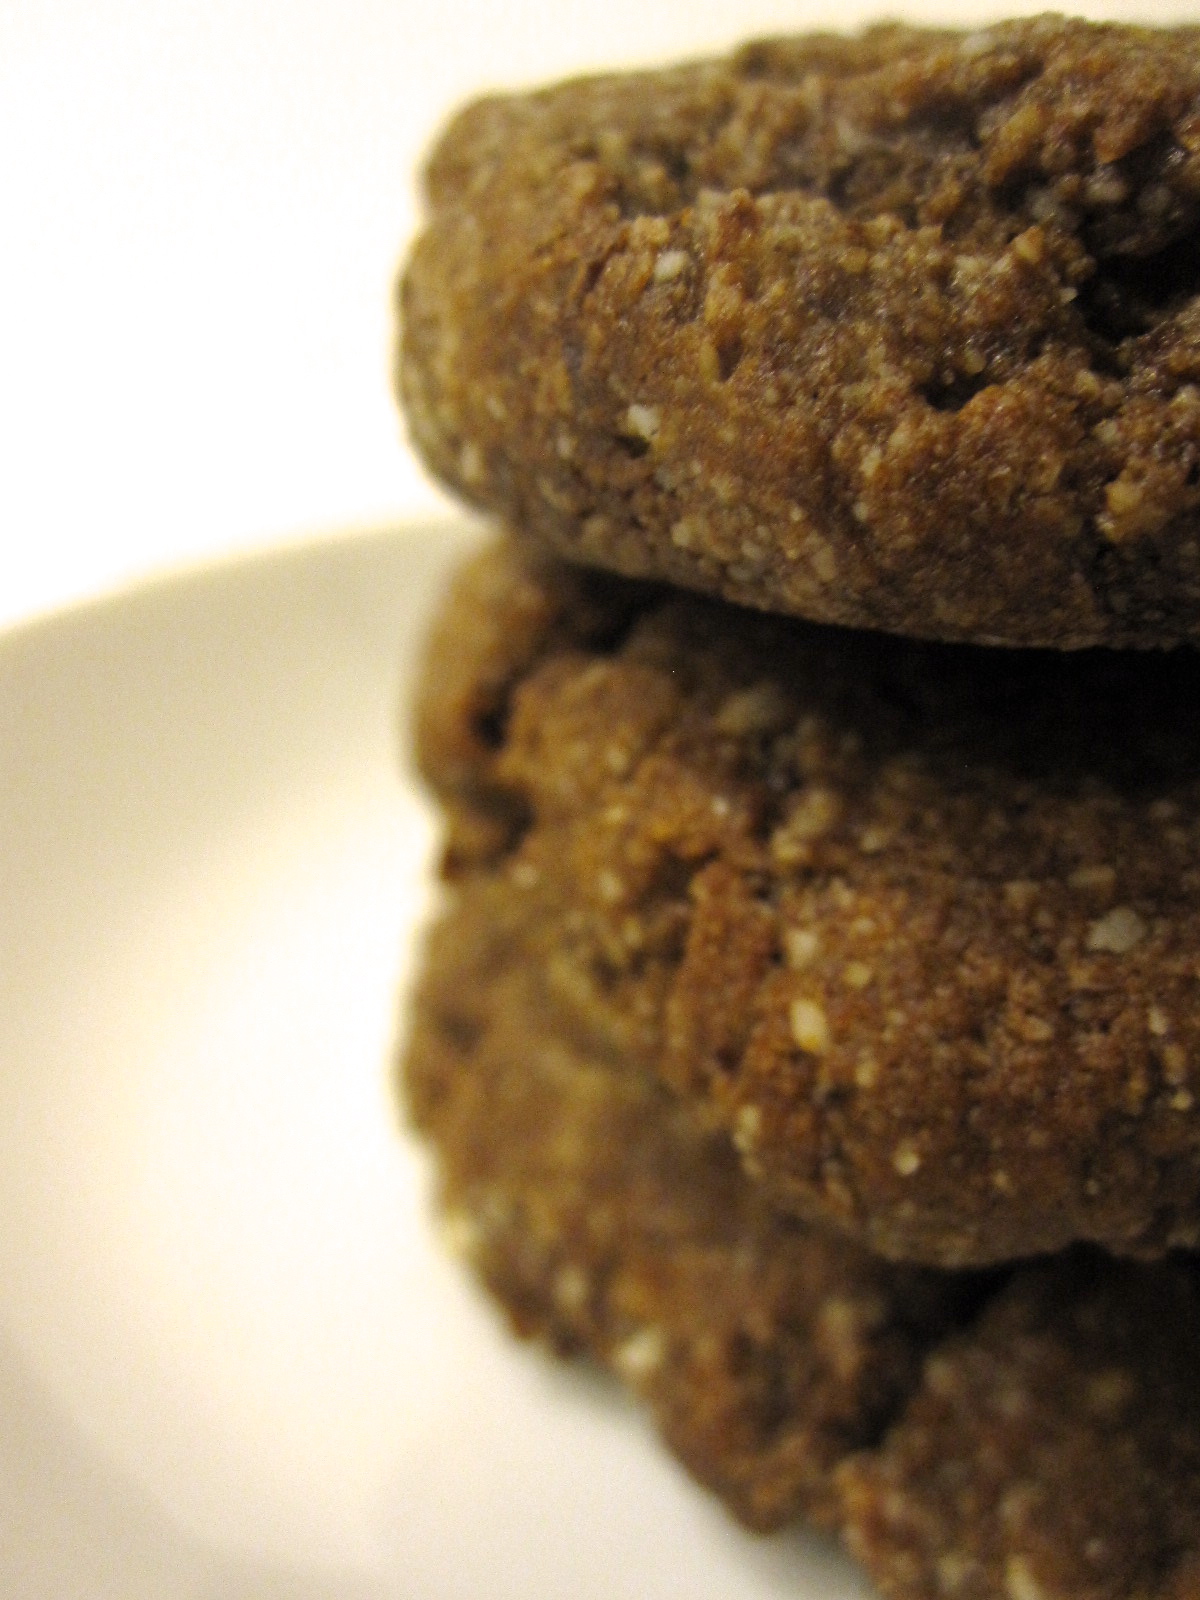
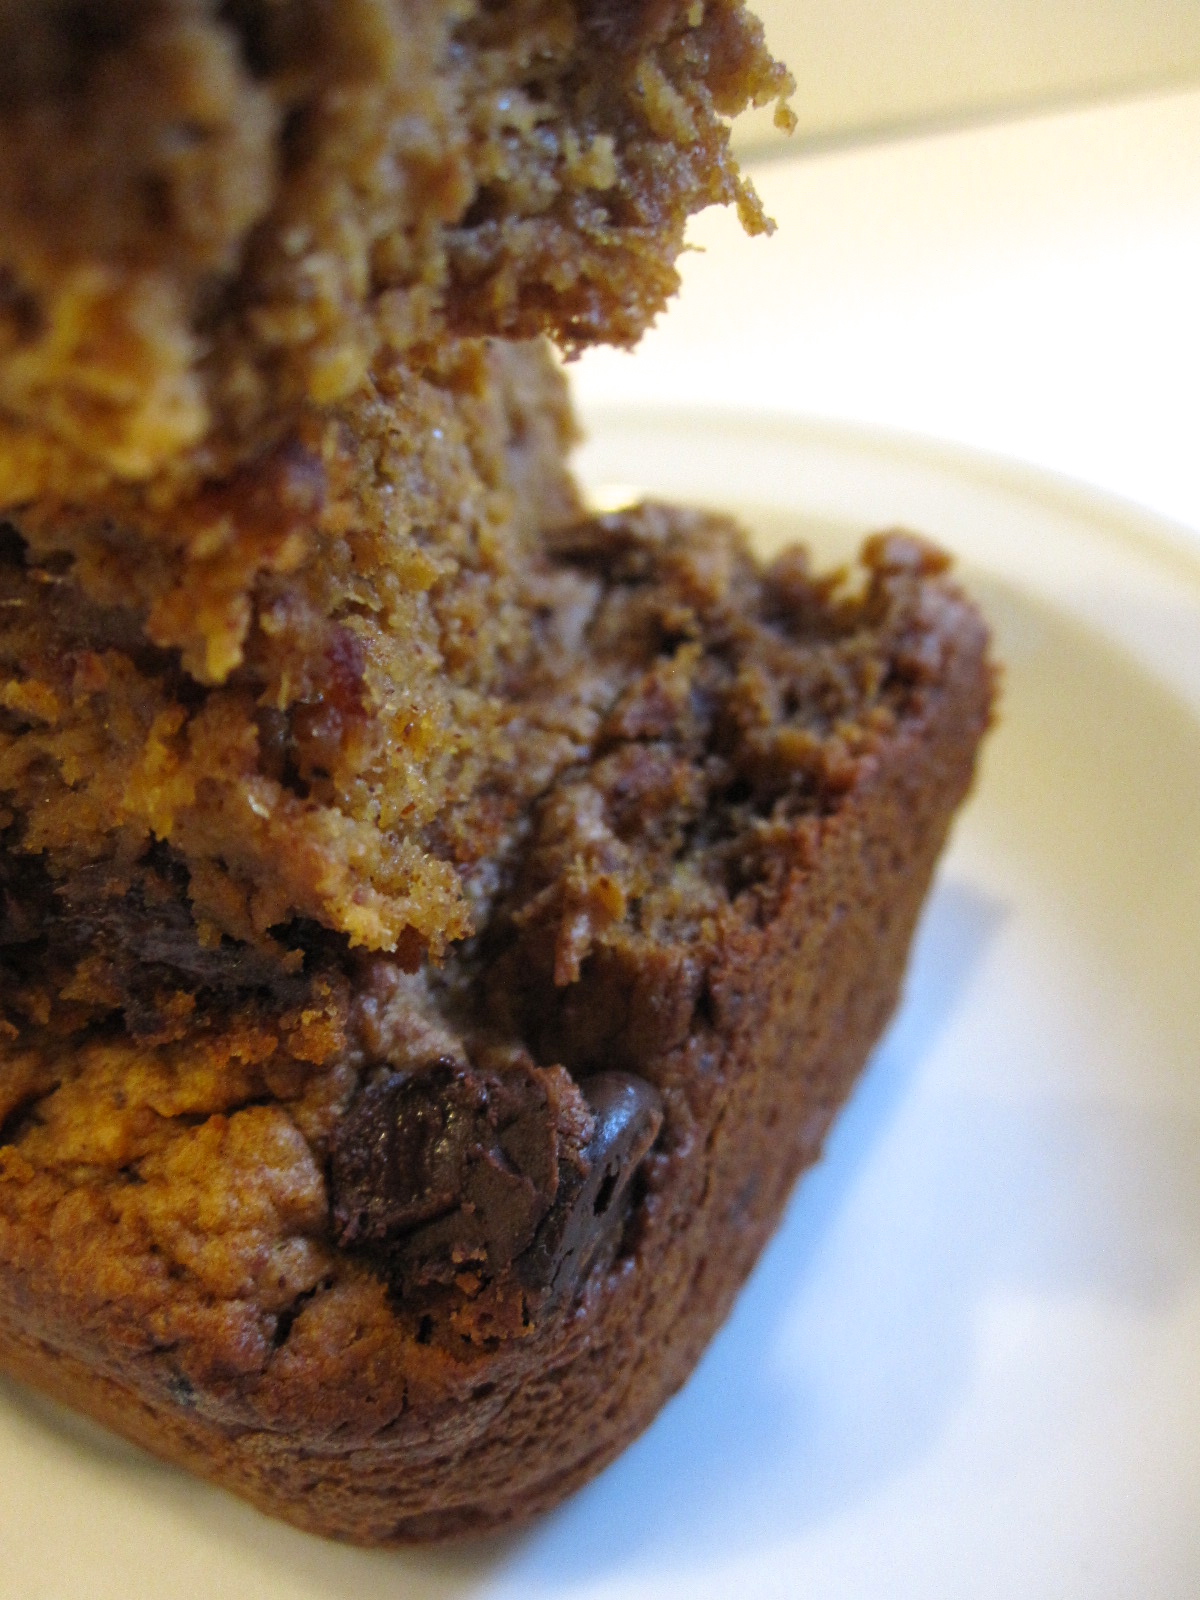
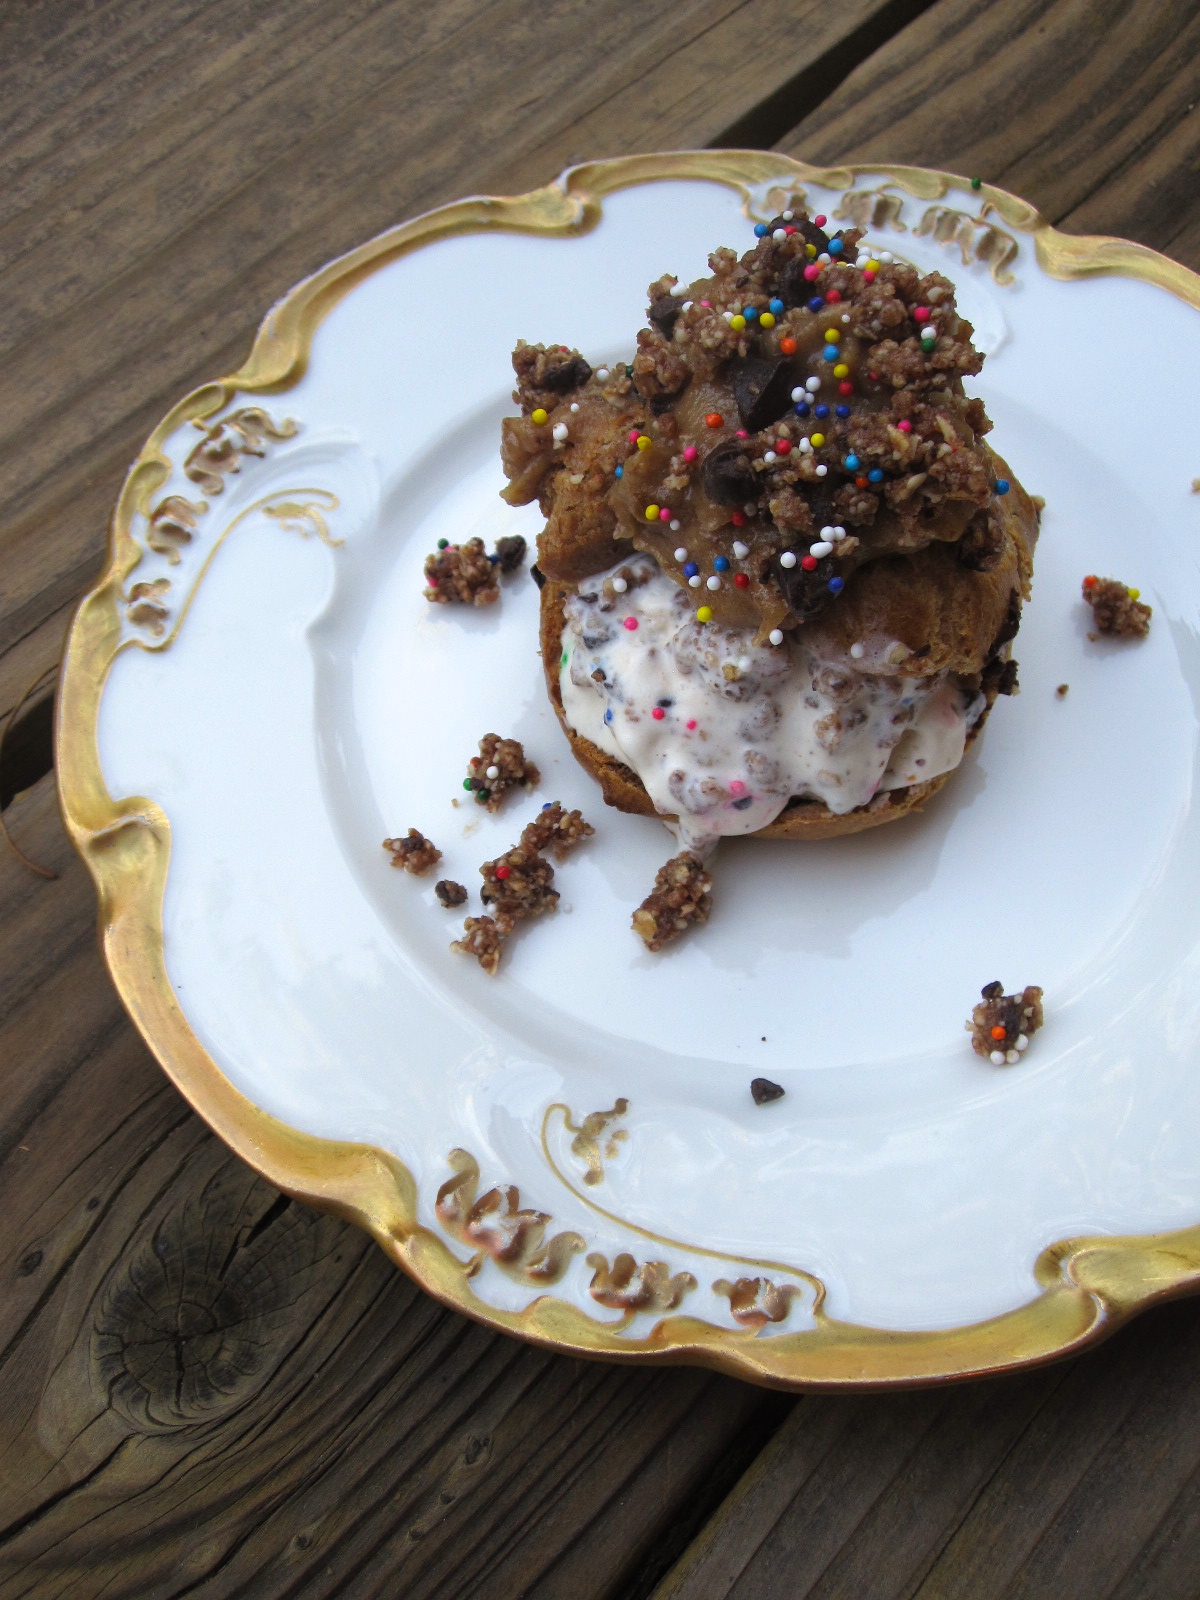
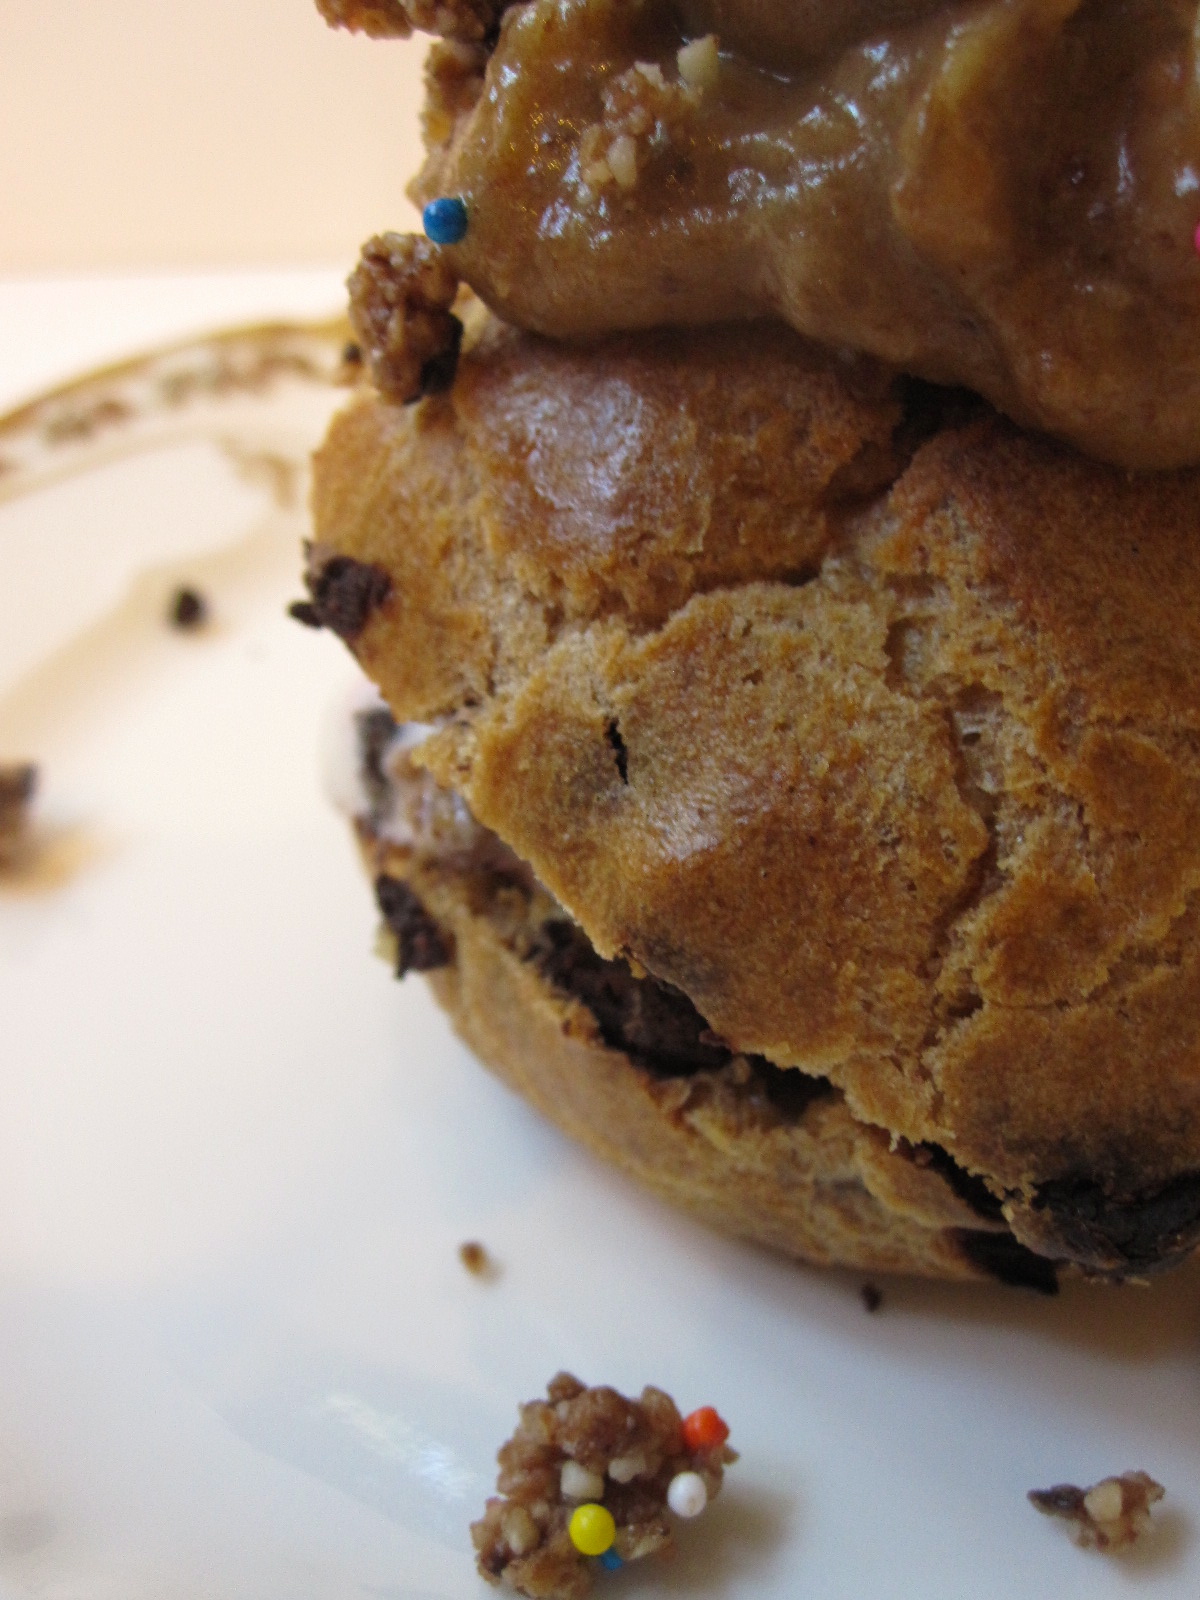
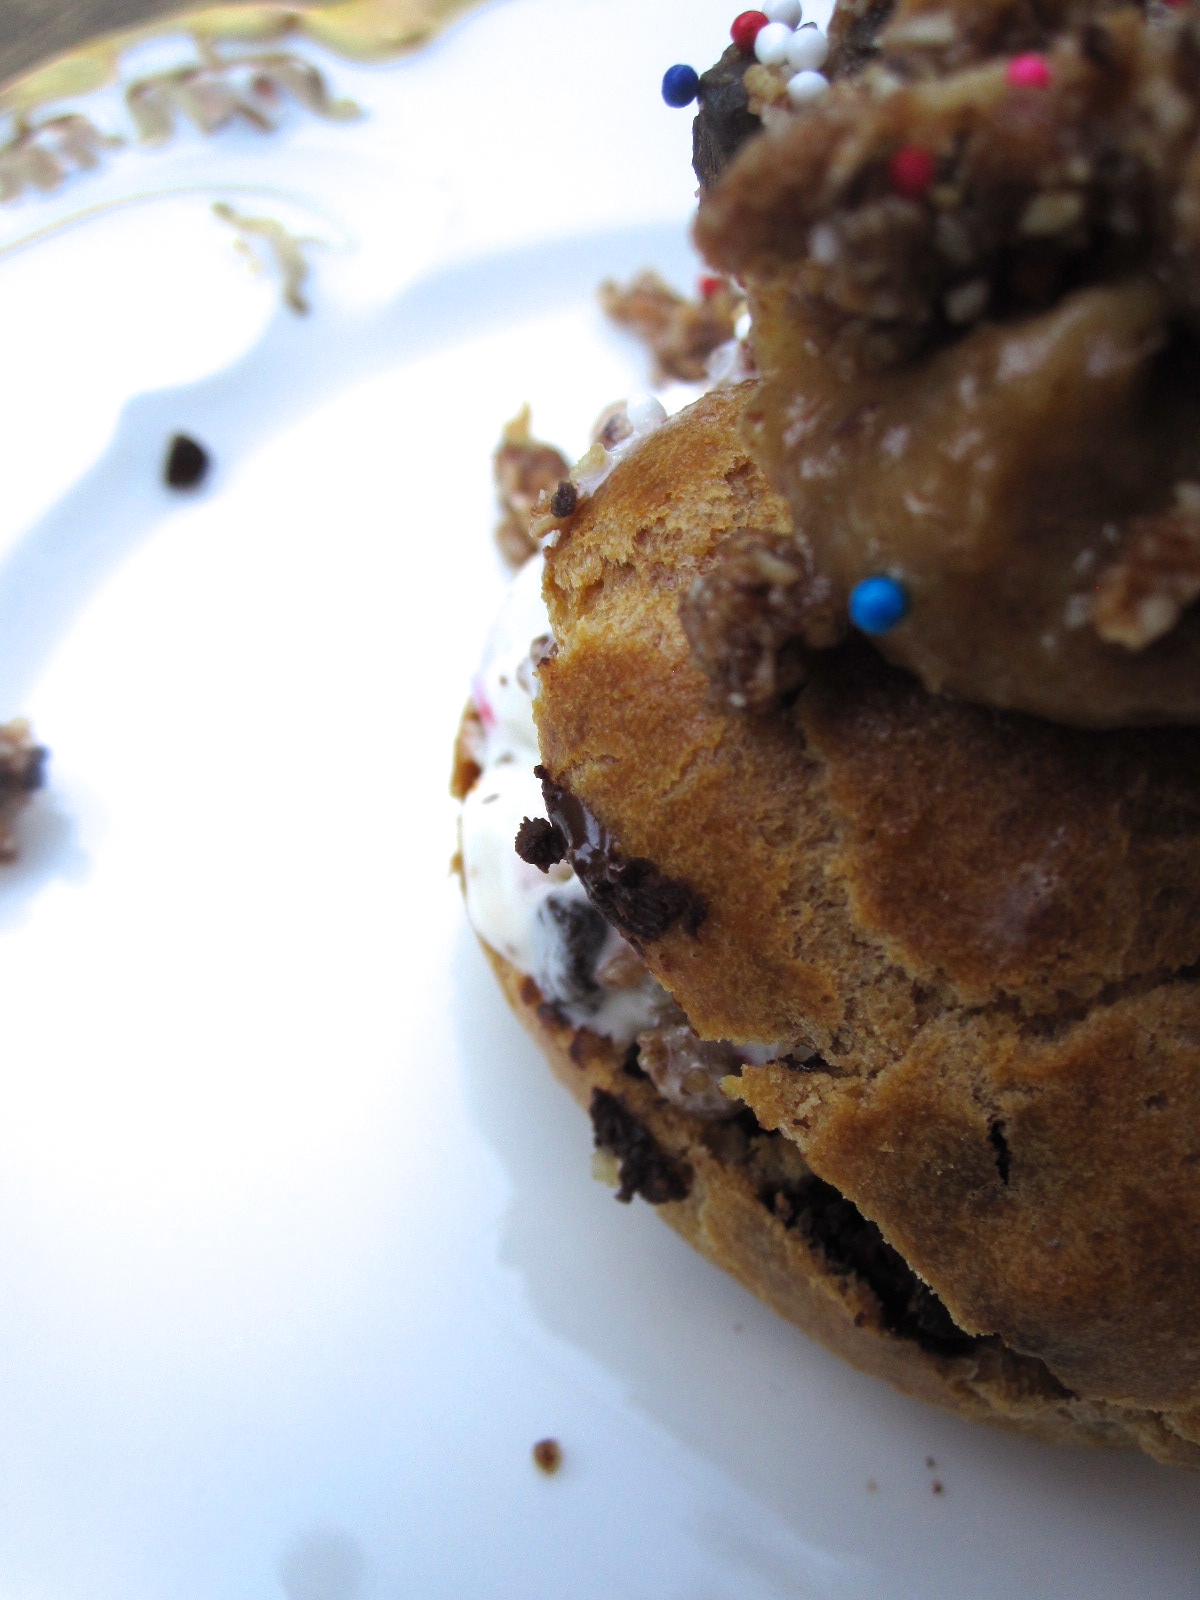
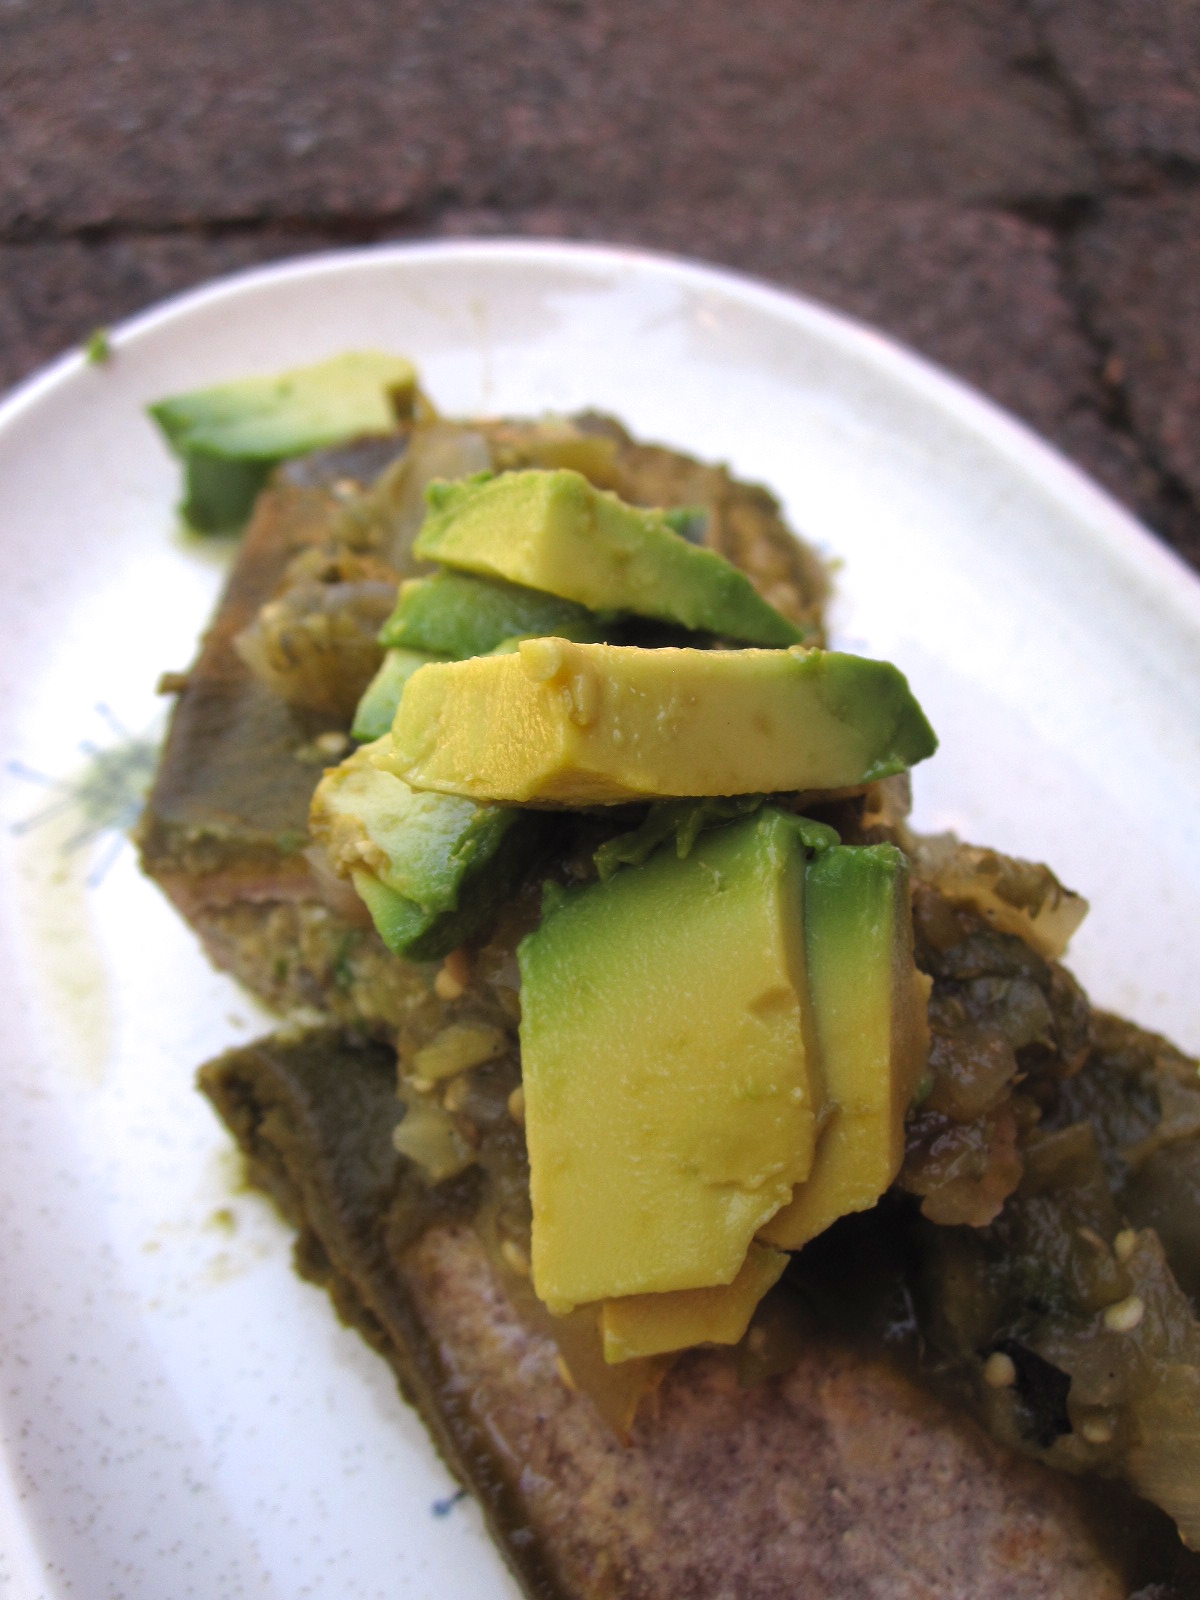
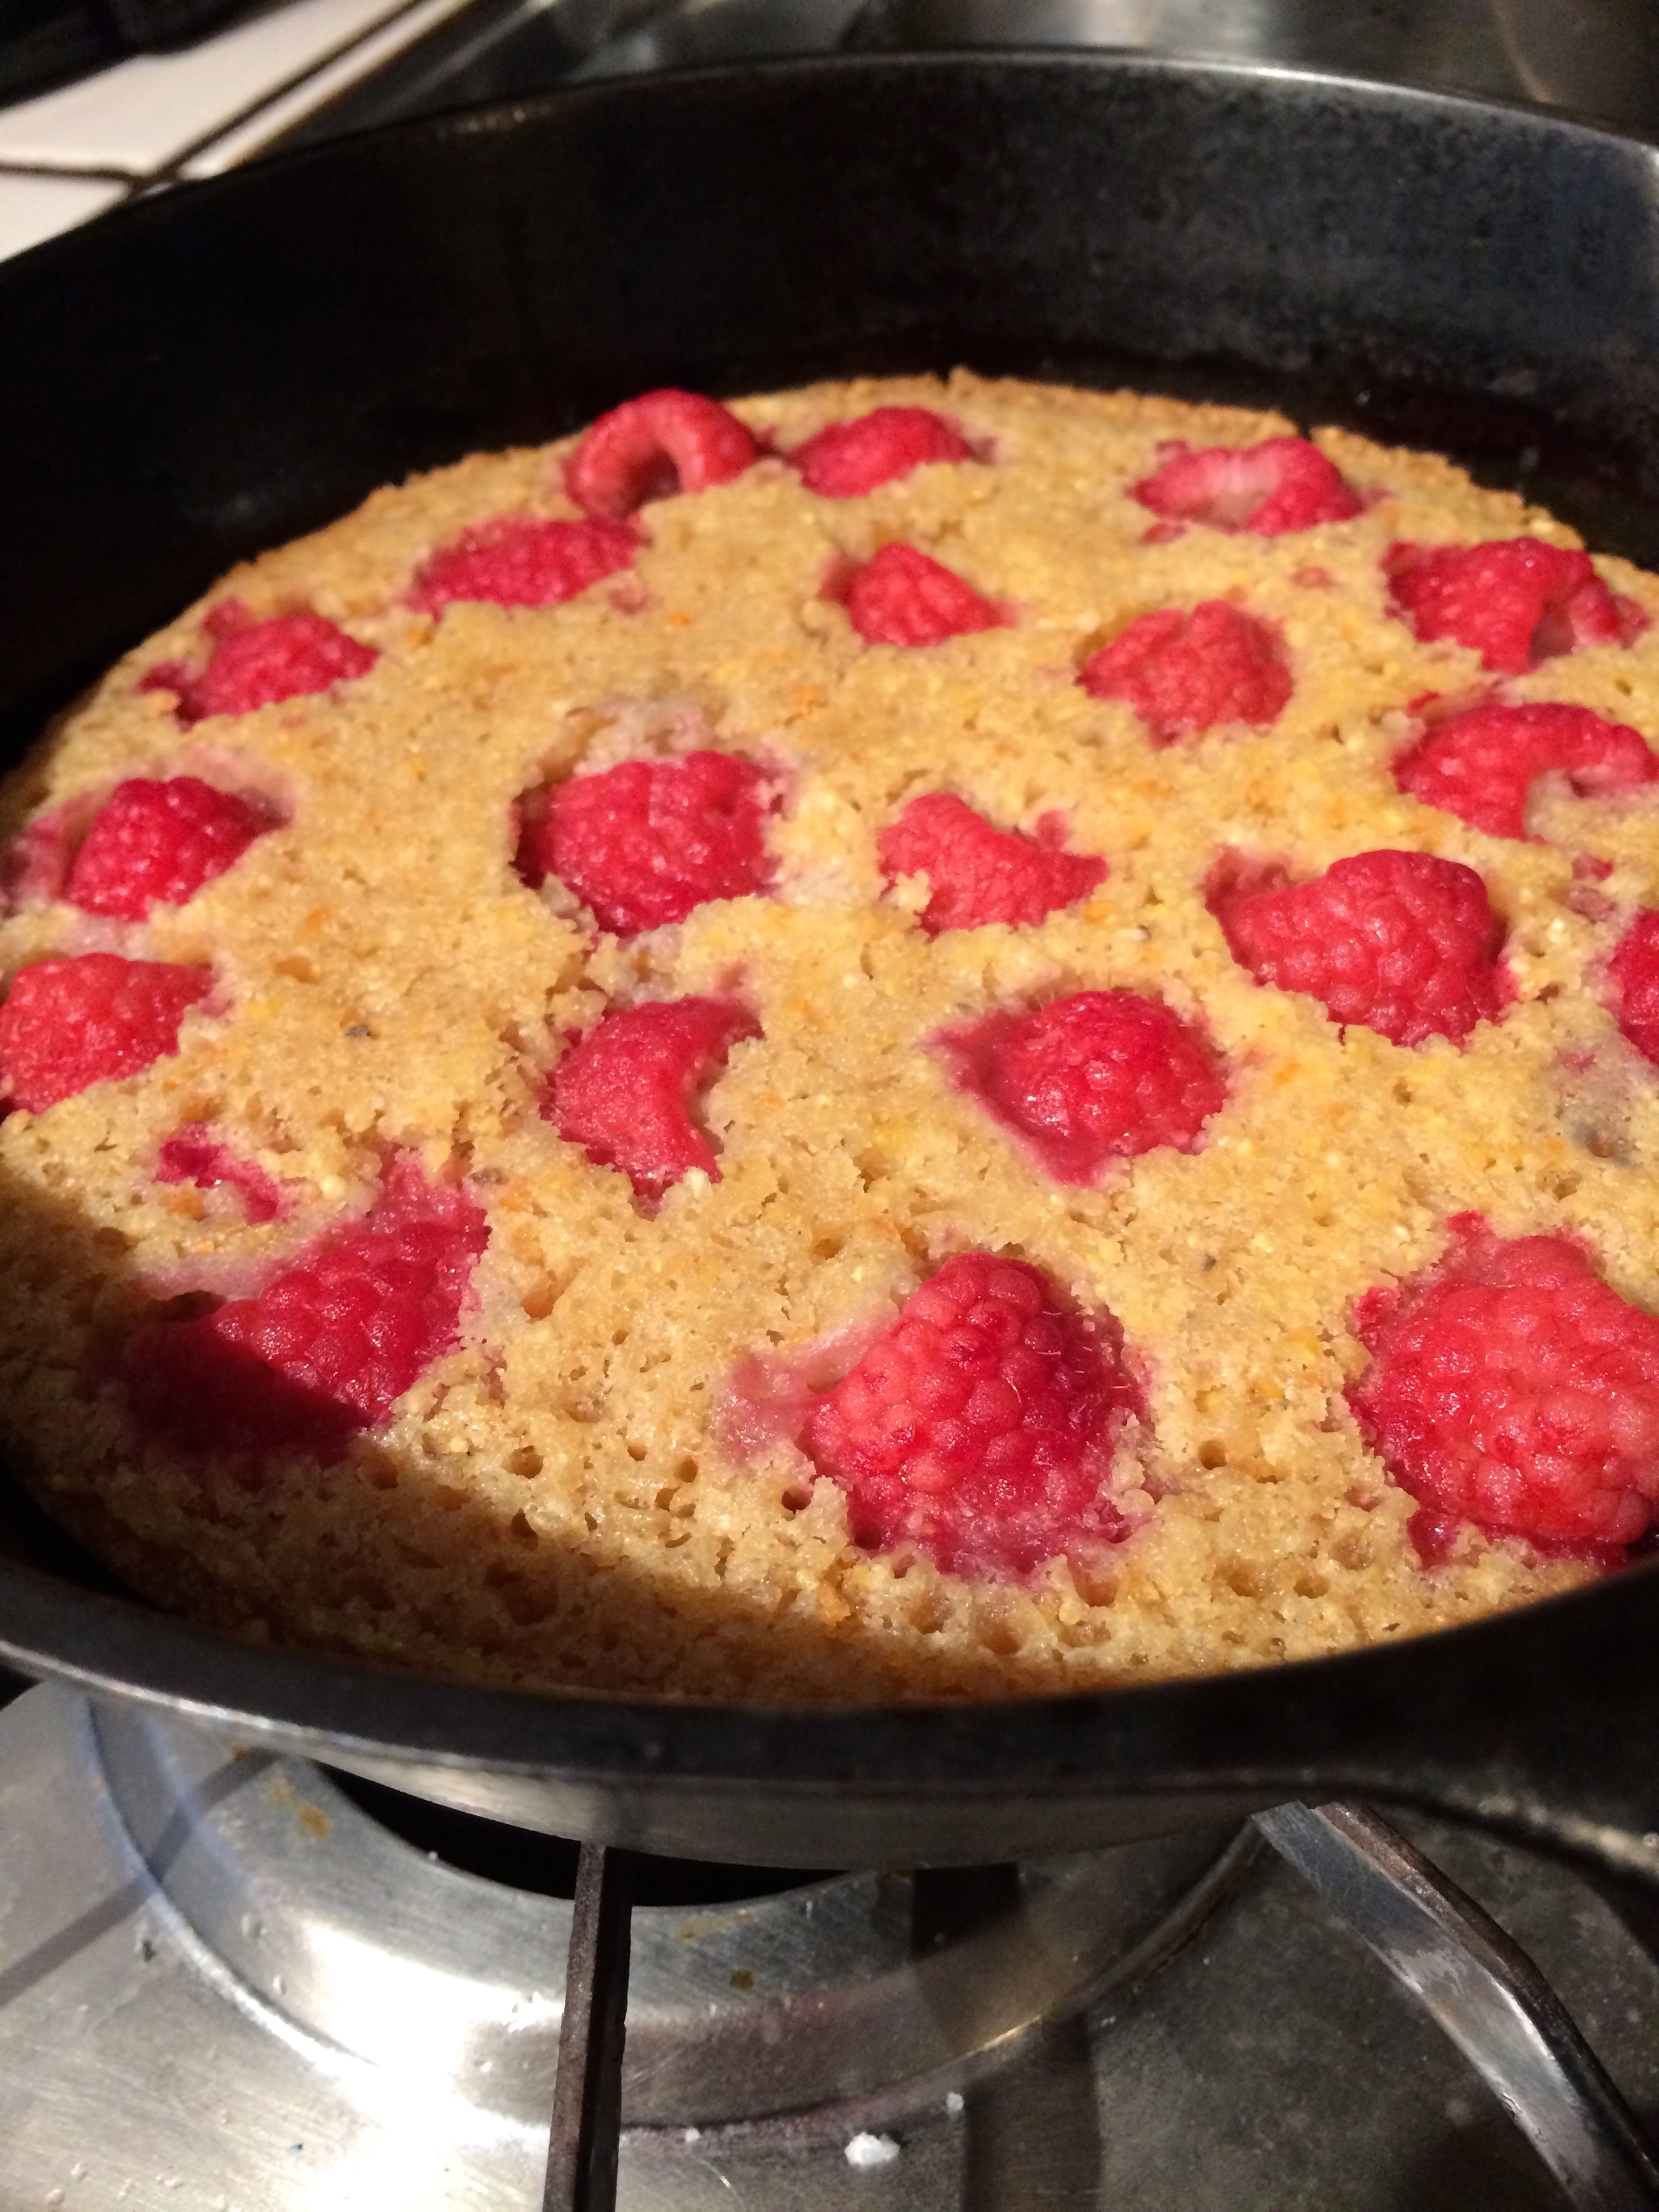
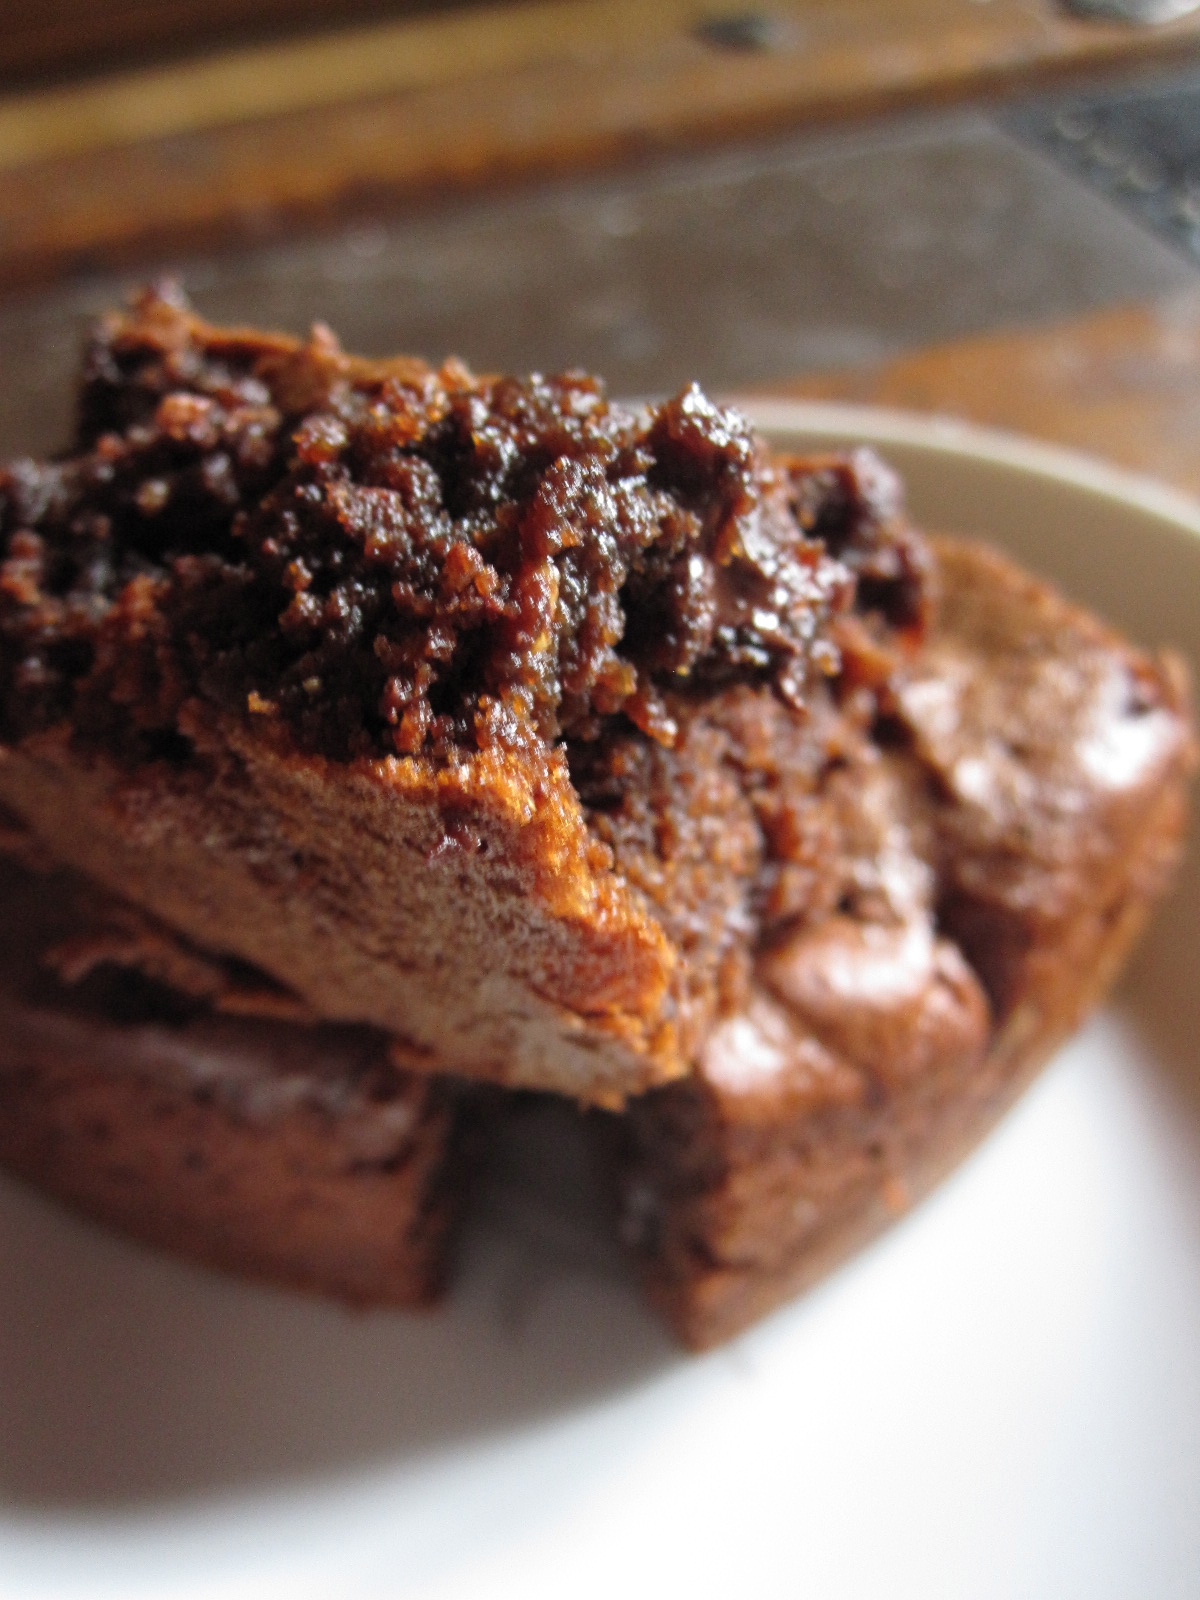
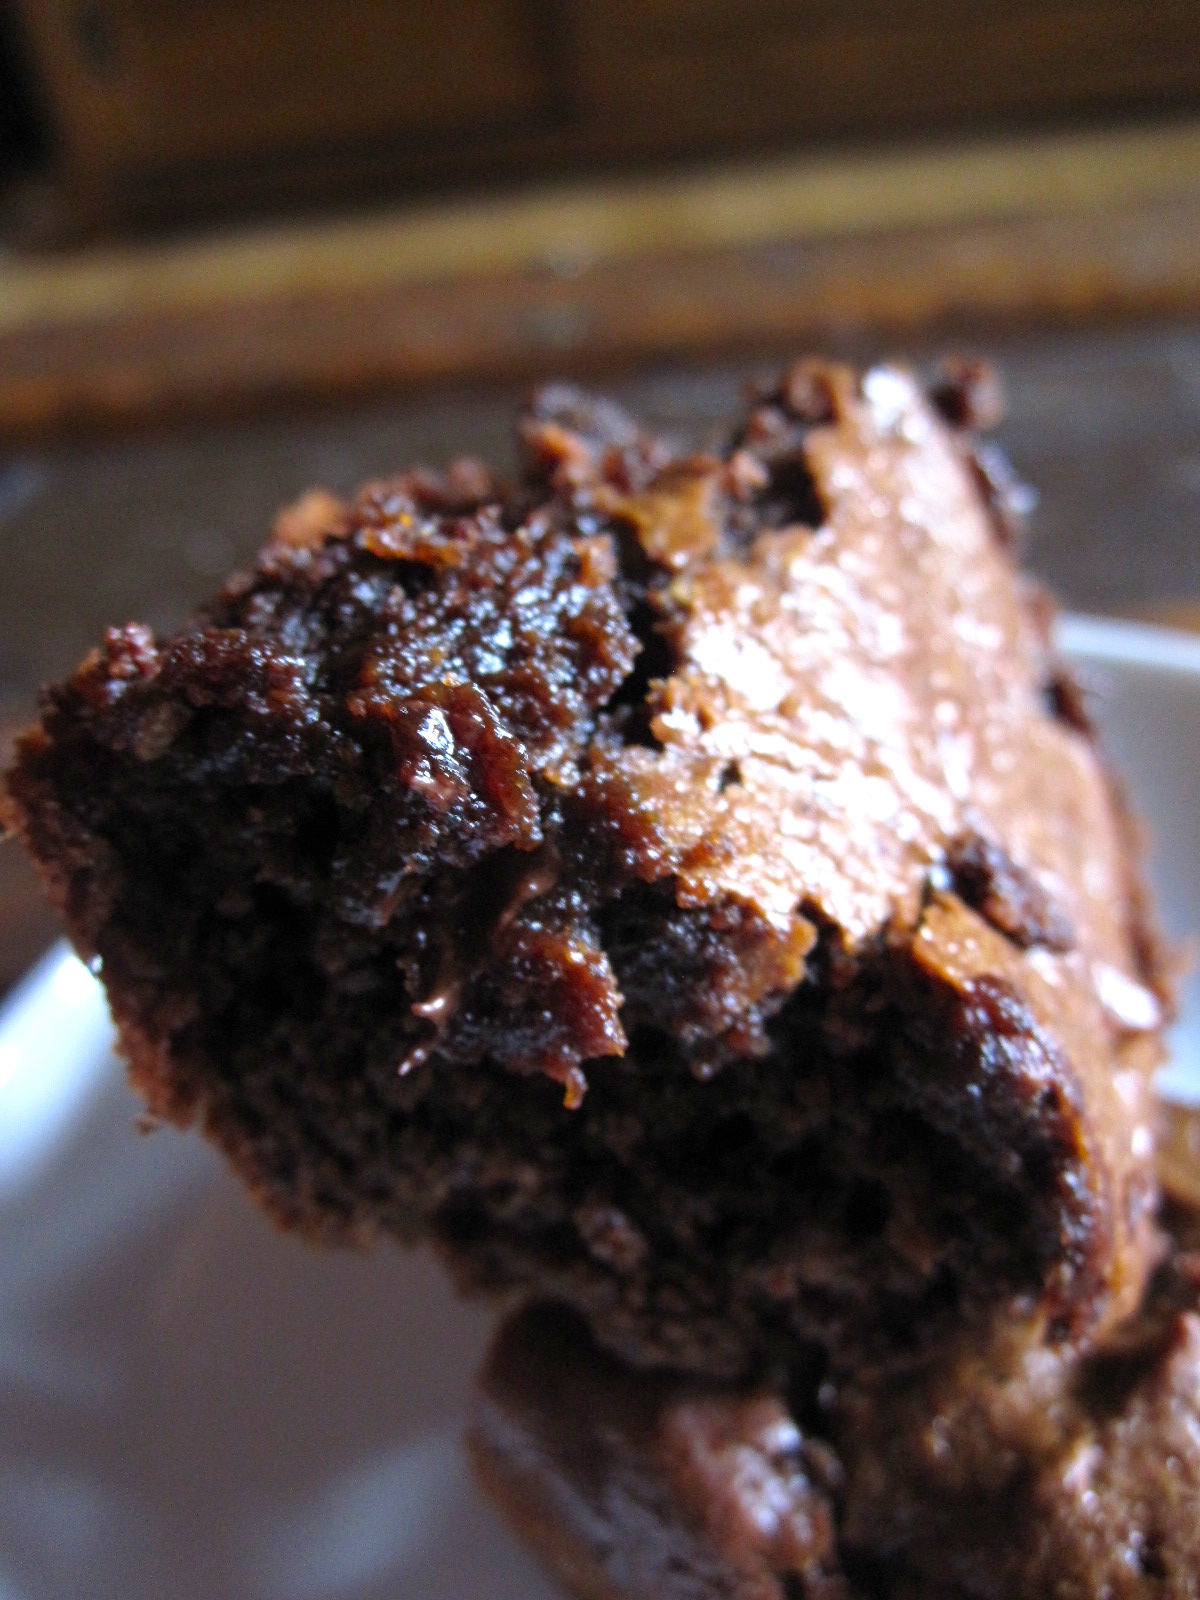
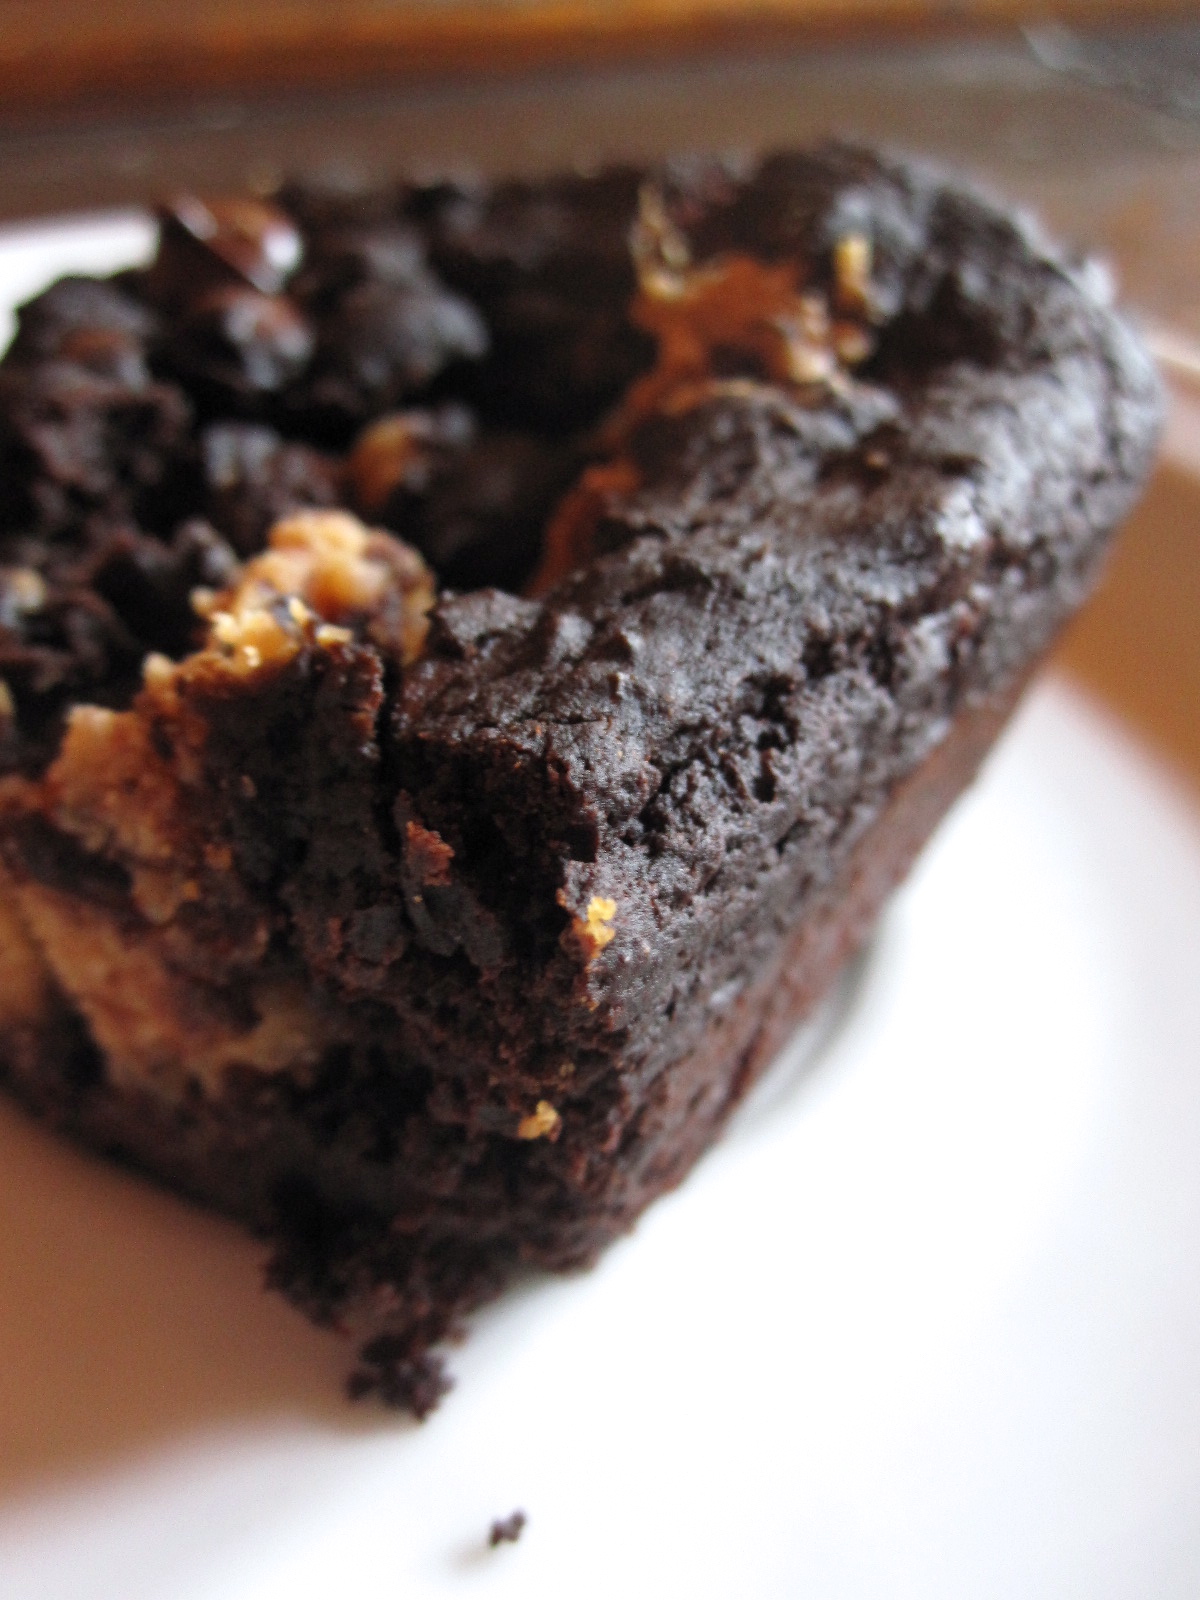
Darling skillet brownie for two! Paleo, gluten free, vegan. From this:
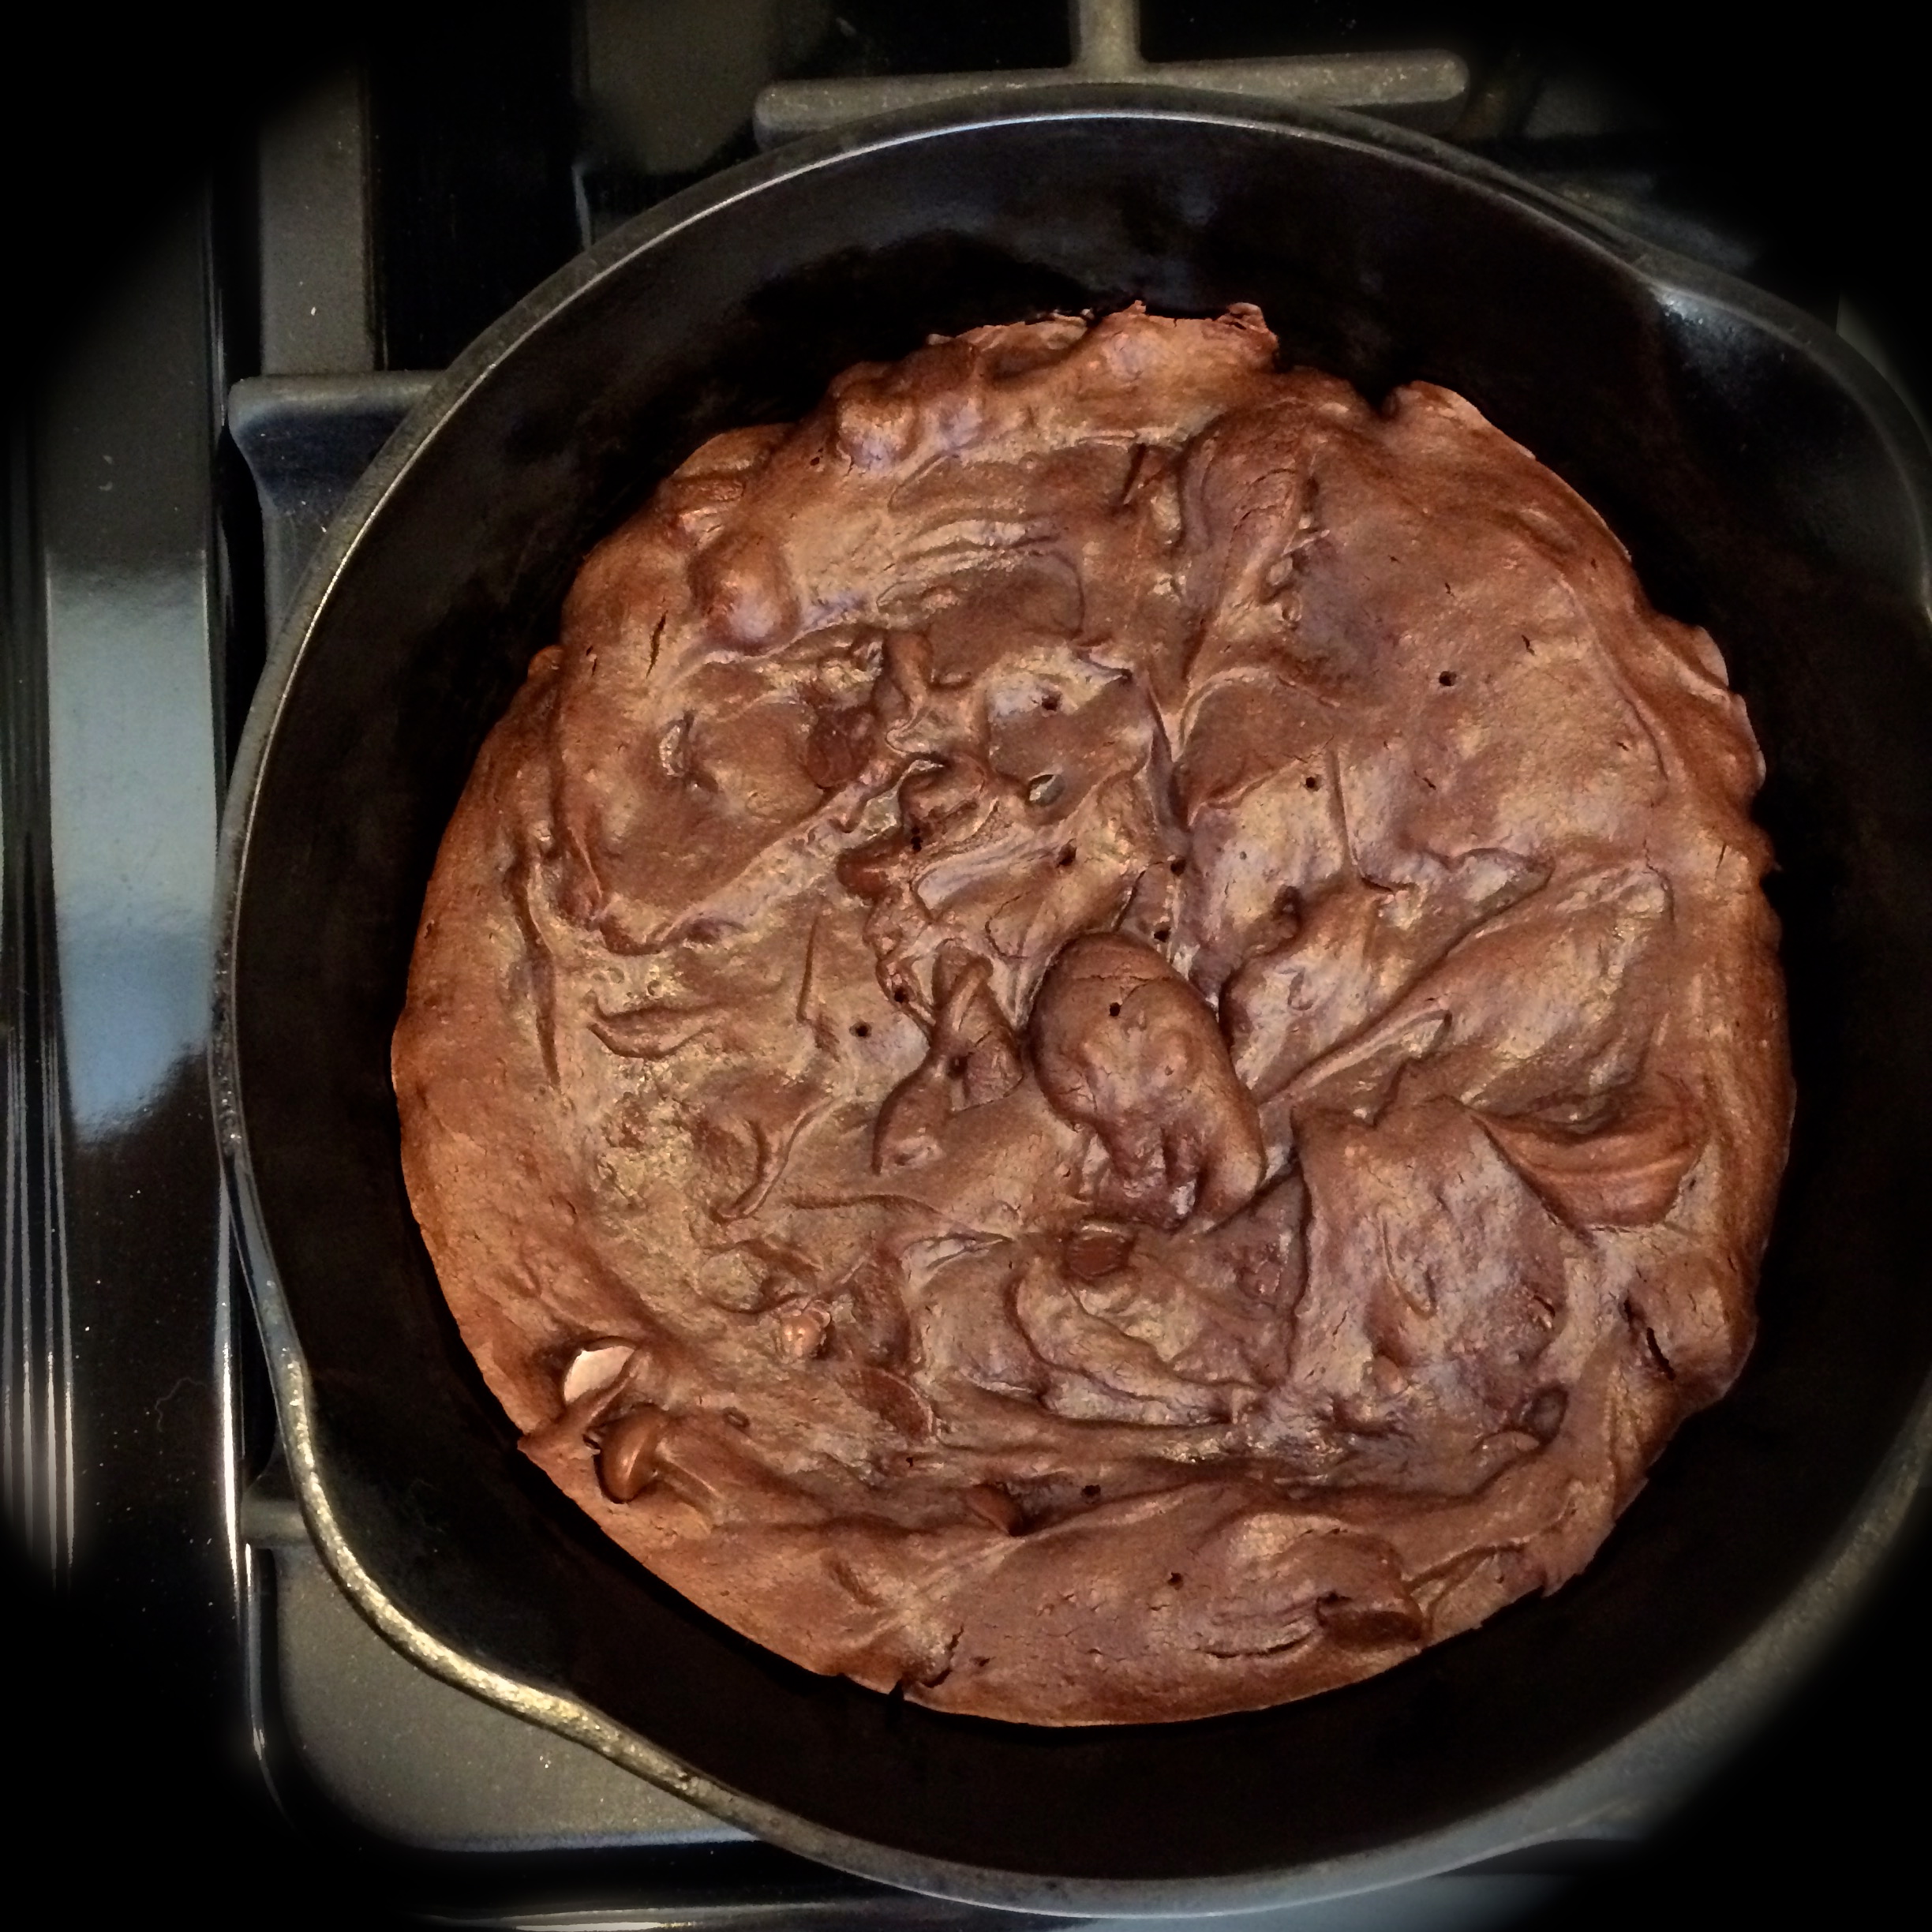
IMG_1323

To this!! Oops.

IMG_1324

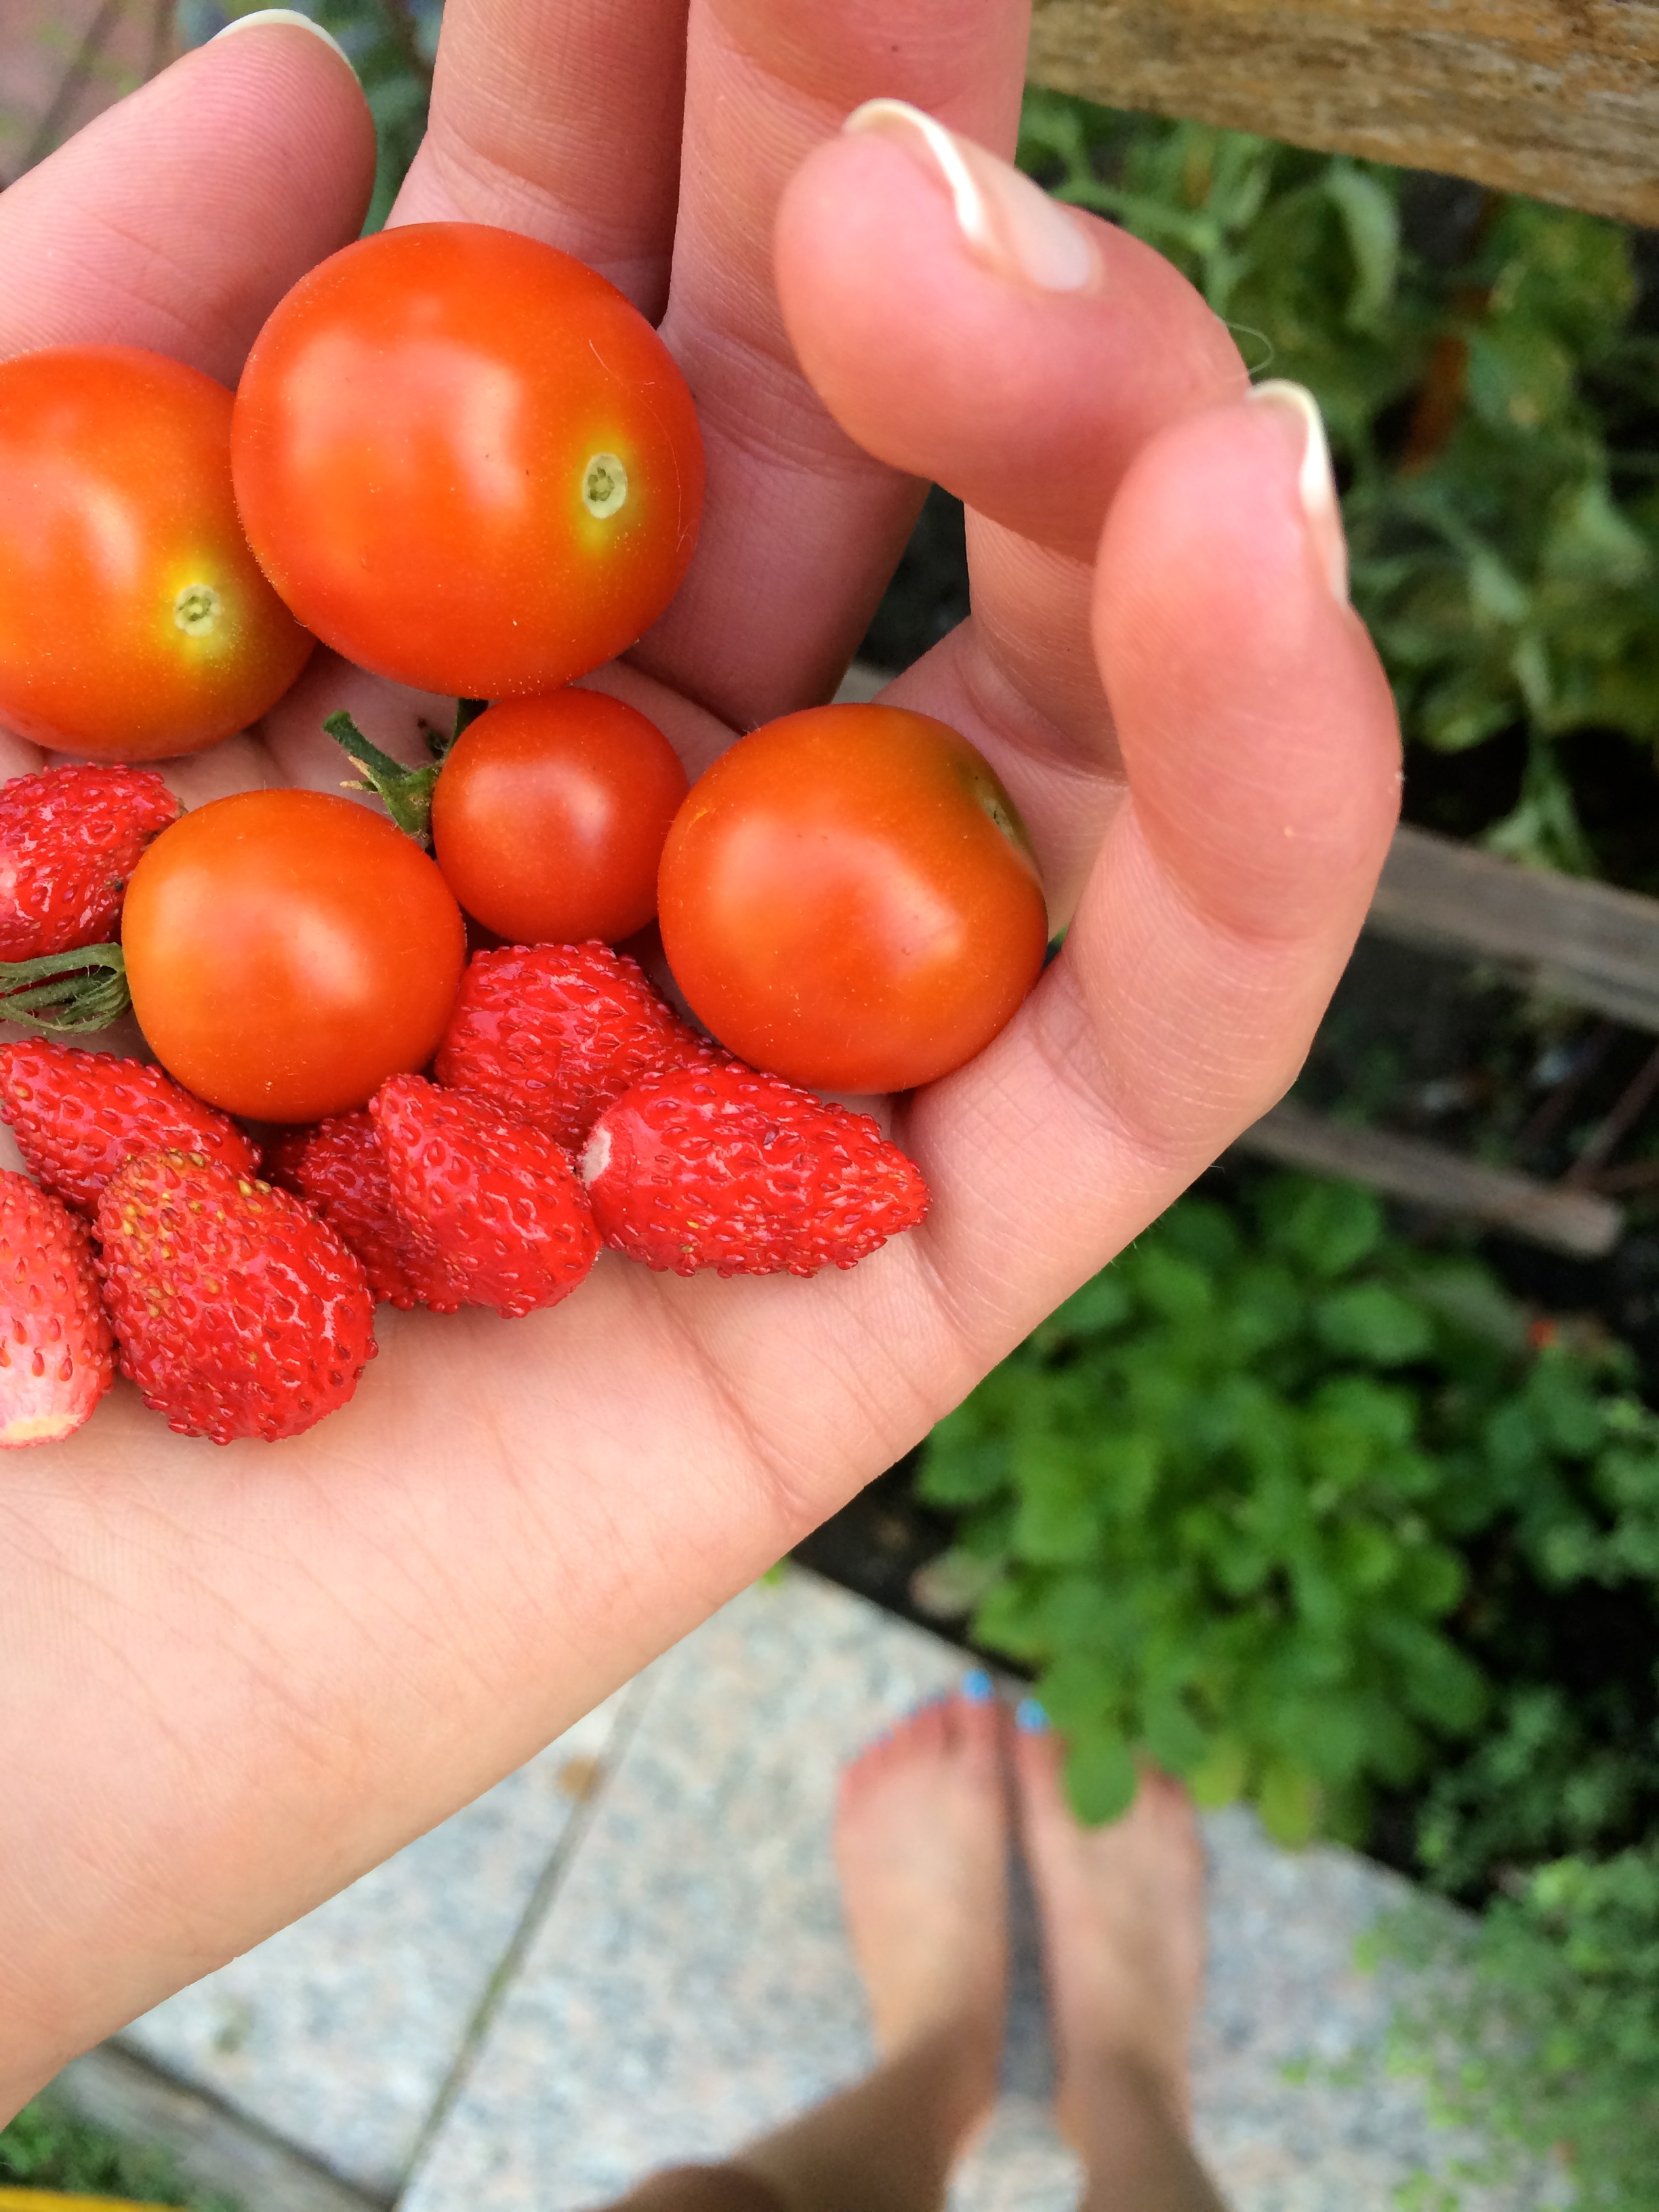
And cranberries! Hi Fall, I love you. IMG_1336

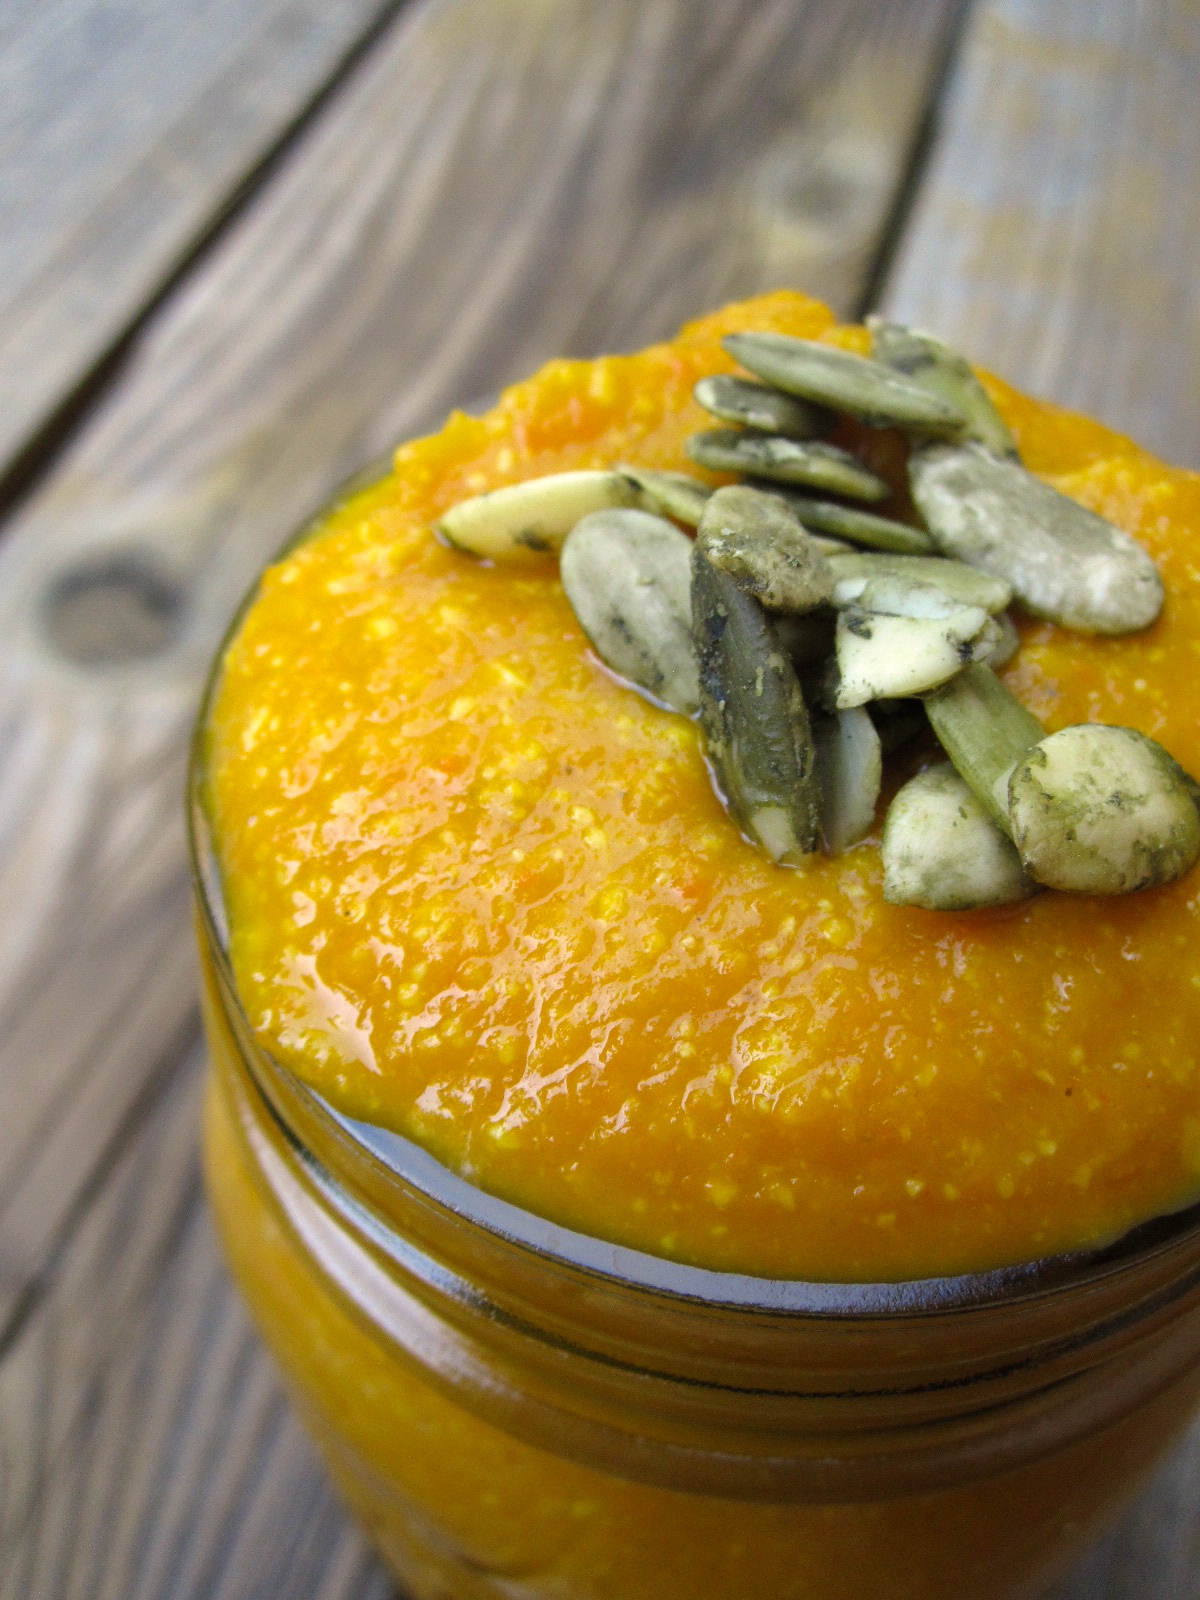
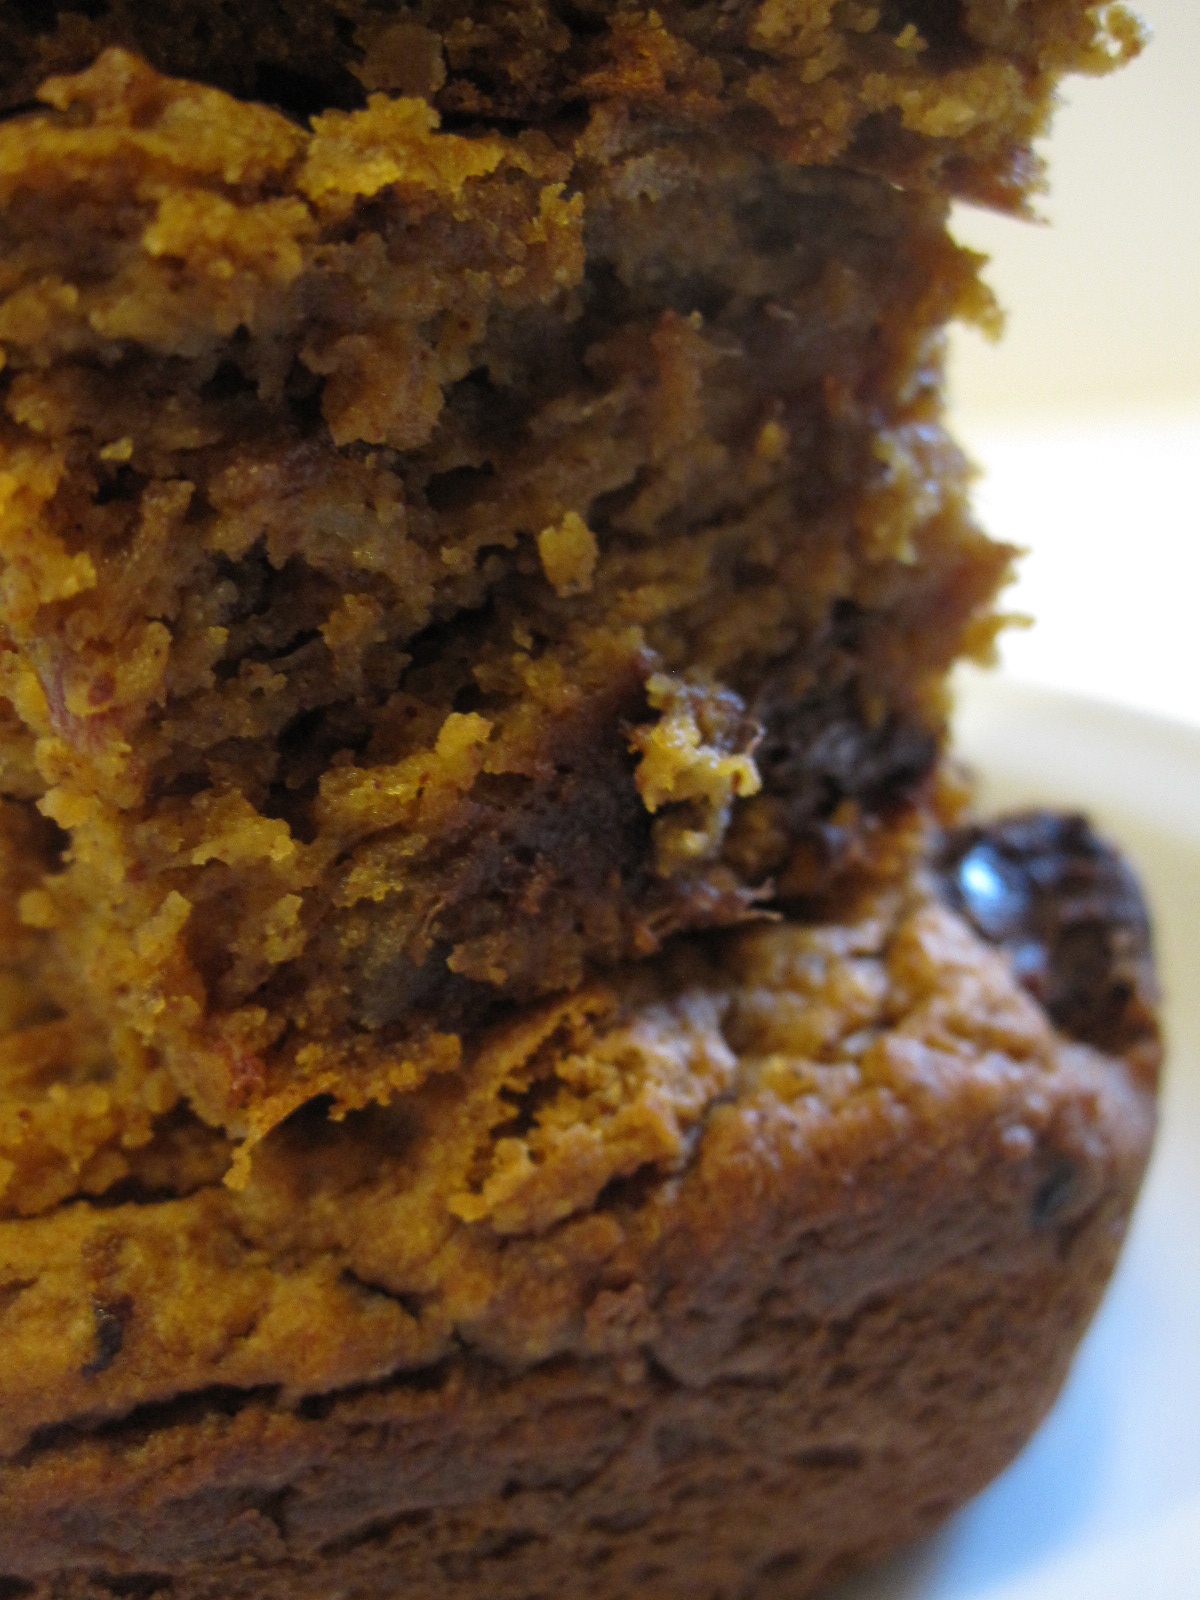
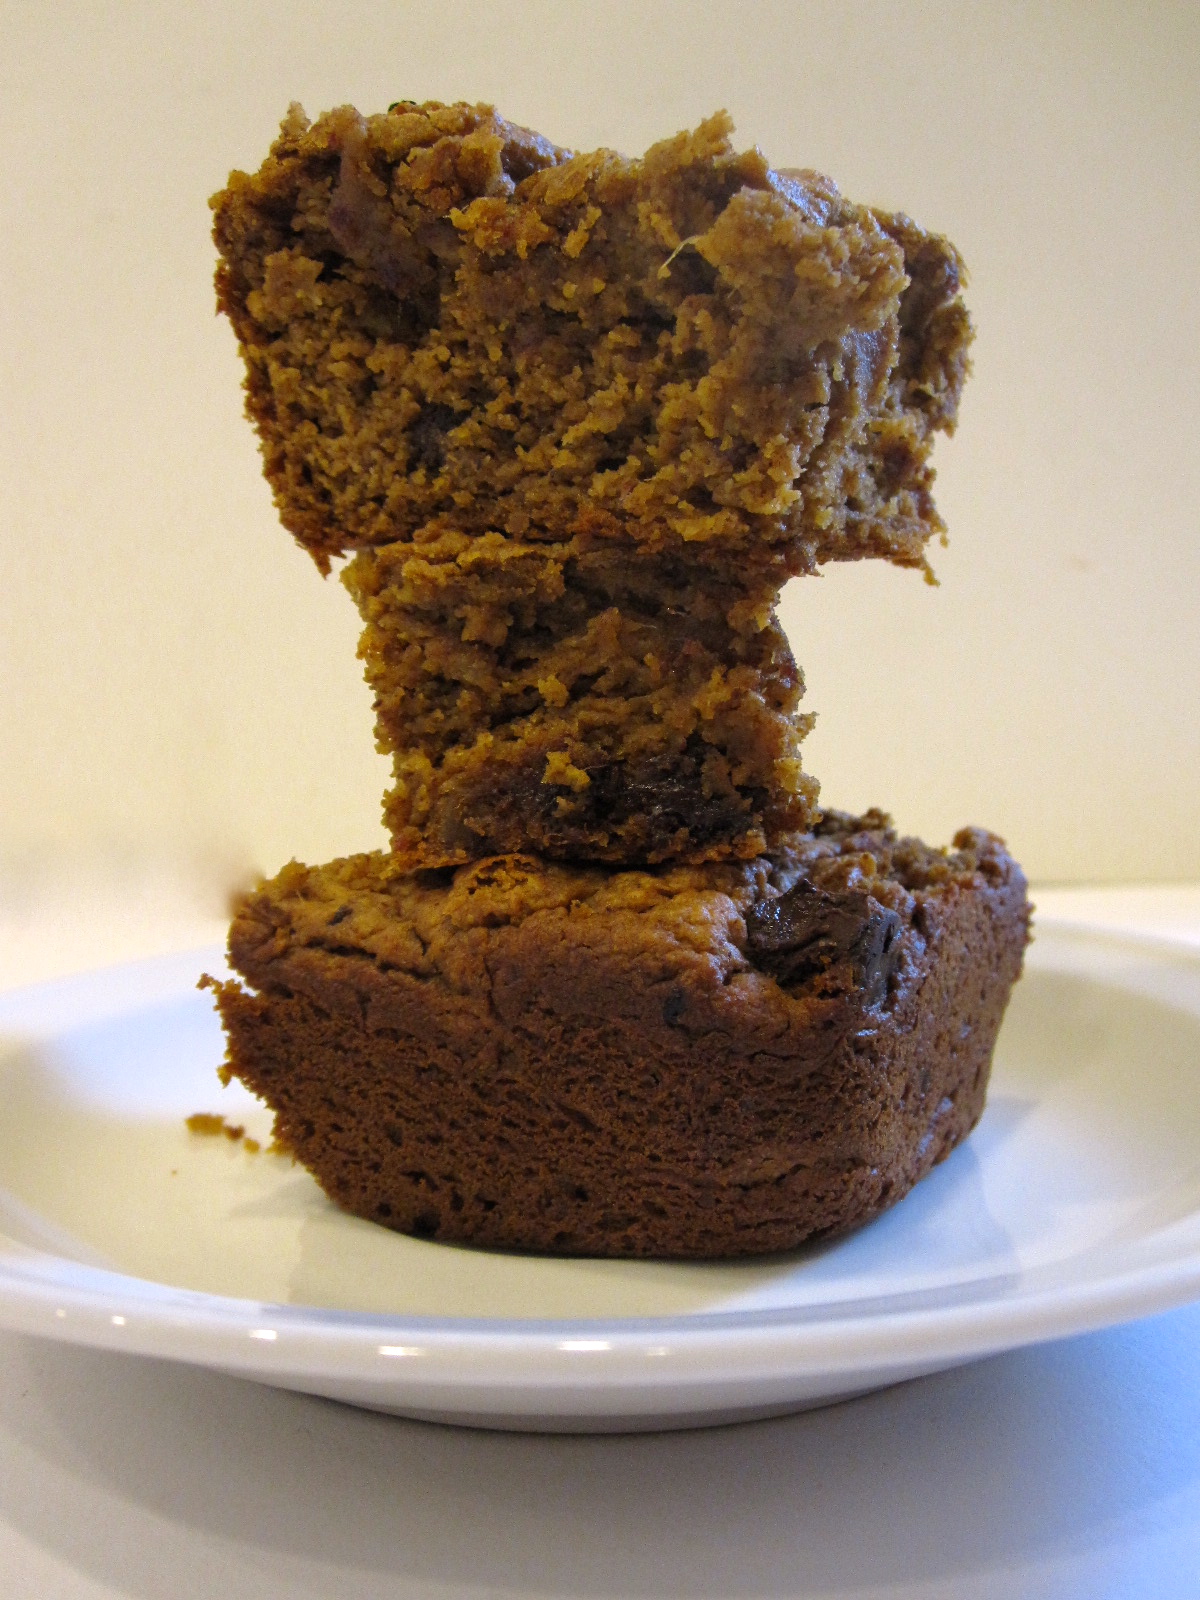
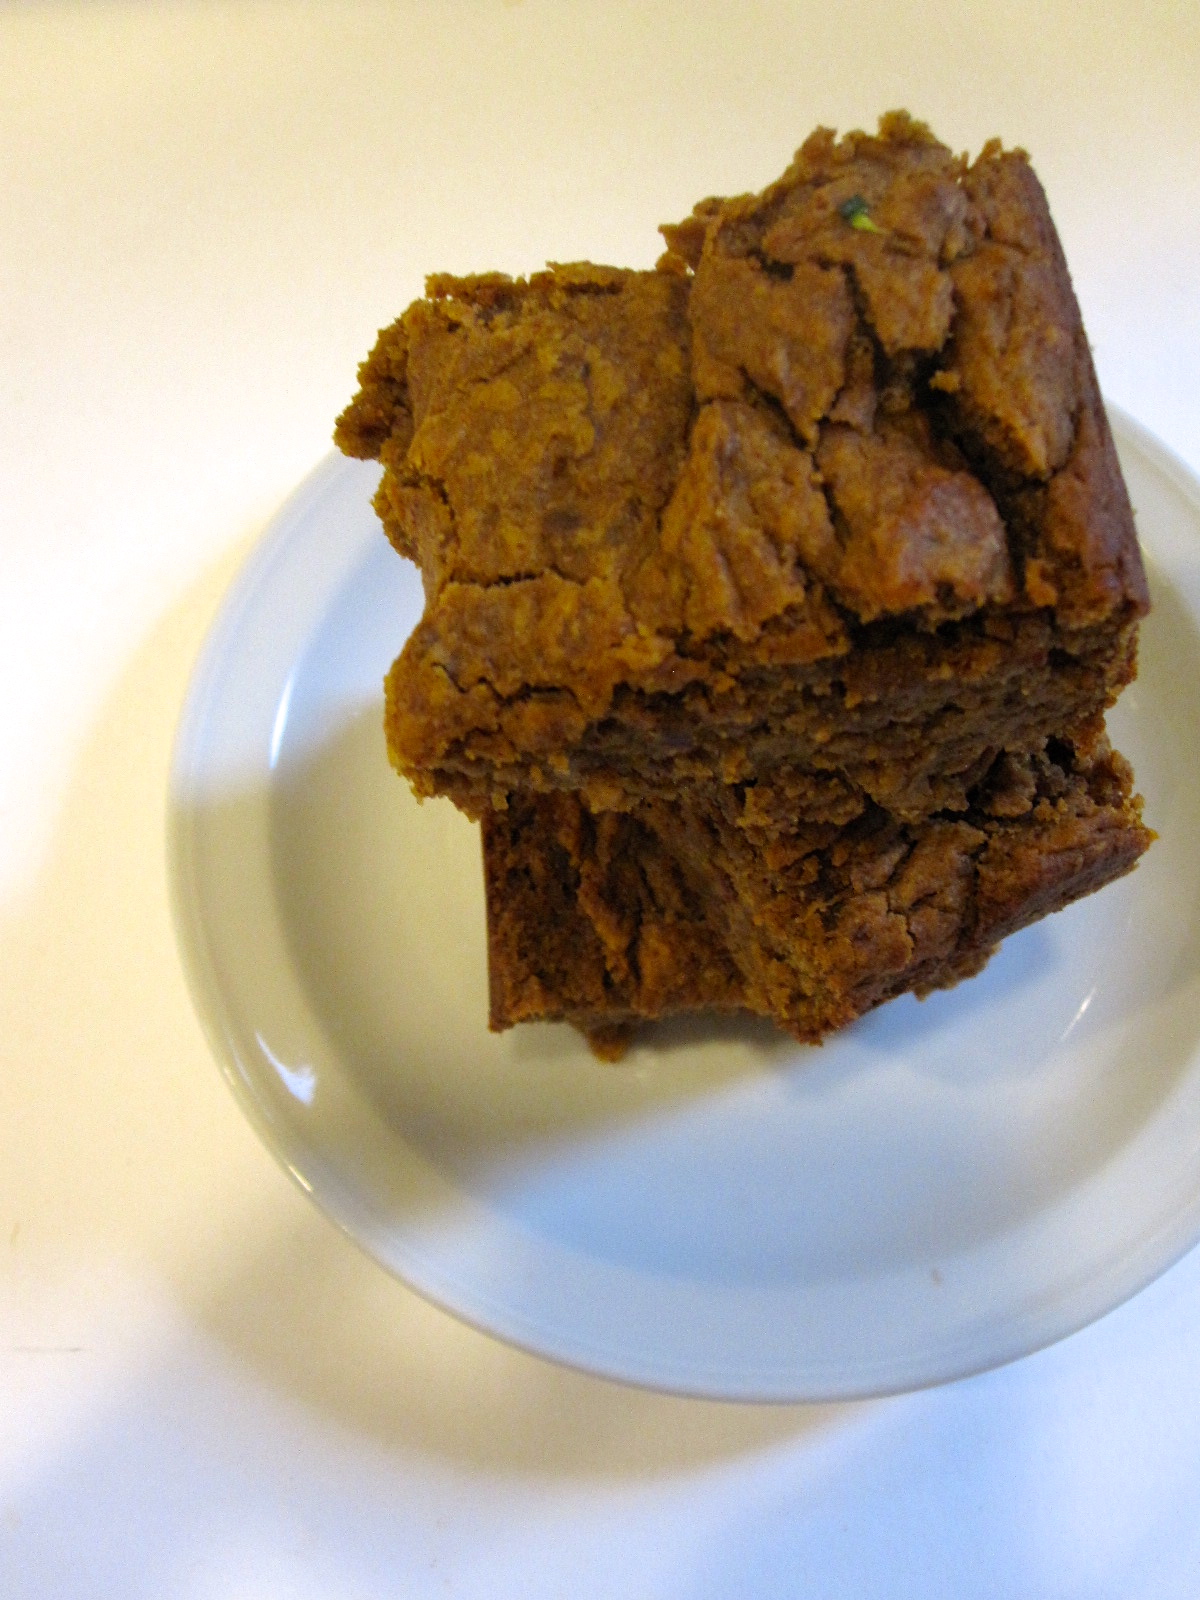
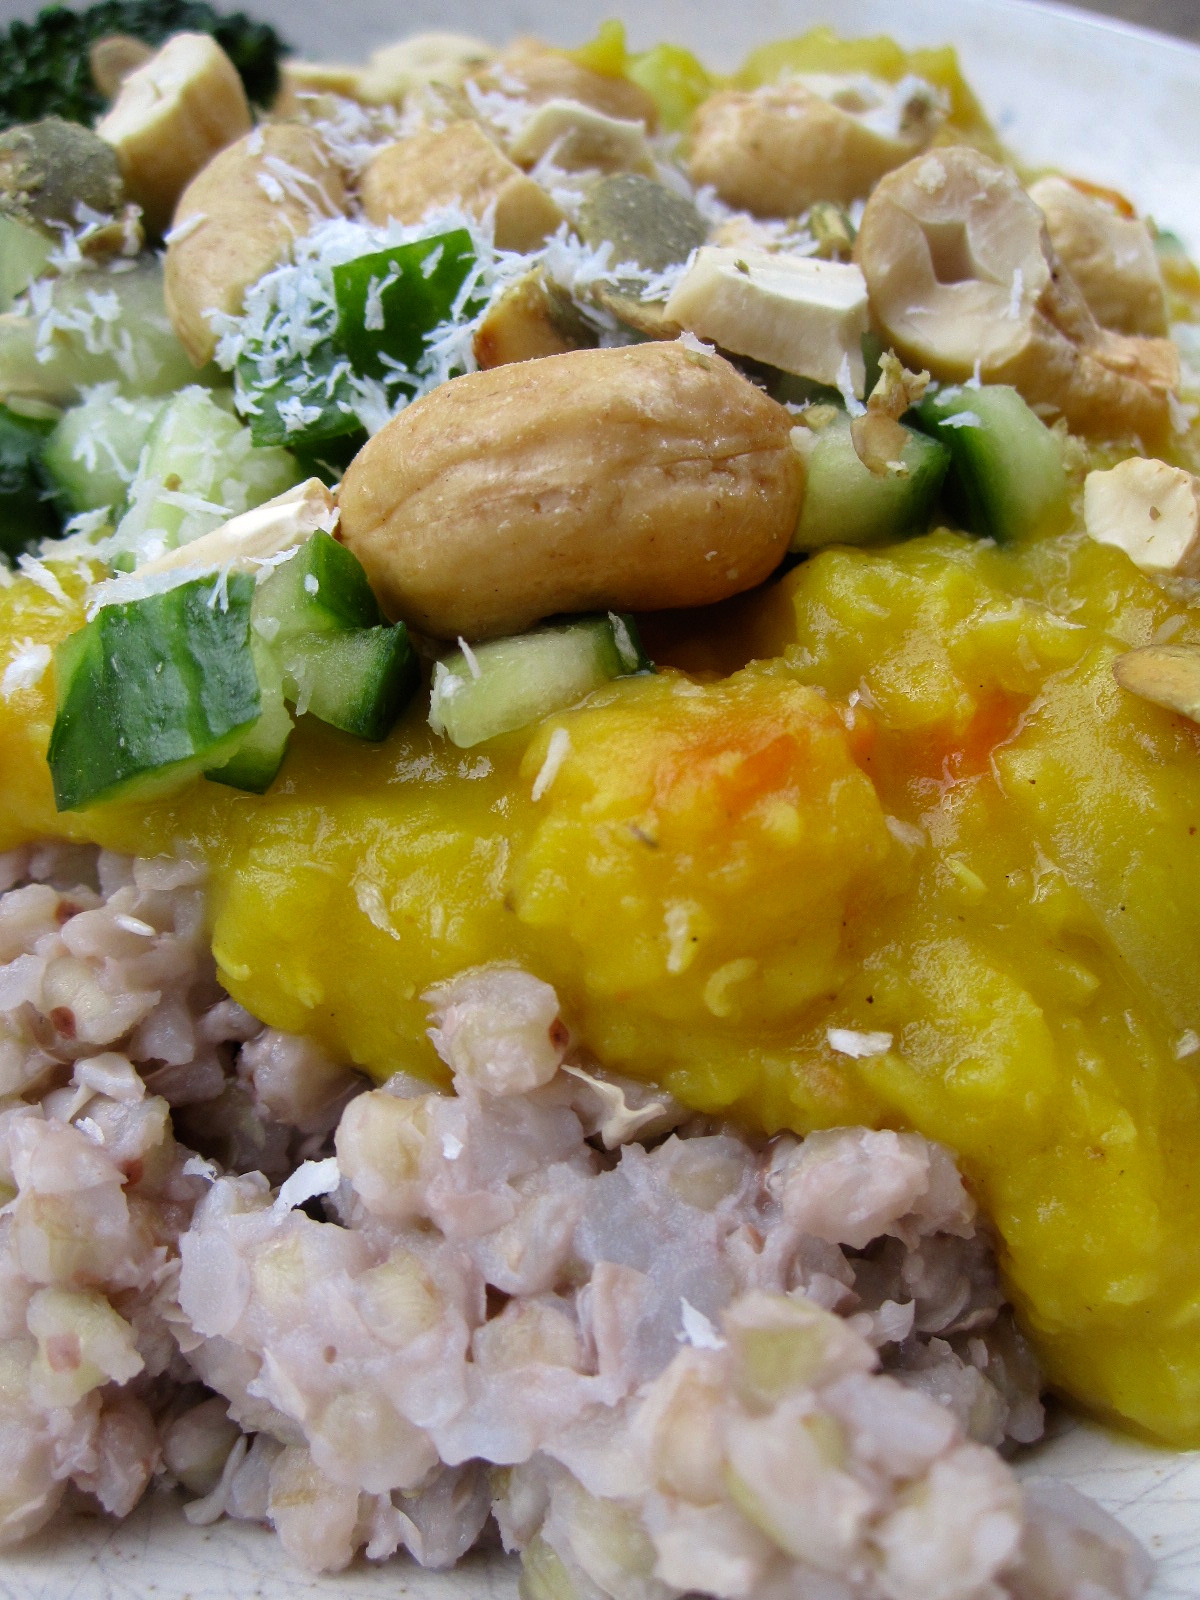
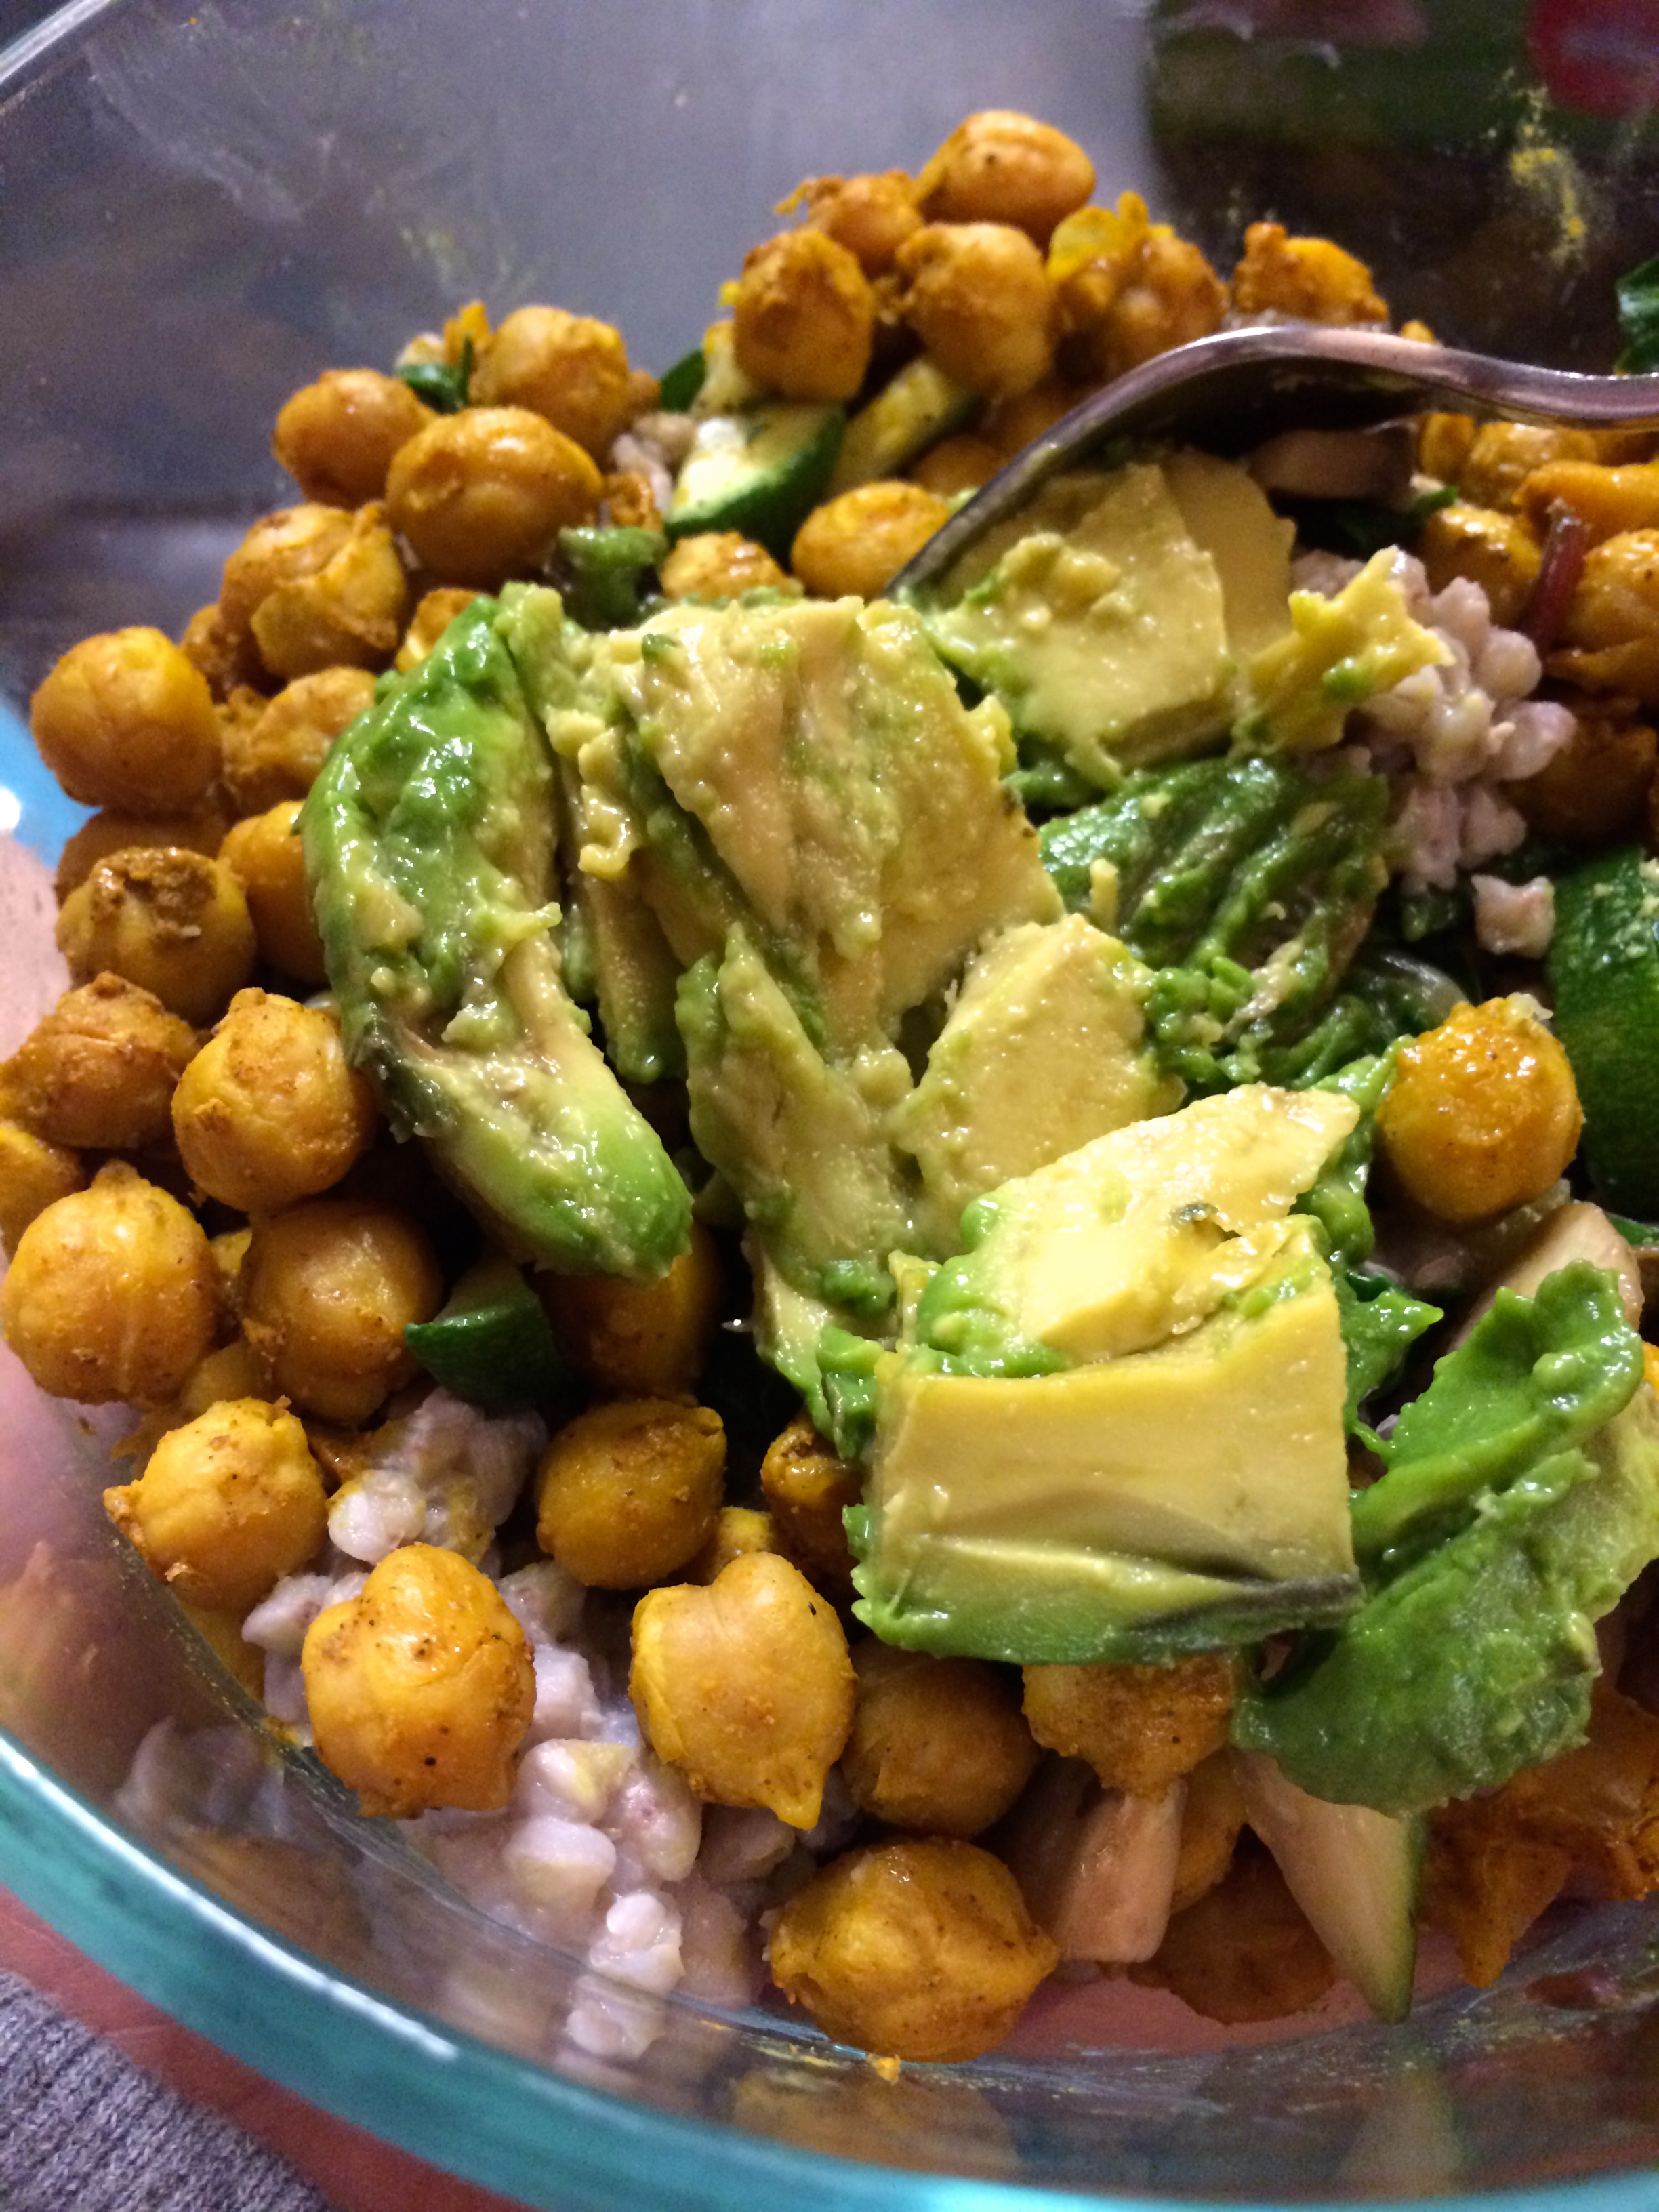
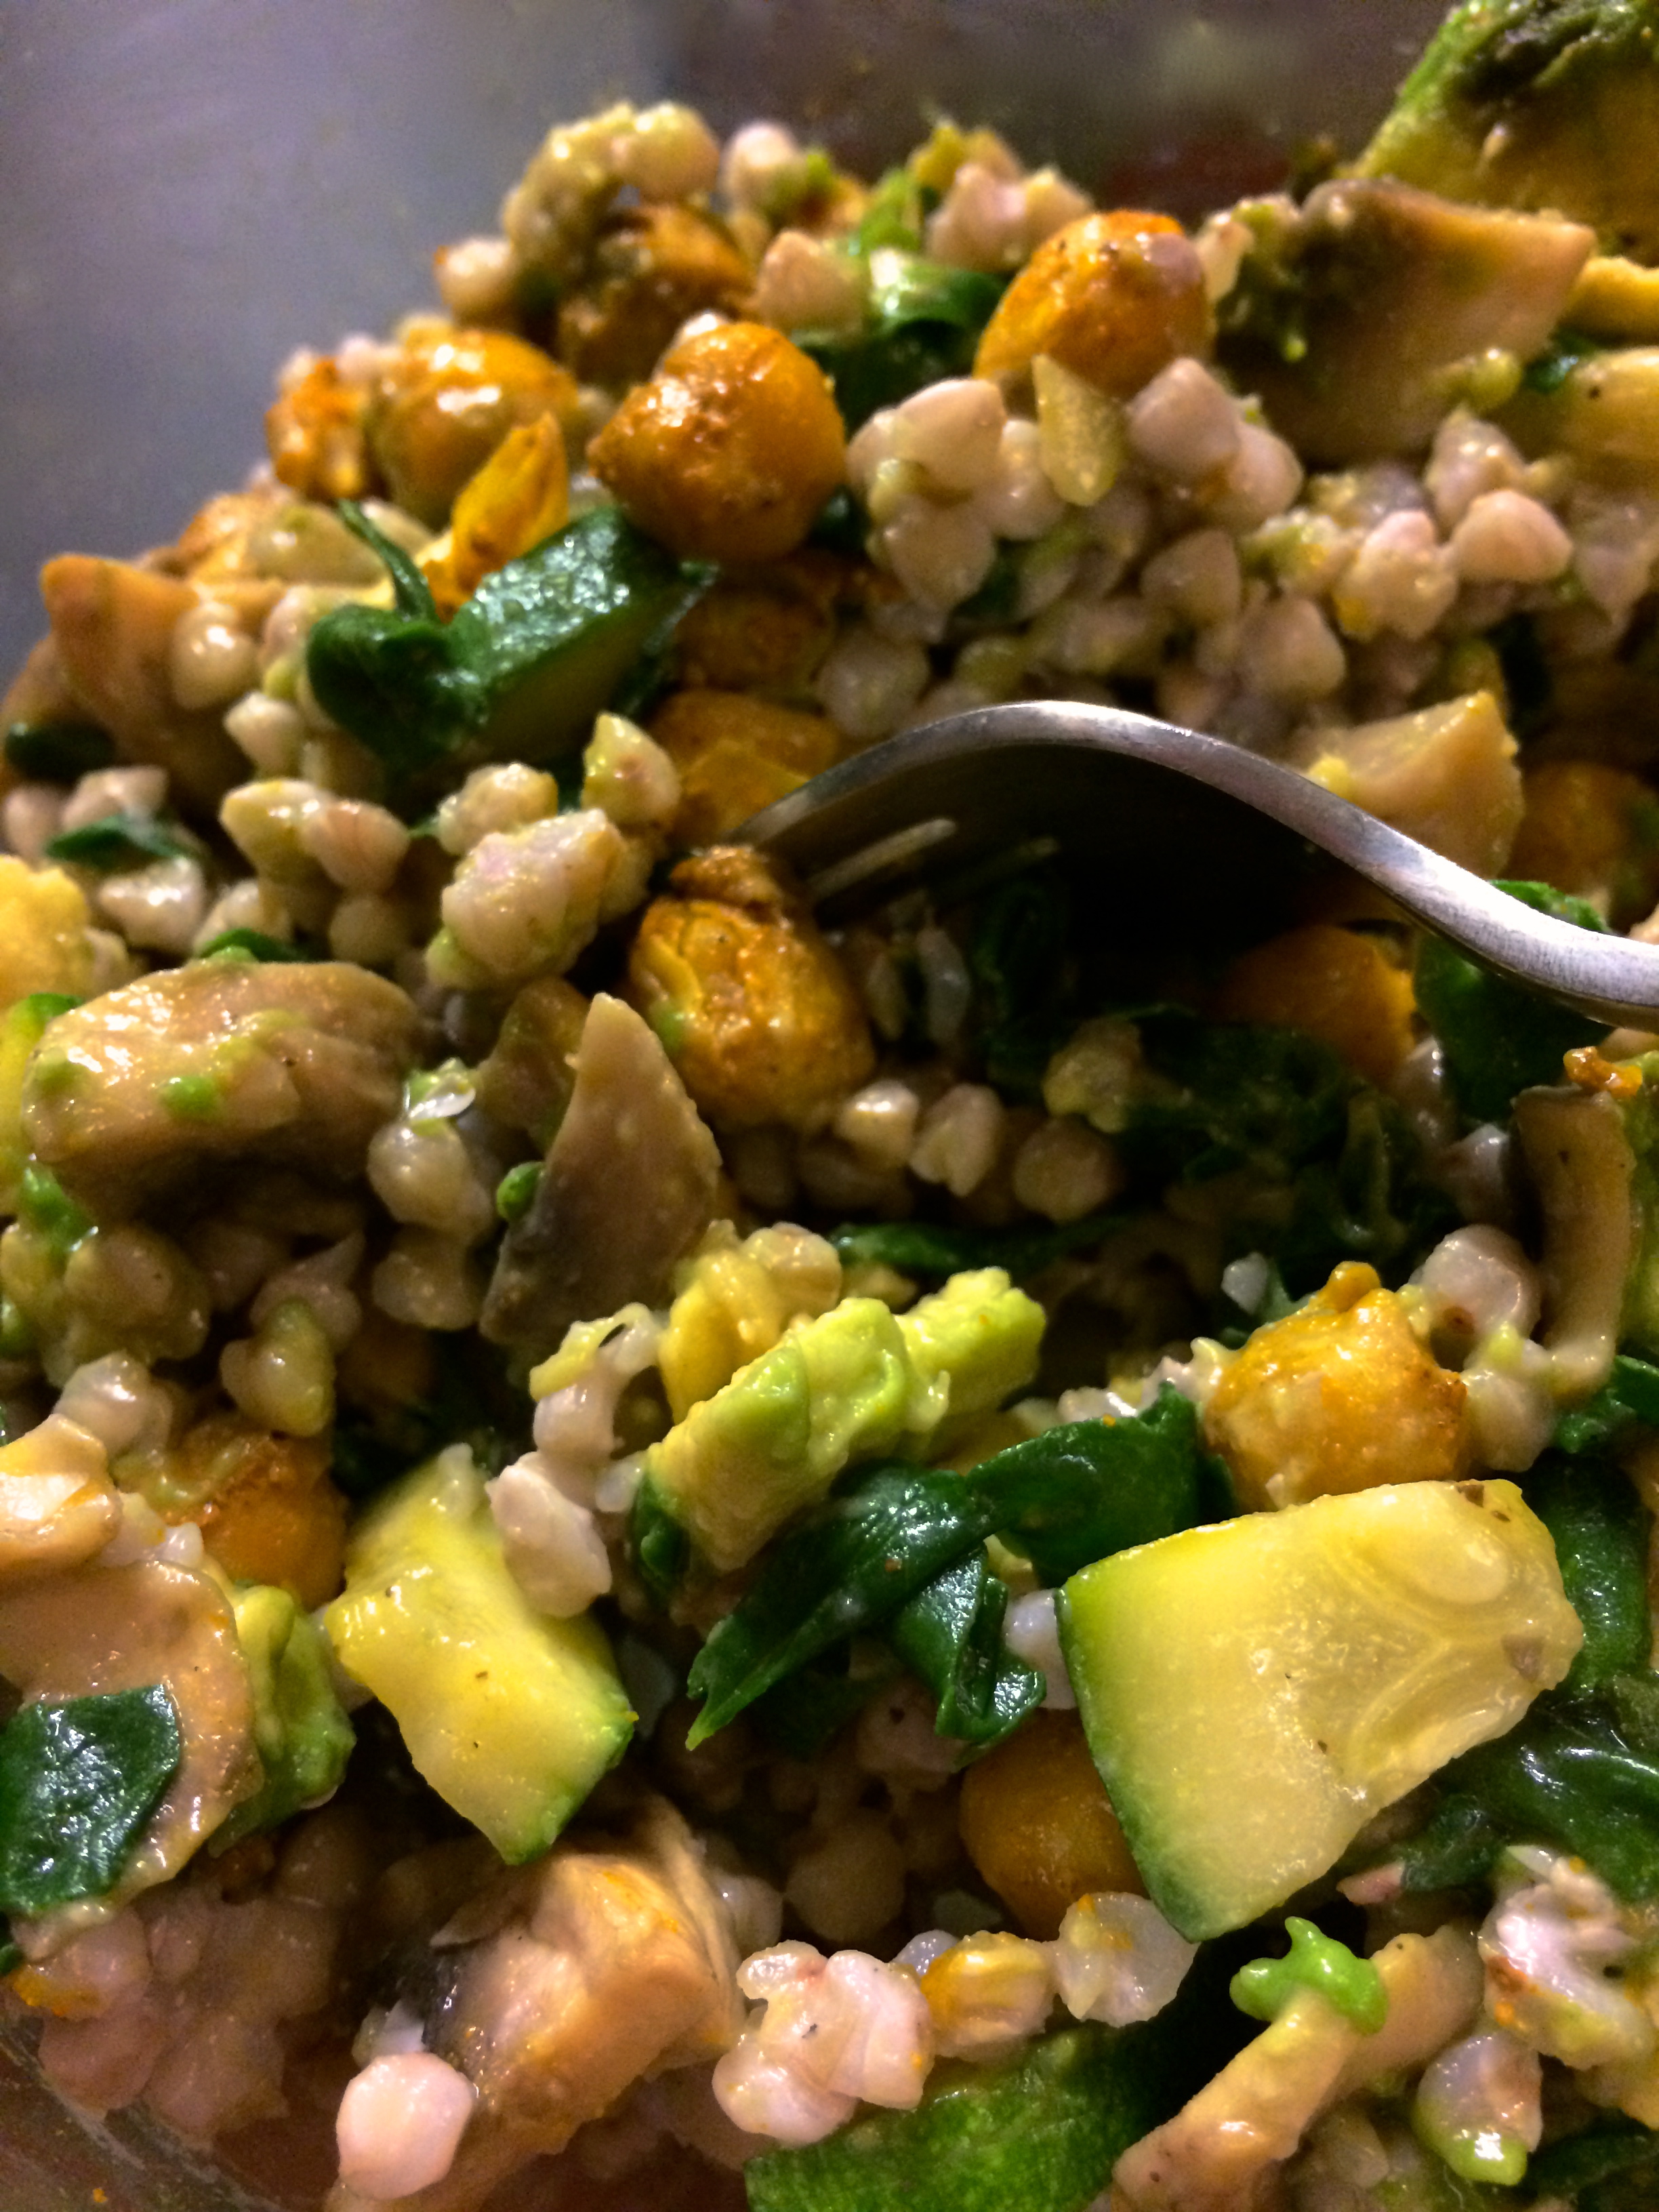
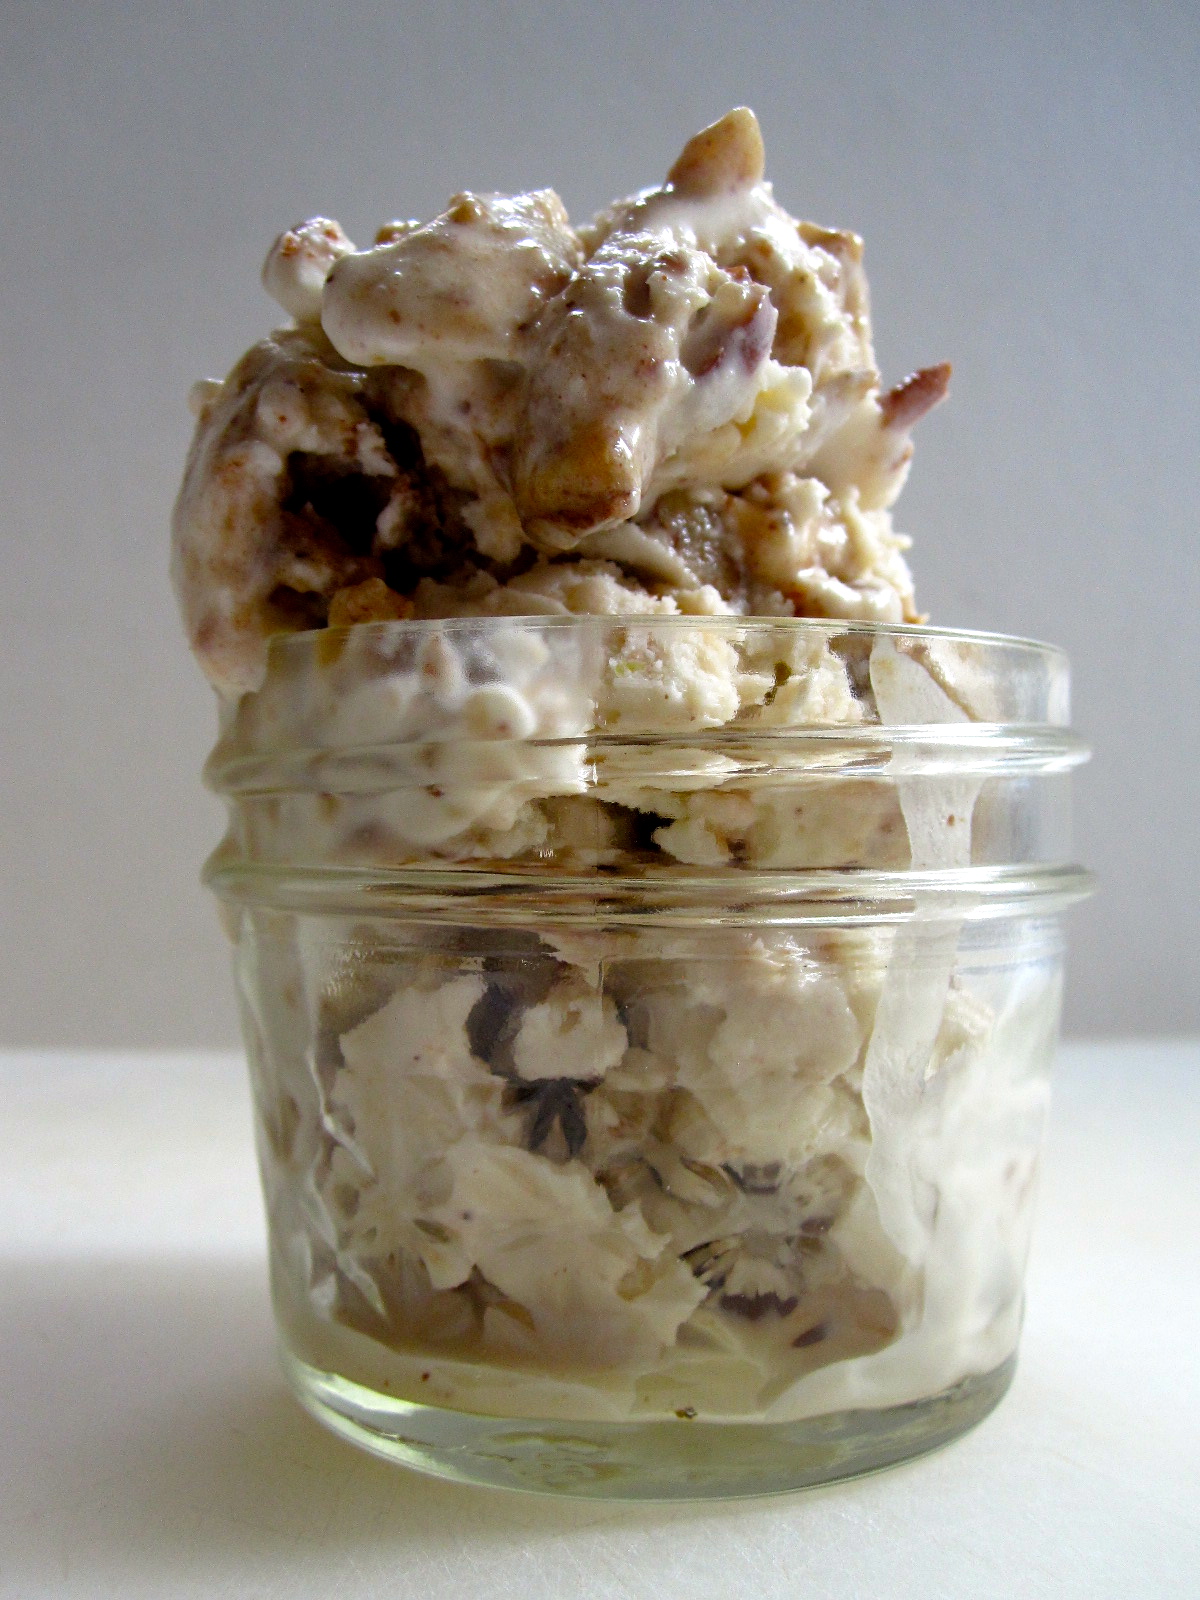
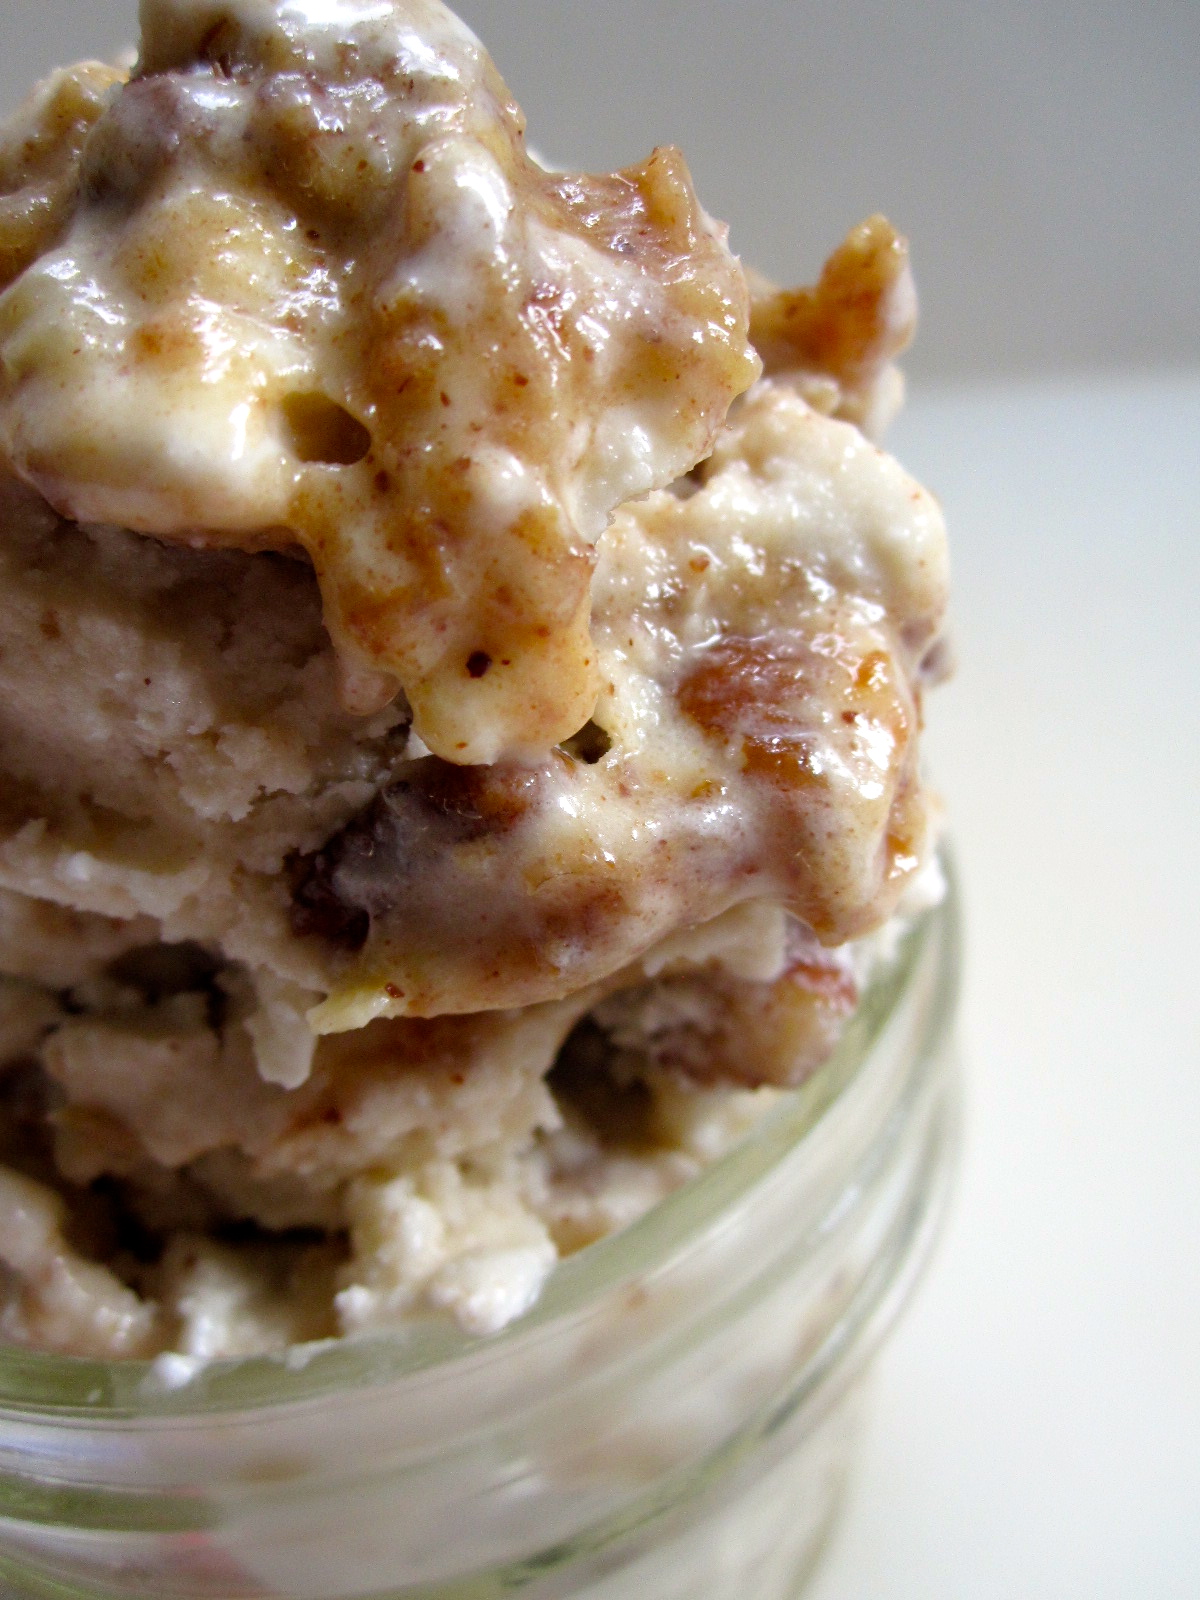
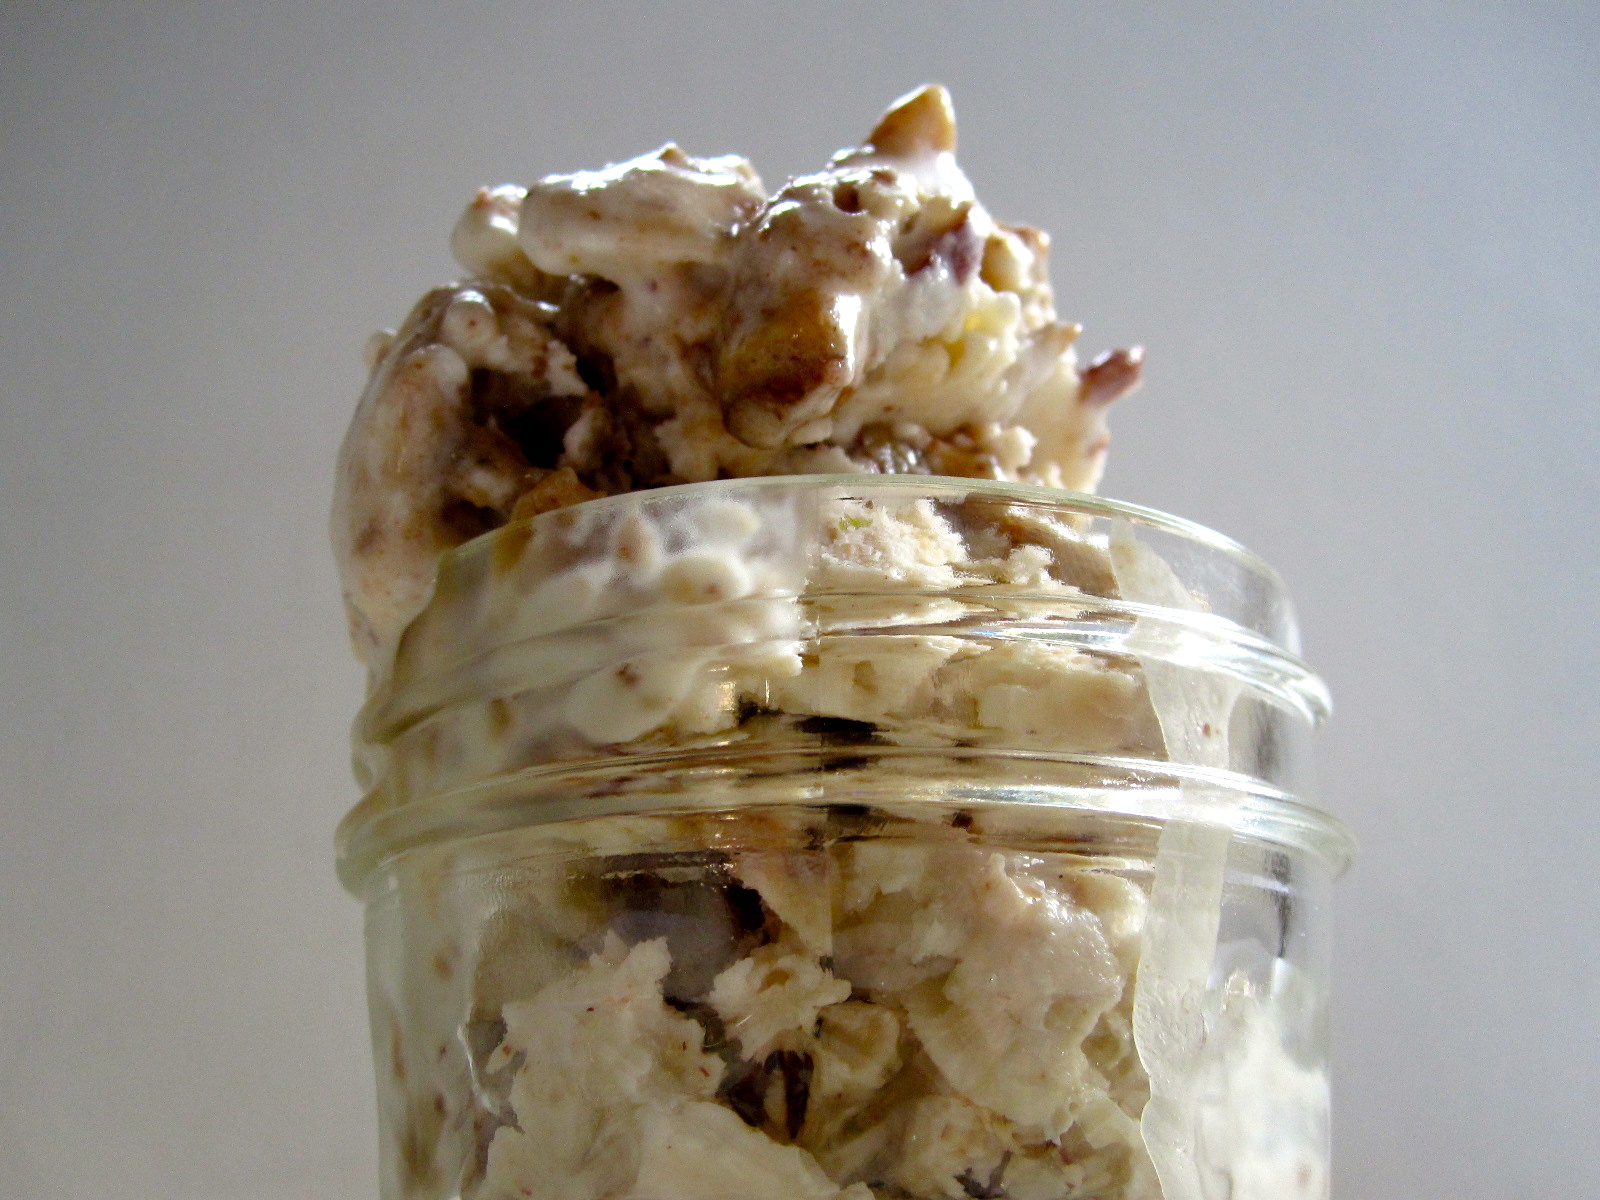
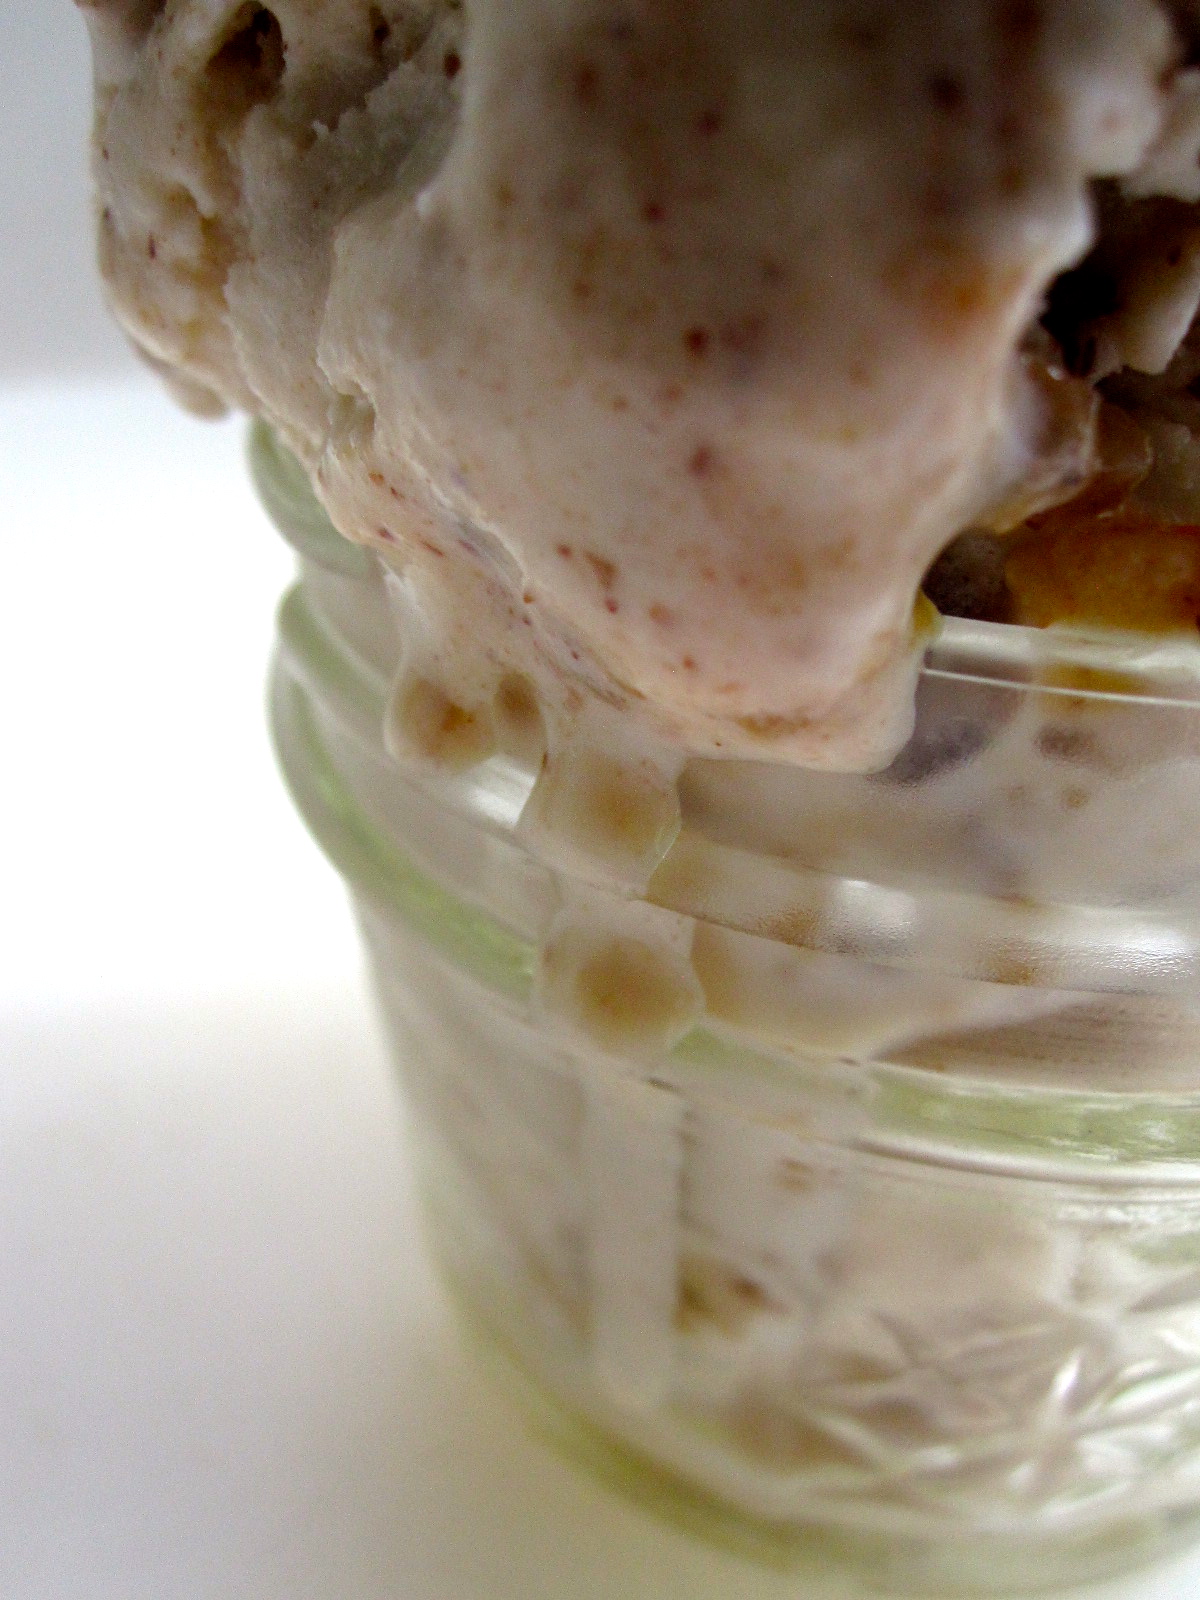
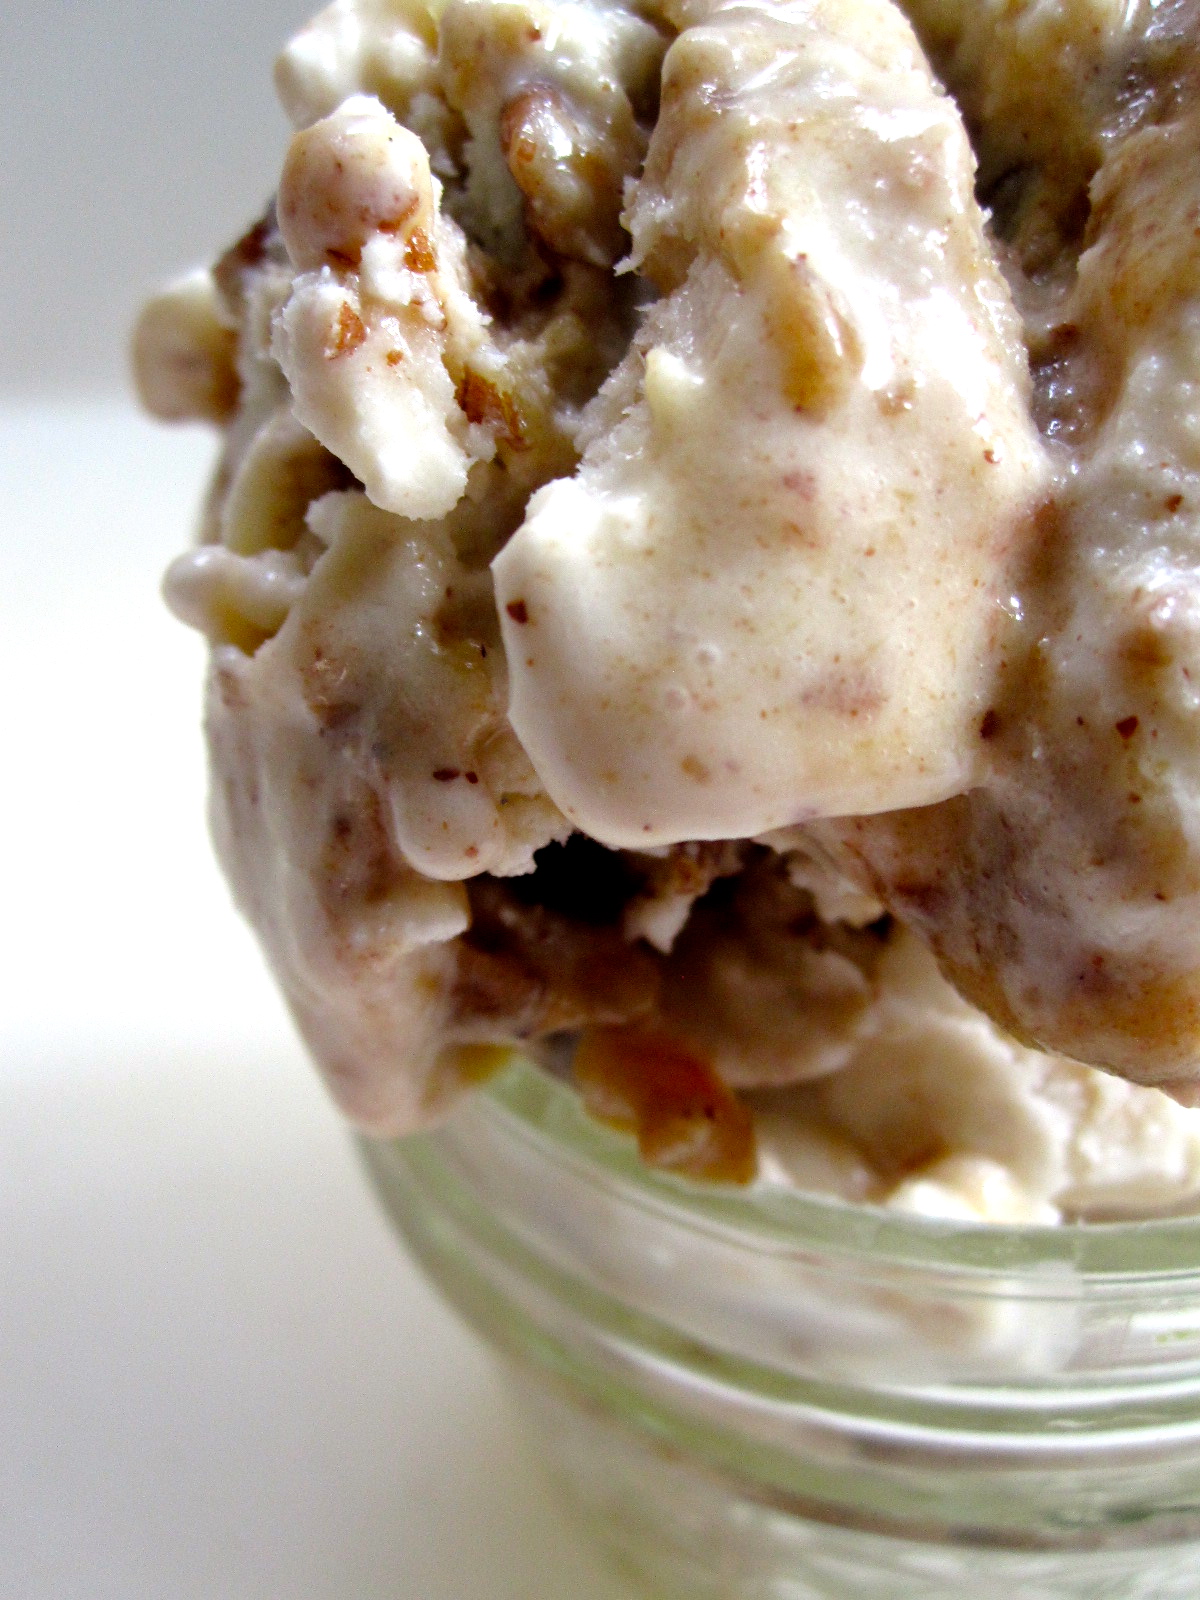
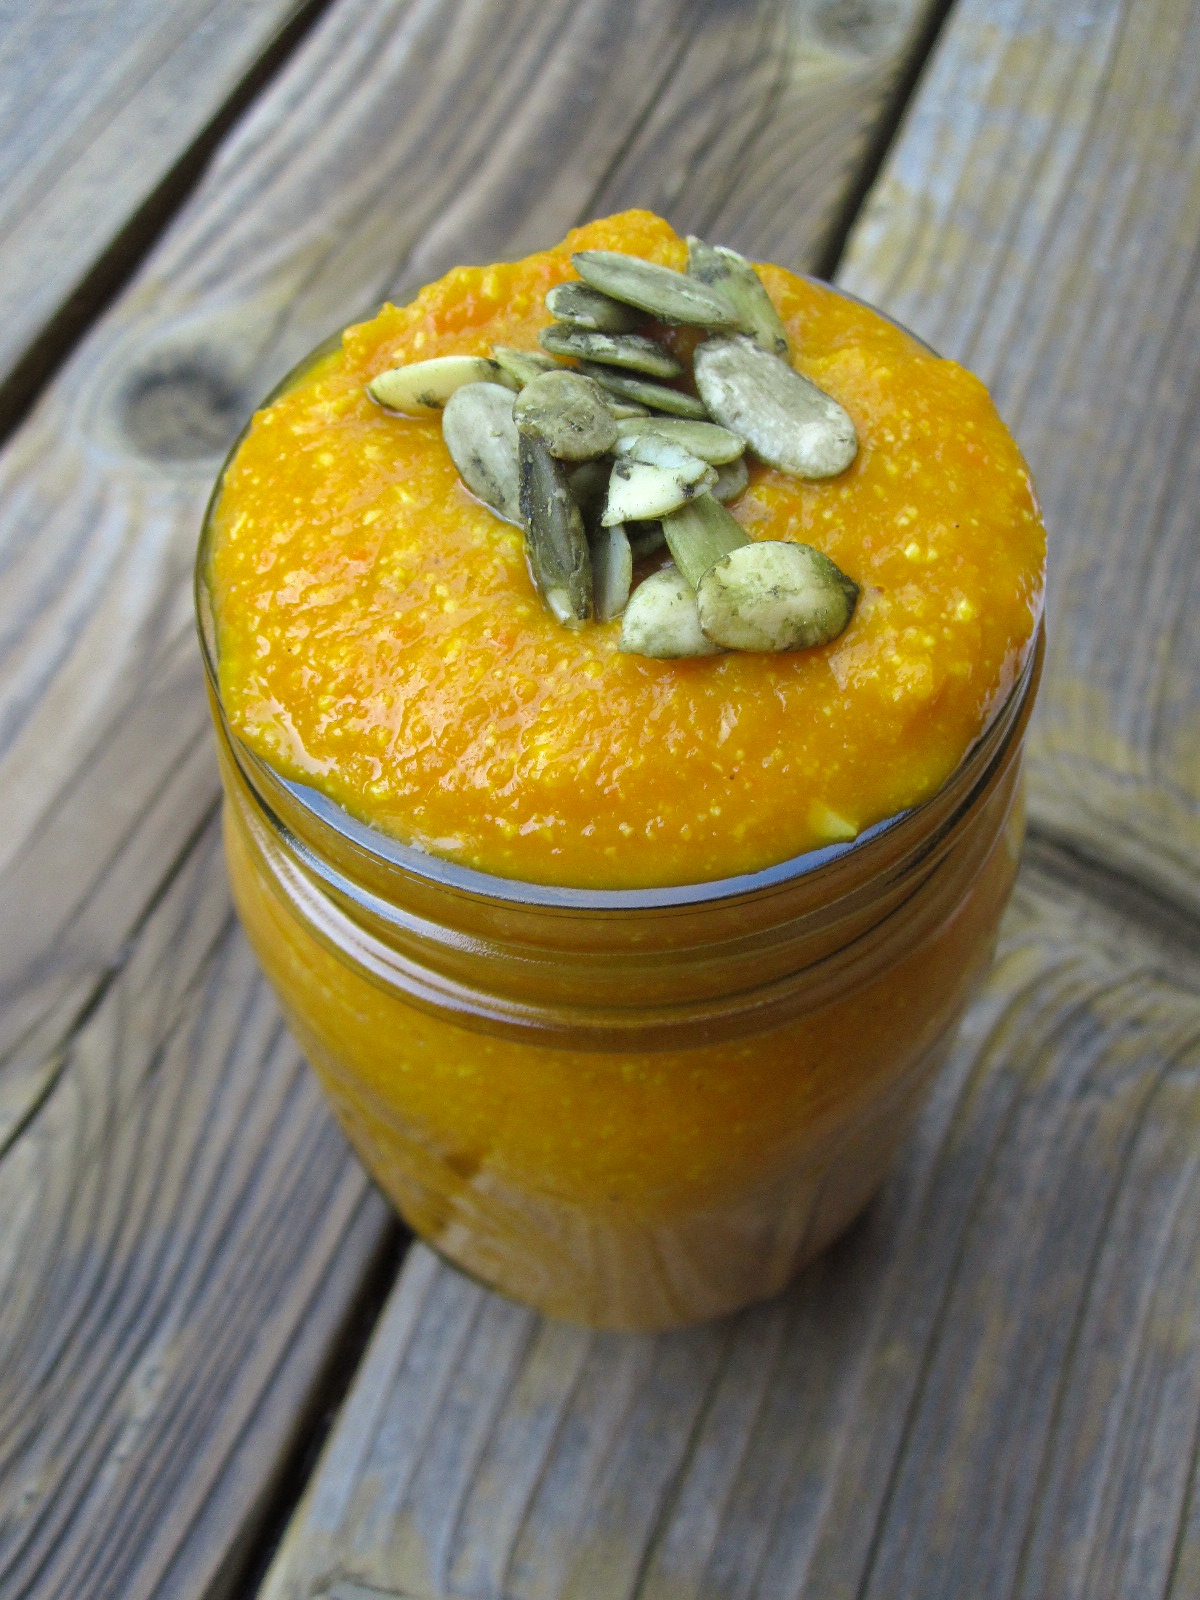
This soup is delicious. And I love kabocha squash (minus the difficulties of getting them open) for their bright orange color and sweet flavor. I actually like them better than butternut—there’s something about the flavor of the kabochas that is richer, or more caramelized? Anyway. They’re easy to roast—toss them in the oven (halved) on a lightly greased baking sheet for about 45 minutes, until they can be pierced with a  fork easily. Take them out, flip them over and let them cool off… then scoop all that pureed goodness out and toss it in some soup. Or something. Like this:

IMG_6970

IMG_6952

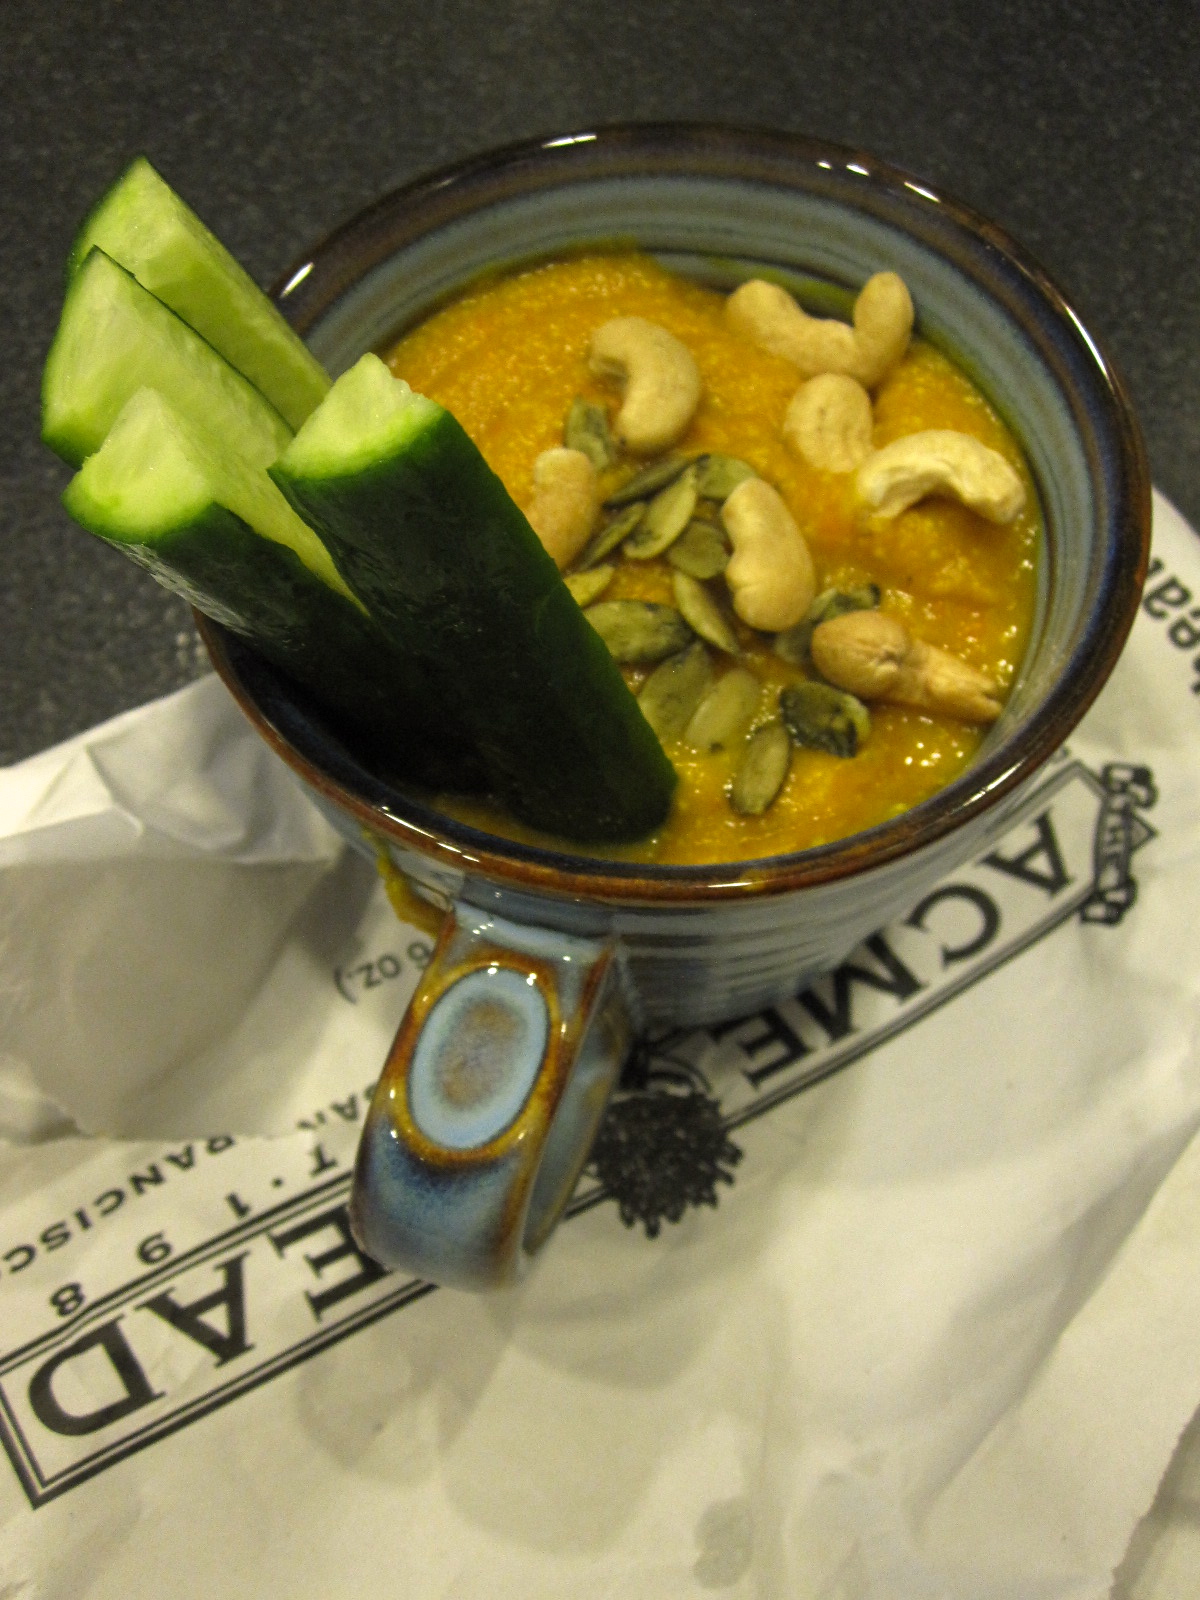
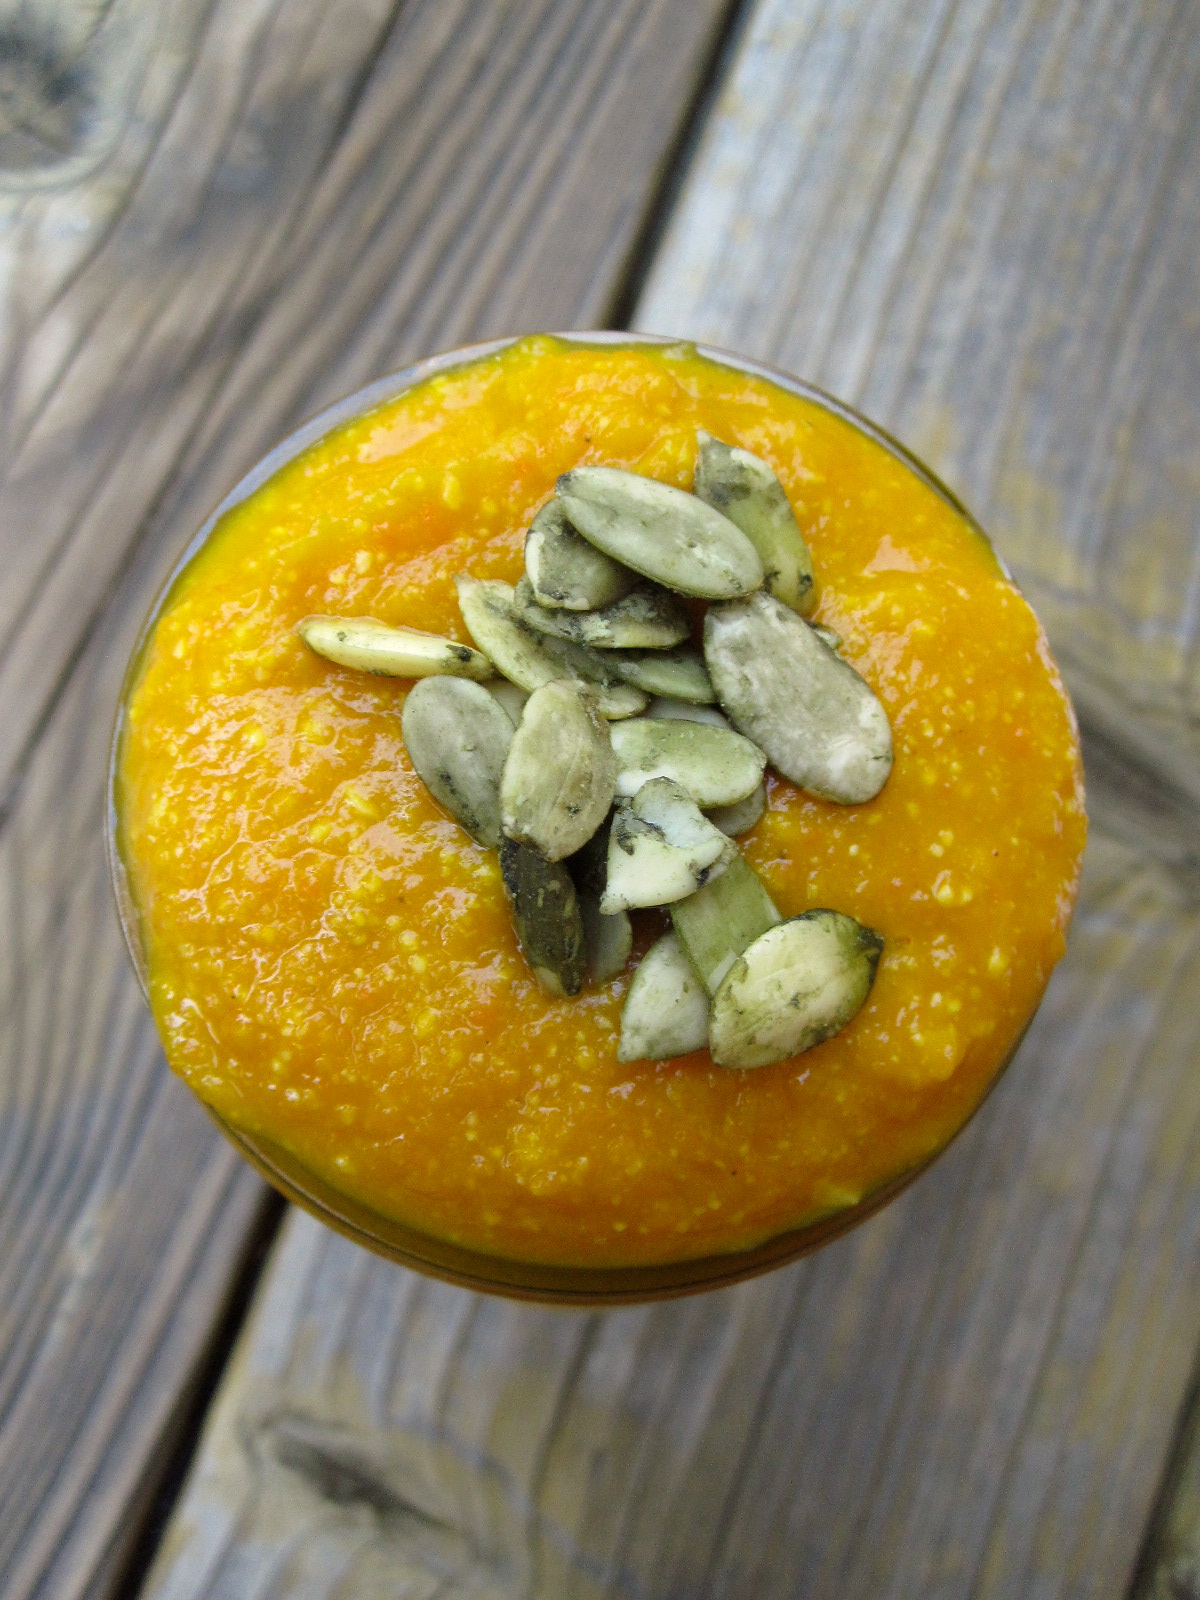
Roasted and Curried Kabocha Squash Soup

Yield: a vat. I used this recipe from My Darling Vegan, but obviously used a roasted kabocha squash instead of pumpkin. I reduced the garlic to 1 clove but went heavy handed on the cumin and curry powder, and I blended in all of the cashew creme instead of saving some for topping. Delicious all around, I wouldn’t change a thing!

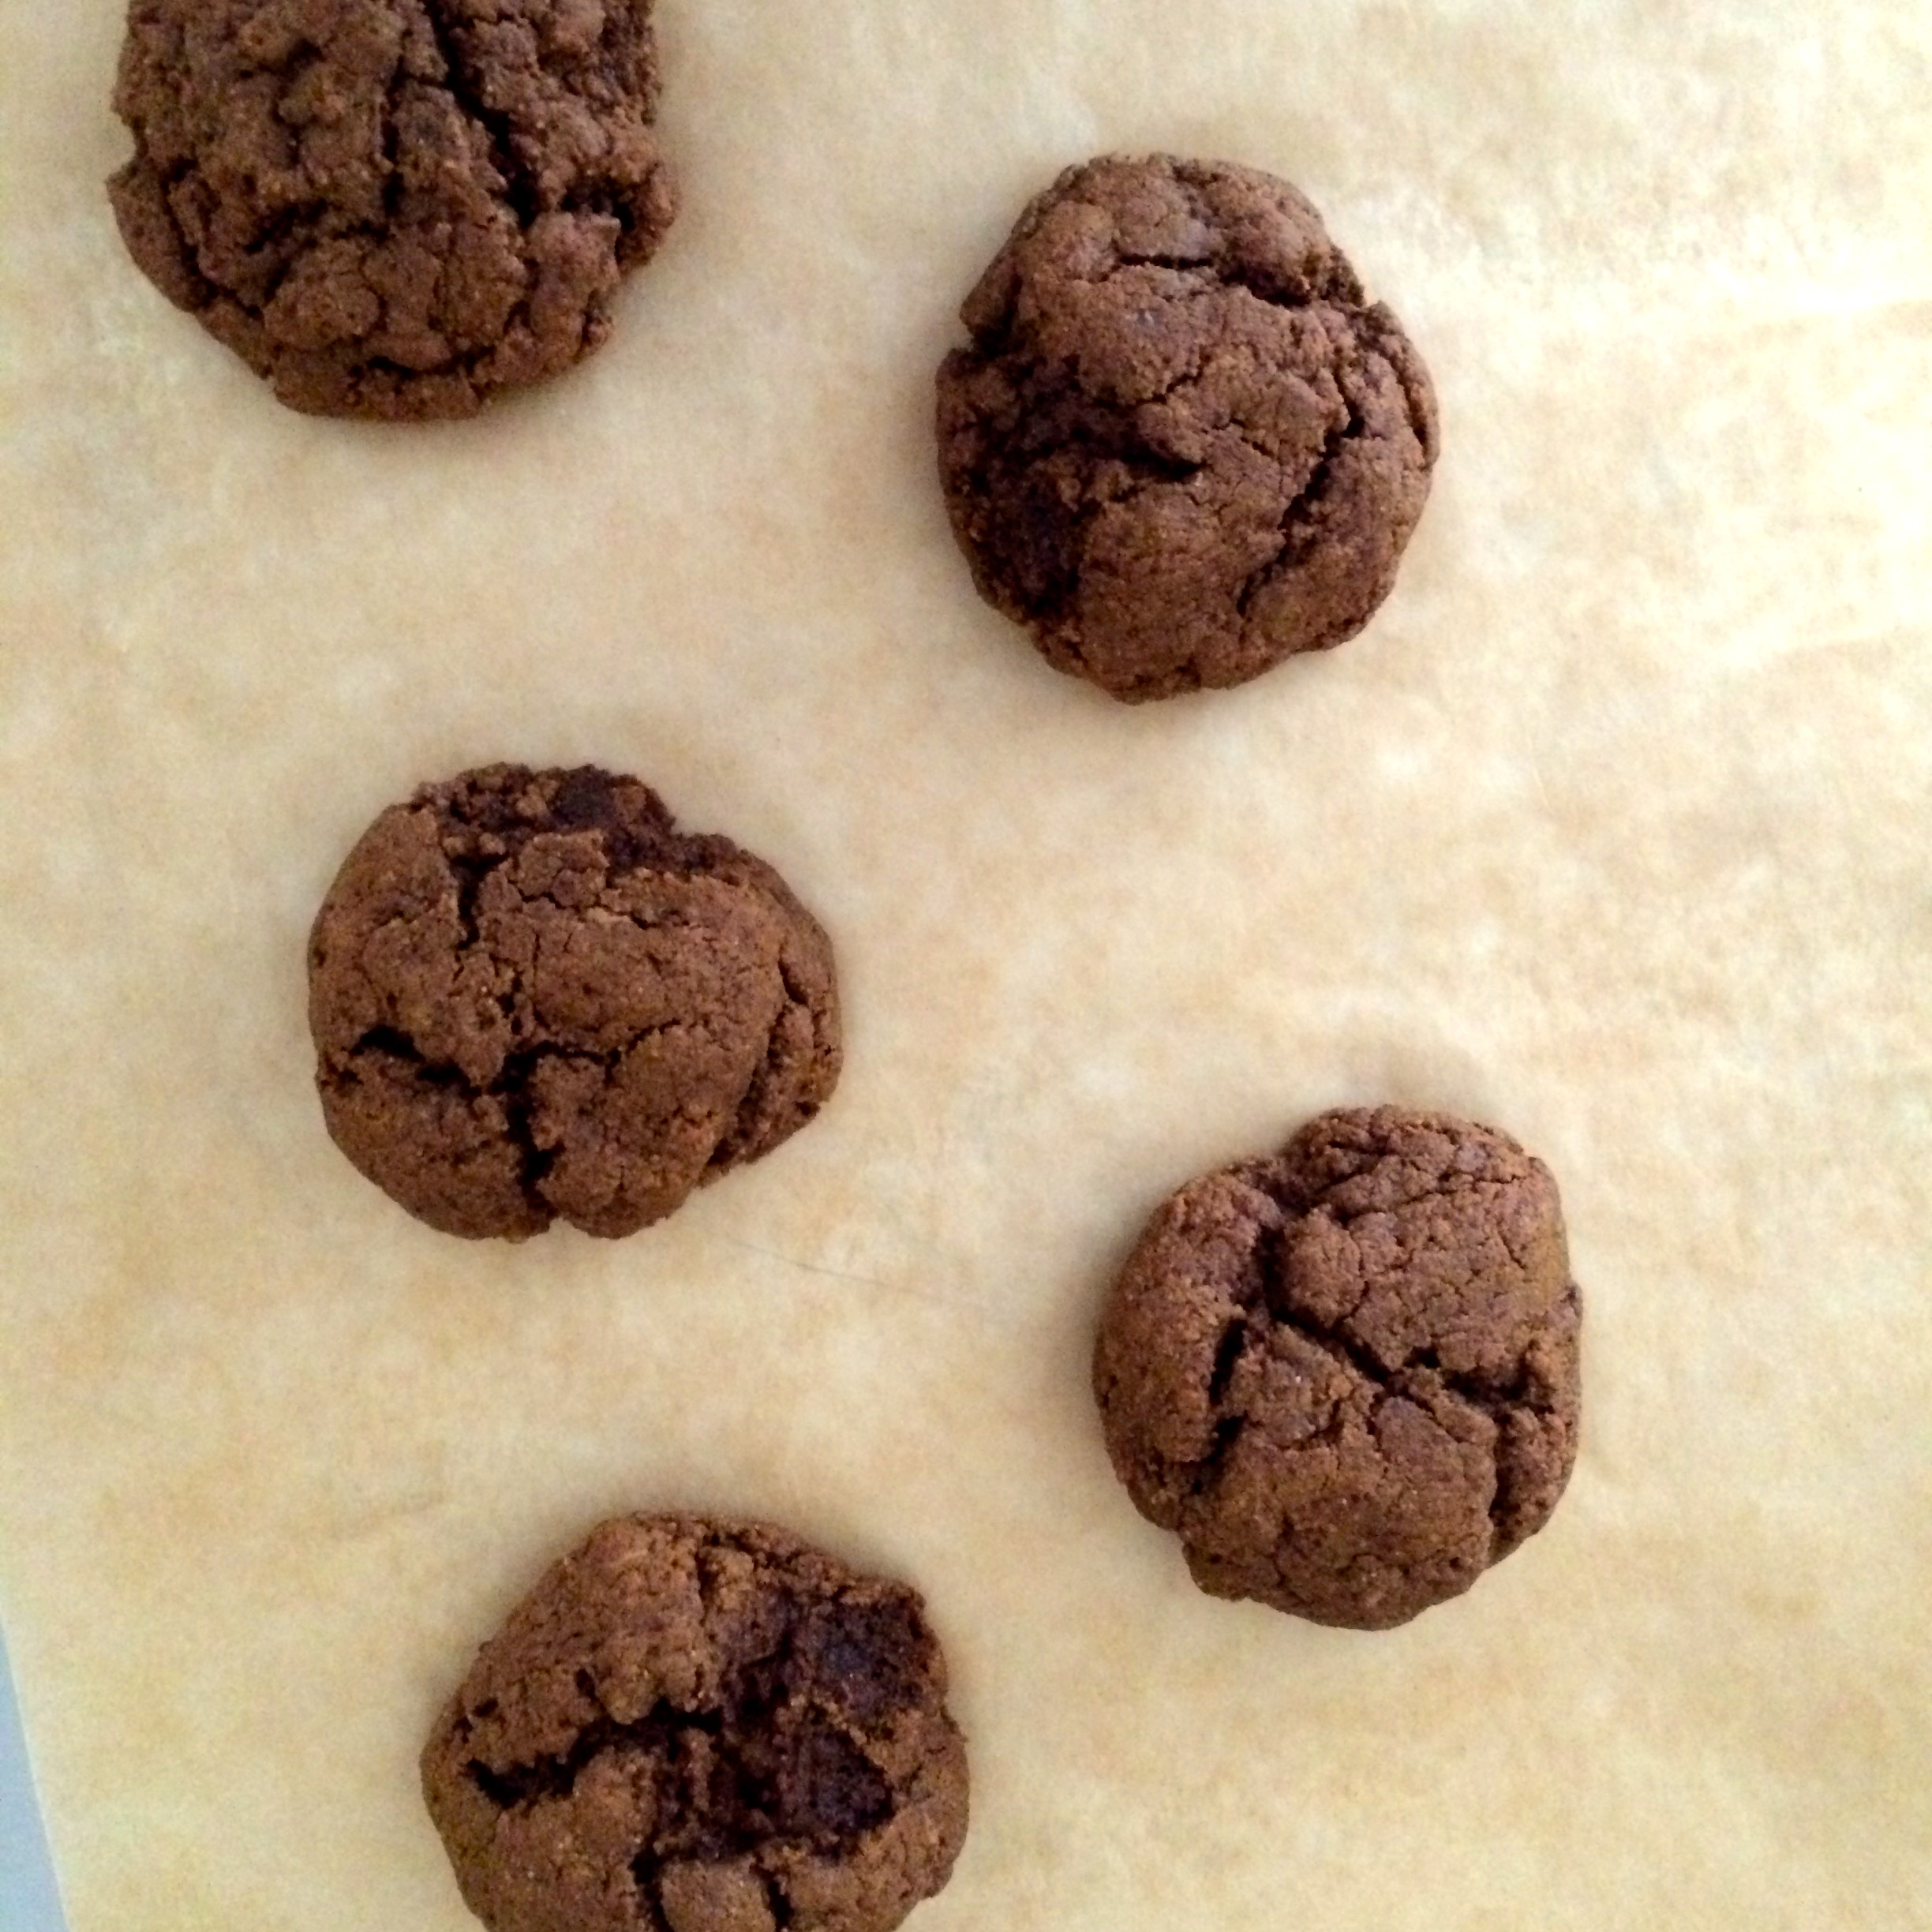
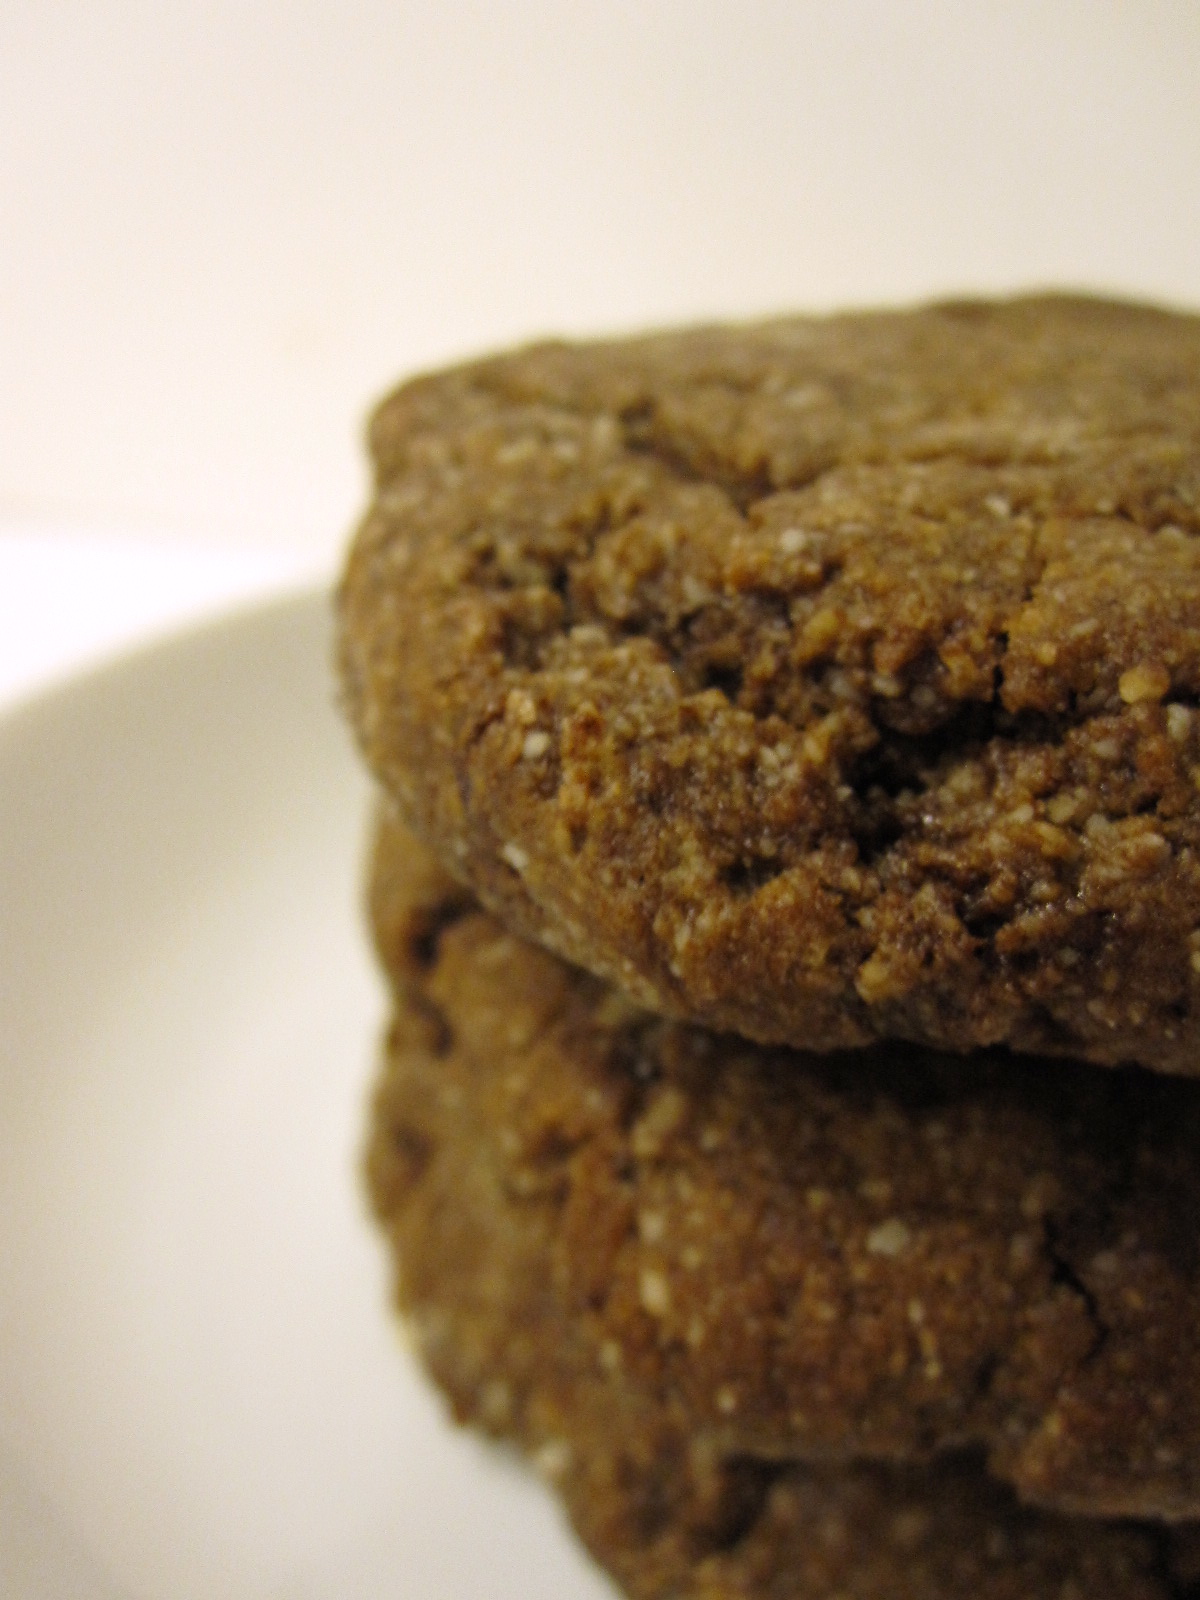
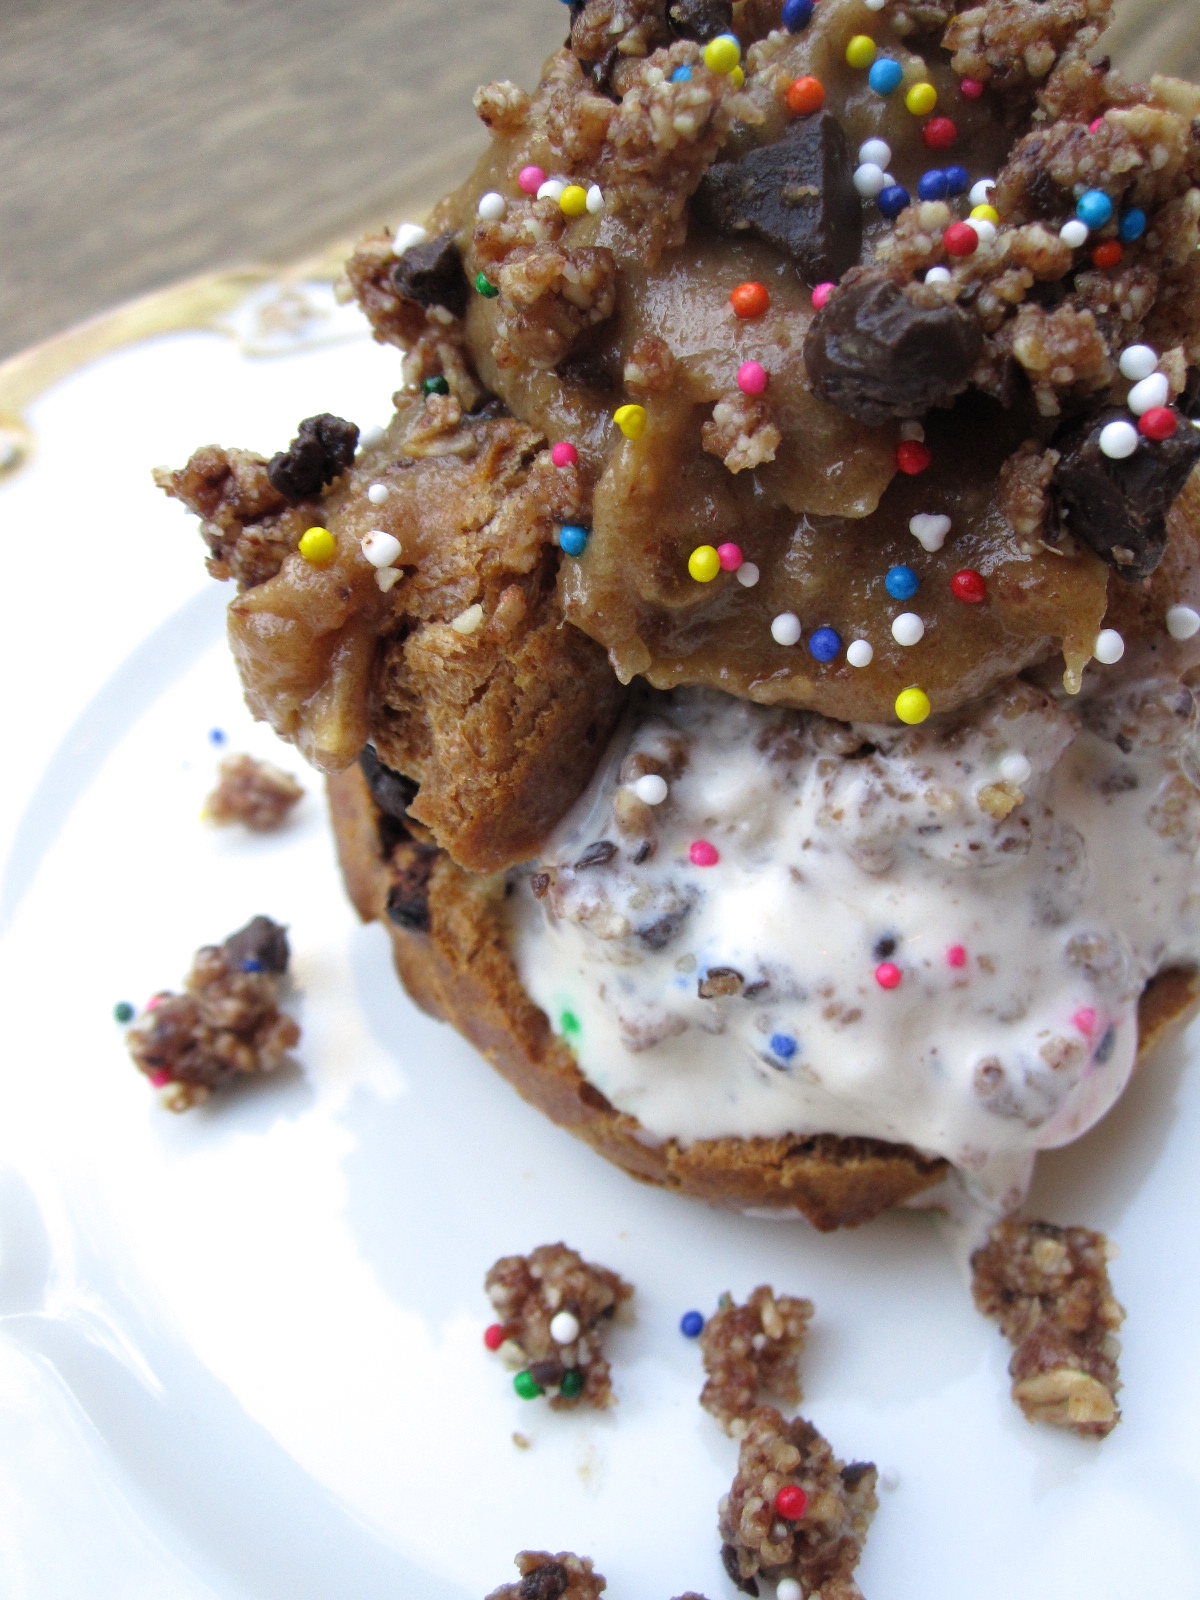
And then obviously you need some beta carotene to go with your beta carotene… and some cookies to follow up that soup sooooo…..

THESE happened. Obviously.

IMG_6941

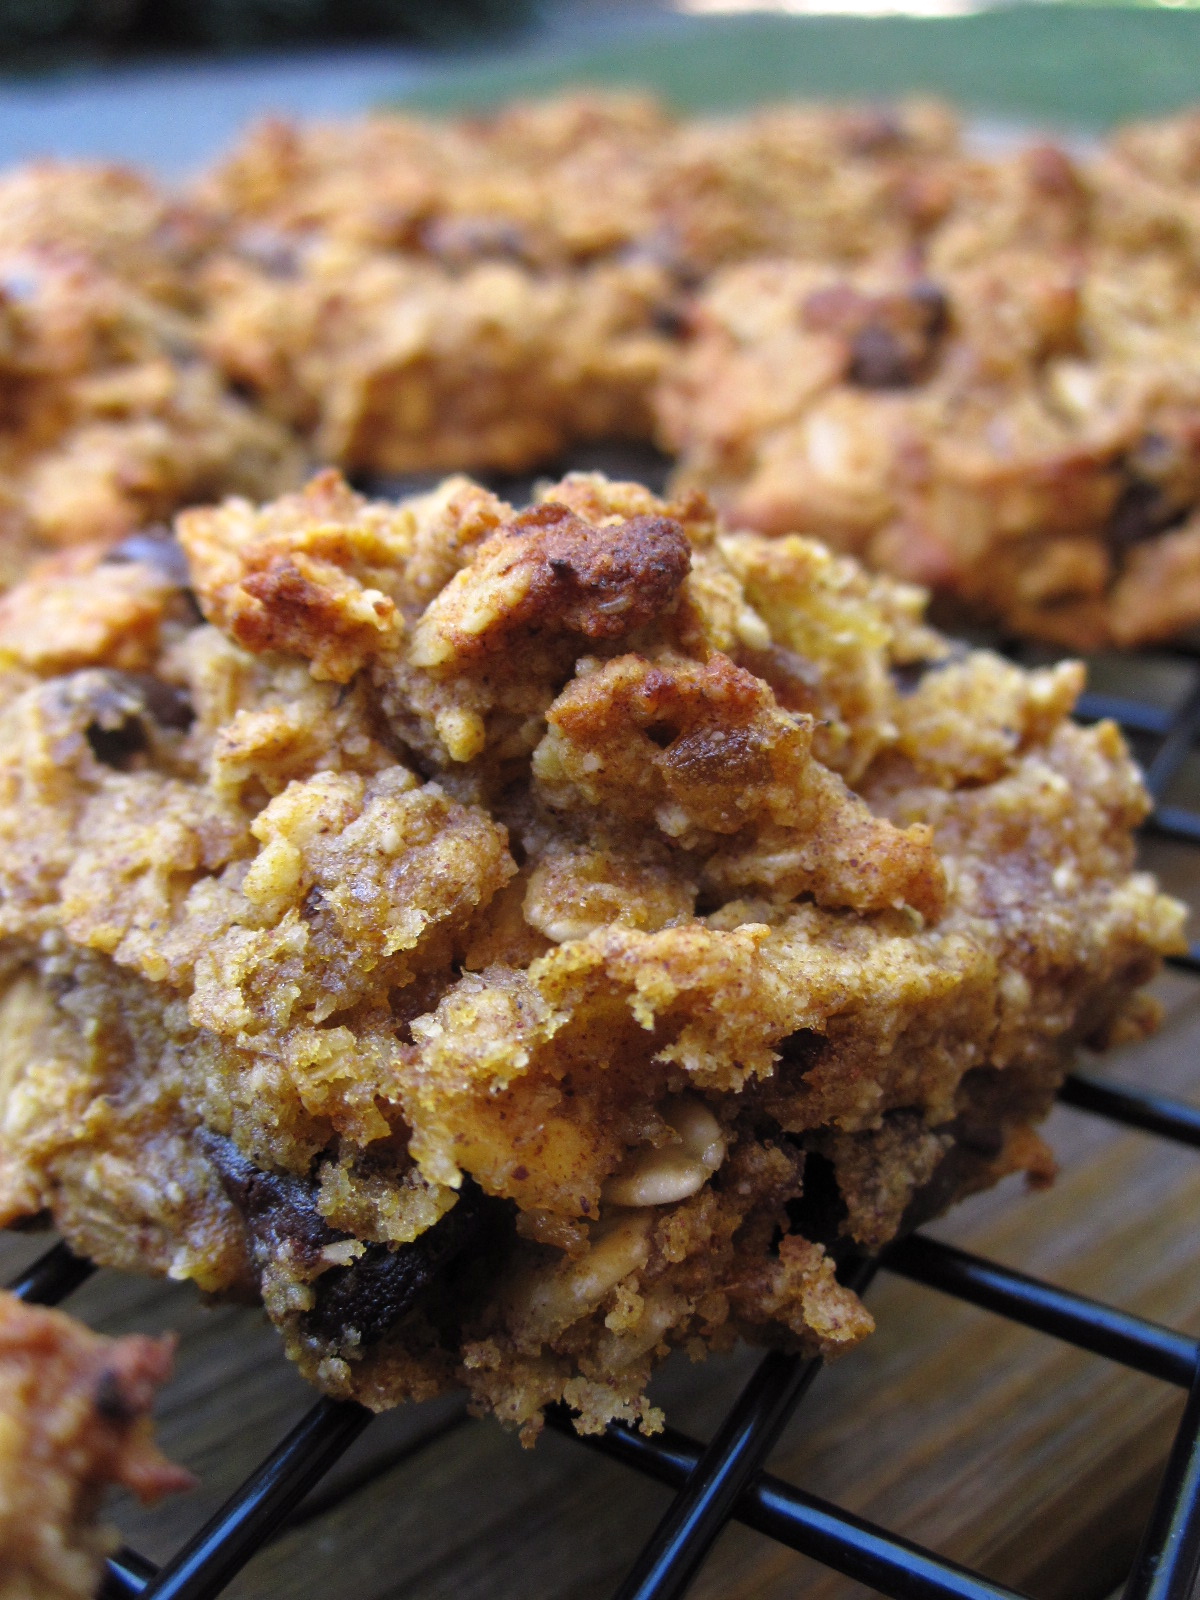
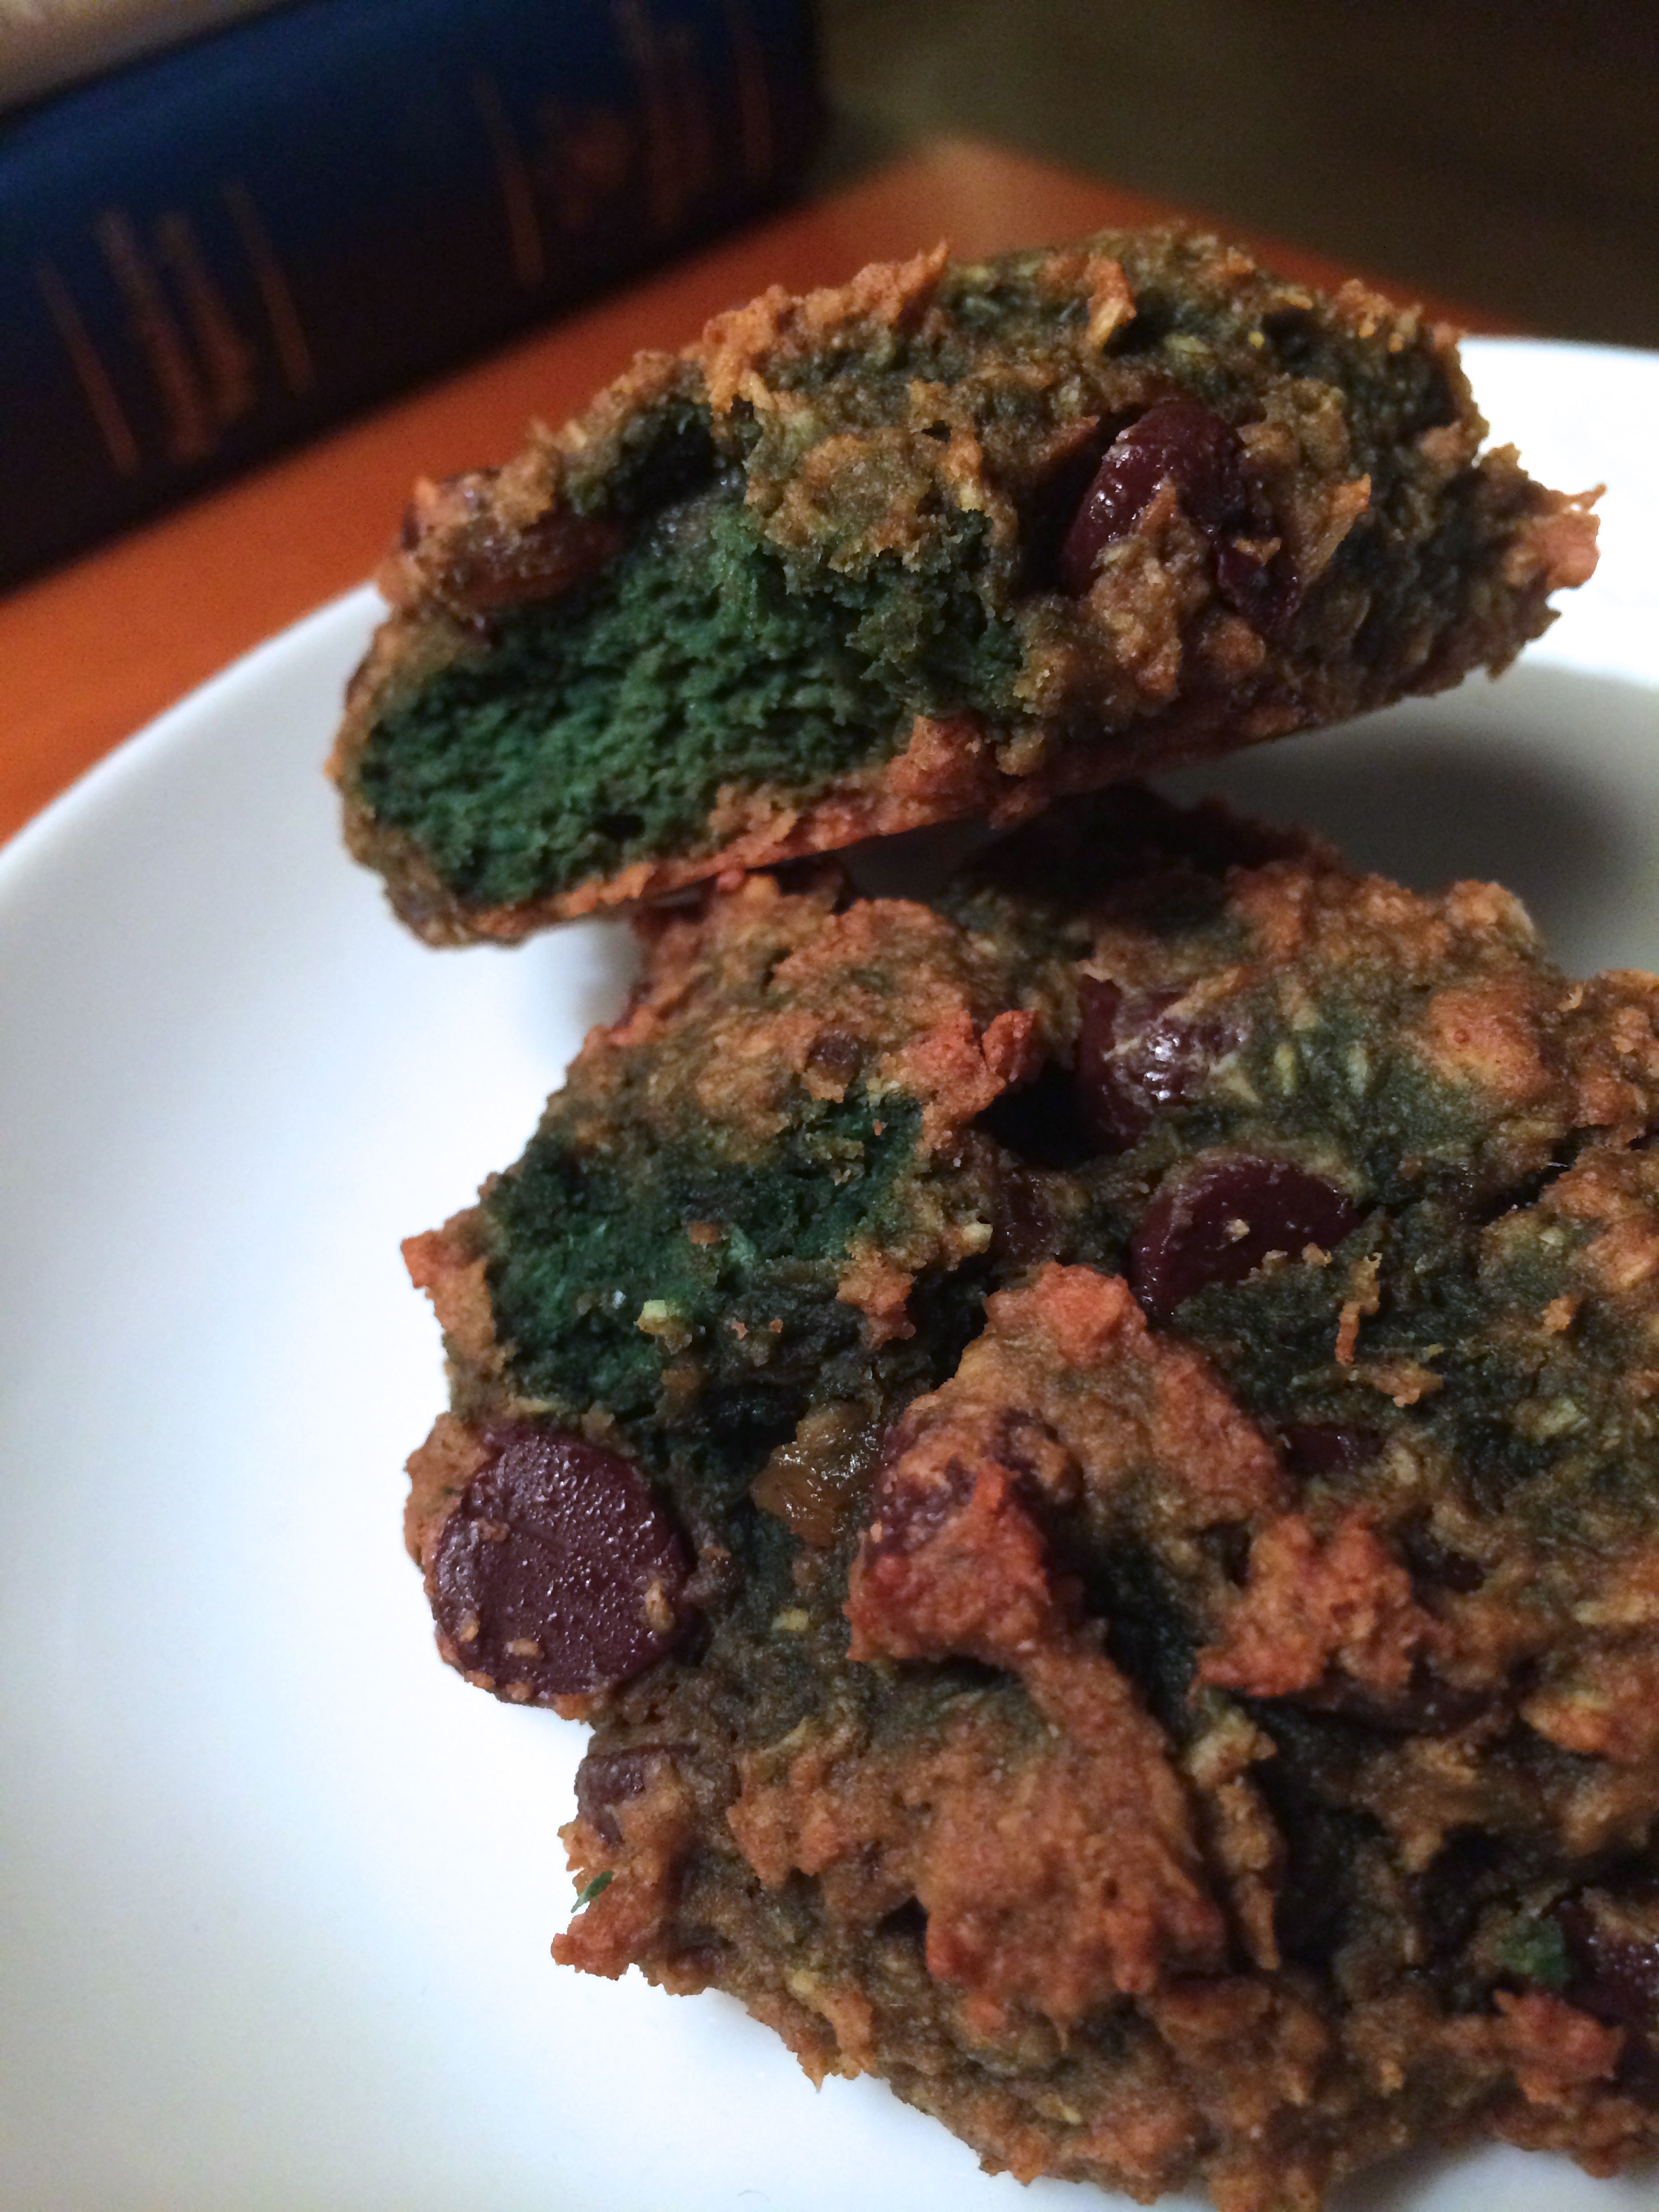
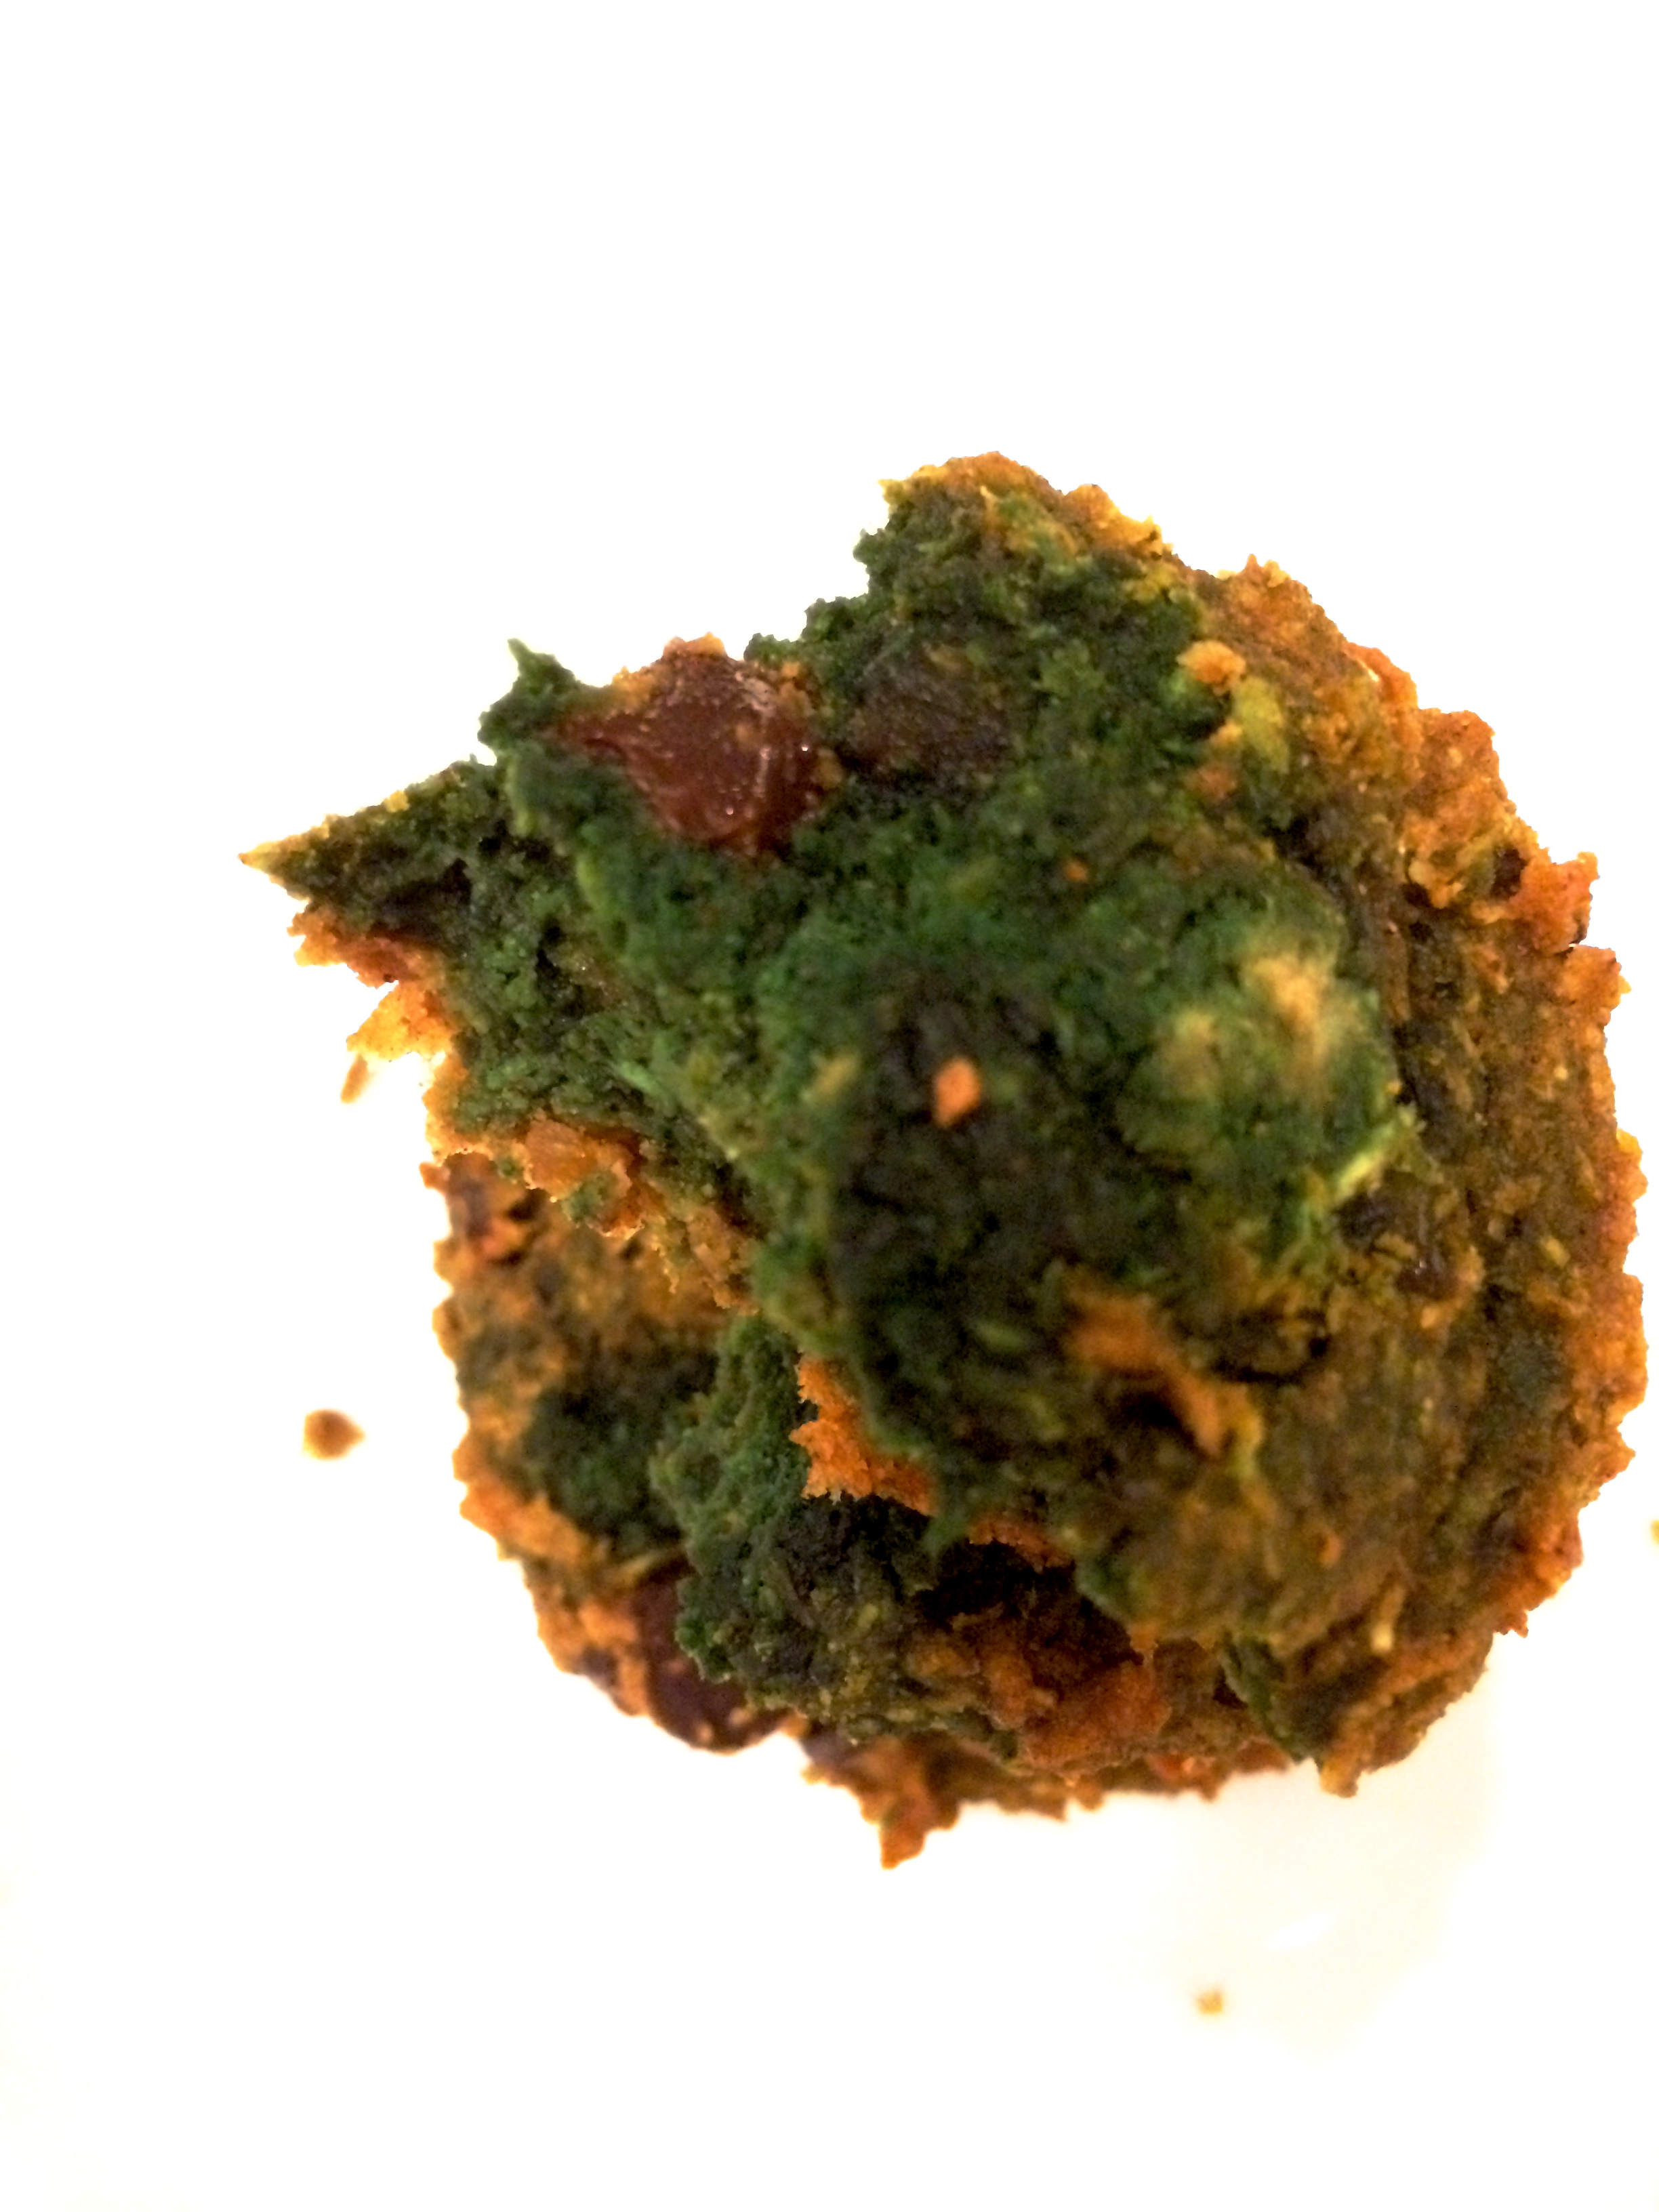
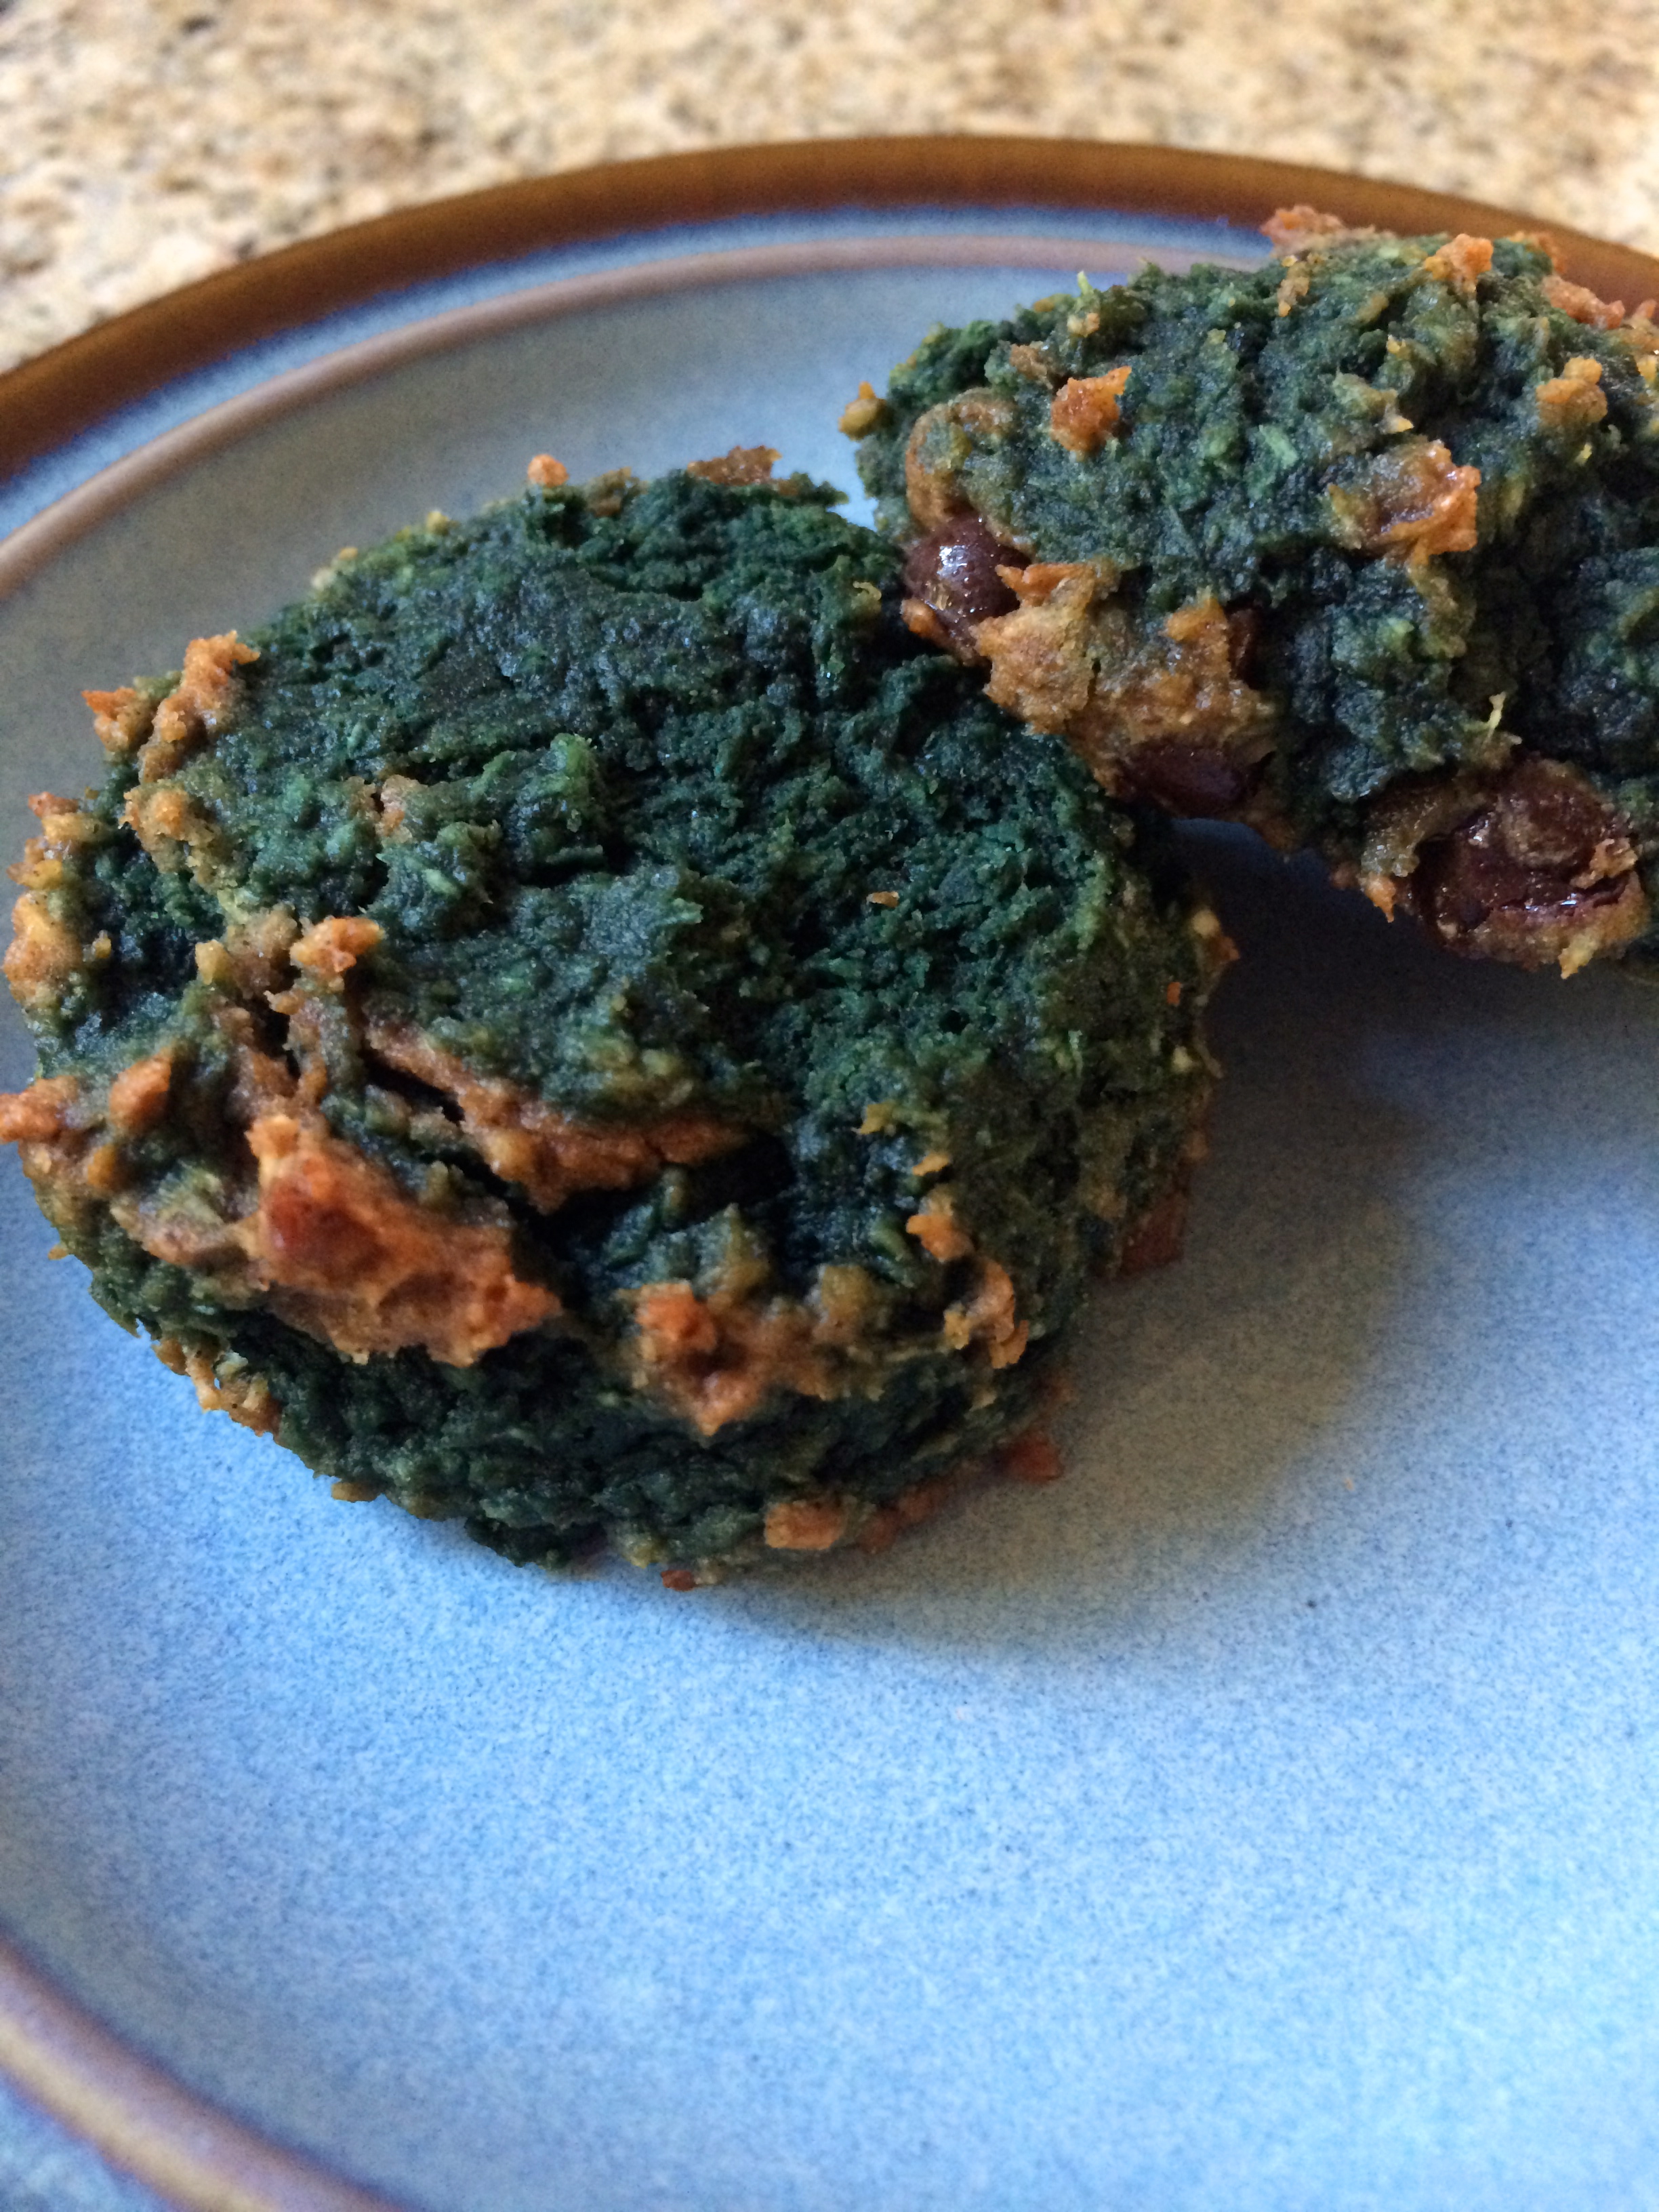
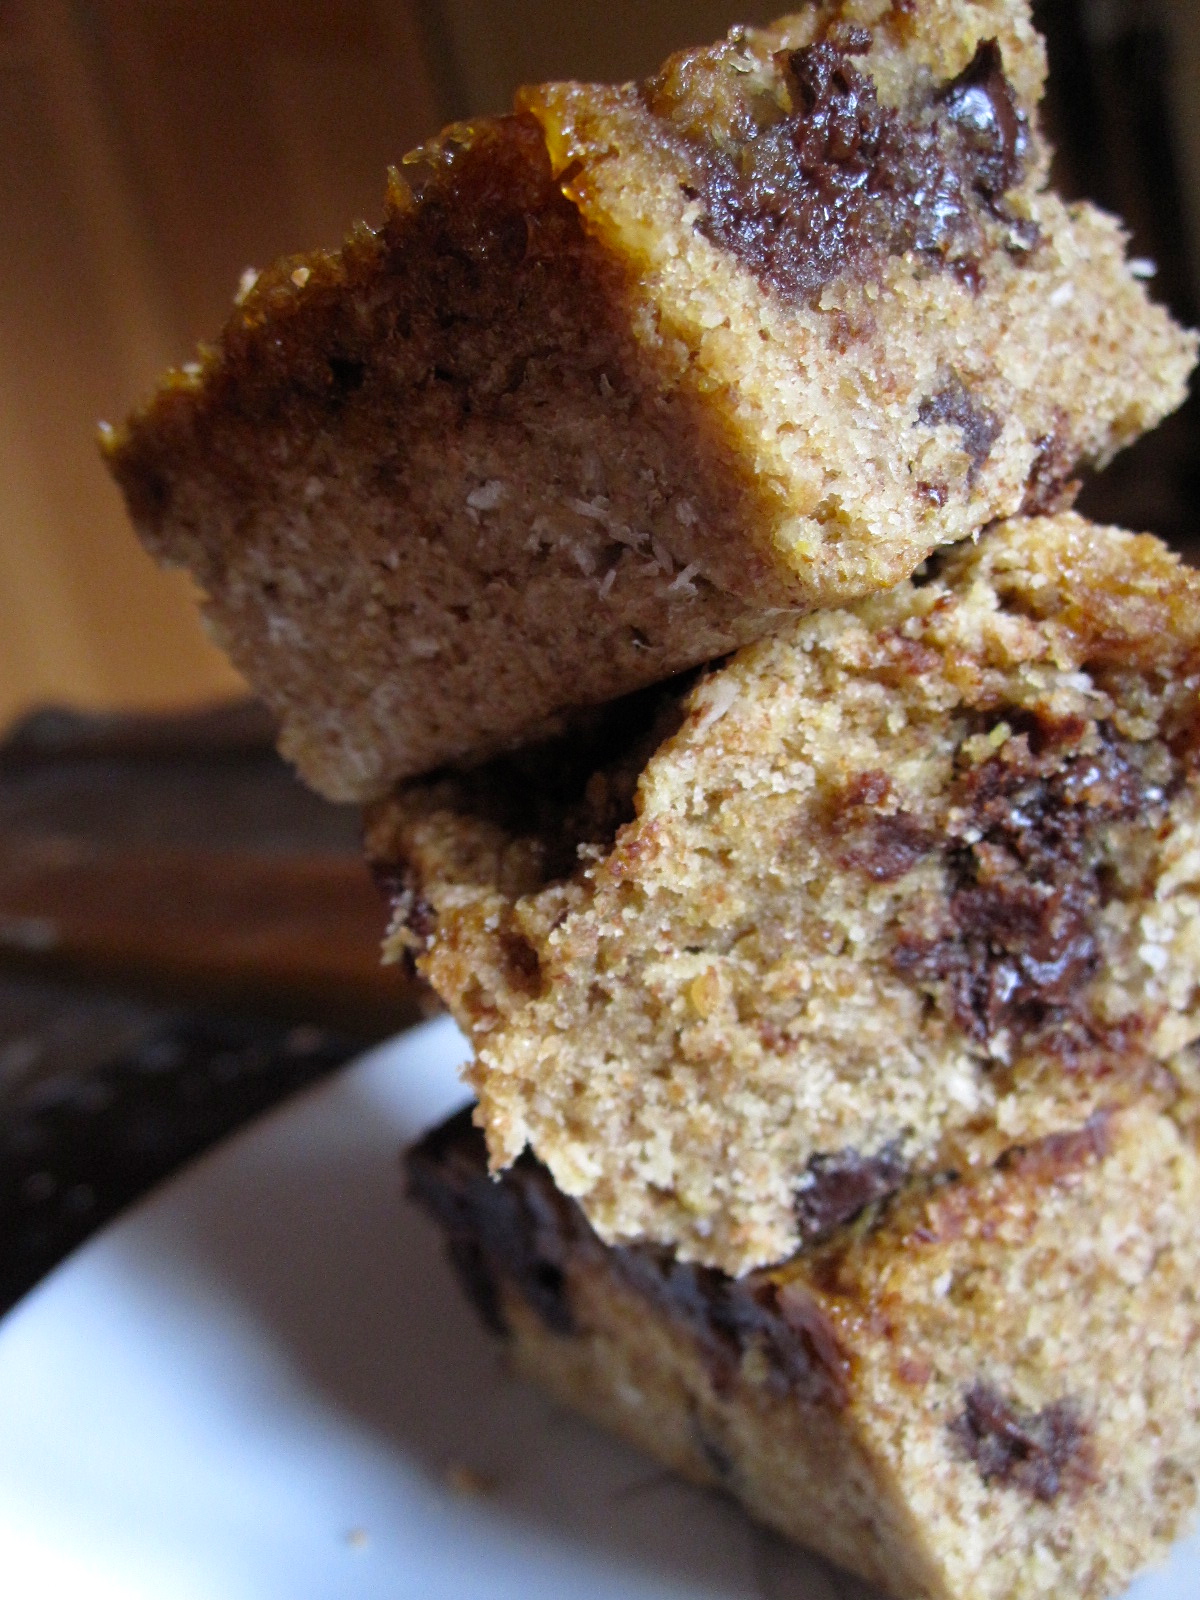
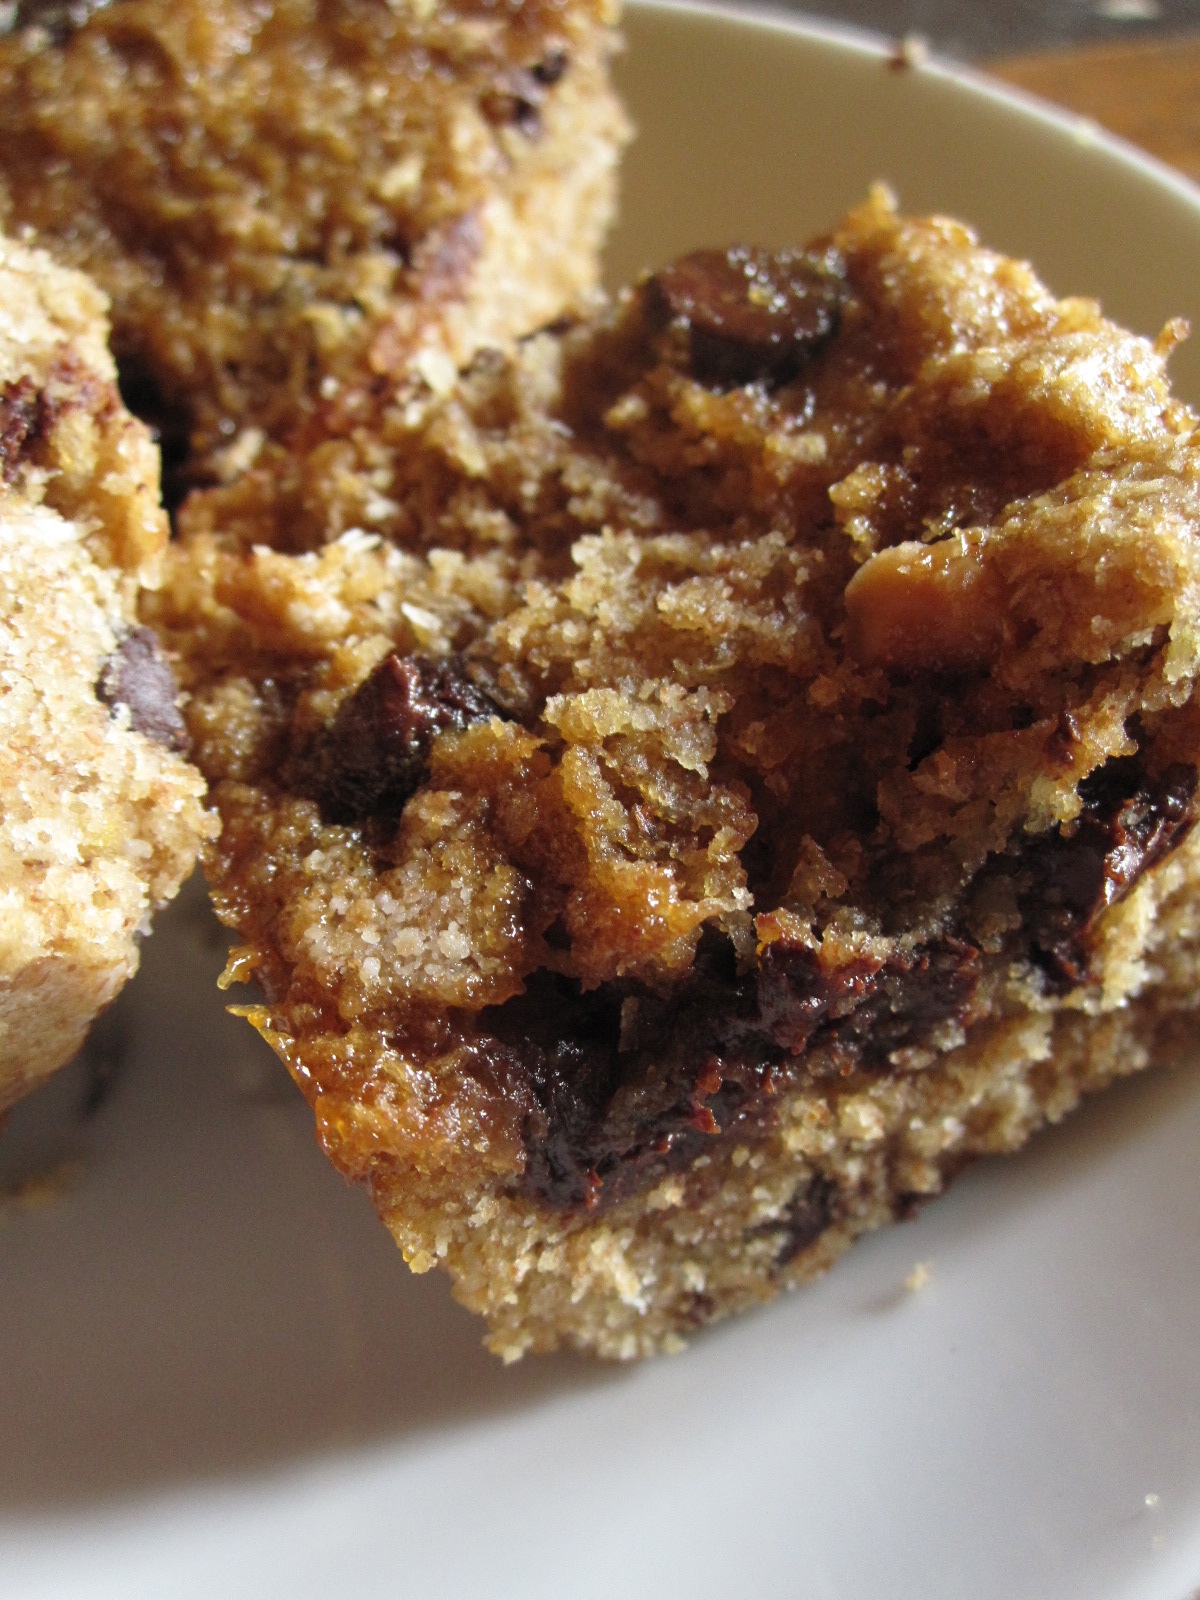
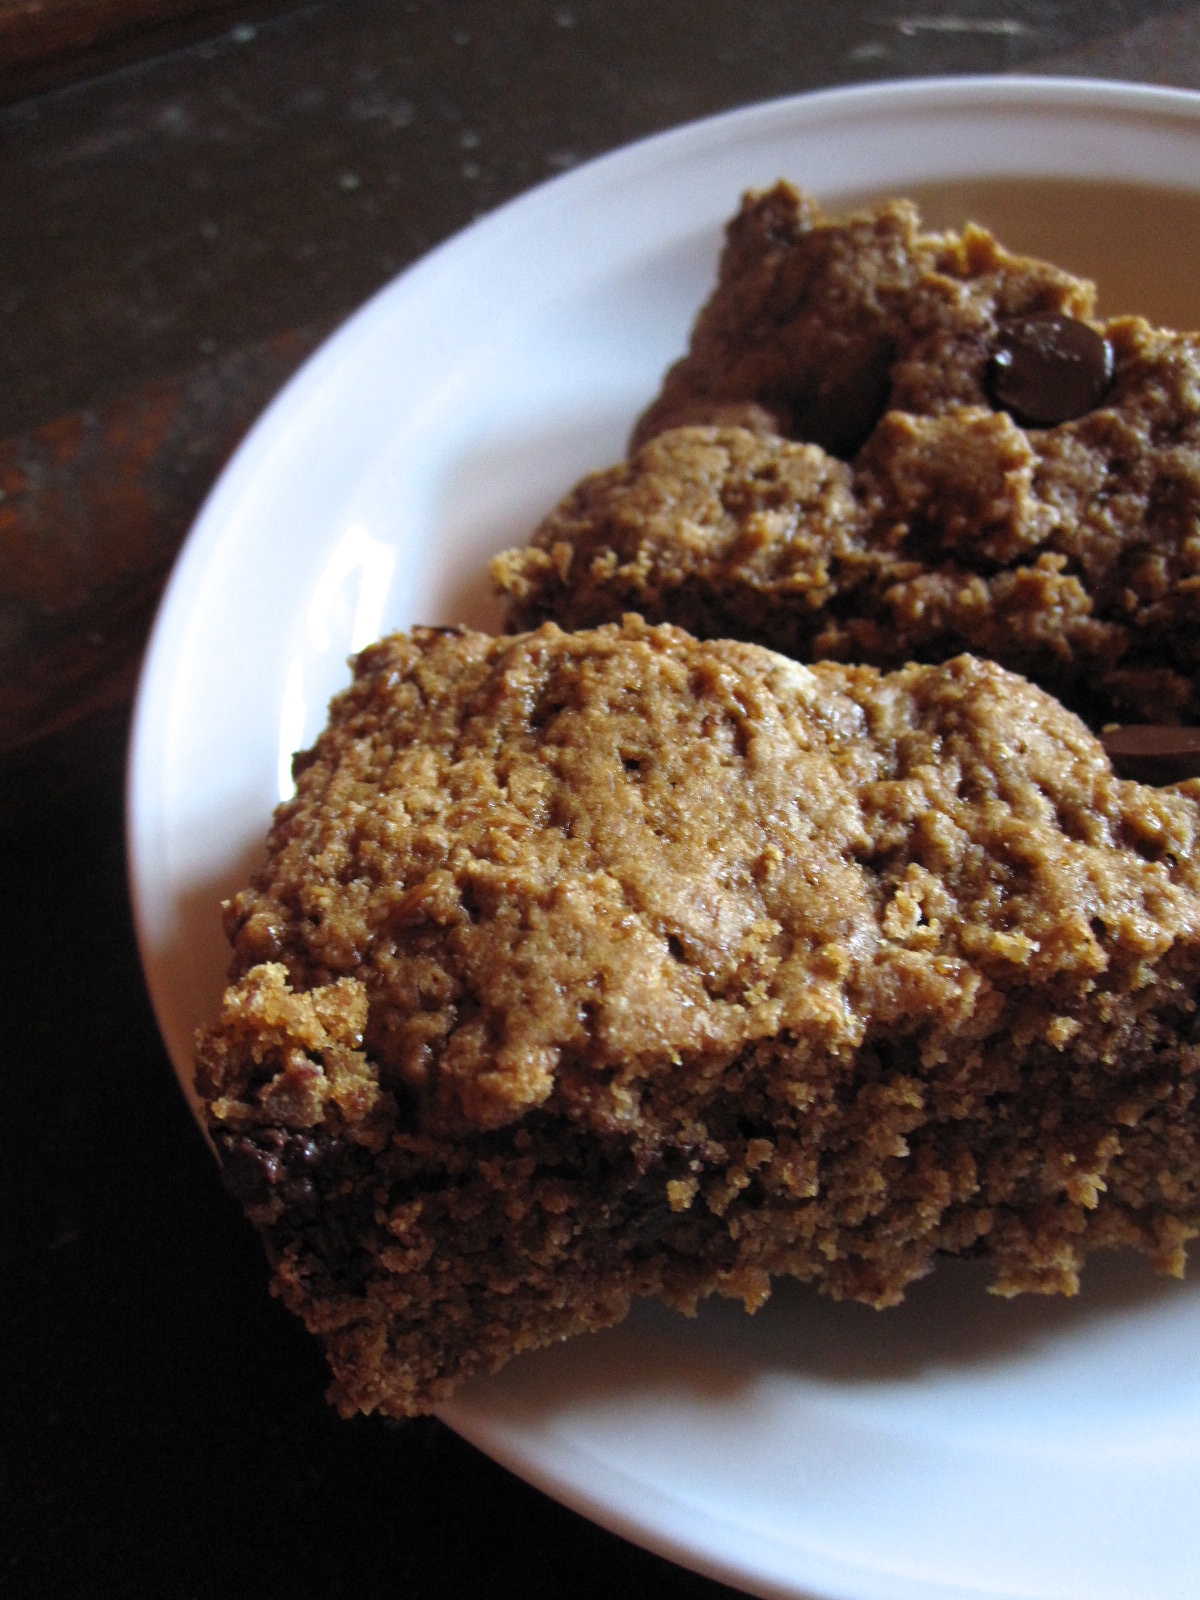
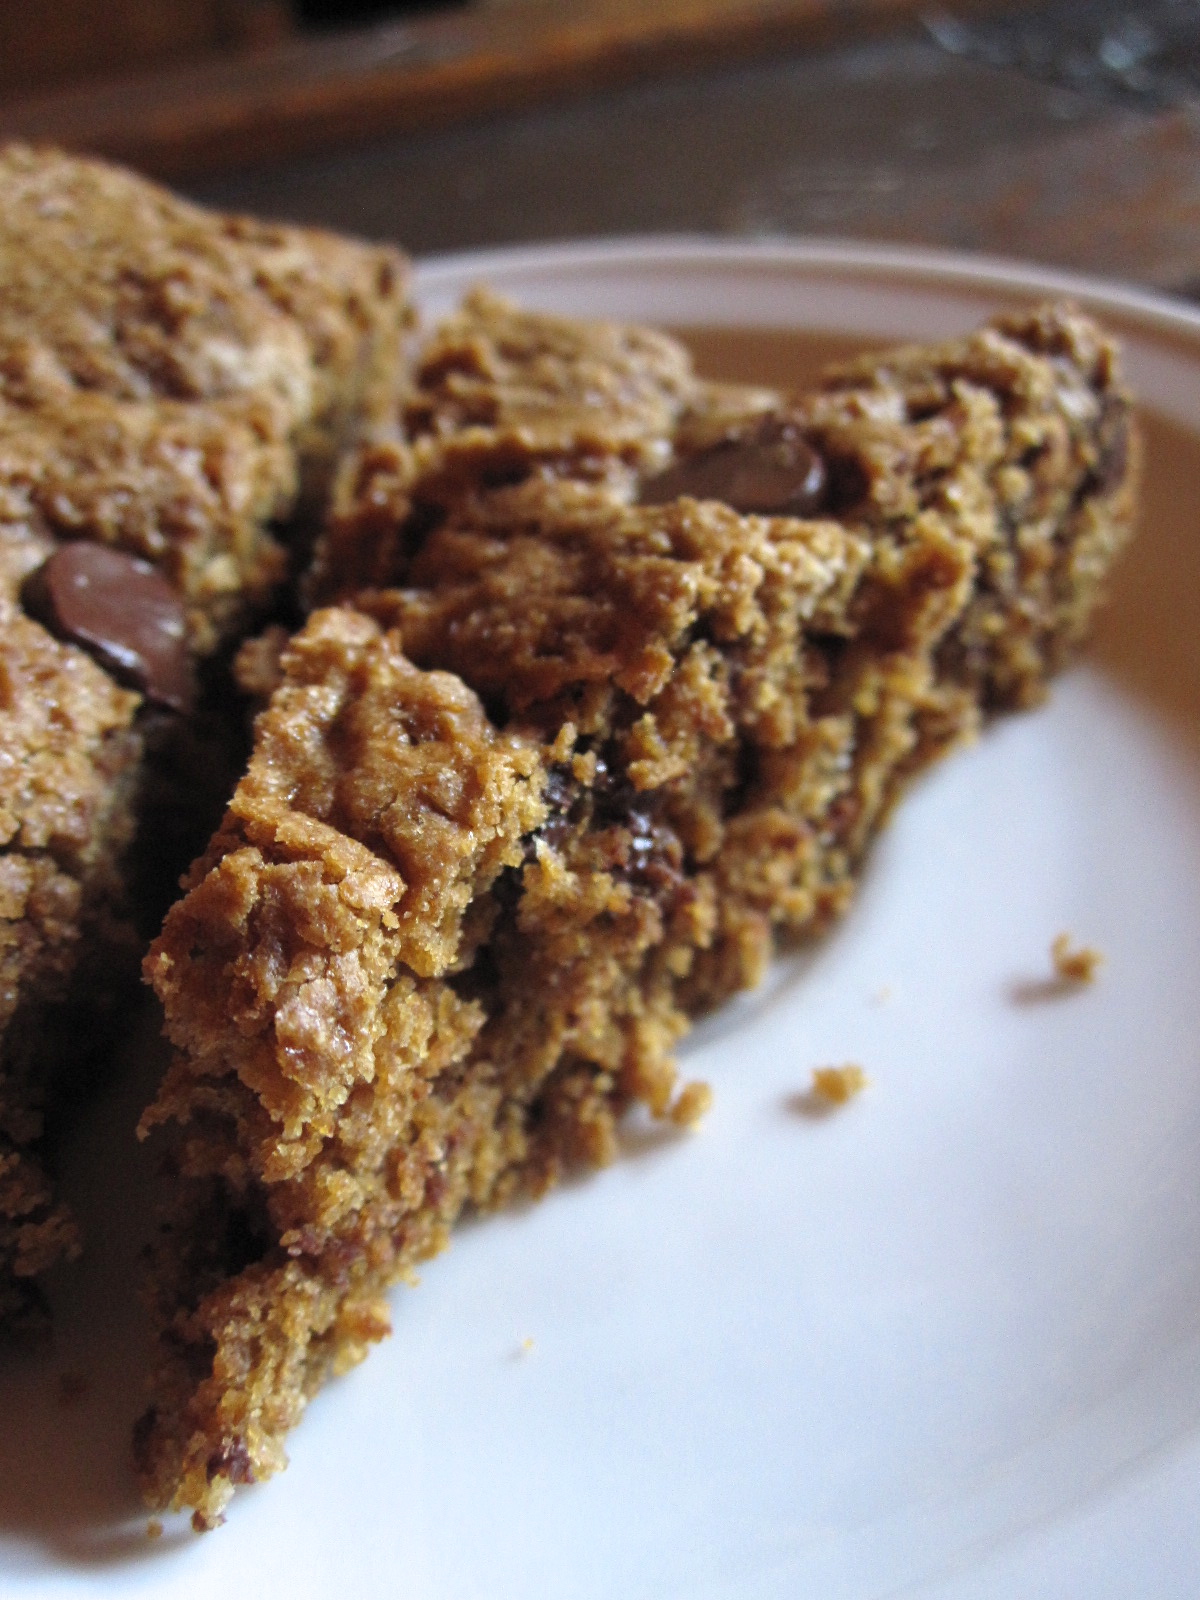
Date Sweetened Pumpkin Cookies

Vegan, gluten free, and refined sugar free! These cookies are soft, but not cakey. They’re oaty, pumpkiny and spicy—everything you want in a fall cookie. I made 3/4 of the recipe (don’t even ask) for a yield of 22. Recipe adapted from Tasty Yummies, here! They do tend to soften as they sit, so I like to store mine in the fridge in an airtight container.

  • 1 c pitted dates, soaked in near-boiling water for at least 10 minutes
  • 1 flax egg (1 tbsp ground flaxseed+ 3 tbsp water)
  • 1.5 c almond flour
  • 3/4 tsp baking powder
  • 3/4 tsp baking soda
  • heaping 1/4 tsp fine sea salt
  • heaping tsp cinnamon
  • 1/2 tsp nutmeg
  • 1/4 c avocado oil
  • scant 1 c pure pumpkin puree
  • 1 tsp vanilla
  • 1.5 c rolled oats
  • 1/4 c extra dark chocolate chips

IMG_6943

Preheat the oven to 350, and line a baking sheet or two with parchment paper.

In a food processor, make date paste out of your soaking dates. Chuck em all in there with a little bit of water and whizz whizz whizz until it’s mostly smooth. This isn’t an exact science and I love chunks of dates in my cookies so I don’t go crazy trying to get it to smooth out. Set aside. Make your flax egg by combining flax and water in a small bowl, and set that aside as well.

In a large bowl, whisk together almond flour, baking soda, baking powder, salt, cinnamon, and nutmeg. In a slightly smaller bowl, whisk together oil, pumpkin, vanilla and gelled flax egg. Stir wet into dry, add in oats and chocolate chips, and stir until combined. Drop by large tablespoons onto the prepared baking sheet, flattening them slightly and rounding the edges if you like perfect looking cookies (I usually opt for the rustic variety). Bake for 18-20 minutes, until the tops are lightly browned and slightly firm. Let cookies cool on the cookie sheet for at least 3-4 minutes before moving them (they’re soft, be careful!). Let cool completely on a cooling rack and store in an airtight container in the fridge.

IMG_6945

IMG_6951

I’ll have all the fall things, puhleez

IMG_6936

I feel a little neglectful of my bloglet but uggghh I’ve been buried under endless math flashcards and GRE study. Eeew ew ew. My free time from now until November 10th is non existent and has been replaced by studying math that I haven’t needed to know since high school. No big deal, I’ll just re-learn how to FOIL because that is SO USEFUL. Not.

IMG_6931

But. That is off my chest now and I can think about all the fun things happening right now like boots and scarves and FALL and pumpkin and ginger and baking and cold, snappy air!! AND grilled cheese festivals with E. WITH UNLIMITED GRILLED CHEESE. We were very, very happy. Obviously.

IMG_1270

IMG_1265

IMG_1267

IMG_1290

But actually I love fall because baking becomes legit again. Who wants to turn the oven on when it’s hot in the summer?! I make the sacrifice but really I hate it. It’s much more fun when it’s chilly out and I get to heat up the kitchen while I putter around. Putter putter putter. What a great word.

Even Jessie gets in on the fall sunbathing. The sun feels sooo much better when it’s brisk out.

IMG_1316

Side note: this was my breakfast. Sometimes I amaze even myself.

IMG_1291

And all I want is ginger. And pumpkin. And fall-spiced things. So I made two kinds of pumpkin bread in one week.

IMG_1246

And then I made these: Almond Butter ginger cookies that were amaaaazing… they got eaten pretty much too fast to take decent pictures.

IMG_1262

And then not even a week later I made these: Molasses Ginger Cookies [Chewy, dense, and spicy. Everything a fall cookie should be]

IMG_6934

Can someone save me from myself, please??

But actually don’t. Just hang around so I can feed you things and make more things. Okay? Okay.

Molasses Ginger Cookies

Makes a nice small batch of about 9 cookies. Vegan, gluten and grain free, refined sugar free, and full of healthy fats and fall spices. The recipe is only slightly adapted from the Roasted Root, here! Also it probably only took me a max of 10 minutes to have these in the oven and the dishes washed. And then they only bake for about 8 minutes so really, there is nooo excuse not to make them!

  • 1.25 c almond meal
  • 1/2 tsp baking powder
  • 1/4 tsp baking soda
  • 1 heaping tsp ground cinnamon
  • 1/2 tsp ground nutmeg
  • 1/8 tsp ground cloves
  • 2 heaping tsp fresh ginger, grated
  • 2 tbsp molasses
  • 1 tsp vanilla
  • 2 tbsp coconut oil, melted

Preheat the oven to 350 and line a baking sheet with parchment paper.

In a bigish bowl, whisk together almond meal, baking soda and powder, cinnamon, nutmeg, cloves and freshly grated ginger. Stir in molasses, vanilla, and melted coconut oil. Roll into a roughly ball-like shape and drop by the tablespoonful onto the cookie sheet, flattening the cookies slightly. Bake for 8-10 minutes, until lightly browned at the edges. The tops will still feel a teeny bit soft, so let them cool on the cookie sheet for a few minutes before removing them to a cooling rack to cool completely.

IMG_6932

Ready, set… PUMPKIN

IMG_6926

Pumpkin!! And stuff. But actually… mostly just pumpkin.

IMG_6924

Because the air finally smells different, the wind is cooler, scarves are necessary, and the leaves are starting to change and fall. This is my FAVORITE time of year, especially since it gives me an excuse to wear an excessive amount of scarves and boots and eat mass amounts of pumpkin. Also fall = flannels, hot tea, holidays, and eatingcookingeatingbakingeating.

IMG_6925

The other day/night it was really fallish weather here, so I was cooking with the windows open so I could smell the air at every opportunity. It didn’t hurt that the neighbors had a wood fire going somewhere, and obviously that smelled delicious.

And the best part of all this means I can use pumpkin for baking with reckless abandon. Which I’ve already started doing. Two pumpkin breads in less than a week? Oh yeah. Easy money. Bring on endless cans of squash puree, and I will speedily dispatch them. Ooooh I love this season!

IMG_6928

Also. Food is more fun when it’s colorful, don’t you think?

IMG_1239

Apparently everything I eat from now on is going to be orange. A spanish tortilla happened last night and this is partly what went in it. Ooooorange!!! Ha.

IMG_1251

This bread is delicious—light, but densely moist (let’s stick to hydrated, mmk?) and spiced. It’s grain free, gluten free, vegan, and refined sugar free [they’re sweetened only with dates!], so there are no excuses not to enjoy. It’s also full of healthy fats and good squash-carbs, as well as enormous amounts of Vitamin A and beta carotene. Wheeee!

IMG_6919

Pumpkin-Almond Butter Bread

Grain free, gluten free, vegan, refined sugar free. It might also be paleo, but I’m not the authority on that business. Makes 1 loaf or an 8 by 8 pan (I used the latter, so the cook time below reflects that. Add at least 10 minutes for a loaf pan and check as needed). Recipe inspired and heavily adapted from the Roasted Root, here!

  • 1 c pure pumpkin puree
  • 1 c unsalted almond butter
  • 2 tsp vanilla extract
  • 1 flax egg (1 tbsp flaxseed meal+3 tbsp water; let sit for 5 minutes)
  • 1 c pitted dates, soaked if needed
  • 1.5 tsp cinnamon
  • 1/4 tsp allspice
  • 1/4 tsp ground ginger
  • 1/4 tsp fine sea salt
  • 1 tbsp baking powder
  • 1.5 tbsp coconut flour
  • 3 tbsp extra dark chocolate chips

Lightly grease an 8 by 8 inch pan and preheat the oven to 350.

If your dates are super hard, soak them in near-boiling water for about 10 minutes. Drain nearly all the water out, but reserve about a tablespoon or two. Puree the dates and reserved water in a food processor until mostly smooth, then set aside. Make flax egg, and set it aside as well to gel.

In a large bowl, whisk together pumpkin, almond butter, vanilla extract, and flax egg, then stir in the date paste. In a smaller bowl, whisk together cinnamon, allspice, ginger, sea salt, baking powder, and coconut flour. Toss dry into wet, add chocolate chips, and stir until everything is just combined. Scoop all that goodness out into your prepared pan, smooth the top, and bake for 35-37 minutes, or until a tester comes out clean. The top should spring back just slightly when touched.

Let cool in the pan for about 10-15 minutes, then run a knife around the pan, top the pan with a cooling rack, and CAREFULLY (it’s delicate!) invert the bread onto the cooling rack to cool completely (you don’t have to flip it back over unless you want to…). Once it’s completely cool, I store it back in the pan I baked it in. Leftovers only lasted a day in my house, and I recommend storing this one in the fridge.

IMG_1247

Birthday Excess

IMG_6877

Happy Birthday to meeeeee!!!

IMG_6890

I made my own dessert. Is that weird?! I have no idea. I’m weird, so it’s probably fitting, right??

Besides, not much has changed:

10522437_10202751179084633_2125268902459090635_n

Yep. As my mom says, “To our sweet girl (who still attacks dessert with dedication and gusto–and looks just as cute doing it!!) Happy 24th Birthday!
Much much Love, Mom and Dad”. That’s fairly accurate, don’t you think?! And I know for a fact I still make that face…

IMG_6886

I’ve always wanted to make choux pastry. So I did!! Forget cake. I love it and whatnot, but it’s my birthday so I’m playing by my own rules. Besides, all you really need to do is makes something delicious that you can put a candle on. Because birthdays are definitely NOT birthdays without smelling candle smoke. Nothing reminds me more of a birthday than smoking candles!

IMG_6870

My birthday rules are thus (and I just made them up soooo they’re going to apply from now on):

1. Excess is required.
2. Jazzercise is an excellent way to start the day and possibly offset the excesses of dessert that will happen.
3. SPRINKLES.
4. Desserts must be excessive. Because… see rule number 1.

IMG_6876

IMG_6885

I think these are spot on. And I DID go to jazzercise yesterday morning which was fab and sweaty as usual and then I went and ate at least a cookie if not two (whoops, not quite sure how that happened) and then I ran around more and then I made these. And then I ate them! Muahahha.

24 is going to be excellent.

IMG_6882

Chouquettes with Vegan Banana Cookie Dough Ice Cream + Salted Date Caramel

Wow really?? Could that title be any longer?? But it’s my birthday sooooo I can do whatever I want, up to and including making excessive desserts that are actually refined sugar free! Because that’s how I roll. Healthy indulgences in celebration of turning 24. Wheeee!! There is gluten, butter, and sprinkles in this. Don’t say I didn’t warn you.
Chouquettes are lightly adapted from David Lebovitz (amazing!!), here. The date caramel is my own brainchild and the vegan banana ice cream is just embarrassingly easy… I made a half batch of chouquettes, which yielded 10. Recipe as listed yields 25 ish. And obvs made extra caramel and ice cream, obvs. These are also excellent stuffed with real ice cream… or pretty much anything.

IMG_6872

For the chouquettes (which makes me feel really sophisticated to say, even if I mangle the pronunciation):

  • 1 c water
  • 1/2 tsp sea salt
  • 2 tsp coconut sugar
  • 6 tbsp unsalted butter, cut into chunks
  • 1 c whole wheat pastry flour
  • 4 eggs, at room temp
  • optional: chocolate chippies! I did them in half the batter

Line a baking sheet with parchment paper and preheat the oven to 425.

In a medium saucepan, heat water, salt, sugar, and butter, stirring often, until the butter is melted and the water starts to boil. Remove from heat and immediately stir in the entire amount of flour, stirring until the dough is incorporated and begins to pull away from the sides of the pan (it should clump up into a big blob). Let cool for 2 minutes, stirring occasionally to release heat. Beat in eggs, one at a time, until dough is silky and smooth. If adding chocolate chips, let the dough cool completely before adding them. If not, begin dropping dough onto the prepared cookie sheet (I found that a single large spoon worked well), about 2 tbsp’s worth per blob. They’ll spread just a little so don’t put them too close together. Bake for 35 minutes, until puffed and golden. Remove to a cooling rack and serve warm or at room temp. Freeze any leftovers (or really, just eat them immediately).

IMG_6873

For the vegan banana cookie dough “ice cream”:

  • several frozen bananas (however many you need depends on the amount of peeps you’re serving)
  • a good splash of plain almond milk
  • 1+ tsp vanilla
  • a dash of cinnamon
  • 1 tbsp (ish) peanut butter

Blenderize all that good stuff in a food processor until creamy. The bananas magically turn into this great ice cream-like consistency!! Like magic. So wonderful and happily guilt free. You can flavor this however you like, I usually use about 1 banana per person, and freeze them in chunks for easy blending. Eat immediately! It’s best fresh.

Then throw all this in the food processor [dry ingredients first, then the wet until it all comes together] :

  • 1 c raw cashews
  • 1/2 c rolled oats
  • 1/4 tsp sea salt
  • 1/2 tsp cinnamon
  • 1/6 c dark chocolate chips
  • 1 tbsp vanilla
  • 2 tbsp pure maple syrup
  • 1 tbsp unsalted almond butter
  • excessive amounts of sprinkles. ha.

Et voila! Vegan, refined sugar free funfetti cookie dough. Muahahha. Mix it into your banana soft serve and be really happy about life.

THEN.

Make salted date caramel:

Soak 1 c of pitted dates in boiling water for at least 5 minutes.

Chuck them all into the food processor, followed by a judicious about of vanilla + unsweetened almond milk + a pinch of sea salt + giant heaping blog of almond butter and blendy blend blend until it’s all smooth.

AND THEN.

Stuff the cookie dough banana deliciousness into a chouquette, top with a ridiculous amount of date caramel, and more sprinkles. Because… it’s your birthday. Or at least it’s mine. So you have an excuse to indulge anyway ;)

IMG_6880

IMG_6878

Brain mush.

IMG_6862

I think I’m just really obsessed with mushy food.

IMG_6866

What a nice way to start a blog post about FOOD, right?? Like, I’m trying to get peeps to keep reading the post, not click off immediately…

IMG_6856

But seriously. Mushy food is my jam. I like oatmeal SO MUCH that it gets me out of bed in the morning. For reals. I lay there going ‘ughghghh it’s dark and whyyyy and I know I have to but uhhhgggh’ and then it hits me… I get OATMEAL for breakfast. And I’m out of my bed like a shot. This is true life, I’m not kidding. It actually works. Every. Single. Morning. And I will be just as excited about it tomorrow as I was yesterday. Or the day before that. Or… well. You get the idea.

IMG_6865

And applesauce. And buckwheat. And any type of porridgy thing besides oatmeal. Is this weird??

I’m making the executive decision that it’s not. Because lentils can also be mushy but lentils are DELICIOUS. Stupidly so. And sooo easy. And cheap. And nutritious so what’s not to like?!

IMG_6855

Also. Too much studying of useless math and endless hours revising grad school app essays have turned my brain into mush so maybe that’s why I’m so fixated on mushy food today? Whatever. I made this for dinner yesterday and it was mushy and delicious and really, calling it mushy is really kind of mean because it is SO delicious. Let’s call it… creamy. And unctuous. And lentily. Spicy, comforting, soul food. There we go. That’s far better than mushy. It has character. I like my food to have character.

IMG_6859

Red Lentil Dal with Creamy Coconut Buckwheat

Gluten free, vegan, full of delicious grains and healthy carbs, and inflammation-fighting turmeric. Serve hot or cold—I like it as cold leftovers the next day. Recipe serves four easily, with leftovers. Buckwheat is my own method, dal adapted from Wholehearted Eats, here!

IMG_6857

For the buckwheat:

  • 1 c buckwheat groats, rinsed
  • 2 c light coconut milk
  • 1/4 c unsweetened shredded coconut
  • salt to taste

For the Dal:

  • heaping 1/2 c diced onion
  • 1 tbsp avocado oil
  • 1 tbsp freshly grated ginger
  • heaping 1/8 tsp ground cardamom
  • 1/4 tsp turmeric
  • 1/8 tsp cayenne pepper
  • 1/2 tsp ground cumin
  • 1 c red lentils, rinsed
  • 1 c light coconut milk
  • 3 c water
  • 2 carrots, chopped into smallish pieces
  • 1 tsp fine sea salt
  • a few grates of pepper
  • chopped Persian cucumber, roasted cashews, pepitas, unsweetened coconut for garnish

Buckwheat is amazing: In a medium sized saucepan, bring coconut milk to a boil. Once boiling, dump in buckwheat groats, cover, and turn down to a simmer. I usually add a few sprinkles of sea salt here (and more to taste after it’s finished cooking).  Let the groats simmer until they have absorbed most of the liquid, about 30 minutes (though I never set a timer; I just check it periodically. Groats should retain their chewy texture when fully cooked). Add salt if needed. Buckwheat tends to thicken up as it sits, so I usually turn it off when there is just a bit of liquid left.

What is a grain without a friendly topping?? For the dahl: heat avocado oil in a medium saucepan. Add in onion, ginger, cardamom, turmeric, pepper, and cumin and sauté until the onions are translucent. If the spices start sticking, add a splash of water—I find it helpful to stir the onions relatively frequently. Add in lentils, coconut milk, water, and diced carrots. Bring to a boil, then reduce heat and let it simmer, covered, for about 40 minutes (Stirring occasionally is probs good). Uncover, add salt (more to taste if that’s your jam) and let simmer for about 20 minutes more. Turn off the heat, let it sit and thicken for a few minutes more.

Serve over buckwheat, with veggie of choice and fave garnishes. I like chopped cashews and pepitas+cucumber and coconut. Leftovers are excellent cold or reheated the next day.

IMG_6861

Green cookies. Because, obviously.

IMG_0841

Guess WHAT?!

I made cookies. And they’re GREEN!! Muahahah. Like you’re even a tiny bit surprised by this? Nope, I didn’t think so.

IMG_0846

But really. I’m studying for the GRE because I have to and it’s SUPER lame (because let’s be honest, who actually uses the math garbage that they put on there after high school?! That’s right, NO ONE. Remind me again why I have to re-learn quadratics and functions and wait, these are of no use in my everyday life, moving on). So to make my studying that much less icky I made myself green cookies!! Green things always make me feel better.

IMG_0838
I know this is horribly overexposed but I think it’s funny because the cookie looks like it’s levitating…. ooOOOooooOOOOoOooOo

Besides, these are really aggressively green. Artificial food coloring crap can take a backseat because this is soooo much more fun. Wouldn’t you rather the color in your food come from natural fun reactions?! This is what happens when baking soda/powder and the chlorophyll from sunflower seeds have a party in your cookies. When they cool, they turn green!! I like to refrigerate them to speed this along (besides I’m weird and I also like cold cookies)… and if you can refrain from eating them all at once (good luck), they get even greener the next day [the photos in this blog show them in varying states of green-ness… the ones on the blue plate are the next day after spending all night in the fridge].

IMG_0835

In addition to making green cookies, I did a number of other fun and delicious things…

bread at the beach with the boy… what more do you want?

Tea sandwiches. Because HIGH TEA!!! Crumpets!! And scones!! And no crusts!!

IMG_0883

And also creamy coconut buckwheat with turmeric-curry-cinnamon roasted chickpeas. Crappy photos but soooo delicious. I accidentally permanently stained a cookie sheet yellow, thanks turmeric.

IMG_0866

IMG_0868

And also this. Frozen pb-banana ‘ice cream’ with a ridiculously good walnut-date-cinnamon-oat crumble [1/2 c raw walnuts, 1/2 c pitted dates, 2 tbsp almond butter+ pinch of sea salt+1/2 c rolled oats+1/2 tsp cinnamon+1 tsp vanilla spun through a food processor]. I couldn’t stop eating it, mildly problematic except not because delicious.

IMG_0861

Oh. One more thing. Are variables delicious? Last I checked, no. These cookies on the other hand? Absolutely yes.

See? Real food fun. Imminently more useful than bothersome little equations and silly variables.

I would much rather have green cookies than remember how to correctly diagram a factor tree, thanks.

IMG_0843

Sunflower Seed Butter Cookies

Grain free, gluten free, vegan, refined sugar free. Paleo? Maybs? GREEN! Full of healthy fats and good fiber. I made a half batch and ended up with seven cookies because I mistakenly thought the 1/3 c was a 1/4 c measuring cup…oops. I wasn’t sorry, it meant I got an extra cookie out of the bunch. I’ll include the full recipe here, for a yield of an even dozen. Recipe lightly adapted from Against All Grain, here!

  • 2 tbsp ground flaxseed
  • 4 tbsp water
  • 1/2 c unsweetened sunbutter (mine is roasted, unsalted)
  •  6 dates, pitted
  • 1/2 c unsweetened applesauce
  • 1 tsp vanilla extract
  • 3/4 tsp apple cider vinegar
  • 1/2 c shredded unsweetened coconut
  • 1/4 c coconut flour
  • 1 tsp cinnamon
  • 1 tsp baking soda
  • 1/3 c dark chocolate chips

Preheat the oven to 350 and line a baking sheet with parchment paper.

In a small bowl, combine flax and water and set aside to gel. If your dates aren’t super squishy and soft, soak them in hot/near boiling water for a few minutes—I usually do this anyway so my food processor doesn’t complain as much. In your food processor, combine sun butter, dates, and applesauce and pulse until smooth. Add in vanilla, vinegar, and flax egg, and process until combined (I left a few chunks of date in mine, but it’s up to you). Add in coconut, coconut flour, cinnamon, and baking soda, processing until everything is fully combined. Take out the blade and stir in the chocolate chips.

Drop by rounded tablespoonful onto the prepared baking sheet, smoothing the edges with your fingers if you want (though I kind of like the craggy rustic look). Bake for 15 minutes. Let cool on the sheet for a few, then remove to a rack to cool further. They’ll start turning green once they start cooling, but they get to be a deeper green after about 2 hours. The next day they’re even better! Store in an airtight container in the fridge (I like plastic for these, glass makes them soft).

IMG_0865
Just because. Happy Friday!


So called weirdness is now accepted normalcy

IMG_6798

Shut the front door. A SAVORY thing?!

No.

Can’t be.

But wait… it is!!!

IMG_6794

ENCHILADAS!!!

Or more accurately…

Lentiladas!!

IMG_6800

So dubbed by my work besties when I trotted these babies into work the other day all ecstatic like “guys guys guys!! I have homemade enchiladas for lunch and guess what?! They’re vegan and made with lentils!!” and they all looked at me with ‘well duh!!’ expressions, closely followed by some comments to the effect of “since when would we expect YOU to bring normal enchiladas with you?! That would just be weird and we’d be concerned”. Typical. You know, I might even love my work peeps more than lentils. Which is unfortunate as my last day there is the 30th of this month [I am moving on to beekeeping (!!!), more on that later]… I will miss you, loyal work peeps who proudly nicknamed me Lentil! Good thing we can still hang out like real life friends…

IMG_6802

So anyway. I brought lentiladas to work and everyone expected it. Obviously my weirdness has just become normalcy.

I also made naturally green cookies (to be posted shortlyish) and no one even batted an eye. My work here is done.

IMG_6805

Vegan Lentiladas with Salsa Verde

Vegan, gluten free (with gluten free tortillas, mine were corn+wheat). Fast, totally accessible for a weeknight dinner. I used store-bought salsa and enchilada sauce—next time I might try making my own sauce and not being such a bum. But whatever. The leftovers are excellent reheated– my yield was about 10 enchiladas, which made plenty of delicious leftovers. The recipe is slightly adapted from Hummusapien, here!

  • 1/2 c raw cashews, soaked for at least 2 hours(ish)
  • 3/4 c dry green lentils+2 c water for cooking
  • 1/2 c salsa verde + extra for serving
  • 1/2 a bell pepper, diced (mine was yellow)
  • 5-6 good sized white mushrooms, sliced and sautéed in a bit of olive oil
  • 1 tsp sea salt
  • 1/4 tsp cayenne
  • 1/2 tsp cumin
  • 2 double handfuls of mixed greens (Mine was chard+kale+spinach)
  • 12 corn blue corn tortillas
  • 16 oz green enchilada sauce*
  • avo!! for serving. Obvi.

*this was the size of the jar I had—-it was delicious and was definitely not too much liquid. If you have an 8 oz can, that is also fine.

Cook yo’ lentils! I always use dried, as they’re super cheap in the bulk section and are very easy to cook—-bring water to a boil, dump in lentils, and simmer for about 20-25 minutes until they’re soft. Aaaaaanndddd… done!

Drain soaking cashews. In a food processor, process soaked cashews and 1/2 c salsa verde until nearly smooth. Add in lentils, diced bell pepper, sautéed mushrooms, sea salt, cayenne, and cumin. Process until combined. Add in mixed greens and process a bit more till everything is incorporated.

Preheat the oven to 350, and locate some kind of 9 by 13 pan. Pour about half of the enchilada sauce in the bottom of the pan. Take each tortilla and fill it lengthwise down the center with filling. Roll it up, and place it seam side down in the pan. If it breaks, who cares? It’ll be covered in sauce anyway…
Once all the tortillas are filled and nestled in next to their friends, pour the rest of the enchilada sauce evenly over the top. Bake for 30 minutes, and let cool for a few before serving. Serve with extra salsa and avo! Store leftovers in an airtight container in the fridge.

Jessie thinks they're awesome too…
Jessie thinks they’re awesome too…

There is drool on my keyboard

IMG_0831

Before I get into all the sweets nonsense… this was this morning’s harvest. I love love love having growing things in my backyard!! The baby strawberries went into buckwheat cereal alongside their pallies blueberries and kale and zucchini and carrots and coconut and sun butter and chia+hemp seeds and all the other ridiculous things I put in my breakfast cereals… But anyway.

IMG_6783

I warned you about the sweets excess, no?!

IMG_6790

Jill and I managed to whip out a batch of coconut milk ice cream with salted almond date caramel and pecans (droooool), a double batch of peanut butter coconut carob chip cookies, and a grain free raspberry polenta cake. In 4 hours. Boom. And we ate lunch in there somewhere, and Jill made this epic quinoa pizza crust just before I came over so that was also lunch.

IMG_0818

IMG_0819

IMG_0822


IMG_0826

But guys.

IMG_6785

THIS ICE CREAM.

I just….

IMG_6789

Drool.

Want.

IMG_6791

Actually, I think this is the first time I have actually made ice cream!! I mean, I did it once at girly scout day camp, but I hardly think that counts (though I do remember it being delicious). I’ve also made it in that silly way of putting rock salt and ice in a plastic baggie and shaking cream around until it sort of resembles ice cream but HELLO that is so NOT as good as this business. This is… I have no words. Just drool.

IMG_6784

AND. Not only that, but this ice cream is dairy free!! And gluten free!!! And quite possibly paleo?! And refined sugar free!! And vegan!!! Extra exclamation points!!! I think food allergies are super lame so here is a tummy-friendly ice cream for [nearly] everyone! YAY!

I got really excited in that last paragraph, sorry… but seriously. This ice cream.. mmmm.

IMG_6781

ALSO ALSO ALSO!!!! I just made these amazing vegan lentil enchiladas with my friend Britt so they’re going up next. Because they’re really freakin’ amazing. Holy moly. Could it be?? Something savory?! No. Surely not. I must have hallucinated from too much ice cream…

Coconut Ice Cream with Salted Almond Date Caramel and Pecans

Recipe gratefully borrowed from Sweet Miscellany, here! I adapted the date caramel and pecans slightly to my taste. Makes about 5-6 servings, but is best the day it’s made (it starts to get a bit hard after a day or two), so go ahead and indulge with some friends. Either way, let it sit out for a few minutes (like 5) before serving–it will scoop a bit better. Gluten free, refined sugar free, paloe, vegan, and dairy free!

IMG_6792

For the ice cream base:

  • 2 cans full-fat, organic coconut milk
  • 1 tsp pure vanilla extract
  • pinch of salt
  • 1/2 c pure maple syrup (I use grade B, I like the flavor better in baked goods or sweets)
  • 1 tbsp plain vodka

For the caramel:

  • roughly 20 good sized medjool dates, pitted (soaked if necessary)
  • 2 heaping tbsp salted almond butter
  • a good pinch of sea salt
  • 1.5 tsp pure vanilla extract
  • 2-4 tbsp unsweetened almond milk, to thin it out a bit

For the pecans:

  • 1 tsp coconut oil
  • heaping cup of pecans, chopped

Get ready to drool: In a large bowl, whisk together all of the ingredients for the base. Cover and chill in the fridge either overnight or for fourish hours.

While the base is chilling, make pecans and caramel! For the pecans, heat coconut oil in a medium skillet over medium-low heat. Toss in pecans and toast, shaking the pan occasionally. You’ll be able to smell the delicious toastiness once they get close to being done—should only be around 5 minutes after the oil is heated.

For the caramel, truck out your trusty food processor. Soak your dates in hot water to soften them if necessary. Once they’re soft, toss them into the food processor and pulse until they form a rough paste. Add in almond butter, vanilla, and sea salt, and pulse to combine. Add almond milk as necessary to thin it out a bit—you don’t want it too thin, but thick enough that it’s spreadable. Set aside when it’s to your liking.

Once the base is done chilling, bust out your ice cream maker! Jill has a really cool one.. mine is OLD school. Like, hand crank. So… we used Jill’s! Chill the insert in the freezer if needed. Toss it all in and churn according to the ice cream maker’s instructions (or if you can’t find them, like Jill and I, just use your best judgement ;). Once the ice cream gets to a ‘soft serve’ consistency—meaning that if you stick a finger in there (or a spoon, pst whatever civilized), you should be able to scoop some up without it being too runny. Stir in about 3/4 of the pecans. Once the pecans are incorporated, spread a layer of ice cream into whatever you’re storing it in (I used a tall, round container; Jill’s was flat and square–either is fine), followed by generous dollops of caramel and a sprinkle of pecans. Repeat, swirling the ice cream together with the caramel dollops, until all the ice cream and caramel (and pecans) are combined. Cover and freeze until firm—for easier scooping, freeze until *just* firm. Let sit out a bit before scooping!

IMG_6790

The usual nonsense

IMG_6755

More of that light side/dark side dessertyness.

IMG_6761

I actually made these last weekend but have been too busy/lazy/my novel is too good lately to actually get around to posting them. But they happened to be a big hit with the fam so I thought I would be nice and share them. These went well together—the super dense fudgy almond butter brownies played nicely with the lighter caramel bars—those aren’t super sweet, so it made a nice contrast.

IMG_6753

IMG_6762

I’m feeling a little brain dead today so pardon the lack of text and written nonsense, I’ll just leave you with the photos and that drool that just hit your keyboard…

IMG_6759

Almond Butter Brownies

Super fudgy, tall brownies with a chewy crust. These are honey sweetened, and you could definitely taste the honey in my batch. I liked it, as a change from the typical brownies that I make, but if you’re not a fan of honey flavor in baked goods, I would sub maple or another liquid sweetener. Recipe only slightly adapted from Smells Like Brownies, here! Makes one 8 by 8 square pan (I had to use round since the square pan I have was currently in use, but I think there’s something weird about round brownies…). Gluten free, grain free, refined sugar free!

IMG_6754

  • 2 eggs
  • 1/2 c raw, runny honey
  • 2 tsp vanilla extract
  • 1 c organic almond butter (mine was unsalted)
  • 6 tbsp cocoa powder
  • 1/2 tsp baking soda
  • generous pinch of salt
  • 1/3 c extra dark chocolate chips

Preheat the oven to 325, and lightly grease pan of choice with coconut oil.

In a medium bowl using an electric mixer, beat together eggs, honey, and vanilla until smooth. Beat in almond butter. In a small bowl, whisk together cocoa powder, baking soda, and salt. Stir dry into wet, mixing until just combined and adding in chocolate chips. Pour the batter into the prepared pan, and bake 25-30 minutes. The center should be slightly puffed, and a toothpick should come out mostly clean (a teeny bit of fudgy is okay, but excessively under baked is ew). Let cool completely before slicing, and store any leftovers in a sealed container in the fridge.

IMG_6756

IMG_6769

Salted Caramel Coconut Bars

This one is slightly adapted from Quiche-a-week (love that blog!) here! Chewy, thick salty-caramel-chocolate-spelt-coconut things. Vegan, refined sugar free! They’re made with spelt flour, which can be easier to digest than wheat, even if you aren’t wheat intolerant (though this is *not* gluten free). Yield: 9-12 bars, in an 8 by 8 pan.

IMG_6764

For the caramel:

  • 1 tbsp coconut oil
  • 1 tbsp maple syrup
  • 2 tbsp coconut sugar
  • 1/4 c unsweetened almond milk
  • a hefty pinch (1/4+ tsp) sea salt

For the barz:

  • 1.75 c spelt flour
  • 1/4 c almond flour
  • 1/4 tsp sea salt
  • 1/2 tsp baking soda
  • 1/4 c shredded, unsweetened coconut
  • 4 tbsp melted coconut oil
  • 4 tbsp peanut butter (preferably the separating kind)
  • 1 tbsp maple syrup
  • 1 tsp vanilla extract
  • 2 tbsp ground flaxseed+6 tbsp water (2 flax eggs)
  • 1/3 c dark chocolate chips
  • up to 1/4 unsweetened almond milk

Make the caramel first so it has a little time to cool! In a saucepan, melt coconut oil, coconut sugar, and maple until it starts to fizz and thicken. When it starts bubbling, add the almond milk. Let it bubble for just a bit, then turn the heat down to low and let it simmer for 3 ish minutes. Stir only occasionally, but mostly just let it sit. Once it’s thickened a little (almond milk won’t thicken too crazy much), turn off the heat, stir in the sea salt, and let it cool.

IMG_6770

For the barz….

Preheat the oven to 325 and grease an 8 by 8 pan with coconut oil. Make your flax eggs and then set them aside to gel.

In a largeish bowl, whisk together spelt flour, almond flour, sea salt, baking soda, and shredded coconut. In a smaller bowl, whisk together melted coconut oil, peanut butter, maple syrup, and vanilla. Add in flax eggs, then stir the wet into the dry until just combined. You’ll need more moisture in the dough since spelt flour can be dry—I added about a 1/4 c of almond milk a tablespoon at a time until the dough was the right consistency. Fold in the chocolate chippies. Spread half the batter into your prepared pan (using your hands is encouraged), then pour half the caramel over the first layer. Add more chocolate chips to this middle layer because… just because. Spread the other layer of dough over the caramel (it’ll get messy but it’s dessert so who cares?), then pour the other half of the caramel over the top.

Bake for 30-35 minutes, until a tester comes out clean. Let cool on a rack, then slice and eat/store!

IMG_6763

Light side? Or…. dark side?!

IMG_6552

So, are you on the light side?

Or…

The dark side?

IMG_6564

Both are equally appealing…

IMG_6556

IMG_6570

B(lond)rownies are kind of like the Force. They have a light side, and a dark side… and they undeniably hold the universe together. My universe, anyway, I can’t speak for yours…

But really, when brownies are holding your universe together, that universe is pretty freakin fab!

I was a little more inclined to the dark side today with these. Dense, fudgy and rich, with small chunks of chocolate chips.. mmm. Doesn’t get much better than that. Except when there’s peanut butter added to your chocolate, in which case the ridiculous deliciousness of these skyrockets into the stratosphere.

IMG_6573

But then there’s these.

IMG_6558

And if you’re feeling like maybe your inclinations push you to the light side (blue, green and purple are pretty awesome lightsaber colors), there’s these. Dense, chewy-crumbly, with an almost graham cracker-like taste. And chocolate chips. Of course.

Actually, much like the dichotomy in the Force (and the real universe..) these two complement each other startlingly well. The deep dark fudgy of one plays nicely against the lighter molassesy flavor of the other.

So go ahead. Indulge your dark side and your light side, and make a batch of both. You never know when the mood might strike, or when your universe might become ruled by baked goods in the best possible way….

IMG_6560

Deep Dark Peanut Butter Brownies

This recipe is from Minimalist Baker, here! It’s freaking fabulous so I didn’t change a thing (other than omitting the powdered sugar and subbing in maple). Makes about 12 good sized brownies, in an 8 by 8 pan. Vegan, gluten free, and refined sugar free!

  • 1 can (15 oz) of black beans, rinsed and drained
  • 2 tbsp flaxseed meal+5 tbsp water
  • 3 tbsp melted coconut oil
  • 3/4 c unsweetened cocoa powder
  • 1/4 tsp fine sea salt
  • 1.5 tsp baking powder
  • 1 tsp baking soda
  • 1 tsp pure vanilla extract
  • 1/4 c pure maple syrup
  • 1/4 c coconut sugar
  • 1/2 c creamy salted peanut butter
  • 1 tbsp pure maple syrup
  • 1/3 c extra dark chocolate chips

Lightly grease an 8 by 8 pan, and preheat the oven to 350.

In a food processor, combine flax meal and water and let sit for a few minutes. Add in beans, coconut oil, cocoa powder, salt, baking powder and soda, vanilla, maple syrup, and coconut sugar. Pulse to combine, and let it run for a minute or two—you want this to be very smooth. Stir in the chocolate chips, and pour batter into the prepared pan. In a smaller bowl, stir together peanut butter and maple. Drop dollops of the peanut butter onto the tops of the brownies, and swirl it in with a knife. Top with extra chocolate chips (because, why not?!), and bake for just about 30 minutes. The center should have no jiggle and the edges will pull slightly away from the pan. Let cool almost completely before slicing, as they’re a little fragile when warm. Store in the fridge in an airtight container!

IMG_6555

Light Side Blondies

These are adapted only slightly from Worth Cooking, here! The recipe makes about 12-14 wedges if you make it in a 9″ round cake pan, as I did. E and I decided these reminded us slightly of graham crackers in the way they tasted, and they’re dense, chewy and vanilla-y. They’re gluten free with oat flour, as originally written, but I was out. Vegan and refined sugar free!

  • 1/4 c flaxseed meal
  • 1/2 c water
  • 1 tbsp molasses
  • 1.25 c whole wheat pastry flour
  • 1/3 c tapioca starch
  • 3/4 c coconut sugar
  • 1/4 tsp fine sea salt
  • 1/2 tsp baking powder
  • 7 tbsp melted coconut oil
  • 2 tbsp vanilla (Yes, you read that right!)
  • 1/3 c extra dark chocolate chips

Lightly grease a 9″ round cake pan (or square, or whatever). Preheat the oven to 350.

In a smallish bowl, whisk together flaxseed, water, and molasses and let sit. In a larger bowl, whisk together whole wheat pastry flour, tapioca starch, coconut sugar, salt, and baking powder. Add in flax mix, followed by coconut oil and vanilla. Stir to combine, tossing in the chocolate chips as you go. Spread the batter into the prepared pan, and bake for just about 30 minutes. The top should be firm, and the blondies will pull away from the sides of the pan slightly. Let cool a bit before slicing. I have no leftovers… but if I had, I would have stored them in the fridge ;)

IMG_6565