The Queen of Citrus

fullsizeoutput_21b9

Hello! I have a big mess of galette for you today.

fullsizeoutput_21b1

Slight change of plan – vacation got rescheduled to March, so I am back with more dessert sooner than I thought I would be! I don’t think anyone was mad about that…

fullsizeoutput_21ad

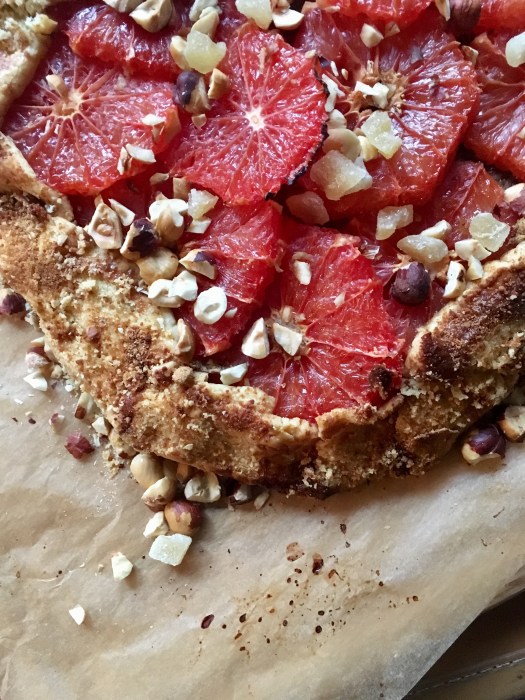
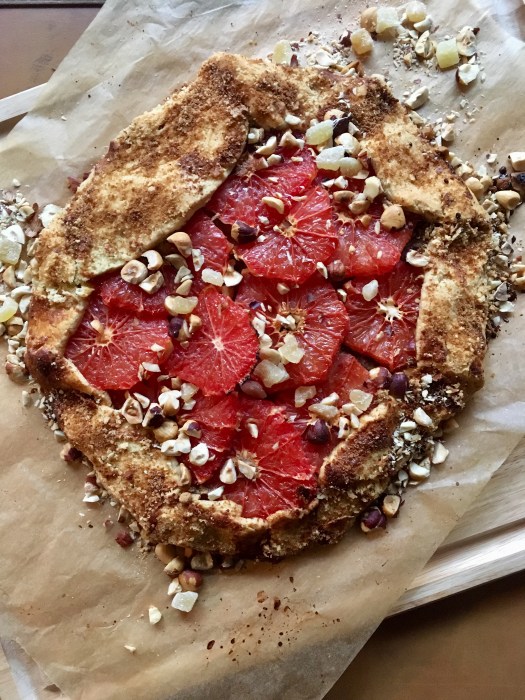
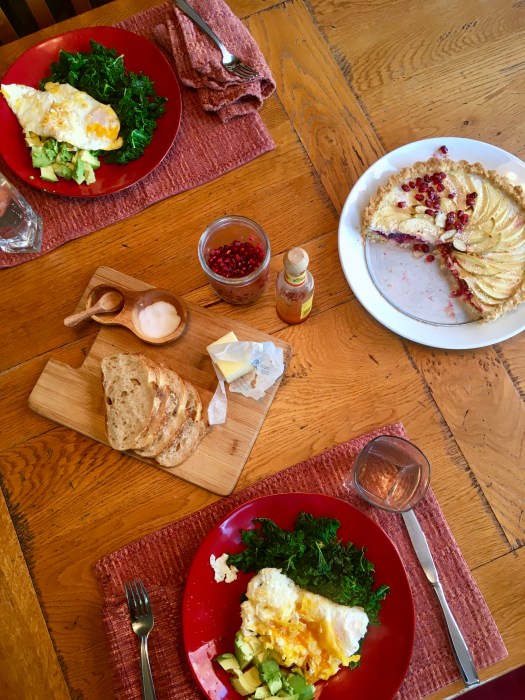
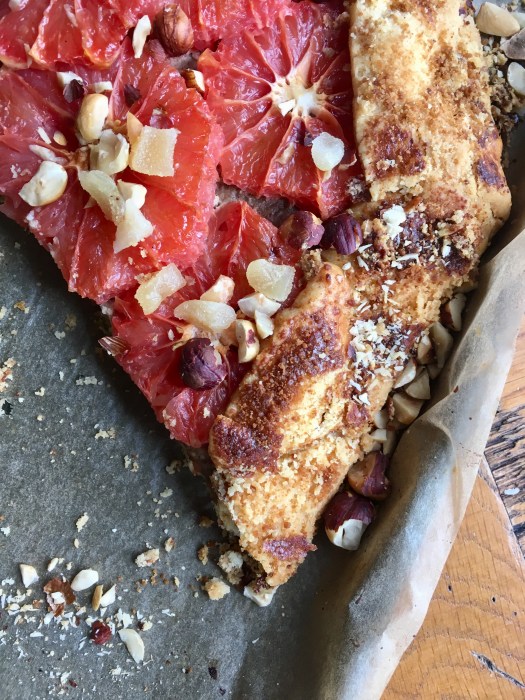
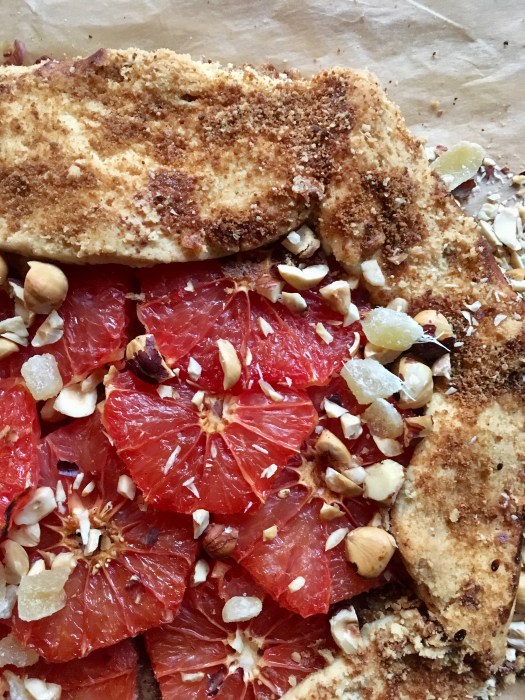
Grapefruit and hazelnut for you today: as C put it, grapefruit is the queen of flavors! I’d be inclined to agree; it’s high up there on my list of faves. I really love it with hazelnut, too. This galette disappeared in literally two sittings (granted, we went to the gym before the second one so – warranted!) but it’s quite light and makes a great breakfast. This is definitely NOT a dessert that will weigh you down after one slice.

fullsizeoutput_21b6

fullsizeoutput_21b5

C and I went skiing! Such a great time – several gorgeous days spent up at my beloved Kirkwood, which of course means I’m also right near camp – I can never stay away from camp for too long! See photo evidence below…

IMG_0211

fullsizeoutput_215c

fullsizeoutput_219d

fullsizeoutput_217f

fullsizeoutput_2185

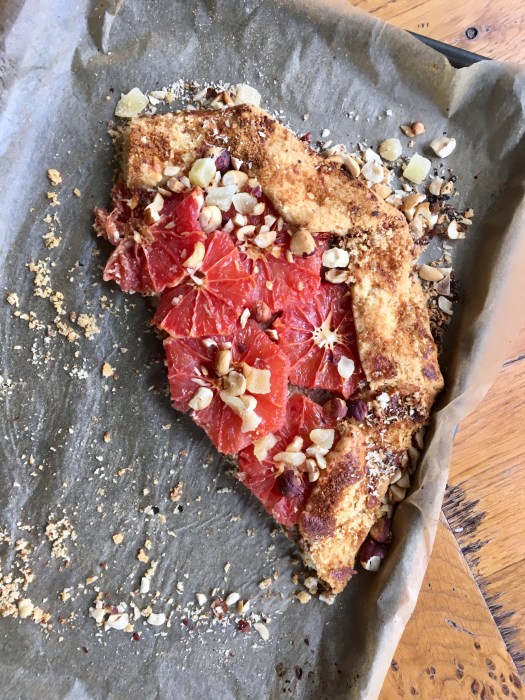
Anyway, galette. I whipped this one up on short notice – though it sounds complicated, it’s really quite simple & quick to make. The dough and the hazelnut filling are made in the food processor, and all that’s left is to slice the grapefruits & bake! It’s quick, I promise; and well worth it for the delicious factor.

fullsizeoutput_21af

Happy weekend!

fullsizeoutput_21b0

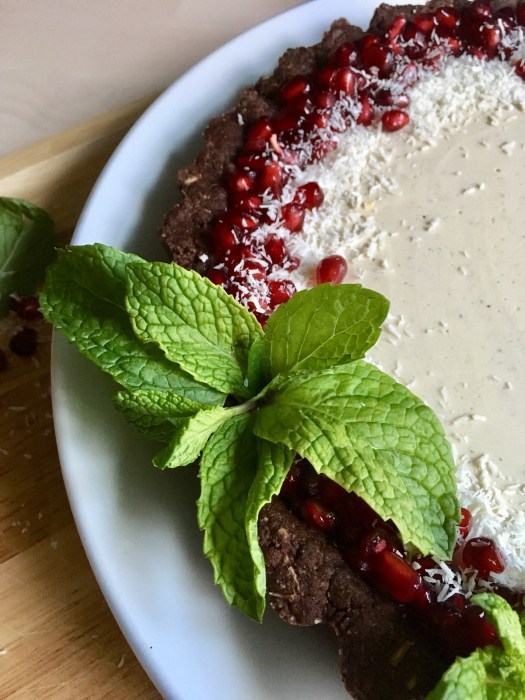
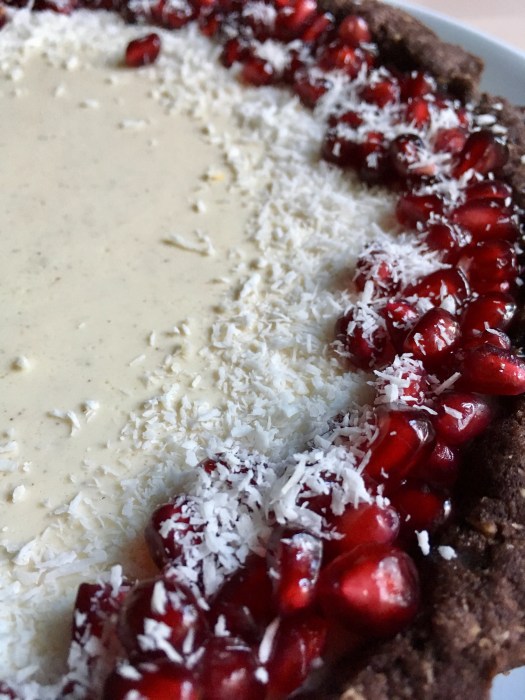
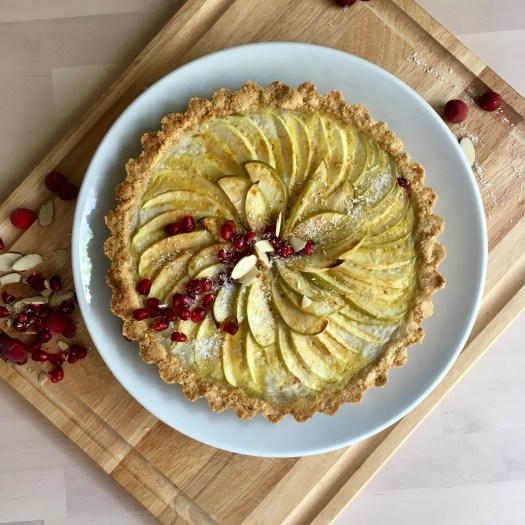
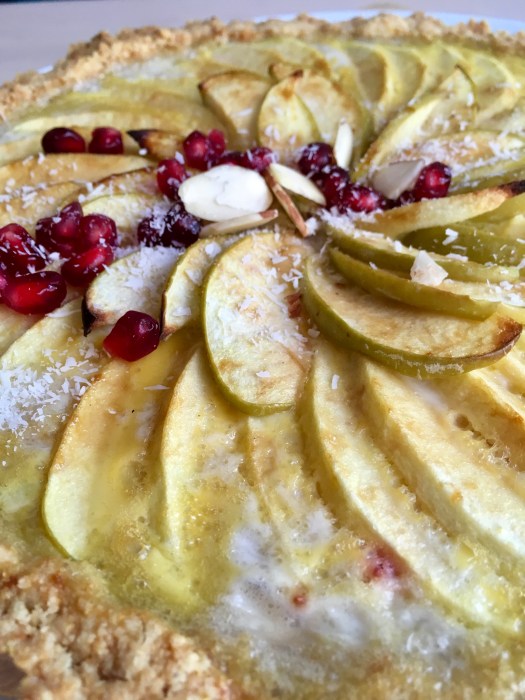
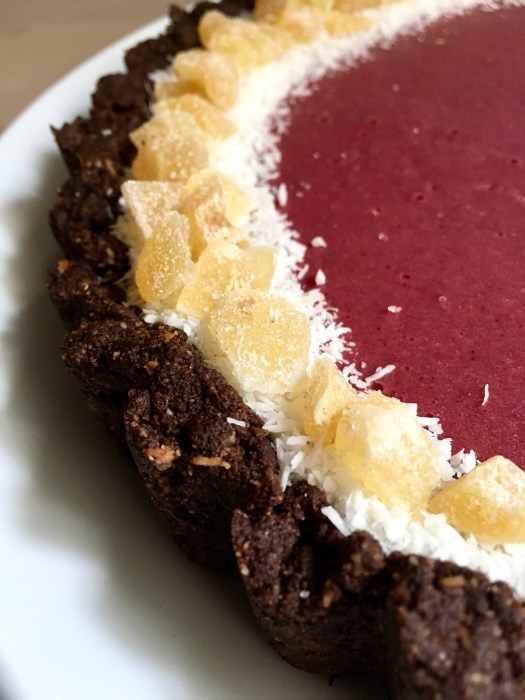
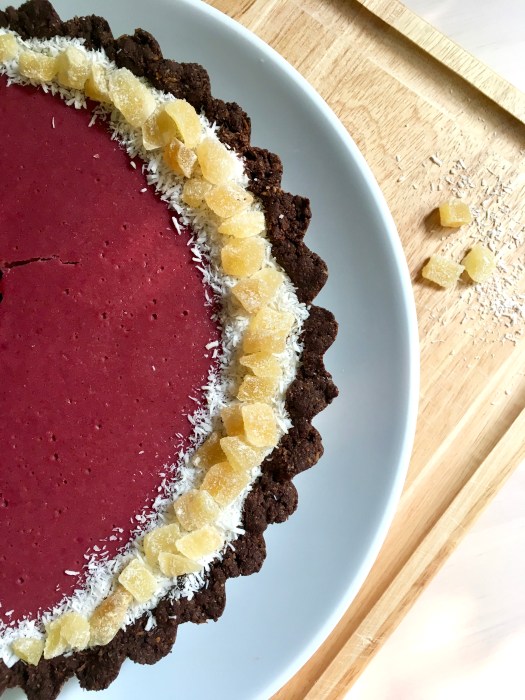
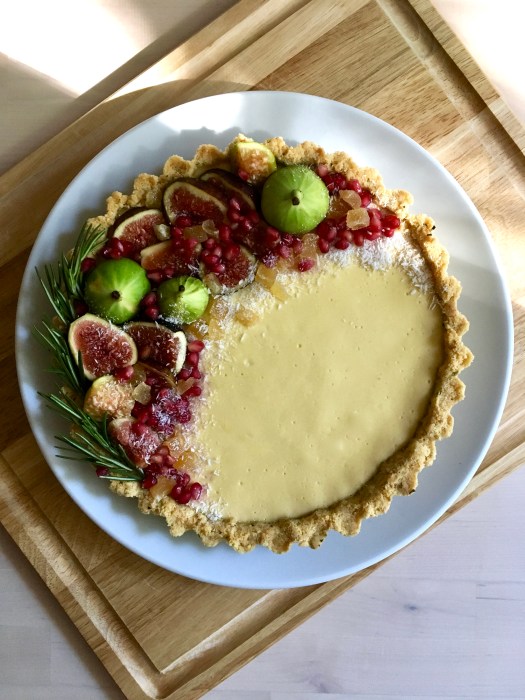
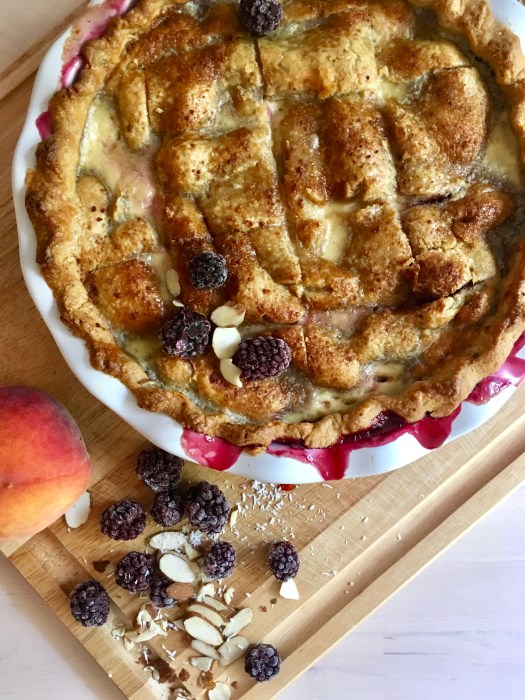
Grapefruit, Hazelnut & Ginger Galette

Grain free, gluten free, and refined sugar free. Tart, nutty, and simple – this comes together super fast. A Wait are Those Cookies original. Yield: 1 galette, serves 3-6 (or in our case, two very hungry humans over two sittings!)

fullsizeoutput_21b8

For the galette dough:

1.5 c almond flour (not meal; you want the finer flour variety)
1/2 c tapioca flour
1/4 tsp fine sea salt
6 tbsp salted butter, chopped (or ghee)
1 egg
1 tbsp vanilla extract

In a food processor or high-power blender (I used a food processor), pulse almond flour, tapioca starch, salt, and butter to combine until it looks like coarse meal. Add in egg and vanilla extract and pulse just until combined. Turn out onto a piece of plastic wrap, shape into a disk and chill in the fridge for at least an hour, or up to overnight.

For the hazelnut filling:
1 heaping cup roasted hazelnuts
1 tbsp maple syrup
1 tbsp vanilla
pinch of sea salt

Grind the hazelnuts in a food processor until they begin to resemble nut butter – I keep mine on the coarser side, but that’s up to you. Add in maple, vanilla & salt and pulse to combine.

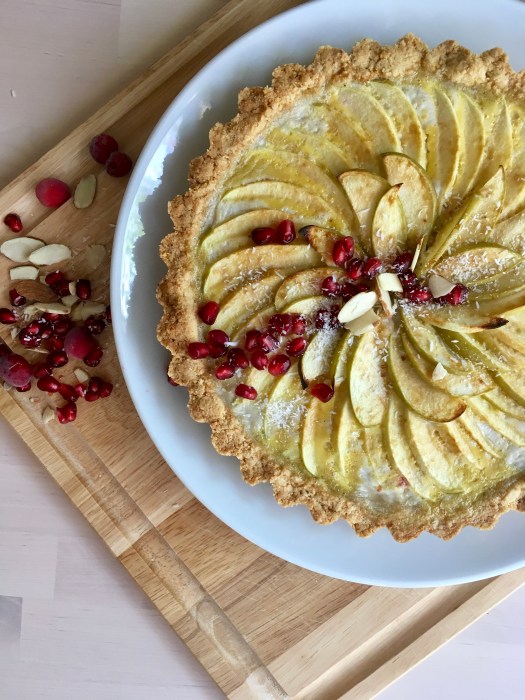
For galette assembly:
2 grapefruits, sliced (I cut the peel off the whole thing and then slice)
1 egg, beaten
coconut sugar to sprinkle
chopped hazelnuts
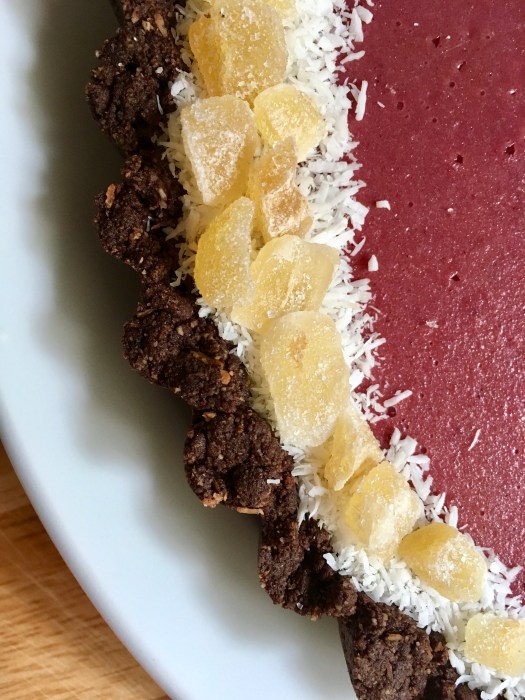
crystallized ginger, optional

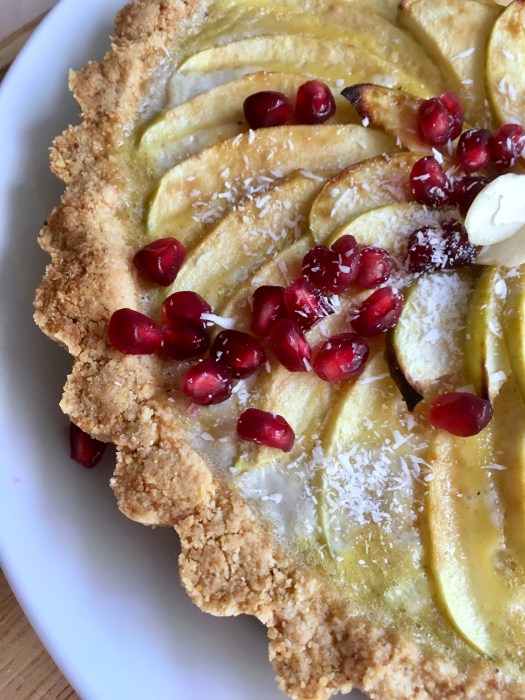
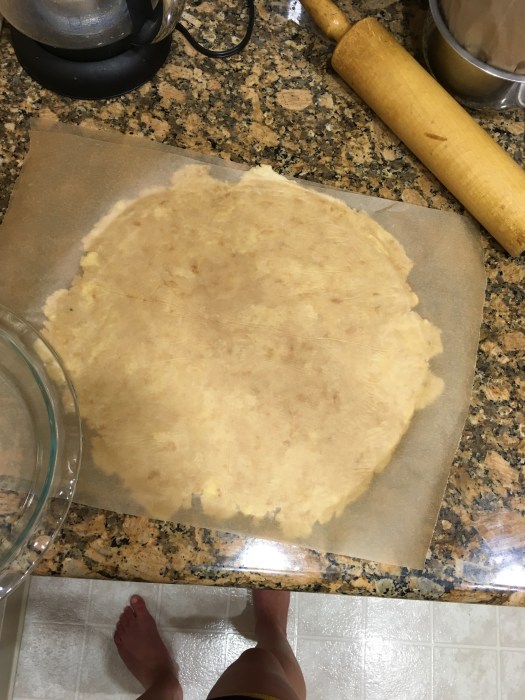
Once the dough has chilled, preheat the oven to 375. Roll out the dough between two pieces of parchment paper, keeping the circle to about 1/4″ thickness. Peel off the top piece of parchment, and slide the rolled out dough on its parchment onto a baking sheet. Top with the hazelnut filling, spreading it carefully in order to not rip or crack the dough. Add the sliced grapefruits and chopped hazelnuts. Begin folding up the sides, creasing them together as you go – if the dough rips, that’s okay (you can crimp the cracks back together; remember: galettes are forgiving and rustic!); you can use the bottom piece of parchment to help fold up the sides. Brush the dough with egg wash, and sprinkle with a little coconut sugar. Bake for 35-40 minutes until edges are golden brown — mine came out just fine at 35 minutes, so check accordingly.

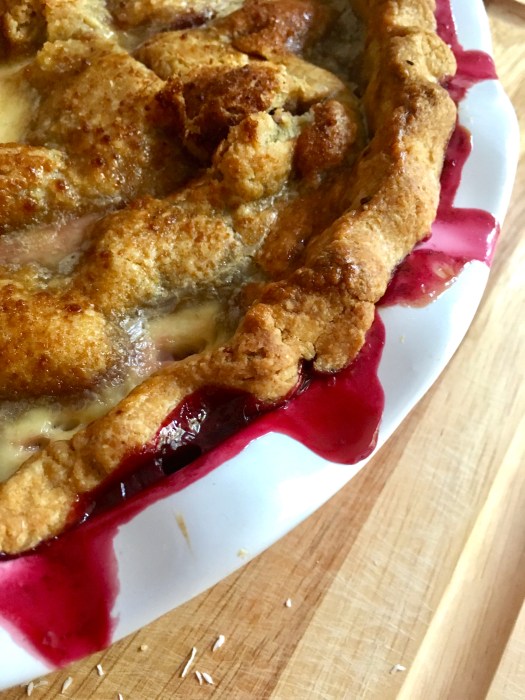
Let cool for a few minutes on the baking sheet, then carefully slide the whole galette onto a cooling rack to let it cool completely. Top with crystallized ginger if desired, and extra chopped hazelnuts. Serve with your fave ice cream or whatever of choice! Keeps well covered in foil on the counter.

fullsizeoutput_21b3

Nature’s ombré: blood oranges!

fullsizeoutput_2138

Hello!

fullsizeoutput_2133

Fun fact of the day – did you know that ricotta is actually *technically* not a cheese? It’s considered a dairy product since it’s made from a dairy by-product, whey. The name comes from the Latin recocta, or ‘twice cooked’. Fascinating! I love things like this.

fullsizeoutput_2135

Anyway! I’ve got ricotta on the brain since I made this tart for the weekend.

fullsizeoutput_212e

Blood oranges are very much in season right now, which is making me very happy – I LOVE their color (and flavor!) They pair so well with vanilla bean, it’s almost criminal.

fullsizeoutput_2131

This tart is lightly sweet, as is everything I make – but packs a powerful orange punch. As a child, I really didn’t like the orange and chocolate combination – what was I thinking?! Thankfully, I aged into more accepting tastebuds, and am happily part of the citrus+chocolate tribe these days.

fullsizeoutput_212f

fullsizeoutput_2130

Perfect for breakfast or dessert – as usual, we ate it both ways. Last weekend, we did a 9 mile hike from Taraval to Lands’ End & back; this weekend was a lighter 5.5 mile up to Twin Peaks and back. I don’t have any photos from today’s; it was hazy and I wasn’t feeling super motivated – so here is one from last weekend! It was a gorgeous day, and those 9 miles flew by.

fullsizeoutput_214a

fullsizeoutput_2105

fullsizeoutput_2149

I’ll be back in mid-Feb with some new posts – C and I are going skiing this week (wooo!!!) and after that I’m taking a bit of time off for some r&r with my mama in a nice, tropical location (which hopefully will allow some of annoying & uncomfortable AF autoimmune symptoms to calm down. Ideally, I’ll just spend a ton of time in the water…)

fullsizeoutput_214e

Happy weekend!

fullsizeoutput_212c

Ricotta, Vanilla Bean and Blood Orange Tart on a Chocolate Polenta Crust

Lightly sweet but with plenty of orange flavor – for those who love the orange and chocolate combination! Perfect for dessert with a blob of ice cream, or for breakfast. Gluten free and refined sugar free. Yield: 1 9″ tart. A Wait are Those Cookies original! Adapted from my other ricotta tart, here.

For the crust:

1.5 c almond flour
1/4 c unsweetened shredded coconut
1/2 c cornmeal
1/4 c unsweetened cacao powder
heaping 1/4 tsp sea salt
1/2 tsp baking soda
2 tsp vanilla extract
2 tbsp pure maple syrup
6 tbsp coconut oil, melted

In a large bowl, stir together almond flour, cornmeal, cacao powder, coconut, sea salt, and baking soda. Add in vanilla, maple, and melted coconut oil and stir until completely combined. The dough will look crumbly, but you’ll be able to press it together with your fingers.

Preheat the oven to 350, and lightly grease a 9″ tart pan or pie plate with coconut oil. Press the crust into the plate and up the sides with a spoon or your fingers, creating a smooth edge (or not, your call!). Poke the bottom with a fork a few times, and bake for 15 minutes.

For the filling:

1.5 c (15 oz) full fat ricotta
1/2 c full fat coconut milk
scant 1/4 c maple syrup
2 egg yolks
1 egg
zest of 2 blood oranges
Juice of 1 blood orange
1 tbsp vanilla bean paste

This is as easy as it gets: toss ricotta into a large bowl, and stir in the rest of the ingredients: coconut milk, maple, egg yolks + egg, orange zest + juice, and vanilla paste, mixing well to prevent any lumps (heaven forbid).

Tart Assembly:
Pour the ricotta filling into the baked and cooled tart shell. Place in the oven at 350 and bake for about 40-45 minutes, until filling is set. Let cool completely before serving.
Top with sliced blood oranges and shredded coconut if desired! Keep refrigerated until serving. Keeps well overnight in the fridge, covered loosely in plastic wrap – arguably it’s almost better the next day!

fullsizeoutput_212e

Meyer Lemons for 2019

fullsizeoutput_209a

Hello hello! Happy 2019!

fullsizeoutput_20a4

Here is the first dessert of the year – and I’m quite happy with it! C and I loved it; but then, we’re also fiercely fond of anything that is citrusy and tart, so it was an easy sell. Plus, cornmeal! Let’s not forget our joint obsession with that.

fullsizeoutput_20a1

I love this tart for winter – meyer lemons are at their peak and are SO delicious, and the naturally bright yellow is just perfect for a bright midwinter dessert!

fullsizeoutput_20a7

fullsizeoutput_20a5

I did actually bake for NYE, but it was the ricotta cornmeal cake I’d made recently & my favorite cookies, and I didn’t want any repeat posts! Both were very well received :)

fullsizeoutput_201b

img_0817

C and I had a lovely weekend – we did the tart for dessert first, with ice cream, and then again for… uh, if you eat your first meal of the day at 3 after a giant hike, is it still breakfast?! Anyway – great day out in Marin on the coastal trails by Rodeo beach, followed by tart and eggs and kale and all the usual things!

fullsizeoutput_20cc

fullsizeoutput_20c8

fullsizeoutput_20ad

fullsizeoutput_20bb

fullsizeoutput_20b5

I hope your weekend was all kinds of delightful, and that your year is off to a great start!

fullsizeoutput_209b

Meyer Lemon Tart with a Cornmeal Almond Crust

Tart and bright – this is citrus at its best! It makes a difference to use meyer lemons – they are naturally sweeter than regular lemons. This is for those who like their desserts tart! Gluten free and refined sugar free. Yield: 1 9″ tart. A Wait are Those Cookies original.

fullsizeoutput_20cb

For the crust:

1.5 c almond flour
1/4 c unsweetened shredded coconut
1/2 c cornmeal
heaping 1/4 tsp sea salt
1/2 tsp baking soda
2 tsp vanilla extract
2 tbsp pure maple syrup
6 tbsp coconut oil, melted

In a large bowl, stir together almond flour, shredded coconut, cornmeal, sea salt, and baking soda. Add in vanilla, maple, and melted coconut oil, and stir until completely combined. The dough will look crumbly, but you’ll be able to press it together with your fingers.
Preheat the oven to 350, and lightly grease a 9″ tart pan (w/ removable bottom) with coconut oil. Press the crust into the plate and up the sides with a spoon or your fingers, creating a smooth edge (or not, your call!). Poke the bottom with a fork a few times, and bake for 15 minutes. Remove and let cool for a few minutes. Increase oven temp to 375.

Maple Lemon Curd*:

2 whole eggs
3 egg yolks
1/3 c lemon juice
zest of 4 lemons
pinch of sea salt
2 tbsp maple syrup
4 tbsp butter
1 tsp vanilla

*I made a batch and a half for a higher curd to crust ratio – feel free to do like I did. If you do, use 3 whole eggs & 4 yolks + another half of all other ingredients listed except maple (I like my curd to be tart!)

I used a double boiler for this lemon curd, which is a game changer. Highly recommended! Heat water in the bottom of the double boiler until it’s at a high simmer. In the top of the double boiler, whisk together eggs, egg yolks, lemon zest and juice, sea salt, and maple syrup. Add in the butter one tbsp at a time, whisking continuously, not adding the next tbsp until the first is completely melted. Whisk in vanilla. Cook, stirring constantly, until the lemon curd thickens and will coat the back of a spoon (or your whisk leaves tracks) – usually around 5 to 8 minutes. It’s a noticeable change when it happens, so just watch the cooking magic! Remove from heat, strain through a fine mesh strainer, and store in a glass container in the fridge until ready for use.

Pour the curd into the crust and smooth the top. Bake at 375 for 8-12 minutes, until the curd is barely set. Cool completely before slicing and serving – store in the fridge until serving and keep leftovers covered in the fridge.

fullsizeoutput_20a2

Panna cotta that is mint to be

fullsizeoutput_1fed

Happy holidays!

fullsizeoutput_2000

I had a delightful holiday with both my fam and C’s. He and I took a 6ish mile hike yesterday with fam; the weather was just beautiful and it felt great to get outside.

IMG_0777

IMG_0721

IMG_0767

fullsizeoutput_1ff2

I’m keeping it short and sweet today – I made this panna cotta tart for xmas dinner with the fave human’s family; it got rave reviews from both kids and adults, which totally makes it a win in my book!

fullsizeoutput_1ffd

fullsizeoutput_1ff5

It’s relatively simple to put together and keeps very well when made ahead – I made it 24 hours before serving, which was just perfect (the panna cotta needs to set up anyway, so that’s ideal).

fullsizeoutput_1ff6

I’m currently navigating the last few work days of the year in this weird no-space between Christmas and New Years (grudgingly, mind you), while I wait for a few more days off and some relaxation time. I’m already plotting my NYE dessert, of course.

fullsizeoutput_1fff

I hope you’re happily relaxing with loved ones! I highly recommend to feed them panna cotta tart :)

IMG_0761

Mint and Vanilla Bean Panna Cotta Tart on a Chocolate Crust

Mint and chocolate: a match made in heaven. Only lightly sweet but a big crowd pleaser (this one got rave reviews from both kids and adults!). Infuse the cream the day before you plan to make the tart. Keeps well wrapped in the fridge overnight; I made it 24 hours before serving. Gluten and grain free; refined sugar free. Yield: 1 9″ tart; serves several! A Wait are those Cookies original.

For the crust:

1.75 c almond flour
1/3 c unsweetened cacao powder
1/4 c unsweetened shredded coconut
heaping 1/4 tsp sea salt
1/2 tsp baking soda
2 tsp vanilla extract
2 tbsp pure maple syrup
4 tbsp coconut oil, melted
~1/4 c chopped dark chocolate

In a large bowl, stir together almond flour, cacao powder, coconut, sea salt, and baking soda. Add in vanilla, maple, and melted coconut oil and stir until completely combined. The dough will look crumbly, but you’ll be able to press it together with your fingers.

Preheat the oven to 350, and lightly grease a tart pan with coconut oil. Press the crust into the plate and up the sides with a spoon or your fingers, creating a smooth edge (or not, your call!). Poke the bottom with a fork a few times, and bake for 15 minutes.

Let cool for a few. Melt the dark chocolate and pour it into the bottom of the tart shell. Use a spoon or a brush to smooth it out. Let cool completely to set the chocolate.

Infused cream*:

1 c cream
1/4 loosely packed fresh mint leaves

Coarsely chop fresh mint with a very sharp knife, without crushing or bruising them. Stir them into cold cream, cover, and refrigerate 8 to 12 hours.

Strain the cream, pressing on the solids to extract as much cream as possible. Discard the leaves. If you’re not using the cream immediately, cover and refrigerate it until needed.

*the infused cream makes just shy of a cup; you’ll be adding more cream for the rest of the panna cotta (see below) – use all of the infused cream + another 3/4 c for a total of 1.75 c

For the panna cotta:

1 package unflavored powdered gelatin
1.75 cup mint-infused heavy cream, divided*
1.5 tbsp vanilla bean paste
1.5 tsp peppermint extract
1/4 cup maple
Scant 1/4 tsp sea salt
1/4 cup plain greek whole-milk yogurt
Pomegranate, coconut and mint for garnish

*See above note; I used 1 c infused cream + 3/4 non-infused cream

In a small bowl, sprinkle the gelatin over 1/4 cup of the cream. Let stand without stirring until the gelatin is moistened, about 10 minutes.

Pour the remaining 1.5 cups of cream into a small saucepan. Add maple, and salt. Bring to a simmer over medium heat, stirring consistently. Remove from the heat, whisk in peppermint extract and vanilla paste. Add the gelatin mixture and stir until completely dissolved, about 3 minutes. Cool until lukewarm, about 5 minutes. Whisk in the yogurt until well blended. Pour the panna cotta mixture into the cooled tart shell. Place in the refrigerator until set, approximately 4 hours.

Store in the fridge – keeps well overnight for breakfast the next morning :)

fullsizeoutput_1ffe

Tis the season for festive desserts

fullsizeoutput_1f15

Happy December!

fullsizeoutput_1f0f

Time for the full-tilt holiday jungle madness to start. I do love this time of year though, even if it means that going to the store becomes an exercise in all kinds of patience. It’s so pretty though, with the cold weather, trees and lights everywhere, and the RAIN! We’ve been getting so much, and I just love it. Even the streetlights reflecting in the wet pavement look festive. Besides that, it’s the season for festive desserts and pretty baked goods! (not that I really need an excuse, but whatever)

fullsizeoutput_1f12

I just put up my tree! I am one of those “nothing Christmas-y before the first of December” people, but here we are – I happened to have time after seeing fave human yday to go grab a tiny tree, and it is currently brightening my living room.

fullsizeoutput_1efa

fullsizeoutput_1f0d

So! This tart!

fullsizeoutput_1ef6

It immediately became a huge fave of C’s and mine; it is tart, but just lightly sweet enough – we both love cornmeal anyway so that part is an easy sell. For the filling, thinly sliced apples are layered over chunky cranberry compote and then everything is submerged in a really simple coconut custard before baking. It sounds complicated, but I promise it isn’t! As with almost everything I make, it is great for dessert with ice cream, and equally great for breakfast.

fullsizeoutput_1efe

As per usual, C and I ate this as part of a very late brunch after hitting the gym for several hours – I was SO ready for all kinds of food at that point (and shaky! We’ve gotten back into climbing, and though my muscle memory is pretty good, my forearms and fingers are going through some serious reconditioning!)

fullsizeoutput_1f02

fullsizeoutput_1f1a

Happy holiday season! Do yourself a favor and whip up a quick cranberry tart: your tastebuds and your loved ones will thank you :)

fullsizeoutput_1f13

fullsizeoutput_1f06

Apple Cranberry Custard Tart on a Cornmeal Coconut Crust

Tart, lightly sweet, and perfect for the holiday season. Thinly sliced apples are layered on cranberry compote, and a simple coconut custard is poured over the whole thing before baking. Gluten free, dairy free, and refined sugar free. Yield: 1 9″ tart, serves somewhere around 6. A Wait are Those Cookies original.

fullsizeoutput_1f0a

For the crust:

1.5 c almond flour
1/4 c unsweetened shredded coconut
1/2 c cornmeal
heaping 1/4 tsp sea salt
1/2 tsp baking soda
2 tsp vanilla extract
2 tbsp pure maple syrup
6 tbsp coconut oil, melted

In a large bowl, stir together almond flour, shredded coconut, cornmeal, sea salt, and baking soda. Add in vanilla, maple, and melted coconut oil, and stir until completely combined. The dough will look crumbly, but you’ll be able to press it together with your fingers.

Preheat the oven to 350, and lightly grease a tart pan with coconut oil. Press the crust into the plate and up the sides with a spoon or your fingers, creating a smooth edge (or not, your call!). Poke the bottom with a fork a few times, and bake for 15 minutes. Remove and let cool for a few minutes. Increase oven temp to 375.

For the filling:
2 cups fresh or frozen cranberries
1 tbsp maple syrup
zest of 1 lemon
1/4 tsp nutmeg
3 tsp vanilla extract, divided
1/4 tsp almond extract
2 eggs
1 teaspoon tapioca starch
1/2 cup full fat coconut milk
2 medium apples, peeled (optional), cored and thinly sliced*

* I used granny smith; pink lady or gala would be nice here too

Combine the cranberries, maple, lemon zest, and nutmeg in a small saucepan and cook over medium heat for 3 minutes or until cranberries pop and sauce thickens slightly. Remove from heat and stir in the almond extract and 2 tsp of vanilla extract. Let cool slightly.

Whisk together the eggs, tapioca starch, coconut milk, and 1 tsp vanilla.

Spread the cranberry compote over the bottom of the tart crust. Arrange the apple slices over the top, and pour custard over everything. Sprinkle with a bit of coconut sugar if desired, but totally optional.

Bake at 375 for 30 to 35 minutes until custard sets and apples brown. Let the tart cool for at least 10 minutes before removing it from the ring and cutting into it. Refrigerate if not serving immediately; keeps well in the fridge overnight.

fullsizeoutput_1f01

Let’s get crackin’

fullsizeoutput_1eb0

Oh heavens, the holiday market shopping madness has already begun! I rather forgot this was the last weekend before Thanksgiving… Whole Foods is already at full-tilt insanity. It’s all good though, I don’t think I need to go back until after the holiday (ha. famous last words).

fullsizeoutput_1eae

It’s time for all things pumpkin, sweet potato, apple, and cranberry! I love the run of late autumn/holiday seasonal baking. I will say though, things can get a little one-note with all of the cinnamon-nutmeg-ginger combinations out there, which is why I especially love this pie. It’s light on the spice, but the cinnamon and ginger are present just enough to give it that seasonal vibe. Plus, it’s purple! Naturally! What’s not to love.

This thing obviously cracked like crazy (it cooled too fast in my apartment…might, *ahem* be a little cold in here?!) but I’m embracing its imperfections! It was delicious, and, like human beings, is unique and imperfect in its own way.

fullsizeoutput_1eb1

Interestingly, it lightened up a lot in color after baking – see below photo! That was taken just over 24 hours after baking. The lighting is a bit different of course, but it was fun watching the color change.

IMG_0407

C and I both loved this one, a LOT. So much so that it might make another appearance this week for Thanksgiving! We’ll see. Regardless, we ate it for dessert and of course for breakfast, as we hibernated away from the bad air.

fullsizeoutput_1eb8

I was traveling in SoCal for work last week and avoided some of it, but we’re still under a big blanket of smoke. The sunsets have been incredible, but that’s small comfort when outside is essentially verboten.

IMG_0340

IMG_0330

fullsizeoutput_1e91

My heart just breaks for those displaced by the terrible fires to the north of us and my beautiful state – we are on our 10th day of extremely unhealthy air quality and choking smoke in the Bay Area, and I can only imagine what it’s like closer to the fires. Sending all the good vibes to those who need them, though I know that isn’t nearly enough.

fullsizeoutput_1eb3

Hold your loved ones, and bake them things – it is always the little kindnesses that are the most appreciated!

fullsizeoutput_1eb6

Purple Sweet Potato Cheesecake Tart on a Chocolate Coconut Crust

Perfect for the holidays! Only lightly sweet – as always – and I love the purple sweet potatoes for their natural color. This comes together in a snap; you can always use regular sweet potato puree, or even pumpkin. This is kind of like a cheesecake, but uses yogurt instead of cream cheese for a lighter dessert. Yield: 1 9″ tart, serves 6-8 realistically or two really hungry people for dessert & breakfast the next morning :) Filling is adapted from the Roasted Root, here!

fullsizeoutput_1eac

For the crust:

1.75 c almond flour
1/3 c unsweetened cacao powder
1/4 c unsweetened shredded coconut
heaping 1/4 tsp sea salt
1/2 tsp baking soda
2 tsp vanilla extract
2 tbsp pure maple syrup
4 tbsp coconut oil, melted
1/4 c dark chocolate, melted

In a large bowl, stir together almond flour, cacao powder, coconut, sea salt, and baking soda. Add in vanilla, maple, and melted coconut oil and stir until completely combined. The dough will look crumbly, but you’ll be able to press it together with your fingers.

Preheat the oven to 350, and lightly grease a tart pan with coconut oil (you can also use a pie pan; I like the tart pans with removable rings). Press the crust into the plate and up the sides with a spoon or your fingers, creating a smooth edge (or not, your call!). Poke the bottom with a fork a few times, and bake for 15 minutes.

For the filling:

1 cup pureed purple sweet potato*
1 cup whole milk, plain yogurt (I use Straus European style – it’s pretty runny)
3 eggs
1/4 c pure maple syrup
1 teaspoon pure vanilla extract
2 tablespoons tapioca flour*
1-1/2 teaspoons ground cinnamon
1/8 teaspoon allspice
½ teaspoon ground ginger
1/4 teaspoon kosher salt

* I boil them; you could also roast & mash them – either way is fine!

Add all of the ingredients for the filling to a food processor or blender and blend just until combined. Pour into the prepared crust and bake at 350 for 25-30 min until the center is set. Let cool completely, then refrigerate until serving.

Keeps well overnight in the fridge; probably best eaten within two days of baking, but I really doubt ours will even last that long :)

A figgin’ awesome tart (and some bad puns)

IMG_0053

Hello and happy weekend!

fullsizeoutput_1db2

We’re having beautiful fall weather over here today – it’s starting to cool down during the days (which I love) and the nights have been appropriately chilly. As such, I wanted to get on the last of fig season before they’re gone from the markets!

See fig. 1:

hahah see what I did there!! Figs?! Fig. 1?! Bahaha. Alright, I’ll stop torturing you… moving on.

fullsizeoutput_1da1

This tart is basically breakfast disguised as dessert. It has barely any added sweetener (maple) and it’s made of yogurt and eggs! C and I both LOVED the crust – I mean, we’re suckers for anything cornmeal anyway, but the combination of cornmeal and rosemary is just perfectly savory against the yogurt custard. I have a thing for rosemary in desserts anyway, so that was a given for me!

fullsizeoutput_1d9e

We had it both for dessert and breakfast (of course) – I loved it with ice cream, but it is equally delicious alongside eggs and kale for breakfast.

fullsizeoutput_1dbb

fullsizeoutput_1dbe

A few photos, just because they’re pretty, and I like to keep my little corner of the internet as visually appealing as possible! There is a lot out there these days – let’s keep this little spot happy.

fullsizeoutput_1db8

fullsizeoutput_1dc3

I can’t wait to get into the fall produce! I have some late season peaches that I froze and I feel I need to use, but apples and pumpkin are calling my name… we’ll see what sounds good by the time next weekend rolls around. In the meantime, I highly suggest you make this! It’s a very lowkey dessert – the filling comes together in about three minutes, and the whole thing (from crust to finish) takes just over 30 minutes in the oven.

fullsizeoutput_1da6

fullsizeoutput_1d9c

I love this time of year – the shorter days, earlier nights, and crispy air make me want to curl up at home with a good book and something in the oven.

fullsizeoutput_1da0

Yogurt Custard Tart on a Rosemary Cornmeal Crust

Lightly sweet – this is basically breakfast! The filling is made of greek yogurt and eggs with a bit of vanilla and almond extracts. The crust is wonderfully savory, with the cornmeal and rosemary – a perfect compliment to the custardy filling. It only requires just over 30 minutes in the oven, so it’s ideal for those times when you need a quick dessert – just make sure to let it set before slicing. Yield: 1 9″ tart. Serves: up to 8. The crust is a Wait are Those Cookies original; the filling is adapted from Food52, here.

For the crust:

1.5 c almond flour
1/4 c unsweetened shredded coconut
1/2 c cornmeal
heaping 1/4 tsp sea salt
1/2 tsp baking soda
2 tsp vanilla extract
1.5 tbsp pure maple syrup
7 tbsp coconut oil, melted
1 tbsp finely chopped rosemary

In a large bowl, stir together almond flour, shredded coconut, cornmeal, sea salt, and baking soda. Add in vanilla, maple, melted coconut oil, and rosemary, and stir until completely combined. The dough will look crumbly, but you’ll be able to press it together with your fingers.
Preheat the oven to 350, and lightly grease a pie plate with coconut oil. Press the crust into the plate and up the sides with a spoon or your fingers, creating a smooth edge (or not, your call!). Poke the bottom with a fork a few times, and bake for 15 minutes. Remove and let cool for a few minutes.

For the filling:
3 eggs
2 tsp pure vanilla extract
1/4 tsp almond extract
2 tbsp maple syrup
1.5 c (340 grams/12 ounces) plain full fat Greek yogurt
1 egg yolk, whisked with a tiny pinch of salt

In a medium bowl whisk the eggs and vanilla. Whisk in the yogurt. (The order in which the ingredients are mixed makes a difference in the smoothness of the filling, so it’s yogurt into eggs rather than eggs into yogurt!) When the crust is ready, remove it from the oven and turn the temperature down to 300°F. Brush the bottom of the crust with just enough of the beaten egg yolk to make a thin (moisture-proofing) coating. Return the crust to the oven for 1 minute to set the yolk. Remove the crust from the oven again. Scrape the filling into the hot crust and spread it evenly. Return the tart to the oven and bake until the filling is set around the edges but, when the pan is nudged, quivers like soft Jell-O in the center, 20-25 minutes. Check often in the last few minutes, as over-baking isn’t fun.

Cool the tart completely, in the pan, on a rack. Refrigerate if not serving within 3 hours. Top with figs, pomegranates, candied ginger, rosemary springs – anything that suits your fancy!

Store leftovers covered in plastic wrap in the fridge; keeps well overnight.

fullsizeoutput_1da8

Behold, fave human’s vision of the tart’s perfect angle:

fullsizeoutput_1dc4

fullsizeoutput_1db5

Part of the SF Pie-Line

IMG_1226

Good morning!

I made another pie for auction this weekend, for my favorite Lamplighters! It feels so good to be able to help out a group of people and an organization that I love so much – on account of both the fave human and my good friends!

IMG_1234

fullsizeoutput_1d65

I’ll keep this short today but I wanted to share pictures – I am SO proud of how this one came out, and I was definitely stressing the details.

Process pictures! Sorry for the crappy lighting – I was definitely more focused on making pie than I was taking good photos at that point.

IMG_1186

IMG_1187

IMG_1188

IMG_1189

IMG_1191

fullsizeoutput_1d33

fullsizeoutput_1d42

fullsizeoutput_1d43

I used my usual pie recipe, found here. I made a double batch of dough so I’d have enough, plus some leftover for any potential last minute patch jobs (thankfully wasn’t needed!)

fullsizeoutput_1d46

Have a great week!

fullsizeoutput_1d5f

A perfect matcha

fullsizeoutput_1d1d

Hello!

fullsizeoutput_1cef

I made a green thing! It’s been awhile but I LOVE matcha, so I’m really overdue. This was DELICIOUS – we ate all but 1/4 of it in two sittings, haha! To be fair, we hiked this morning so it was part of a well-earned post-hike brunch. Also eggs. Also kale!! Of course. I know, you’re shocked. It was a beautiful (if a bit hot, and very windy) day – the air was so clear.

fullsizeoutput_1d26

fullsizeoutput_1d1f

I highly recommend this dessert if you love matcha – it’s very matcha-forward in the best way. I love matcha and chocolate together; they’re a matcha made in heaven! HAHAH see what I did there, I crack myself up. It’s also light, and makes for both a great dessert and awesome breakfast.

fullsizeoutput_1d0f

fullsizeoutput_1cf2

It’s October already! Can someone explain that? Jeez, September went fast. I did go to Disneyland though, that was fun! It’s only been about a decade since I was there last. While there, I had ice cream for lunch (more green things), which was really an inspired lunch choice, I must say.

fullsizeoutput_1c7a

IMG_1009

Anyway – this matcha panna cotta tart is grain free, gluten free, refined sugar free! It can be dairy free too, if you swap out the greek yogurt for something nondairy. Easy to put together and requires only about 15 minutes of oven time, which is alway a bonus.

fullsizeoutput_1d0d

fullsizeoutput_1d10

Happy fall!

fullsizeoutput_1d24

fullsizeoutput_1d19

Matcha Panna Cotta Tart

For those who love matcha! This is not for the faint of matcha hearted – we both loved it. The earthiness of the matcha plays really well against the cacao crust. Grain and gluten free, refined sugar free. Dairy free option – swap out the greek yogurt for something nondairy (coconut greek would work well here). Yield: 1 9″ tart, serves 2 very hungry humans over two sittings or 6-8 normal humans ;)

For the crust:

1 c almond flour
3/4 finely ground walnuts (blitz them in the food processor)
1/3 c unsweetened cacao powder (or cocoa powder)
1/4 c unsweetened shredded coconut
heaping 1/4 tsp sea salt
1/2 tsp baking soda
2 tsp vanilla extract
2 tbsp pure maple syrup
4 tbsp coconut oil, melted
1/4 c dark chocolate, melted

In a large bowl, stir together almond flour, walnut meal, cacao powder, coconut, sea salt, and baking soda. Add in vanilla, maple, and melted coconut oil and stir until completely combined. The dough will look crumbly, but you’ll be able to press it together with your fingers.

Preheat the oven to 350, and lightly grease a pie plate with coconut oil. Press the crust into the plate and up the sides with a spoon or your fingers, creating a smooth edge (or not, your call!). Poke the bottom with a fork a few times, and bake for 15 minutes.
Remove and let cool completely.

With a pastry brush or a spoon, coat the bottom the crust with an even layer of melted chocolate. Refrigerate until chocolate sets, about 10 minutes.

Panna Cotta:
1 package unflavored powdered gelatin
1.5 cup full-fat coconut milk, divided
1 tbsp vanilla
1/4 cup maple
Scant 1/4 tsp sea salt
2 tbsp matcha powder
1/2 cup plain greek whole-milk yogurt
more melted chocolate, for drizzling (just a few tbsp needed – use more for serving if desired)

In a small bowl, sprinkle the gelatin over 1/4 cup of the coconut milk. Let stand without stirring until the gelatin is moistened, about 10 minutes.

Pour the remaining 1.25 cups of coconut milk into a small saucepan. Add vanilla, maple, salt, and matcha powder into it. Bring to a simmer over medium heat, stirring consistently. Remove from the heat. Add the gelatin mixture and stir until completely dissolved, about 3 minutes. Cool until lukewarm, about 5 minutes. Whisk in the yogurt until well blended. Pour the panna cotta mixture into the cooled tart shell. Drop melted chocolate onto the surface of the tart and swirl with a knife or a toothpick. Place in the refrigerator until set, approximately 4 hours.

Store in the fridge – keeps well overnight for breakfast the next morning :)

fullsizeoutput_1d1e

Birthday Pandowdy!

IMG_0834

I had a birthday!

fullsizeoutput_1c30

It was lovely – C and I hiked, went to the symphony for some Stravinsky and ate a bunch of good things (like matcha verbena ice cream omg yum) and this thing! He also gave me some beautiful flowers – all around it was a wonderful birthday!

fullsizeoutput_1c4e

fullsizeoutput_1c53

fullsizeoutput_1c5b

fullsizeoutput_1c05

fullsizeoutput_1c5c

fullsizeoutput_1c56

fullsizeoutput_1bf3

fullsizeoutput_1c5a

Of course, true to form, I made my own birthday dessert! No surprises there, I don’t think. I haven’t had much of a chance to bake (other than a wedding cake, which was SO fun) lately, so it felt good to get this out – I’m overdue!

fullsizeoutput_1c6e

Besides, I love pandowdies – they are pie’s unfussy cousin! So very easy, and so fun. Another excuse to play with your food! Cutting up the crust and flooding it with cream is my favorite part – it’s simultaneously soothing and satisfying.

fullsizeoutput_1c2e

I sliced and froze a bunch of peaches over the last month while they were at their peak – frozen peaches do really well in this, as long as you don’t thaw them first – which makes for even easier baking, since you just toss them in some lemon zest and a few other things and go! The only bit of this that requires more planning is the crust refrigeration, but it can be made the night before or just an hour before, so you have some flexibility.

fullsizeoutput_1c42

I highly recommend this for breakfast after hiking – it’s filling and delicious without being overly heavy. Pair it with some whole milk (not like I speak from experience or anything!) and go to town. Whole grain, refined sugar free – as C said, this is no namby pamby fruit situation! We’re just into the tail end of peach season – enjoy it while it lasts!

fullsizeoutput_1c34

Enjoy the rest of your week!

fullsizeoutput_1c32

Swamped Peach and Blackberry Pandowdy

No namby pamby fruit here! This is a very fruit-foward dessert, so make it with the ripest, most perfect fruit you can find! Best for late summer/early autumn peaches. Whole wheat, refined sugar free goodness. Pandowdies are the unfussy cousin of pie – no bottom crust nonsense here! Yield: 1 9″ pandowdy, serves 6-8.

For the crust:

1.25 c whole wheat pastry flour
1/4 c cornmeal
1 tsp sea salt
zest of 1 lemon
9 tbsp unsalted butter, cubed into small pieces
3-5 tbsp ice water

Add whole wheat flour, cornmeal, sea salt, and lemon zest to a large bowl and stir to combine. Add in butter, toss to coat, and use your fingers or a pastry cutter to cut in the butter until a coarse mixture forms and the butter chunks are the size of peas (I prefer to use my fingers for this since I a) like the feeling of having my hands in flour and b) have greater control over butter-chunk sizing). Add ice water 1 tbsp at a time until the dough just begins to hold together when pinched between two fingers. It’ll look a little crumbly, but that’s fine.

Toss the dough out onto a clean counter or wax paper (I prefer the counter method; less fuss), and use a bench scraper to gather the dough into a rough rectangle. Using the heel of your hand, smear the last fourth of dough away from you, against the counter. Repeat until you smear all the dough (see? playing with your food!), then gather the dough back into a rectangle and repeat, smearing it all away from you. The dough should be cohesive by this point, so gather it up into a disc, wrap in plastic, and stick it in the fridge for at least an hour, or up to overnight.

For the filling:

3 c peaches, sliced*
1.5 c blackberries*
1 tsp vanilla
1/4 tsp almond extract
1.5 tbsp arrowroot starch
juice & zest of 1 lemon
1 tbsp maple syrup
egg white & 1 tbsp coconut sugar for glaze

1 egg yolk
3/4 c heavy cream
1 tsp vanilla

*I used some that I had frozen earlier; if you do as well, bake them straight from frozen instead of letting them thaw beforehand

In a large bowl, combine the peaches and blackberries. Add 1 tsp vanilla, arrowroot, lemon juice, and maple, and toss to combine. Pour all this goodness into your pie plate or skillet of choice – 9″ pie plates are fine as long as they’re the deeper variety; a 10″ cast iron skillet would also work well.

Preheat the oven to 400. Roll out the dough to be roughly circular (no need to be perfect here, like I said – pandowdies are pie’s unfussy cousin), and lift the dough onto the fruit. Tuck in the edges, leaving a rim of dough between the edge of the pie dish and the fruit – I crimped mine because I’m an overachiever and I also had extra dough, but no need to do that. Make a few slits for steam to vent, brush the top with egg white and dust with coconut sugar. Pop the whole beautiful thing into the oven for 40 minutes; best if you line the rack beneath with foil or a large baking sheet – the juices runneth over!

In a liquid measuring cup with a spout, measure the cream, beat in the egg yolk and 1 tsp vanilla, and let it sit at room temp.

Once you hit the 40 minute mark, take the pandowdy out, and use a sharp knife to break up the crust, thus ‘dowdy-ing’ its looks (now begins the really fun part). Carefully pour the cream into the new breaks in the crust, filling each – some of the cream will pool under the crust, and some will sneak out on top, which is fine. Just be careful not to drown the whole crust! Go slow, and fill each vent/break. Stick the pandowdy back in the oven, and bake for another 10 minutes, until the cream is just set and barely jiggles in the center. Let cool completely before serving; it will be gloriously juicy and delicious so might I suggest serving it in bowls? Ice cream is… optional, sort of, if you’re out of cream; otherwise, this can be served even swampier with extra cream poured over the top. You do you!

Store any leftovers (who are you) covered in the fridge, but make sure to save some for breakfast. You’ll thank me later!

fullsizeoutput_1c1a

fullsizeoutput_1c66