This tart is made of grapefruit. Therefore, BREAKFAST!

img_5259

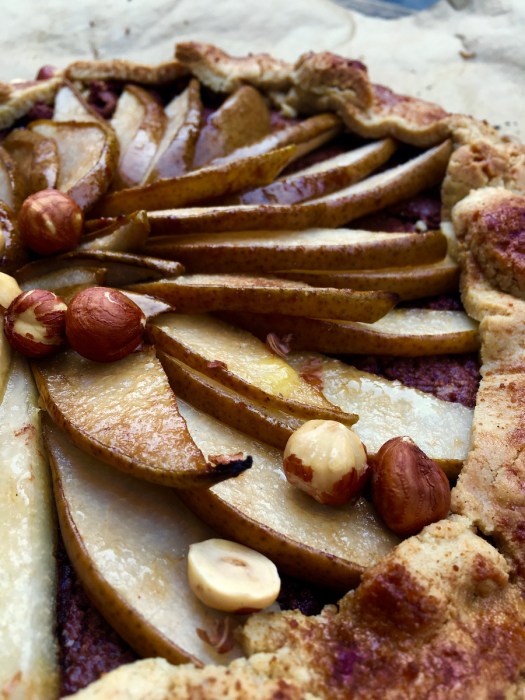
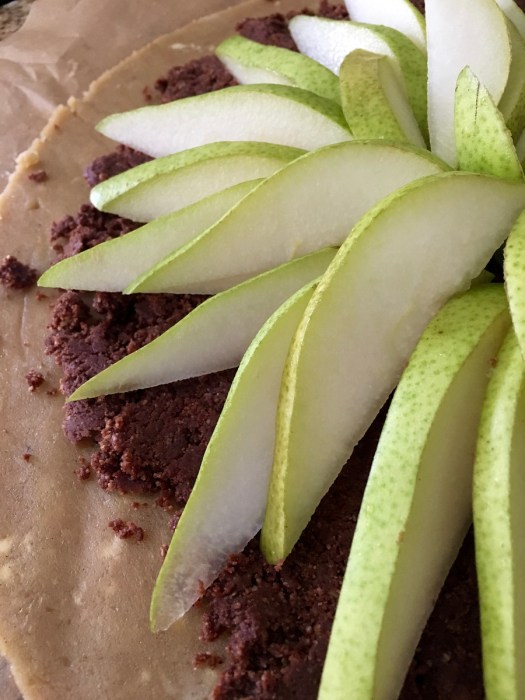
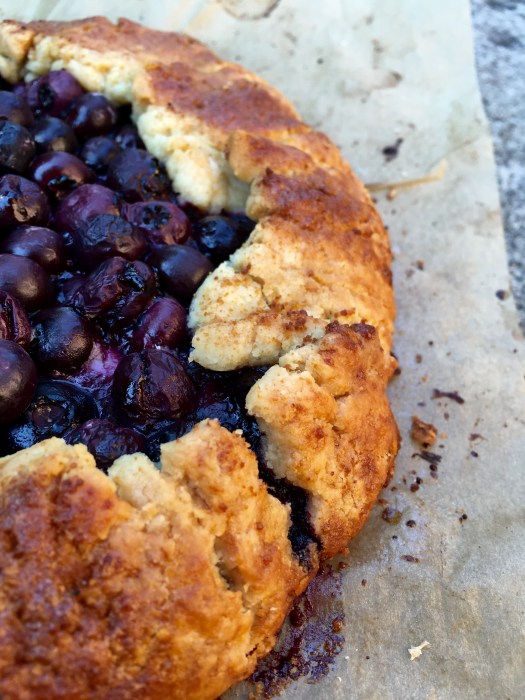
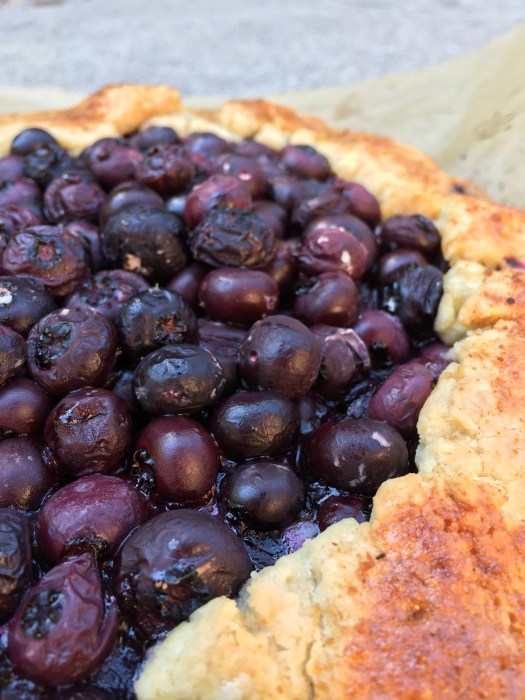
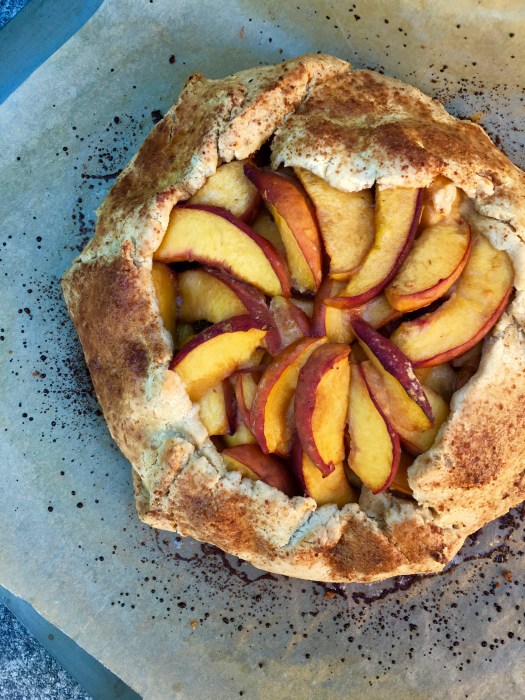
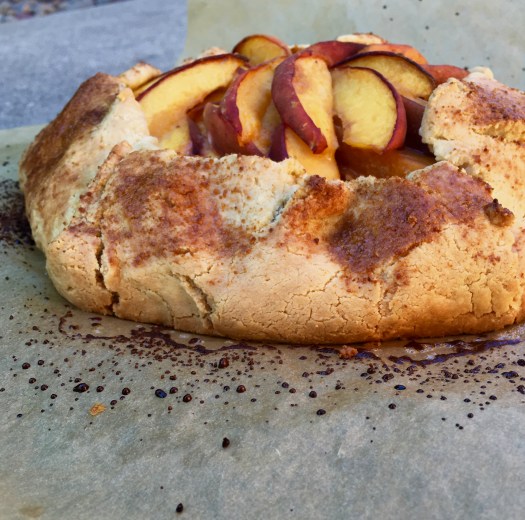
It’s December! I doubt you need reminding, but there it is. Despite the slight annoyances of increased traffic, impacted post offices and whatnot, I do love this time of year, especially all the lighted buildings in the city and the excuse to have a giant tree in my living room.

img_5250

img_5242

AND the baking. Because holidays = baking & eggnog, a well known fact. I haven’t gotten to the eggnog (give it time) but at least I’ve got the baking on lock.

img_5248

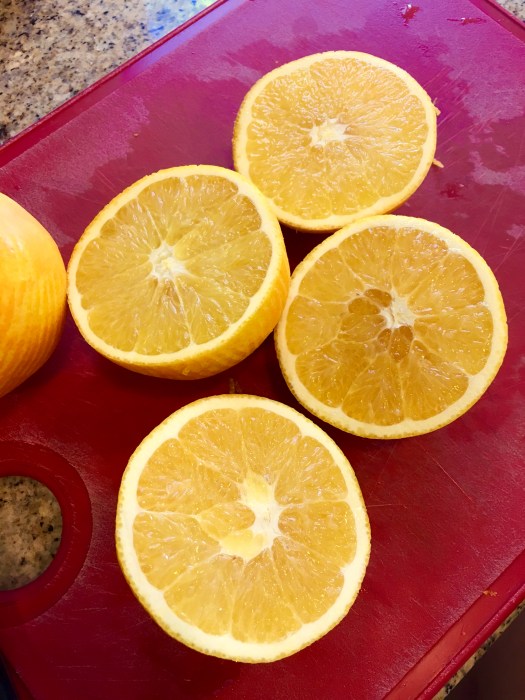
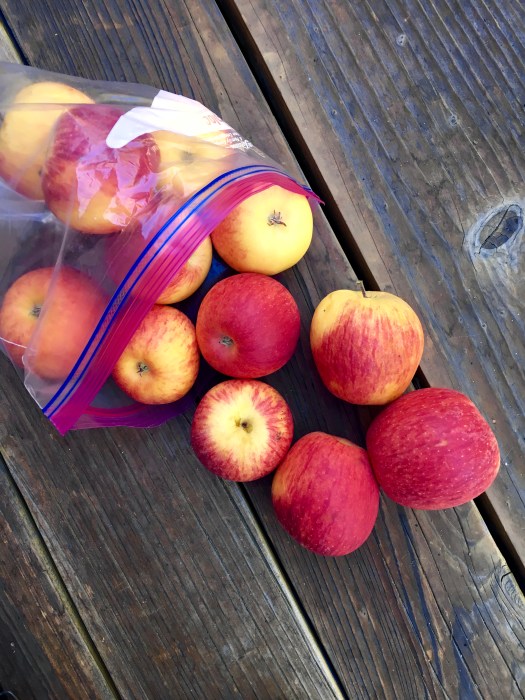
I’m on a citrus run over here (scurvy? pshhhh no) — I’ve had requests and I’ve been loving fresh citrus taste. This makes two in a row, and there’s at least one more coming, probably lemon next time — can’t stop won’t stop!

img_5249

I debated calling these bars vs a tart… but tarts are fun I can call it whatever I want! Besides, this slices into wedges which makes me want to call it a tart. Bars are square. Right?! Right. We’ll go with tart. ALSO hahahaha grapefruits are kind of tart. You see what I did there?!

…. Moving on, terrible pun notwithstanding.

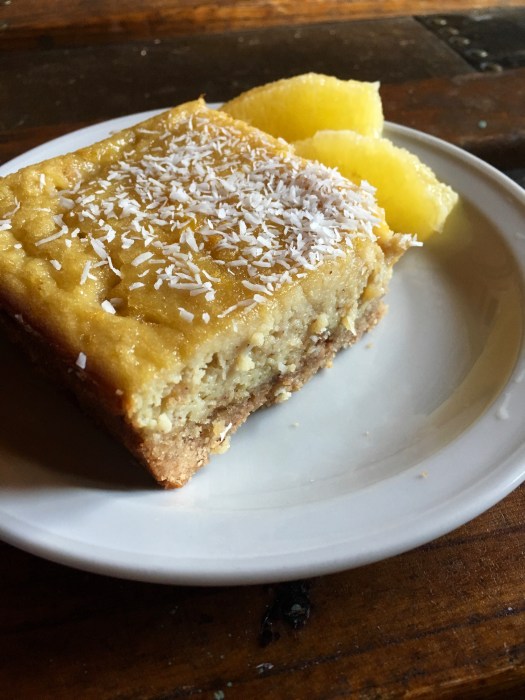
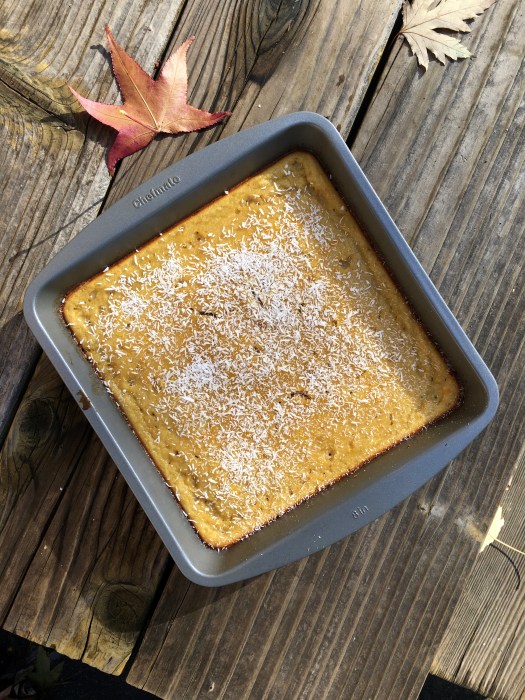
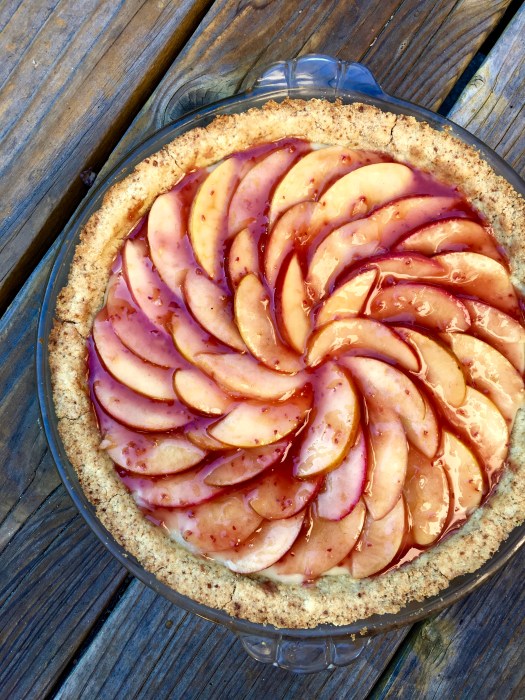
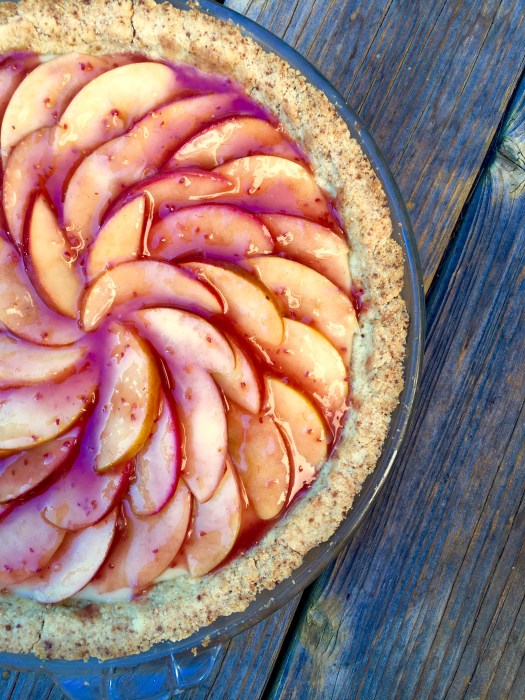
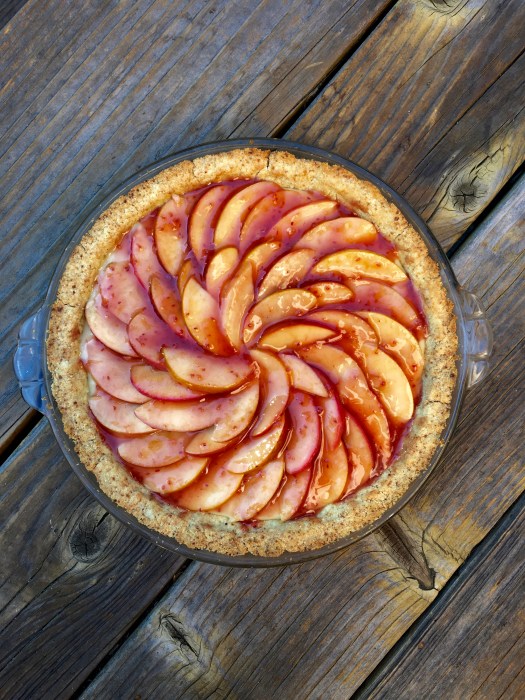
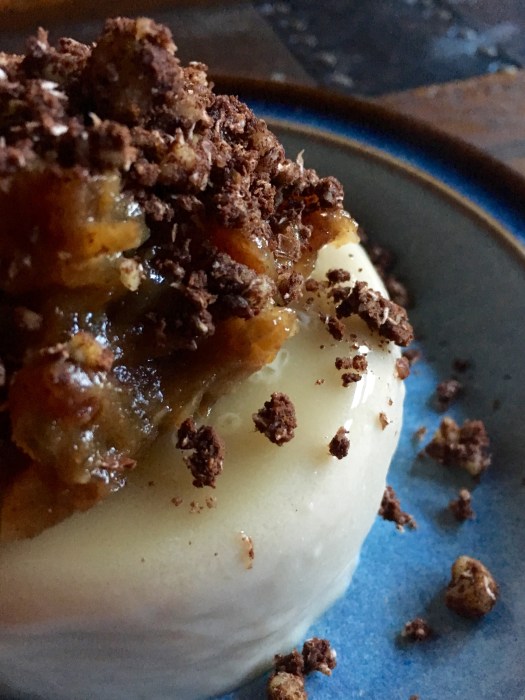
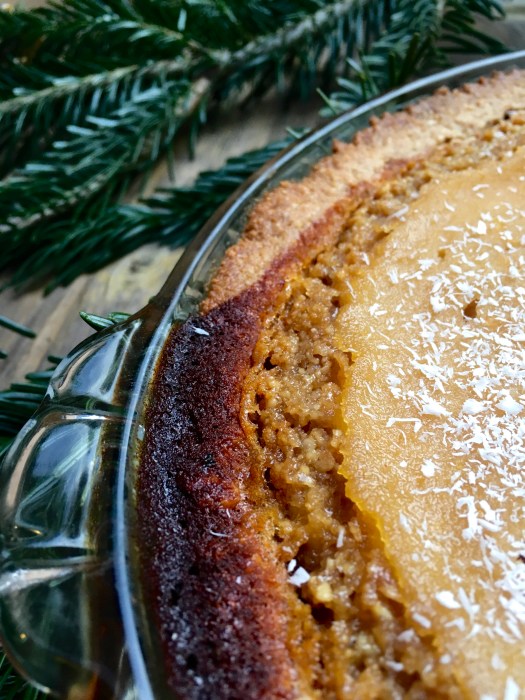
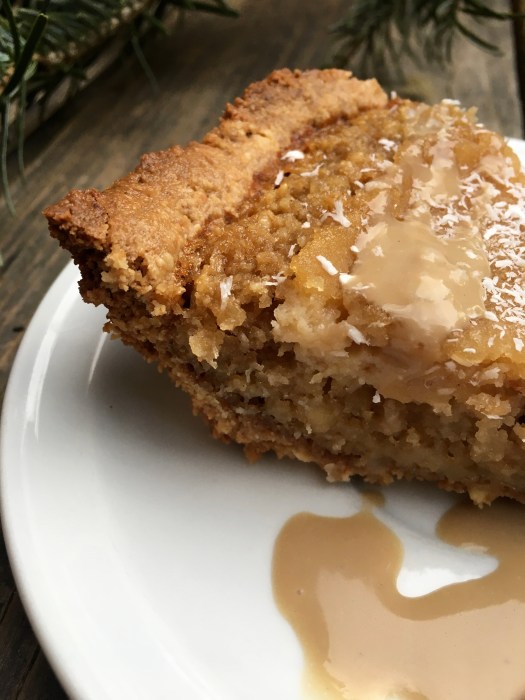
This tart is spectacular (and easy!) – if you love grapefruit, these are for you. In the course of my recipe brainstorming, I discovered that caramel is a flavor affinity for grapefruit, which seemed rather counter-intuitive, but I decided I was going to try it anyway. Good thing too because the grapefruit – caramel combination of these bars is SO GOOD IT MUST BE WRITTEN IN ALL CAPS. Not shouting… just for emphasis! ha. But seriously — if you like grapefruit, get on these. They will brighten up your day and make your kitchen smell amazing! The tart has the consistency of lemon bars, with the crust adding a great textural counterpoint. And then there’s caramel… of course.

img_5237

Besides that, it’s paleo, gluten & grain free, refined sugar free and dairy free – enjoy with abandon! ‘Tis the season :)

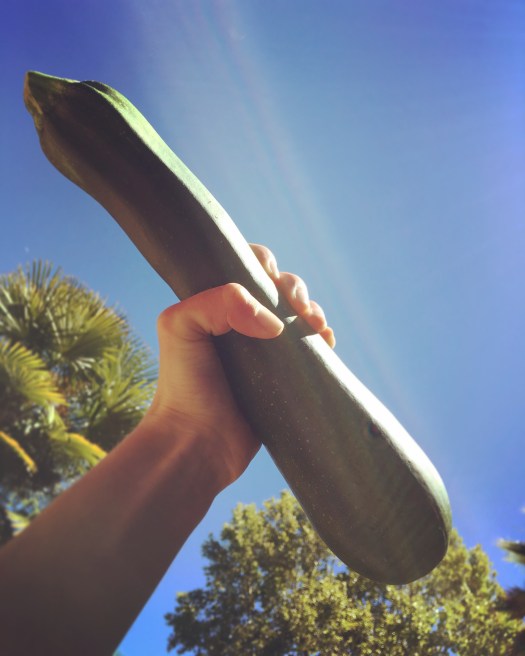
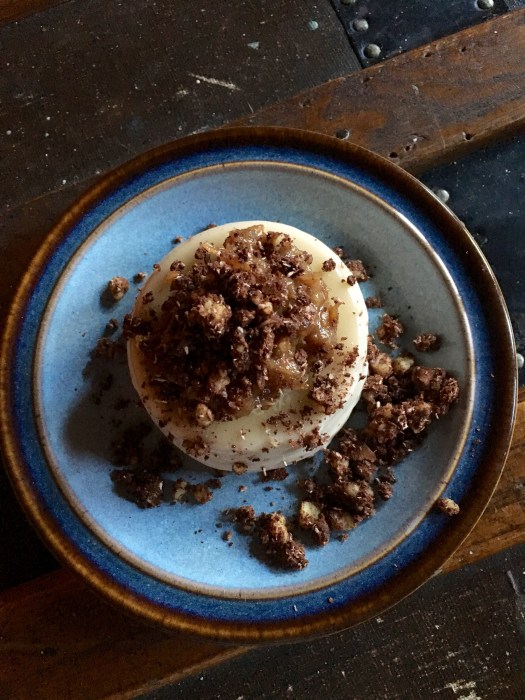
Jessie would like to say hello:

img_5196

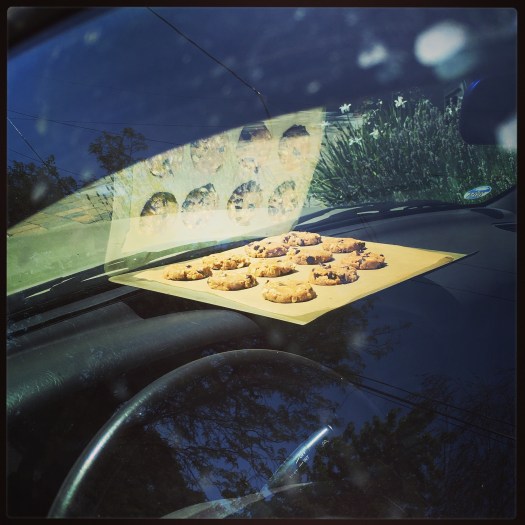
The latest… plus fun at the tree lot:

img_5198

img_5200

Happy December!

img_5253

Side note, this tart is perfectly acceptable breakfast food. Because, grapefruit!

img_5238

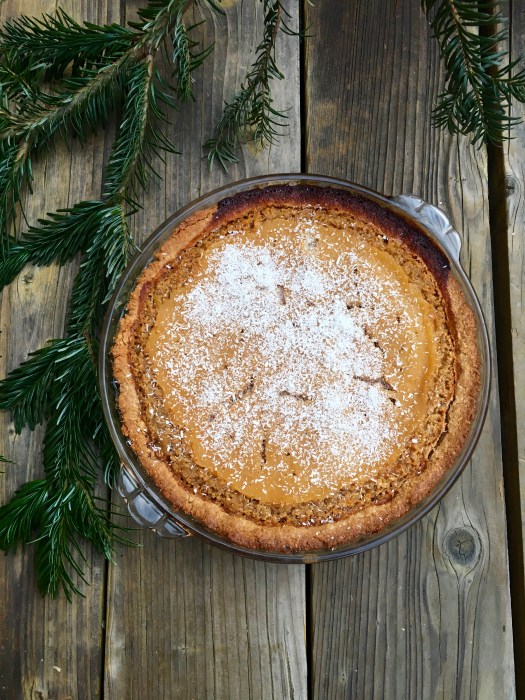
Grapefruit Tart on a Coconut Cashew Crust with Coconut Caramel Sauce

A Wait are those Cookies original! Full of grapefruity flavor (if you love grapefruit, these are absolutely for you!) that is complemented by the coconut and cashew crust. Serve with vanilla ice cream of choice for maximum flavor happiness. Gluten & grain free, dairy free, refined sugar free, paleo depending on your definition. Yield: 1 9″ dish; serves as many as your discretion dictates (that could be 2. Or 8!)

For the crust:

  • 1.5 c cashew flour
  • 1/2 c unsweetened shredded coconut
  • 3/4 tsp baking soda
  • heaping 1/4 tsp fine sea salt
  • 1/3 c unsalted cashew butter
  • 1.5 tbsp pure maple syrup
  • 2 tbsp melted coconut oil
  • 2 tsp vanilla extract

For the bars:

  • 4.5 eggs*
  • scant 2/3 c runny honey
  • zest of 1 grapefruit
  • 1/4 + 1/8 c fresh grapefruit juice
  • pinch of sea salt
  • 4.75 tbsp coconut flour
  • 2 tsp vanilla extract

* to achieve half an egg: crack an egg into a small bowl and whisk it; then either measure or eyeball half and use that. or just use a whole one as long as it’s small, I doubt it would affect the consistency of the bars all that much…

For the caramel sauce:

  • 1 can full fat coconut milk
  • 1/3 c coconut sugar
  • 1/2 tsp sea salt
  • 1 tbsp coconut oil
  • 1 tbsp vanilla extract

For the caramel (best made at least one day ahead):

Combine coconut milk, coconut sugar, and sea salt in a small saucepan over medium-high heat. Leave uncovered and bring to a boil, then lower the temp and continue to let the sauce simmer for 40-45 minutes, stirring occasionally. Once the sauce has reduced, thickened and will coat the back of a spoon, remove from heat and stir in coconut oil and vanilla. The caramel will lighten in color and thicken slightly if you keep it overnight in the fridge (though it is still relatively runny caramel) — store in an airtight jar for up to two weeks if not using immediately.

Preheat the oven to 350, and grease a deep 9″ pie dish with coconut oil.

In a large bowl, stir together cashew flour, coconut, baking soda, and sea salt. Add in cashew butter, maple syrup, melted coconut oil, and vanilla, and stir until combined and crumbly. Press the crust dough evenly into the prepared pan and up the sides, and poke with a fork a few times. Bake for 15 minutes. Remove and set aside when done.

While the crust is baking, make the filling! In a large bowl, whisk together eggs, honey, grapefruit zest and juice, sea salt, coconut flour (sifted if lumpy) and vanilla until smooth. Pour into the parbaked crust, and bake for 30-35 minutes. The top should be mostly firm and the filling set, with just a small amount of wiggle (it’ll firm up as it cools). Let cool completely and eat immediately or chill in the fridge for later (I like it cold!) — serve with vanilla ice cream and caramel for maximum happiness. Store any leftovers in the fridge, though I challenge you to actually have any leftovers!

img_5245

Orange bars: like a creamsicle only WAY better

img_5192

Hello!! I have citrusy goodness for you today, because this time of year is all about the citrus and scurvy is bad news.

Besides that, I used to LOVE 50/50 bars when I was a kid (you know, those popsicle-looking things that were orange on the outside and vanilla on the inside? also known as a creamsicle?) and I wanted something that tasted sort of like that, only WAY better and not filled with all the junk. So I made these!

img_5182

Orange bars with a vanilla almond crust… pair them with vanilla ice cream and they are pretty much the perfect citrus dessert.

img_5179

img_5183

Let’s see, what else is new… more drawing, of course — still on the SF series, naturally.

img_5168

I think that’s about it, otherwise I’m business as usual over here — didn’t really bake diddly for Thanksgiving so I’ll have to make up for it at Christmas, which is (gasp) rapidly approaching.

img_5187

Citrus was requested and I was thinking of doing something along those lines anyway, but I really wanted to do something besides lemon. I LOVE lemon, but… it’s always the favored child when it comes to citrus desserts. Let’s let oranges have their time in the limelight, ya know? …. Limelight? Really?? That just happened. Let’s see how many citrus references can fit in one sentence…

img_5186

Anywayyyy. Make these! Eat them! Your neglected oranges will love you, and you’ll get a nice blast of creamsicle nostalgia.

img_5180

Orange Bars with Vanilla Almond Crust

(Otherwise known as Creamsicle bars but that’s probably trademarked…)

Gluten & grain free, refined sugar free, easy dairy free option, probs paleo depending on your definition… all around delicious. I was going for the creamsicle flavor profile here and I haven’t eaten a 50/50 bar in years, but I’m pretty sure this really close (and, frankly, better tasting… let’s be real). These bars are light and citrusy, easy, delicious, and free of all the junk!

Sorry for some of the strange measurements — I prefer this in an 8 by 8 pan and I like my layers a little thicker, which is why the measurements are a little weird. Don’t forget to zest your oranges and then juice them! Nothing like attempting to zest pre-juiced oranges, it might be one of the more annoying kitchen things I’ve inadvertently done.

img_5184

For the crust:

  • 1.5 c almond flour
  • 3/4 tsp baking soda
  • heaping 1/4 tsp fine sea salt
  • 1/4 + 1/8 c unsalted almond butter
  • 1.5 tbsp pure maple syrup
  • 1.5 tbsp salted butter, softened (or coconut oil for non dairy)
  • 2 tsp vanilla extract

For the filling:

  • 4.5 eggs*
  • scant 3/4 c pure maple syrup
  • zest of 3 oranges, roughly chopped
  • 1/4c + 1/8c fresh orange juice
  • pinch of sea salt
  • 4.75 tbsp coconut flour
  • 2 tsp vanilla extract

* to achieve half an egg: crack an egg into a small bowl and whisk it; then either measure or eyeball half and use that. or just use a whole one as long as it’s small, I doubt it would affect the consistency of the bars all that much…

Preheat the oven to 350, and grease an 8 by 8 pan.

In a large bowl, stir together almond flour, baking soda, and sea salt. Add in almond butter, maple syrup, softened butter, and vanilla, and stir until combined and crumbly. Press the crust dough evenly into the prepared pan, and poke with a fork a few times. Bake for 10 minutes. Remove and set aside when done.

While the crust is baking, make the filling! In a large bowl, whisk together eggs, maple, orange zest and juice, seal salt, coconut flour (sifted if lumpy) and vanilla until smooth. Pour into the parbaked crust, and bake for 30-35 minutes. The top should be mostly firm and the filling set, with just a small amount of wiggle (it’ll firm up as it cools). Let cool completely and eat immediately or chill in the fridge for later (I like them cold!) — serve with vanilla ice cream for maximum creamsicle flavor :) Store any leftovers in the fridge.

img_5178

Let’s roooollllllll

img_5165

This is how I roooolllllllllll.

img_5158

Or something like that! I roll with rolls for dessert and for breakfast, because I am all about the treats that do double duty. These are appropriately autumnal with pumpkin and warming spices and such, and glazed pecans just sort of scream HOLIDAY TIME!!!! to me. Do you hear that, or is it just me? … don’t answer that.

Anyway, moving on. Cinnamon rolls! A winner all around, especially when there is some kind of glaze or frosting involved (which is absolutely necessary…there is no question).

img_5160

These happen to be paleo, grain free, gluten free, dairy free, and refined sugar free (everything EXCEPT taste free), so if that’s how you roll (ha. pun intended), these are for you!

Let’s see, what else is new…

More drawing!

img_5125

More photography fun:

img_5130

img_5134

Succulents! Why not.

img_5120

I don’t have much anecdotal humor for you today, so you’ll just have to content yourself with some cinnamon rolls. I highly recommend making them to be eaten for dessert… and then for breakfast! You won’t be sorry, promise.

img_5159

Grain Free Pumpkin Cinnamon Rolls with Maple Coconut Glaze and Maple Pecans

These aren’t overwhelmingly pumpkin-y, more towards the cinnamon side, but are delicious regardless. Grain free, paleo, refined sugar free, and dairy free. Roll dough adapted from Eat Something Delicious, here! Yield: 1 8″ skillet-worth of rolls; I got about 8 large rolls.

img_5157

For the dough:

  • 2 c tapioca starch
  • 1 c almond flour
  • 1.5 tsp baking powder
  • 1/2 tsp fine sea salt
  • 3 eggs*
  • 2 tbsp coconut milk*
  • 1 tsp vanilla extract
  • 1 tbsp coconut sugar

*the eggs I used were small, so I needed a few tbsp of coconut milk to bring it together — you may not need this if your eggs are larger

For the filling (This makes extra; use it to top the rolls or eat separately!)

  • 1/2 c pumpkin puree
  • 1 tbsp maple syrup
  • 1/6 c coconut sugar
  • 2 tsp vanilla extract
  • 2 tsp cinnamon
  • 1/8 tsp nutmeg
  • 1/8 tsp allspice
  • 1 heaping tbsp almond butter

For the glaze:

  • 1/4 c coconut butter, melted
  • 2 tbsp maple syrup
  • 1 runneth-over tsp vanilla
  • pinch of sea salt

For the pecans (these are great to make ahead and store for when you need them):

  • 1 c pecans, roughly chopped
  • 1/4 c maple syrup
  • pinch of sea salt

If making the pecans ahead, do that now!

Heat a large sauce pan over medium heat. Once hot, add maple — it will foam a bit when it hits the pan. Add in pecans and sea salt, stirring to combine. Keep stirring and cooking for about 3-5 more minutes, until the maple has caramelized. Line a baking sheet with parchment for easy clean up and pour the pecans out, breaking up any large chunks. Let cool completely before storing in an airtight jar.

Preheat the oven to 350, and grease an 8″ cast iron skillet, or other pan of choice. I sprinkled the bottom with a little extra coconut sugar, just for fun.

For the dough: stir together tapioca starch, almond flour, baking powder, salt, and coconut sugar. Make a well in the center and add the eggs and vanilla. Use a fork to combine until you get lots of little pieces, then get in there with your hands and knead until the dough comes together (add coconut milk here if needed; by the tsp and just until the dough comes together to avoid sticky dough). The dough should come together nicely and be stiff enough to roll out; if it’s too sticky, add a bit more starch. Flour a clean work surface and a rolling pin (or do like I did and roll out between parchment paper), and roll the dough out into a rectangle, about 1/4″ thick.

In a small bowl, make the filling: stir together pumpkin, maple, coconut sugar, vanilla, cinnamon, nutmeg, allspice, and almond butter until smooth. Spread the filling onto the rolled out dough, leaving about a 1/2″ clear on the edge furthest from you (there will be leftover filling!). Roll up the dough starting on the long side (I always try to cram as much filling in there as possible and end up with it going everywhere, so you do you!). Once the log is rolled up neatly-ish, slice it into rolls. I like to start in the middle and slice outwards to get the most even slices. Place the rolls into the skillet, so that their sides are just touching. Bake for 20-30 minutes — sorry for the range; mine stayed in much closer to 30 so that the centers of the rolls that were touching would be done all the way through — the rolls should be firm to the touch and not goopy in the spaces between them.

Remove from the oven and let cool. Make the glaze while the rolls are cooling: stir together warmed/melted coconut butter (it’s solid at room temp), maple, vanilla, and sea salt together until smooth. Alternatively, store it in a jar and dance around to mix it up. It’s way more fun, I guarantee.

If you want a true glaze and less of a frosting, pour the melted coconut butter mix over the rolls and eat immediately. Let cool to room temp or overnight if you’d rather have a consistency closer to frosting. Either is delicious!

Before serving, drizzle glaze over the rolls and top with a few pecans for decorative shenanigans. Serve with more glaze, more pecans, and vanilla ice cream because you’d be missing out otherwise, and we can’t have that!

Leftovers keep well covered on the counter overnight; in the fridge for longer storage.

img_5162

Galette for breakfast: guaranteed to improve your election day experience

img_5117

Galette and pears and hazelnuts and dark chocolate and November!

img_5107-x3

I love fall because it means pears are EVERYWHERE and I love pears so this just feels like a win-win situation. Besides that, throw in some dark chocolate hazelnut filling and put all that goodness in a cardamom crust? Sign me up. And then eat it for dessert with ice cream and then for breakfast with (what else) eggs and kale and sourdough toast? Yeeessssss please thanks.

img_5101-x3

Let’s see, what else… today is election day! Did you vote?! I voted absentee ages ago and didn’t get a sticker… they should send stickers with the ballots!

And the time changed, woohooo for not having to get up in the dark anymore! I miss the extra daylight hours but I’d rather not go to work when it’s still dark out… Jessie and I enjoyed our extra hour of snuggles:

img_5089

Pretty skies lately!

img_5111img_5091

Annnnnd I’ve been drawing again, shocker I know. I just read a study that says making art reduces cortisol levels! Which is awesome and I think I subconsciously knew that because drawing always gets me into the flow state, pretty much without fail.

img_5110-x3

But anyway, back to galette!

img_5094-x3

This sounds complicated but totally isn’t. The crust is forgiving and easy to work with, and the filling comes together in a snap. Also, unlike the last time I made galette and crammed a truckload of blueberries into it, this one is far more structurally sound since pears are a little easier to wrangle than blueberries.

img_5097-x3

Give yourself a break from watching those election returns and gaze on this instead. I guarantee it’ll lower your cortisol levels ;) 

img_5109-x3

Pear Galette with Dark Chocolate Hazelnut Filling and Cardamom Crust

Grain free, gluten free, paleo and refined sugar free. Yay! There is butter, though a sub for coconut oil might definitely be possible (if you try it, tell me how it goes!). Yield: 1 galette, serving sizes are up to your discretion ;) A Wait are those Cookies original!

img_5096-x3

For the crust:

  • 1.5 c almond flour
  • 1/2 c tapioca starch
  • 1/4 tsp fine sea salt
  • 1 tbsp coconut sugar
  • 3/4 tsp ground cardamom
  • 1 egg
  • 6 tbsp salted butter, chopped
  • 2 tsp vanilla extract

In a food processor or high-power blender (I used a Vitamix), pulse almond flour, tapioca starch, cardamom, salt, and butter, and pulse to combine until it looks like coarse meal. Add in egg, coconut sugar, and vanilla extract and pulse just until combined. Turn out onto a piece of plastic wrap, shape into a disk and chill in the fridge for at least an hour, or up to overnight.

For the dark chocolate hazelnut filling*:

  • 1 c roasted hazelnuts, skins mostly removed (reserve a few for topping purposes if you want!)
  • 3 tbsp raw cacao powder
  • pinch of sea salt
  • 1.5-2 tbsp pure maple syrup
  • 1 tsp vanilla extract

* measurements are approximate! Adjust as necessary to suit your tastebuds :)

Blend hazelnuts in a vitamix or high power blender / food processor until a nut butter consistency forms (it’s okay for it to be on the chunkier side; mine wasn’t completely smooth). Add cacao powder, sea salt, maple, and vanilla and pulse until combined. This can be made up to a week ahead — just store it in an airtight jar in the fridge!

For the galette:

  • 1 crust
  • most or all of the hazelnut spread
  • 2 pears, thinly sliced (I used d’Anjou; Bosc would also be good) — you can peel them if you want, I chose not to
  • 1 egg, lightly beaten
  • 2 tbsp coconut sugar, divided
  • 1 tbsp salted butter, melted
  • extra hazelnuts for topping, if desired!

Preheat the oven to 375.

Roll out the dough between two pieces of parchment paper, keeping the circle to about 1/4″ thickness. Peel off the top piece of parchment, and slide the rolled out dough on its parchment onto a baking sheet. If you’re feeling extra artistic or motivated, cut some extra dough off the edge of the circle and cut leaf shapes out of it because… I’m an overachiever and it’s FALL! YAY! Anyway… moving on.

Spread the hazelnut paste carefully over the dough circle, leaving about a 2″ border from the edge — I found that the back of a spoon worked nicely for this (Try not to move it around too much, just press it into place so that the bottom dough stays intact). Spread the sliced pears in a fan shape if you’re feeling fancy, or just toss them all in there (I’m definitely not going to judge!). Begin folding up the sides, creasing them together as you go – if the dough is cracking, that’s okay (you can crimp the cracks back together; remember: galettes are forgiving and rustic!); you can use the bottom piece of parchment to help fold up the sides. Stick the leaves on the edges if you went that route. Brush the pears with the melted butter, and top with 1 tbsp of coconut sugar. Brush the dough with the beaten egg (I like a pastry brush for this), and sprinkle with the remaining tablespoon of coconut sugar.

Bake for 35-40 minutes (mine was perfectly done at 35, so check accordingly), until the dough is firm to the touch and golden brown. Let cool on the baking sheet for a few minutes, then slide the whole piece of parchment paper and galette onto a cooling rack to cool completely (or serve immediately!). Eat with some kind of vanilla ice cream thing (dairy or not) because… you should!

Leftovers keep covered at room temp for about… 1 day. Because it will be gone by then anyway so you won’t even have to worry. Promise!

img_5102-x3

Tolkienesque Cake for Dessert and Elevenses!

img_5043

Welcome to the Shire!

img_5034

Happy circumstances dictated that a Tolkeinesque dessert was in the offing (sometimes, you just need themed desserts)… as such, this one was directly inspired by the Hobbit: besides Beorn’s honey cake being mentioned in the Hobbit itself, blackberries and hazelnuts just seem like they’d be something you’d stash in your knapsack during your travels, right? And hobbits seem like the type to have cast iron skillets. So there you go. ALSO this cake is not only dessert but also does double duty for Elevenses (I can attest. I actually ate it for elevenses / brunch / breakfast / lunch, as part of a very complete, Hobbity spread).

img_5028

In other news, I went to the opera on a random Tuesday the other week because, why not?

img_5008

img_4996

More drawing!

img_5014

img_5020

And more cake.

img_5030

It’s rainy and drizzly today and as such is perfect cake and indoor fun weather; I highly recommend this one. It’s somewhat like a light variation on pound cake, and the blackberries / hazelnuts make for a great textural pairing. Plus ice cream. Obviously. They may not have had ice cream in the Shire, but let’s face it: everything is better with a bit of cream, right?

img_5026

Yes, the blackberries in the pictures are frozen — they were subsequently thawed and honeyed and drizzled and got all juicy and delicious, but for ease of transportation, that happened after the photos.

fullsizerender-7

So! Cake! And a nice revisit to the land of the Shire; I was a little overdue. Be warned, the maple hazelnuts are supremely addictive…. don’t say I didn’t warn you ;)

img_5035

Honey Almond Cake with Honeyed Blackberries and Maple Glazed Hazelnuts

Lightly sweet cake that is somewhat akin to a lighter pound cake, topped with tart-sweet blackberries and crunchy hazelnuts. Hobbit-y dessert perfection that also happens to be gluten free, grain free, dairy free, refined sugar free, and arguably paleo (depends on what sweeteners are on your okay list). The cake is adapted from Cookie and Kate, here! One confession: I’m a crazy baking person and for Hobbit authenticity and size preferences I wanted to make this in my 8″ cast iron skillet, which meant that I made a 3/4 recipe of a a full 9″ pan. I will be posting my altered measurements here; if you bake it in a 9″, it will just be a slightly shorter cake (apologies for some of the funky measurements!)

img_5034

For the cake:

  • 1.5 c almond flour (not meal), firmly packed
  • 3/4 tsp baking powder
  • 1/4 + 1/8 tsp baking soda
  • 1/4 + 1/8 tsp fine sea salt
  • 2 eggs, beaten
  • scant 1/2 c runny honey
  • 1/8 + 1/16 c melted coconut oil
  • 1.5 tsp vanilla extract

Preheat the oven to 325, and lightly grease cast iron skillet or pan of choice with coconut oil. Toss a little almond flour in the bottom to finely coat. In a large bowl, whisk together almond flour, baking powder, baking soda, and sea salt. In a smaller bowl, whisk together beaten eggs, honey, melted coconut oil, and vanilla. Pour wet into dry, and stir until just combined. Pour into the prepared pan, and bake on the center rack of the oven for about 38-40 minutes. I checked mine at 30 and put it back in for 8; it was perfect at 38. The top should be golden brown and firm to the touch, and the center shouldn’t jiggle when lightly shaken. Remove from the oven and let cool before topping and serving.

For the honeyed blackberries:

  • 1 bag frozen blackberries, or fresh if they’re in season
  • 1 tbsp runny honey

Thaw blackberries, if frozen, and toss with the honey…. and that’s it! Let sit for a few hours if you have time — they get extra juicy that way.

Maple Glazed Hazelnuts:

  • 1/4 c pure maple syrup
  • 1 c roasted hazelnuts
  • sprinkle of sea salt

Remove most of the skins from the hazelnuts by rubbing them together; it doesn’t matter if there are skins left, but I try to get rid of the majority. Heat an empty saute pan (not nonstick) over medium heat; once heated, add maple (it will bubble and fizz) and hazelnuts. Cook for about 3-5 minutes, stirring continuously until the maple has caramelized. The nuts will feel a little soft, which is fine. Spread parchment paper on a baking sheet, pour out the nuts and spread them out a bit. They will harden as they cool. Store in an airtight jar at room temp for as long as they last which is realistically about five minutes.

For serving: Top cake with honeyed blackberries & glazed hazelnuts, and preferably ice cream.

Store leftover cake in the fridge; covered with foil in the original pan is just fine. I’m here to attest that this cake is fabulous the next morning for breakfast!

fullsizerender-3

Sometimes, dessert just needs to be an unashamedly sloppy, delicious mess

fullsizerender-5

This tart is a lesson in what dessert sometimes should be: an aesthetically pleasing, sloppy, delicious mess. Because sometimes dessert should just be eaten out of the pan it was baked or assembled in, with two spoons and happy grins. Or, you could attempt civilized plating (as I did) when you consume it for dessert, with a hasty decant into bowls topped with ice cream. Which is perfectly acceptable. Until the next morning when you peek at the custard tart that’s been hangin’ in the fridge overnight and notice that the custard has decided to attempt an escape outside its proscribed bounds, at which point you decide to eat it out of the pan with spoons. Wise and delicious decision!

img_4940-2

fullsizerender-2

Sometimes, you need a less than perfect dessert. Messy, delicious and less than perfect is exactly what this tart is. You’ve been warned! Indulge accordingly.

fullsizerender-7

In other news, I completed another year on this earthplane, and celebrated accordingly at Gary Danko! Nowhere else am I going to sit down to a four course dinner with two desserts. Shockingly, I didn’t even need a wheelbarrow to leave…. I consider this a success all around. Thanks to everyone who made my birthday weekend such fun! Y’all are so rad.

img_4931

Hmm, what else. It’s officially autumn! Which means apples, scarves, boots, and pumpkin. And baking. Except that the Bay has decided to have a heat wave these last few days, which means baking is totally off the table until it gets back down into the 80s, at least. Since when do I wear a dress and no jacket in San Francisco all evening?! Since never… until yesterday! Reason number one to eat messy, cool, creamy dessert that can be had with minimal baking and heating of the kitchen!

fullsizerender-4

More drawing! A wee bit of dome practice with the beautiful San Francisco city hall.

img_4937-2

Nighttime cityscapes are so beautiful.

img_4953-2

But back to the food!

This tart presents beautifully but once cut, devolves into a sloppy, delicious mess. But, fear not! Just grab a spoon and eat it straight from the pan. Messy and delicious, just how dessert should be.

img_4954

Maple Custard Apple Tart with Almond Crust

Lightly sweet, creamy and an appropriate amount of crust. Refined sugar free, grain free, gluten free, paleo & dairy free with one small swap (coconut oil for butter in the crust). Yield: 1 10″ pie pan of the deep variety; serves as many as you feel like sharing with. Recipe adapted from Hip Foodie Mom, here!

fullsizerender-3

For the crust:

  • 2.5 c almond flour
  • scant 1/4 tsp fine sea salt
  • 2 tbsp coconut sugar
  • 4 tbsp salted butter (or coconut oil), melted
  • 1 runneth-over tsp vanilla
  • 1 egg white

For the custard:

  • 1.5 c coconut milk (mine was light; use whatever you have)
  • 6 egg yolks
  • 1/2 c pure maple syrup
  • 1/4 c tapioca starch
  • 1/2 tsp fine sea salt
  • 2 tsp vanilla extract

For the apple topping:

  • 2 apples, finely sliced
  • 3 tbsp raspberry jam, thinned with a bit of water and lemon juice

Because the custard needs to sit and chill in the fridge after cooling for at least 2 hours, I made this a day ahead and let it hang out in the fridge overnight. The crust only takes about 15 minutes to bake, so the tart itself comes together quite quickly.

Preheat the oven to 400 and lightly grease a 9 or 10″ deep pie plate with coconut oil or butter. For the crust: in a large mixing bowl, stir together almond flour, salt, and coconut sugar. Add in melted butter or coconut oil, vanilla, and egg white, and stir until combined — I found it more fun and more efficient to use my hands at the end. Press the dough into the bottom of your pie plate of choice, poke the bottom a few times with a fork, and bake for 15 minutes. The crust should be lightly browned. Remove from the oven and let cool completely.

For the custard: in a medium saucepan, heat the coconut milk over medium, until small bubbles begin forming along the egg whites. In a medium bowl, whisk together egg yolks, maple, tapioca starch, and salt. Slowly temper the eggs by pouring the hot coconut milk into the egg bowl in a thin stream, whisking constantly until all the milk is incorporated. Pour this whole bowl of goodness back into the pot that was previously holding the coconut milk, and cook over medium-low heat, whisking constantly, until the custard begins bubble and thicken (you’ll know. it’ll go from watery to thick enough that your whisk makes tracks). Remove from heat, stir in the vanilla, and let sit until cool. Give it a good stir, and store in an airtight container in the fridge if you made it ahead.

Pour the custard into the completely cooled crust. Thinly slice 2 apples of choice, and drop them in a bowl of lemon water to prevent browning while slicing. In a small bowl, thin the raspberry jam with a few tbsp of water and lemon juice (I used the leftover from my apple-soaking water). Fan the apple slices across the surface of the custard, brush with the raspberry jam mixture to prevent excess browning. Cover and refrigerate if not eating immediately!

Keeps well overnight in the fridge, covered, but don’t expect it to stay in one piece! The custard is runny — best advice (and I definitely put this into practice) is to just eat it with a spoon, straight out of the pie plate. For breakfast! Keep any leftovers in an airtight container in the fridge.

fullsizerender-8

The only acceptable summer blues

IMG_4839

Hi! I made galette again because it was so good last time I just couldn’t stay away. Besides, it’s still gloriously late summer so I will stay happily buried in late summer fruit desserts until seasonality dictates otherwise.

These are the only acceptable kind of summer blues!

FullSizeRender 6

I also sojourned up to Portland for a minute last weekend and caught up with all the PNW buds and did ALL the EATING. No really. ALL of it. Rather glad to be back to eating my kale and eggs, I will say — love traveling and love eating but omg I need a break after awhile! So now I’m back and galetting around, blah blah the usual.

FullSizeRender 5

I may have gone a little overboard in my excitement of finding an enormous (2 pound!) clamshell of organic blueberries at whole foods for a reasonable price…. apparently they disappeared about 2 hours later too so obviously it was meant to be and my excitement is warranted. There were 2 full cups of blueberries in this thaaang, which meant that I was more than slightly concerned with its structural integrity. However! The crust held its own (barely) and all the goodness stayed contained within its slightly leaky exterior. Galette structural engineering for the win.

FullSizeRender 2

For those who love lemon and blueberry, this is for you. Flaky crust, jammy blueberries and tart lemon curd. Late summer shenanigans don’t get much better than this! Messy, beautiful and delicious, just like summer should be.

IMG_4837

Grain Free Blueberry Galette with Lemon Curd

Grain free, gluten free, paleo, and refined sugar free! Easy to put together and obviously delicious or I wouldn’t be shoving these photos into your inbox. Yield: 1 largish galette; about 9″ across. Serving size is up to your discretion… like the last one, this one was dessert and breakfast with a bit of leftovers for 2. No shame.

FullSizeRender 3

For the crust:

I used the same one as I did for the last peach galette I did; but omitted the almond extract.

  • 1.5 c almond flour
  • 1/2 c tapioca starch/flour
  • 1/4 tsp fine sea salt
  • 6 tbsp salted butter
  • 1 eggs, divided
  • 1/2 tbsp coconut sugar
  • scant tbsp vanilla extract (yes, that is a tablespoon!)

Glaze:

  • 1 tbsp coconut sugar for sprinkling over the crust
  • 1 egg, lightly beaten for the egg wash
  • a few small chunks of butter to dot the top of the fruit

For the paleo lemon curd: I used meyer lemons for this recipe here from What the Fork blog (which was absolutely delicious); any lemon curd recipe will work just fine; here is a traditional one that I made a billion years ago that is also spectacular (just excuse the horrendous pictures). Make this a day before (or earlier in the day) so that it has time to cool completely before you put it into the galette. It will thicken / not run all over the place, and you’ll thank your foresight.

For the blueberry filling:

  • 1.5 c fresh blueberries
  • 2 tbsp tapioca starch
  • 1 tbsp coconut sugar
  • 2 tsp vanilla extract
  • 1 tbsp lemon juice

For the crust: In a food processor or high-power blender (I used a Vitamix), pulse almond flour, tapioca starch, salt, and butter, and pulse to combine until it looks like coarse meal. Add in egg, coconut sugar, and vanilla extract and pulse just until combined. Turn out onto a piece of plastic wrap, shape into a disk and chill in the fridge for at least an hour, or up to overnight.

While the crust is chilling (or a day before, which I found to be easier), make the lemon curd! See links for recipes.

Once the dough has chilled, toss the ingredients for the filling into a large bowl: blueberries, tapioca, coconut sugar, vanilla extract, and lemon juice; toss to coat and incorporate.

Preheat the oven to 375, and roll out the dough into a circle between two pieces of parchment. It should be uniformly thick; about 1/4″ but no thinner. Slide the dough and the bottom piece of parchment paper onto a baking sheet. Spread a thick layer of lemon curd in the middle of the dough, leaving about a 2″ border all around. Pile the blueberry filling onto the lemon curd, and carefully fold the edges of the crust up around it, sealing any cracks that happen. Some juices will probably leak out when you bake it, but that’s no big deal. Brush the crust with the beaten egg wash, and sprinkle with a bit of coconut sugar. Dot the tops of the blueberries with a few small chunks of butter. Bake for 35-40 minutes – mine is usually always perfect at 35; the crust should be lightly golden and firm to the touch.

Remove from oven and let cool on the baking sheet for about 10 minutes; then slide the whole piece of parchment+galette onto a cooling rack to cool completely. Serve with extra lemon curd and vanilla gelato! Galette leftovers keep on the counter overnight and make a fabulous addition to breakfast; if you keep leftovers any longer I would store them in the fridge. Store any leftover lemon curd in the fridge!

FullSizeRender 4

Late summer galettes and camp shenanigans

IMG_4745

Hello! Long time no see.

Mostly because it’s summer so I had to do this:

IMG_7122

IMG_4718

IMG_4715

IMG_7119

IMG_4721

IMG_7219

Step off the grid for 10 days to reconnect, laugh, love and play in the dirt at my favorite place on earth. Two Sentinels will always be my mountain home, and there is nothing like my camp family!

IMG_4738

But now I’m back! And because it’s late summer, all the fruit desserts are called for. Especially galettes, because there is something about the rustic pie dough thing that is so forgiving and accepting of whatever fruit you have on hand that reminds me of late summer. Besides that, galettes play much nicer than pie in the sandbox: less time in the oven, less fussy dough (usually) and less crimping, fussing, and general worries about ice cold this and that and the other thing. Which is mostly why I love them, but also because they’re delicious (and I am totally not hating on pie; I love it equally!! But I also love not dying in a hot kitchen, so there’s that).

IMG_4742

This galette made the perfect dessert with a spot of ice cream, and then a rad breakfast accompanied by eggs and kale… you really can’t go wrong here.

IMG_4739

Grain free, lightly sweetened, almondy crust surrounds almondy peaches and a homemade almond paste. Very little sweetner actually goes into this, since the peaches are so sweet on their own. Pretty much any summer fruit can go into this, but I love the combination of peach and almond!

IMG_4740

Hopefully you have some late summer produce hanging around, begging to be made into a galette. Trust me, it’s a good plan. Definitely recommended to eat this for breakfast… Happy baking!

IMG_4737

Grain Free Almond Peach Galette

Grain free, refined sugar free, and paleo! Yay! Minus chilling time, the actual galette making comes together in a snap. Lightly sweet: the perfect vehicle to highlight late summer produce that is so sweet on its own. Yield: 1 galette; serves two for dessert and breakfast with leftovers, or somewhere between 6-8 peeps. Your call on how much you feel like sharing… Crust recipe lightly adapted from Running to the Kitchen, here! The almond paste and filling are Wait are those Cookies brainchild. Happy eating!

For the crust:

  • 1.5 c almond flour (not meal; you want the finer flour variety)
  • 1/2 c tapioca flour
  • 1/4 tsp fine sea salt
  • 6 tbsp salted butter, chopped
  • 1 egg
  • 1/2 tbsp coconut sugar
  • scant 1/2 tsp almond extract

For the almond paste*:

  • 1/3 c almond flour
  • 1/4 c almond butter
  • 3 tbsp maple syrup
  • 1 tsp vanilla extract
  • scant 1/2 tsp almond extract

*disclaimer: didn’t measure when I made this… so these are best guess estimates! Taste as you blend, and adjust the flavor as you like!

For the filling:

  • 3 peaches, thinly sliced
  • 1 tbsp tapioca flour
  • 1/2 tsp almond extract
  • 1/2 tsp vanilla extract
  • 1/2 tbsp coconut sugar

Last little beautification elements:

  • 1 egg, beaten
  • 1-2 tsp coconut sugar
  • 1 tbsp butter, chopped

Let’s make galette!

In a food processor or high-power blender (I used a Vitamix), pulse almond flour, tapioca starch, salt, and butter, and pulse to combine until it looks like coarse meal. Add in egg, coconut sugar, and almond extract and pulse just until combined. Turn out onto a piece of plastic wrap, shape into a disk and chill in the fridge for at least an hour, or up to overnight.

In the (cleaned) blender or food processor, combine the ingredients for almond paste: almond meal, almond butter, maple syrup, vanilla, and almond extract. The texture should be pretty thick, and should stick to itself when you press it between your fingers. Add more almond butter or flour, and adjust sweetness accordingly. Set aside once made.

Once the dough has chilled, preheat the oven to 375. Slice the peaches, and toss in a largish bowl with tapioca, extracts, and coconut sugar. Roll out the dough between two pieces of parchment paper, keeping the circle to about 1/4″ thickness. Peel off the top piece of parchment, and slide the rolled out dough on its parchment onto a baking sheet. Top the dough circle with the the almond paste, spreading it to about 2″ from the edge. Pile on the peaches, keeping them towards the center if possible. Begin folding up the sides, creasing them together as you go – if the dough is cracking, that’s okay (you can crimp the cracks back together; remember: galettes are forgiving and rustic!); you can use the bottom piece of parchment to help fold up the sides. Top the exposed peach filling with dots of butter, and brush the edges of the dough with the beaten egg. Sprinkle a little coconut sugar around the sides.

Bake for 35-40 minutes until edges are golden brown — mine came out just fine at 35 minutes, so check accordingly. Let cool for a few minutes on the baking sheet, then carefully slide the whole galette onto a cooling rack to let it cool completely. Serve with your fave ice cream or whatever of choice! Keeps well covered in foil on the counter; mine didn’t last longer than about 2 days so I can vouch for it at least that long!

Galette in situ:

IMG_4743

IMG_4744

Summer = Shortcakes. Forever and always!

IMG_4701

I’ve decided that every summer needs to have at least one shortcake, because summer and shortcake are just made for each other. Gloriously excessive gluts of fresh berries, stone fruit, or both… shortcake is best friends with all of them.

IMG_4705

Shortcake is also fast, simple, and doesn’t heat up the kitchen (too) much; besides, even if it does, it’s worth it.

IMG_4697

These were definitely worth it! Not only were they a delicious very late night snack to accompany a prerecorded watching of the GC time trials from the TDF16 (nerd alert, sorry not sorry), they also made an awesome side to eggs and greens the next morning for breakfast. Nothing better than a versatile shortcake…

IMG_4695

In other news, the world’s most giant zucchini decided to make an appearance in the yard (it was subsequently turned into vegan, gf brownie bars as well as sautéed with kale for the obligatory savory part of dinner).

IMG_4660

I also brought back the dashboard cookie the other day since I really wanted cookies and it was way too hot to even consider turning on the oven. They turned out great as usual, and my car smelled amazing for about five seconds.

IMG_4670

But anyway. Back to shortcakes. The other funny thing is that I seem to always make them right before I leave for camp, which I do on Monday. Maybe summer = camp = shortcakes? Who knows. Whatever though, I’m just happy I made and ate them and sad that they’re gone. These were delicious with only strawberries, and with strawberries+raspberries… despite not really eating dairy these days, these were eaten with ice cream and it was SO worth it. Because sometimes you are reminded that life is short, and should be enjoyed to the fullest.

IMG_4699

That being said, it’s summer! Make shortcakes! These are grain free and paleo, so have at it. Give your summer berries a playdate with their best friends shortcake and ice cream. Your return on investment will be delicious!

IMG_4702

Grain Free Shortcakes with Summer Berries

Gluten free, grain free, refined sugar free, paleo (for those who eat butter). Lightly sweet, slightly vanilla-y. Excellent with any kind of berry (or stone fruit) that you happen to have on hand. I didn’t do anything to the fruit since it was so perfect; just slice and eat. Serve with ice cream, non-dairy, whipped cream, coconut whipped cream… the options are endless. Recipe lightly adapted from The Roasted Root, here! Yield: 7 medium sized shortcakes (go either bigger or smaller for 6 or 8 cakes, up to you!)

IMG_4707

  • 2.5 c almond flour (not almond meal, the consistency is different)
  • 1/2 tsp baking soda
  • 1/4 tsp fine sea salt
  • 3 tbsp salted butter, melted*
  • 2 tbsp unsweetened almond milk
  • 1 tbsp pure maple syrup
  • 1 tsp vanilla extract
  • 2 large eggs
  • 1/4 tsp apple cider vinegar
  • Ice cream or whipped topping of choice for serving
  • Summer berries or stone fruit for serving!

*coconut oil also fine, though I used butter and they were awesome because…. BUTTER.

Preheat the oven to 350, and line a baking sheet with parchment paper.

In a large bowl, whisk together the almond flour, baking soda, and sea salt. In a smaller bowl, whisk together melted butter, almond milk, maple syrup, vanilla, eggs and vinegar until combined. Using a spoon, stir the wet into the dry until incorporated. The dough is moist but should be workable (you can chill it for a few minutes if it’s not). Scoop dough balls in the size of choice and roll them gently in your palms before putting them onto the baking sheet a few inches apart. Flatten them slightly with your fingers or palm.

Bake for about 15 minutes (mine were perfect at 15) until the top is golden and cracked. A tester should come out clean. Eat immediately, or let cool on a rack (I like them room temperature).

Serve with ice cream or whipped topping of choice (mine was vanilla caramel gelato) and fresh strawberries — I love my fruit so much, I didn’t do anything to it, but feel free to doctor your fruit as you see fit.

Store these overnight in the fridge — they’re also great cold for breakfast the next day!

IMG_4690

Master Status.

IMG_4531

oh hey! I DID IT! I’m actually DONE!

A masters degree in 10 months? Not too shabby.

IMG_4532

Somehow, that isn’t computing in my brain… I still feel like I need to be doing something. I’m sure you know the feeling? But… I don’t! I’m taking a mini break from adulting, so the biggest decisions I have to currently make are a) am I going to go work out (answer: pretty much always yes) and b) what will I eat afterward?

IMG_4536

My presentation went well, and it felt really good to end on a high note! I’m officially a master? Or something. Ha.

IMG_4535

But! I now have more time and mental energy to blog and make interesting things, which is just lovely. I got a notification today that my bloglet is 5 years old today! I can’t believe it. It’s growing up so fast!! *sniff* … or maybe that means I’m just getting old; that’s probably more likely.

SO! For mutti’s (rather belated) birthday dessert, I got fancy. Coconut milk panna cotta (dairy free, paleo, vegan, refined sugar free) with date caramel and walnut cookie crumble. So good! And actually fairly simple, when it comes down to it — there are just a lot of parts, but they come together with a minimum of fuss.

IMG_4533

Coconut Panna Cotta with Date Caramel and Walnut Cookie Crumble

Dairy free, paleo, vegan, refined sugar free, gluten free — everything EXCEPT taste free. Because these are delicious! And they really don’t heat up the house much if you’re making them on a day that it’s stupid hot outside (not like I did that or anything). Yield: 3 panna cotta servings (I chilled mine in small coffee cups; about the size of normal ramekins only deeper) + extra caramel and crumble left over after serving. Recipe lightly adapted from Kiss my Bowl, here!

For the panna cotta:

  • 1 can full fat coconut milk, well shaken
  • 1/3 c pure maple syrup
  • 2 tsp agar flakes*

*agar powder is no doubt better, but all my Whole Foods carried was the flakes, and they worked fine

For the date caramel:

  • 1 c pitted medjool dates, soaked
  • 1 tsp vanilla
  • 1 heaping spoonful of almond butter**

**mine is salted; I like the salty-sweet combo so you may want to add a pinch of salt if yours isn’t

For the walnut cookie crumble:

  • 1/2 c raw walnuts
  • 4 tbsp cocoa powder / cacao powder
  • 1/2 tsp vanilla
  • splash of maple syrup
  • pinch of salt

In a saucepan over medium heat, warm the coconut milk until it steams. Whisk in the maple syrup and bring just barely to a boil. Whisk in the agar flakes and let cook for just about 5 minutes, still barely boiling/high simmering. Remove from heat and let stand in the pan, whisking occasionally, for another 5 minutes. Once cooled slightly, pour into molds of choice (I used small coffee mugs that are deeper and slightly less wide than a standard ramekin; ramekins are just fine if you have them!). Let cool on the counter until your fridge can handle it, then let them set up in the fridge for at least an hour.

While the panna cottas are chilling, use a food processor or a vitamix to make the date caramel. Pour the dates and a few tablespoons of their soaking water into the implement of choice, add vanilla and almond butter, and blend till smooth (or chunky. you do you!). Store in a jar in the fridge until needed.

I made the cookie crumble in the same vitamix as the date caramel without cleaning it overmuch, which worked totally fine. Add walnuts, cocoa powder, vanilla, maple, and salt and whiz away until it’s crumbly. Store in a jar in the fridge until needed!

The panna cottas should be firm to the touch on top and have lost most of their jiggle by the time they’re ready. Run a knife around the edge of the ramekin or coffee cup, and they should flip right out onto a plate. Top with excessive amounts of date caramel and cookie crumble for maximum effect, and indulge accordingly!

Any leftover date caramel (who are you?!) and cookie crumble keeps well in the fridge for at least a week (but I dare you to make it last that long).

IMG_4537