Pears and cranberries: the perfect pair

IMG_1884

So normally, I would tell you that this makes great dessert but you should save some and eat it for breakfast, blah blah…

fullsizeoutput_e20

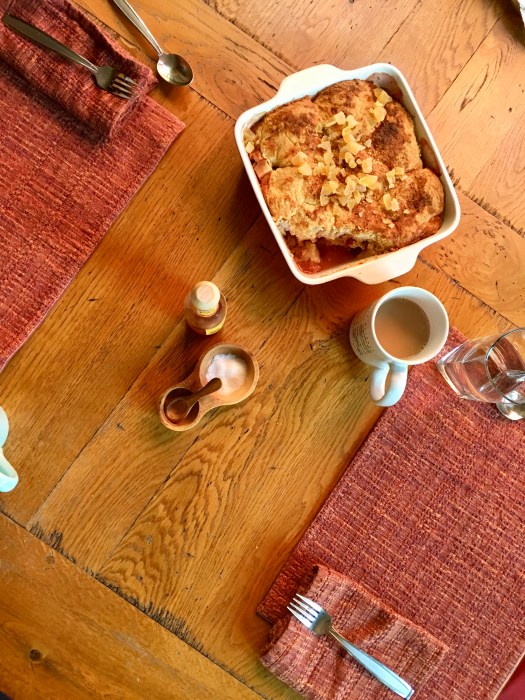
But really, this time, I’m going to throw that out the window and tell you to just straight up make this for breakfast. You really won’t be sorry – it’s mostly fruit anyway! Hiding under a whole grain, gluten free cream biscuit – what more do you want for breakfast?! I concede that we added eggs, kale, cholula & coffee, and it was a stellar combination, but you do you of course.

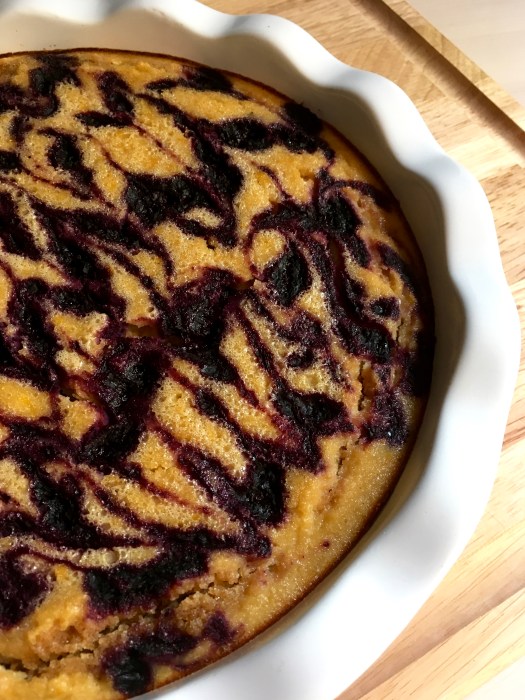
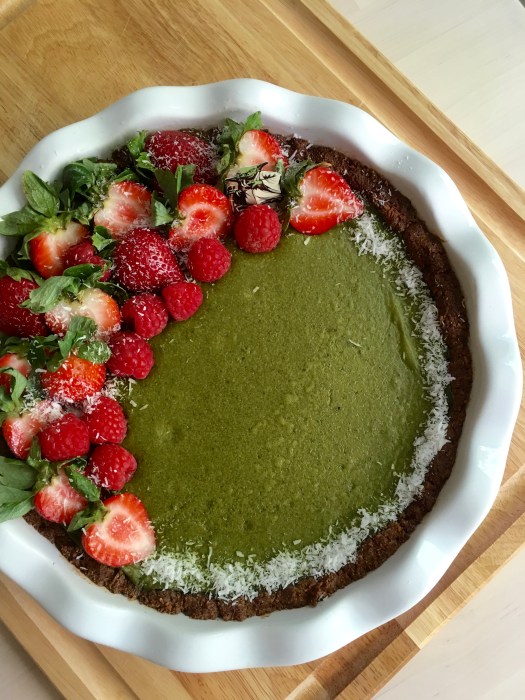
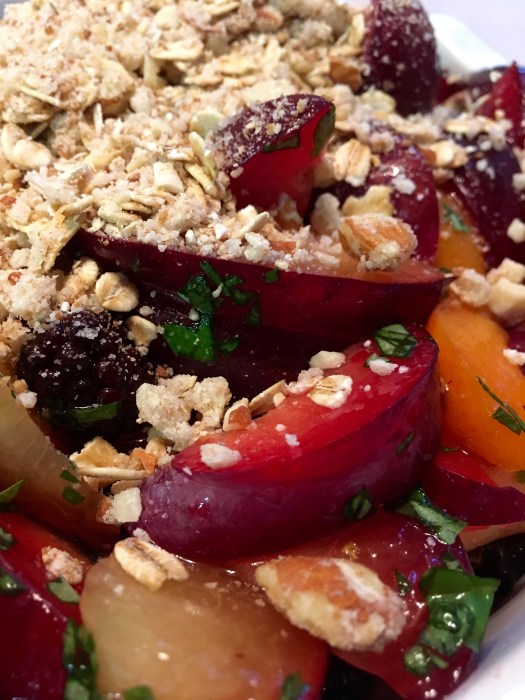
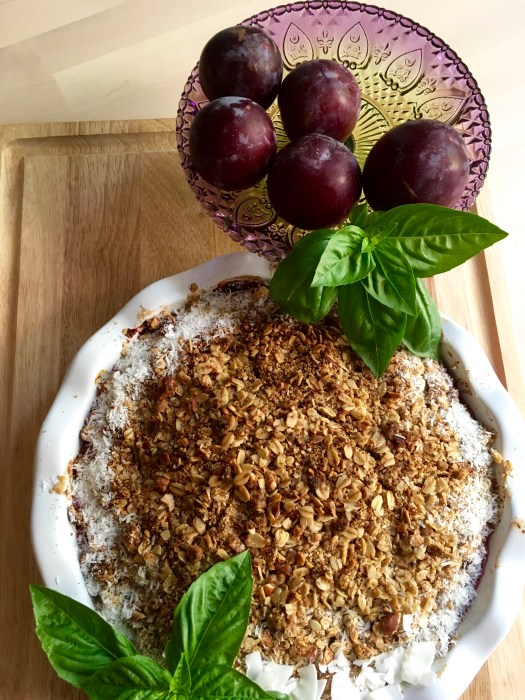
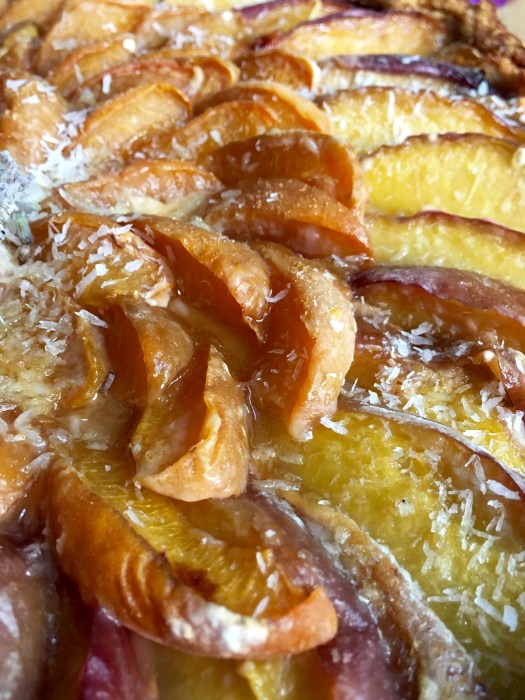
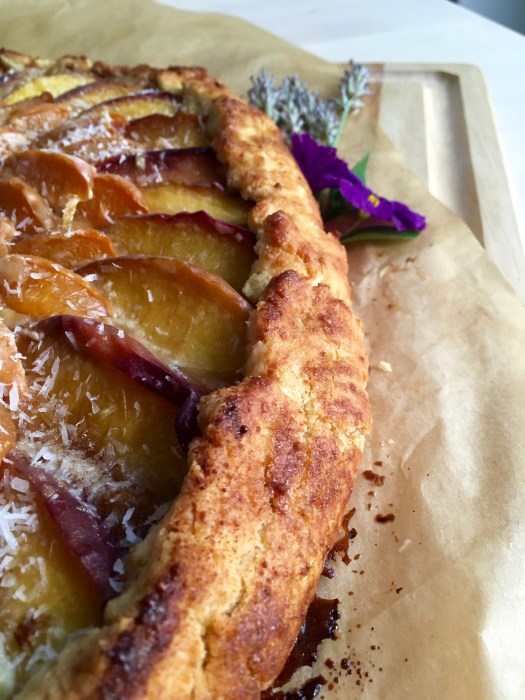
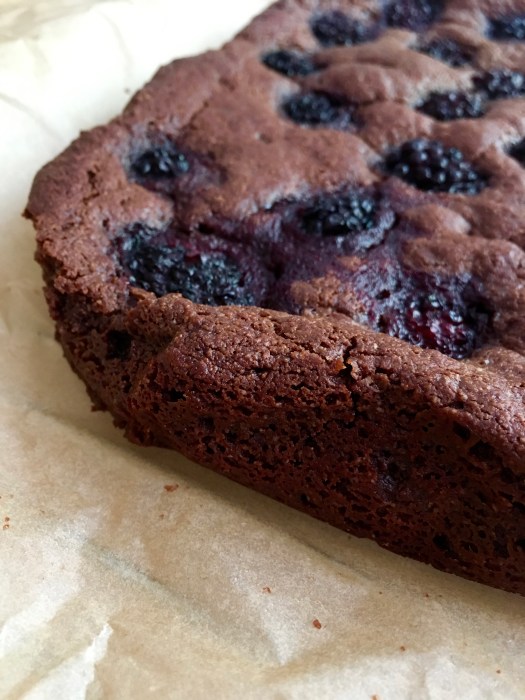
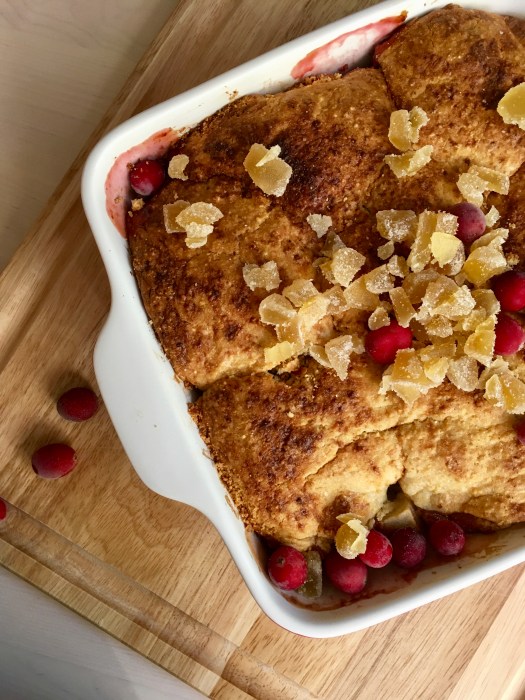
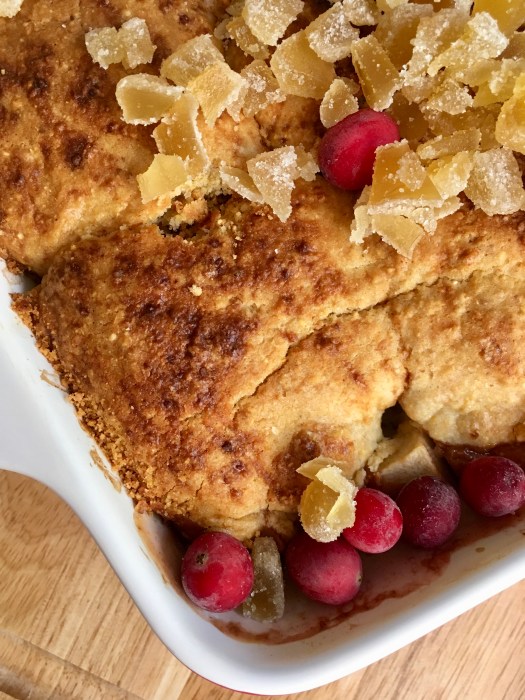
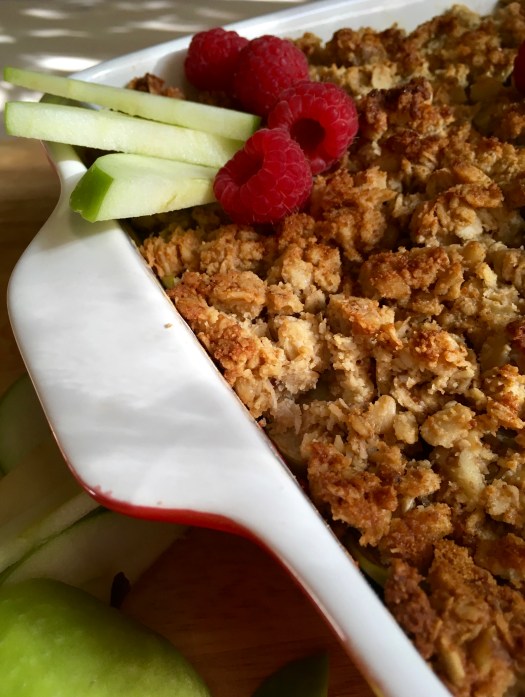
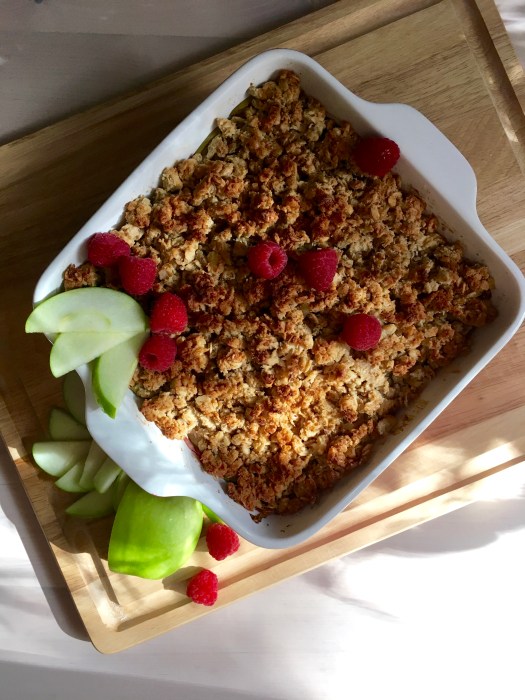
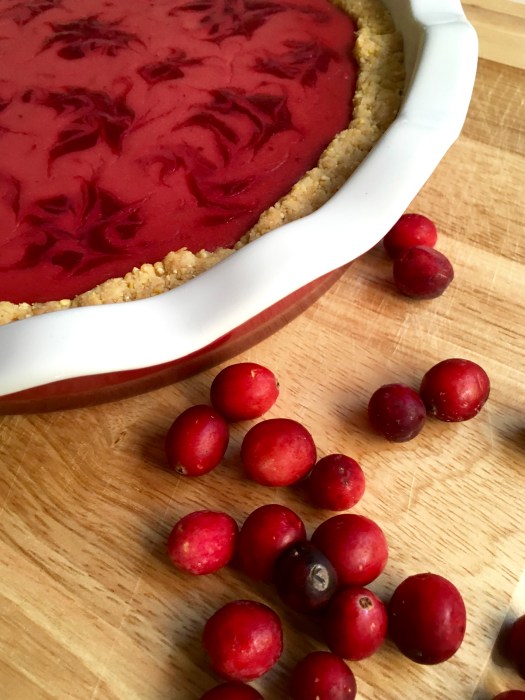
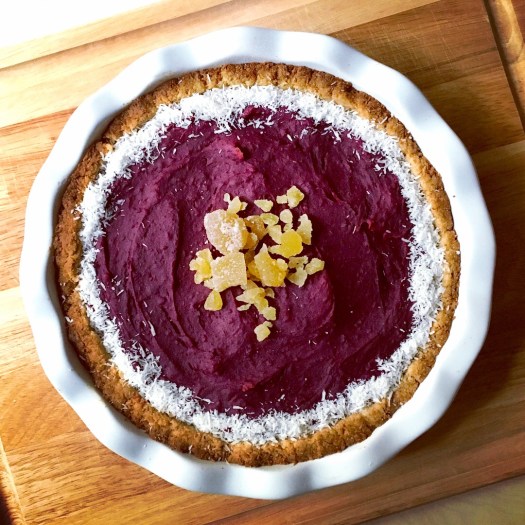
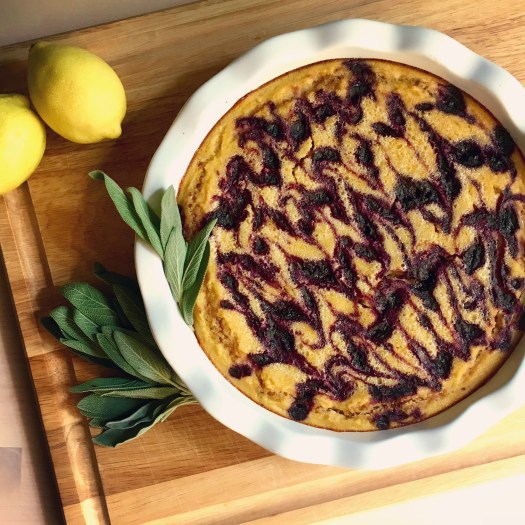
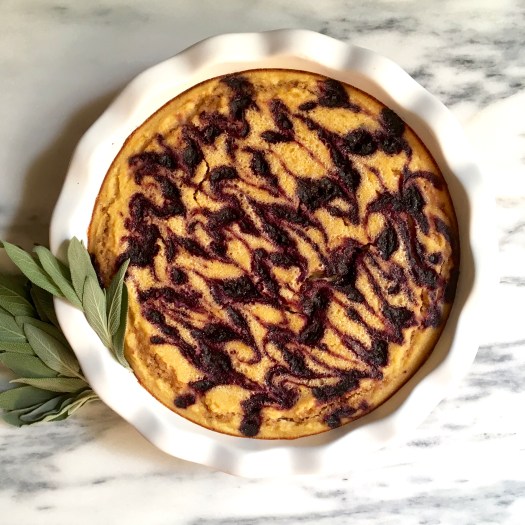
This is one of those homely-but-delicious desserts that doesn’t win any awards in the looks department but is undeniably amazing and should be made and loved immediately!

fullsizeoutput_e3c

I really love this for an autumn-winter breakfast-dessert: the cranberries and pears are a perfect pairing; the cornmeal cream biscuits are hands-down one of my favorite things on this planet (I am not alone in this, either); and the whole thing is just so seasonal!

fullsizeoutput_e24

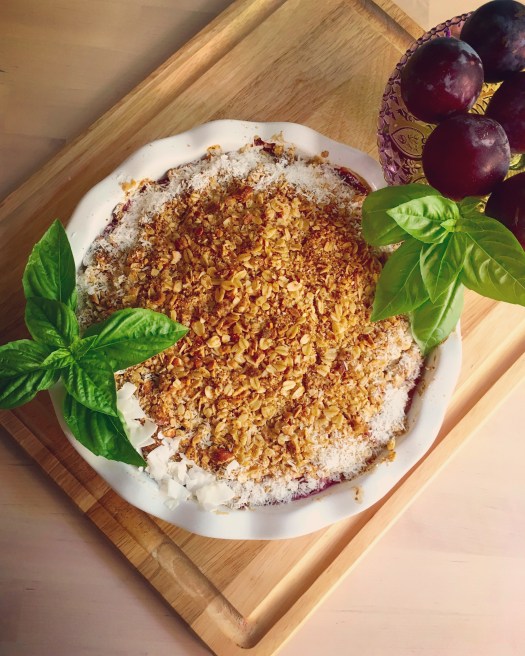
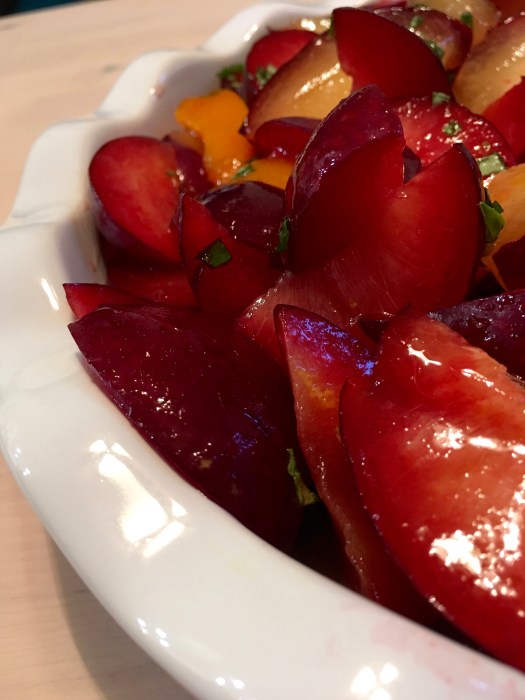
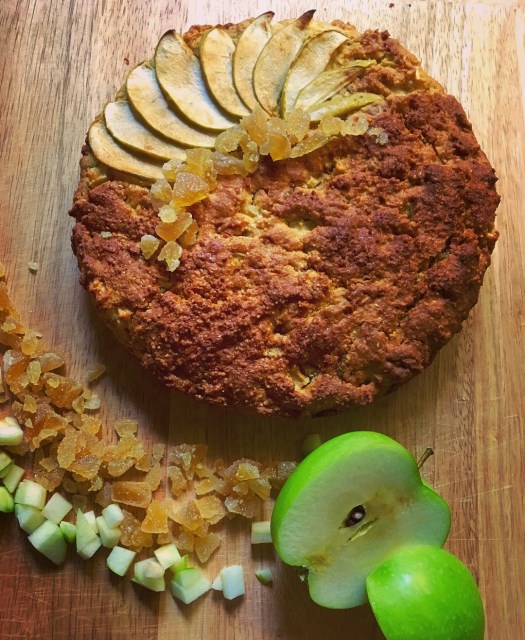
I leave the skins on the pears, both because I enjoy when my fruit desserts have more texture & body, but also because fiber is good for you! The cranberries soften but still retain their shape and eating them is quite fun, since they pop when you bite them!

fullsizeoutput_e27

fullsizeoutput_e3a

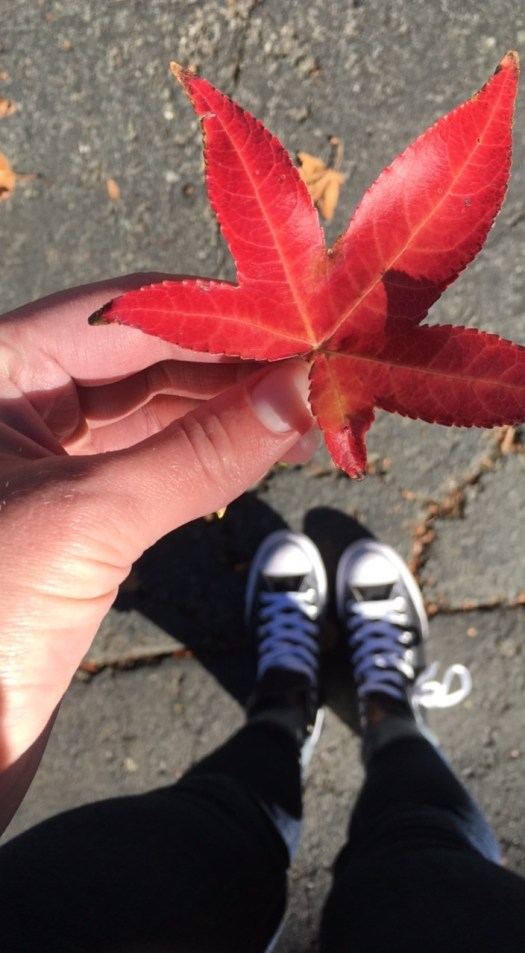
Let’s see. Besides eating this for a stellar breakfast, other things of note lately…
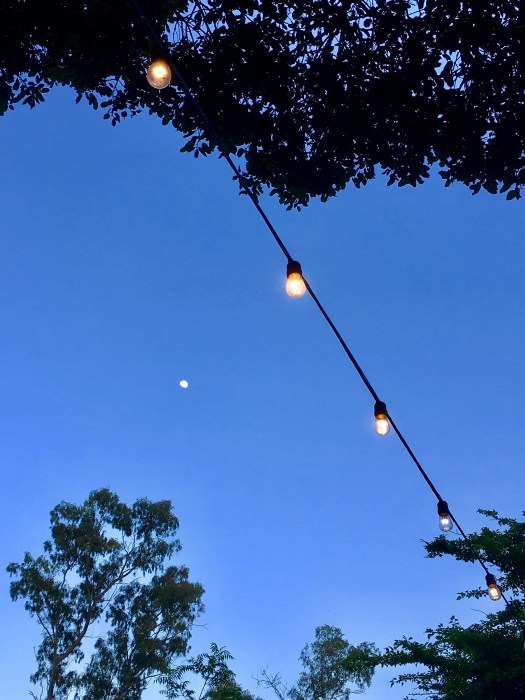
Beautiful skies!

fullsizeoutput_e2d

The worst opera we’ve both ever seen, but in the best company with some awesome seats so it was worth it… as an excellent learning experience and unforgettable evening ;)

fullsizeoutput_e30

fullsizeoutput_e31

Can anyone else believe December starts tomorrow?! I can’t. Where did the fall months go?? Not that I’m particularly sorry, I do love festive holiday time and all the baking that goes along with it.

fullsizeoutput_e28

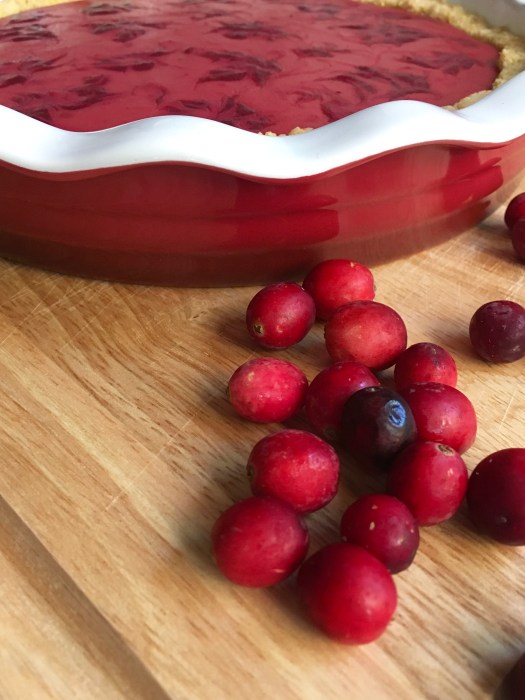
I highly recommend you throw the rule book out the window and make this for breakfast. I am behind you 100% on the wisdom of this action. Happy eating!

fullsizeoutput_e2b

fullsizeoutput_e29

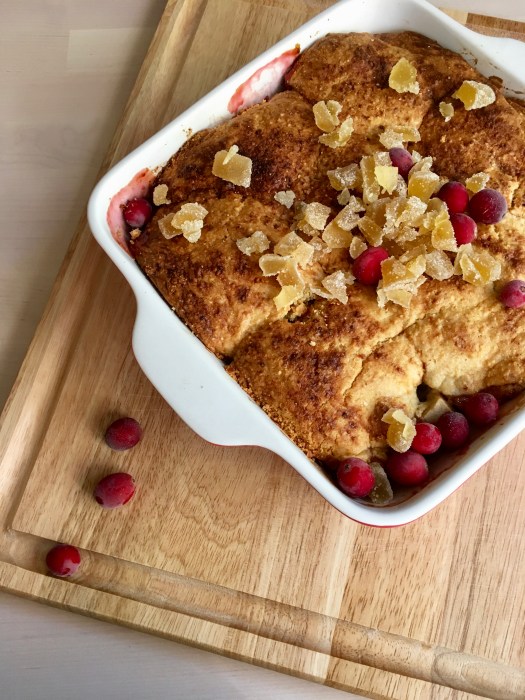
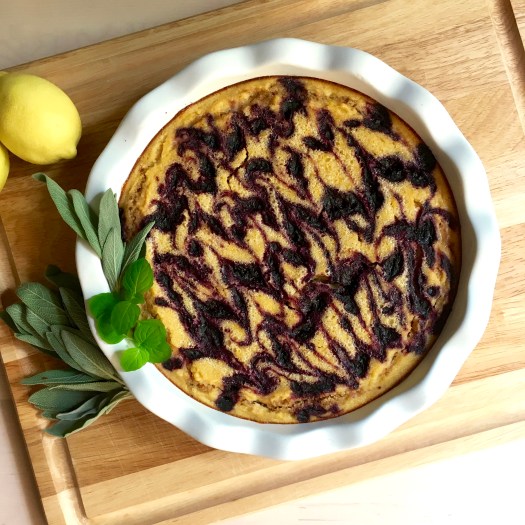
Pear and Cranberry Cobbler with Cornmeal Cream Biscuits and Ginger

Gluten free, whole grain and refined sugar free! The fruit makes an amazing complement to the cornmeal cream biscuits, which are personally one of my absolute favorite things. Easy to make, the most time consuming bit of this is chopping up the pears. But you don’t even have to peel them, so that bit is even easier! Very lightly sweetened, this is perfect for those who love seasonal, fruity desserts. Adapted from both of my earlier cream biscuit cobblers, here & here.

For the filling:

4-7 Bartlett & Anjou pears (about 2 pounds), peeled, cored and sliced into small bite-sized pieces*
1 cup fresh cranberries
1/4 c maple
2 tbsp port
2 tablespoons arrowroot starch
juice of 1 lemon
1 tsp vanilla
½ teaspoon ground ginger
¼ teaspoon cinnamon

*I used about 6; shrinkage will happen to a point so don’t be afraid to use a little more than you would think

For the cobbler:

3/4 cup fine cornmeal
1/2 cup oat flour
1/3 cup brown rice flour, slightly heaping
1 tablespoons maple (or coconut) sugar
1 1/2 teaspoons baking powder
3/4 teaspoon kosher salt
1 tsp vanilla
1 1/2 cups heavy cream

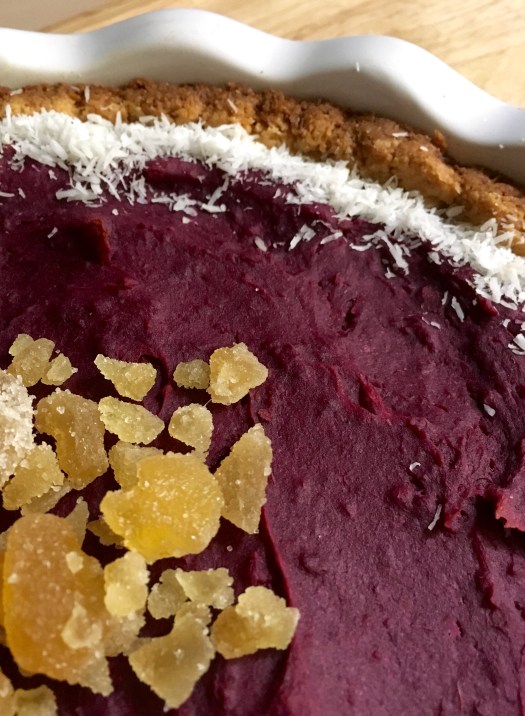
Crystalized ginger, chopped; for topping – optional but delicious

Preheat the oven to 375°F. Grease a deep 9-inch square baking dish or deep 9-inch pie pan with butter (I prefer the deepness of the 9″ square – mine is a 2qt baker & it holds tons of fruit!). Cut up pears into large chunks and toss them into the buttered baking dish. Add cranberries and toss to combine. Whisk the maple, port, arrowroot, lemon juice, ginger, and cinnamon together, pour over the fruit, and toss to coat.

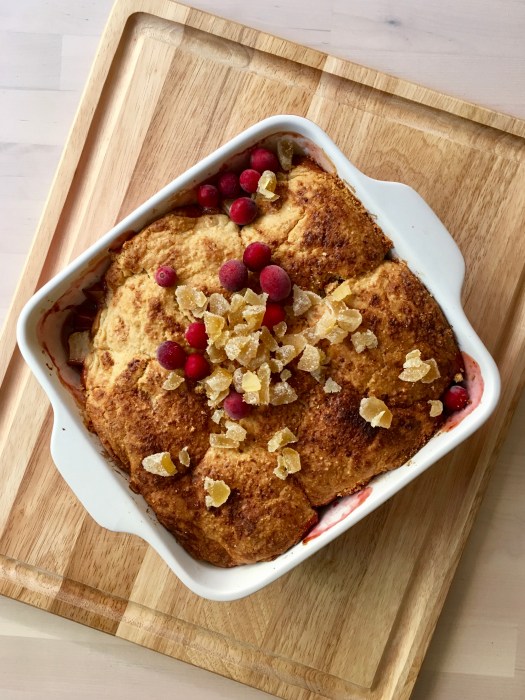
Combine cornmeal, oat flour, rice flour, sugar, baking powder, and salt in a medium bowl and whisk to combine. Pour in the cream and vanilla, stirring until just combined; the dough will be very wet. Scoop the dough into 8-ish blobs onto the fruit filling. Sprinkle with maple or coconut sugar if desired. Bake until the fruit bubbles and the juices thicken, and the topping is browned and cooked through, 45-55 minutes. Typically I test the biscuit done-ness by sticking a knife between two of them to see if the bottom is done – you’ll know if it isn’t, it will look raw. Stick it back in for about 10 minutes if you find that – mine is typically perfectly done at 55 minutes.

Serve with vanilla ice cream or more cream and chopped crystalized ginger; leftovers keep well, covered, in the fridge for a few days.

fullsizeoutput_e21

Breakfast disguised as dessert

IMG_1823

Ahh, the post-thanksgiving stupor….

IMG_1804

Just kidding! No such thing. First thing Friday morning was jazzercise, of course; I hate sitting still for too long. Thanksgiving itself was full of family and laughter & lots of croquet (ha!) – and of course, food. I was asked to bring the cornmeal apple & ginger cake that I made a few weeks ago; I made it with fresh ginger this time instead of crystallized, and I’m happy to report it’s amazing both ways.

IMG_1811

But for the days after Thanksgiving, a fruit-heavy, non-pie dessert was definitely required.

Perfect mornings look like this:

IMG_1807

Plus, I discovred a glut of late-season raspberries at the market a while back and pounced on them, knowing I’d want to pair them with apples strictly so I could go around saying RAZAPPLE! Ha.

IMG_1817

This crisp bakes up so well, you find yourselves eating bits of the crisp topping with your fingers.. not that we did that or anything…

It makes a stellar addition to breakfast alongside – what else? eggs and kale! – and I could argue that it’s even better the next day. We both liked that the apples retain their integrity – they don’t become a pile of mush, but they’re not crispy either – they’re somewhere in between & are absolutely delicious. This is one of my favorite things that I’ve made lately – simple, delicious, and seasonal. Happy baking!

IMG_1820

Raz-Apple Walnut Crisp

Gluten free & refined sugar free, with an easy dairy free/vegan option. Full of healthy fats and whole grains. Perfect for fall when there’s a glut of late summer berries at the market but apples are starting to be in season… for that matter, frozen raspberries work just fine too. Lightly sweet, tart and perfect for dessert and breakfast. Adapted from Cookie and Kate, here! Yield: 1 8×8 deep pan, serves 2 w/ leftovers for 1, haha…. kidding, only not really! Serves more like 6 normal humans.

  • For dairy free/vegan, sub coconut oil for the butter & non-dairy (coconut would be good!) yogurt for the dairy yogurt; bake as directed

For the filling:

5 largish (or 7 small) Granny Smith apples, cored and sliced into thin wedges*
2 c raspberries (frozen is fine)
scant â…“ cup maple syrup
1/8 c port**
1 tablespoon lemon juice
2 teaspoons arrowroot starch
½ teaspoon ground cinnamon
¼ teaspoon ground allspice

*I just approximate as I slice; I use however many it takes to fill my 2 quart, 8×8 baking dish

**the port is optional but amazing; if you don’t use it, use 1/8c water instead

For the crisp:

1 cup old-fashioned oats (use certified gluten-free oats for a gluten-free crisp)
½ cup firmly packed almond flour
½ cup chopped walnuts
1/4 c unsweetened shredded coconut
1/4 c maple sugar
¼ teaspoon fine sea salt
2 tsp vanilla extract
4 tablespoons unsalted butter, melted
¼ cup plain whole milk Greek yogurt

Preheat the oven to 350.
Slice apples into a deep baking dish, and add raspberries (my dish is 8×8, 2 qt capacity; 9″ square or 9″ deep pie dish would also be fine). In a liquid measuring cup, whisk together the maple and water/port until combined. Add the lemon juice, arrowroot, cinnamon and allspice, and whisk to combine. Pour the mixture over the apples and toss to combine. Bake for 20 minutes.

While the filling is baking, make the crisp. In a mixing bowl, stir together the oats, almond meal, walnuts, shredded coconut, maple sugar and salt. Mix in the vanilla, melted butter and the yogurt. Stir until everything is mixed thoroughly.

Once the filling has baked for 20 minutes, stir it to redistribute evenly in the dish. Plop spoonfuls of the crisp topping evenly over the filling – no need to pack it down. Return the dish to the oven and bake for 25 to 30 more minutes, until the filling is bubbling around the edges and the top is golden.

Let the crisp rest at least 5 to 10 minutes before serving; or do like I did and make it earlier in the day, and have it later. Serve with vanilla ice cream, obviously! Keep leftovers, covered, in the fridge for about five days (yeah right. It would take some kind of major feat to make it last that long; ours was gone in 2 days!) Serve cold alongside breakfast because it’s extra awesome that way.

IMG_1819

Cranberries – not just for sauce!

IMG_1788

Happy almost-Thanksgiving! Hard to believe it’s in less than a week. In keeping with the spirit of all things autumnal and holiday-ish, I bring you a cranberry curd tart! Perfect for dessert but also excellent for breakfast alongside eggs & kale.

IMG_1782

Besides, this color is amazing! Nature is really spectacular when you let her do her thing – no artificial coloring here, obviously!

IMG_1773

This tart is for those who love love love tart things! I really loved the crust – cornmeal and ginger are a match made in heaven.

IMG_1780

In other news, the leaves are gorgeous around here just now, and I move my plants around my apartment to follow the sun. They seem happy about it…

IMG_1739

IMG_1745

I don’t think I have too much more for you today; it’s a mellow Sunday and I’m contentedly chill today.

IMG_1749

Enjoy your holiday week!

IMG_1772

Cranberry Curd Tart on a Cornmeal Ginger Crust

Tart, PINK and perfect for fall / holiday dessert. Gluten free, dairy free and refined sugar free – this is for those who like tart things! The cranberry curd ended up kind of like mousse – see note; if you’d like it sliceable like a proper tart, use a few extra eggs in the curd. The cornmeal ginger crust provides a naturally not-too-sweet complement to the tartness of the curd & puree. Yield: 1 9″ tart, serves 2 ;) kidding – serves 2-6! A Wait are Those Cookies original.

For the crust:

1.5 c almond flour
1/4 c unsweetened shredded coconut
1/2 c cornmeal
heaping 1/4 tsp sea salt
1 tsp ground ginger
1/2 tsp baking soda
2 tsp vanilla extract
2 tbsp pure maple syrup
5 tbsp coconut oil, melted

In a large bowl, stir together almond flour, shredded coconut, cornmeal, sea salt, ginger, and baking soda. Add in vanilla, maple, and melted coconut oil, and stir until completely combined. The dough will look crumbly, but you’ll be able to press it together with your fingers.
Preheat the oven to 350, and lightly grease a pie plate with coconut oil. Press the crust into the plate and up the sides with a spoon or your fingers, creating a smooth edge (or not, your call!). Poke the bottom with a fork a few times, and bake for 15 minutes. Remove and let cool for a few minutes, but leave the oven on.

For the cranberry curd*:

3 cups (12oz) cranberries, rinsed and picked over
1/2 c water
1/4 c maple
juice of 1 lemon
2 whole eggs
2 egg yolks
Pinch of salt
scant 1 tbsp vanilla
3.5 tbsp coconut oil

*mine was on the runnier side, making my tart more like mousse than a set curd tart. Suggest adding another couple of eggs – unless you’re okay with the mousse texture (it was totally fine taste-wise, just didn’t really hold its shape when sliced)

To make the cranberry curd, place the cranberries and water in a saucepan. Cook, covered, over medium-low heat, until you hear the the berries start to pop. Cook, stirring occasionally, until all the berries have burst. Cool slightly, then puree with an immersion or regular blender. Strain the mixture into a bowl or large liquid measuring cup, pushing on the solids to extract as much cranberry puree as possible. Yield is about 1.5 c of puree.

Beat the eggs, egg yolks, maple, and lemon juice together in the top of a double boiler. Whisking constantly, slowly pour in the warm cranberry puree. Add salt and vanilla. Whisk in coconut oil 1 tbsp at a time until melted. Cook over low heat, whisking constantly, until the mixture has thickened and coats the back of a spoon (about 15 minutes). Remove from the heat and let cool. The curd will thicken a little more as it cools – store in an airtight container in the fridge for a week, or freeze for later.

For the cranberry swirl:

Basically, you’re replicating the earlier part of the cranberry curd, prior to actually making curd with it. If you’re smart (unlike me, who decided to do this later), do it all at once, and reserve some of the cranberry puree.

1.5 c cranberries, rinsed & picked over
1/4 c water
2 tsp maple sugar
1 tsp vanilla

Combine cranberries and water and cook as directed above, for the curd, until the cranberries pop. Strain as before, pressing to extract the liquid. Stir in maple sugar and vanilla.

For assembly:

Bake the crust, as directed above (350 for 15, in case you don’t want to scroll back up). Remove and let cool for a few minutes, then pour in curd. Dollop the cranberry swirl in large dollops over the curd, then use a knife or toothpick to swirl everything together. Bake for 15-20 minutes to set the curd, then remove and let cool completely before serving. I prefer to refrigerate mine for at least half a day before serving to further set the curd. Serve with ice cream (obvs!) and extra cranberry puree. Store any leftovers in the fridge, covered.

IMG_1775

I only have (pies!) for you

IMG_1737

Could someone explain to me what happened to October? I blinked, and then… here we are. ALSO it’s already less than two weeks till Thanksgiving?! Um…. wat.

IMG_1738

But regardless… I have PIE!

IMG_1710

And it’s PURPLE pie!

IMG_1708

Because really, how could something like this not make you happy? That color just makes me smile every time. As does the fact that it’s grain & gluten free, dairy free, refined sugar free, vegan & paleo so errrybody can enjoy – because also, despite all the ‘free’ in its name, it is also delicious (NOT taste free. ha!)

IMG_1734

Maybe consider it if you’ve got friends or fam with some dietary stuff and they’re coming for Thanksgiving? I’m 100% sure they’d love you for it.

It’s been raining! I love love love the sound of rain – it so soothing, no matter what kind of day I’m having. Baking when it’s raining is one of my favorite things – I love that even though my apartment’s galley kitchen doesn’t have windows, I have a big window on the wall facing the entrance to the kitchen, which lets in light and rain sound. It’s perfect! Besides, my little one-butt kitchen is exactly the right size for my baking shenanigans.

IMG_1735

In other news, pretty coffee and some opera (shocking, I know…NOT).

IMG_1695

IMG_1696

IMG_1733

I’ve made this pie twice in three days – it’s that good! Full disclosure: the first time I made it, I took the first bite straight out of the pie dish: fork, meet pie. I NEVER do that, since I’m all about the presentation, but you know what? Sometimes it just has to happen.

IMG_1714

IMG_1729

Happy Saturday! I’m loving the beautiful fall weather over here – the leaves are gorgeous, the air is crisp, and I had purple pie, eggs & kale for breakfast with the best company: life is wonderful! Happy baking!

IMG_1709

Purple Sweet Potato Pie on an Almond Coconut Crust

Gluten & grain free, refined sugar free, dairy free, vegan, paleo. Crust is a Wait are Those Cookies original, filling is adapted from The Endless Meal, here! Yield: one 9″ pie, serves 2 or several! ha.

For the crust:

  • 1.75 c almond flour
  • 1 c unsweetened shredded coconut
  • heaping 1/4 tsp sea salt
  • 1/2 tsp baking soda
  • 1 tbsp vanilla extract
  • 1/4 tsp almond extract
  • 2 tbsp pure maple syrup
  • 4 tbsp coconut oil, melted

Preheat the oven to 350, and lightly grease a pie plate with coconut oil.

In a large bowl, stir together almond flour, shredded coconut, sea salt, and baking soda. Add in vanilla, almond extract, maple, and melted coconut oil, and stir until completely combined. The dough will look crumbly, but you’ll be able to press it together with your fingers. Press the crust into the plate and up the sides with a spoon or your fingers, creating a smooth edge (or not, your call!). Poke the bottom with a fork a few times, and bake for 15 minutes. Remove and let cool for a few minutes, but keep the oven on if you’re making the whole thing at once.

For the filling:

  • 2 large purple sweet potatoes, peeled & sliced into 1″ pieces (about 3 cups worth)
  • 3/4 c full fat coconut milk
  • heaping 1/4 c maple syrup
  • 1.5 tbsp tapioca starch*
  • juice of 1/2 a lemon (~1tbsp)
  • 1 tablespoon vanilla extract
  • 1/4 tsp almond extract
  • 2 teaspoons ground cinnamon
  • 1 teaspoon ground ginger
  • heaping 1/4 teaspoon ground nutmeg
  • 3/4 teaspoon fine salt

*full disclosure: I made this twice in three days & totally forgot the tapioca starch the second time. It’s actually not essential – the filling set up fine without it.

While the crust is baking, make the filling!

In a medium saucepan, boil the sweet potato slices until fork tender. Drain and let cool for a few minutes. Add them to a food processor (or high powered blender) and pulse a few times to puree. Add in coconut milk, maple, tapioca, lemon juice, vanilla, and almond extract, and pulse to combine. Add cinnamon, ginger, nutmeg, and sea salt, and pulse until combined. The filling should be thick! Pour/spoon/spatula it into the prepared crust, smooth the top (or not, you do you!), and bake at 350 for about 45 minutes – the crust should be golden brown and the pie should be set, but with just the slightest bit of jiggle in the middle. Remove and let cool completely before serving (preferably with ice cream or whipped cream of choice, either dairy or non dairy). I prefer to make this earlier in the day and refrigerate until serving, to give the filling ample time to set up.

Top with crystalized ginger & extra coconut if desired!

Keep leftovers covered in the fridge – it will last for a few days, provided all of it doesn’t get eaten first!

IMG_1703

IMG_1711

Appropriately autumnal baking

IMG_1677

There is something so soothing about early morning baking. I don’t necessarily choose to bake at 6:30a, but when a workout and work have to happen before I can deliver & eat dessert, baking by necessity becomes an early morning activity. That being said, though, it’s a very meditative way to spend a morning, especially when it’s still dark outside.

IMG_3170

Of course, then of course there’s that moment when you go to put socks on and somehow find some crystallized ginger stuck to your foot… um… no comment.

IMG_1654

It also gives me a great sense of productivity to know I’ve created something before I even leave the house that day – and then add a workout and a highly productive work day and by 6p I feel extraordinary accomplished.

IMG_1656

IMG_3171

And THEN I get to eat cake! Ha. Win win, all around. Besides, coming back into my apartment after work, I’m greeted with a waft of OMG THIS CAKE SMELLS AMAZING – always a good sign.

IMG_3168

IMG_1663

This cake was well loved by both of us – it is definitely going on the to-make-again list – and I have high standards for that list! The cornmeal/polenta give it great texture – it’s a cross somewhere between cake and cornbread, in the best way possible. It’s amazing with ice cream for dessert, and equally so alongside eggs and kale for breakfast – see exhibit A below.

IMG_3173

Besides that, just in case you needed proof as to how loved this cake was, see exhibit B:

IMG_3177

No crumbs. One (large) slice left – that is after a stint of very productive yard work & leaf raking – that cake had NO chance.

IMG_1656

I can’t believe it’s already November. What happened to October?! Happy autumn!

IMG_1653

Apple Ginger Polenta Cake

Gluten free, refined sugar free, and dairy free. Lightly sweet, sort of like a cross between cake and cornbread – perfect for dessert (served with ice cream!) and breakfast alongside eggs and leafy green things. Yield: 1 8″ cake, serves… um… 2! Ha.

1 c almond meal
2/3 c yellow corn meal (I used medium grind)
1/3 c rice flour
2 tsp baking powder
Heaping 1/4 tsp sea salt
1/4 c extra virgin olive oil
2 eggs
1/6 c maple sugar
1/6 maple syrup
2 tsp vanilla
2 Granny Smith apples
1/3 c crystallized ginger chunks, chopped*

*I have also made this with fresh ginger and it’s equally amazing; finely mince peeled, fresh ginger root and add to the batter. The quantity is up to you – I love ginger, so I used a knob probably about 1.5″ long

Preheat the oven to 350, and line an 8″ cake pan with parchment paper, or do like I did and use strips of parchment paper for easy removal. Be sure to grease the pan first though to prevent any stickage.

In a large bowl, whisk the eggs with the maple sugar and maple syrup until soft and fluffy. Add in olive oil and vanilla. In a smaller bowl, whisk together almond flour, polenta, rice flour, and baking powder. Stir dry into wet. Cut one and a half apples into cubes and thinly slice remaining half. Add the apple cubes and chopped ginger and stir until just combined. Pour the cake batter into the prepared pan, and smooth it out a bit.

Arrange a few apple slices on top of the cake, sprinkle with a bit of maple (or coconut) sugar. Bake at 350F for 40 minutes. Check the cake after 35 minutes; mine was perfect at 40. If the top of the cake is browning too quickly during baking, you can always tent it with a sheet of tinfoil.

I stuck mine in the fridge for a few hours of storage, which didn’t hurt it at all. It keeps well on the counter overnight (covered with foil), and makes a ridiculously amazing addition to breakfast the next day!

IMG_1631

IMG_1632
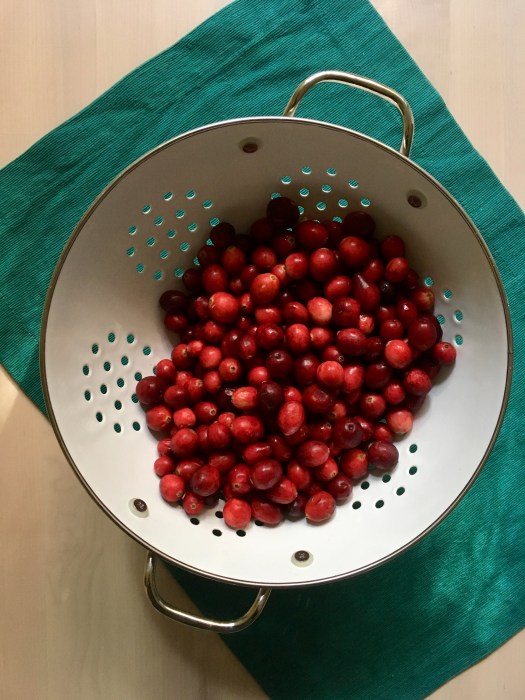
Early morning mis en place…

IMG_1637

Kitchen wisdom is sage advice

IMG_1526

Sending all the good vibes and healing thoughts to those caught in the terrible wildfires in the North Bay – I can’t even imagine the scale of destruction happening. I don’t even live in the thick of it, and I still can’t see the sky on account of smoke. My heart hurts for my state and for those in the middle of it all.

IMG_1500

These bars can bring a little sunshine to otherwise smoky, obscured days – the citrus is bright and fresh, and we all know I’m obsessed with herbs in dessert, so this is no exception. The sage in the crust is noticeable but not aggressive – just a hint of earthiness to play up the brightness of the meyer lemons (locally grown, of course!). Blueberries and almonds go with just about anything, so why not invite them to the party too?

IMG_1508

These do double duty as dessert and breakfast (that seems to be a theme around here, hmm) – makes some amount of sense, since my desserts are almost all whole-food and fruit focused.

IMG_1524

Besides, these have a hefty dose of eggs which basically makes them breakfast. See? Science!

IMG_1505

In other news, there are finally leaves on the ground, and of course I’m excited about a return to sweater, boot and scarf weather. I’m a little sad at the shortening days though, especially because I miss my good morning photography light! Sigh. It will be back!

IMG_1484

IMG_1496
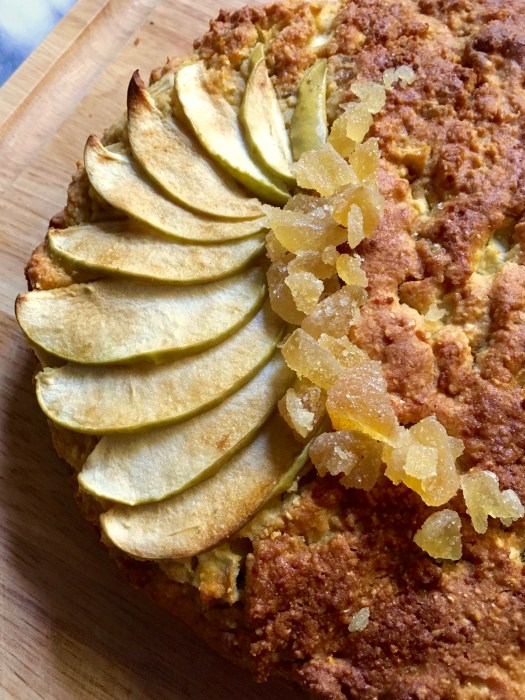
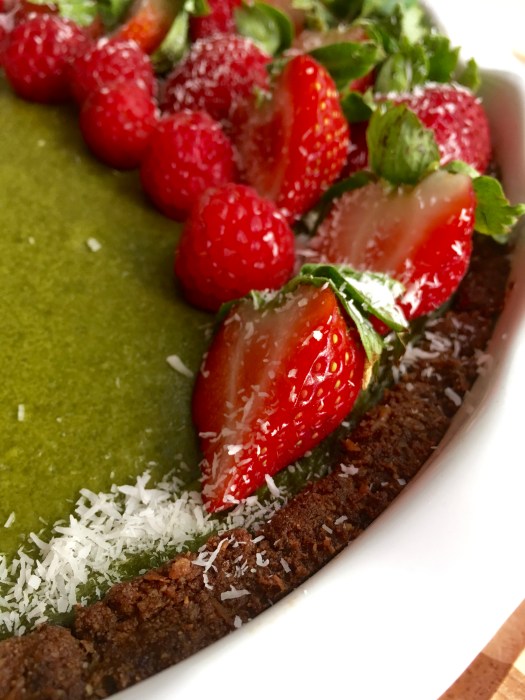
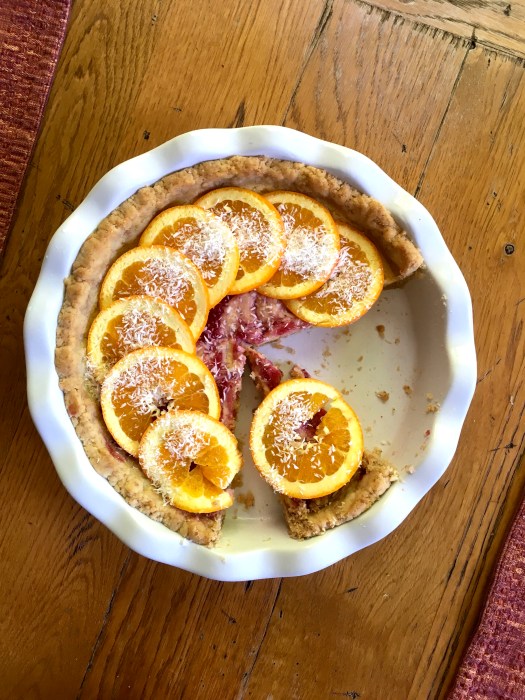
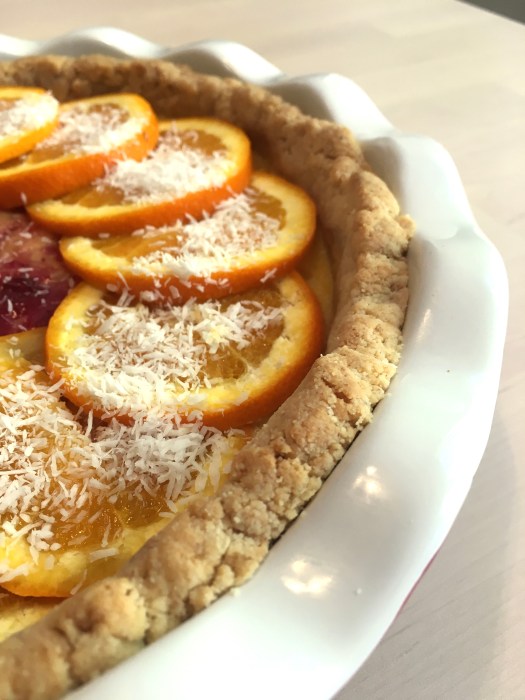
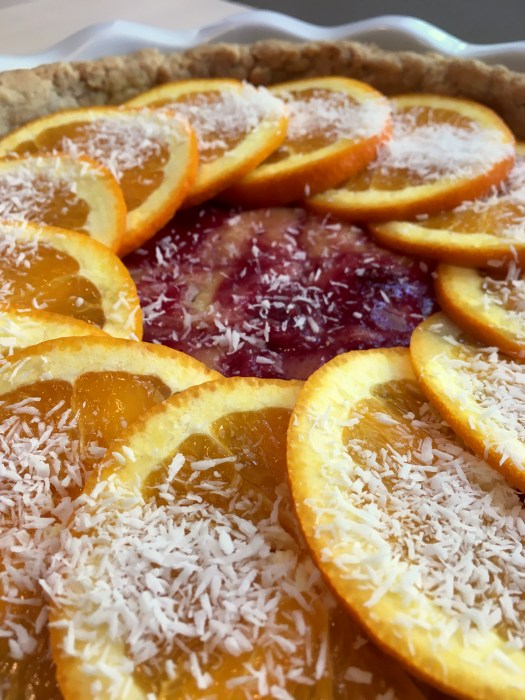
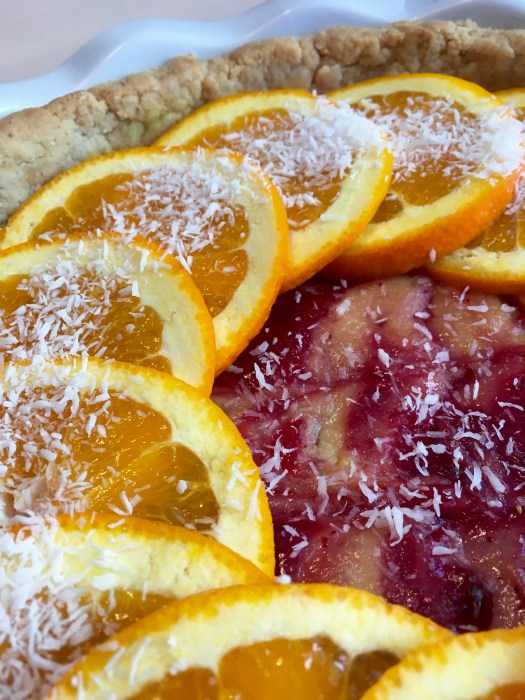
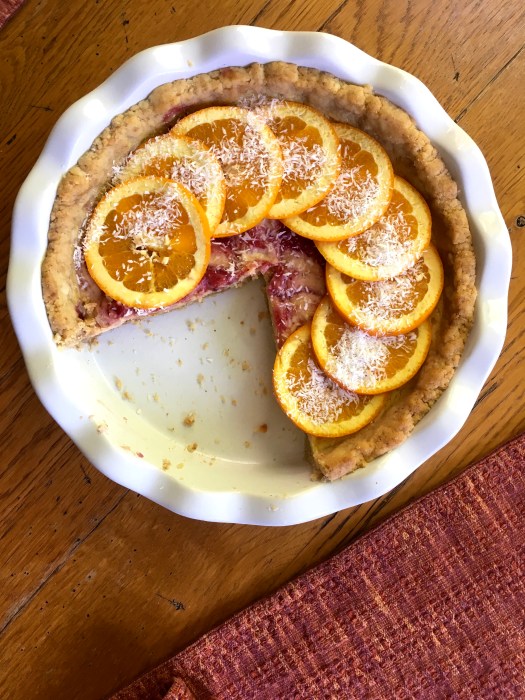
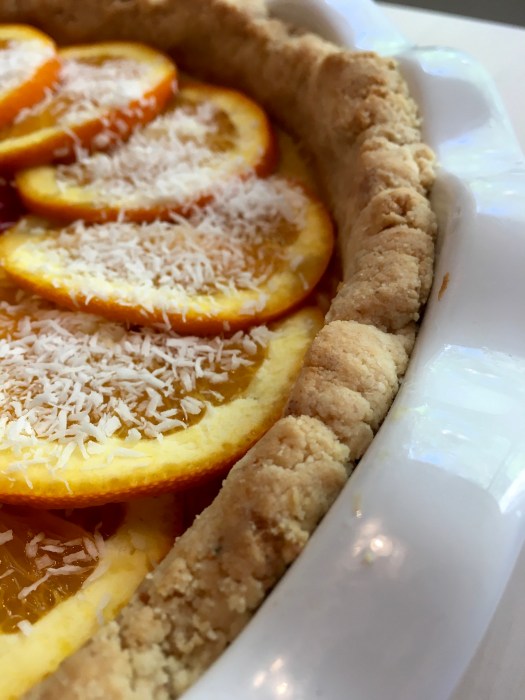
In the meantime, I’ll make bright, citrusy and quite probably herb-y desserts to bring some brightness to the shorter days. Happy Autumn!

IMG_1507

Meyer Lemon Blueberry Bars on an Almond Sage Crust

Lightly sweet, tangy, and perfect if you have a glut of meyer lemons (though regular lemons are fine too!). The sage adds such a nice earthy twist to the basic lemon bar – I love lemon with almond so these just hit all high points for me! Grain free, gluten free, refined sugar free, dairy free, arguably paleo. Yield: 1 9″ pie plate or 1 8 by 8 square pan, serves 2-8 (ha – I recommend dessert and then for breakfast the next day). Adapted from my orange creamsicle bars, here!

For the crust:

1.5 c almond flour
3/4 tsp baking soda
heaping 1/4 tsp fine sea salt
1/4 + 1/8 c unsalted almond butter
1.5 tbsp pure maple syrup
1.5 tbsp coconut oil, melted
2 tsp vanilla extract
1/4 tsp almond extract
1.5 tbsp chopped sage

Preheat the oven to 350, and grease an 9″ round pie dish (must be deep) or an 8 by 8 pan.

In a large bowl, stir together almond flour, baking soda, and sea salt. Add in almond butter, maple syrup, melted coconut oil, vanilla, and almond extract and stir until combined and crumbly. Stir in chopped sage. Press the crust dough evenly into the prepared pan, and poke with a fork a few times. Bake for 10 minutes. Remove and set aside when done.

For the filling:

4.5 eggs*
1/2 c pure maple syrup
zest of 3 meyer lemons, roughly chopped
1/4c + 1/8c fresh lemon juice
pinch of sea salt
4.5 tbsp coconut flour
2 tsp vanilla extract
* to achieve half an egg: crack an egg into a small bowl and whisk it; then either measure or eyeball half and use that. or just use a whole one as long as it’s small, I doubt it would affect the consistency of the bars all that much…

For the blueberry swirl:
1 c wild blueberries (preferably frozen, thawed)
1 tsp vanilla extract

While the crust is baking, make the filling! In a large bowl, whisk together eggs, maple, lemon zest and juice, sea salt, coconut flour (sifted if lumpy) and vanilla until smooth. Pour the filling into the par-baked crust. For the blueberry swirl, blend blueberries with their juice (some is released during thawing) and vanilla either with an immersion blender or a food processor. The sauce won’t be especially thick, but that’s fine. Pour the sauce into a ziplock bag (or use a piping bag, but be warned that blueberry stains!), carefully snip a really small triangle off of one corner, and pipe 5-6 lines across the lemon filling. Some will sink in, but most will stay on top (and no, the lines do NOT have to be perfect!). Take a table knife and swirl the lines gently into the filling.

Bake for 30-35 minutes. The top should be mostly firm and the filling set, with just a small amount of wiggle (it’ll firm up as it cools). Let cool completely and eat immediately or chill in the fridge for later (I like them cold!) — serve with vanilla ice cream :) Store any leftovers in the fridge.

IMG_1510

Dessert straight out of Dagobah

IMG_1443

Green things!

IMG_1417

Because of course I would make myself something ridiculously green for a (belated) birthday dessert!

IMG_1427

IMG_1431

Naturally it would also have a tiny Yoda in it, because that seems to have become the birthday dessert tradition around here (reference this cake!) and I am unashamedly nerdy – besides that, this dessert looks like it’s just come out of Dagobah, so it only seems fitting that Yoda would take up residence, right?

img_1438.jpg

IMG_1436

I have to say, I LOVED this (there I go again blowing my own horn regarding my baking, oops sorry). I already love matcha lattes, but this was something else. Earthy, lightly chocolatey, and not one of those desserts that put you into a coma – it’s the perfect post-opera snack and breakfast alongside eggs. Besides, then you can drink your coffee and eat your tea!

IMG_1426

Besides all that, how fun to have something so GREEN for dessert? And then alongside other greens at breakfast (because tea is breakfast food, obvs) – I was having fun with all of the tones of green (art history nerdiness is making an appearance, clearly).

IMG_1442

I mean, this thing is really aggressively green. It is not for the faint of heart, but luckily myself and the one I fed it to loved it, and is obviously fine with green dessert.

IMG_1424

IMG_1439

Among other things, I will have been to the opera three times by Saturday night – YAY!  Green dessert + opera is my kind of week!

IMG_1413

IMG_1397

So! Like green tea? Do yourself a favor and make a matcha tart! You won’t be sorry, and you can impress your friends with the GREEN-NESS of it all!

IMG_1441

Matcha Custard Tart on Cacao Coconut Almond Crust

Lightly sweet and perfect for those who love their matcha lattes! This is somewhere between a custard and a mousse – the filling is light & earthy, and plays perfectly against the chocolate crust. Grain and gluten free, refined sugar free, dairy free, and paleoish (it’s sweetened with maple, so it depends on your def of paleo). Yield: 1 9″ tart. Serves: 2. Ha! Eat for dessert & breakfast, because tea = breakfast food.

For the crust:

1.5 c almond flour
1/3 c unsweetened cacao powder
1/2 c unsweetened shredded coconut
heaping 1/4 tsp sea salt
1/2 tsp baking soda
2 tsp vanilla extract
2 tbsp pure maple syrup
3.5 tbsp coconut oil, melted

In a large bowl, stir together almond flour, cacao powder, coconut, sea salt, and baking soda. Add in vanilla, maple, and melted coconut oil and stir until completely combined. The dough will look crumbly, but you’ll be able to press it together with your fingers.

Preheat the oven to 350, and lightly grease a pie plate with coconut oil. Press the crust into the plate and up the sides with a spoon or your fingers, creating a smooth edge (or not, your call!). Poke the bottom with a fork a few times, and bake for 15 minutes.

Increase the oven temp to 375. While the crust is baking, make the custard.

For the matcha coconut milk custard:

3 cups coconut milk
3 large eggs
1/3 c maple syrup
3 tablespoons tapioca starch
2 tablespoons culinary-grade matcha powder
2 teaspoons pure vanilla extract
1/4 teaspoon pure almond extract
1/8 teaspoon fine sea salt

Heat coconut milk in medium saucepan over medium-low heat until it just barely simmers, about 5 minutes. Meanwhile, whisk together eggs, sugar, cornstarch, matcha powder, vanilla, and salt in medium bowl.

Whisk warm milk into egg mixture in slow, steady stream to temper the eggs. Return egg and milk mixture to saucepan and cook over medium-low heat, stirring constantly and scraping the bottom of the pan, until custard begins to thicken and forms a ridge on tip of spoon when bottom of pan is scraped and spoon is lifted, about 4-6 minutes. Remove crust from the oven and pour in the custard*. Bake until custard has set around edges but jiggles slightly in the center when shaken, 13-15 minutes. Cool to room temperature, about 2 hours. Refrigerate until serving.

Decorate with raspberries, strawberries & coconut (and a tiny Yoda) if you’re so inclined! Serve with ice cream for dessert or eat straight up for breakfast. Refrigerate any leftovers, covered.

*Note – I had slightly more custard than what would fit comfortably in my pie plate. You have options here – bake it in some smaller ramekins until set, or maybe add some tapioca pearls and make pudding? I didn’t do that but now I wish I had! If you do, let me know how it turns out…

IMG_1432

IMG_1433


Late summer stone fruit shenanigans

IMG_1156

Can someone explain to me how it’s already the latter half of August? That went FAST, yeeshh.

IMG_1095

At least I’m still getting my fill of stone fruit – pluots are amazing right now, I just found peaches on sale, and options are endless. AND it’s not so beastly hot right now, which means I can actually haul my loot home and bake with it and not give myself heat stroke in the process. I’m a happy girl!

IMG_1093

A few other pictures of life lately…

IMG_1060IMG_1148IMG_1030IMG_3723

I highly recommend this crisp, not only because it’s crisp which is basically the easiest thing ever but also because its insanely customizable. Can find pluots? No prob. Use peaches! Or nectarines. Or any other stone fruit that calls you. I’m loving the basil in here for some earthy freshness against the sweetness of the fruit, so I can’t in good conscience let you leave that out (also it’s summer, which means basil is going gangbusters. Get on that!)

IMG_1080

IMG_1085

Keeping it short and sweet today – Go hang out in  your kitchen for the approximately 10 minute it takes to throw this together (okay, maybe a bit more if we include slicing up fruit), round up a loved one and enjoy the late summer bounty. Your sense of general wellbeing will thank you!

IMG_1094

Pluot, Apricot, Blackberry and Basil Crisp

Gluten free and whole grain, vegan, dairy free, and refined sugar free. Perfect for the late summer bounty of all the stone fruit – pluots, apricots and berries do the tango with a bit of basil thrown in for good measure. Peaches also work nicely here – I’ve also done a version with a few plums, peaches, and blackberries. Yield: 1 9″ crisp, serving sizes are up to your discretion ;)

  • 3.5 c assorted pluots, sliced*
  • 3 small apricots, sliced*
  • 1 c blackberries
  • juice of one meyer lemon
  • zest of one meyer lemon
  • 1 tsp vanilla extract
  • 2 tbsp maple syrup
  • 2 heaping tbsp fresh basil, chopped

*a combination of peaches and pluots works nicely here too

For the filling, you basically need enough fruit to fill your pie plate of choice. My approximate measurements are listed – I usually just cut it directly into my pie plate and estimate from there.

For the crisp:

  • 1 c rolled oats (gluten free if needed)
  • 1/2 oat flour
  • 1/2 c almond flour
  • large pinch of sea salt
  • 1/2 c raw almonds, roughly chopped
  • 1/4 c coconut sugar
  • 6 tbsp coconut oil, solid
  • 1 tsp vanilla extract

Preheat the oven to 350, and select your 9″ pie plate or 9×9 pan.

In a large bowl, combine rolled oats, oat flour, almond flour, sea salt, almonds, and coconut sugar. Cut in the coconut oil, using a fork/your fingers/a pastry cutter if you’re feeling fancy — I used a fork and my fingers and it worked just fine (crisp is exceedingly forgiving). Stir in vanilla extract.

In a large bowl, toss together pluots, apricots, and blackberries. Add lemon juice and zest, maple, vanilla extract, and chopped basil, and toss to combine.

Add the pluot-berry mix into the prepared pie plate or baking pan, top evenly with the crisp. Pop the whole thing into the oven for 45-50 minutes, until the fruit is bubbly and the crisp is lightly browned and… crisp!

Serve with your fave vanilla ice cream/non dairy of choice (whipped coconut cream would also be good here), and store any leftovers covered in the fridge. Makes EXCELLENT breakfast the next day – the crisp solidifies a little in the fridge and omg it’s good. Besides, who is going to pass up crisp for breakfast?! Not this girl.

IMG_1074

IMG_1083

Living the stone fruit life

IMG_0934

Can’t stop, won’t stop with the stone fruit! I love mid to late summer for that reason – peaches, pluots (personal fave), nectarines, apricots… the list goes on and on and on. It’s definitely worth it to brave the oven heat and do some summer baking when there is stone fruit involved.

IMG_0936

A food nerd fun fact for you! Did you know that peaches and almonds are related? What we think of as almond nuts are actually the hard-shelled fruit of the almond tree, which is in the prunus family (we’re getting real food-nerdy up in here). That’s the same family that also includes most stone fruit-producing trees and shrubs, like peaches, cherries, plums, and nectarines! Food is so cool.

IMG_0939

Not only is it awesome that almonds and peaches are fam, but they also are a taste pair made in heaven. Throw in some apricots and meyer lemon zest and have yourself a party – I always taste things when I’m cooking, but very rarely do I actually say out loud to myself, “DAMN that’s good!!”… however, in the making of this meyer lemon and almond frangipane, that is exactly what I did.

IMG_0937

Barefoot in my kitchen at 6 am (because as we’ve previously discussed, I often end up baking early not only because of time constraints the rest of the day, but also because I love it for its quietude and peaceful mindfulness), I taste-tested the frangipane to determine if I had the right balance between lemon and almond and practically yelled, “OMG THIS IS DELICIOUS!” Not to toot my own horn, or anything, ha! Sometimes I surprise even myself.

IMG_0940

Apricots lend themselves especially well to baking – unlike most other stone fruit that can be eaten out of hand over the sink, I’m less partial to snacking on apricots. BUT – when you bake them, they take on greater flavor and are just delicious; even if they’re not perfectly ripe when you use them.

IMG_0947

Refined sugar free, grain free, gluten free, paleo depending on your definition (I have some paleo friends who eat butter, some who don’t, so you do you!) – a heap of summer stone fruit, fragrant meyer lemon and almond, and a kitchen that smells amazing. What’s not to love?

IMG_0952

Apricot and Peach Galette with Meyer Lemon Almond Frangipane

A Wait are Those Cookies original! Adapted from my Rhubarb Frangipane tart, here. Grain free, gluten free, refined sugar free and possibly paleo, depending on your definition. Definitely delicious, perfect for the late summer glut of stone fruit. Yield: 1 galette, serves… 2. For dessert & breakfast, duh. Just kidding – probably serves 4 to 5.

For the galette dough:

  • 1.5 c almond flour (not meal; you want the finer flour variety)
  • 1/2 c tapioca flour
  • 1/4 tsp fine sea salt
  • 6 tbsp salted butter, chopped
  • 1 egg
  • zest of 2 meyer lemons (or regular lemons)
  • 1 tbsp vanilla extract

In a food processor or high-power blender (I used a food processor), pulse almond flour, tapioca starch, salt, and butter to combine until it looks like coarse meal. Add in egg, lemon zest, and vanilla extract and pulse just until combined. Turn out onto a piece of plastic wrap, shape into a disk and chill in the fridge for at least an hour, or up to overnight.

For the frangipane:

  • 1/2 c almond flour
  • 1/4 c maple syrup
  • zest of 2 meyer lemons
  • 1 tbsp meyer lemon juice
  • 2 eggs
  • 1 tsp vanilla
  • 1/4 tsp almond extract
  • 1/3 c roasted unsalted almond butter

In a food processor, combine almond flour, maple, and lemon zest. Pulse once to combine. Add in lemon juice, eggs, vanilla and almond extract, and pulse once or twice, until combined. Add in almond butter, and blend again until smooth. If the frangipane seems too sticky, add 1-2 tbsp of maple to loosen it; if it’s too loose, add a few tbsp of almond flour. Can be made ahead and refrigerated overnight.

Assembly:

  • 2 large peaches, sliced
  • 6 apricots, sliced
  • 3 tbsp tapioca starch
  • zest of one meyer lemon
  • 1 tsp vanilla
  • 1.5 tbsp butter
  • beaten egg, for egg wash
  • 2 tsp coconut sugar for sprinkling

Once the dough has chilled, preheat the oven to 375. In a large bowl, toss peaches and apricots with tapioca starch and lemon zest, and vanilla and set aside momentarily.

Roll out the dough between two pieces of parchment paper, keeping the circle to about 1/4″ thickness. Peel off the top piece of parchment, and slide the rolled out dough on its parchment onto a baking sheet. Top with the frangipane, spreading it carefully in order to not rip or crack the dough.

Add sliced peaches & apricots, in whatever pattern you like! Begin folding up the sides, creasing them together as you go – if the dough is cracking, that’s okay (you can crimp the cracks back together; remember: galettes are forgiving and rustic!); you can use the bottom piece of parchment to help fold up the sides. Brush the edges of the dough with the beaten egg and sprinkle a little coconut sugar around the sides. Dot with butter. Bake for 35-40 minutes until edges are golden brown — mine came out just fine at 37 minutes, so check accordingly. Let cool for a few minutes on the baking sheet, then carefully slide the whole galette onto a cooling rack to let it cool completely (it’s fine to leave it on the parchment paper on the cooling rack, I don’t find that it makes it soggy). Serve with your fave ice cream or whatever of choice! Keeps well covered in foil on the counter for a day or in the fridge overnight; mine didn’t last longer than about 2 days so I can vouch for it at least that long!

IMG_0938

Just can’t get enough of all the citrus!

IMG_0387

Hello, internet friends, and happy Mother’s Day to the moms out there! I do like my little corner of the interwebs… there’s so much STUFF going on in the world right now, I like to keep a little spot that’s just pretty food & friends.

IMG_0404

I went on my annual yoga retreat last weekend! So lovely as always – love, laughter and light with friends (and delicious food, and beautiful scenery)!

IMG_0351IMG_0348IMG_0343IMG_0346IMG_0318IMG_0315IMG_0306

But I’m back now, and fully back into the dessert swing of things – party snax, plus another citrus tart! The brownies are barely adapted from Ambitious Kitchen, here – I doubled the recipe & used blackberries instead with excellent results.

IMG_0398

IMG_0397

My kitchen currently smells like heaven – two desserts in under two hours is my kind of morning.

IMG_0399

More progress on the SF series!

IMG_0384

But this tart. Let’s get back to the tart…

IMG_0388

Citrusy (though not as much as my meyer lemon curd/blackberry iteration) – this one is lighter on the citrus front, which makes sense since oranges are less in your face than lemons anyway.

IMG_0390

Lingonberries are delicious – tart like cranberries but… different! Apparently they’re high in antioxidants too, whoop whoop! I have a largish jar of lingonberry jam that I wasn’t really going to get through using it just for toast, so I decided to introduce it to my orange curd and see if they got along. Turns out they pair surprisingly well, especially with a vanilla crust to bring it all together.

IMG_0392

Lightly sweet and perfect for spring – this tart does double duty as dessert and breakfast (as so many of my desserts do; why be limited?). I mean, it’s basically fruit and nuts…

IMG_0401

Have a great weekend, friends in my little corner of the internet!

IMG_0393

Orange Curd Tart with Lingonberry Swirl on an Almond Vanilla Crust

More citrus! Tart, lightly sweet, and perfect for spring. Gluten free, grain free, refined sugar free, dairy free. Yield: 1 9″ tart; serves 6-9 (or two. your call). Incidentally, curd freezes quite well in airtight container –  I made this ahead of time and froze it for about a week since I wasn’t quite sure when I would use it. Tart is a Wait are those Cookies original!

For the orange curd:

  • 4 eggs
  • 1/2 c coconut oil
  • scant 1/4 c honey
  • 1/8 tsp sea salt
  • 1/2 c orange juice
  • juice of 1 meyer lemon
  • zest of 3 oranges
  • 1 tsp vanilla

In a saucepan over medium-low heat, combine eggs, coconut oil, honey, sea salt, lemon juice, lemon zest, and vanilla. Whisk to combine and continue to cook, whisking constantly for about 10-15 minutes – it should be just on the edge (but not there yet!) of a low boil. The curd should thicken and your whisk will make tracks – don’t let it boil. It will still be slightly runny but will firm up in the fridge. While it’s still warm, strain curd through a metal strainer into a glass container and let cool completely before storing in the fridge (overnight is preferable, but at least 4 hours if pressed for time).

For the lingonberry swirl:

I used about a 1/4 c lingonberry jam (on the tart side) blitzed a few times with an immersion blender (a food processor would be fine too), just to get rid of the whole berries (cause piping those through a pastry bag or ziplock is a recipe for disaster, just saying)

For the crust:

  • 2.5 c almond flour
  • 1 tbsp coconut flour
  • 1/4 tsp baking powder
  • 1/4 tsp fine sea salt
  • 3 tbsp melted coconut oil
  • 1 tbsp vanilla extract
  • 1/4 c unsalted almond butter
  • 2 tbsp maple syrup

In a large bowl, whisk together almond flour, coconut flour, baking powder, and sea salt. Add in melted coconut oil, vanilla, almond butter, and maple syrup, and stir until combined – the mixture will be crumbly.

Preheat the oven to 350, and press the mixture into the bottom and up the sides of a 9″ pie plate. Poke the bottom a few times with a fork, and bake for 10 minutes. Remove from the oven and fill with the orange curd. If you’re planning on the lingonberry swirl, use a ziplock bag with a teeny corner cut off to pipe the sauce into the curd, and then use a knife to swirl it around (alternatively, use a pastry bag if you’re less lazy than me!). Bake for 8-10 minutes to set the curd, then let cool completely at room temperature. Top with sliced oranges and shredded coconut if desired. I prefer to chill mine in the fridge for at least two hours before serving.

Leftovers keep well covered in the fridge (though I dare you to have any!).

IMG_0395