Bluebs for Fogust

Hi blog friends –

Full transparency: I’ve been hit by a case of the covid/state of the country blues lately, and am not in the best headspace ever, at the moment. That being said, I’m going to keep this short, focus on pretty, delicious things, and then go clean the crap out of my apartment to make myself feel a bit better.

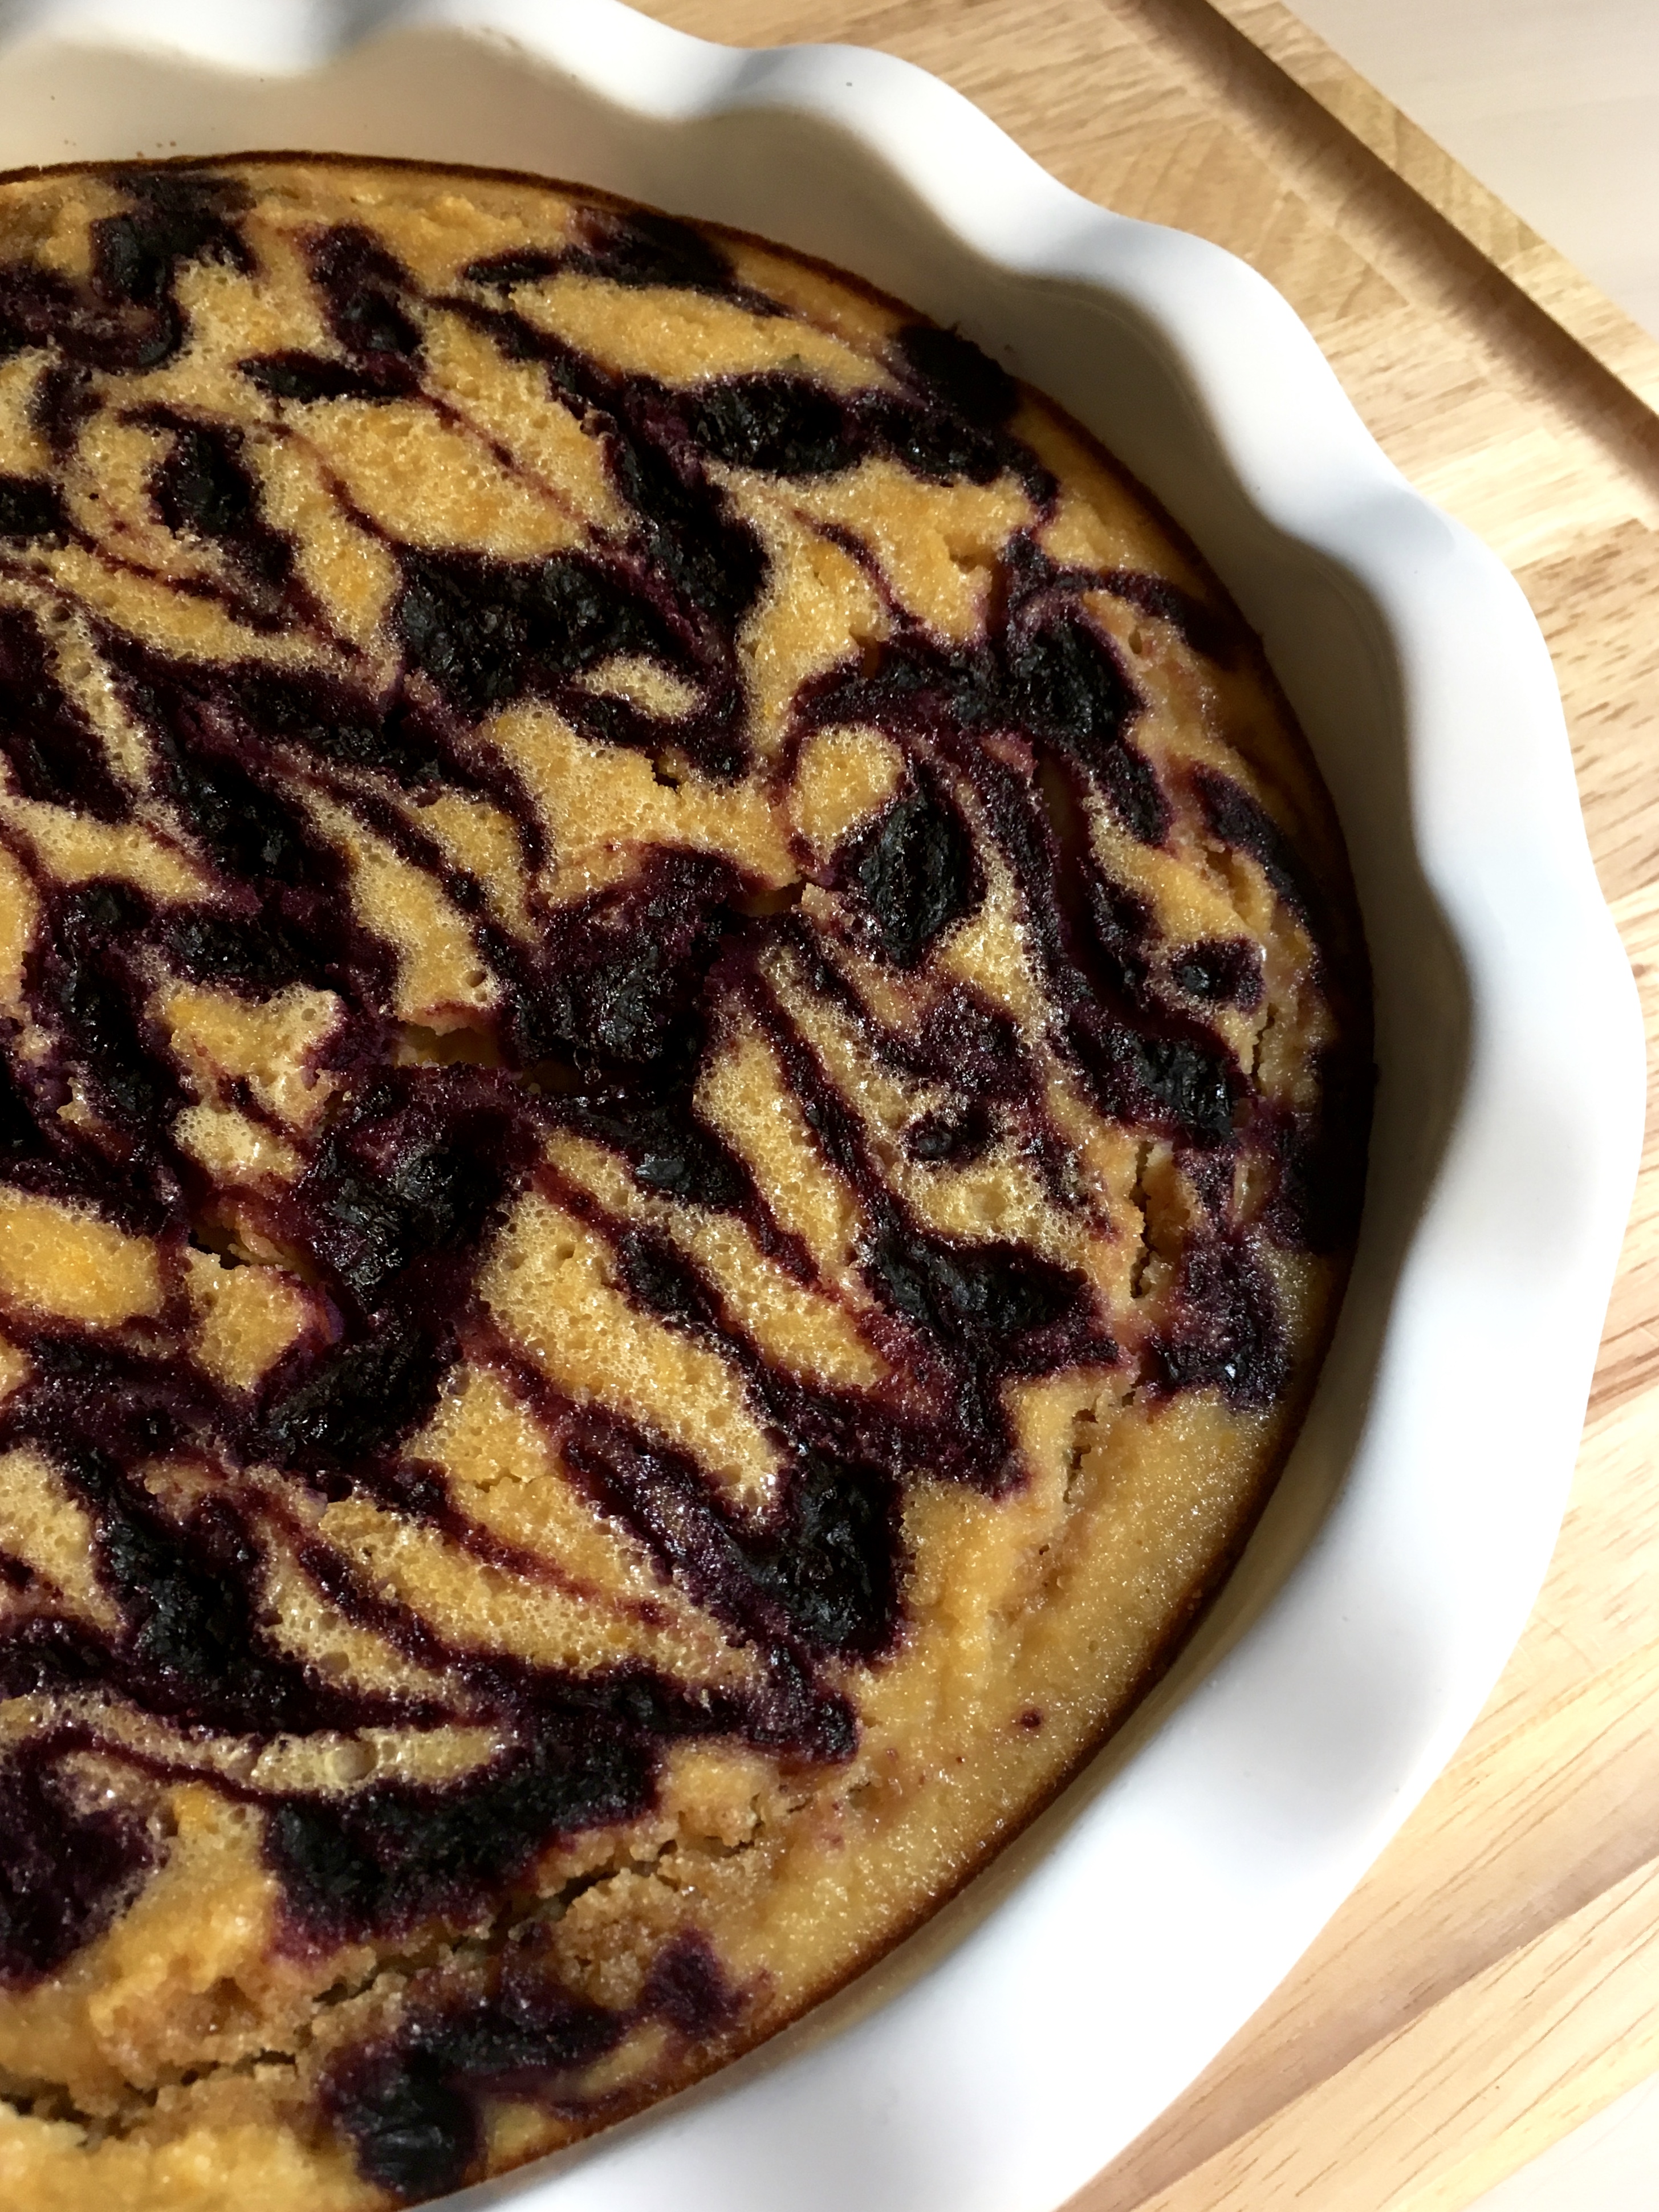
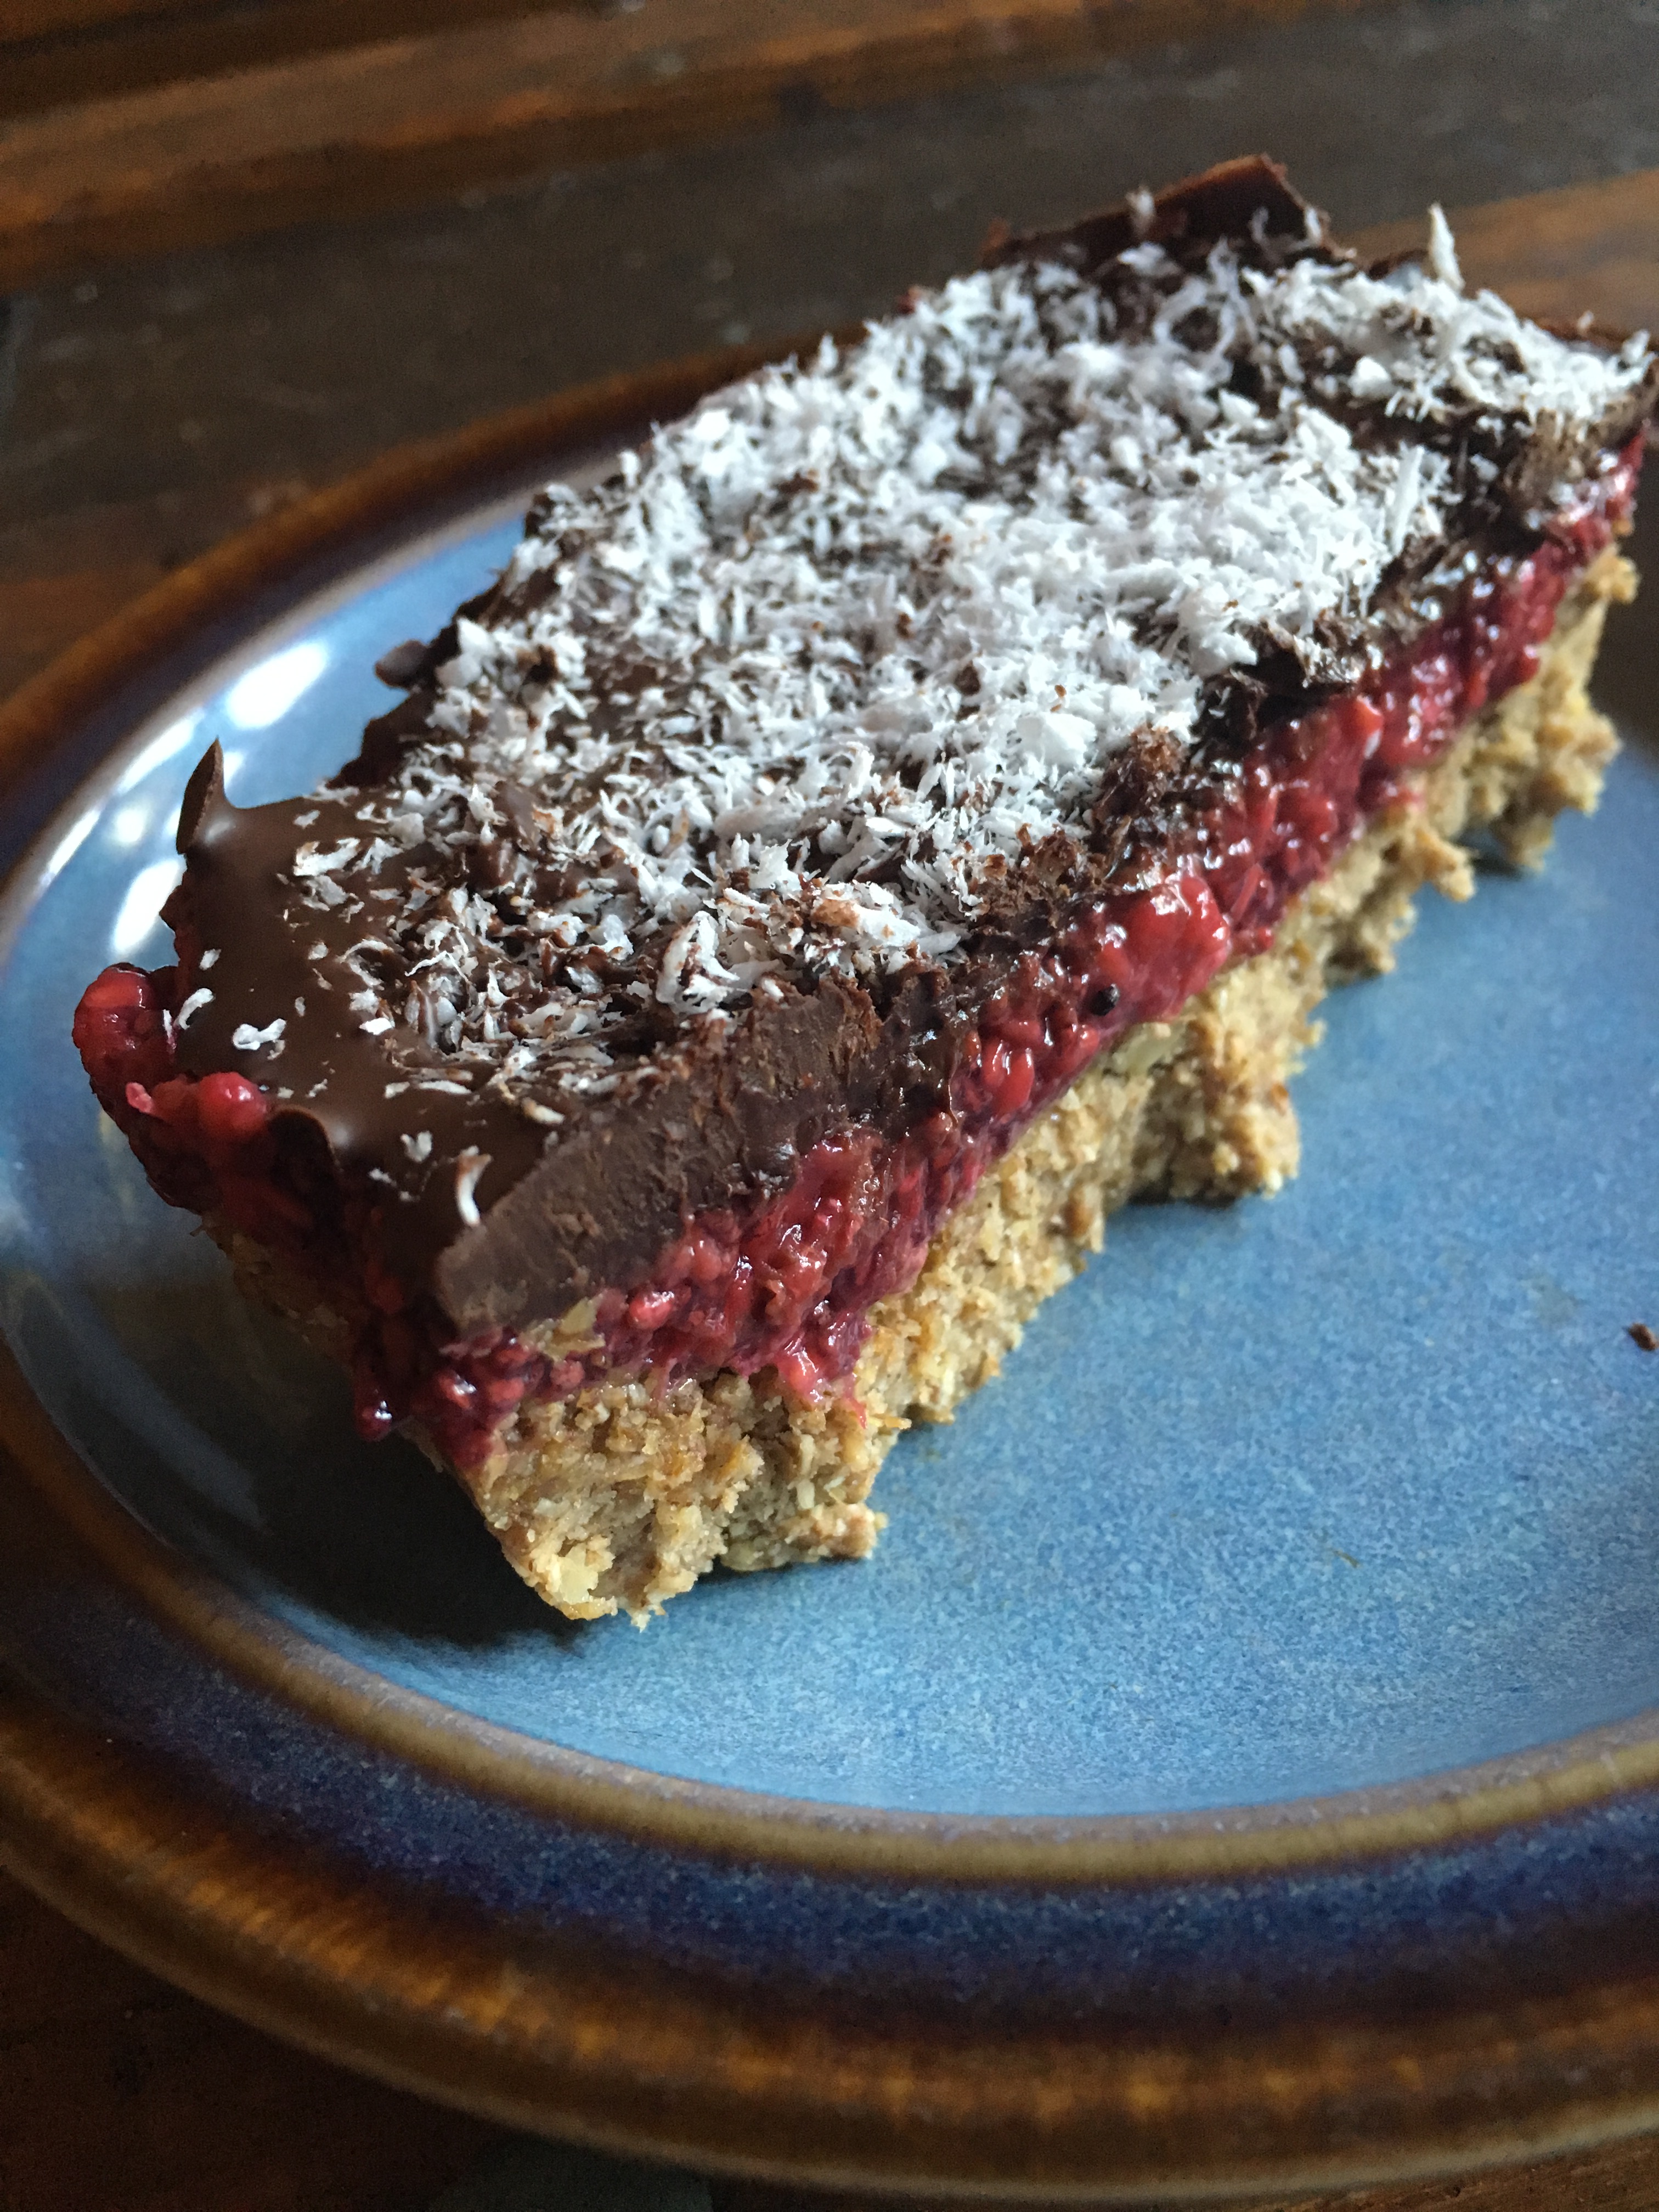
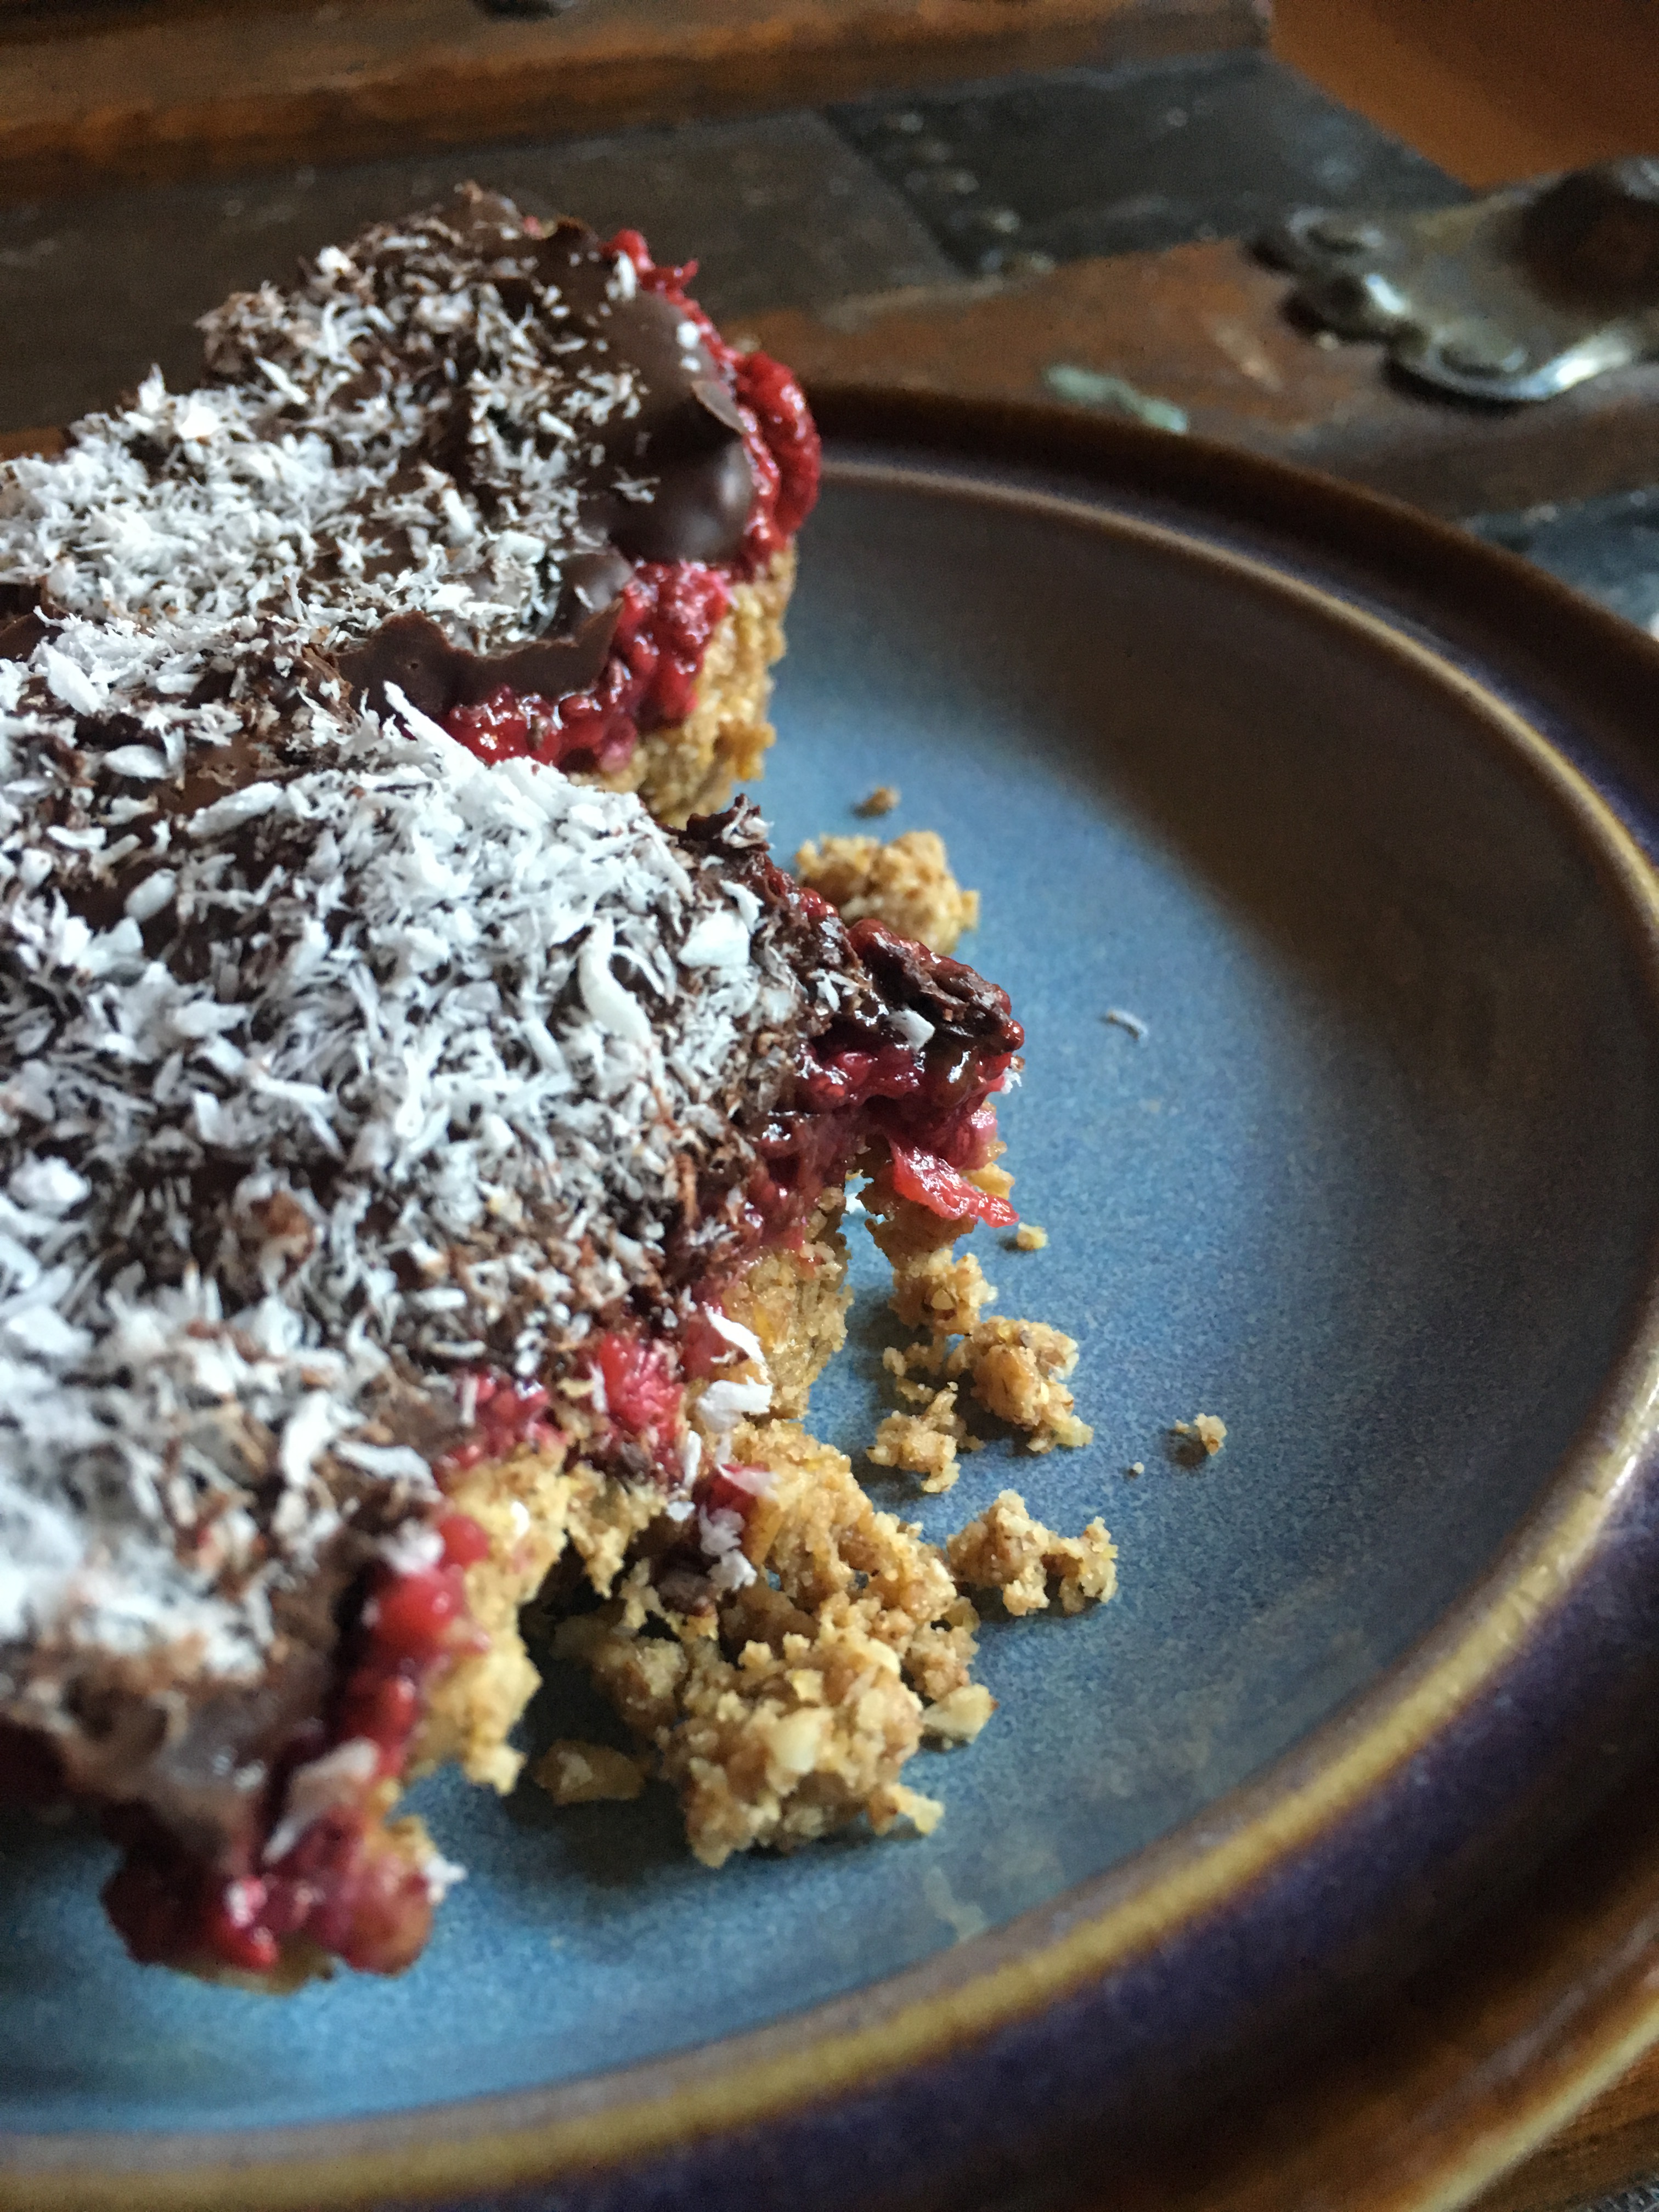
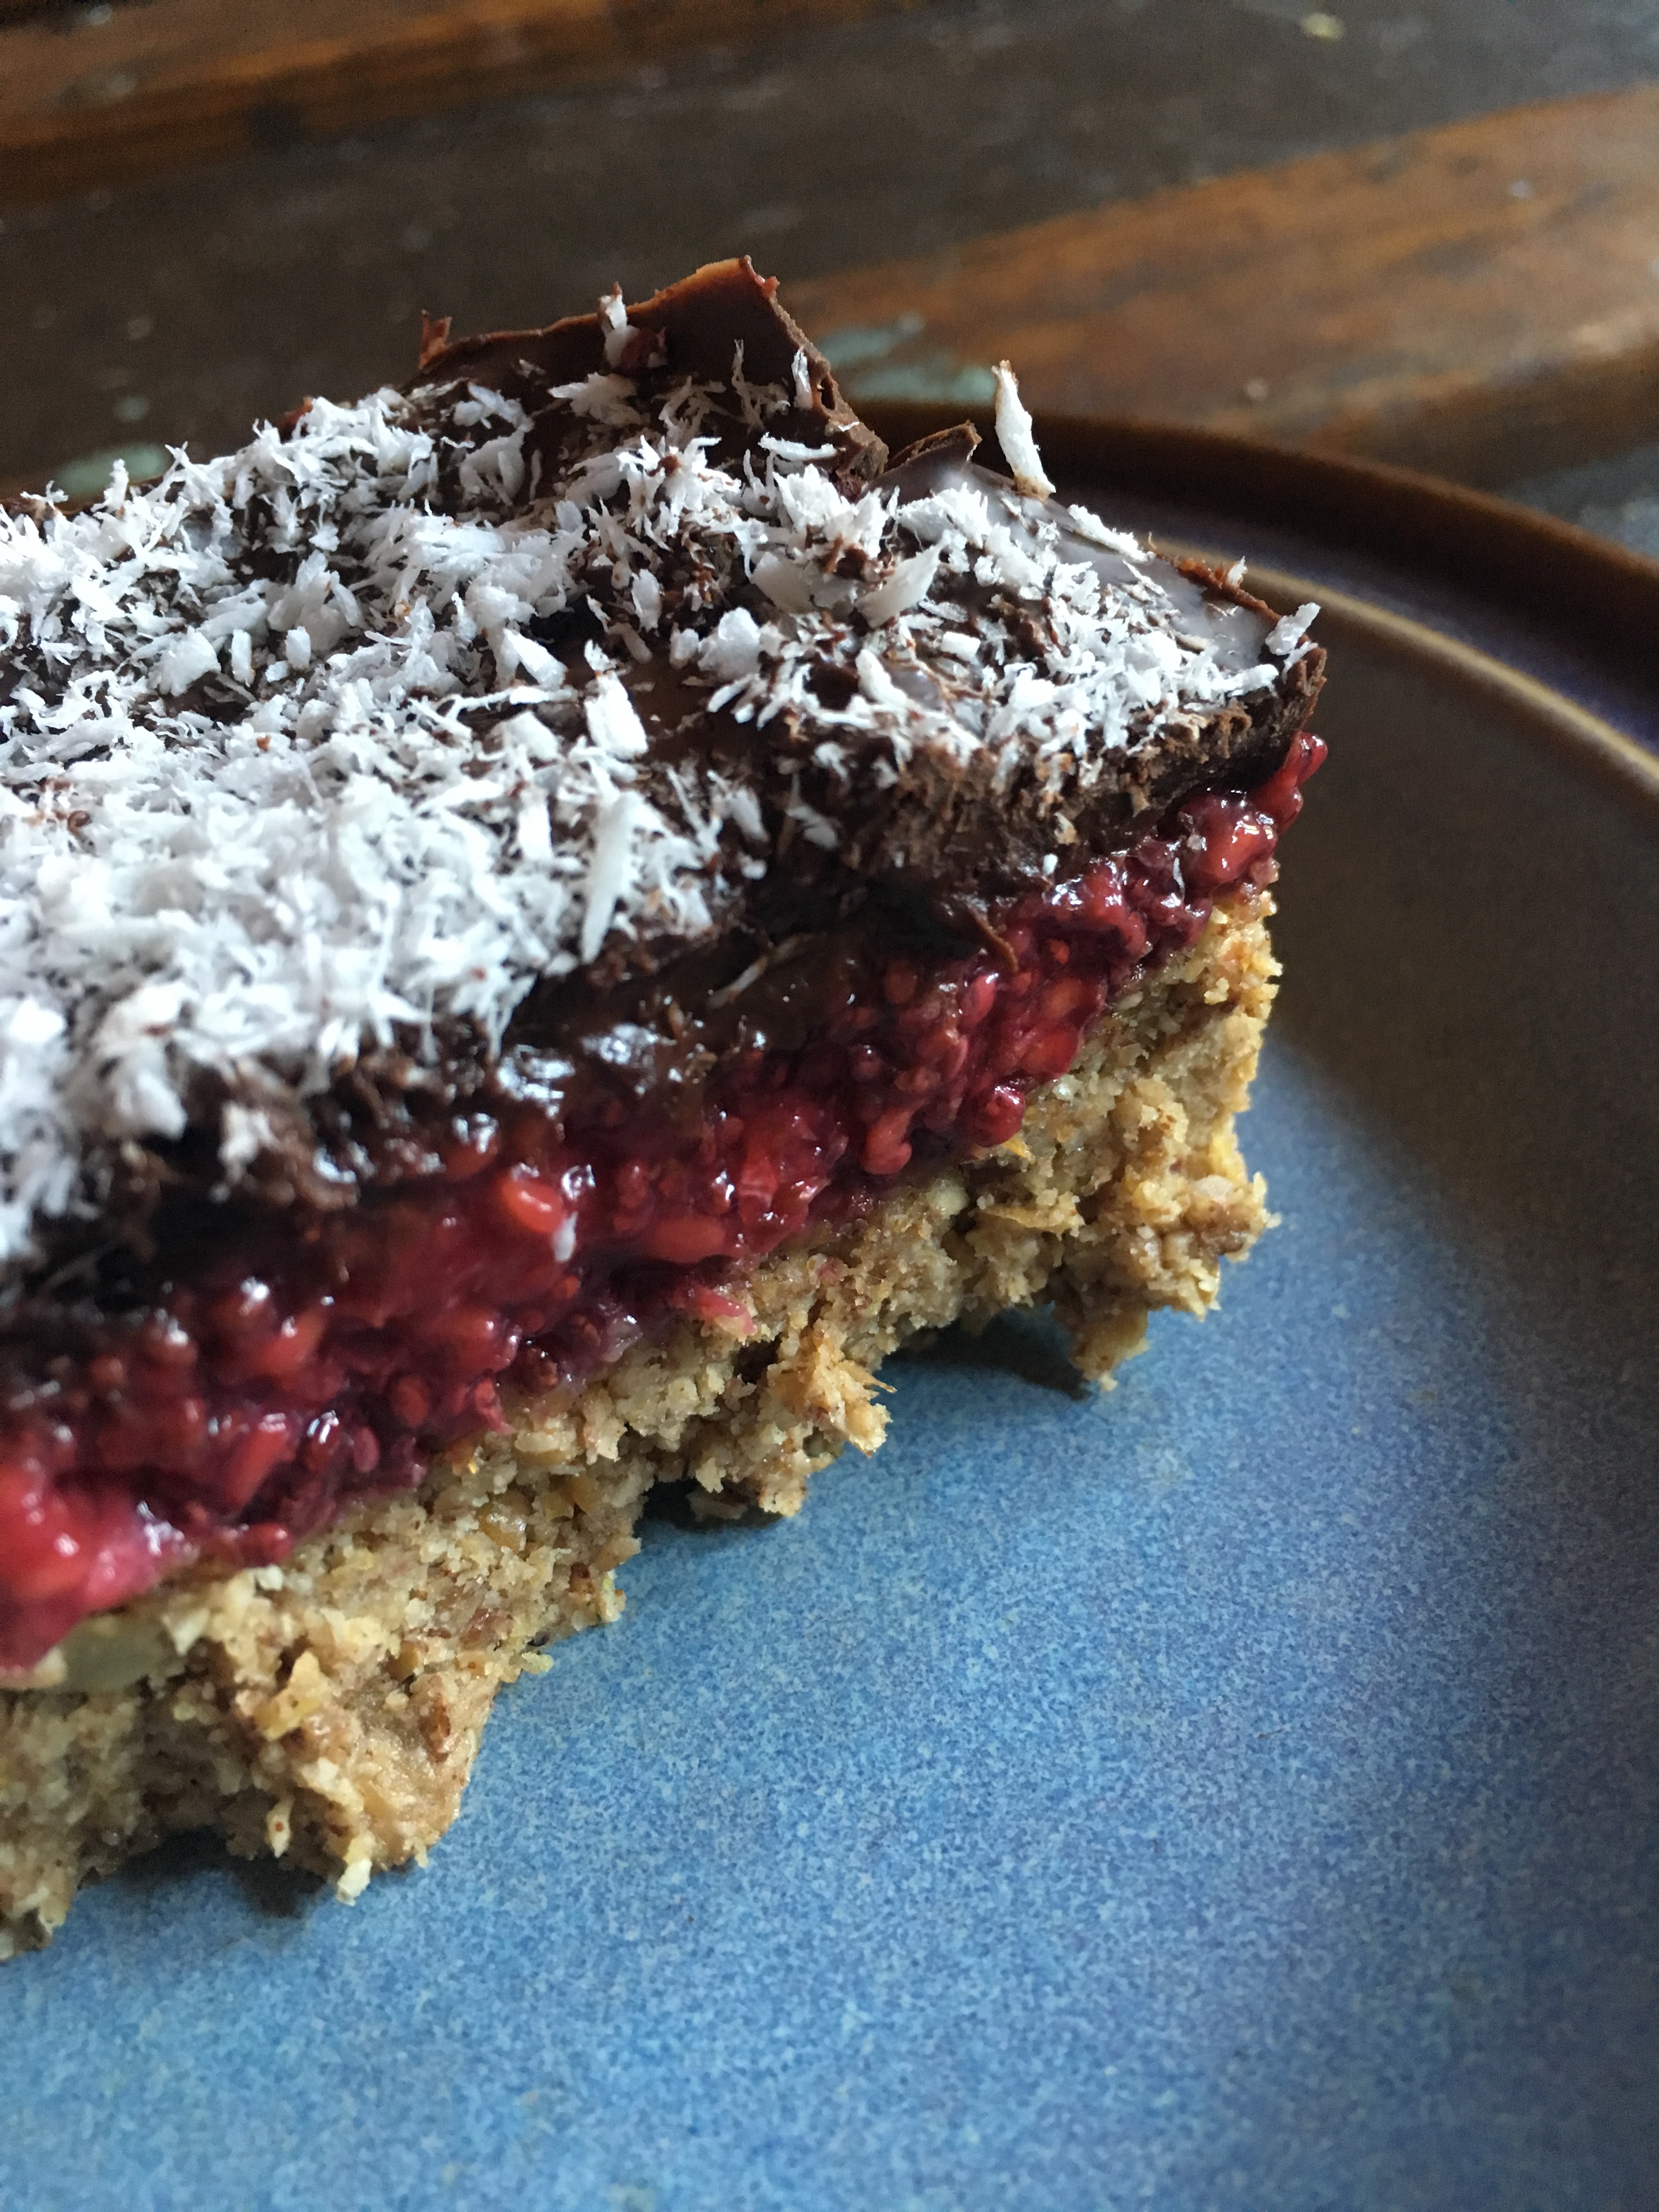
These bars are really good though. Perfect for a late summer dessert, or even for the times when you have blueberries that are just past perfect – maybe you don’t want to eat them out of hand, but they’re still perfectly good? Yep. These bars are a great vehicle for that. I love them for their simplicity, dietary restriction friendliness, and overall ease. Not to mention you can use whatever you have on hand, which is always a winner.

They’re gluten & grain free, refined sugar free, dairy free, vegan & paleo, making them suitable for just about everyone (sorry to my nut free friends out there; next time!)

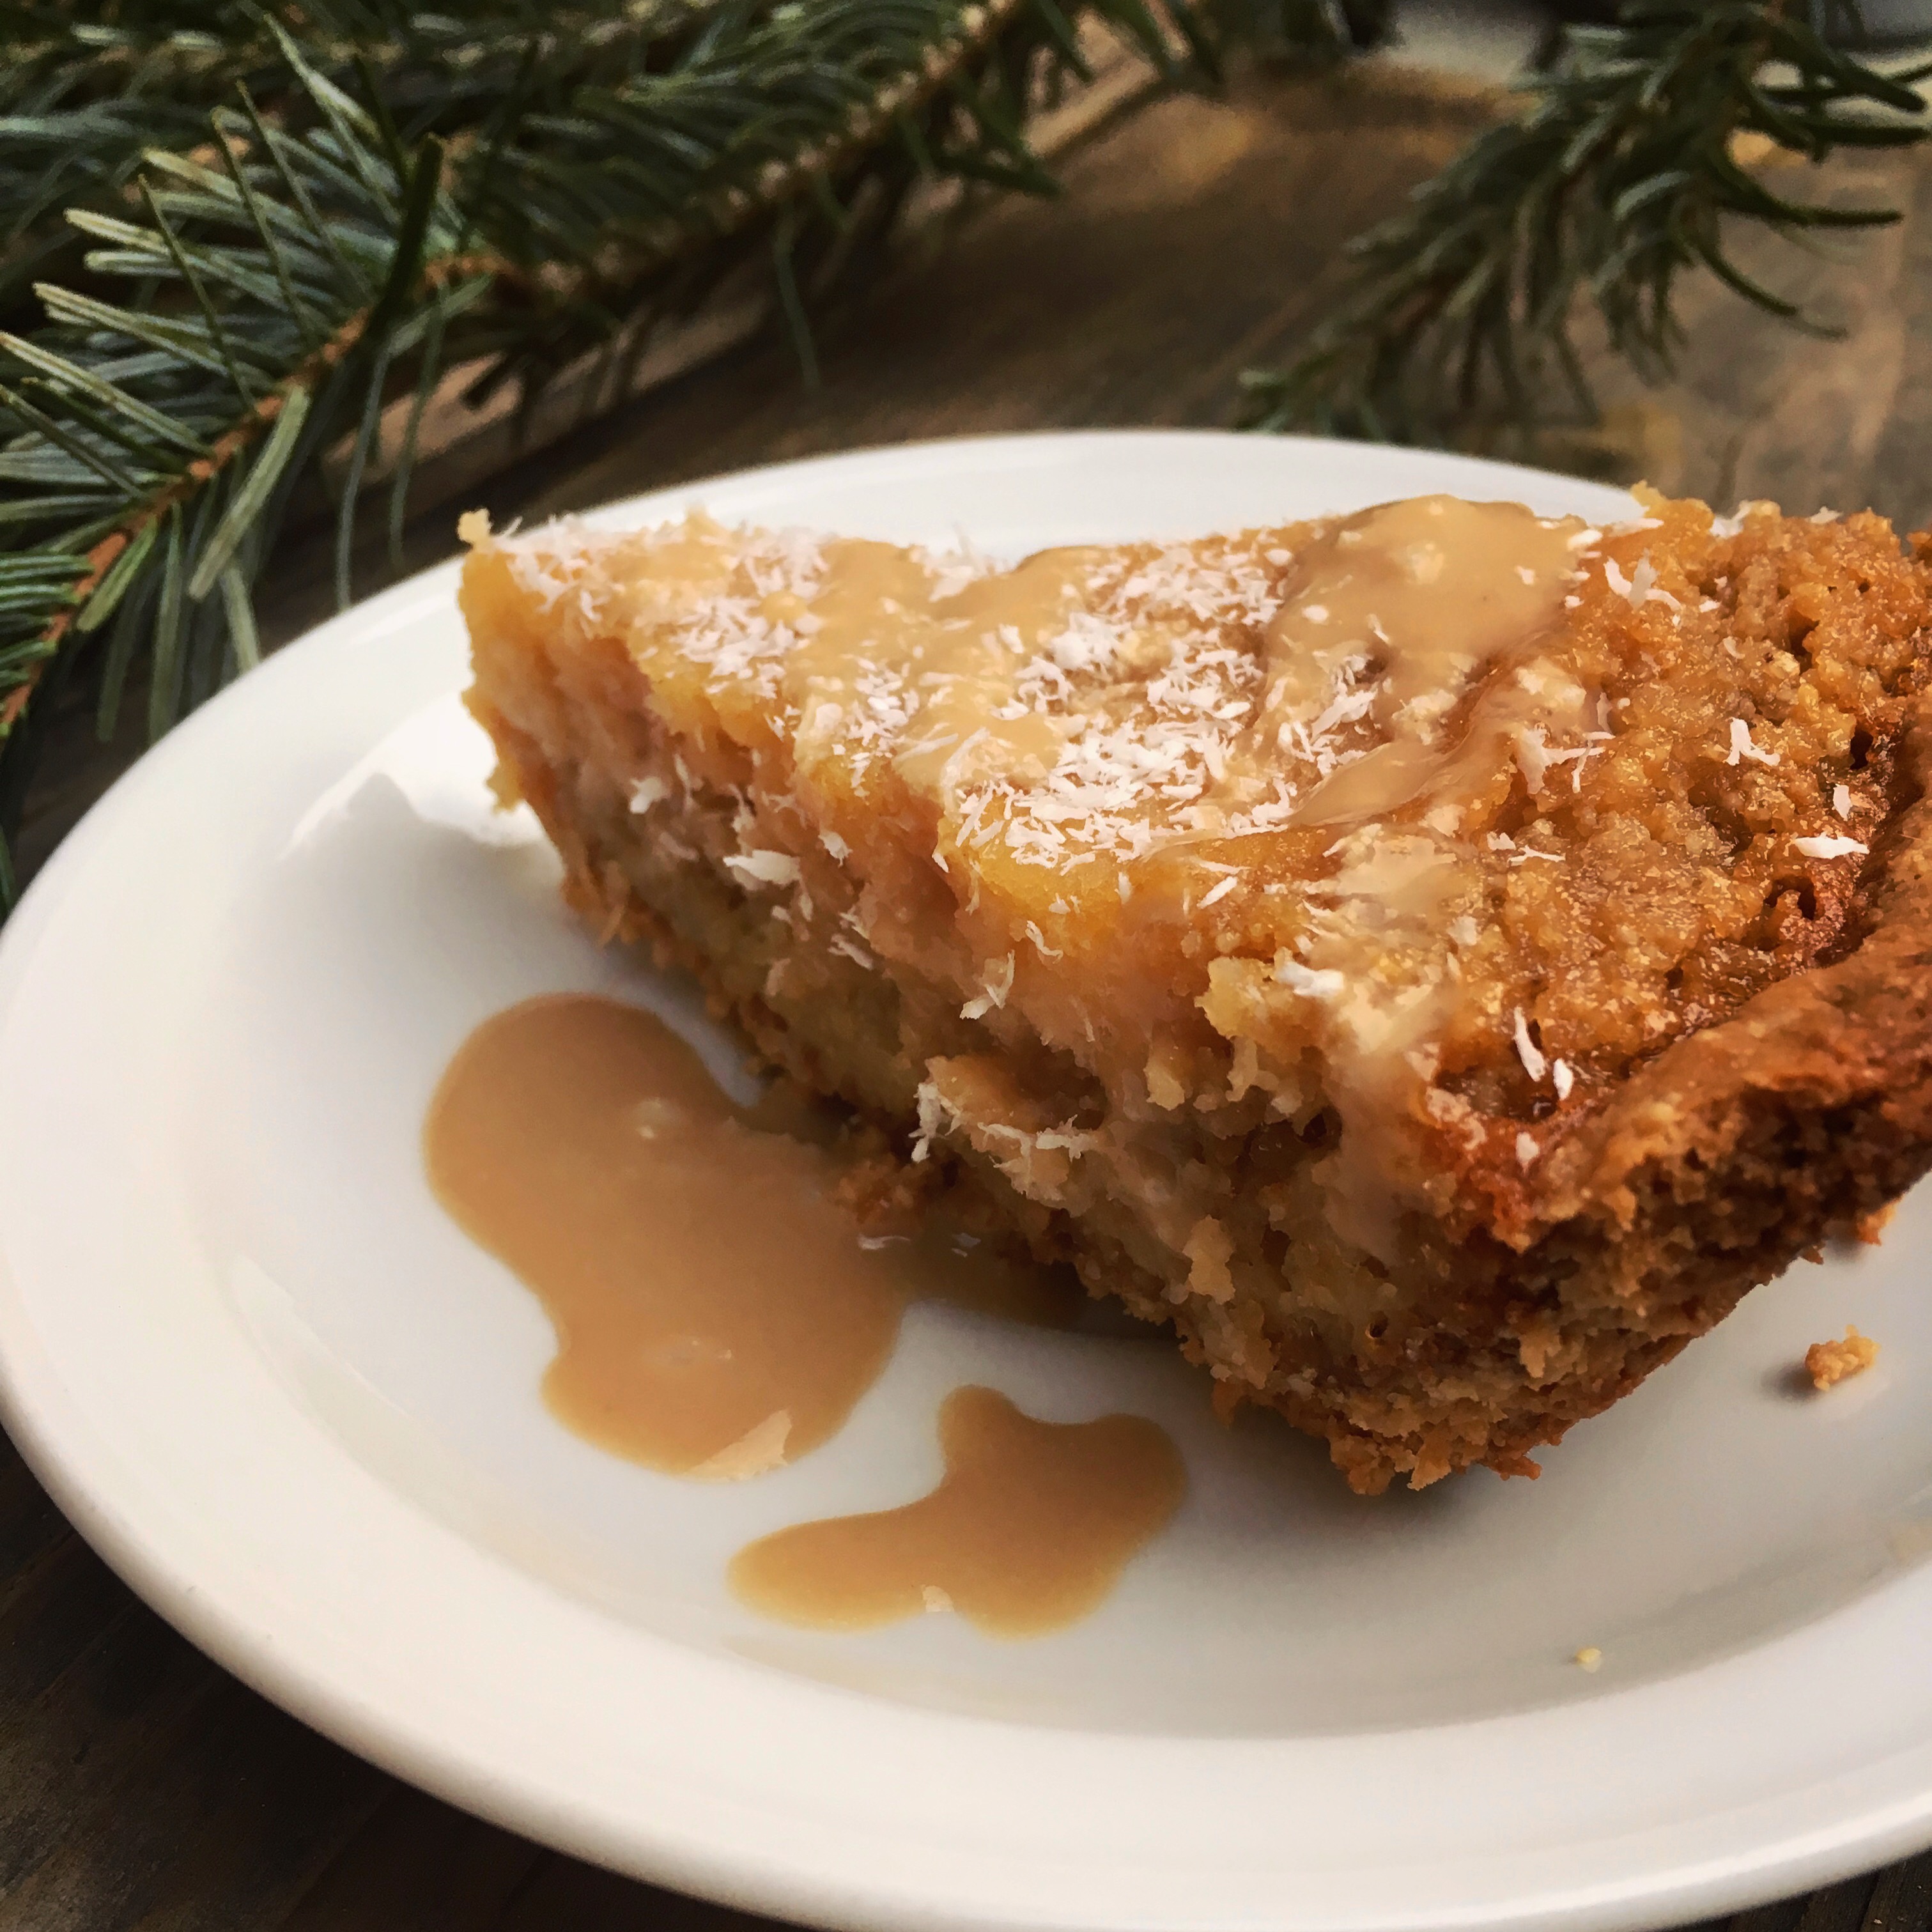
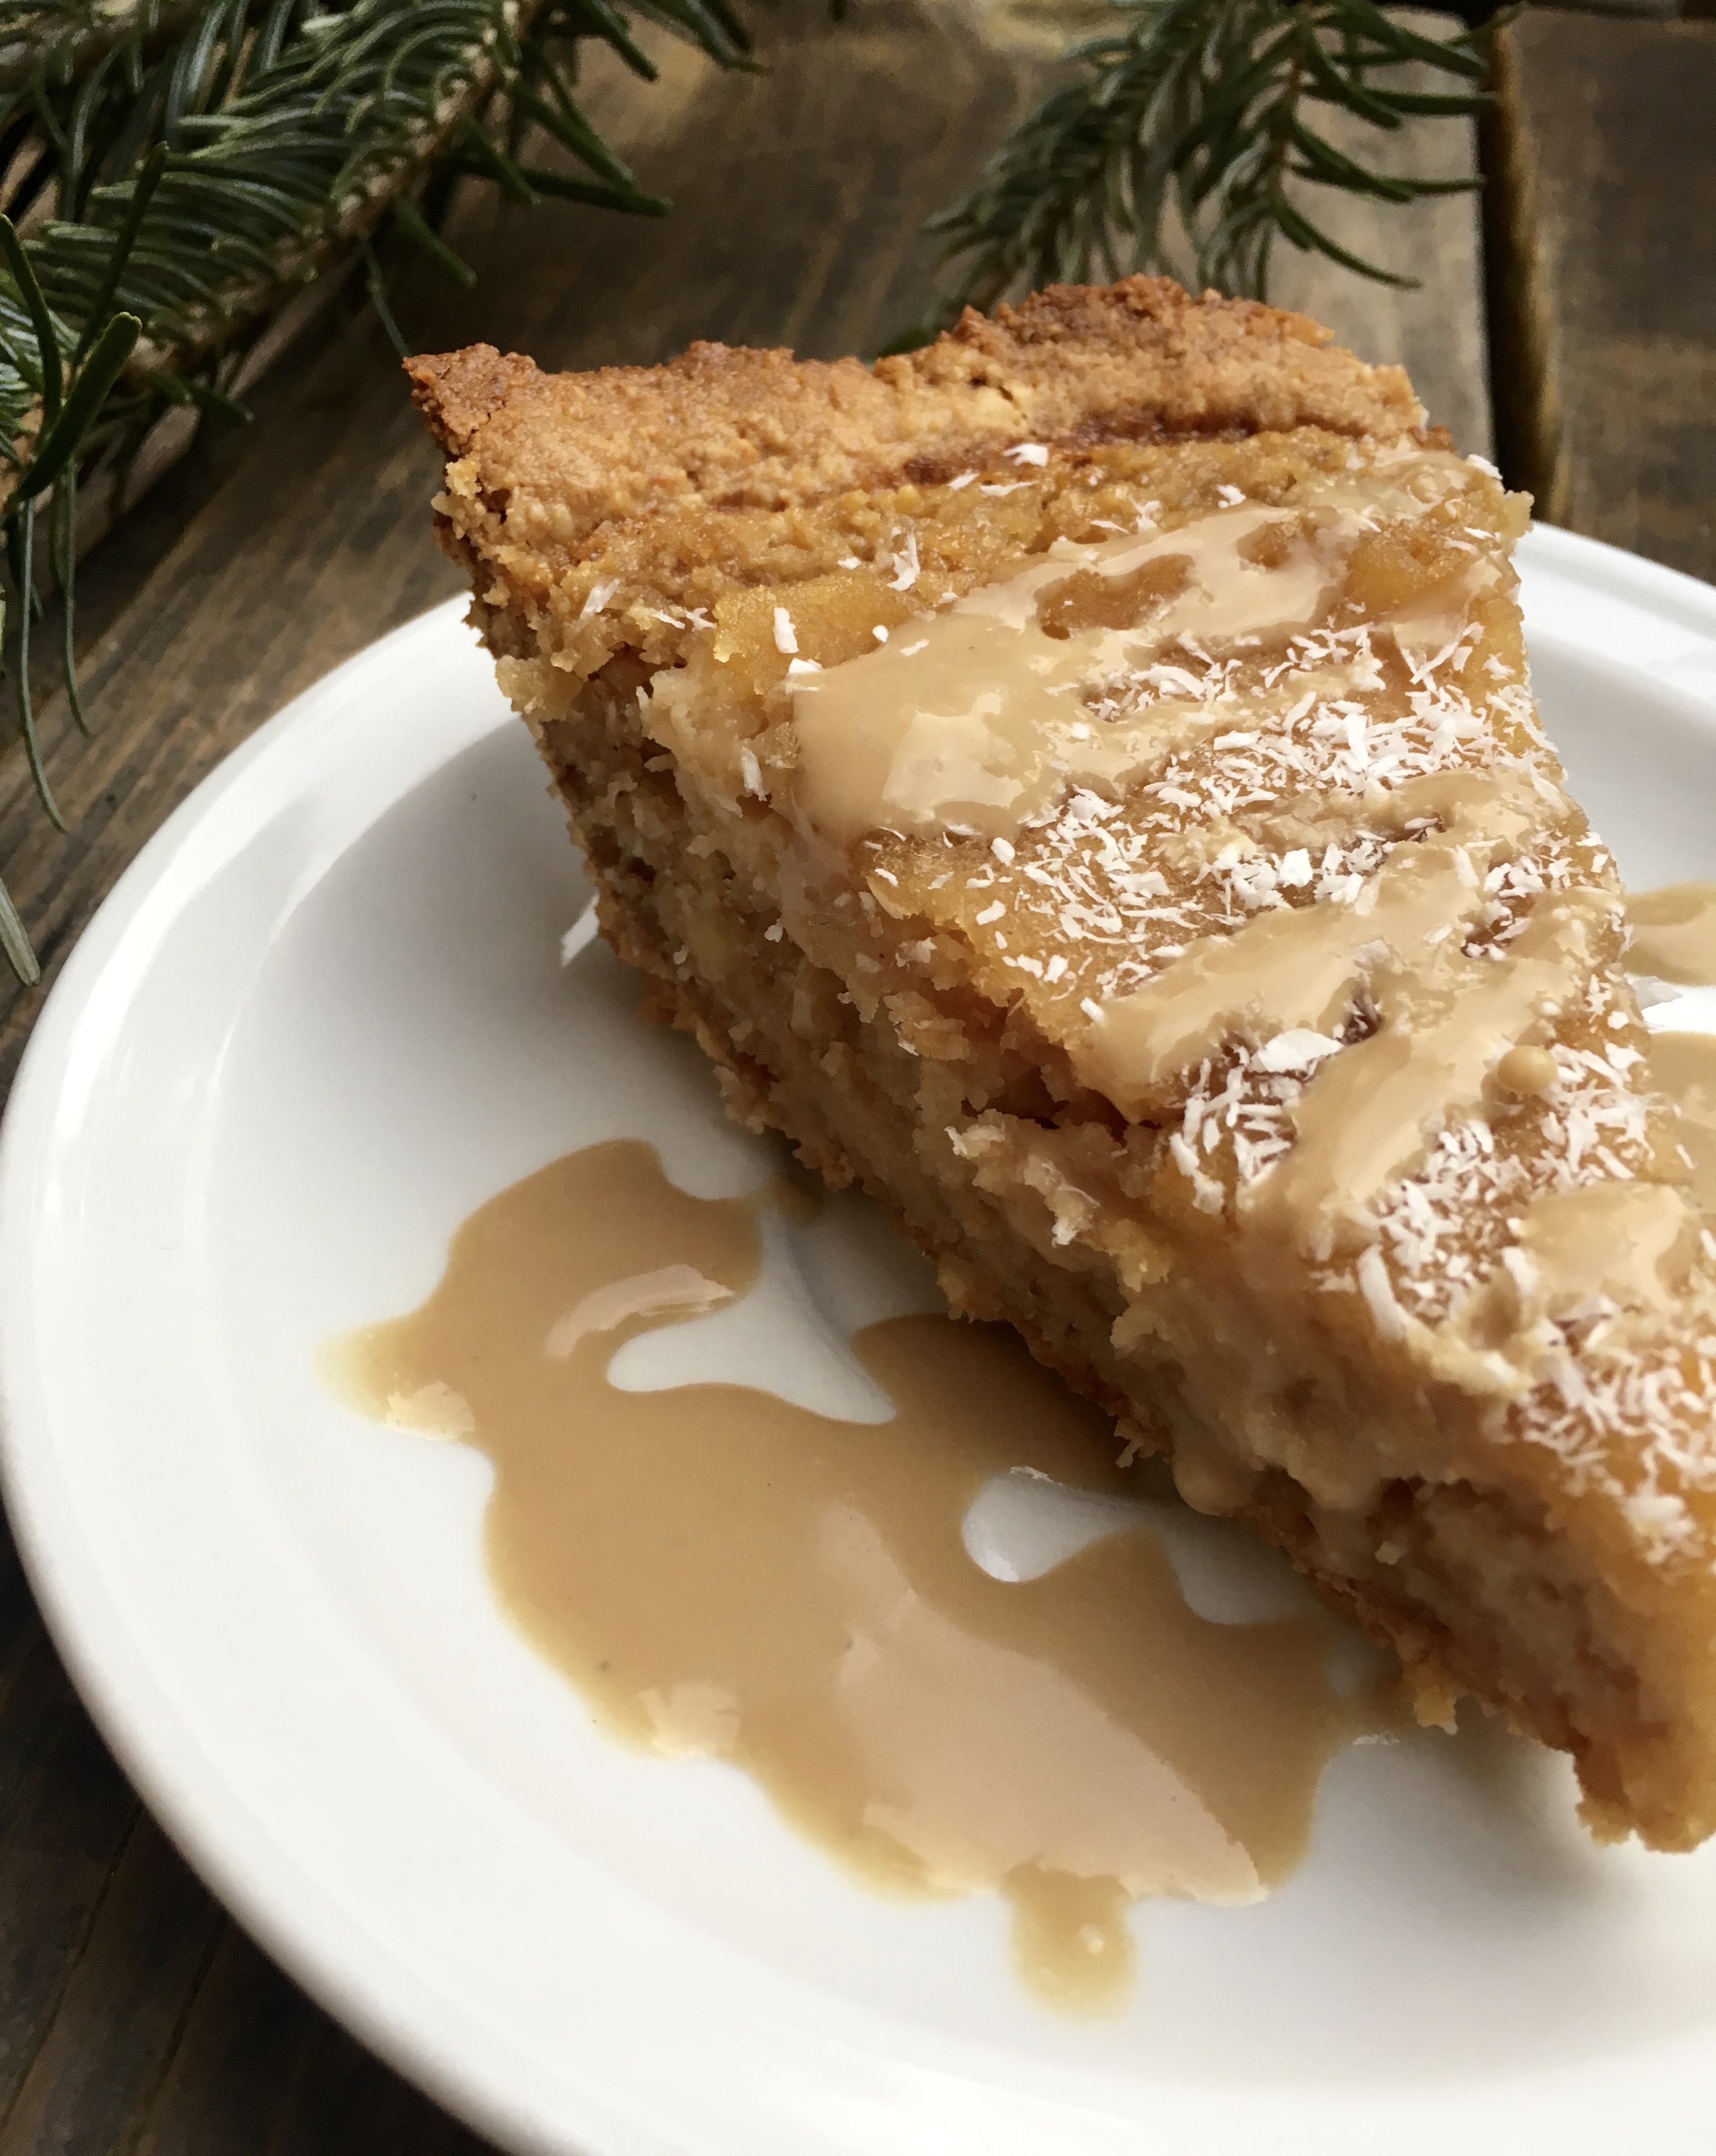
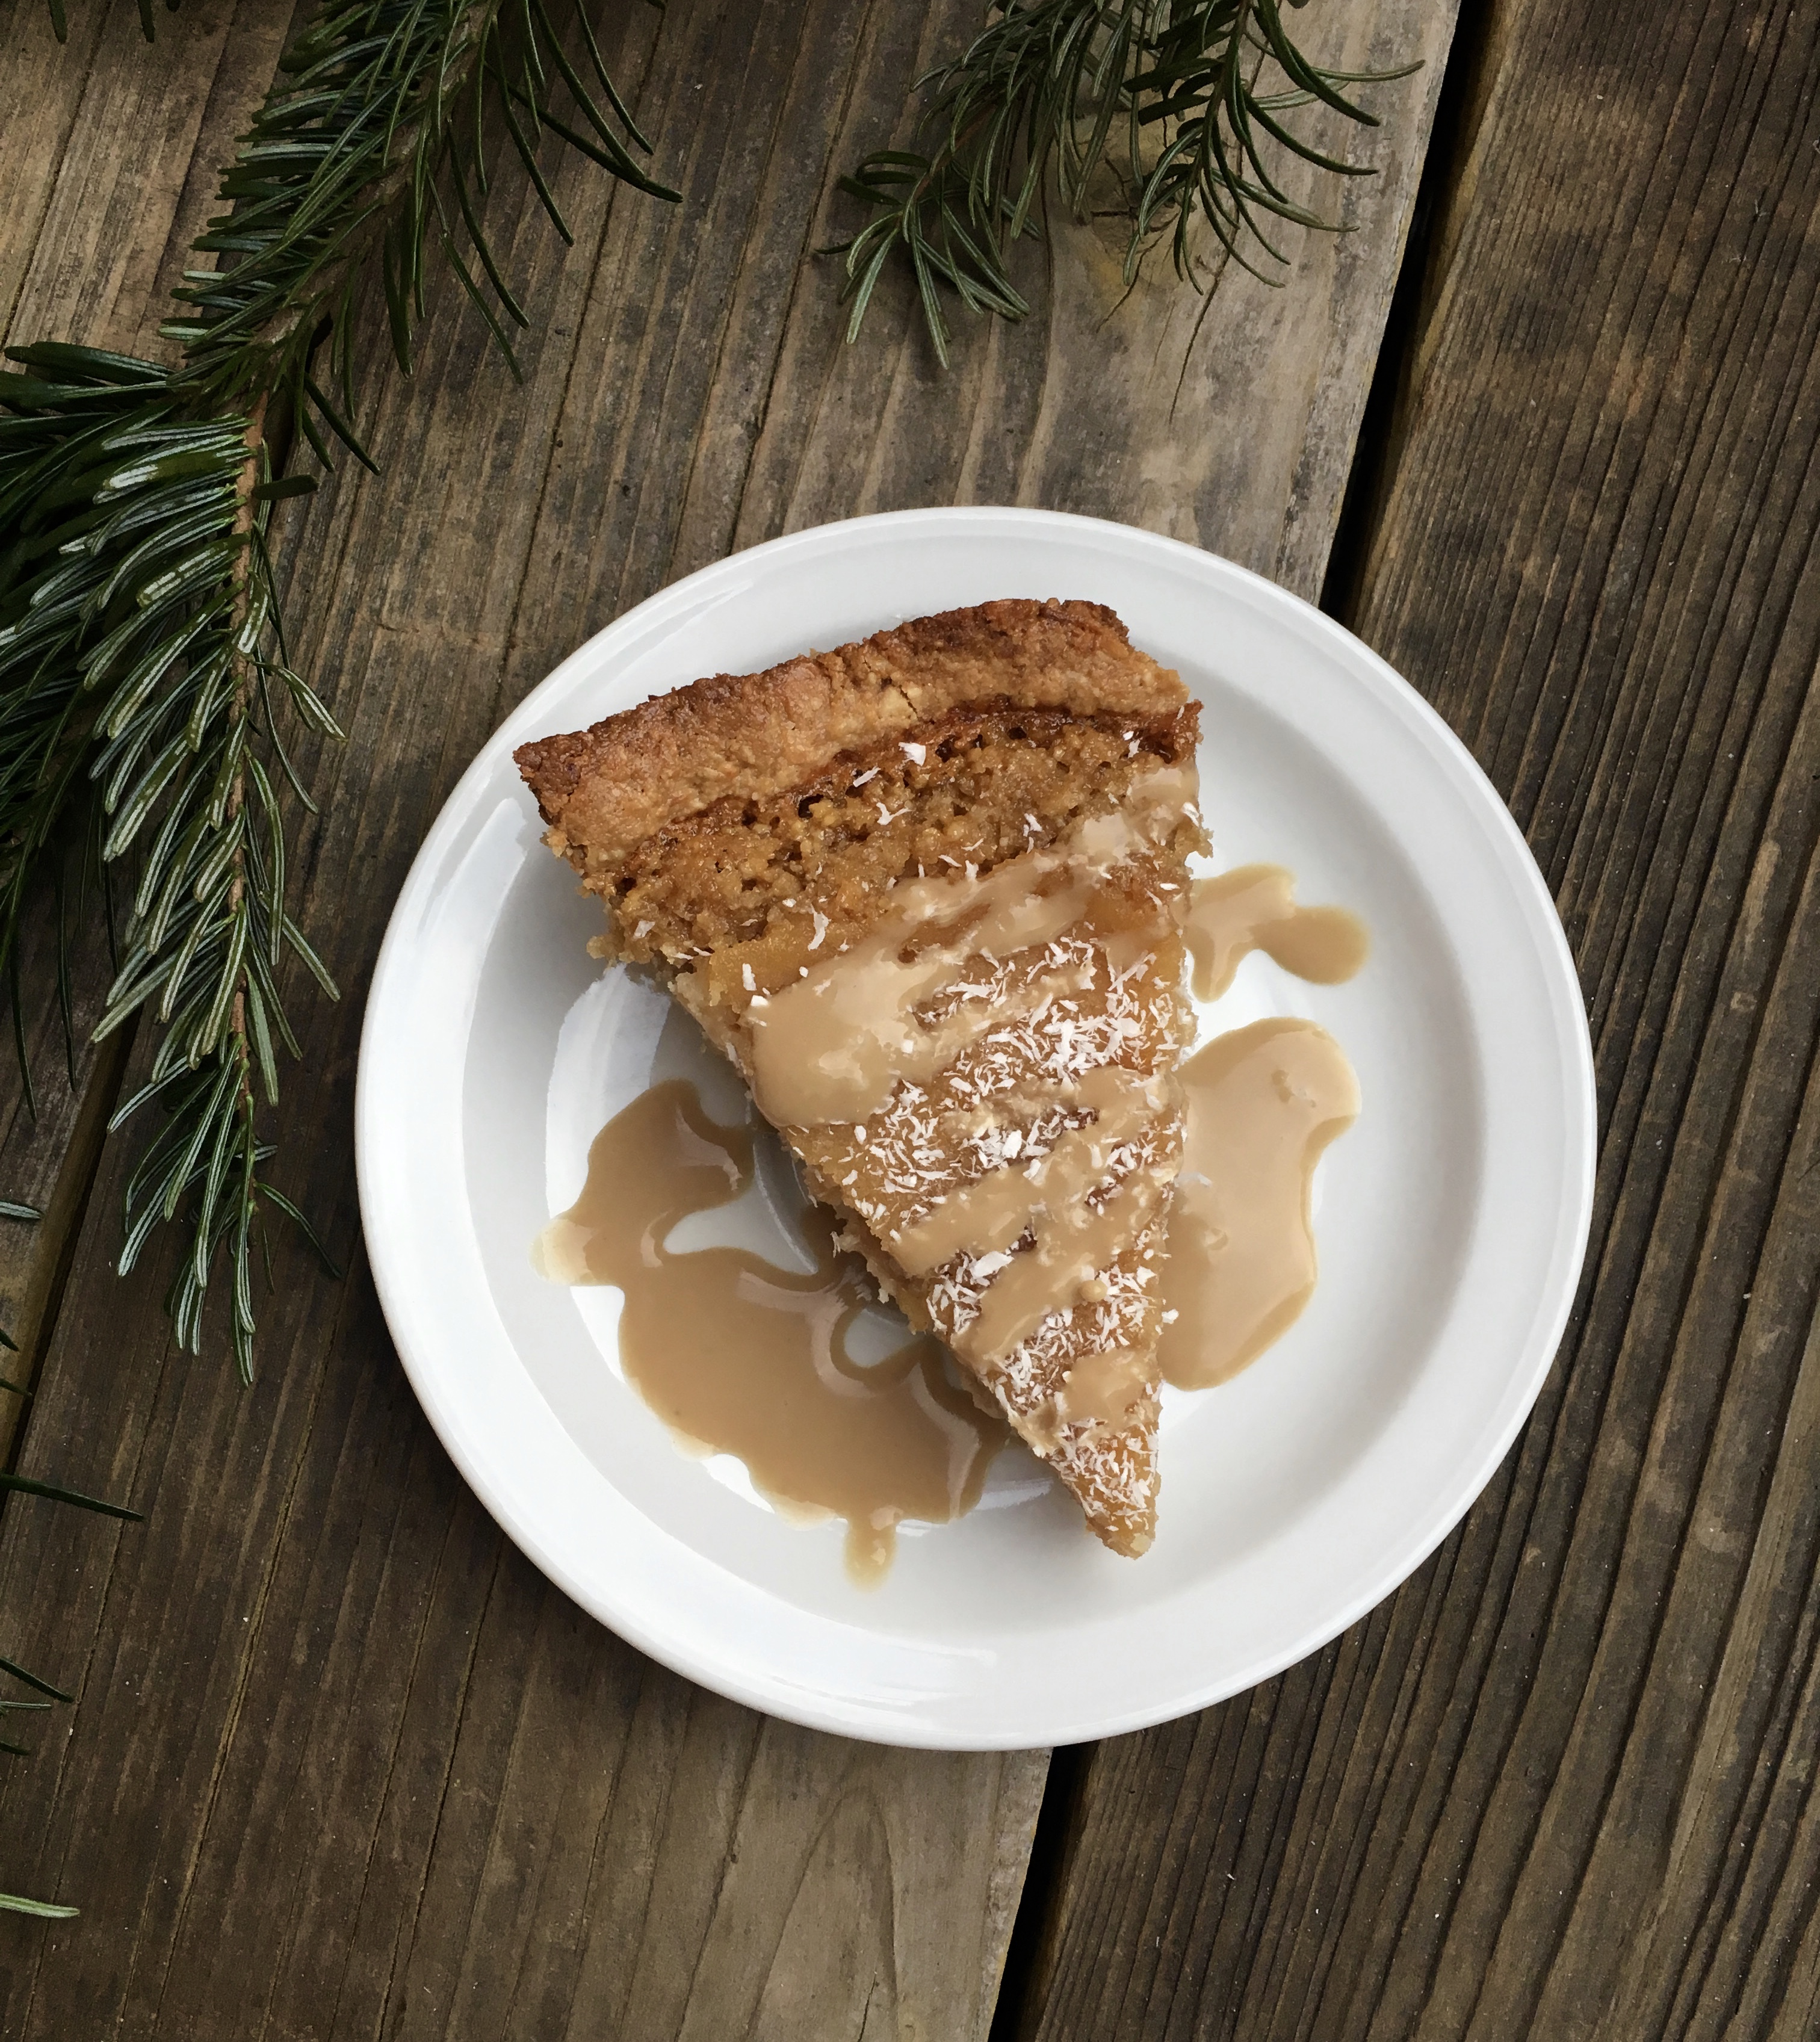
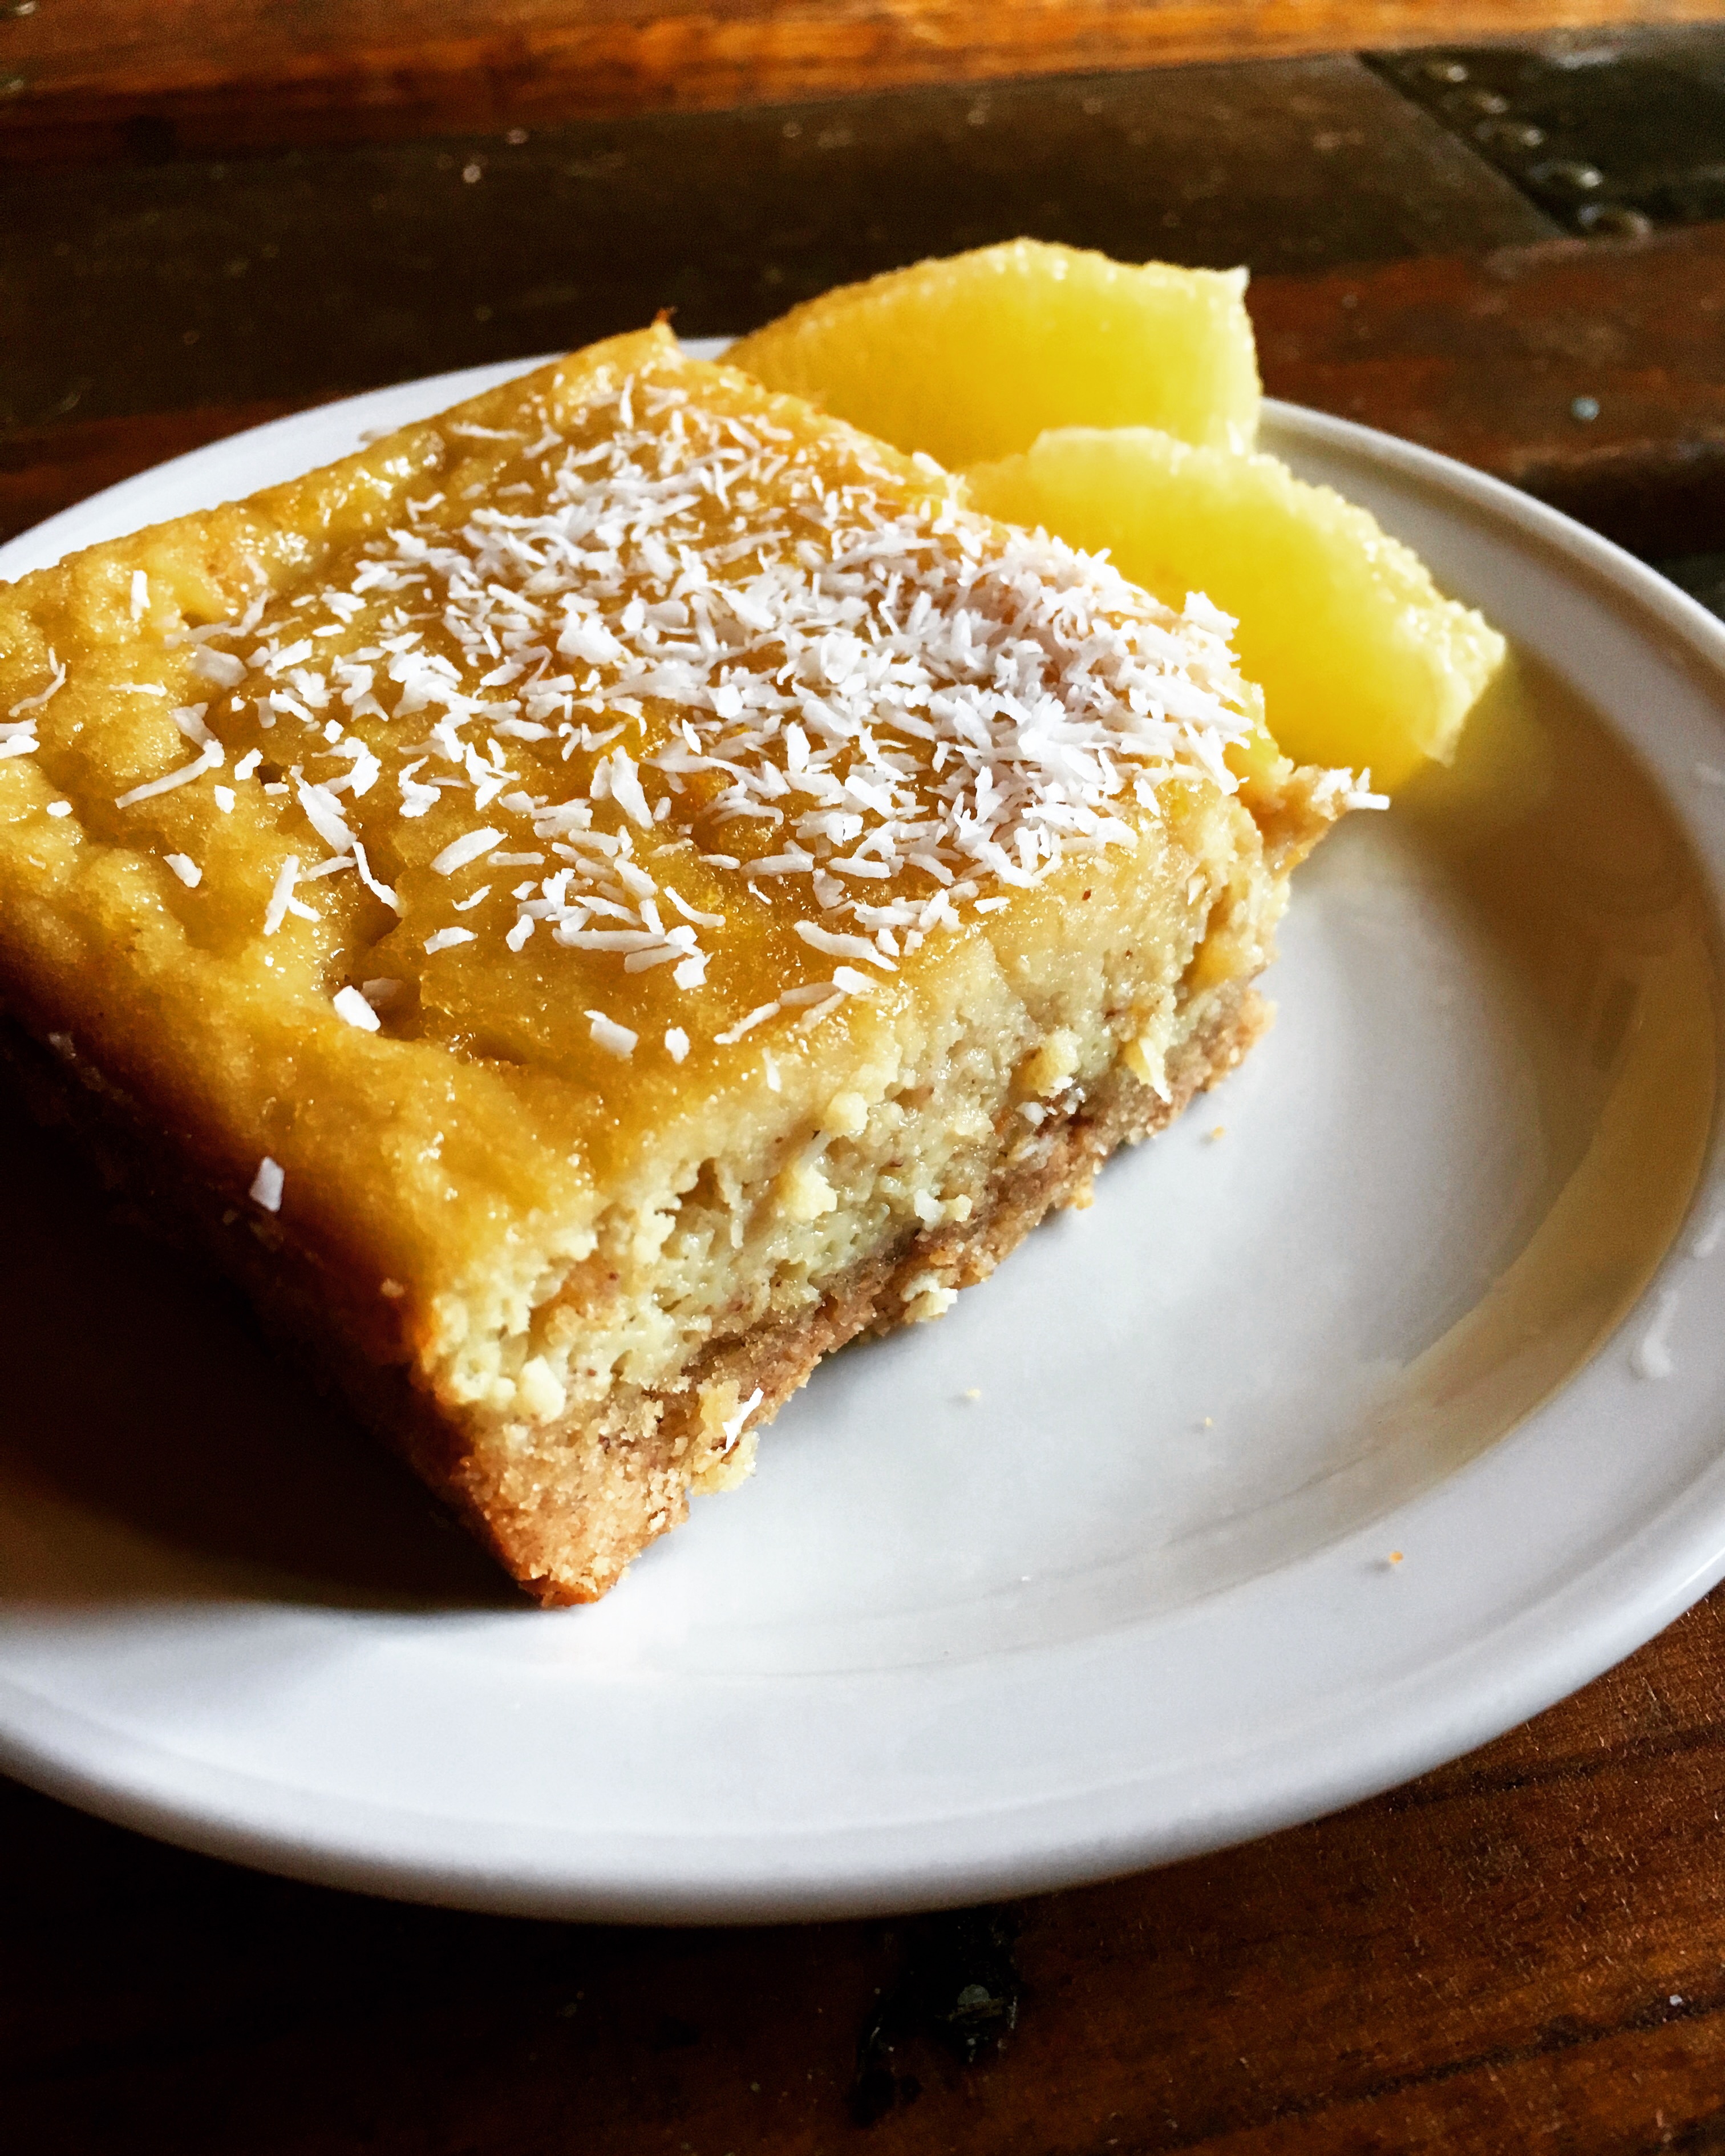
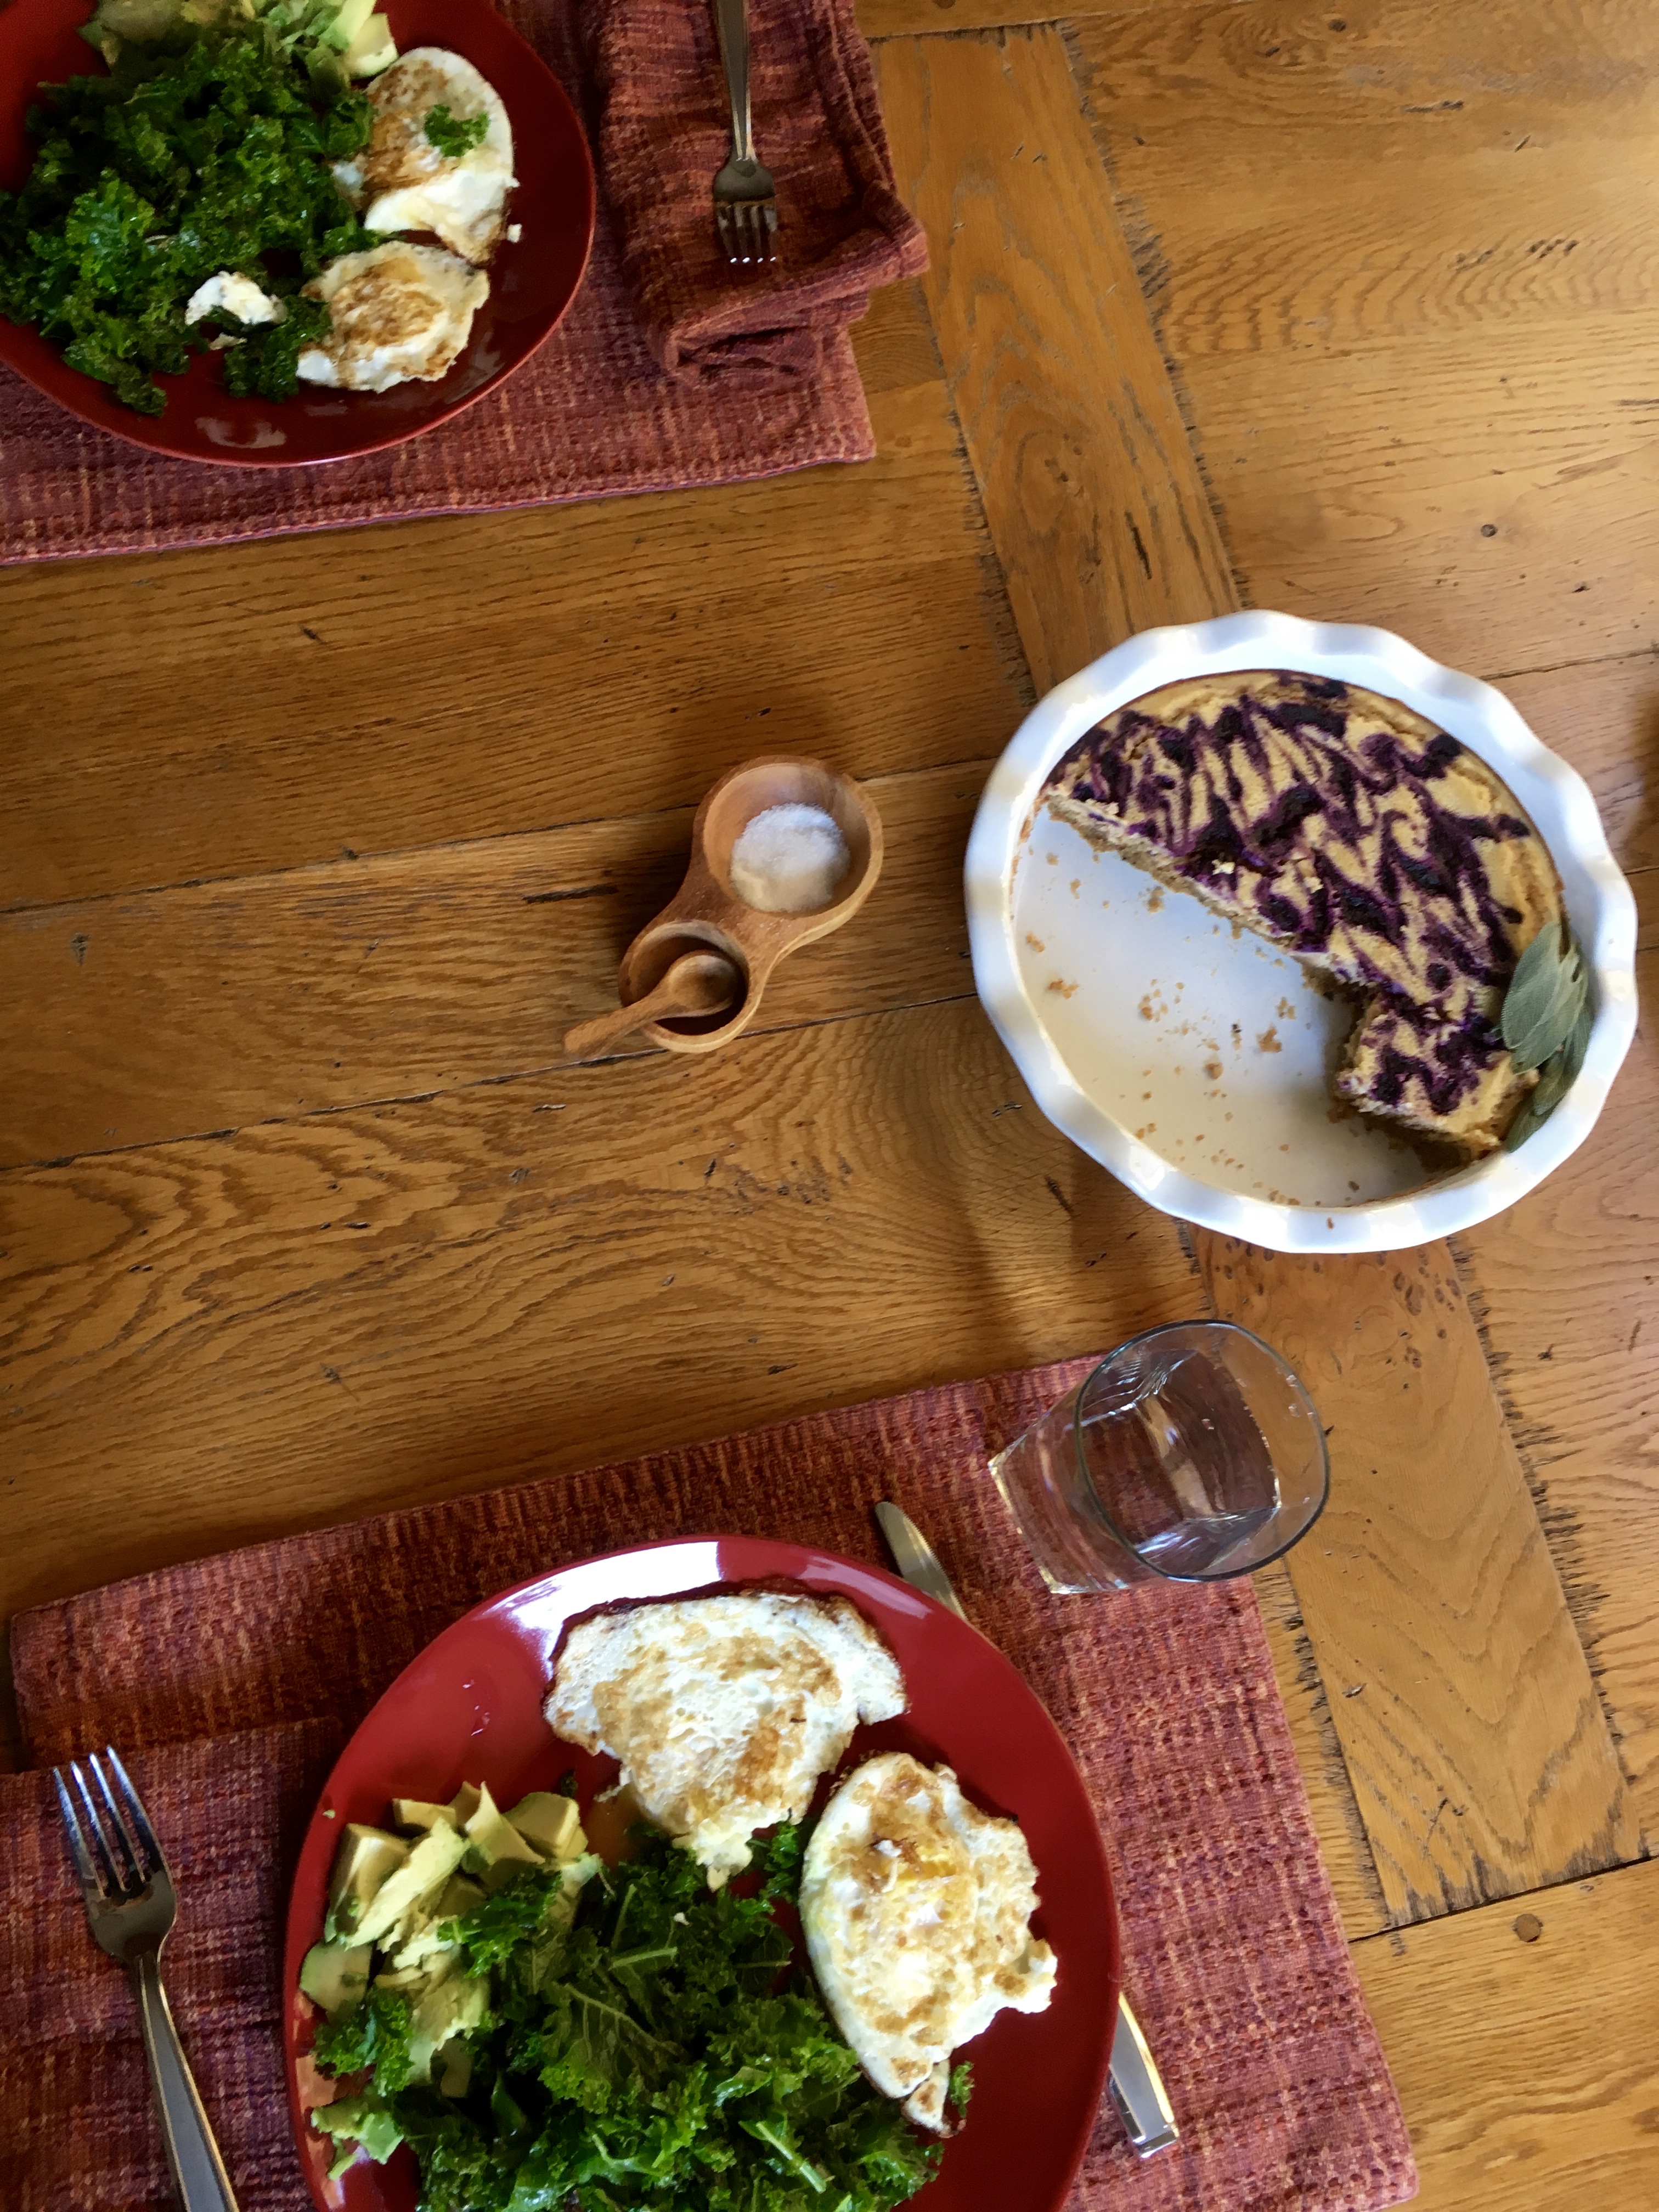
C and I ofc ate them for dessert last night with ice cream – definitely recommend. Equally good for breakfast by themselves though, so keep some leftovers!

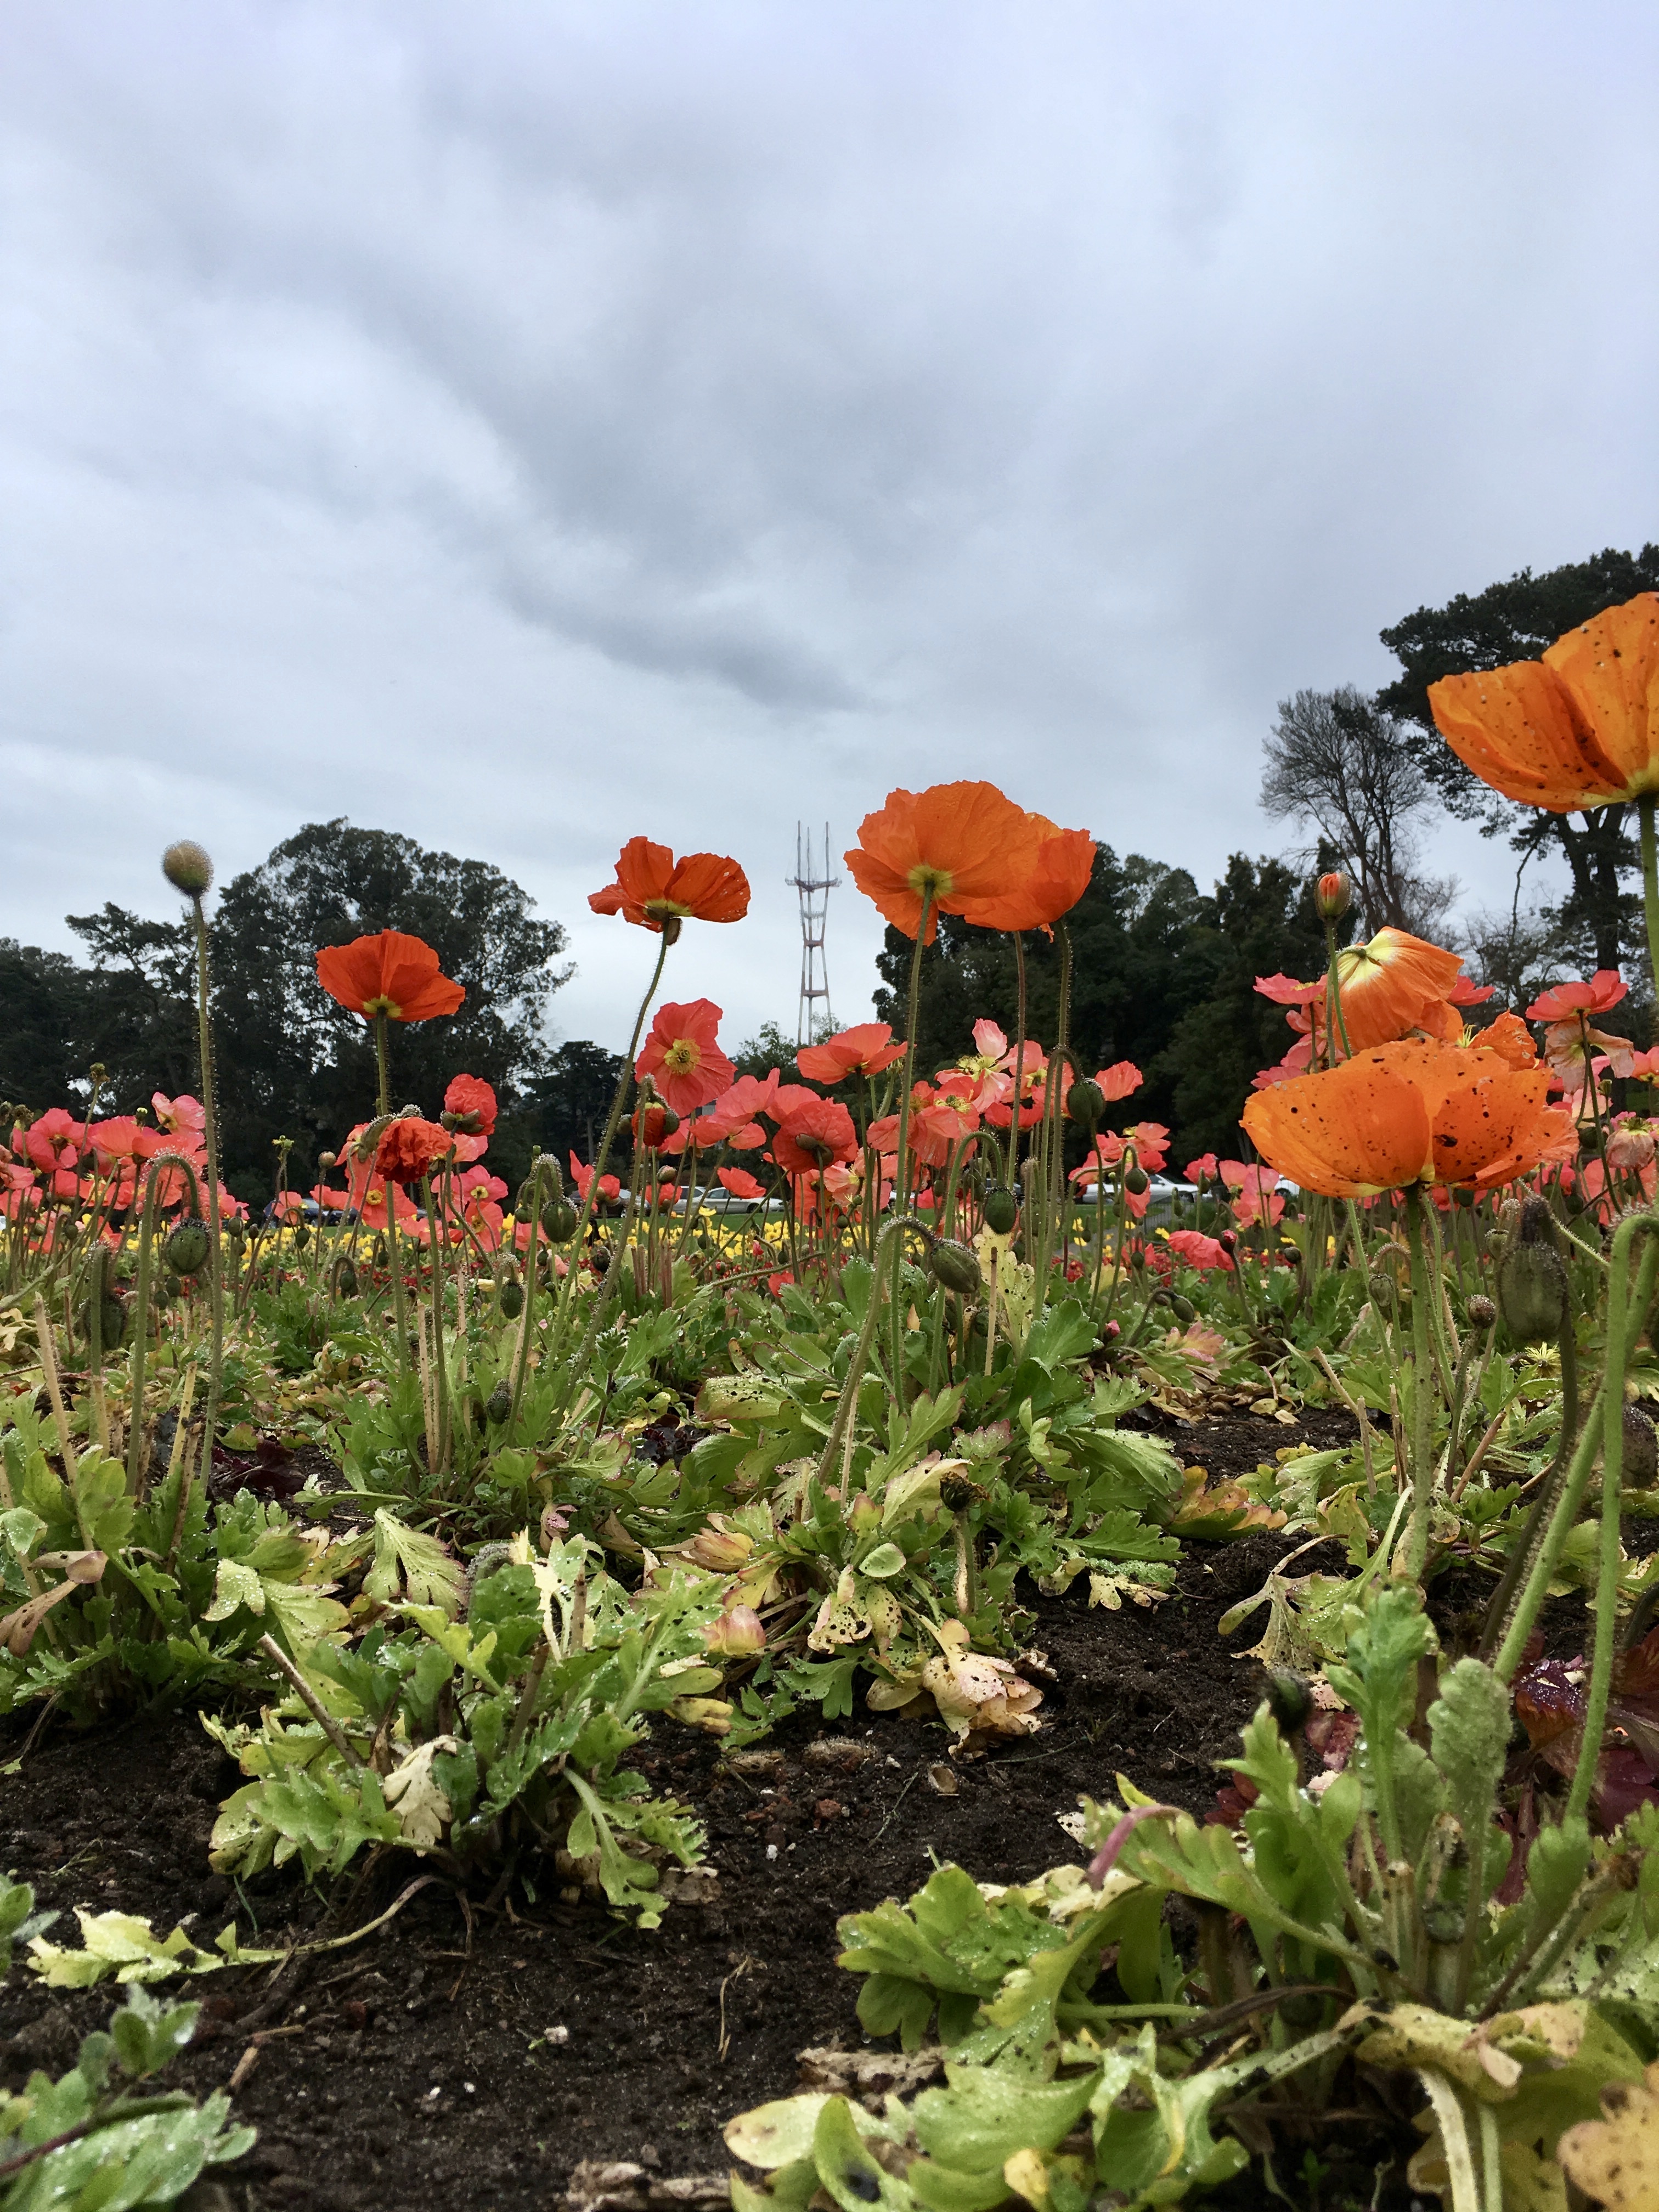
Fogust is definitely in full swing, and the dahlias are still gorgeous – I checked on them last Thursday, just to see… I just can’t stay away.

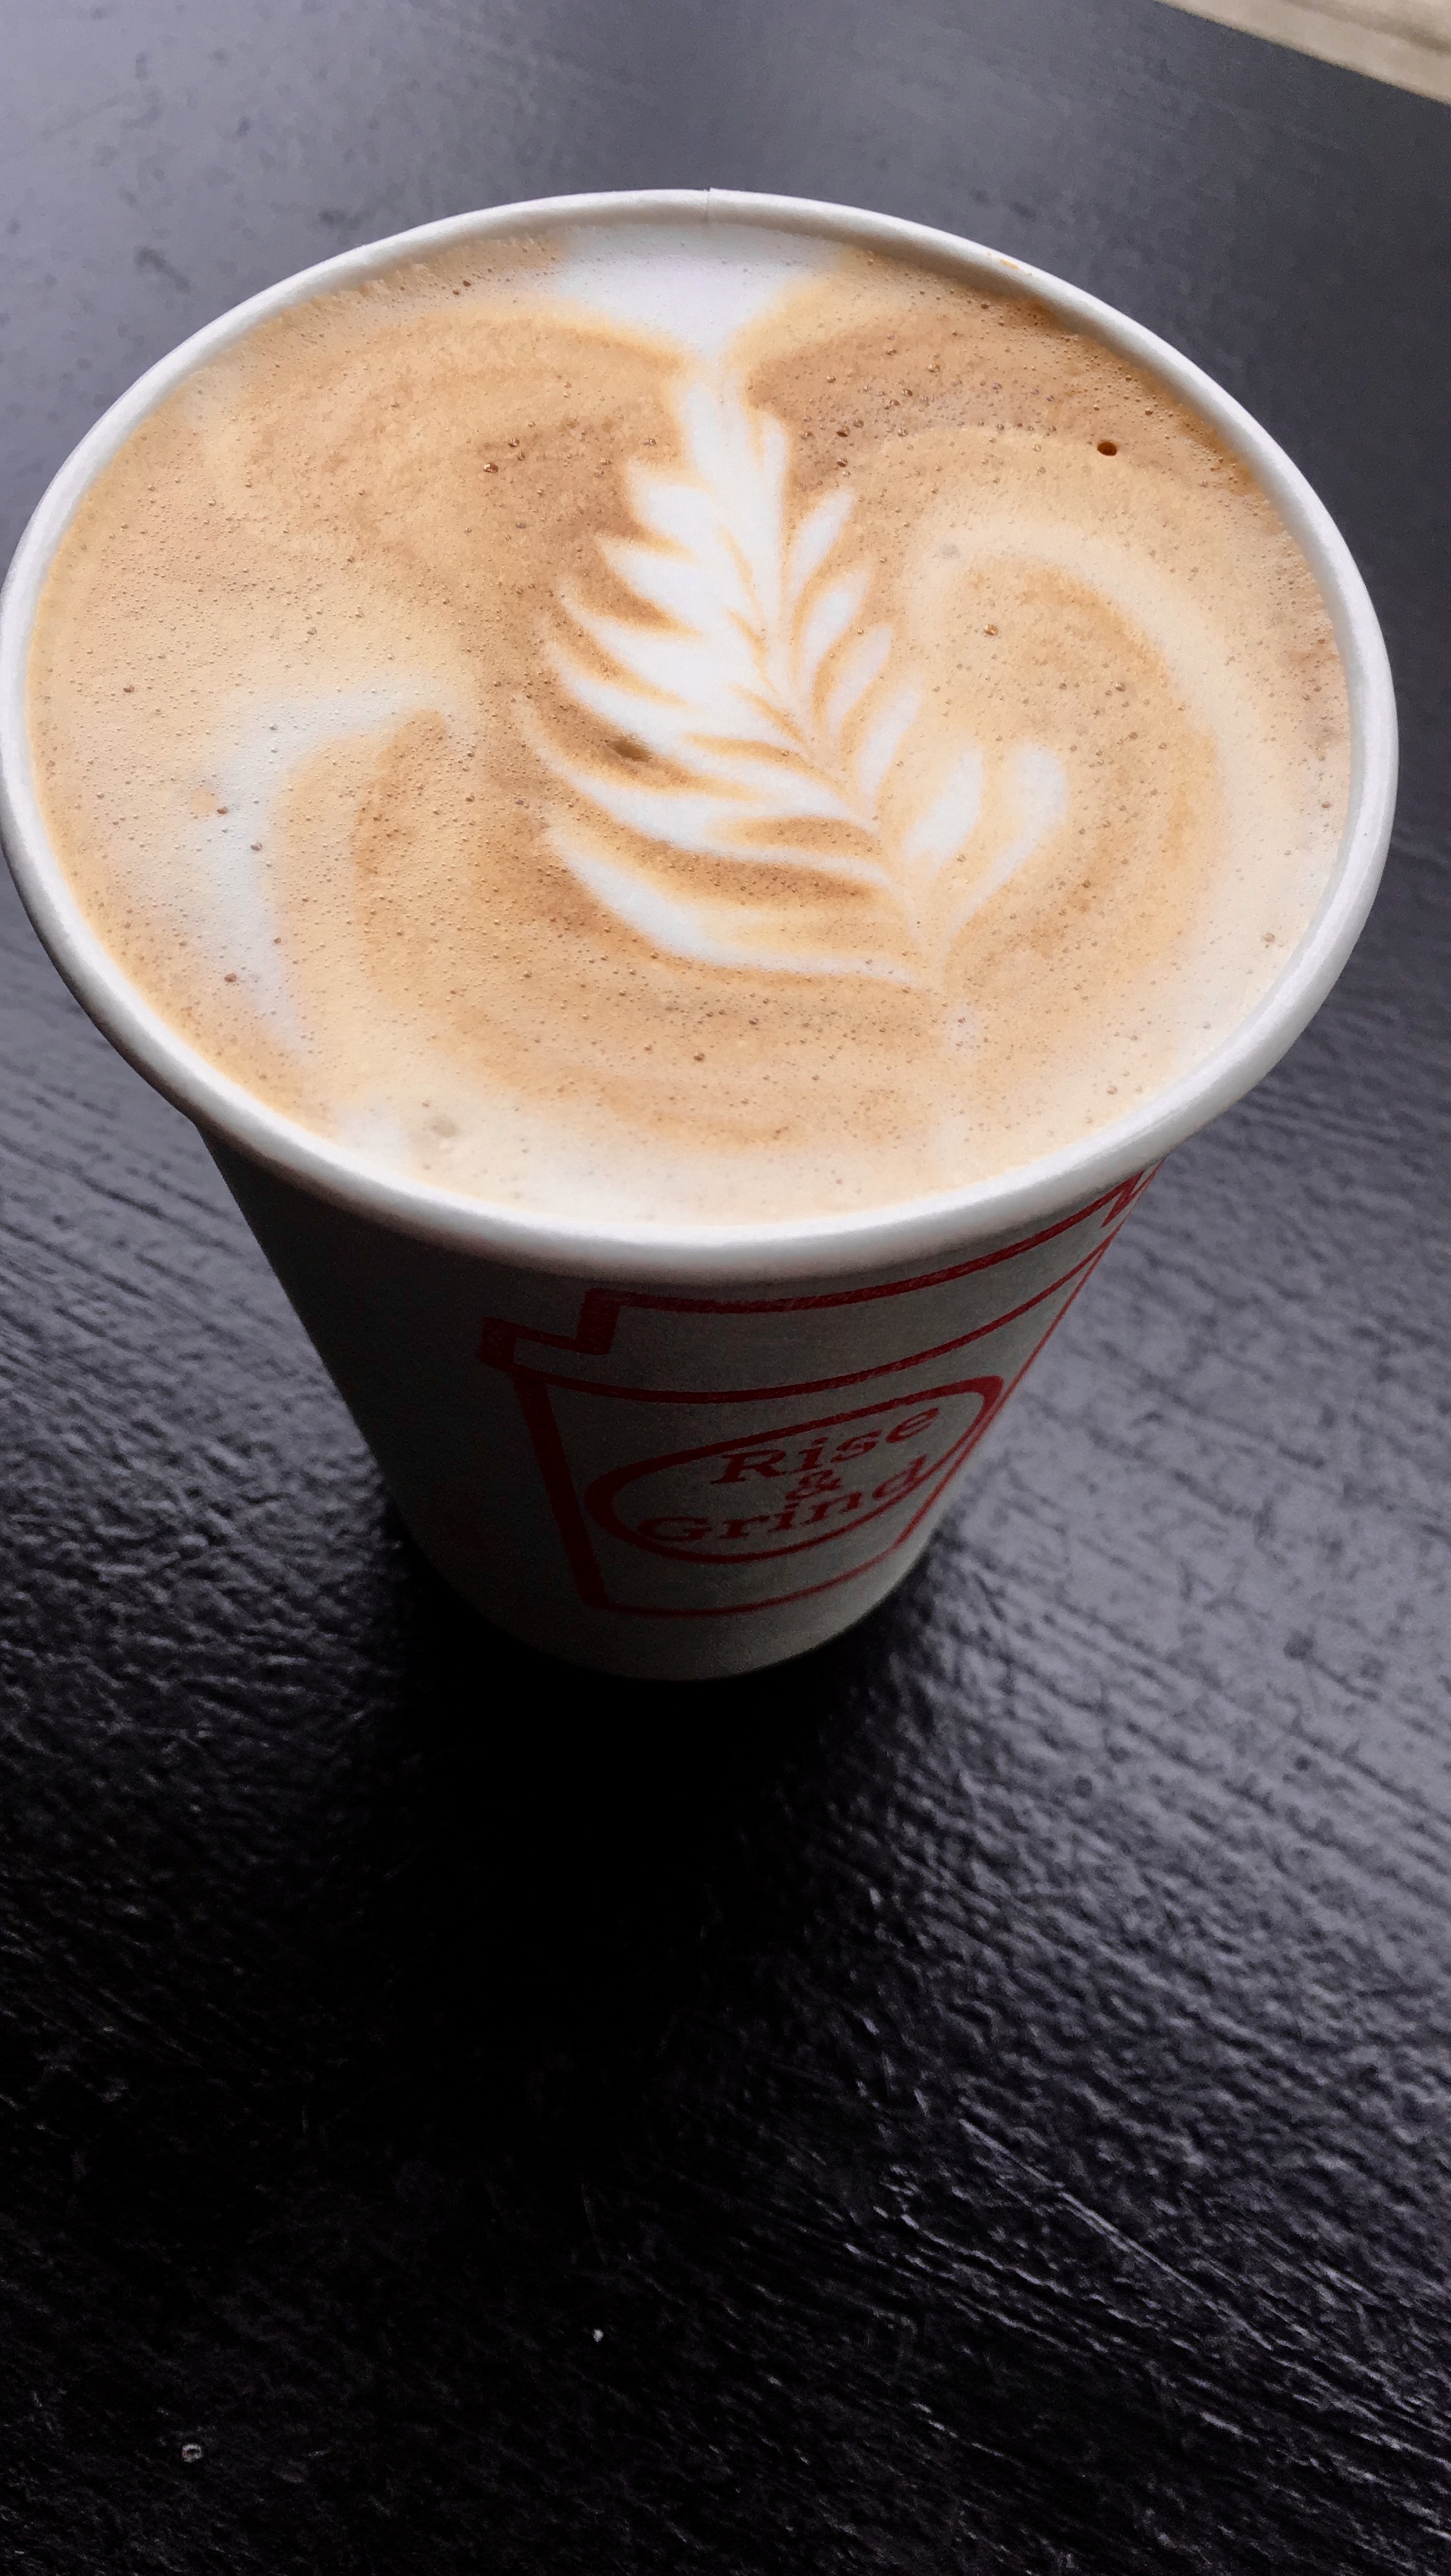
Sending love from my kitchen to yours! Happy baking :)

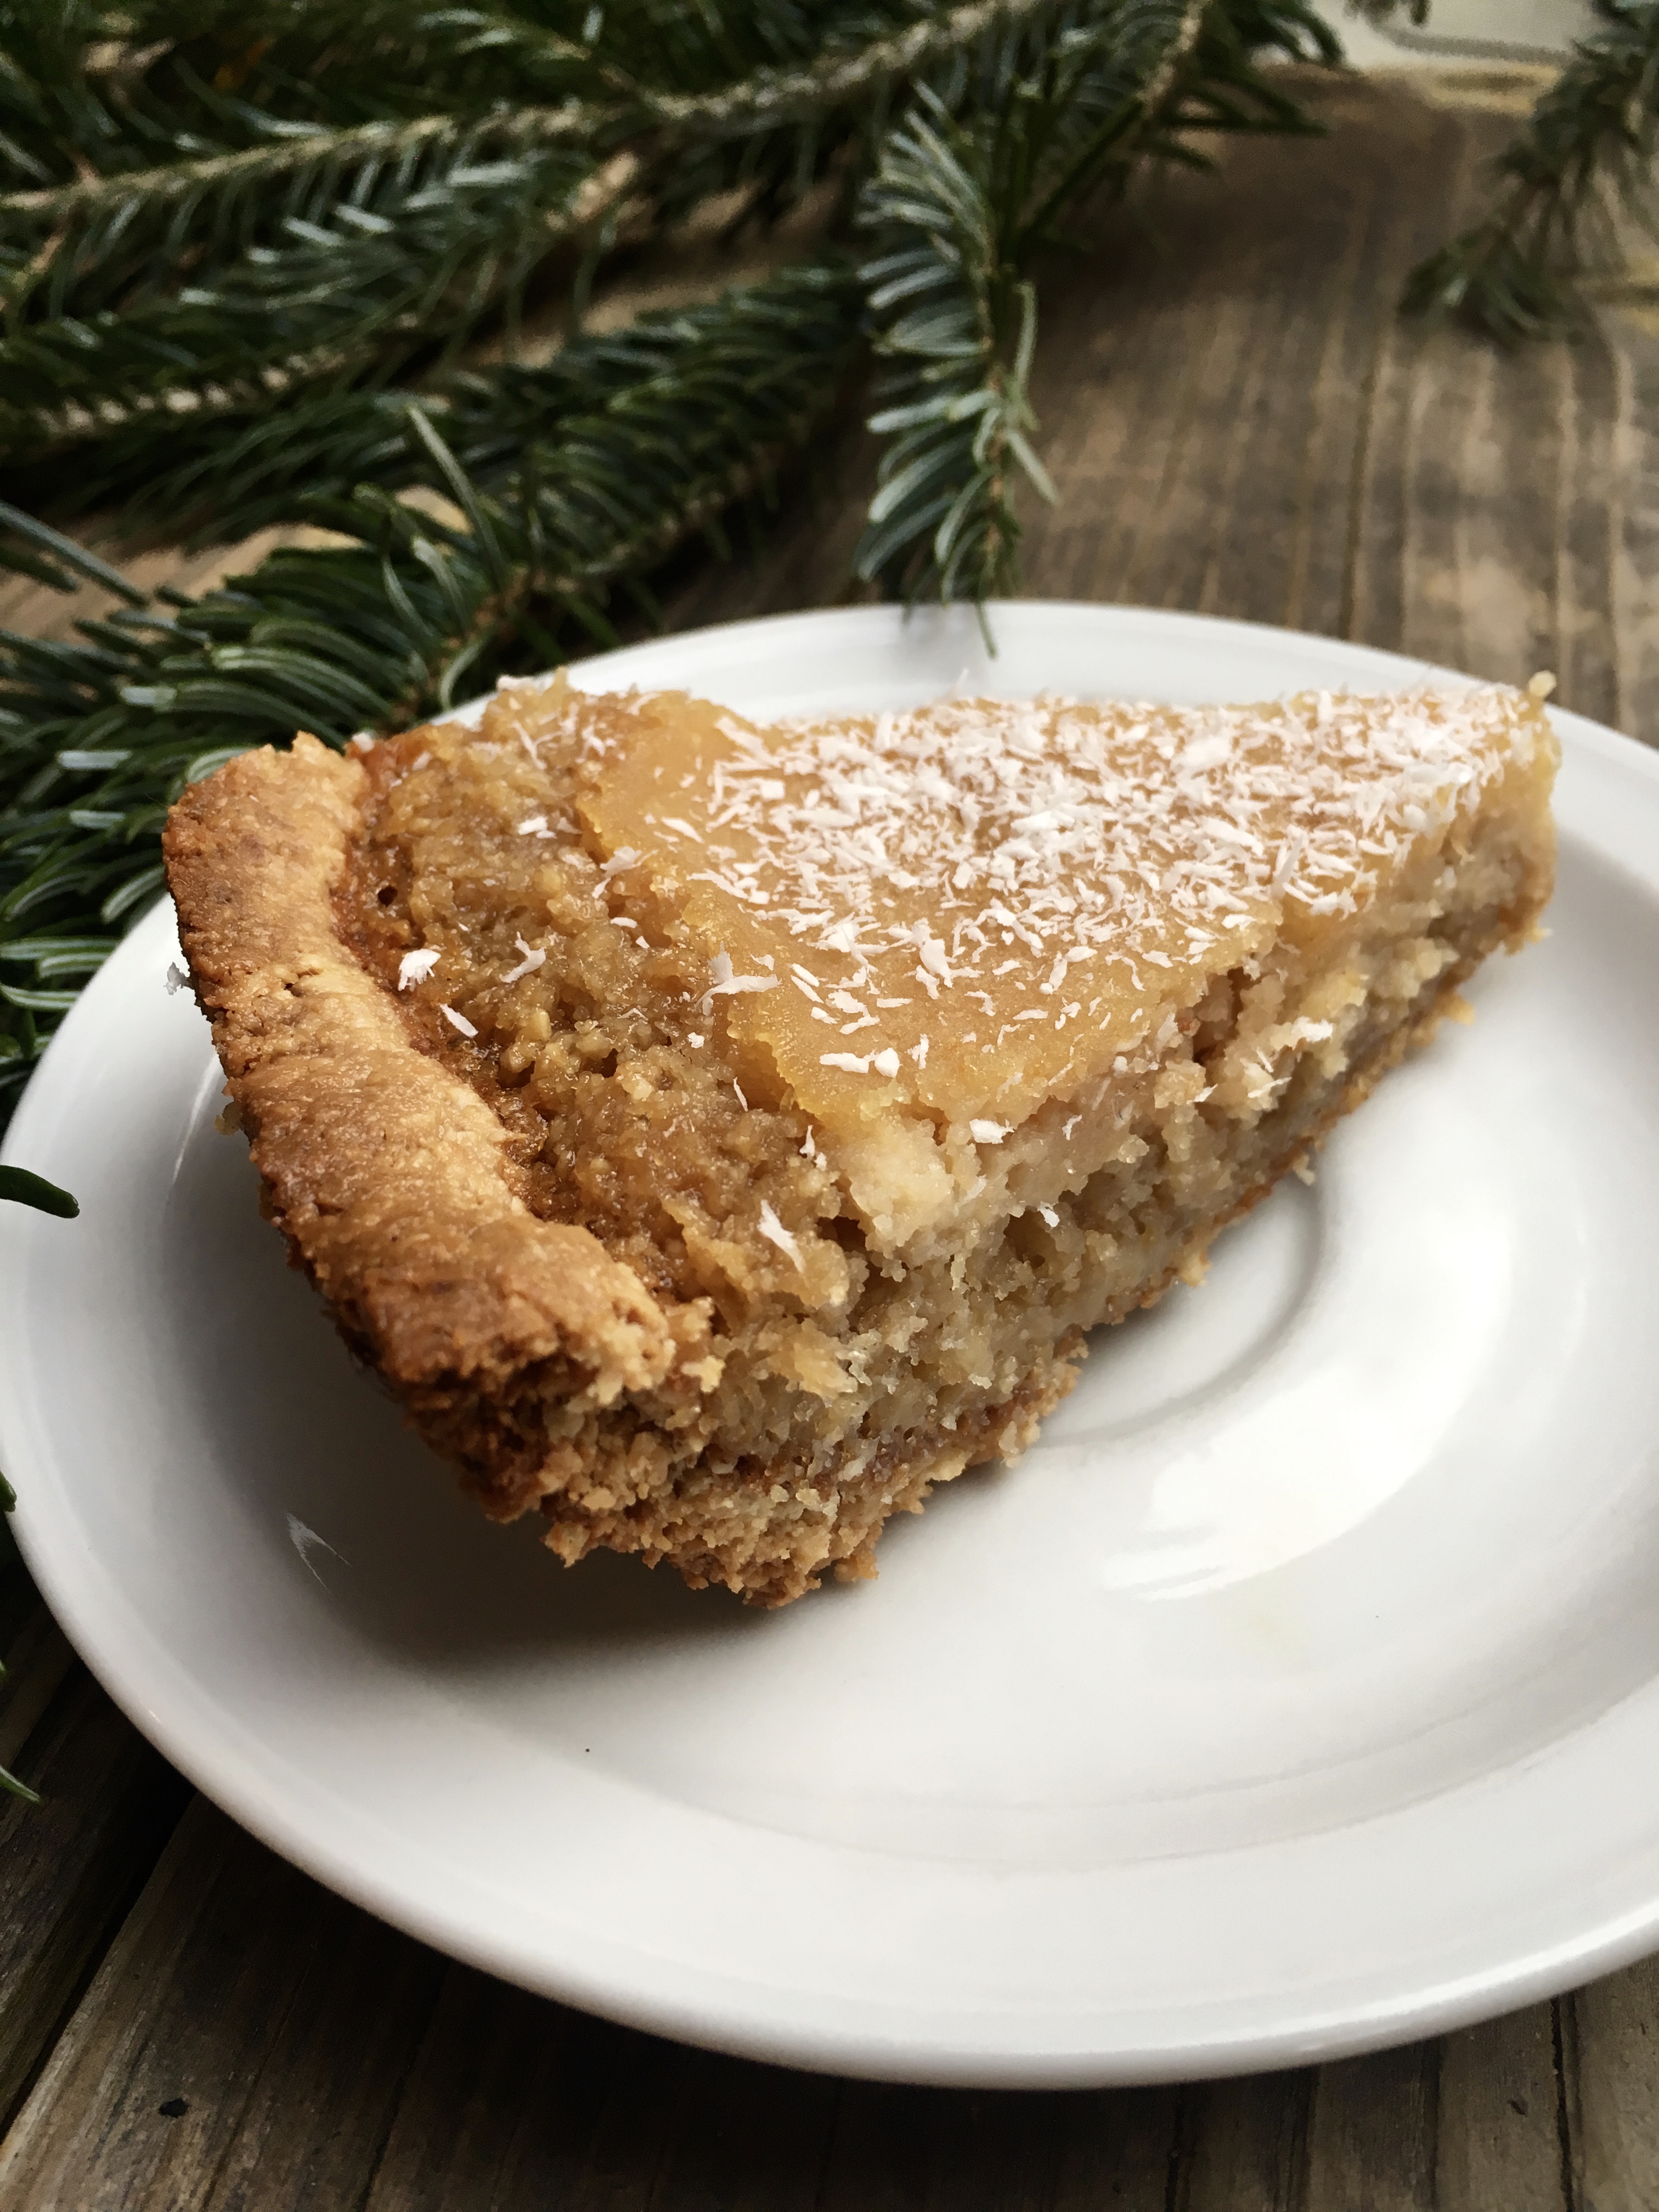
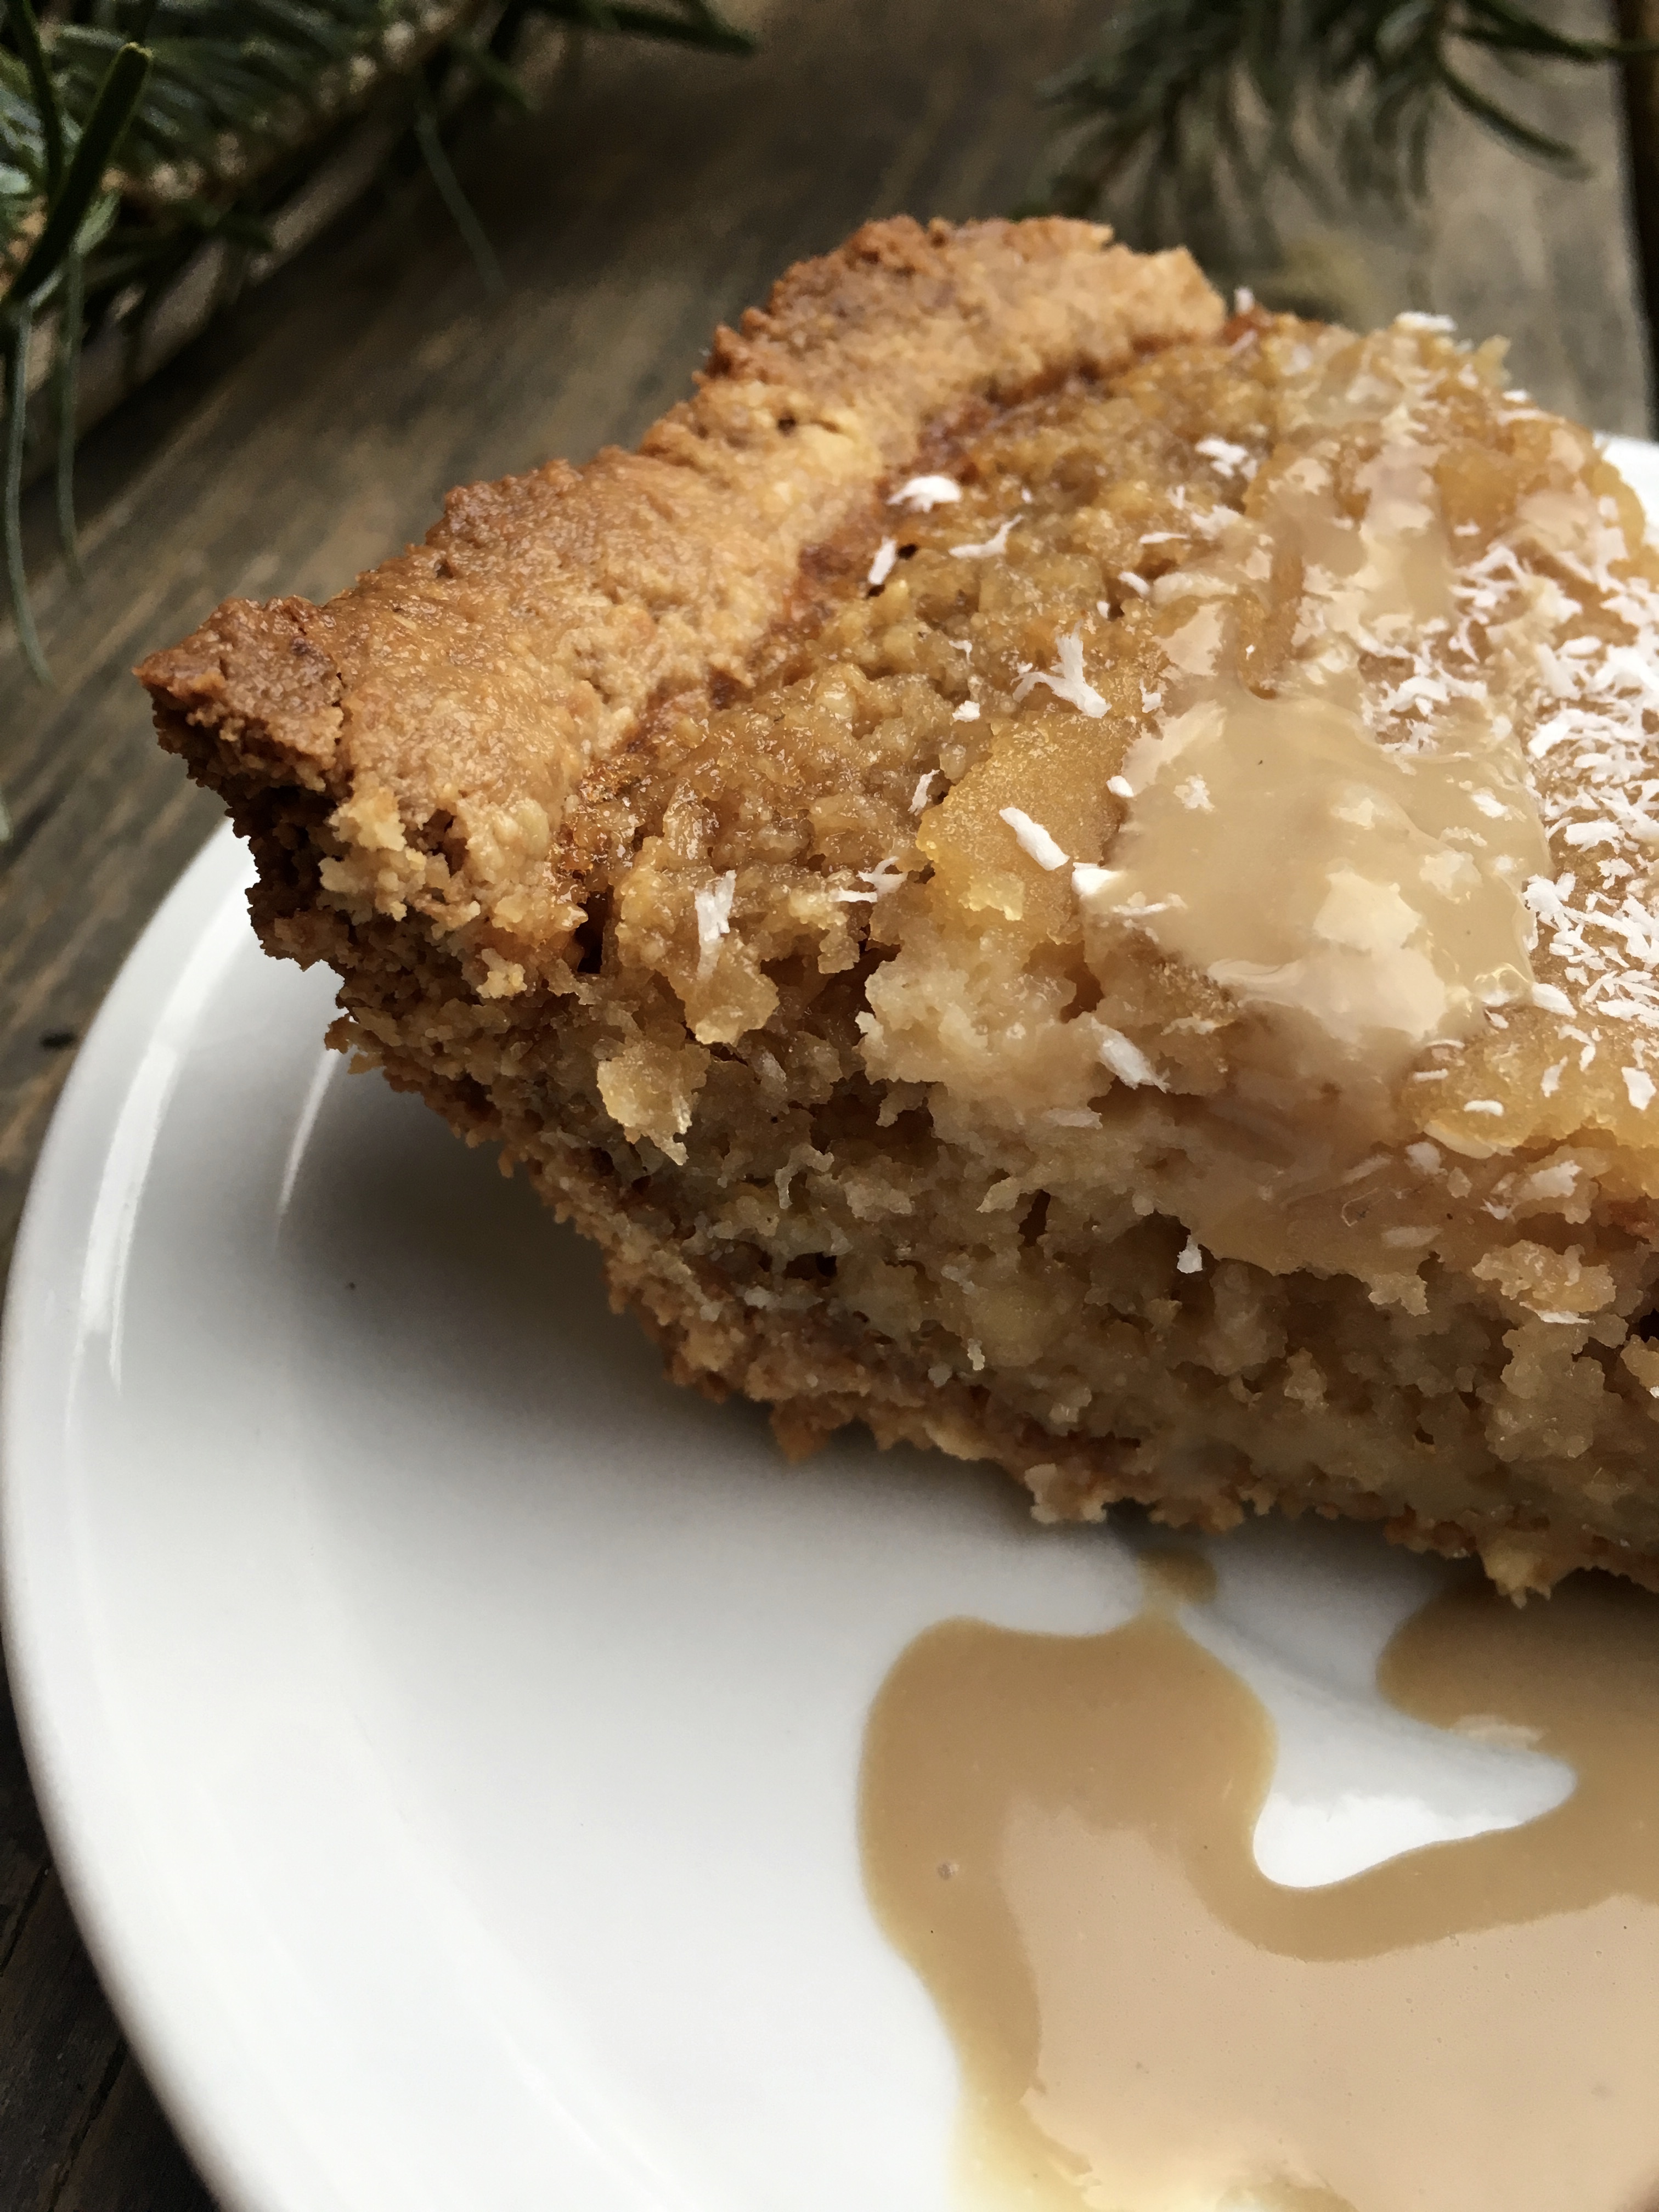
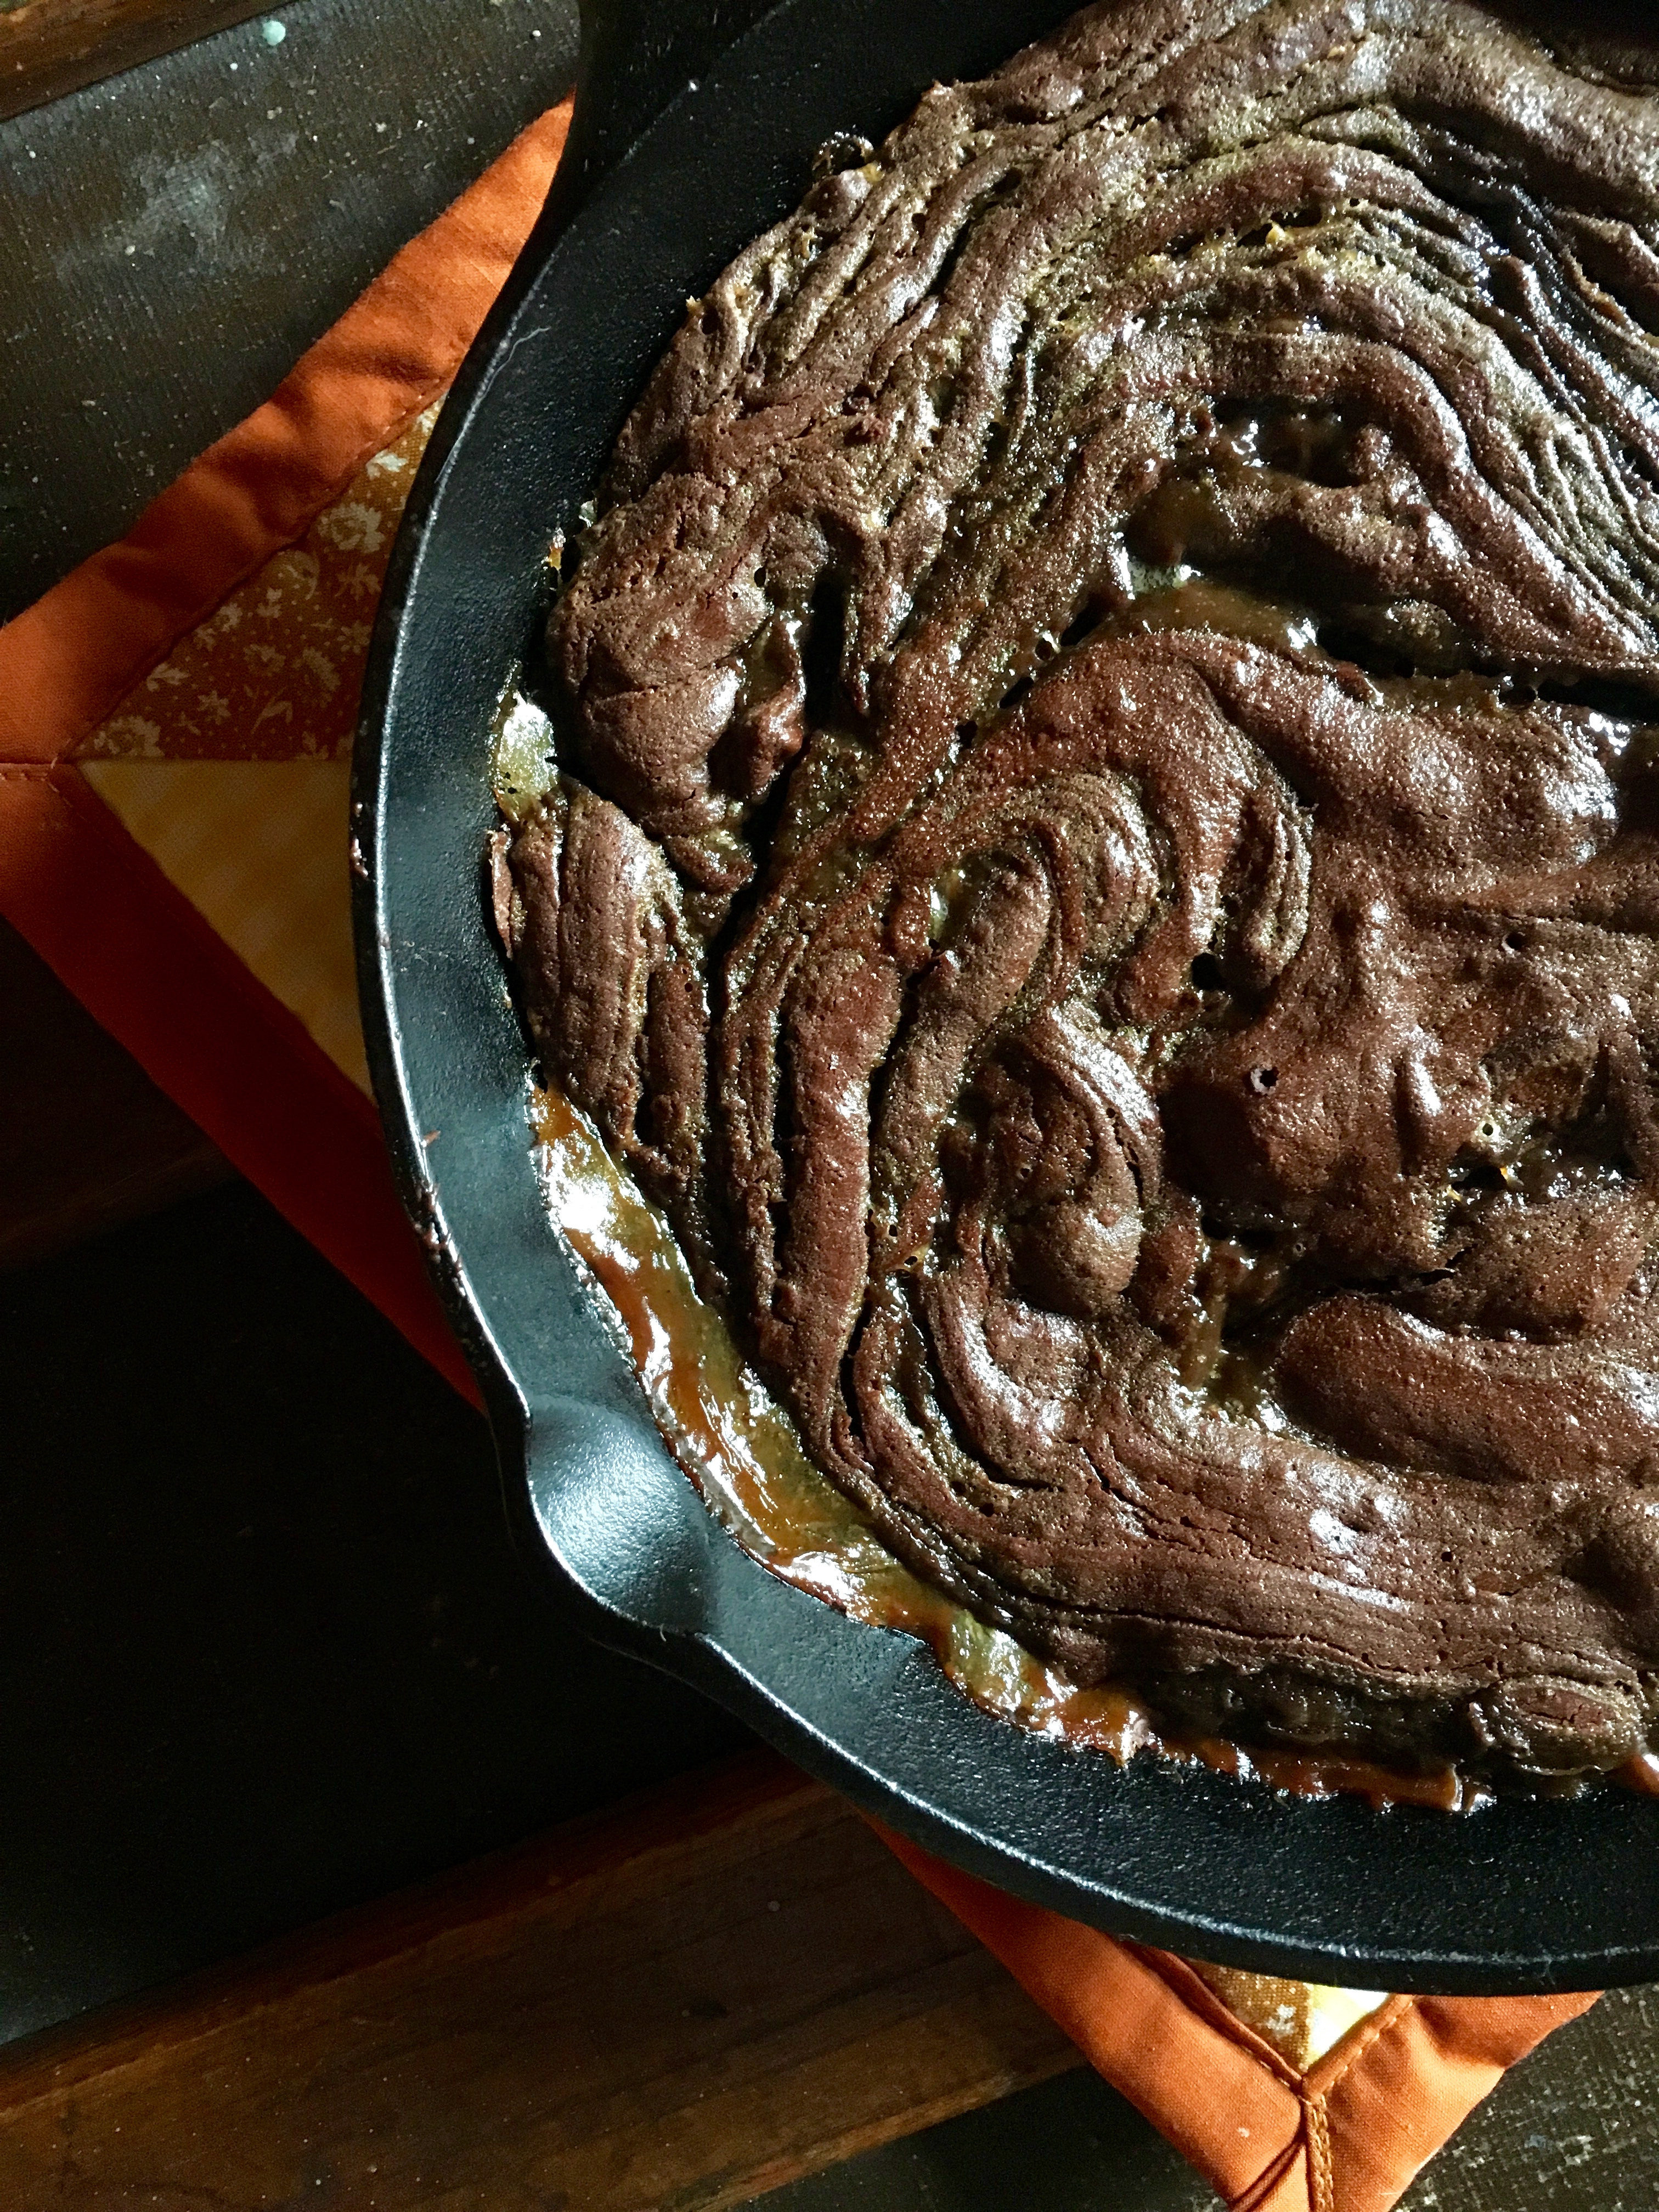
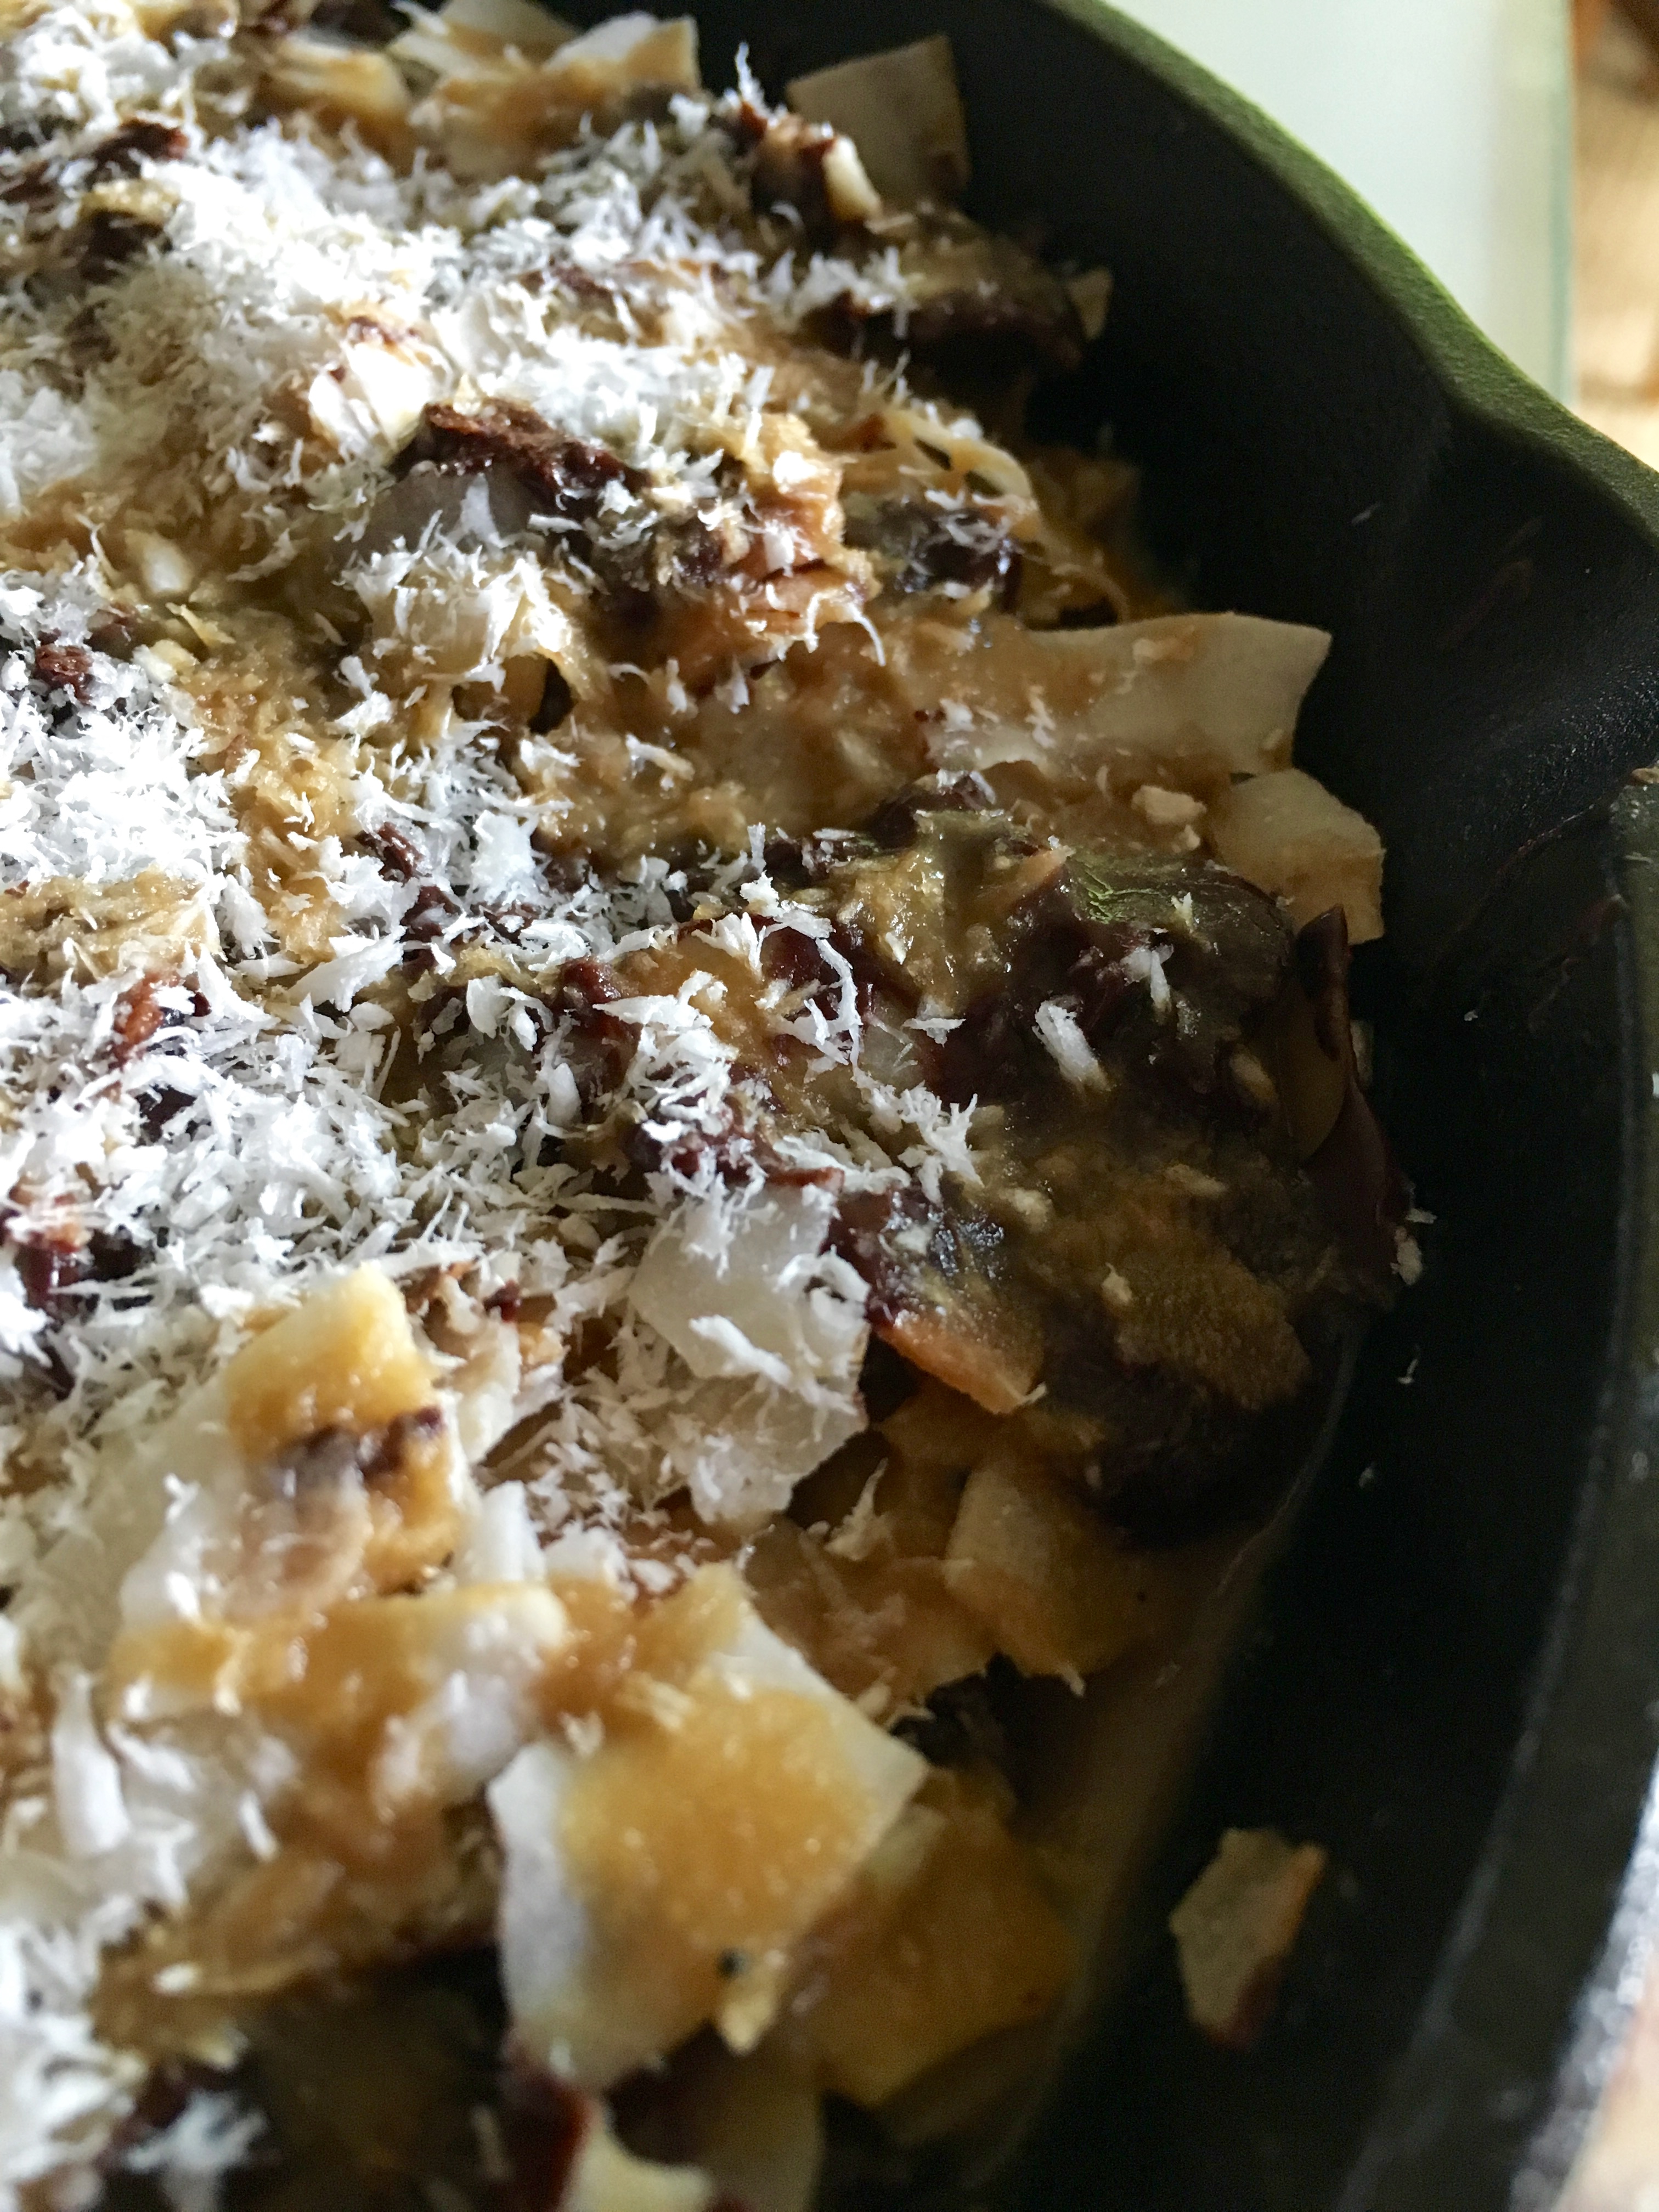
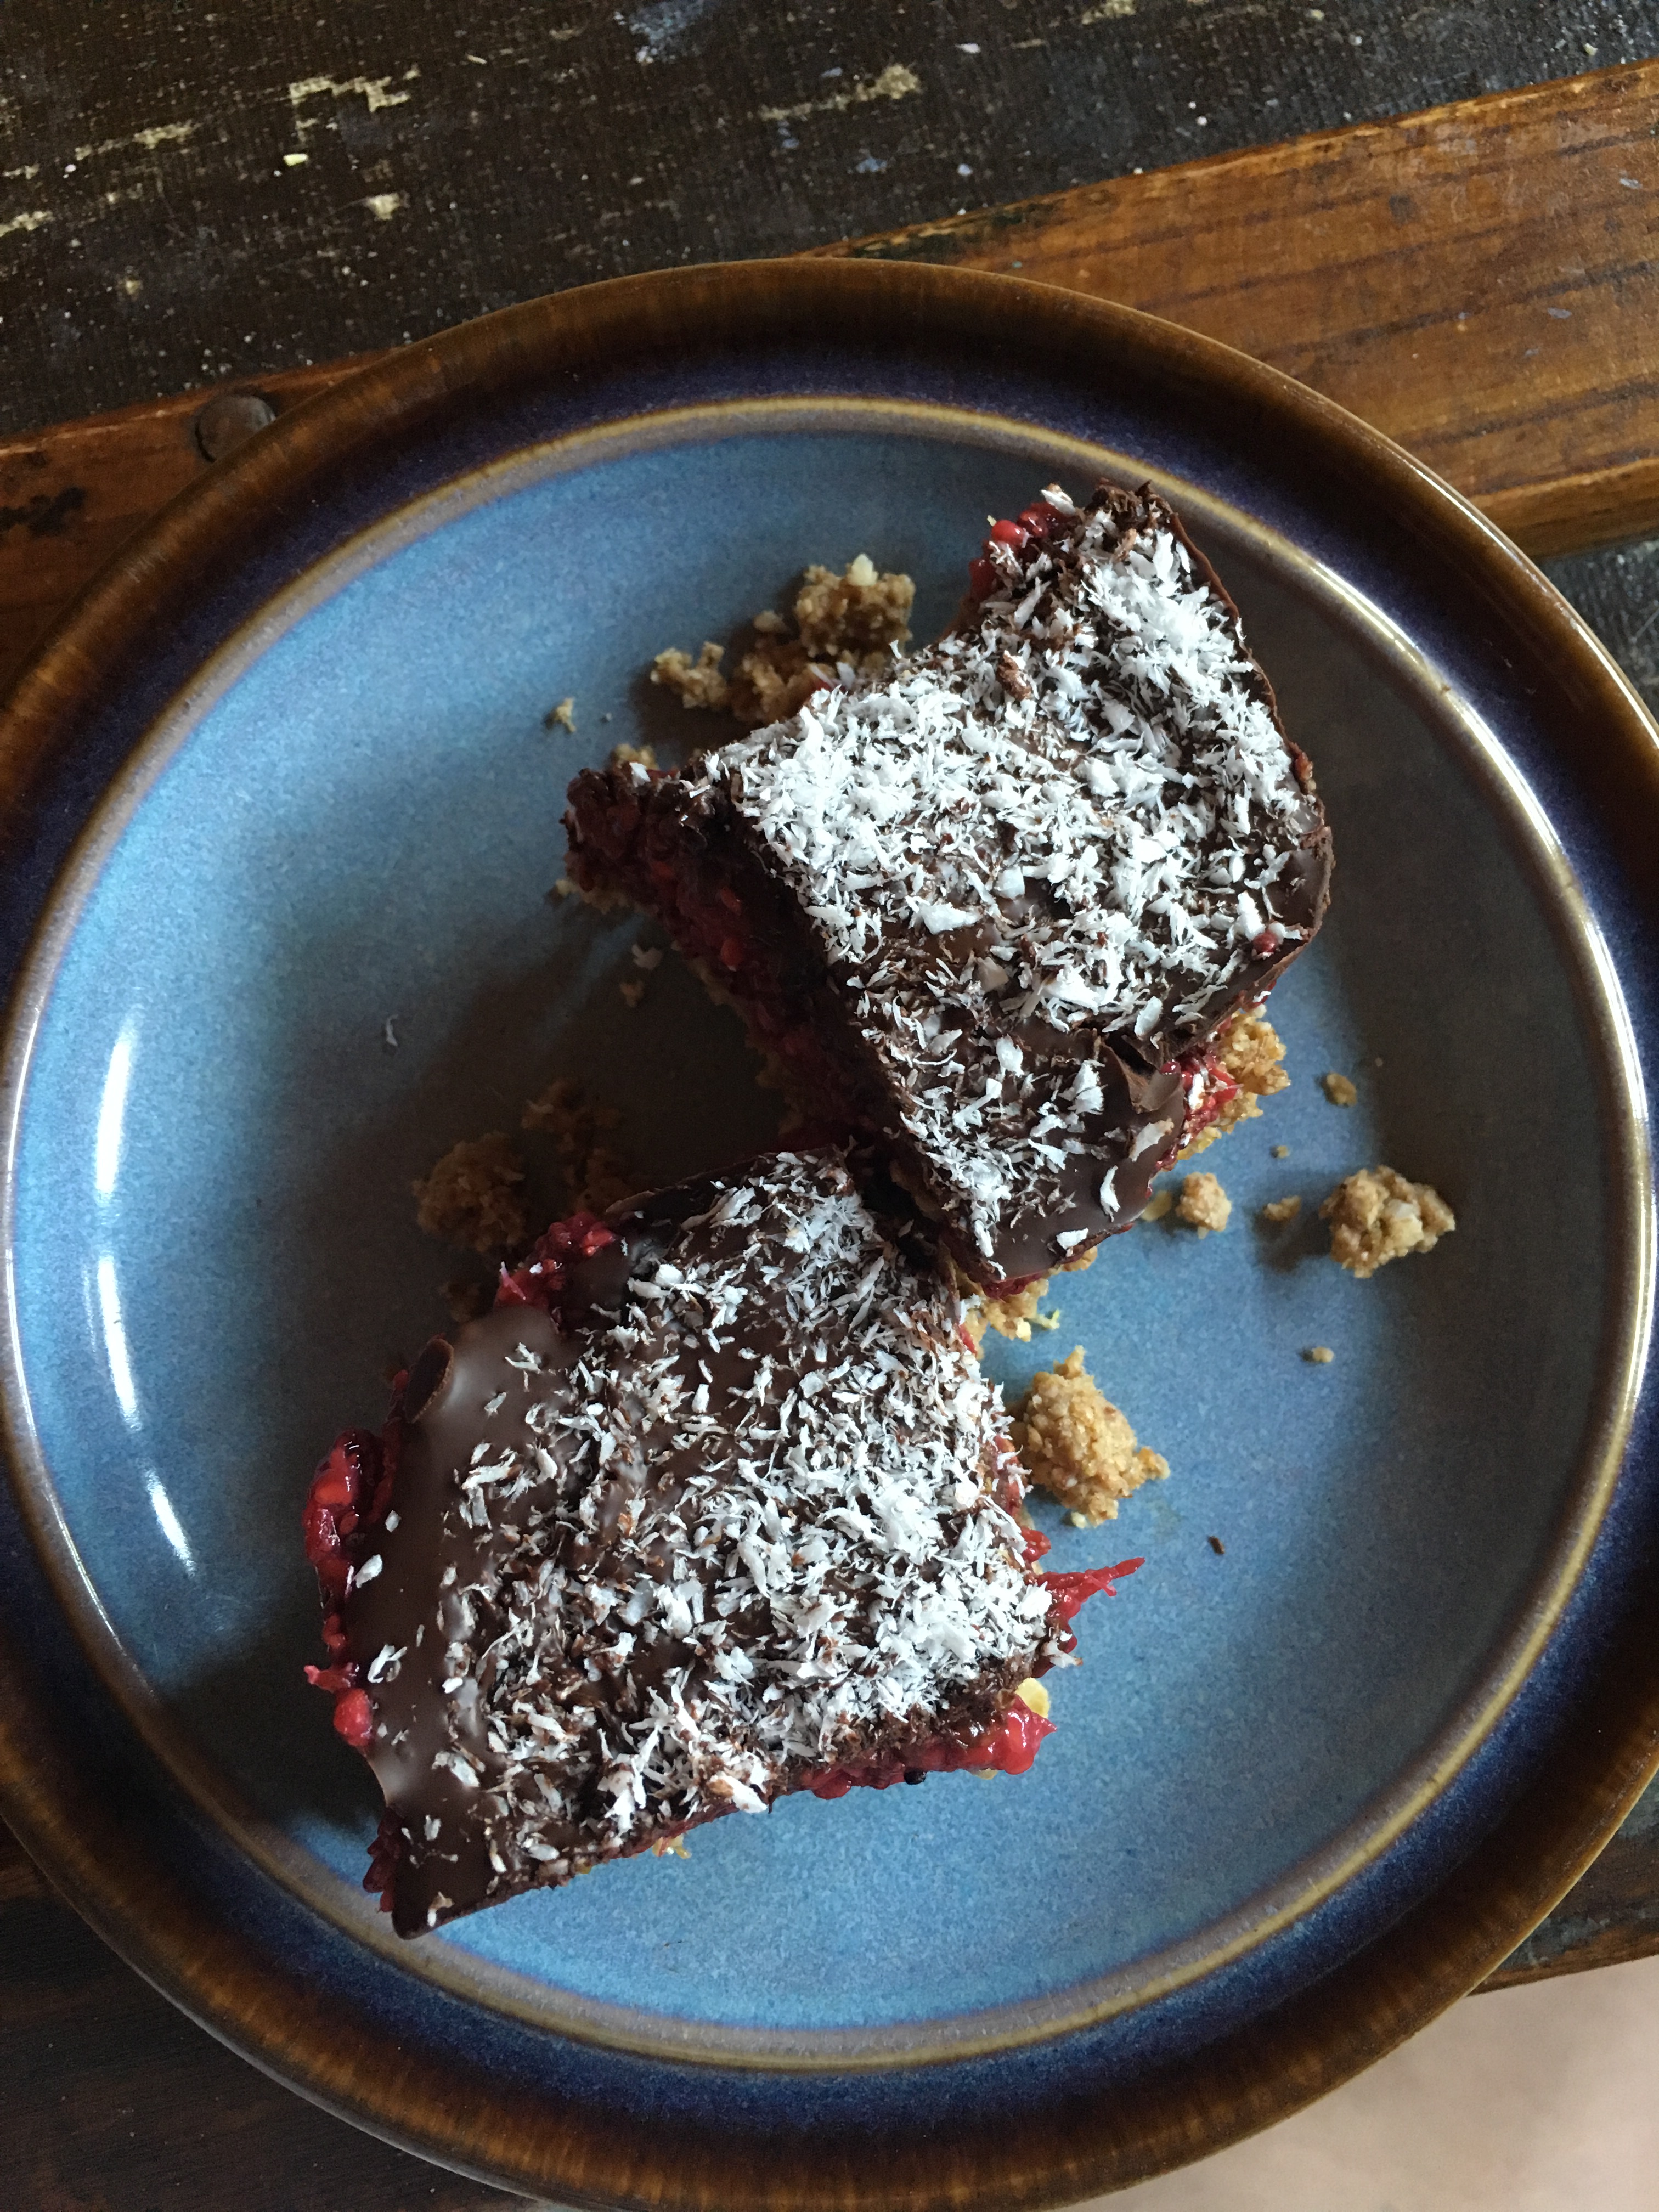
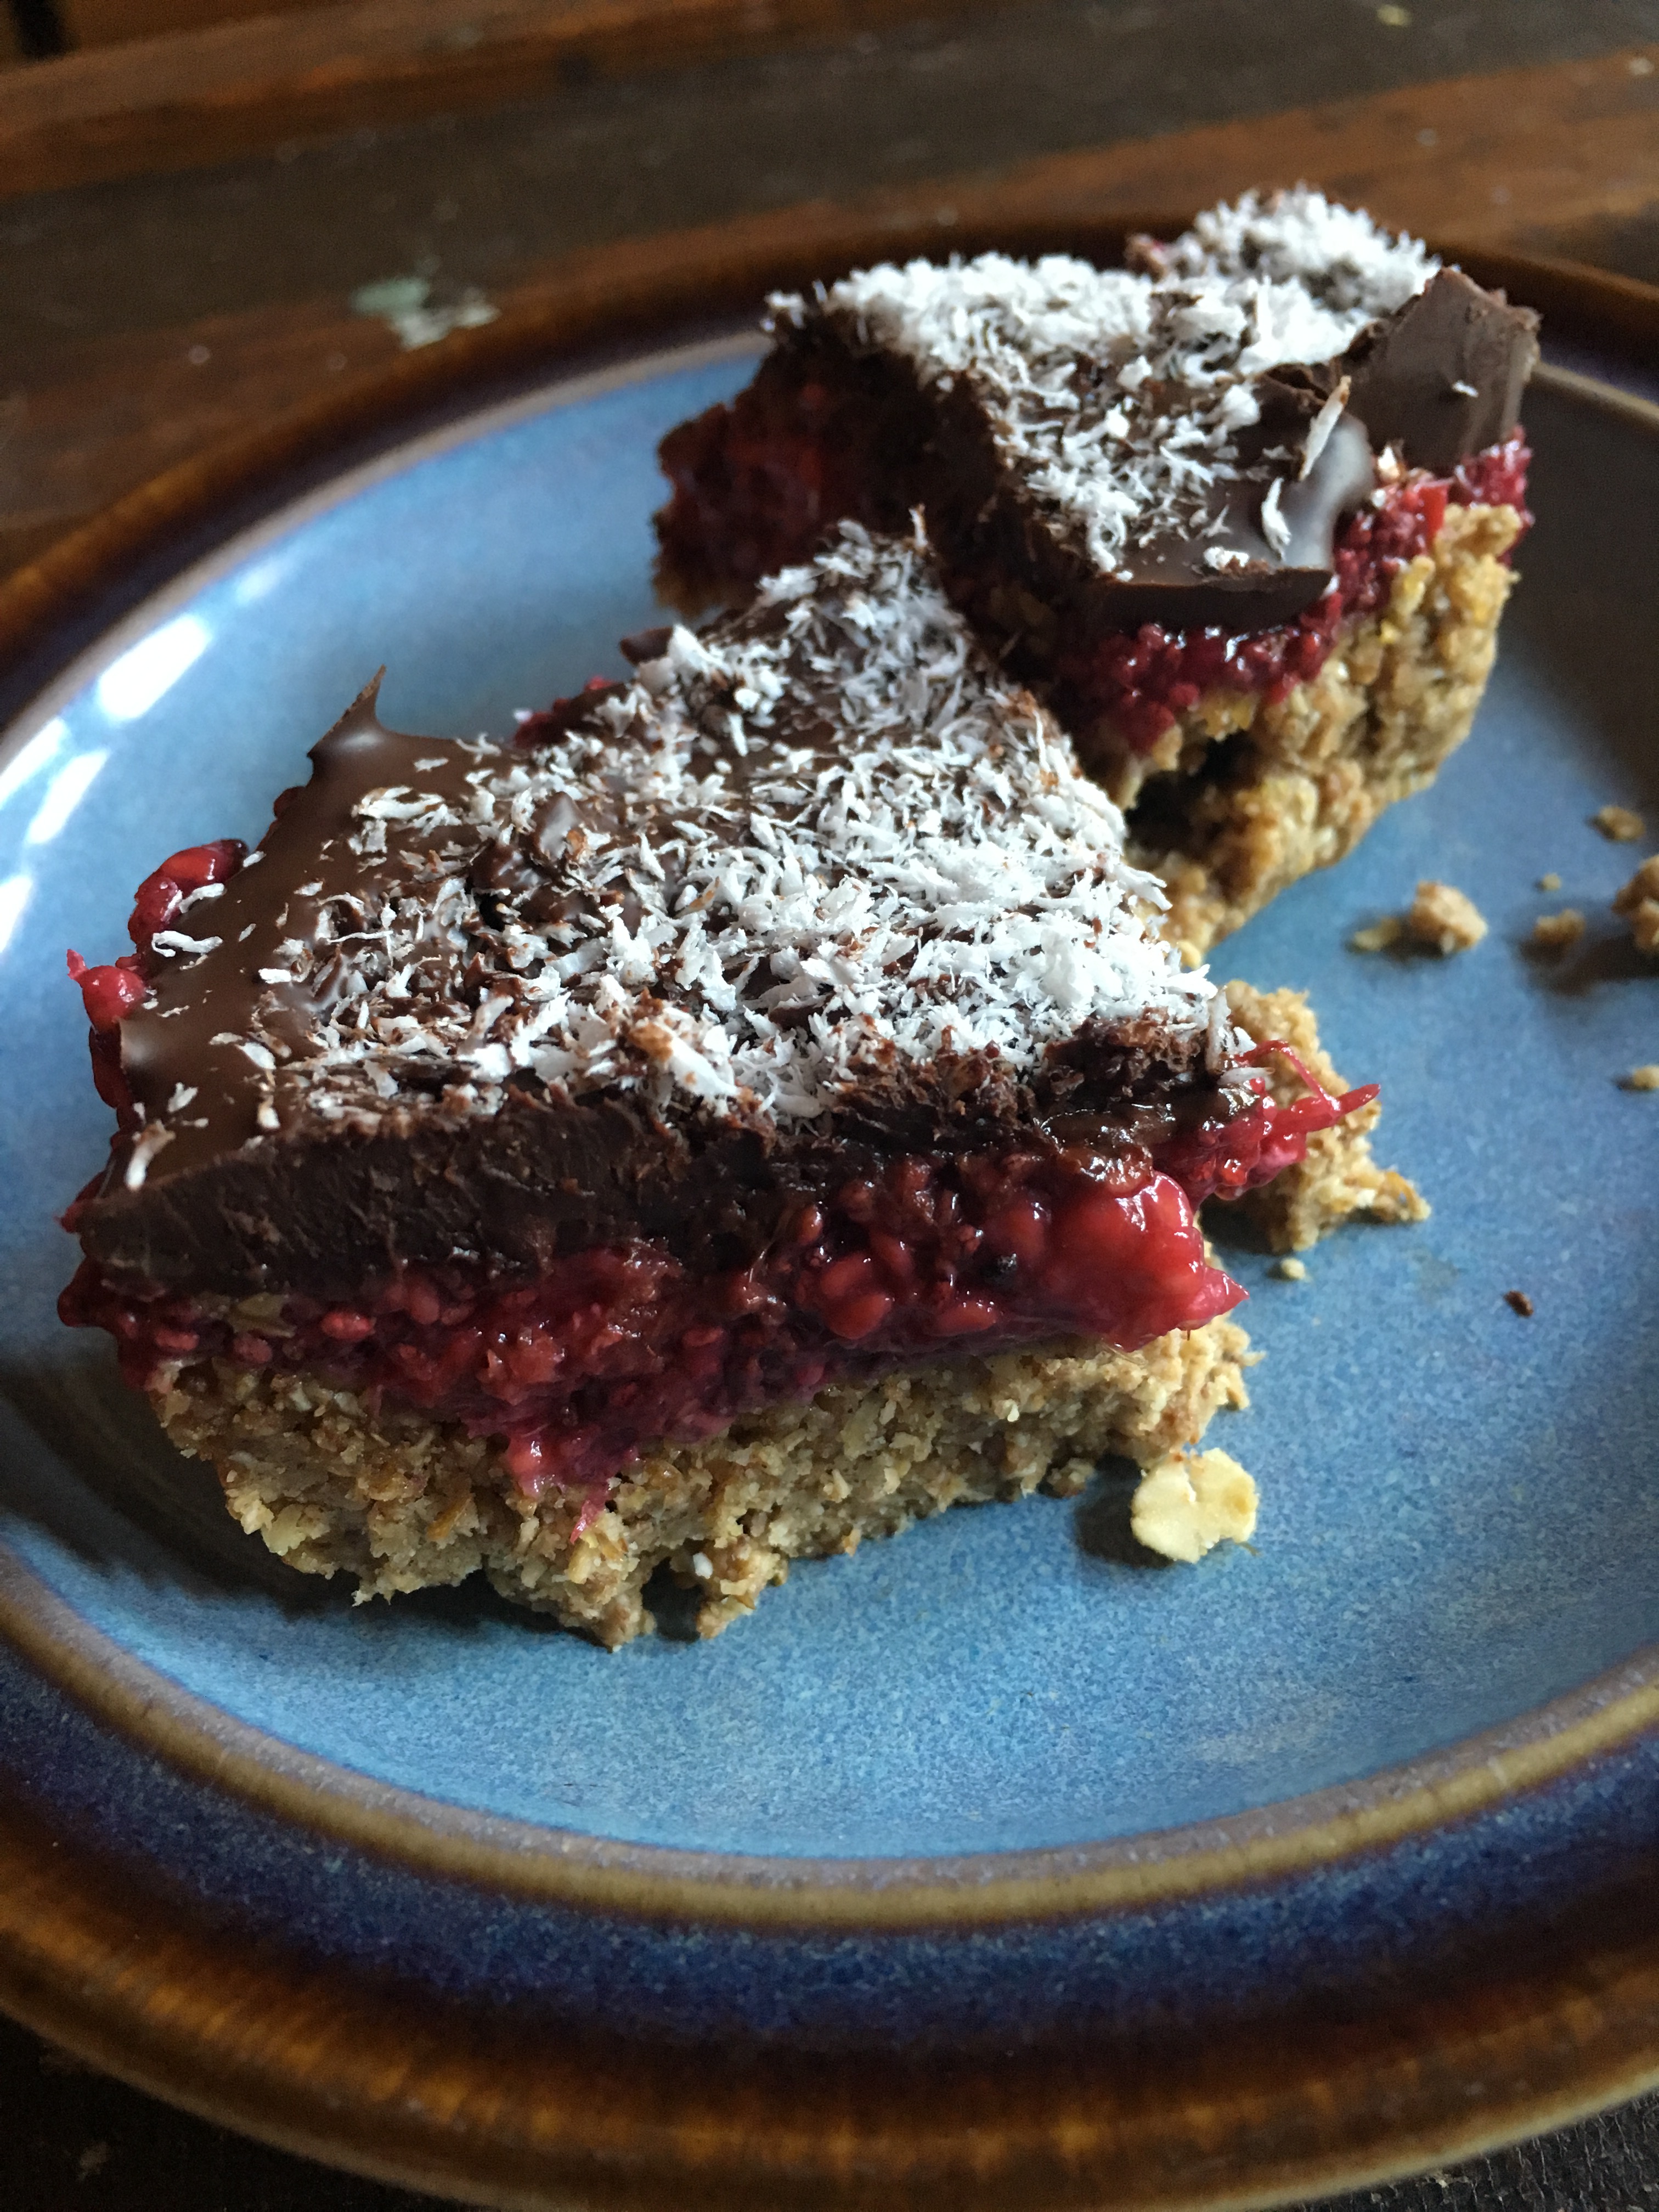
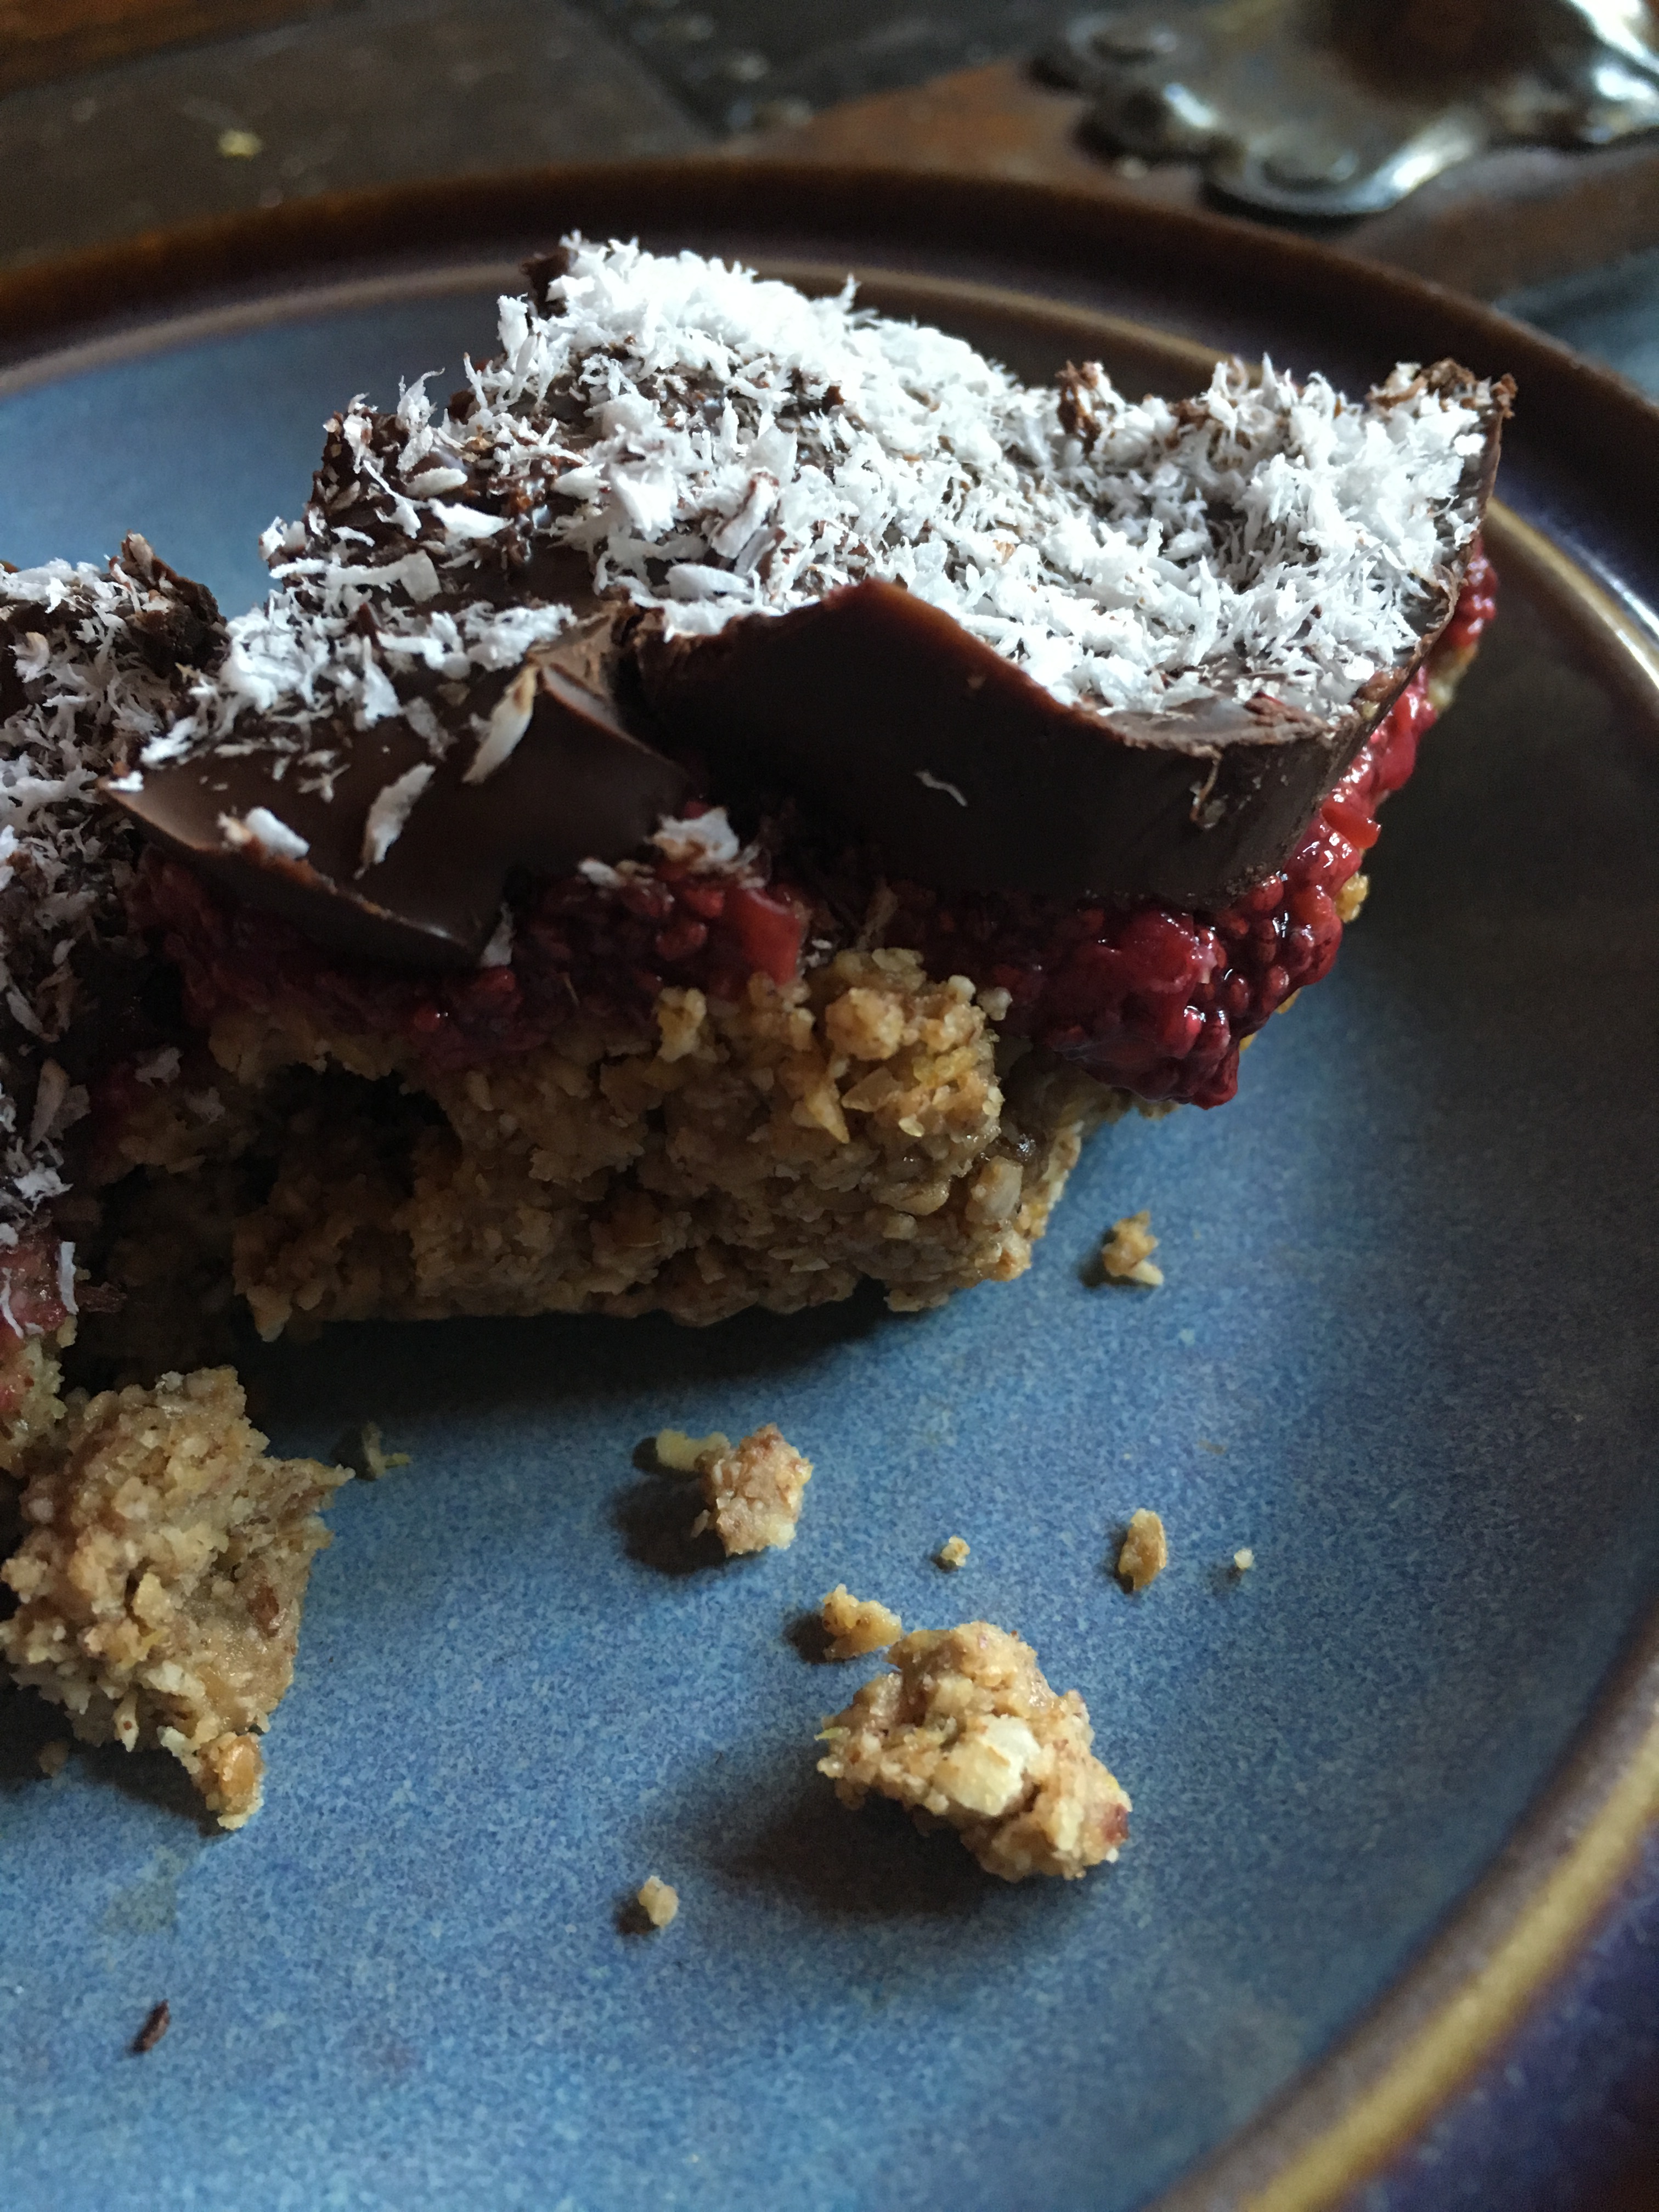
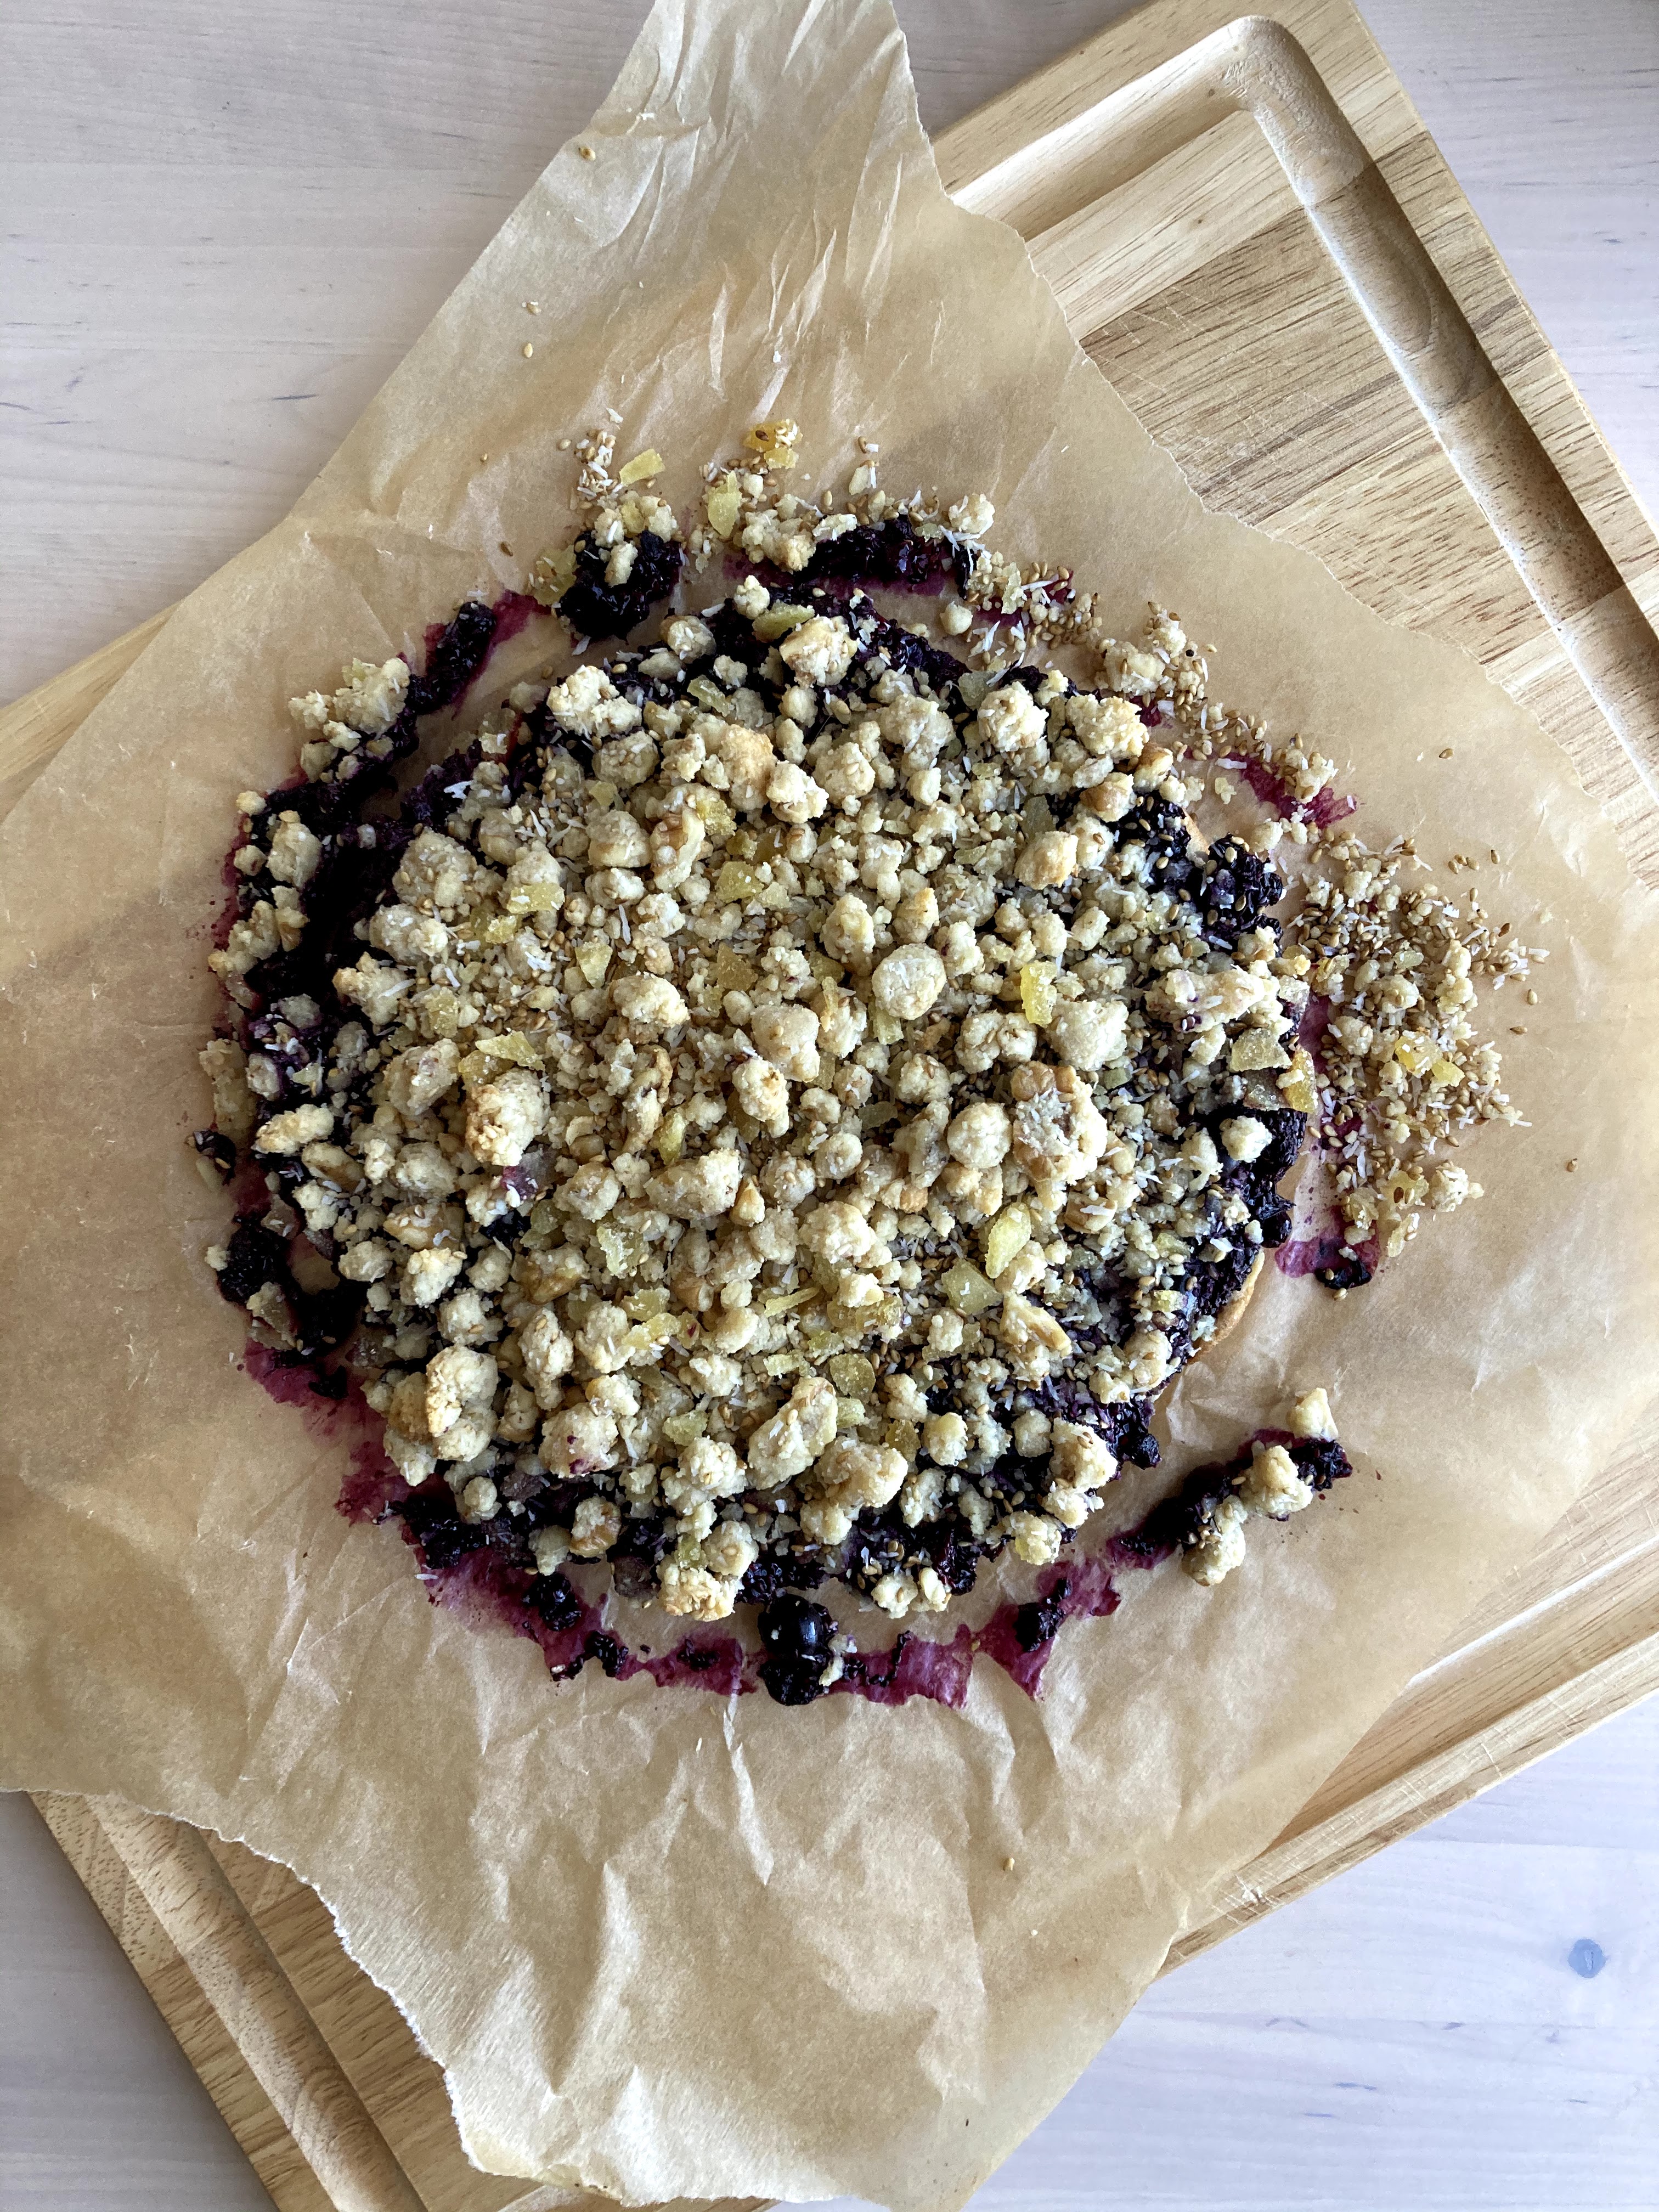
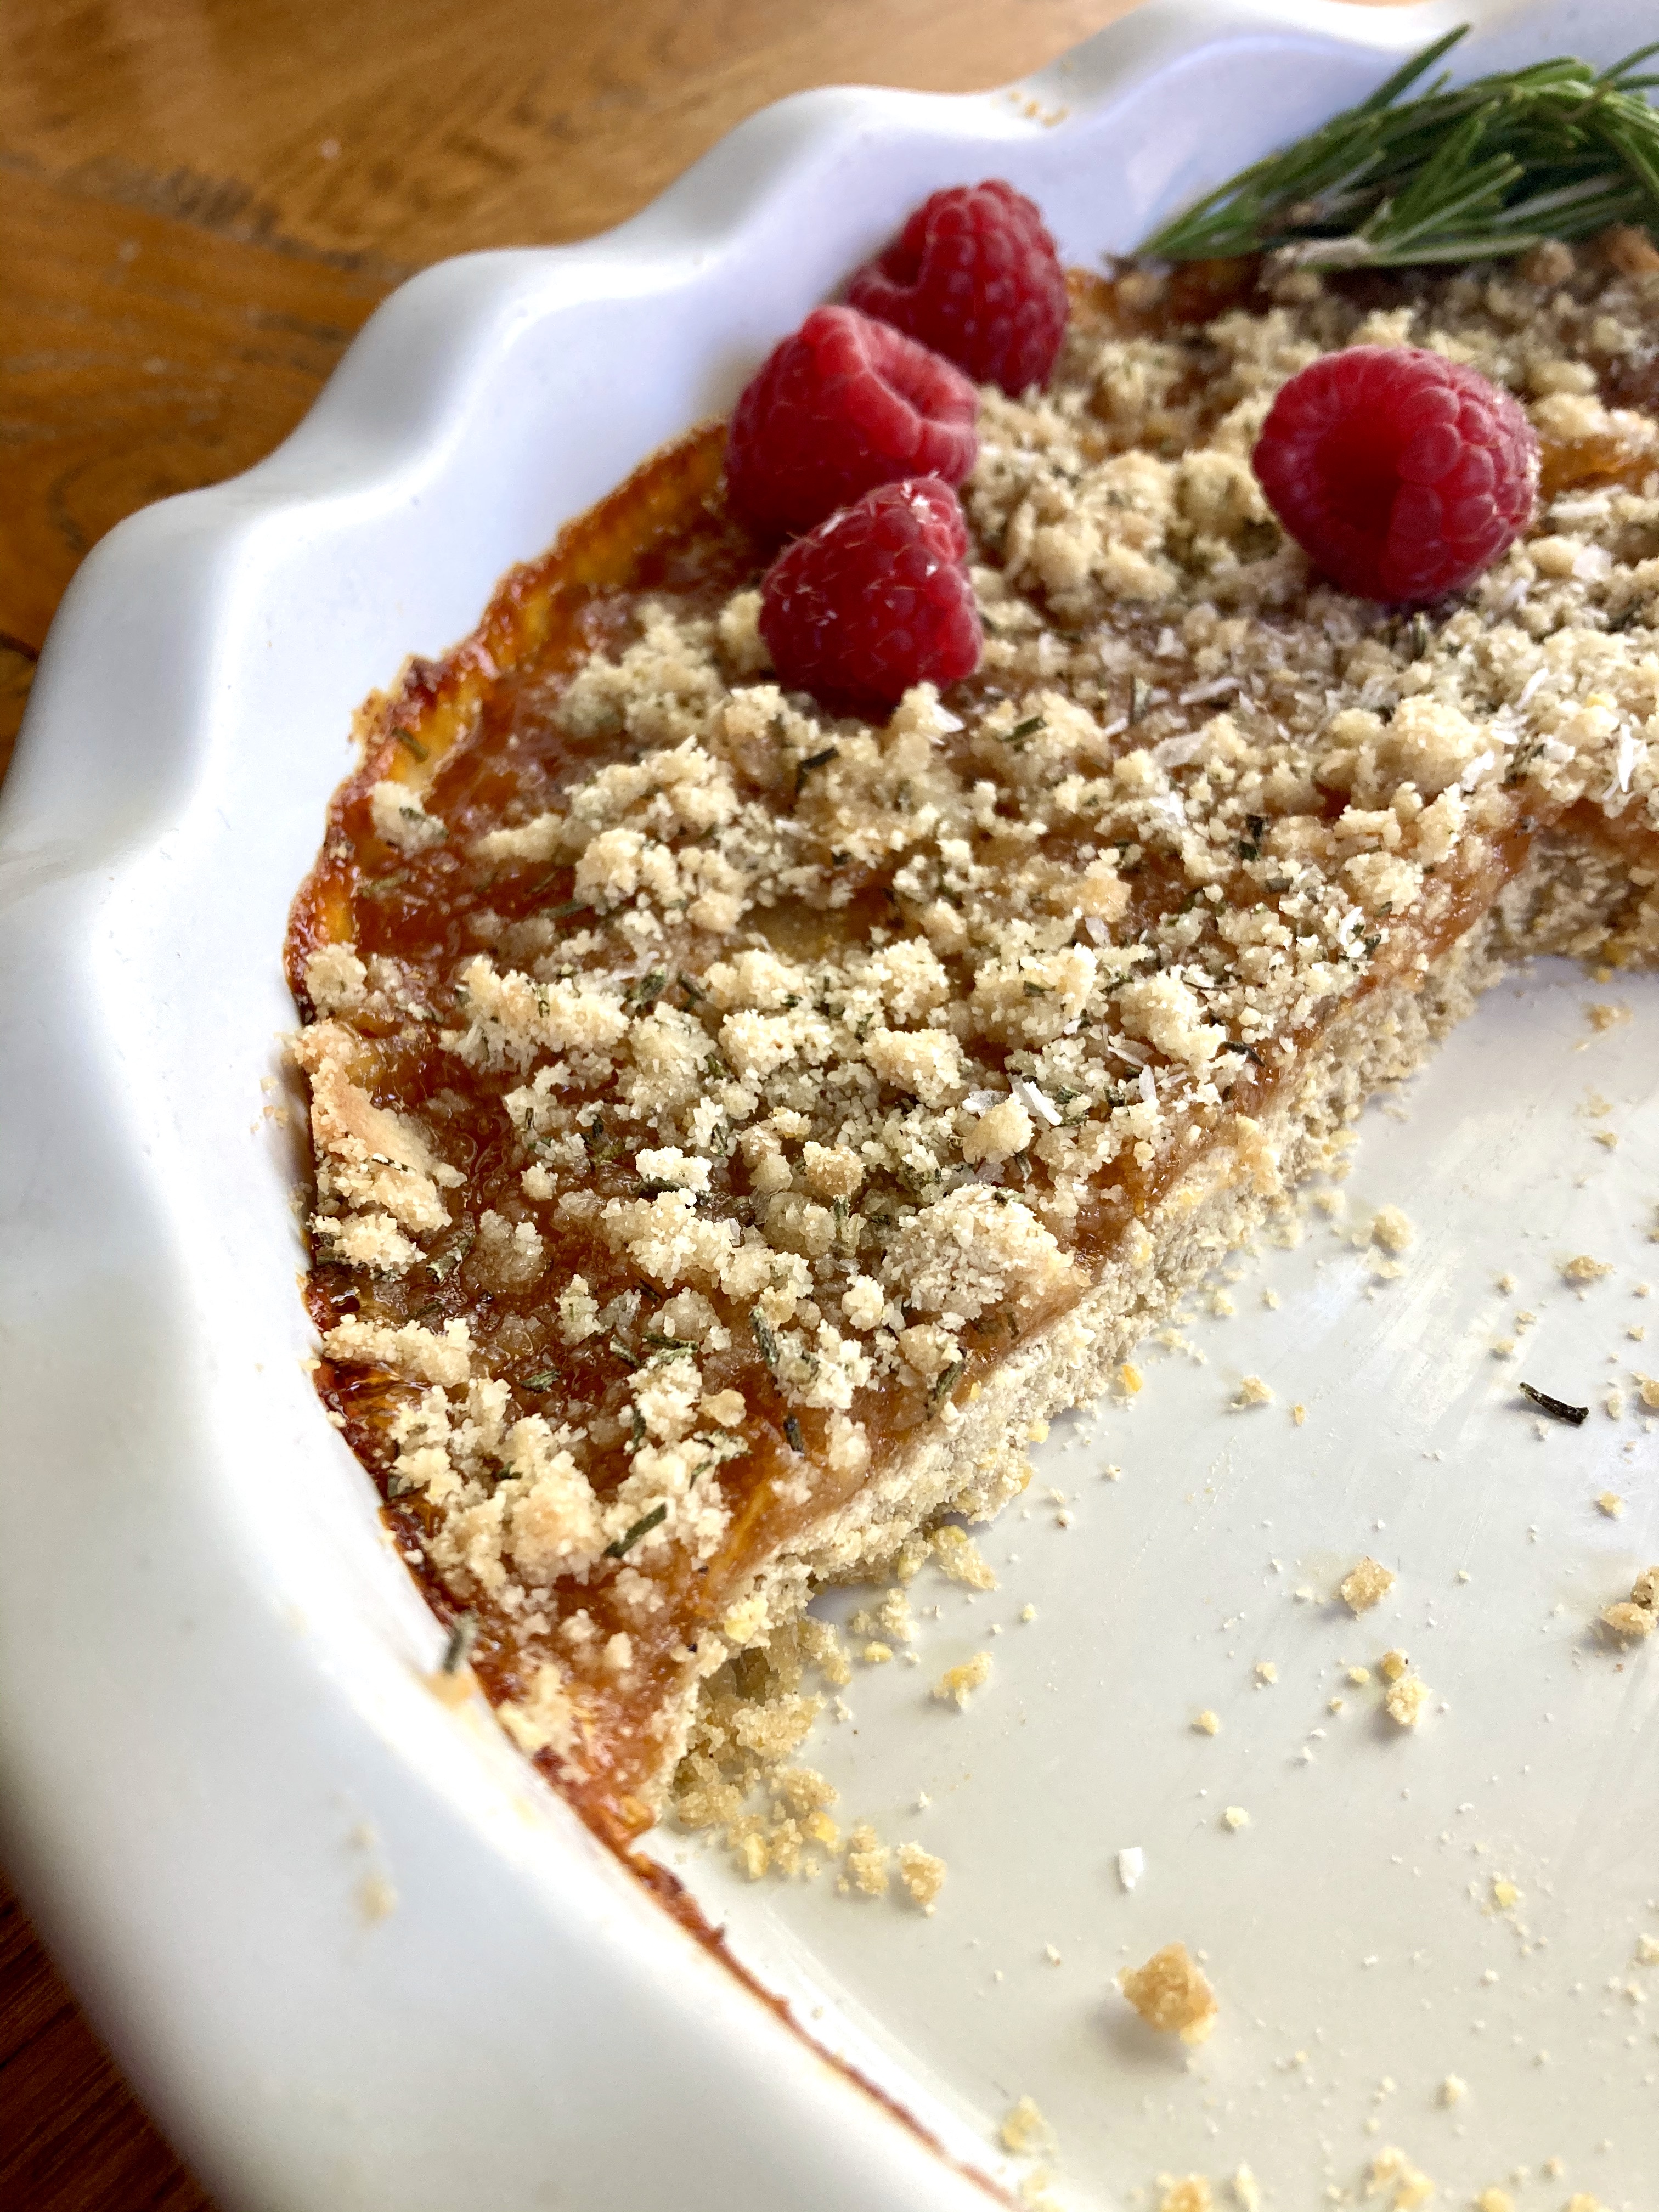
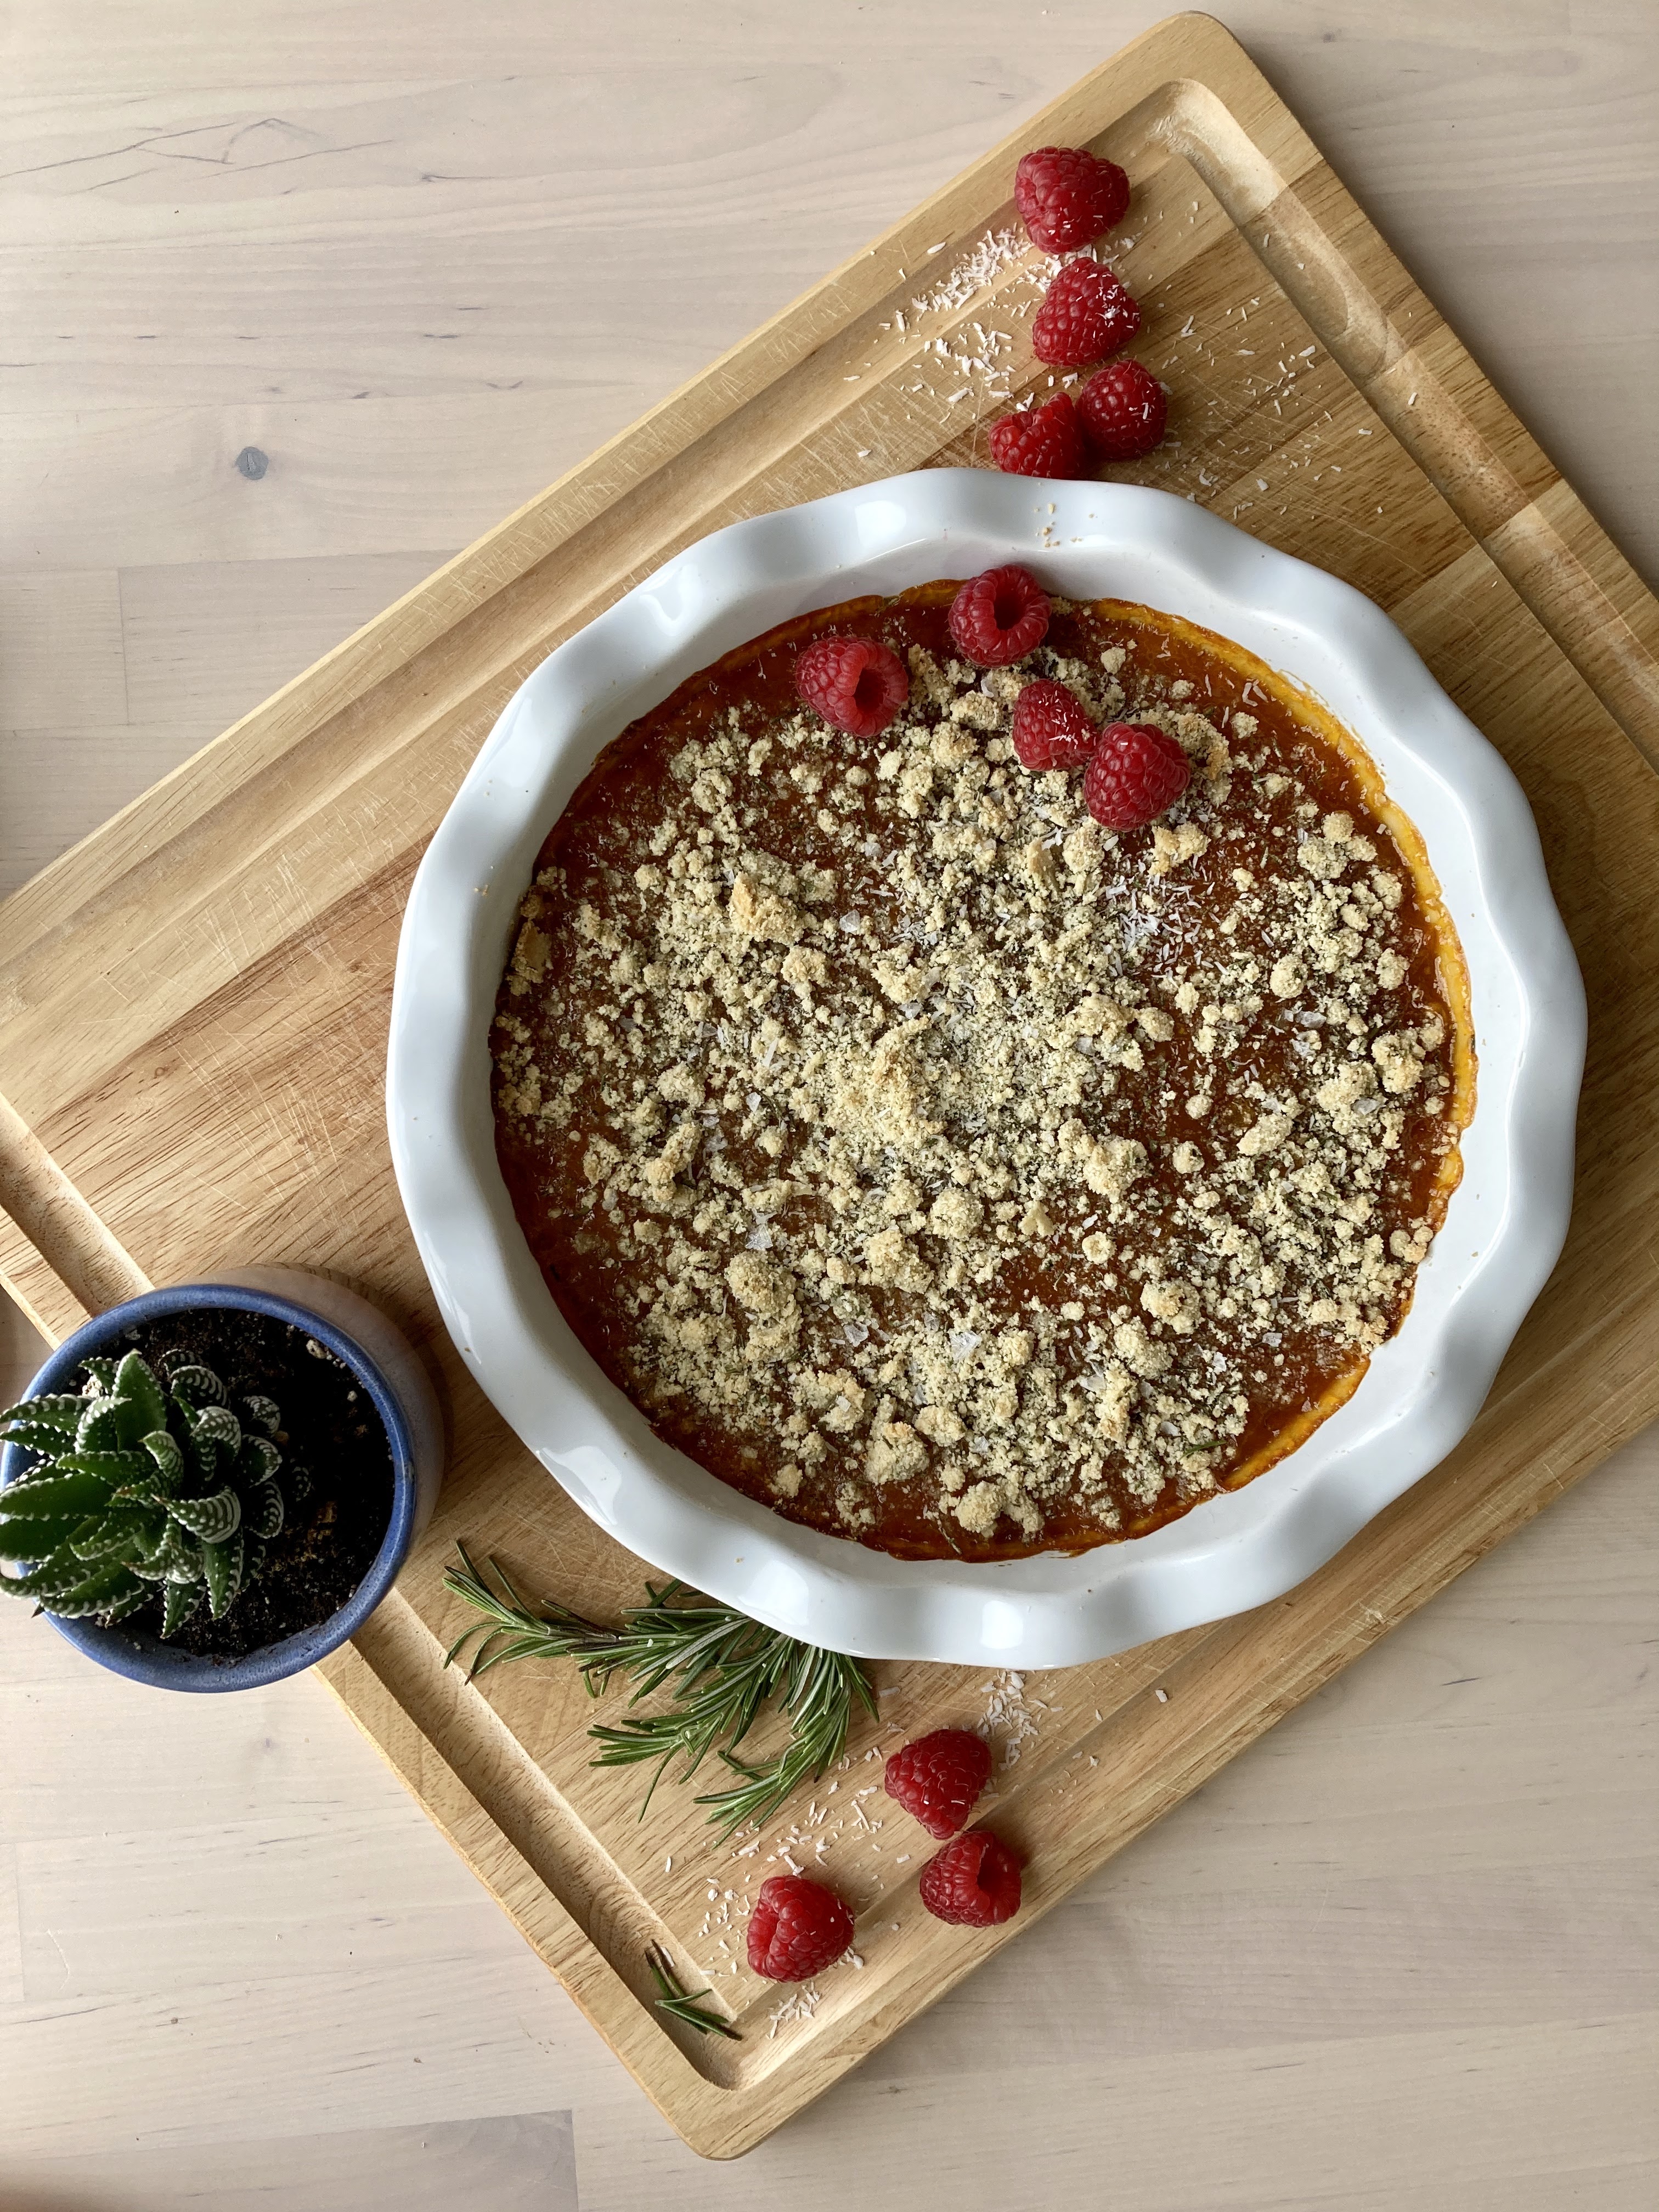
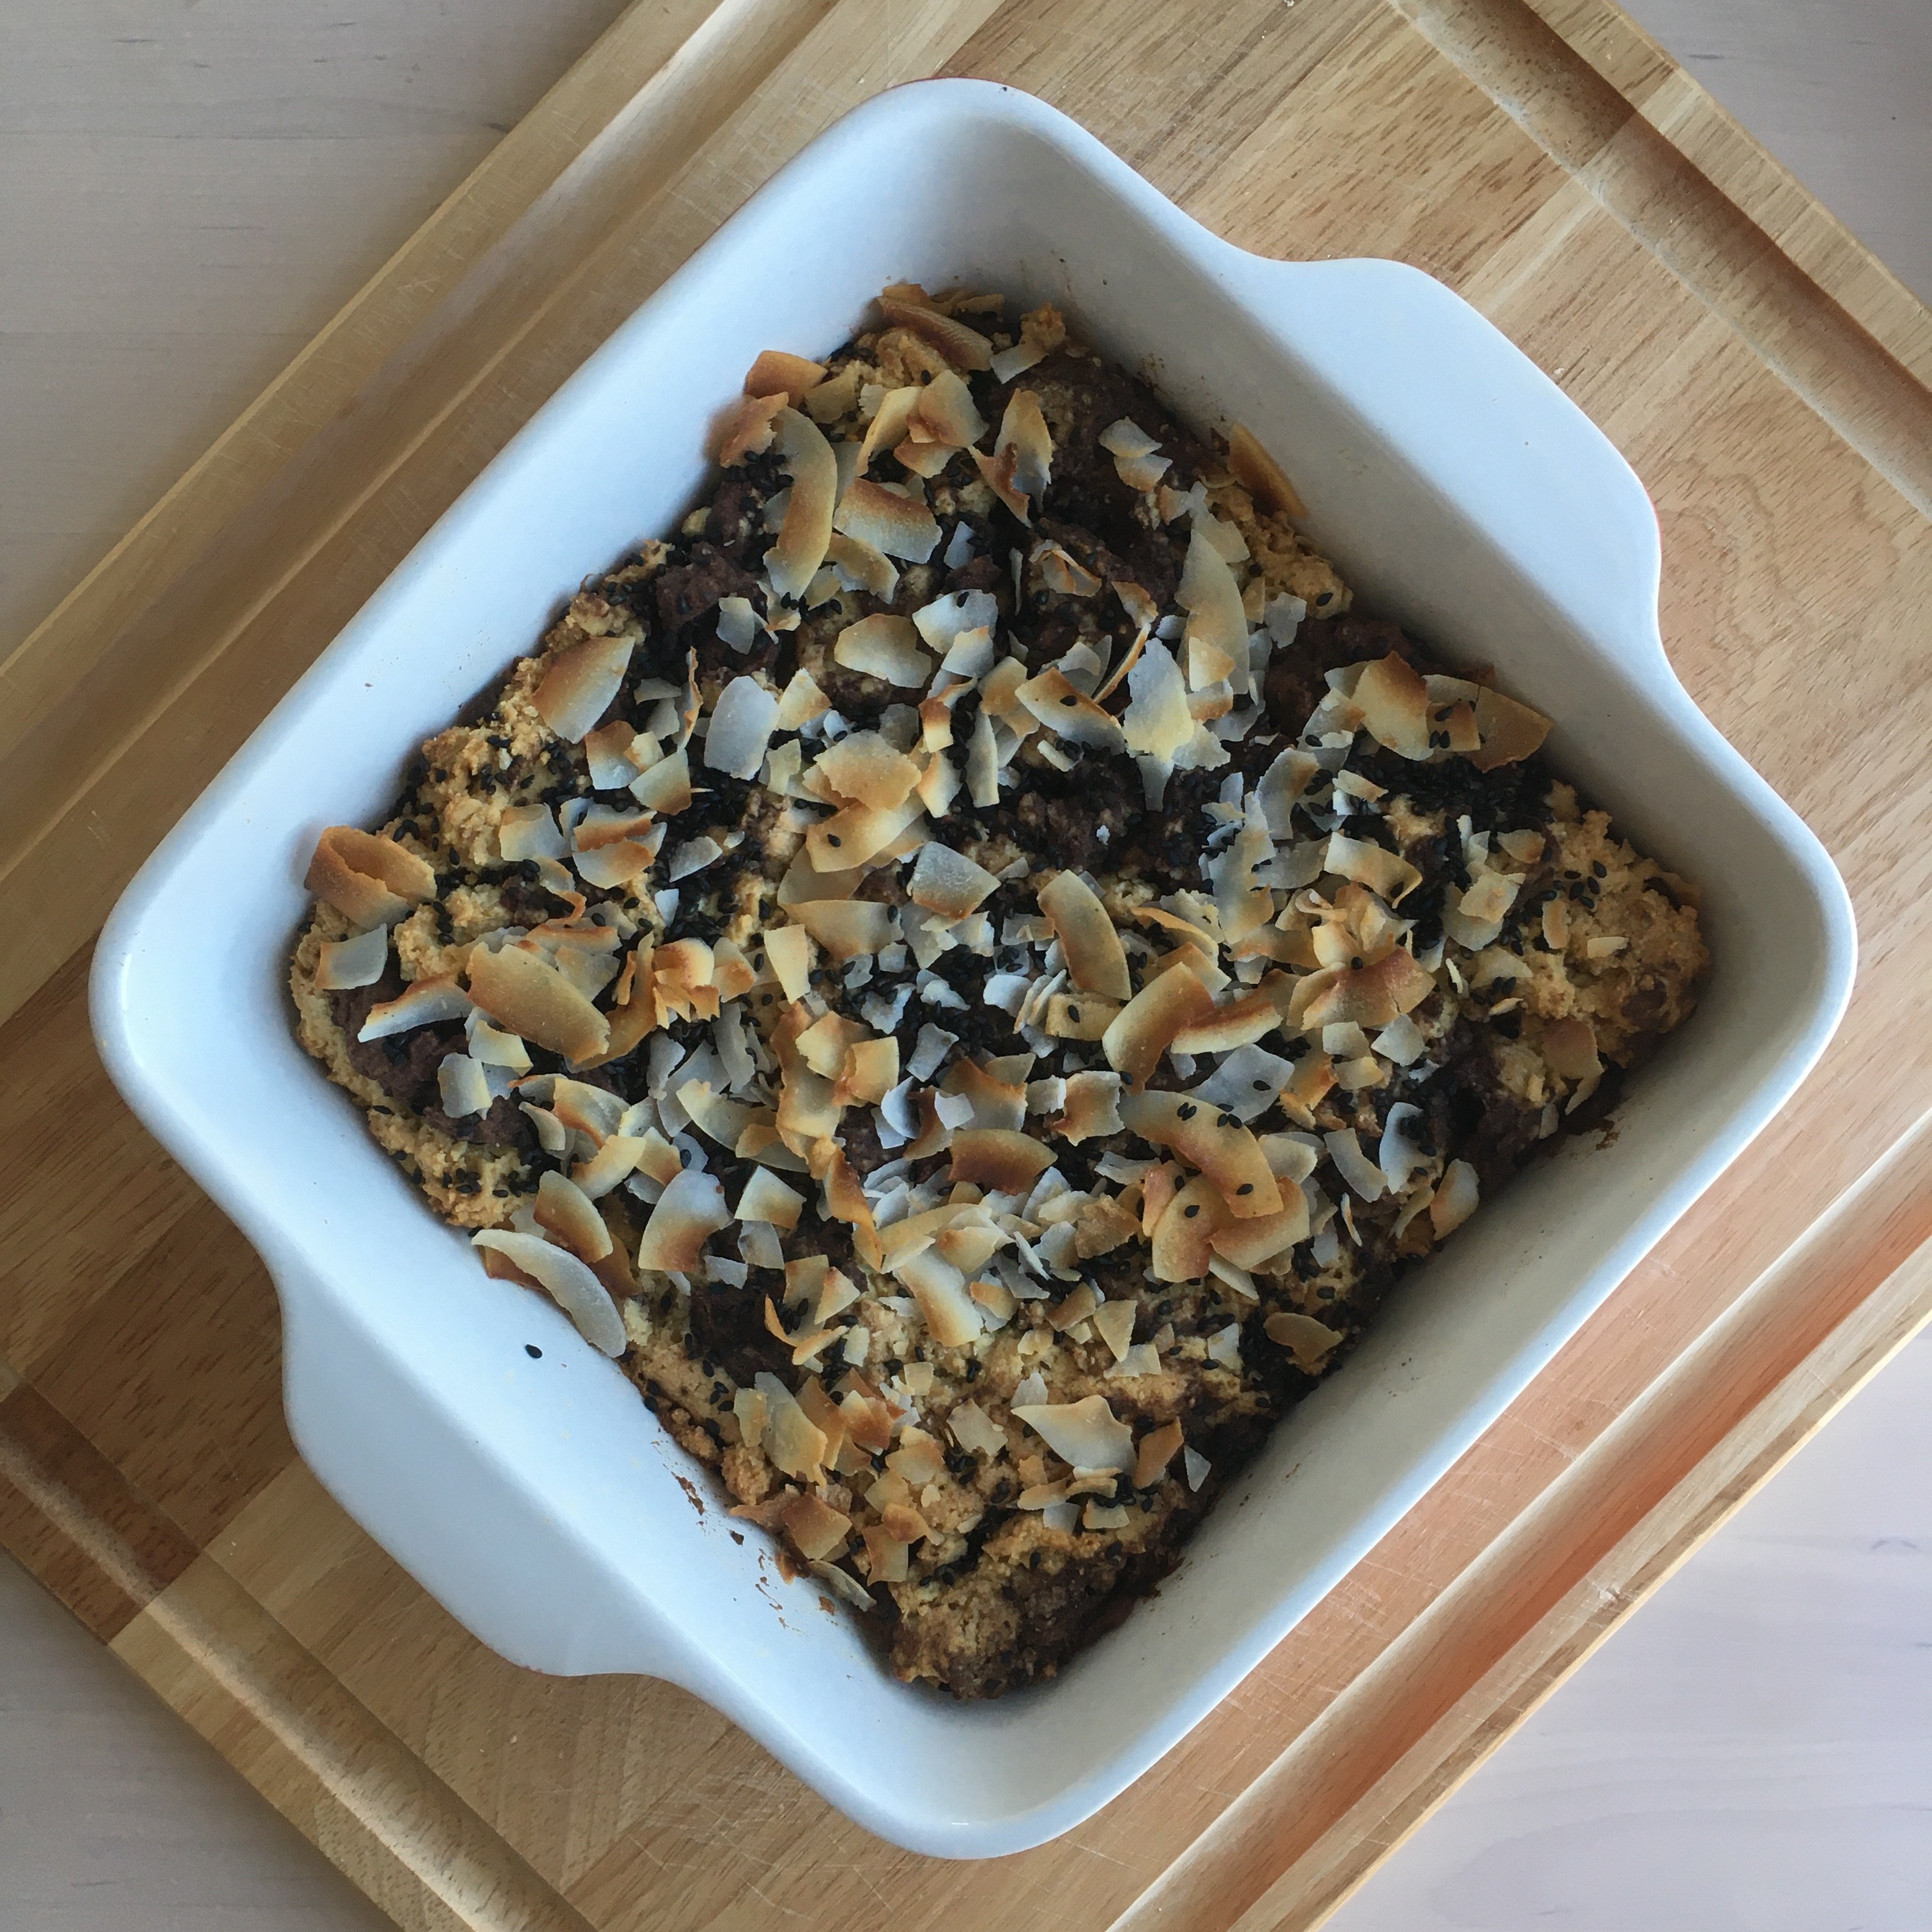
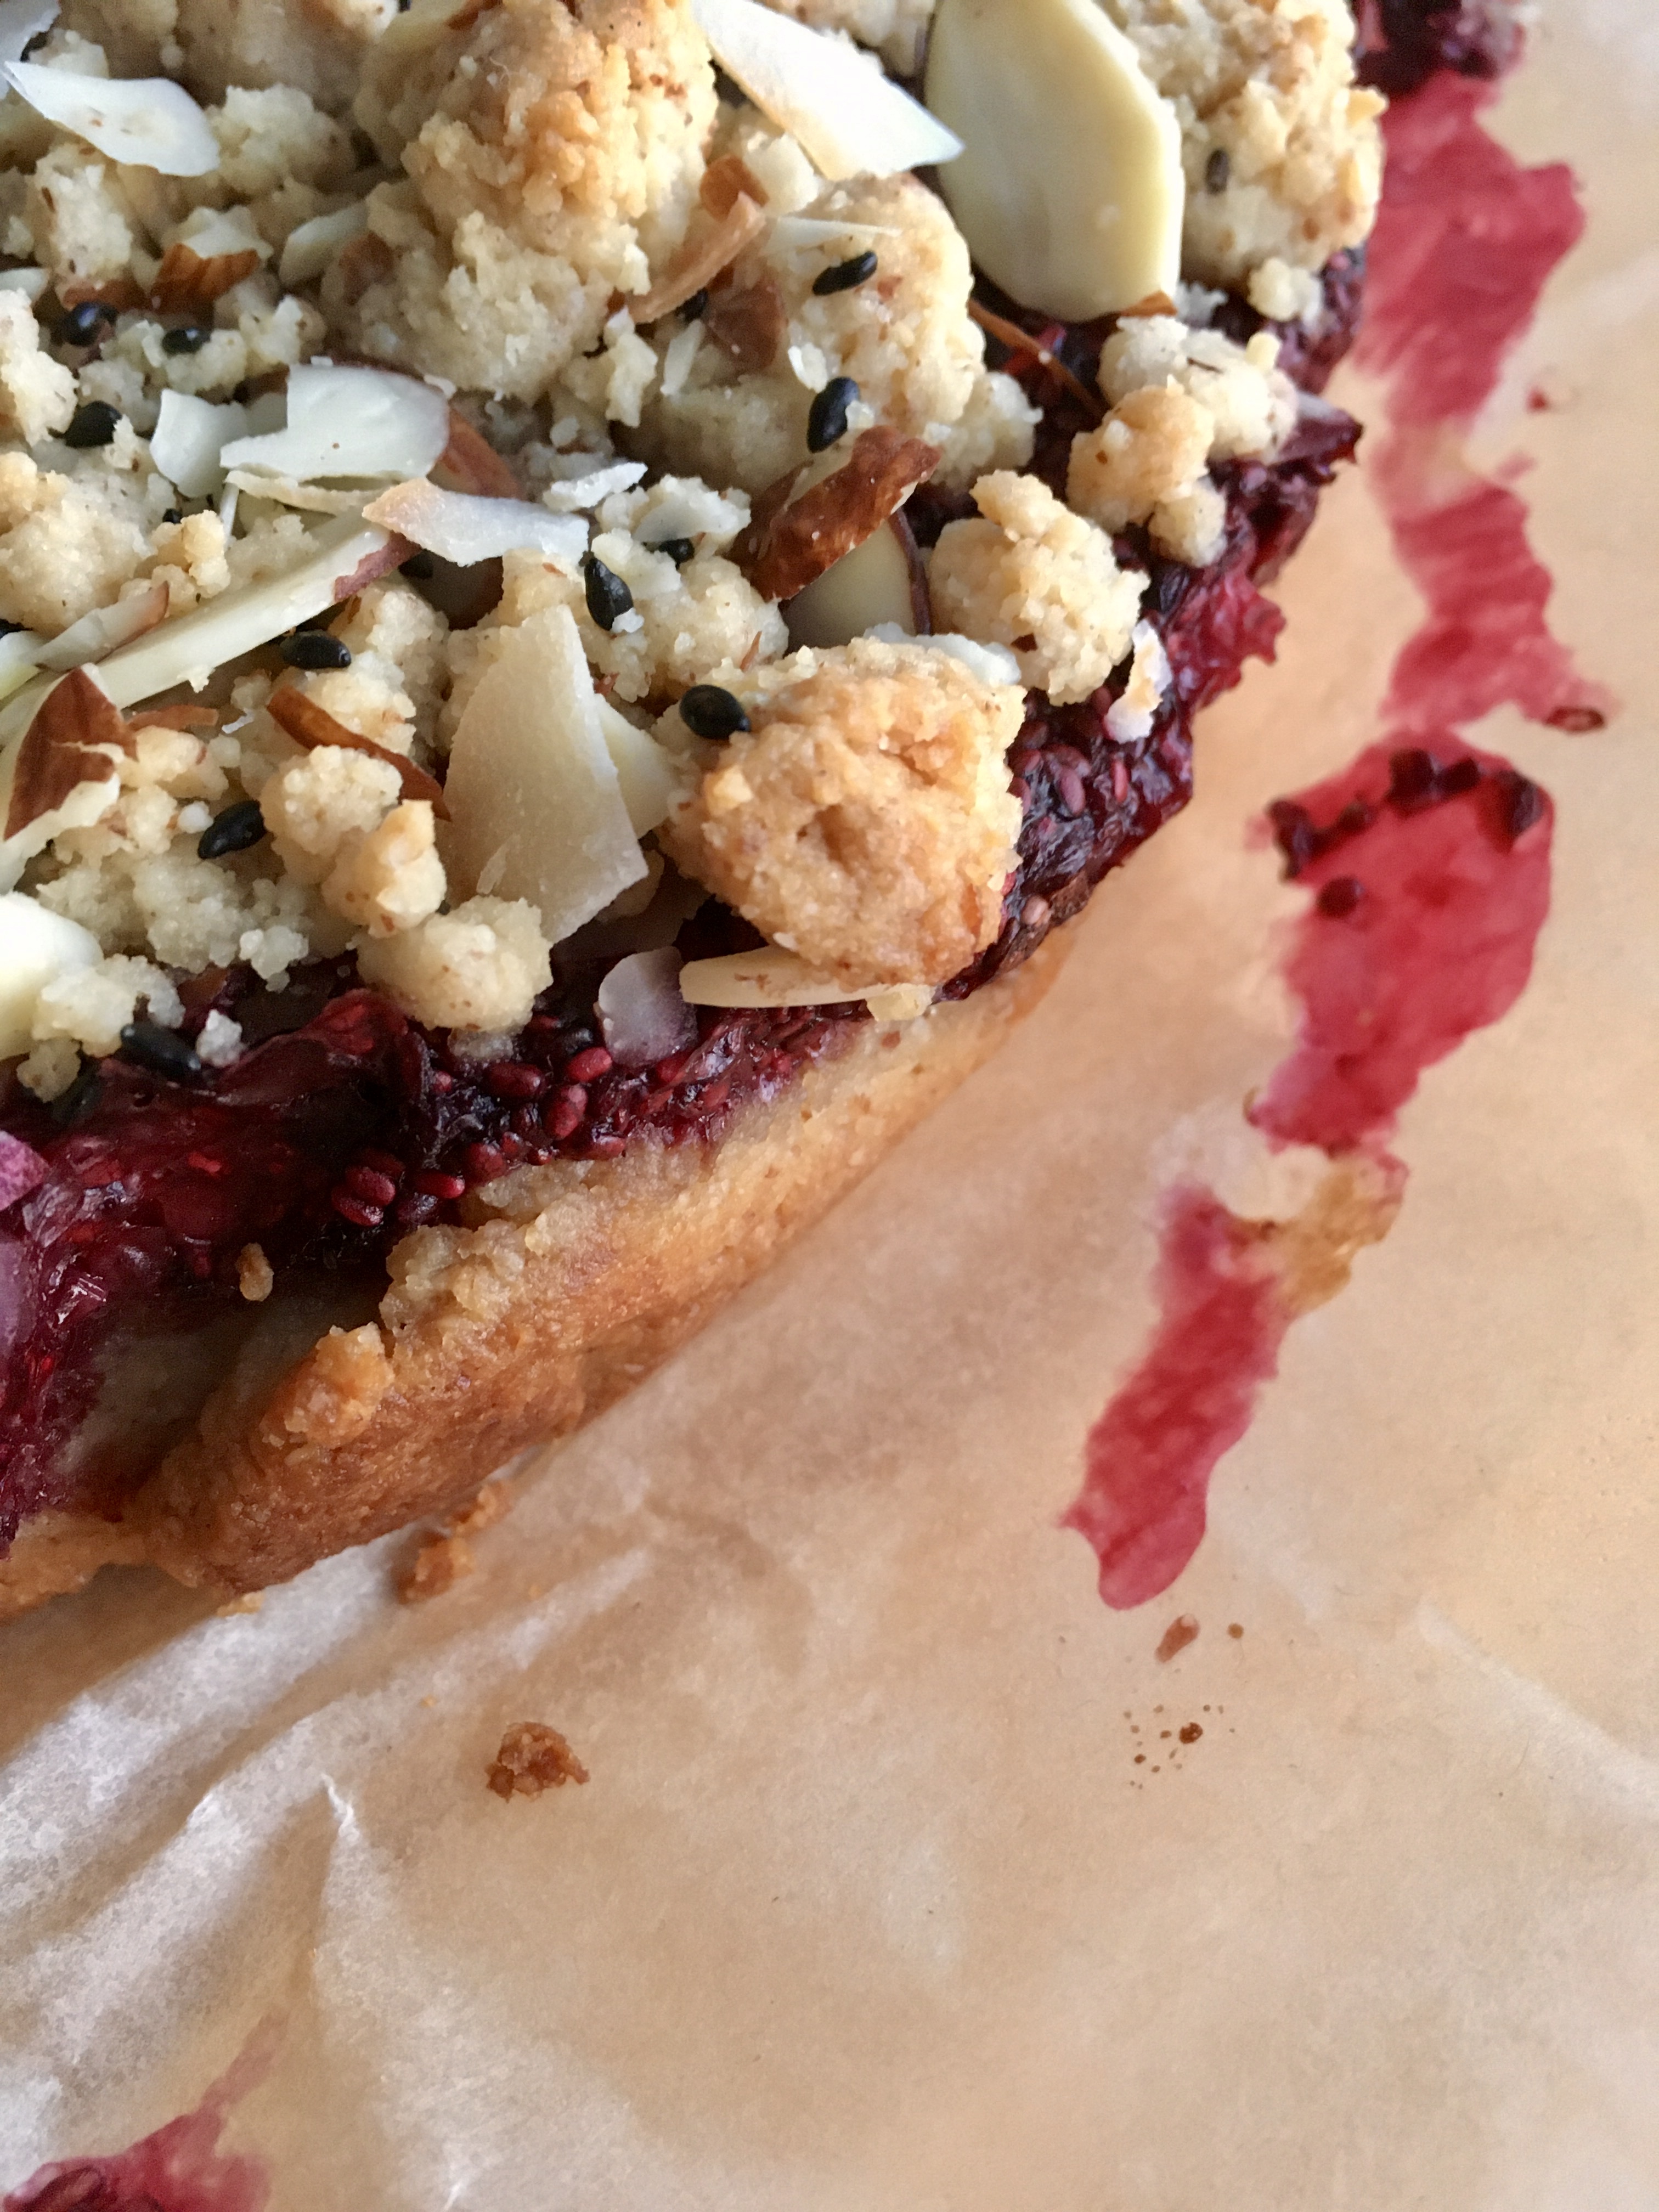
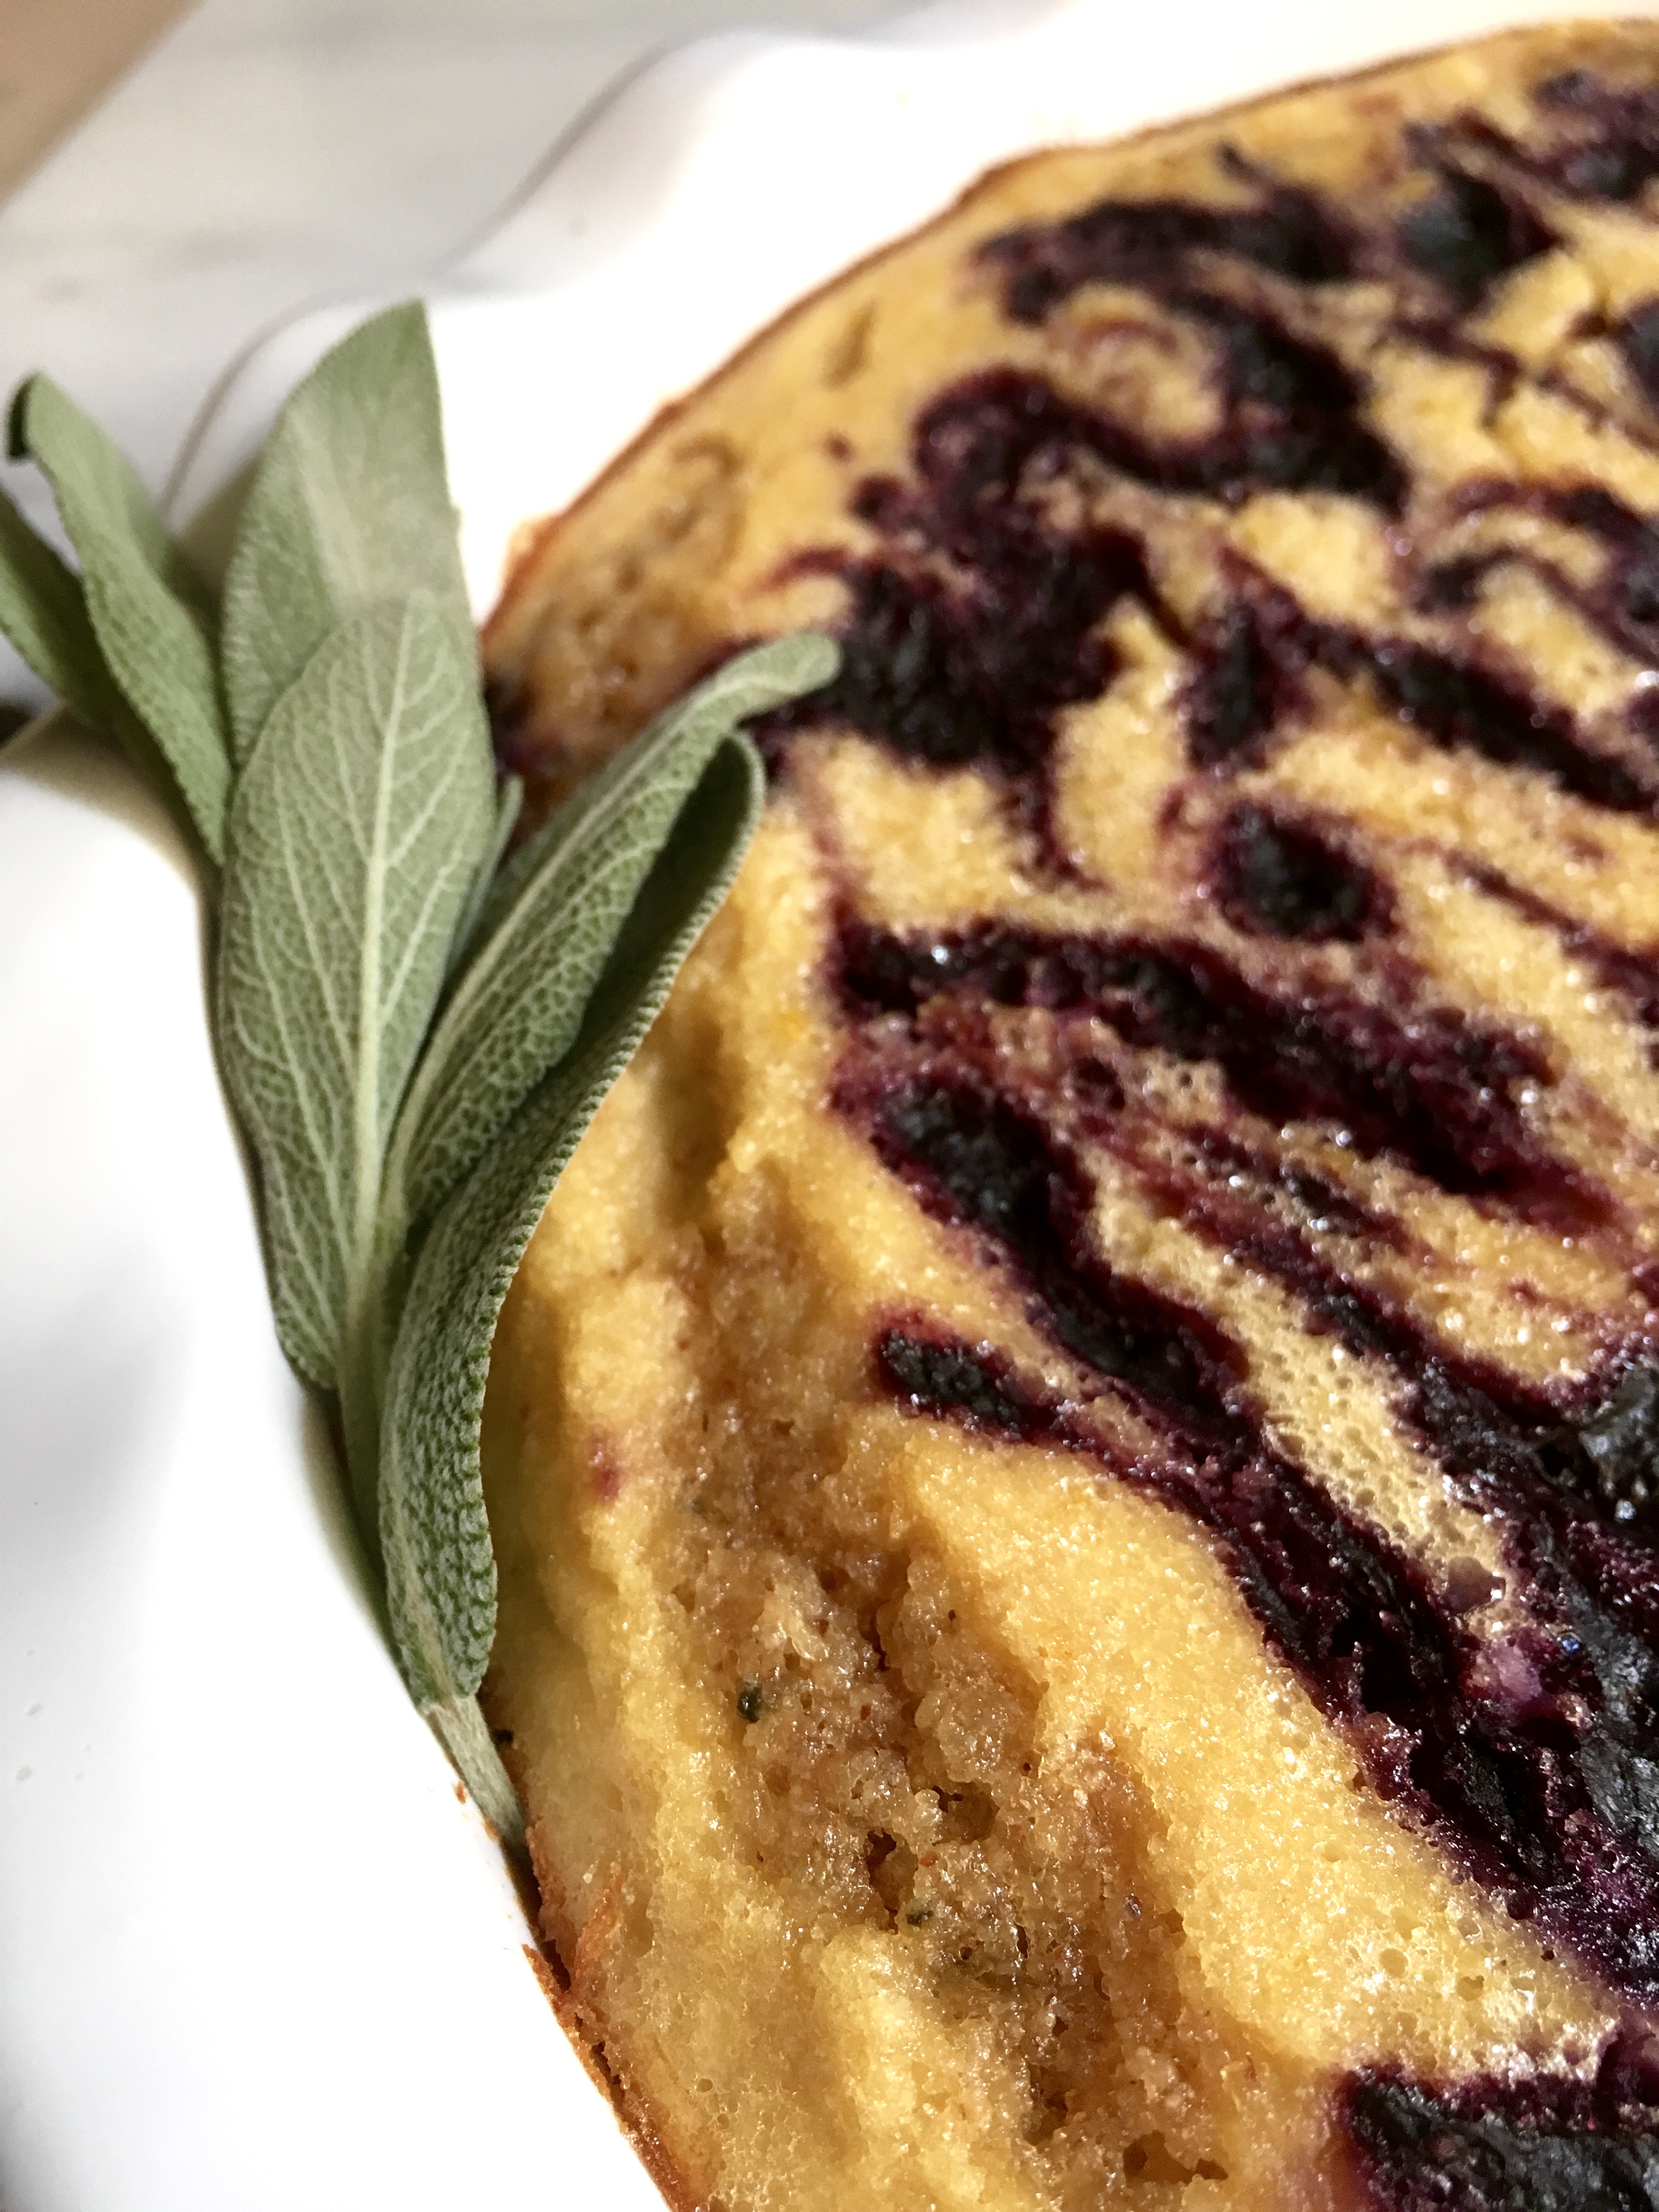
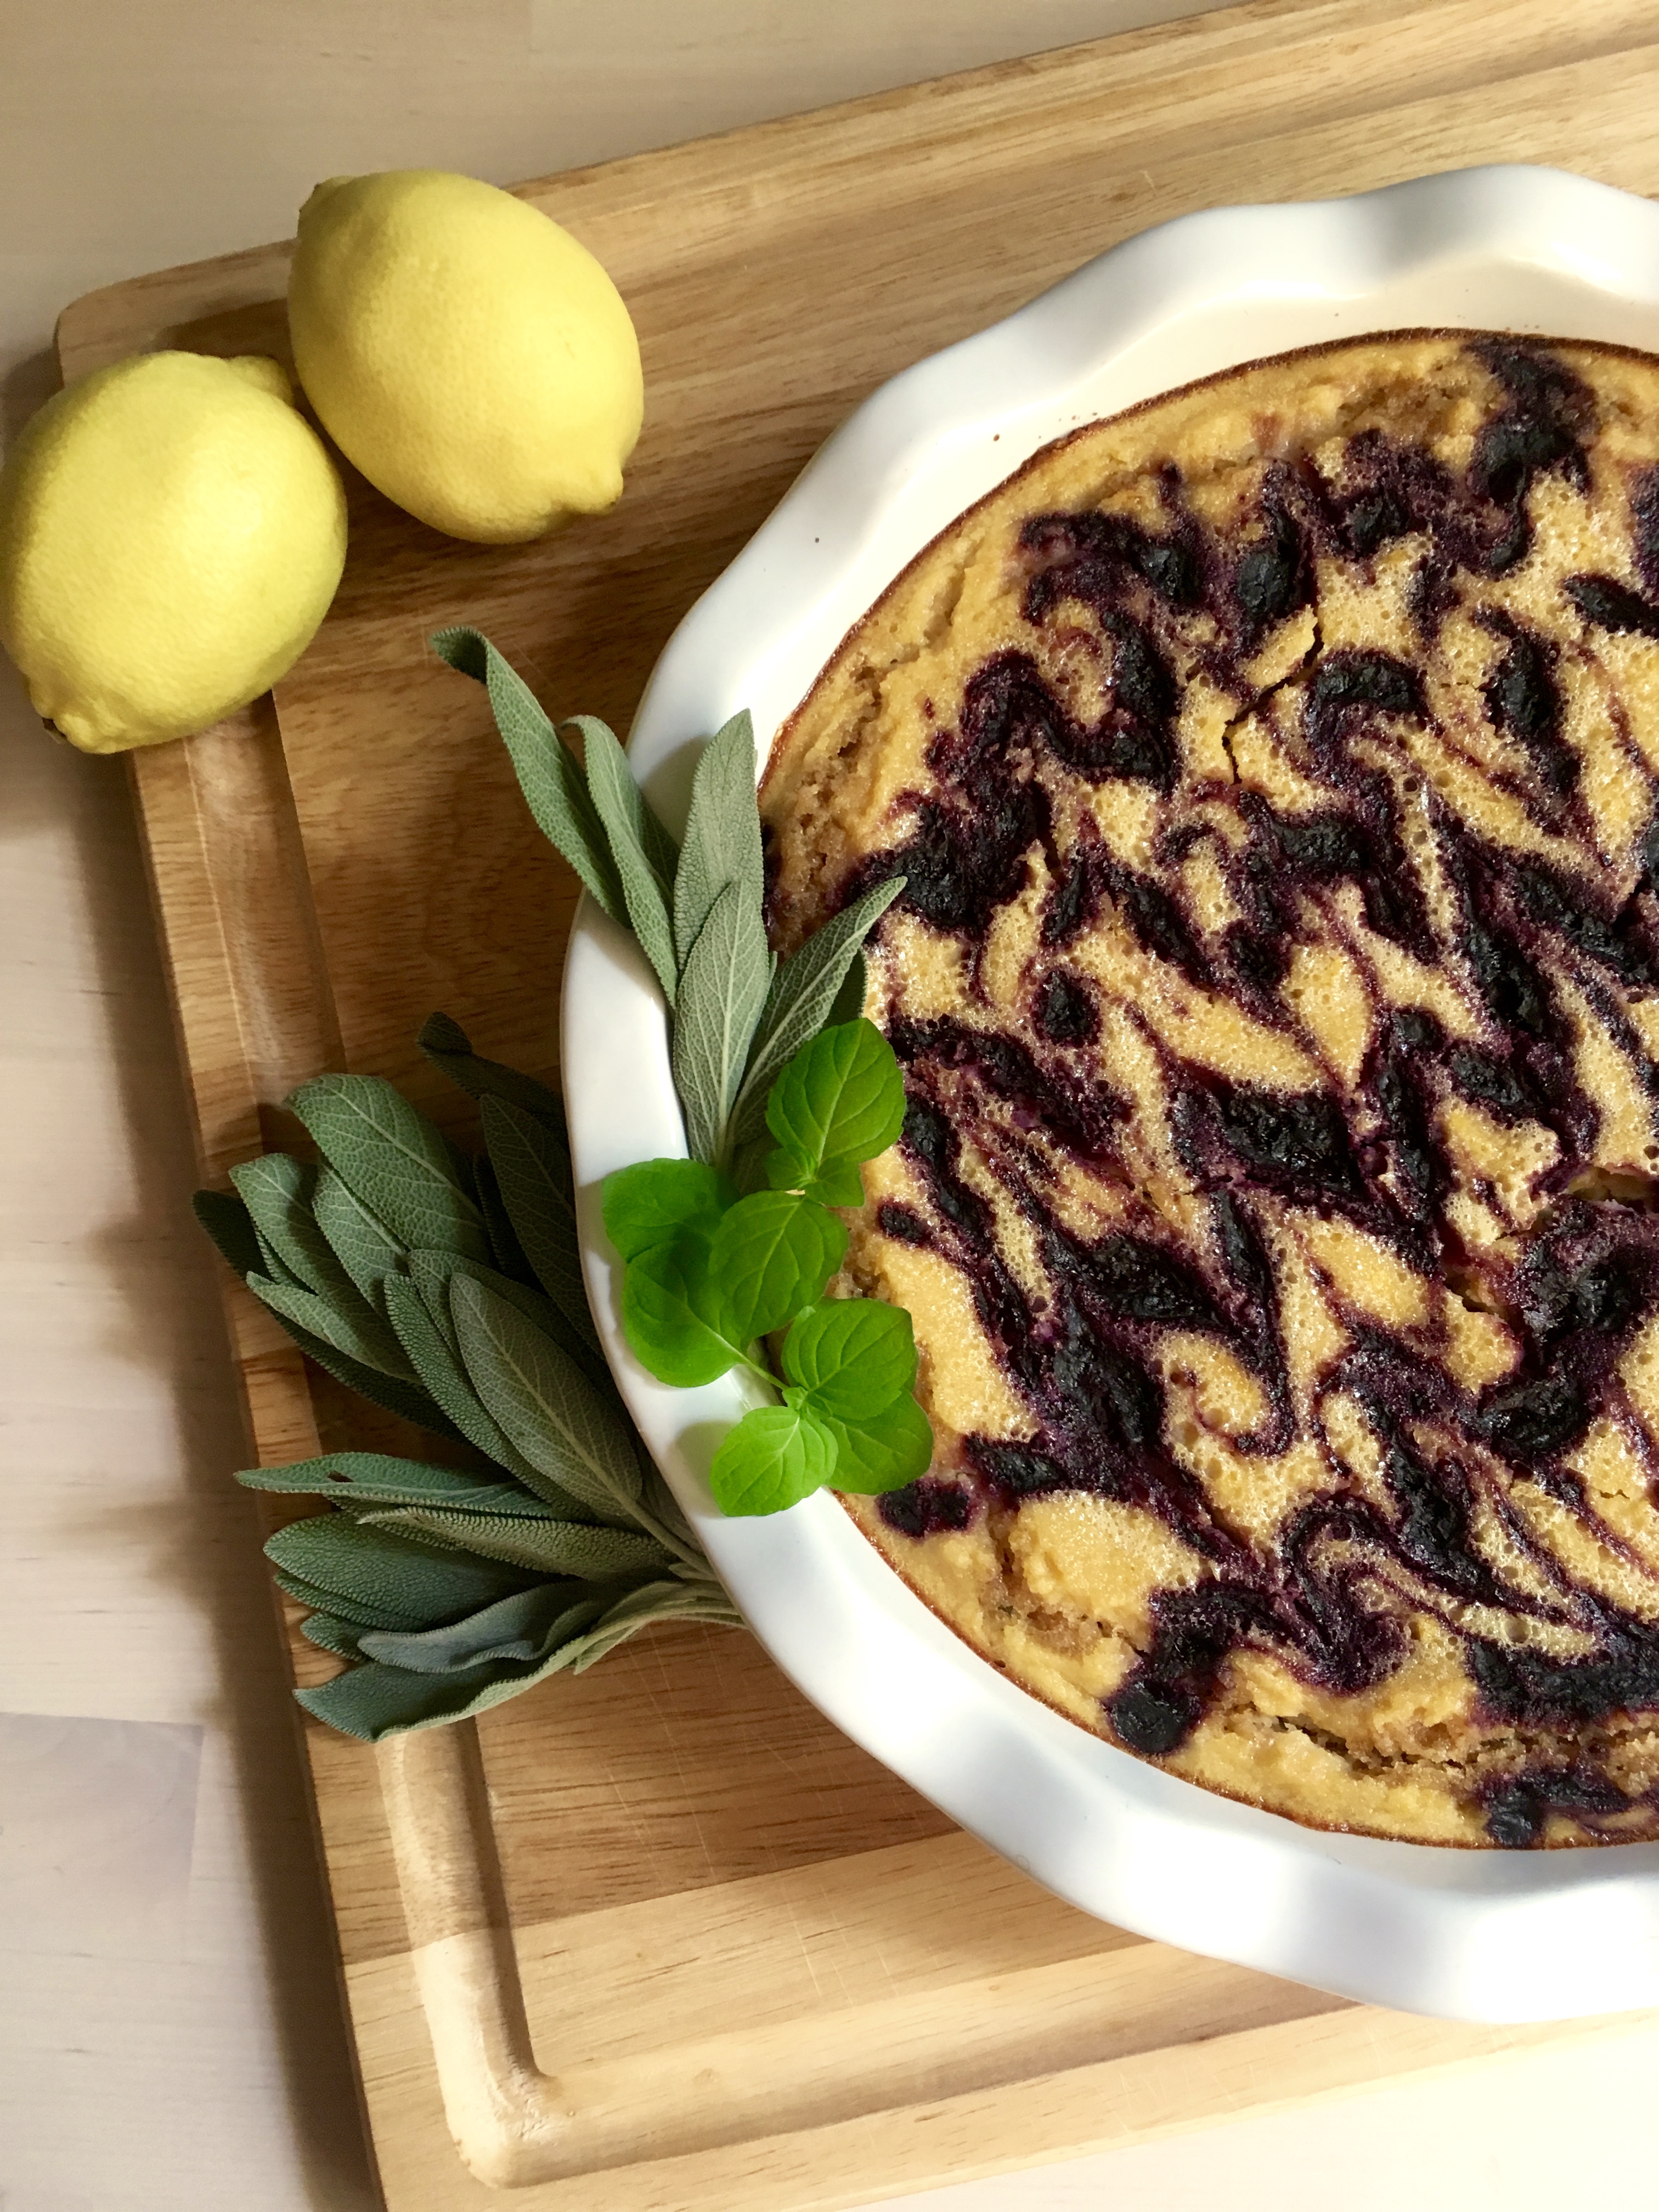
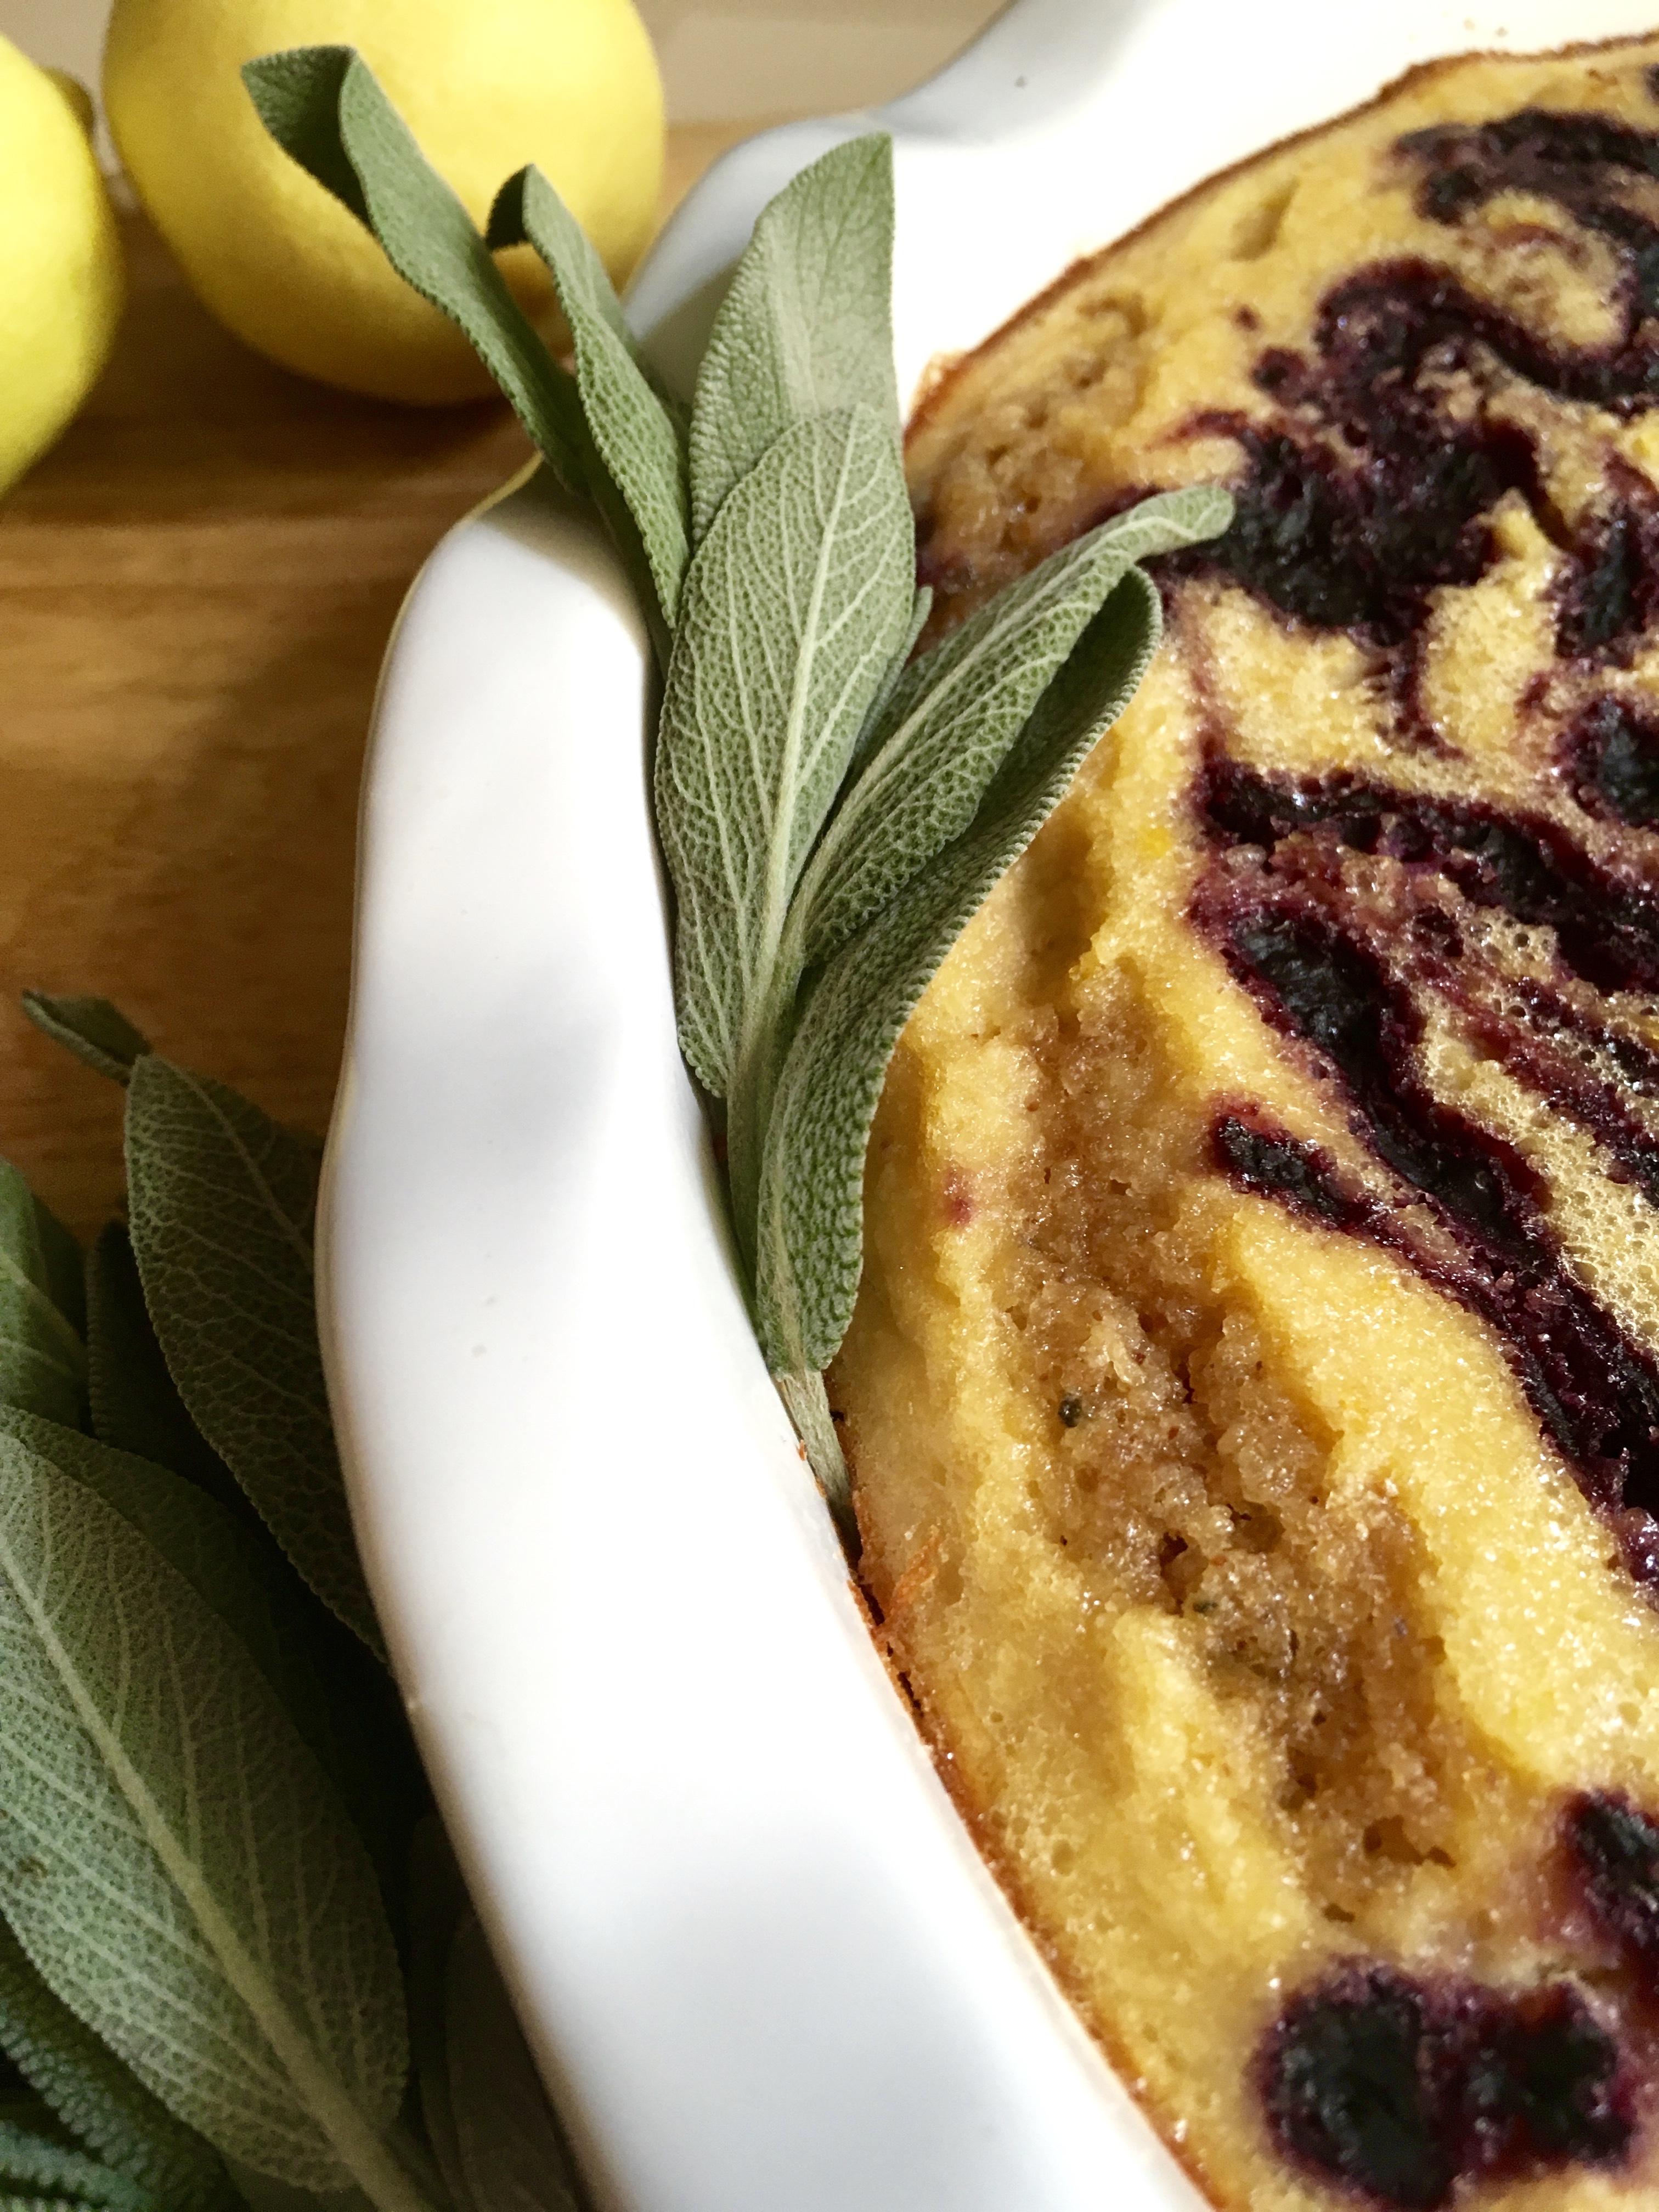
Sesame Ginger Blueberry Crumble Bars

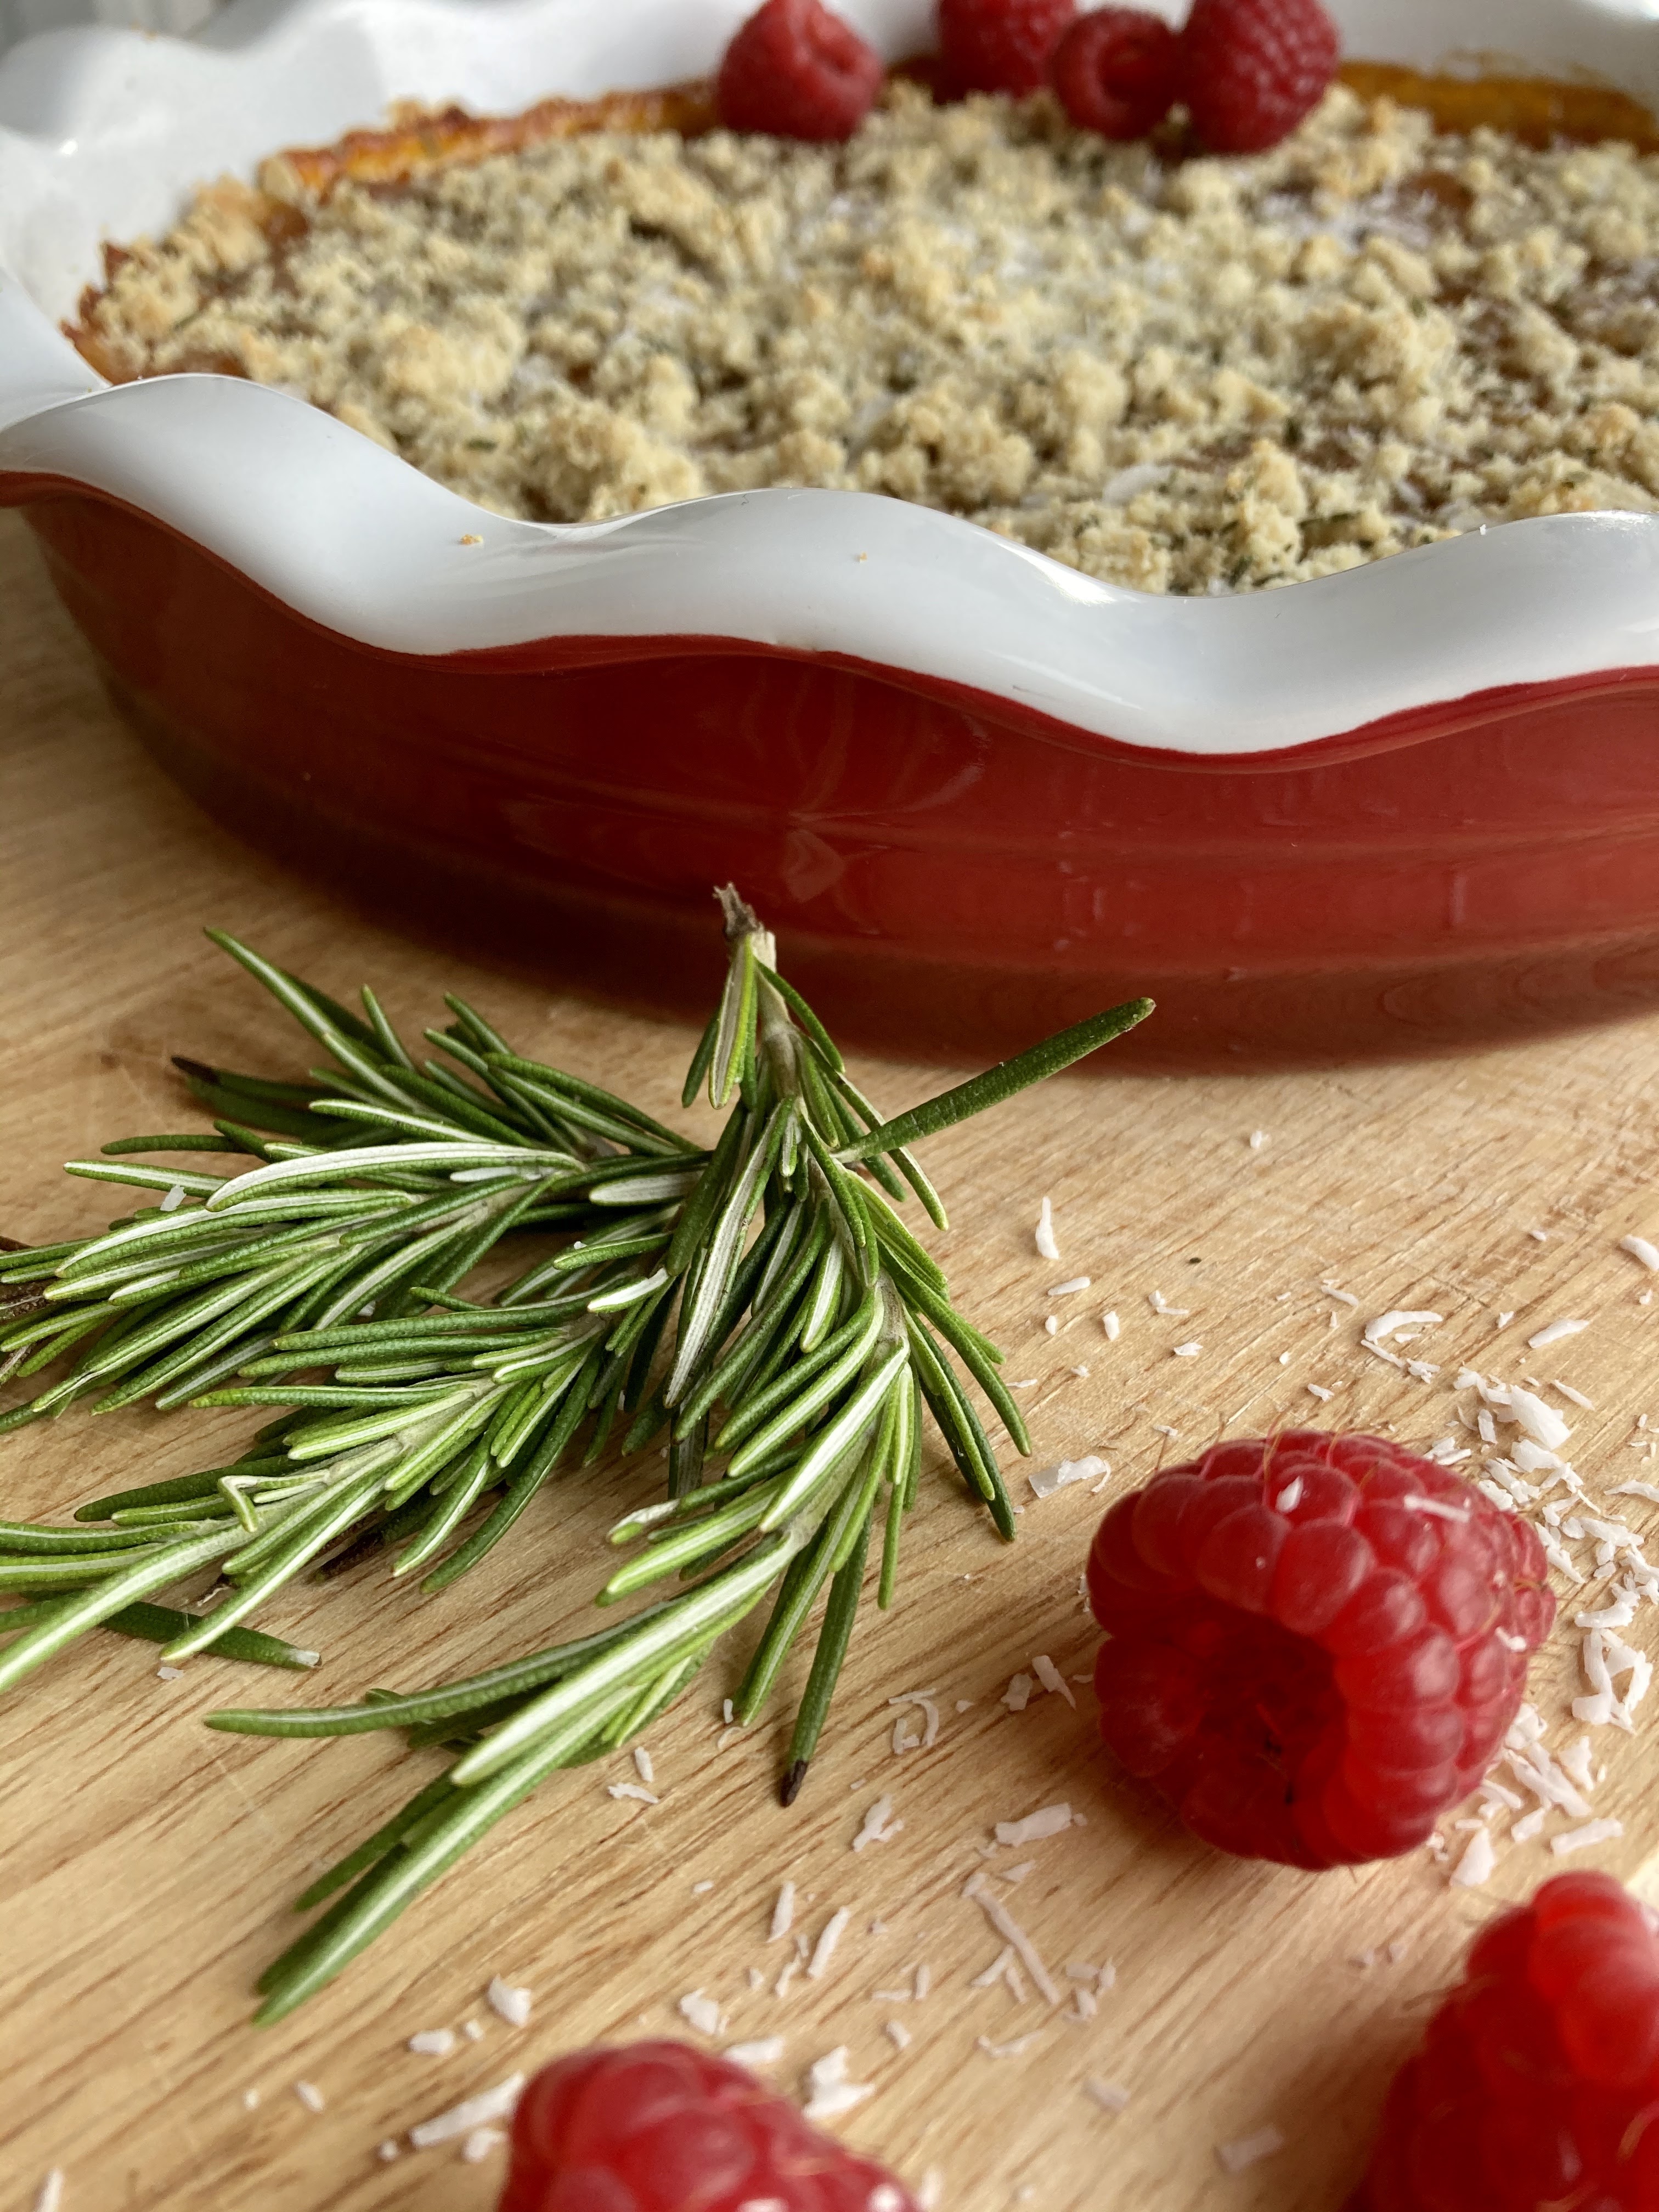
Gluten and grain free, refined sugar free, dairy free, vegan & paleo. Something for everyone! Excellent alone or with ice cream, perfect for a late summer dessert. Nutty, slightly spicy, and naturally sweet. A Wait are Those Cookies original. Yield: 1 8 or 9″ pan of bars; serves several.

For the berry filling

1/2 bag (~1 c) frozen wild blueberries
1/2 pint fresh blueberries
zest & juice of one lime
1/4 tsp sea salt
2 tsp tapioca flour
1/4 c chia seeds
1 tbsp vanilla

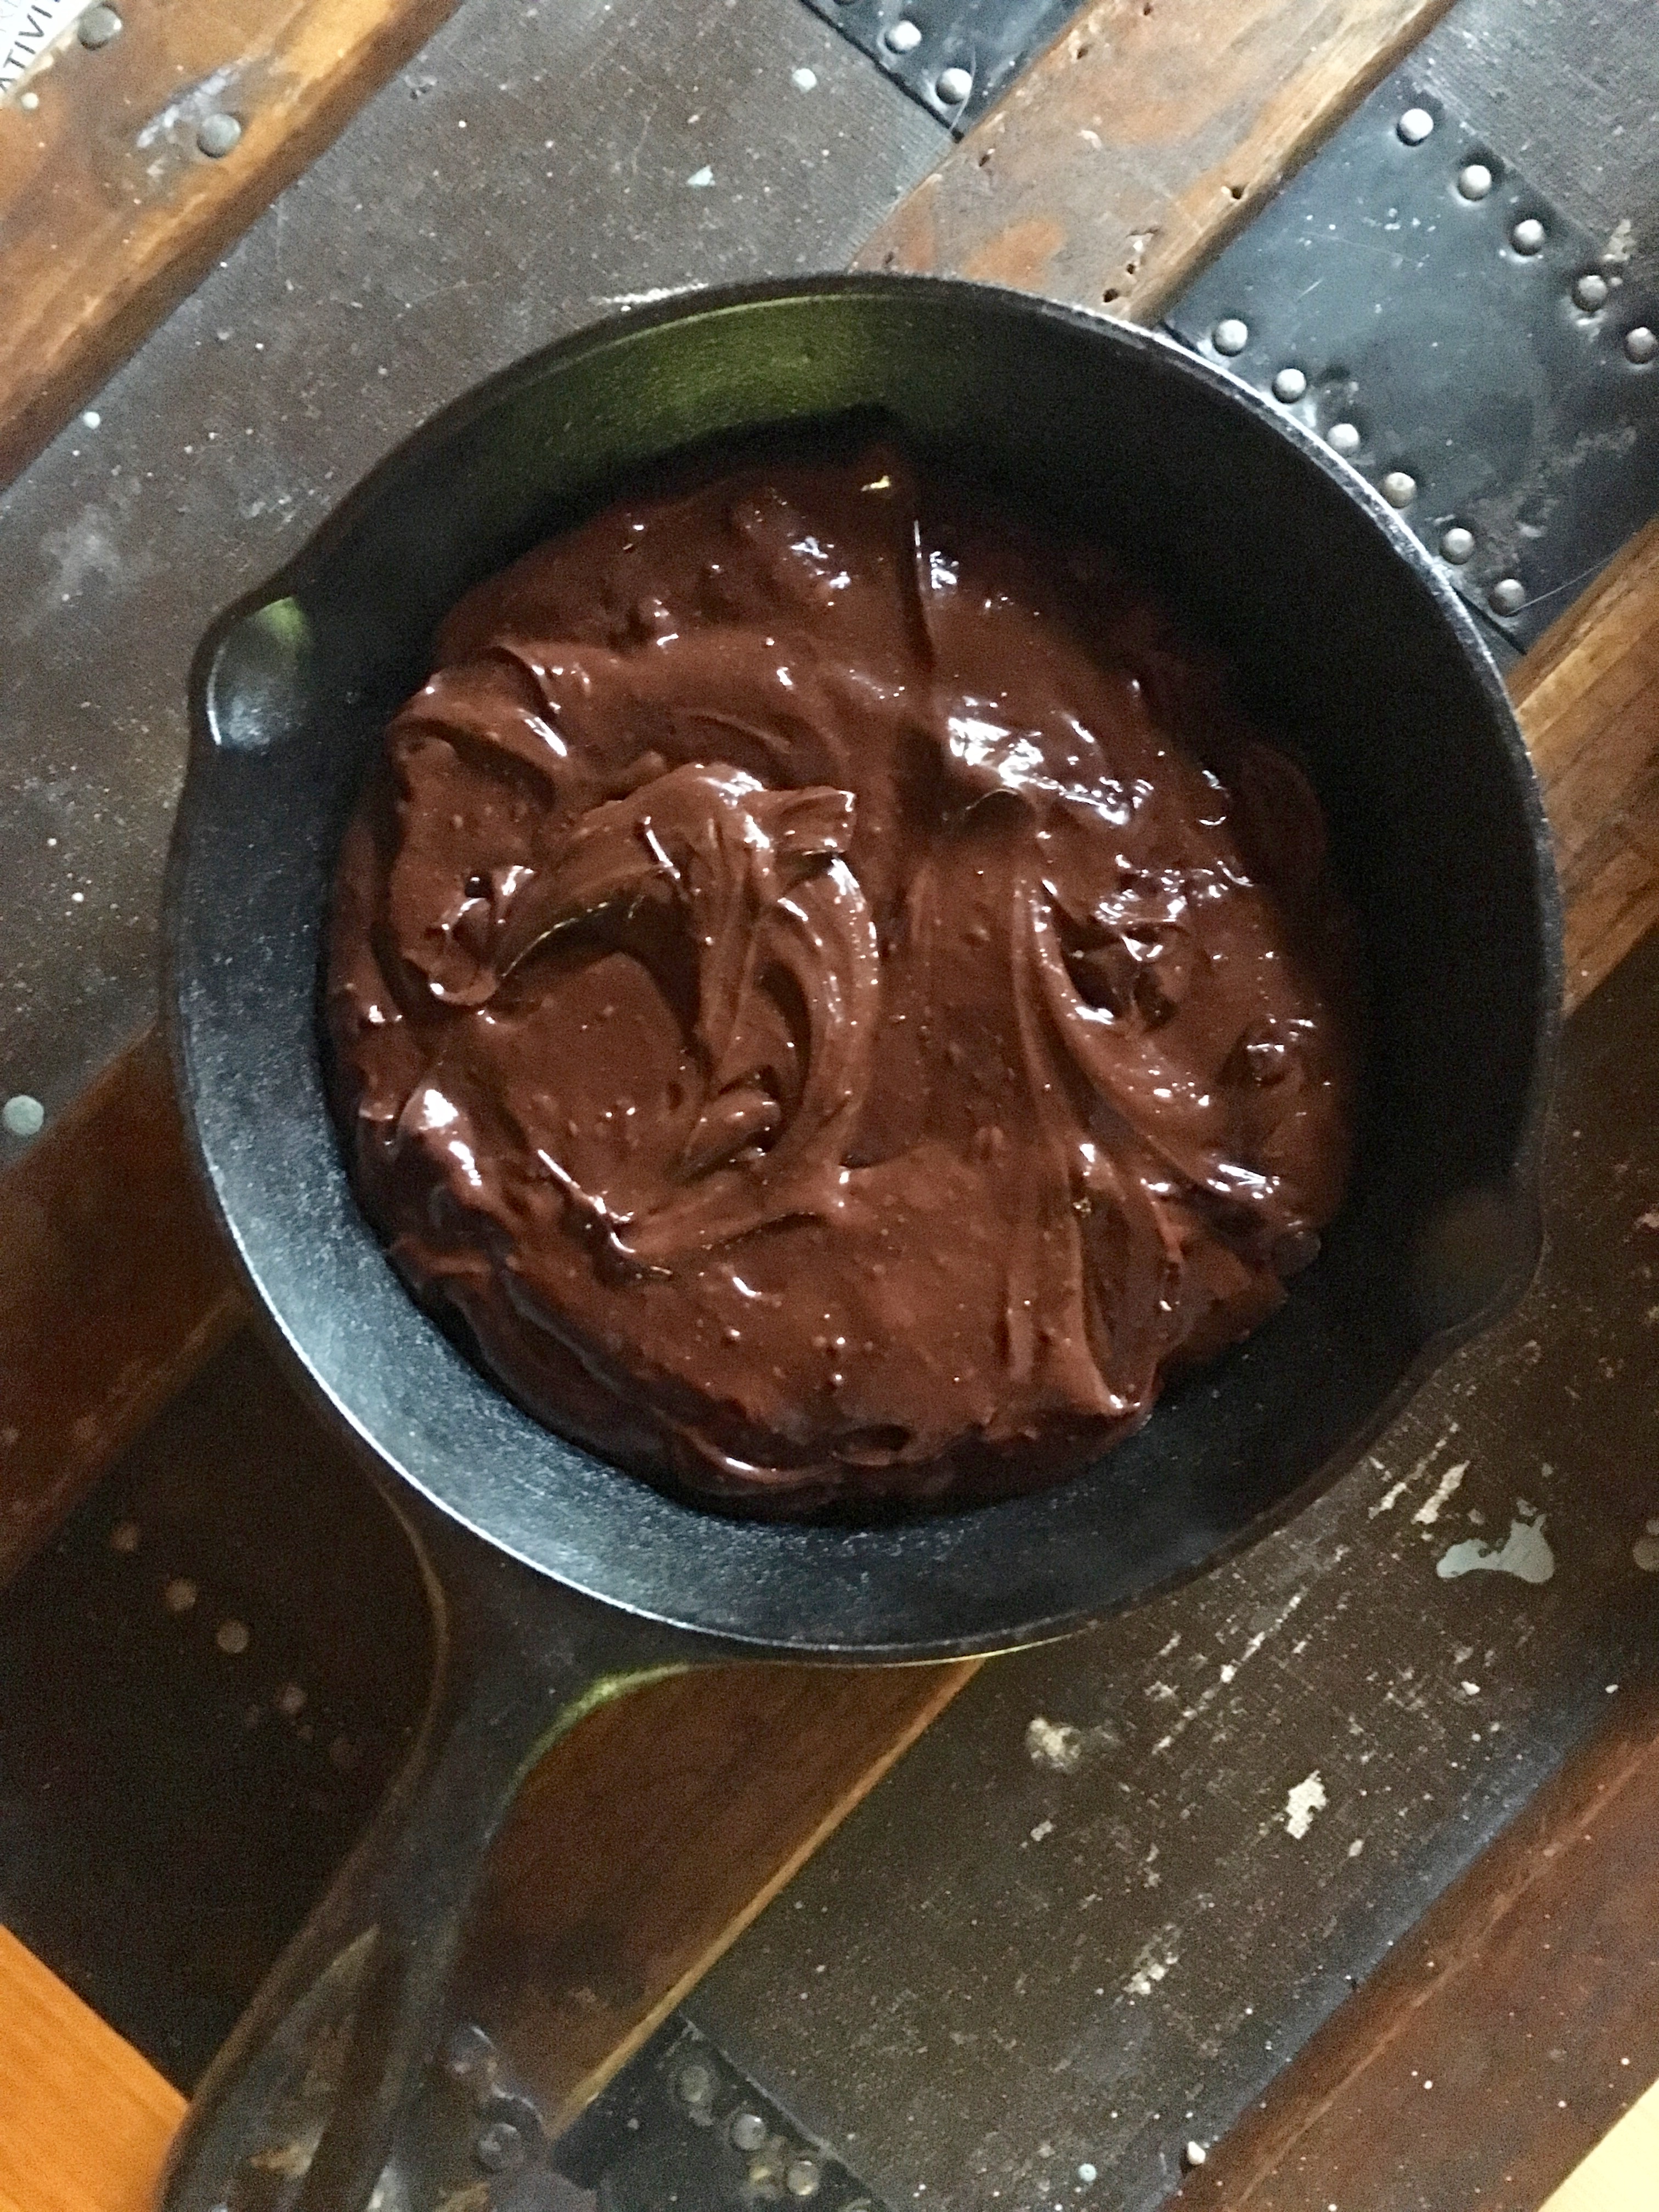
In a small saucepan, heat berries, lime zest and juice, maple, sea salt, and tapioca until the berries have popped and the liquid is just barely boiling, 10ish minutes. Remove from the heat and stir in chia seeds & vanilla; let cool.

For the crust & crumble

2.5 c almond flour
1 tbsp vanilla
1/4 tsp sea salt, heaping
3 tbsp maple
5 tbsp melted coconut oil
1/2 c chopped pecans
1/4 c unsweetened coconut
3 tbsp black sesame or toasted sesame seeds
3 tbsp crystalized ginger, chopped

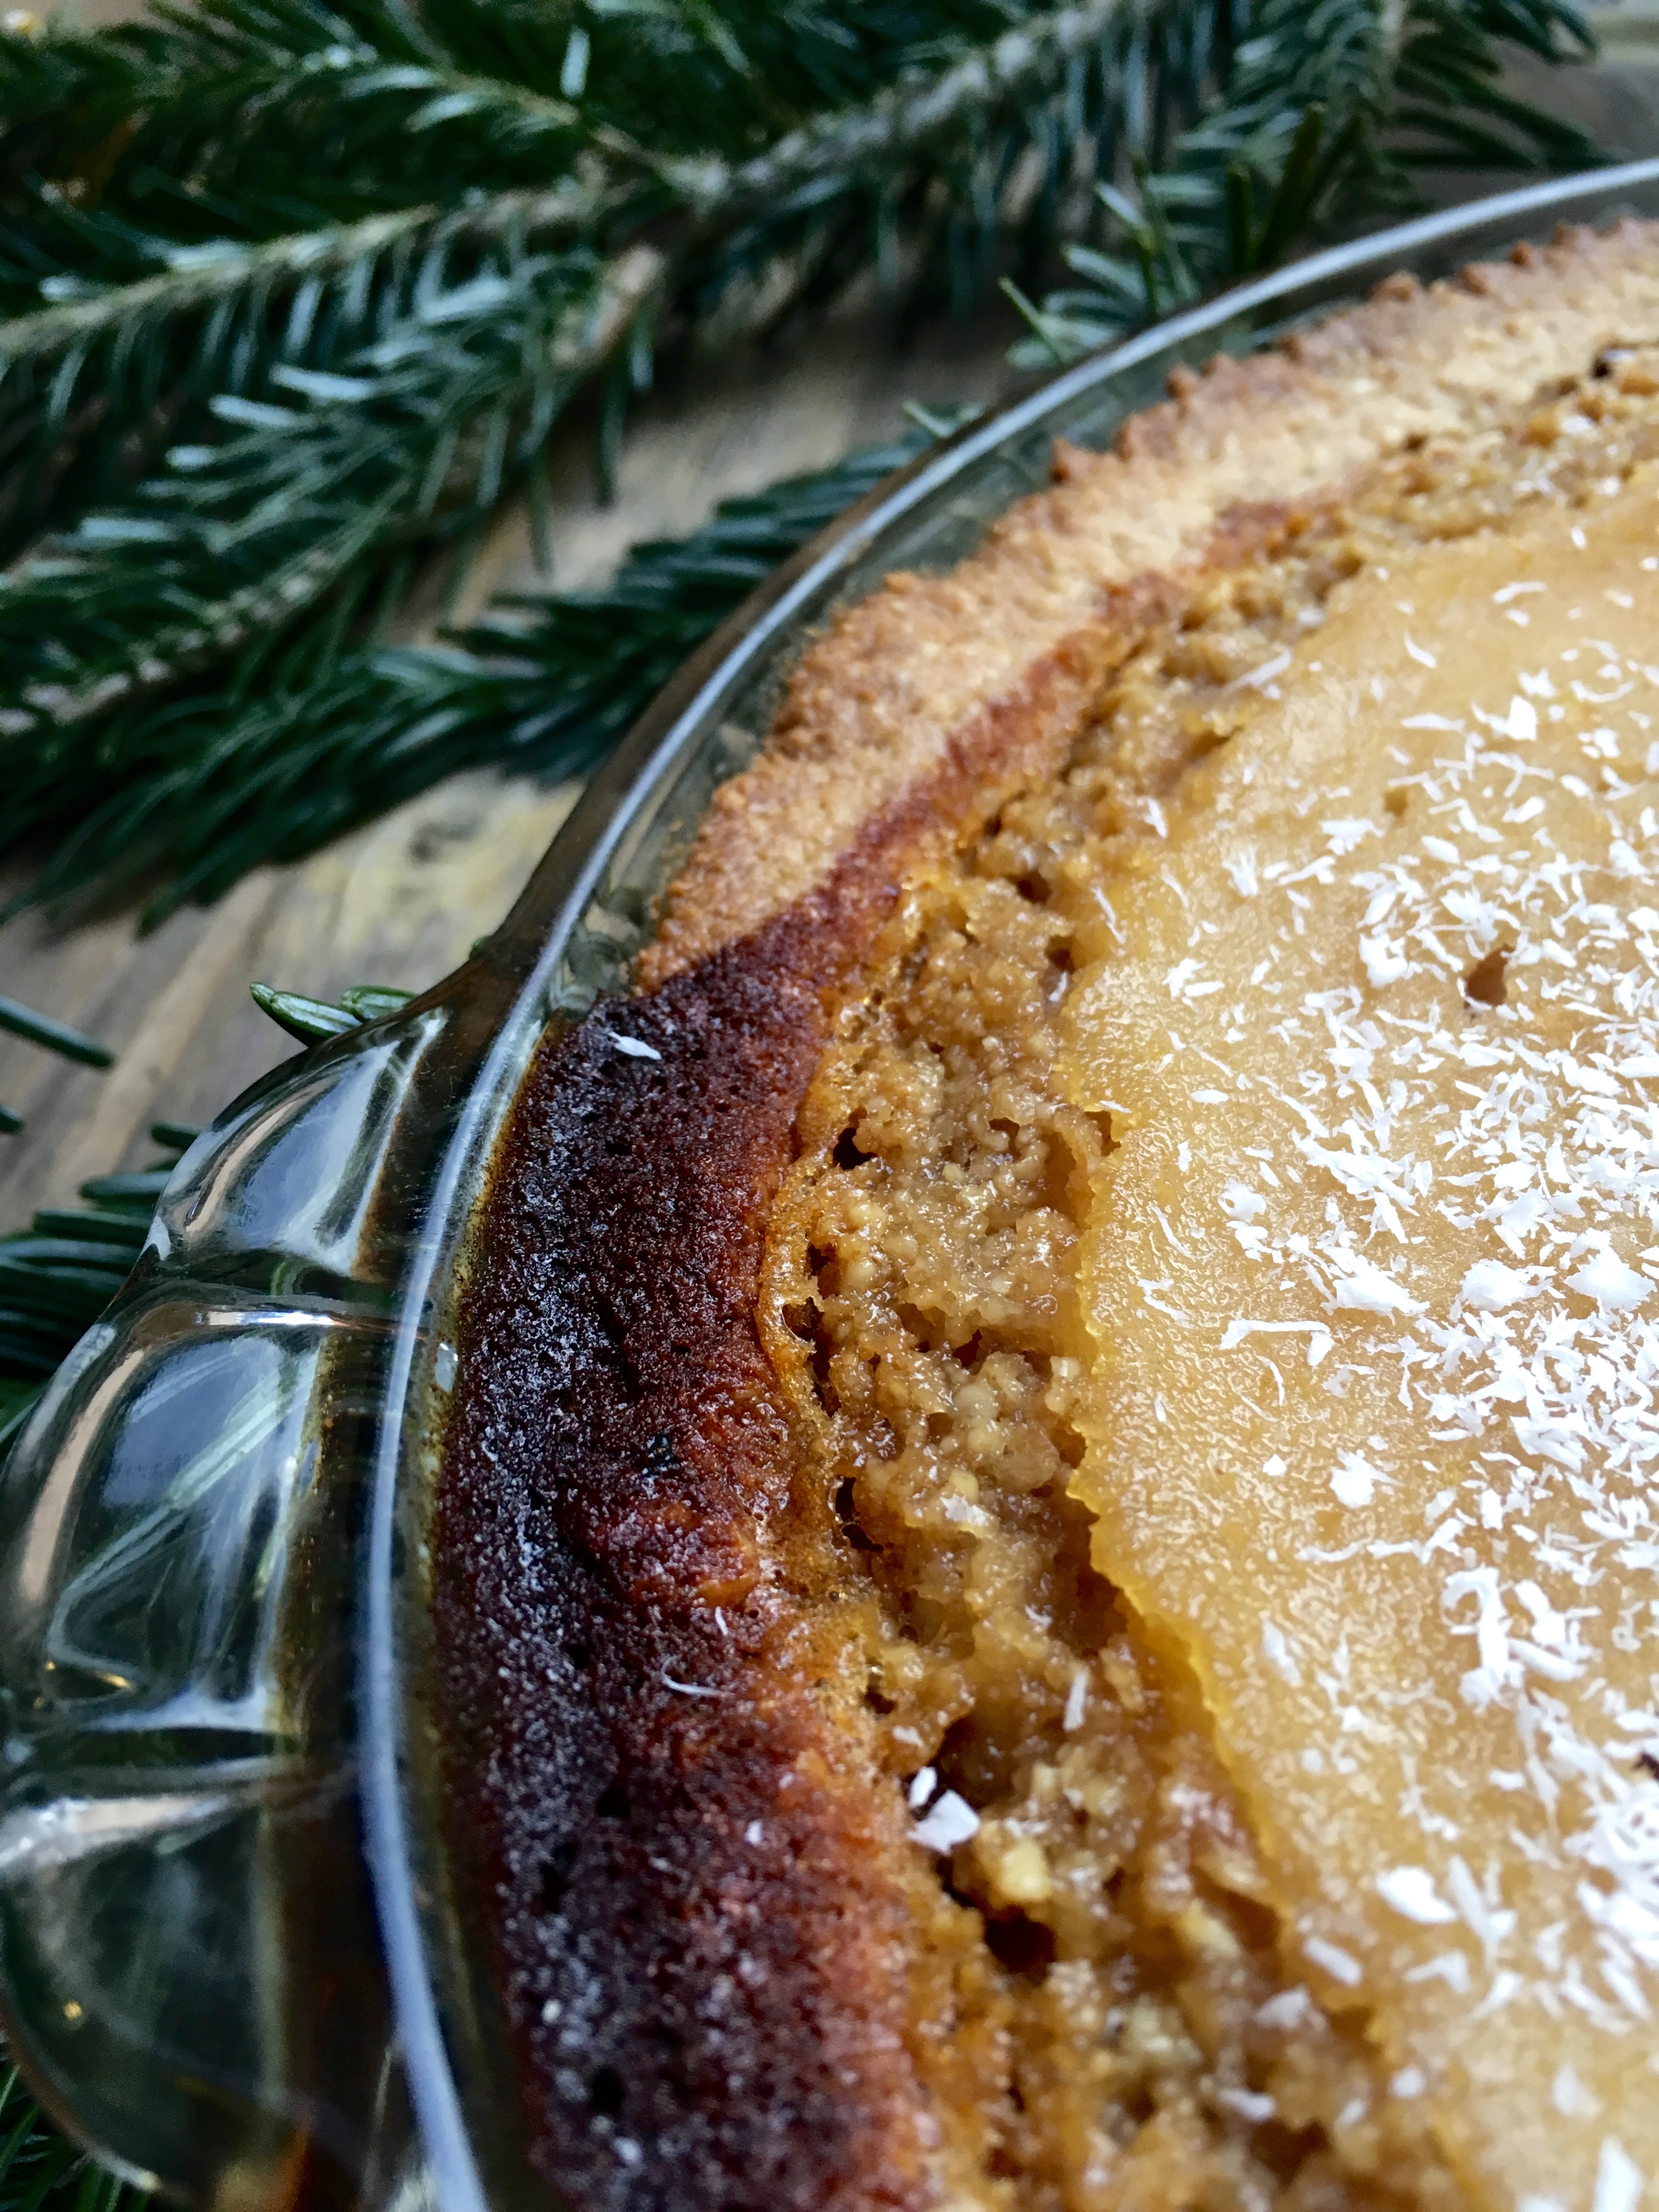
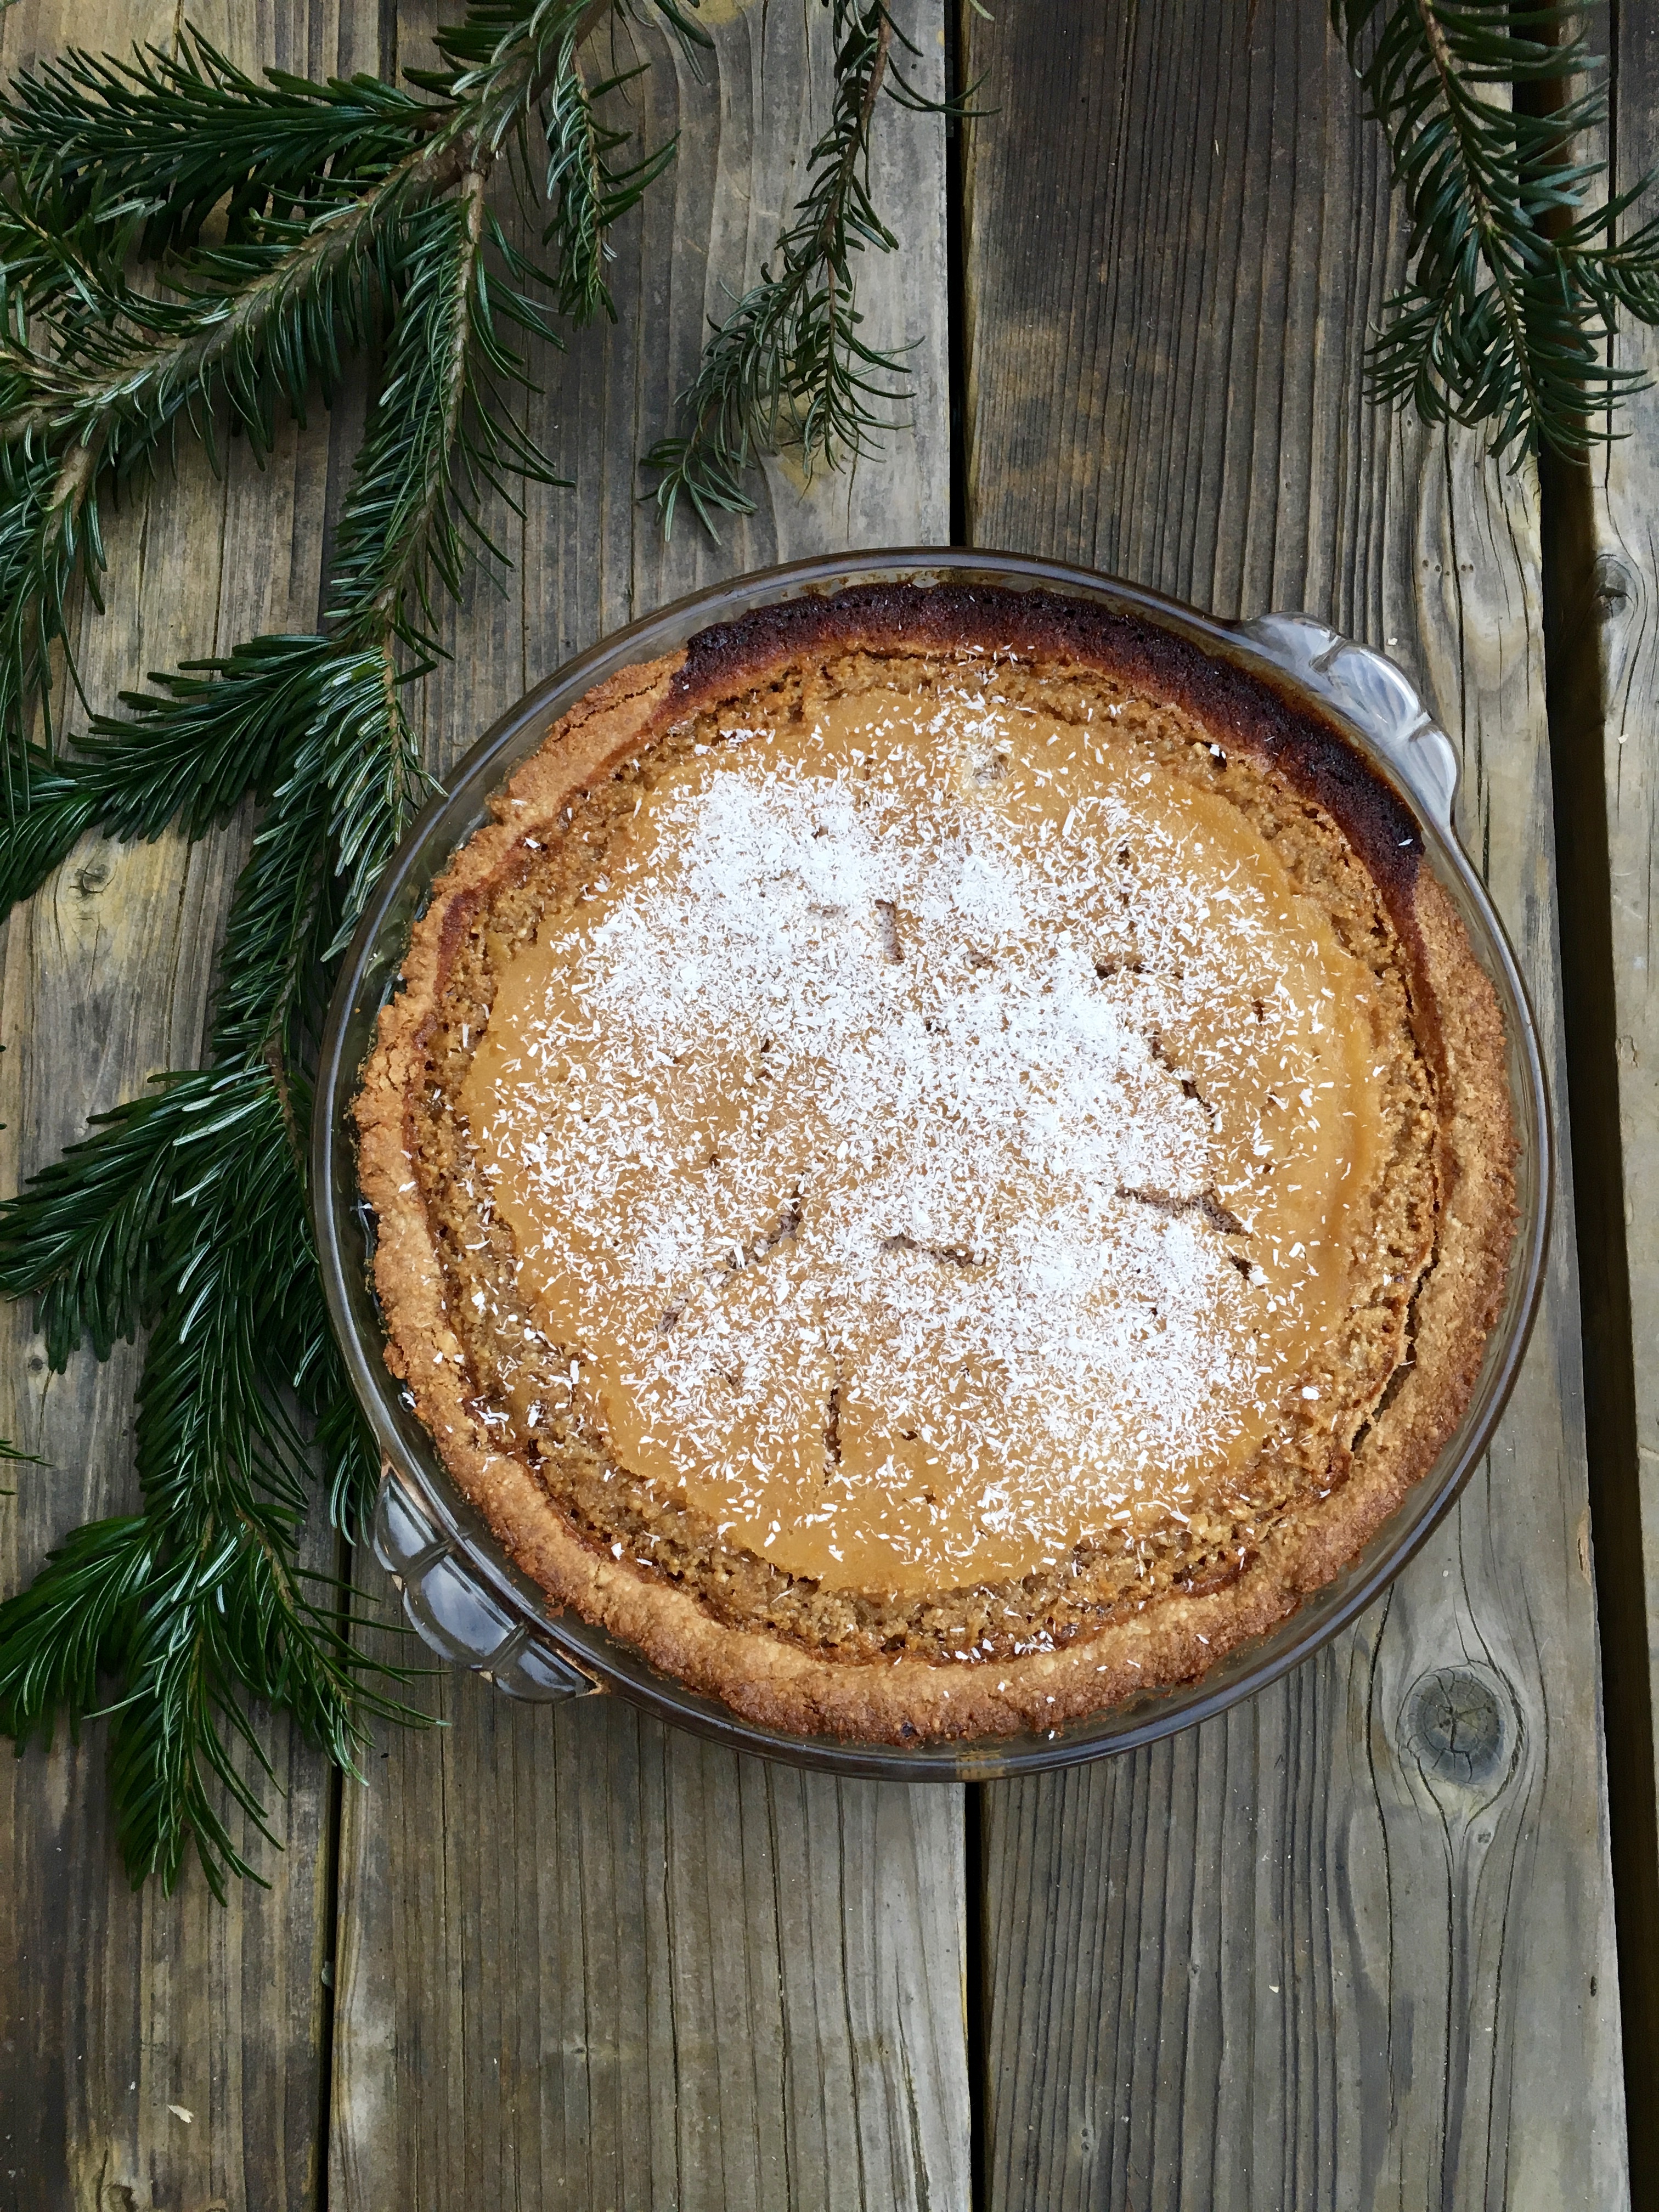
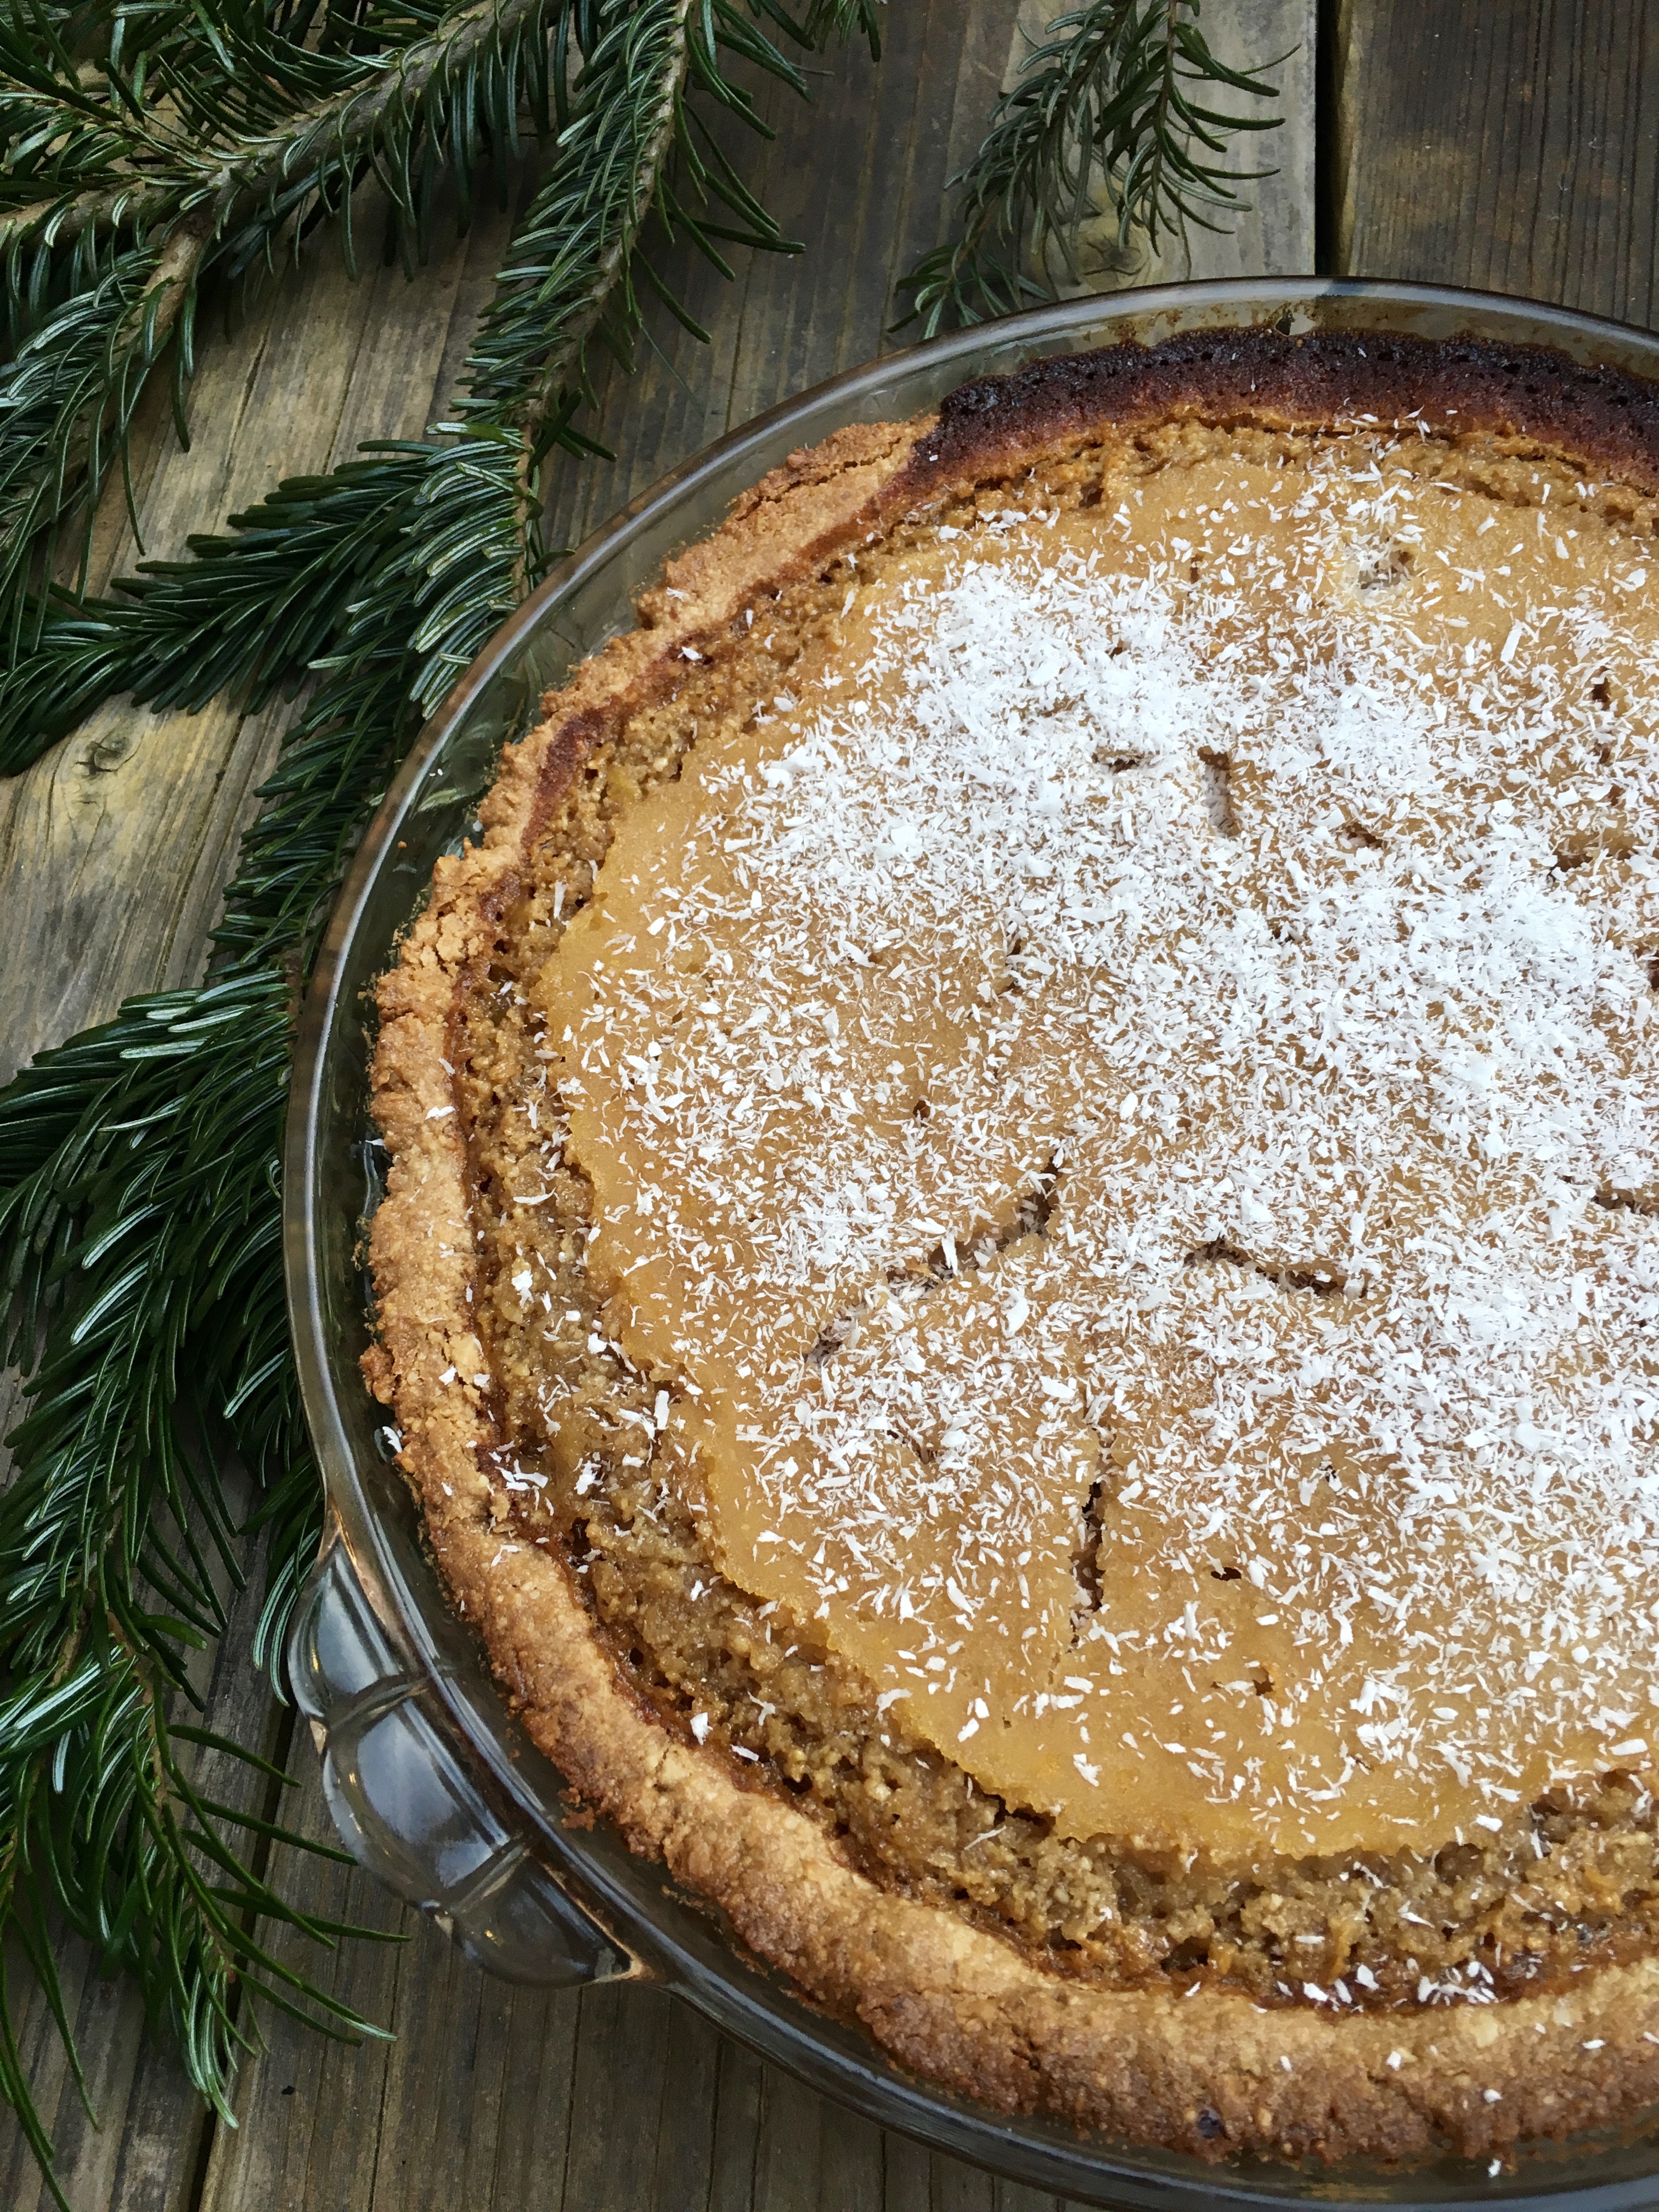
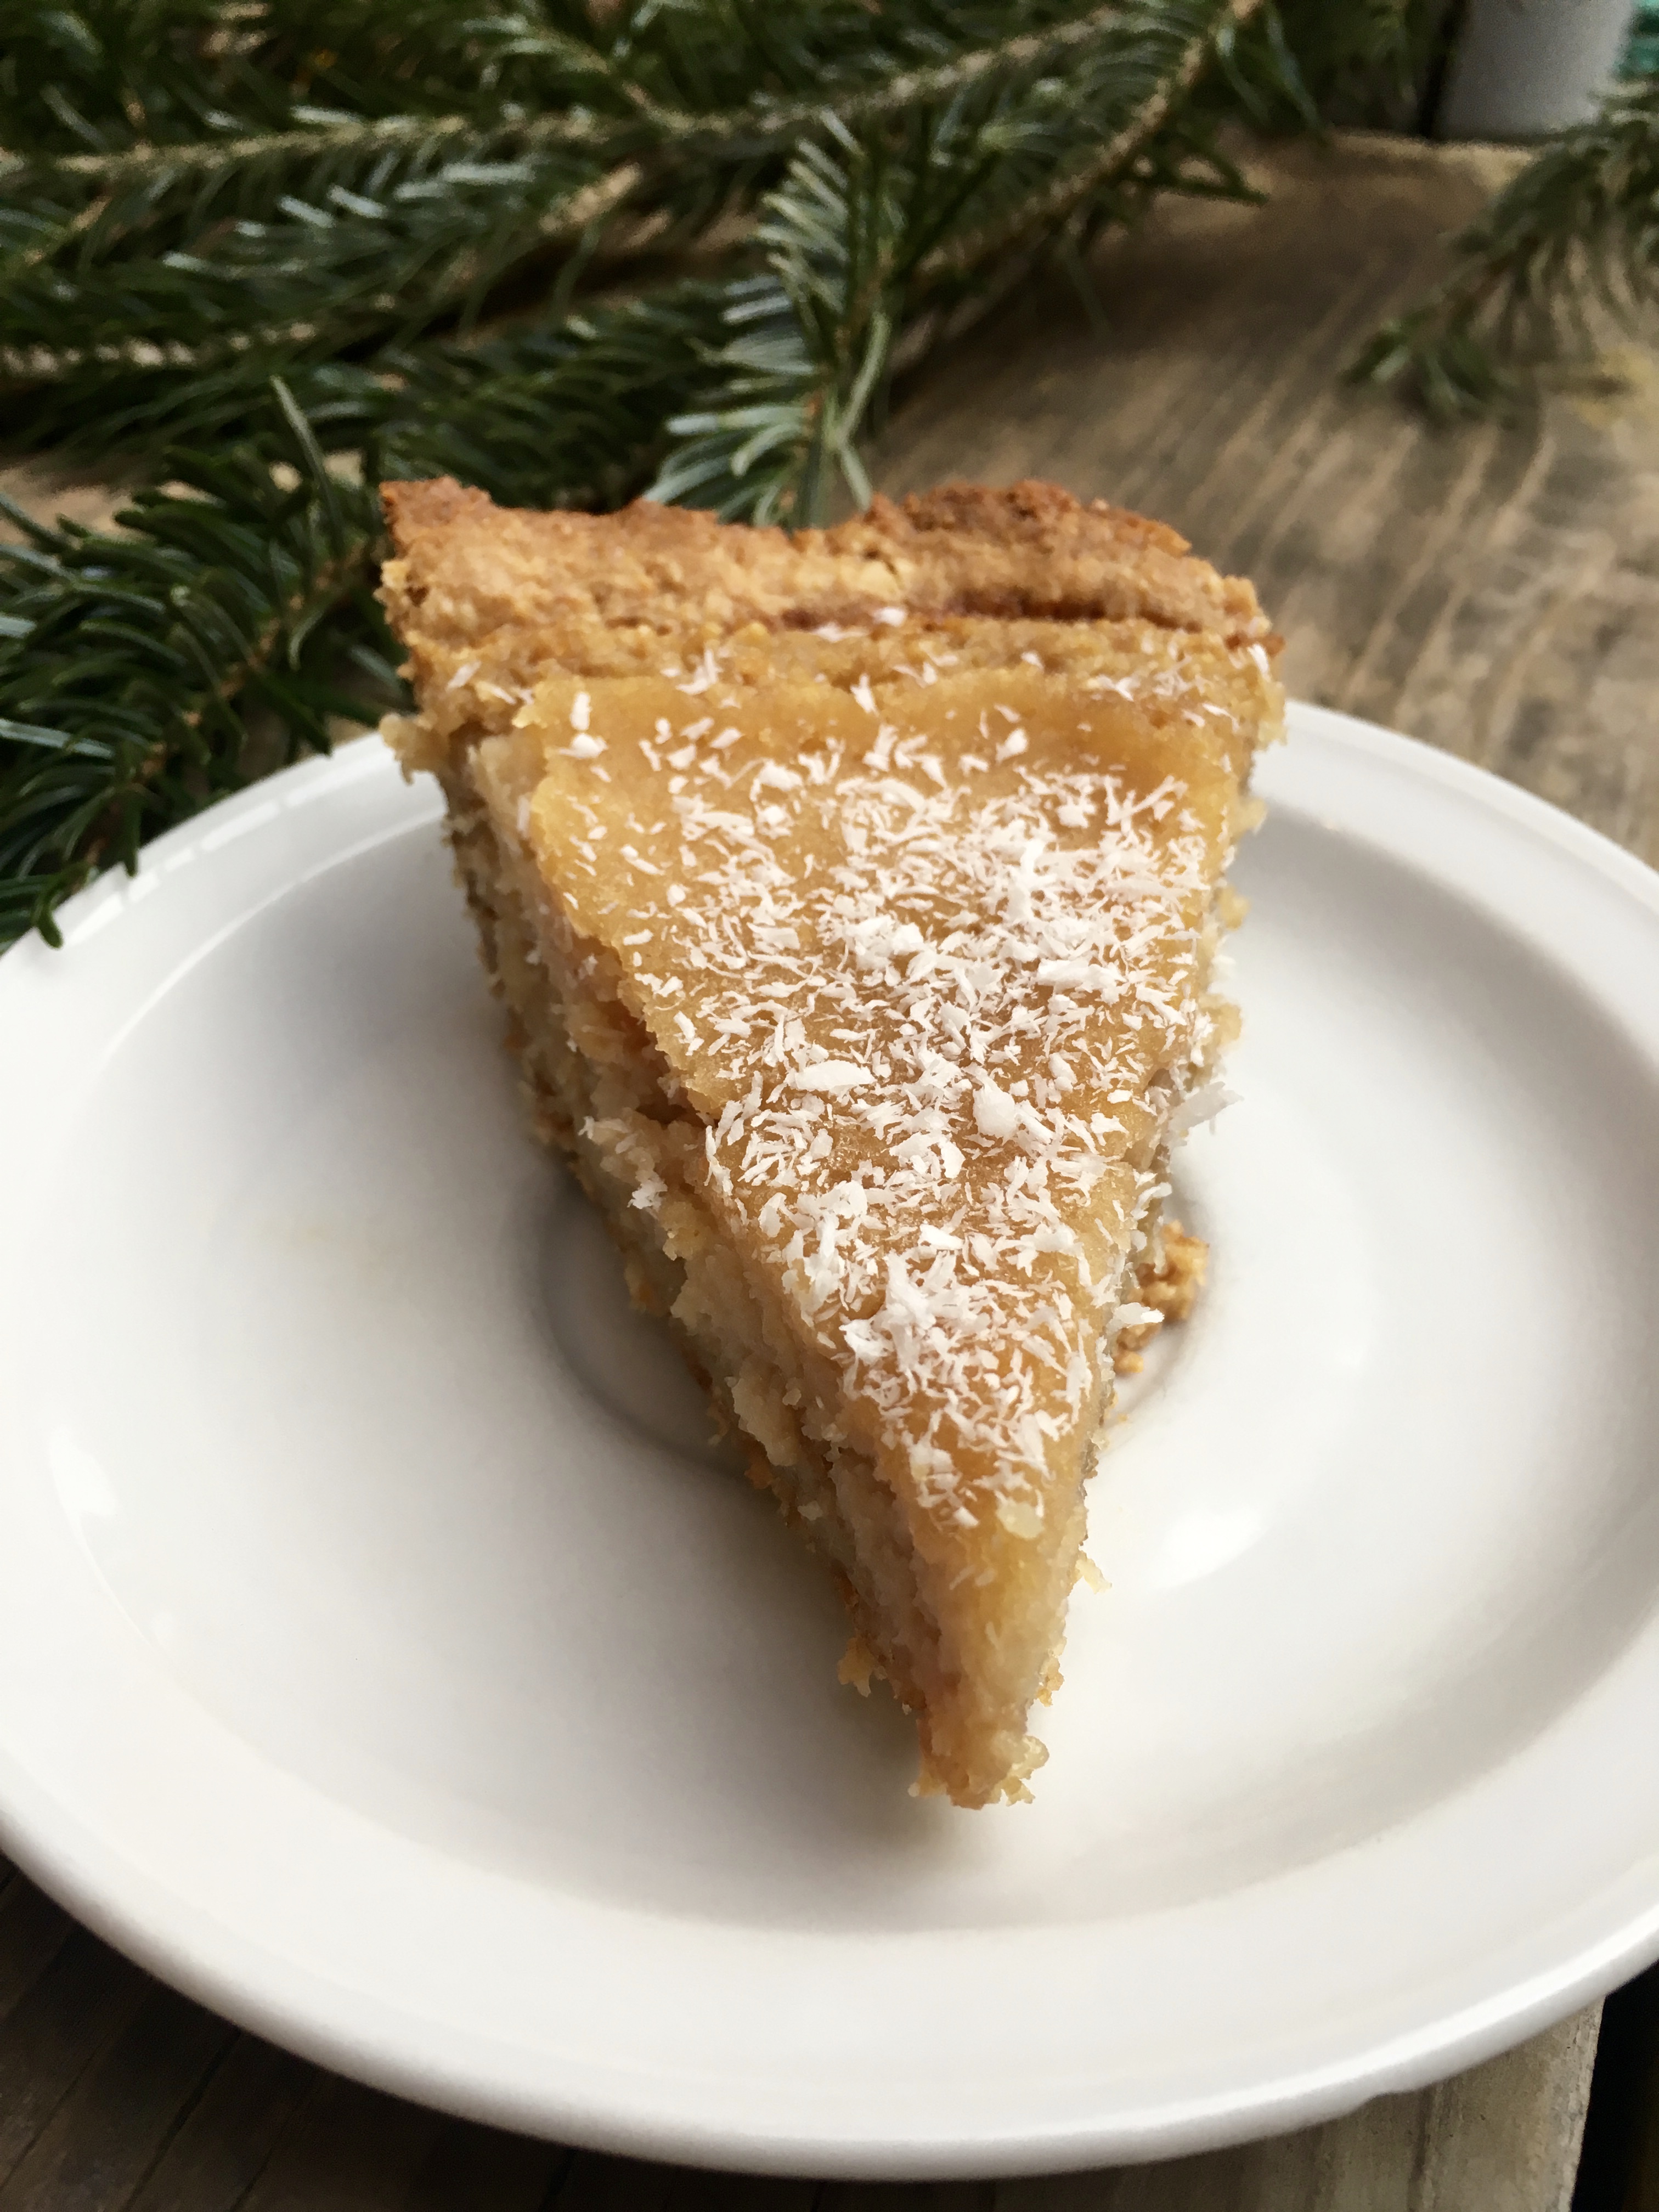
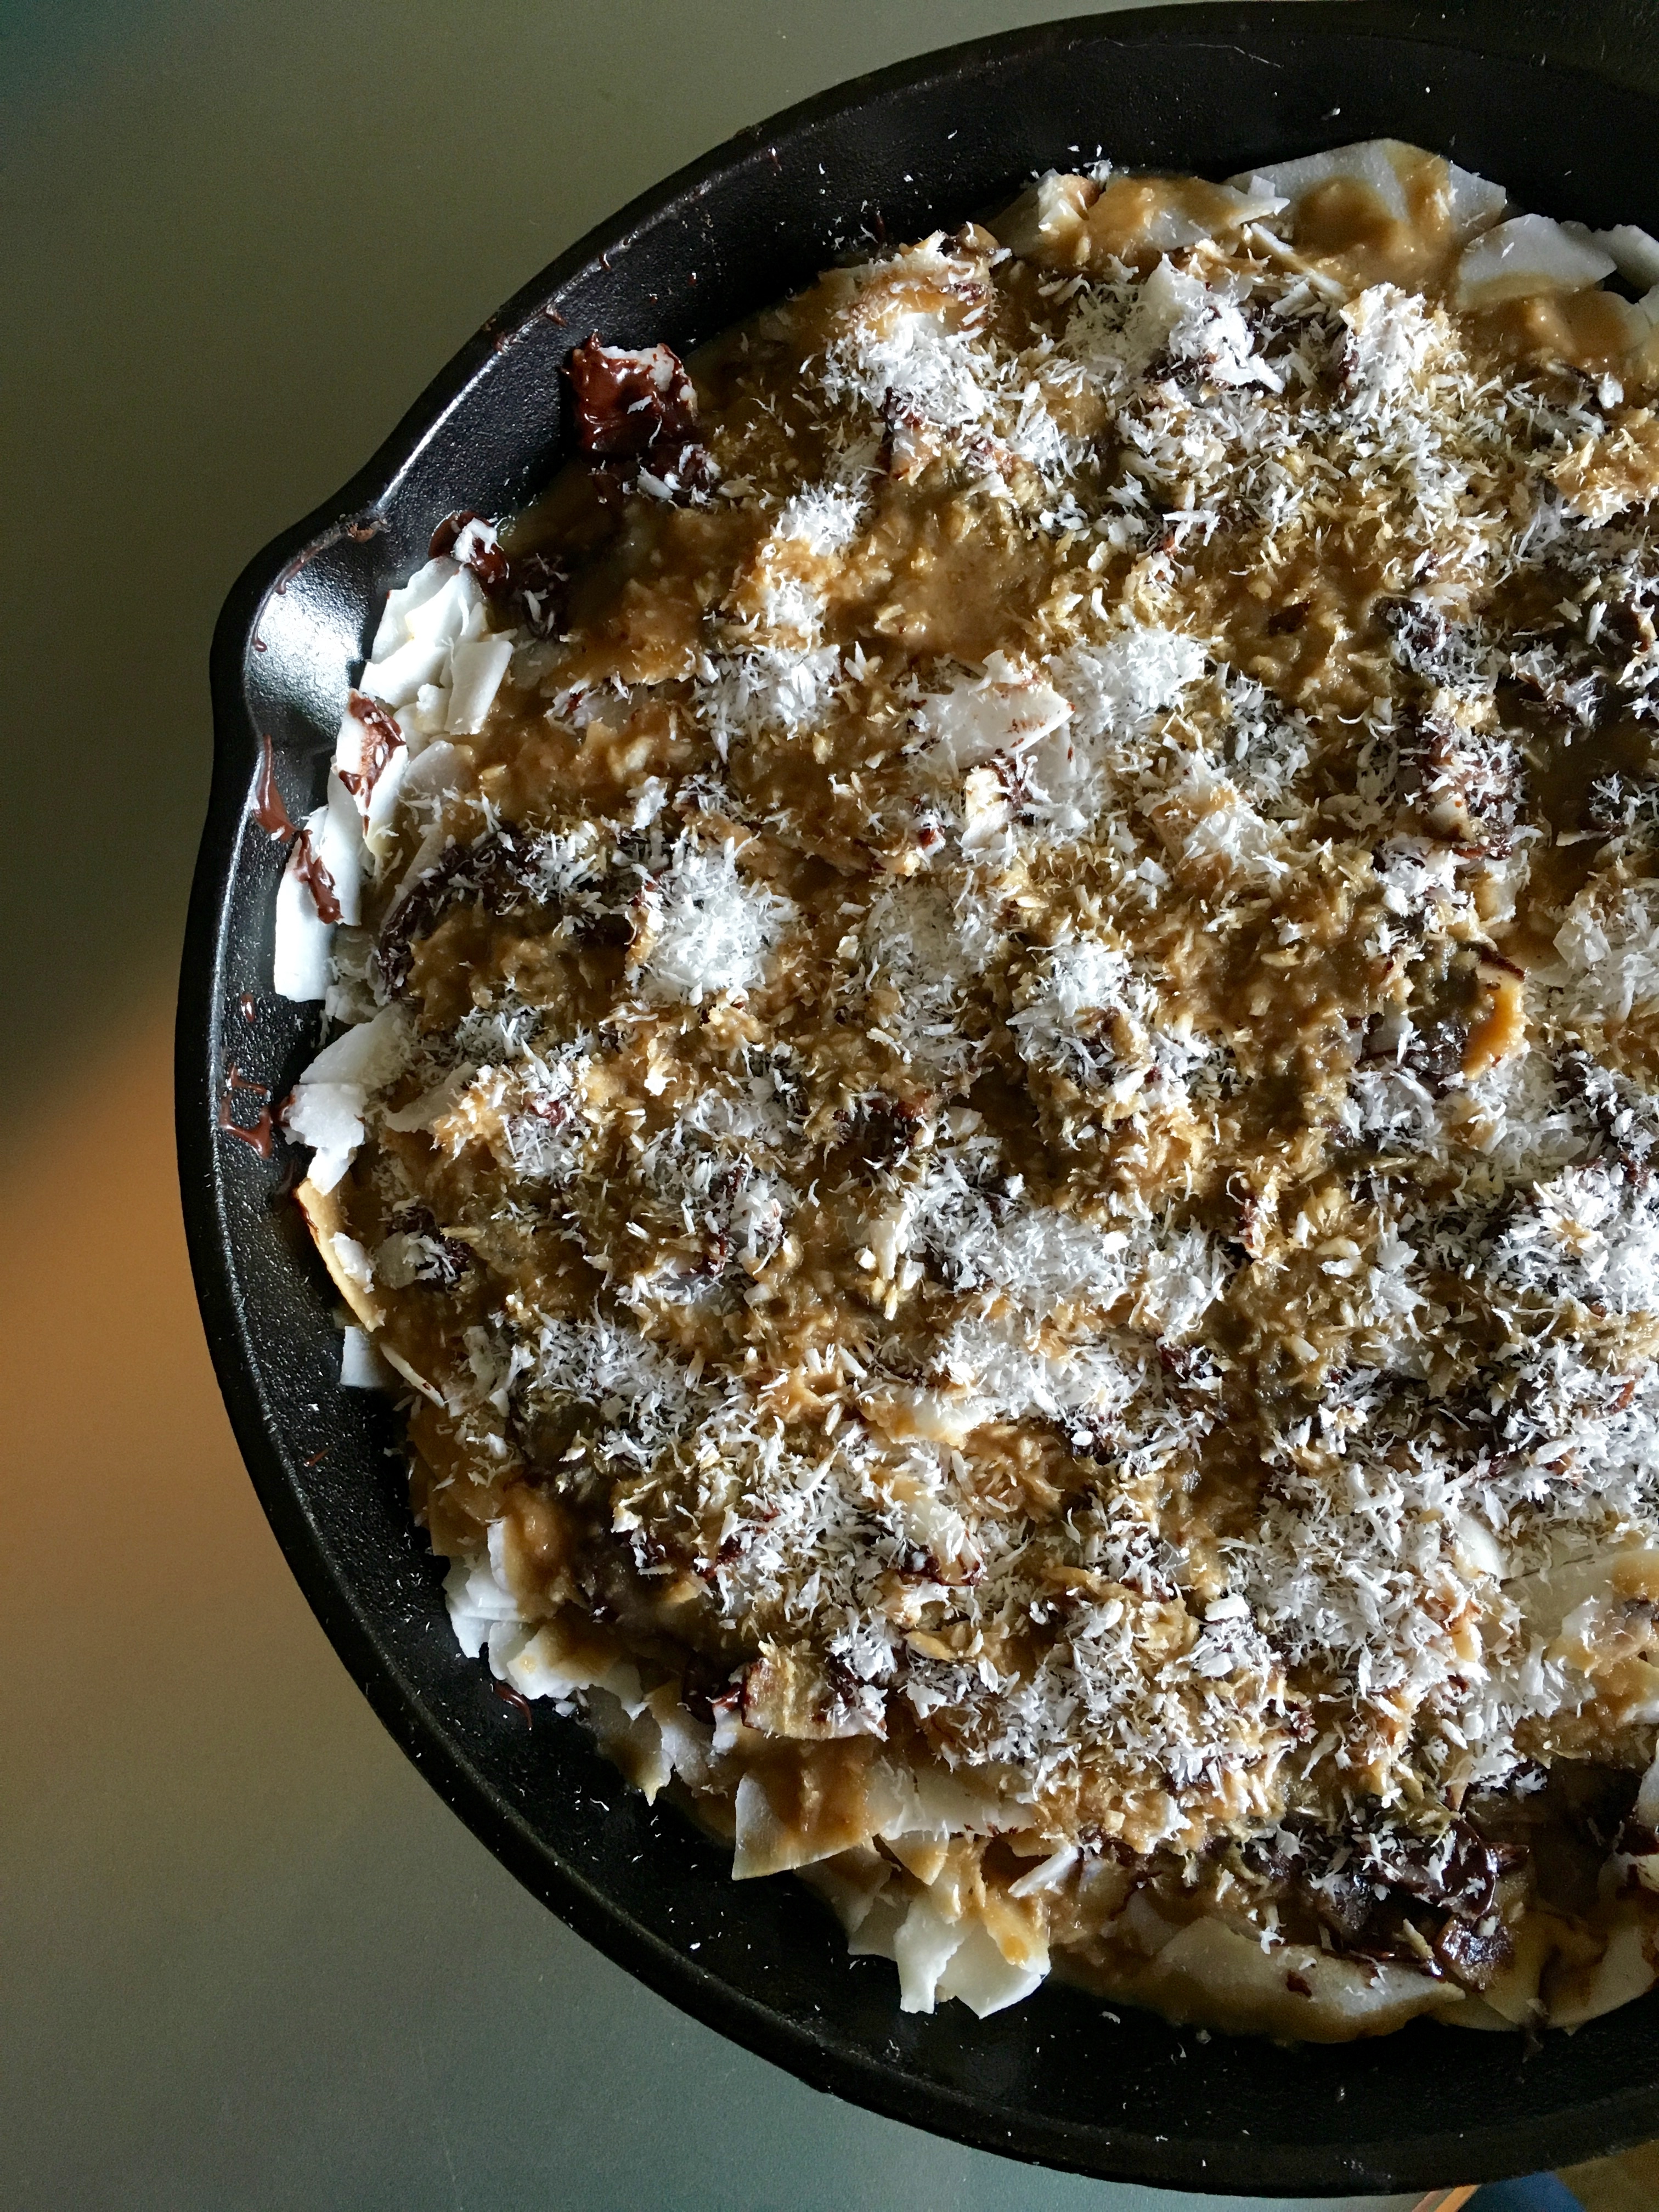
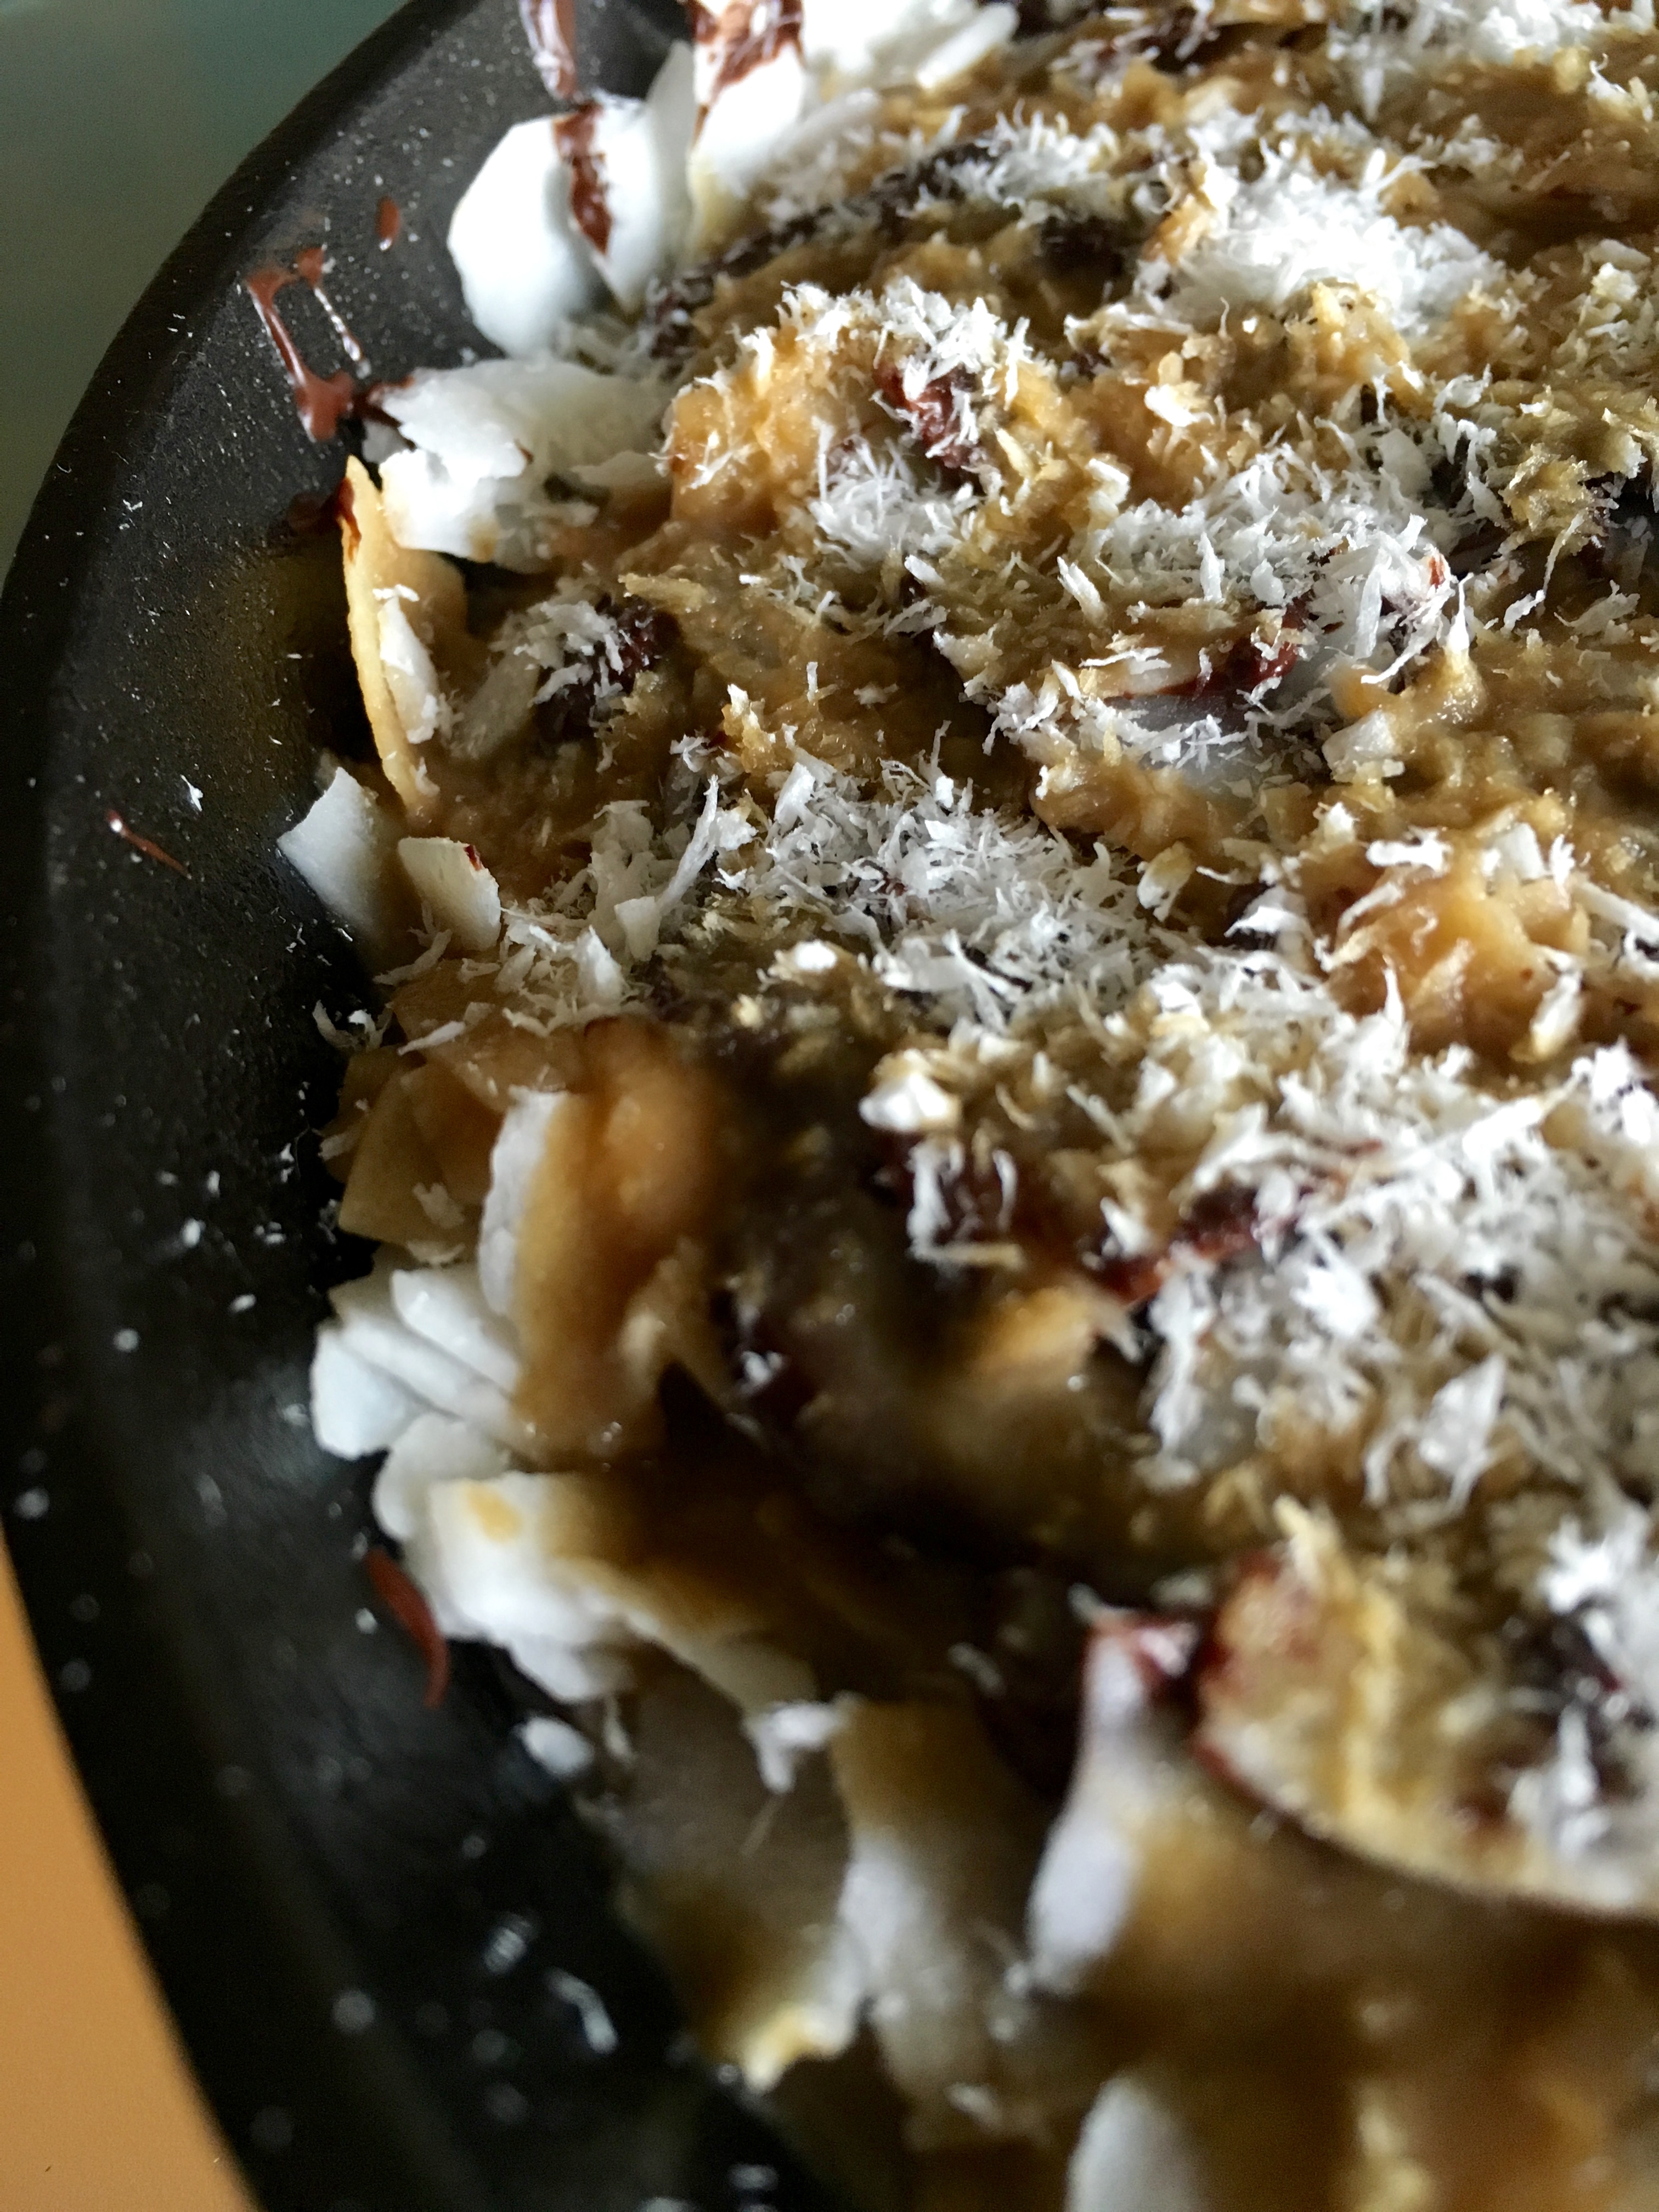
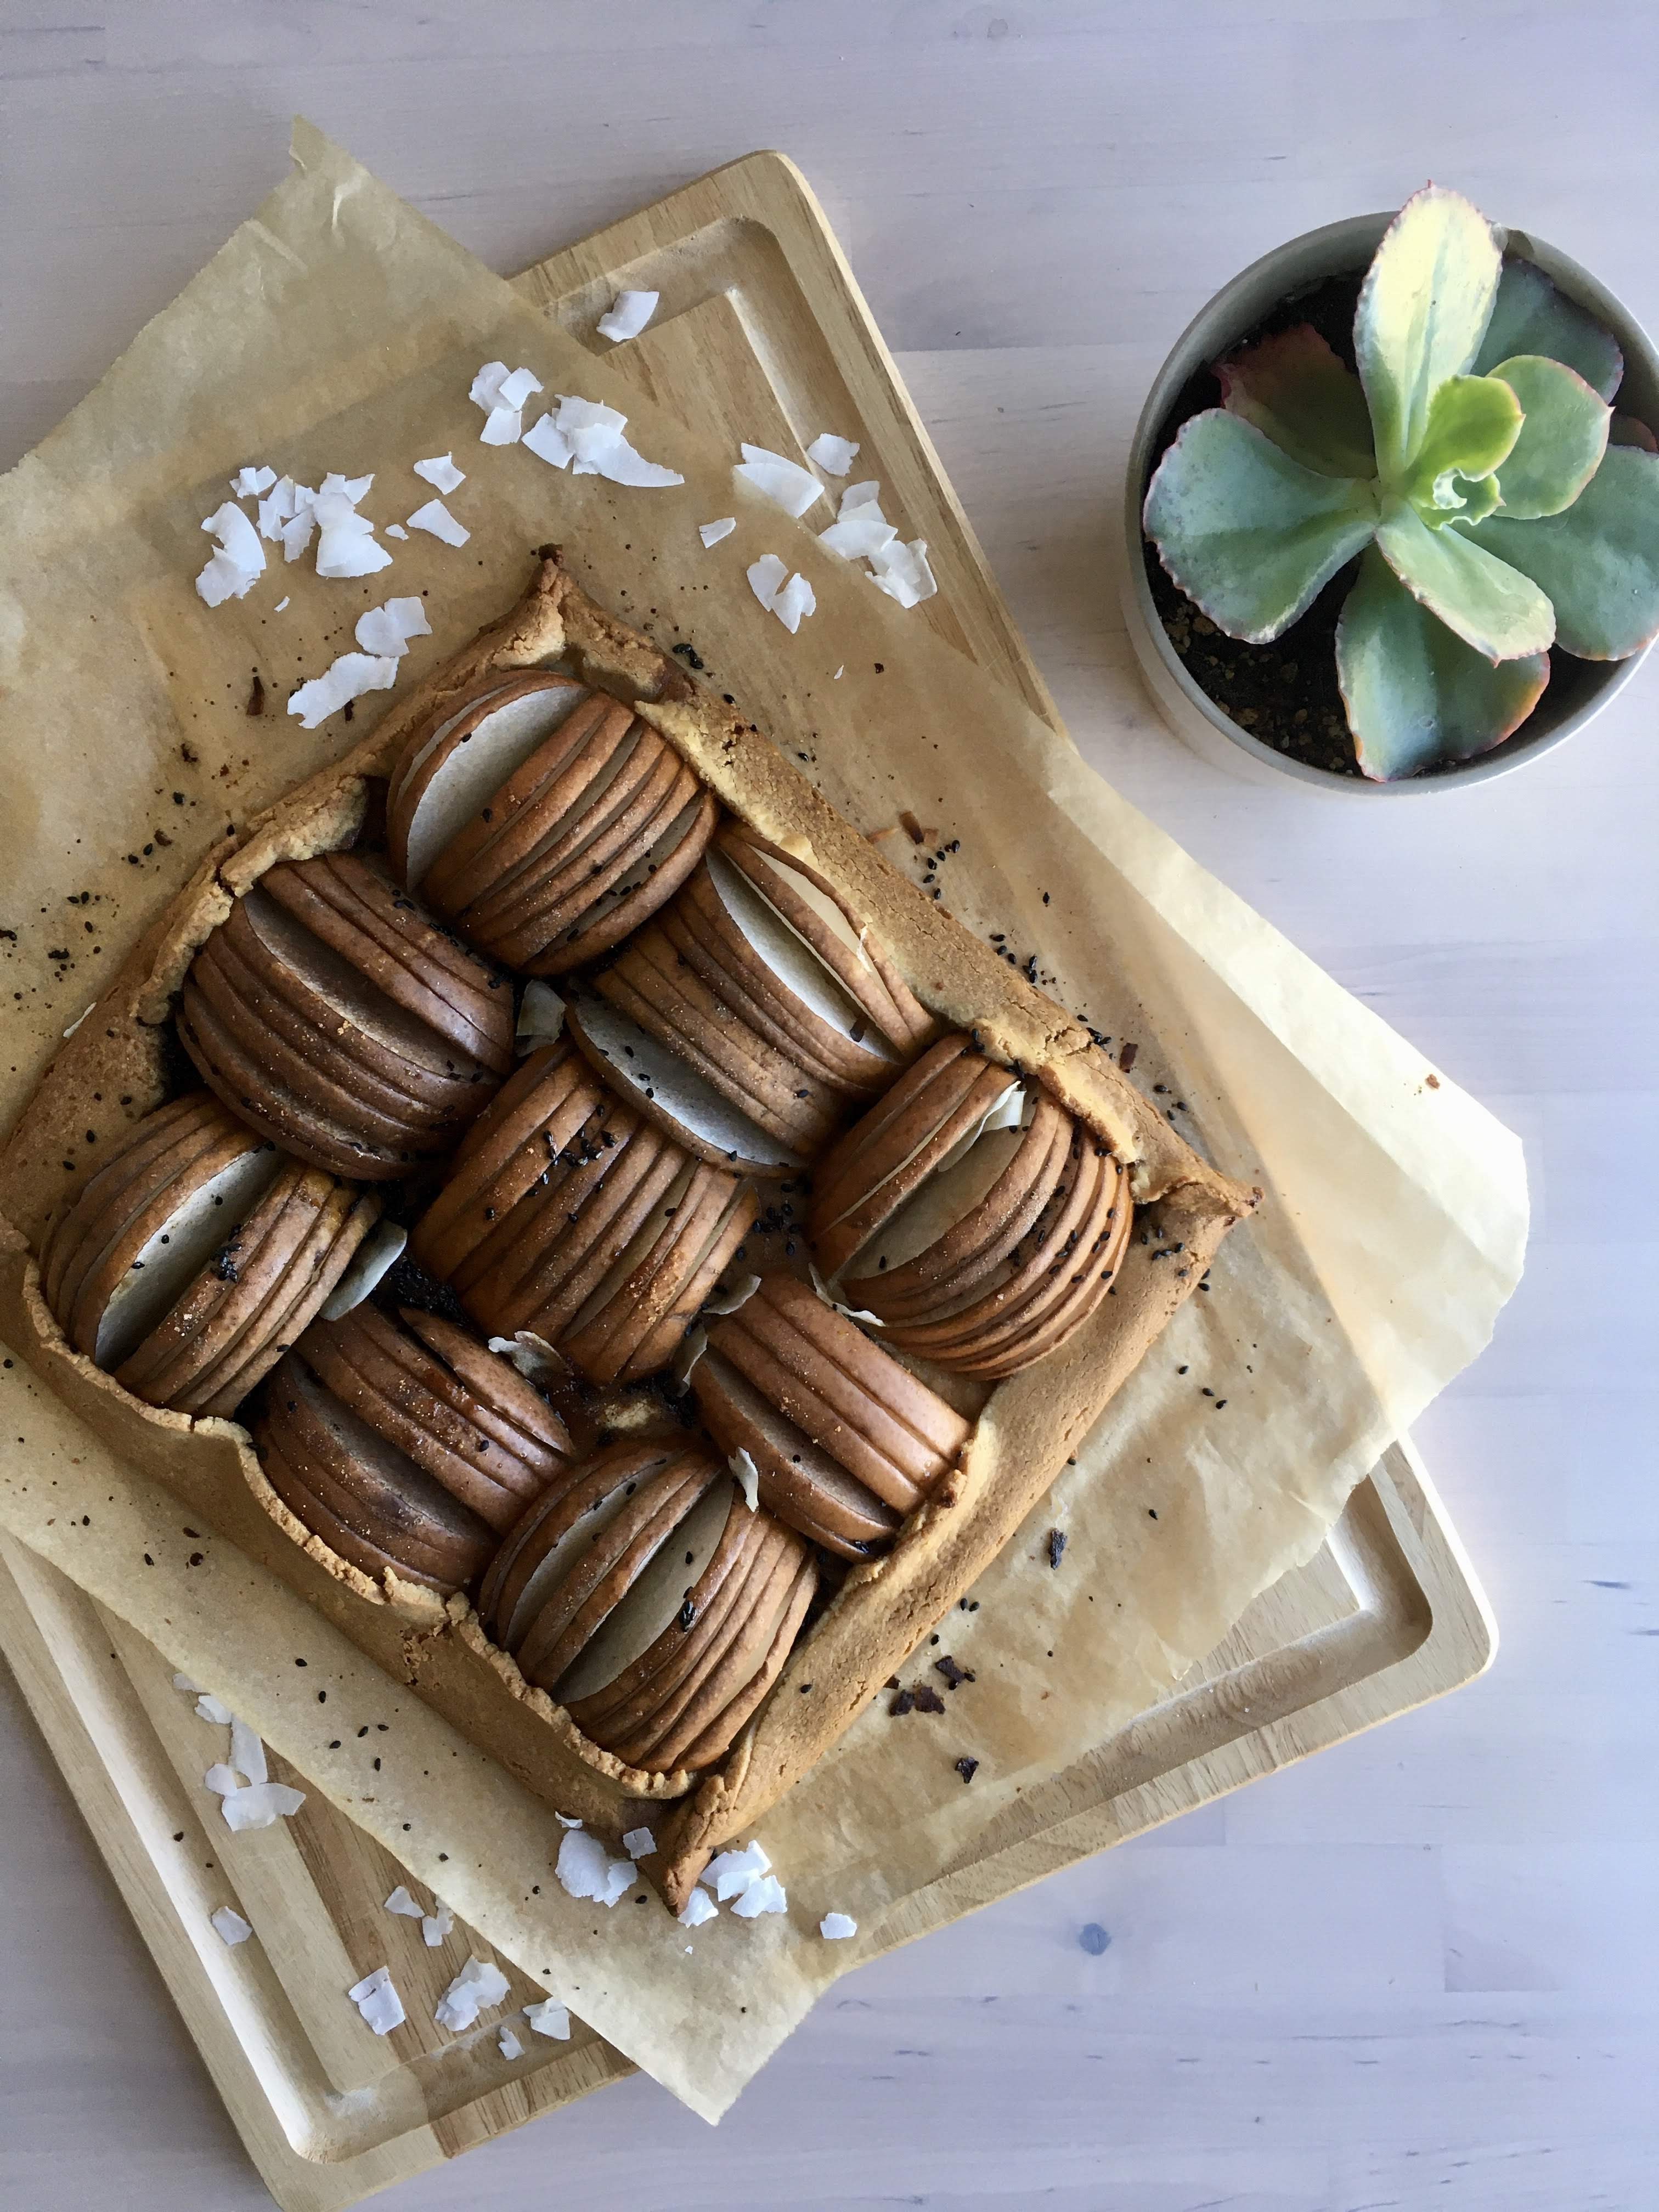
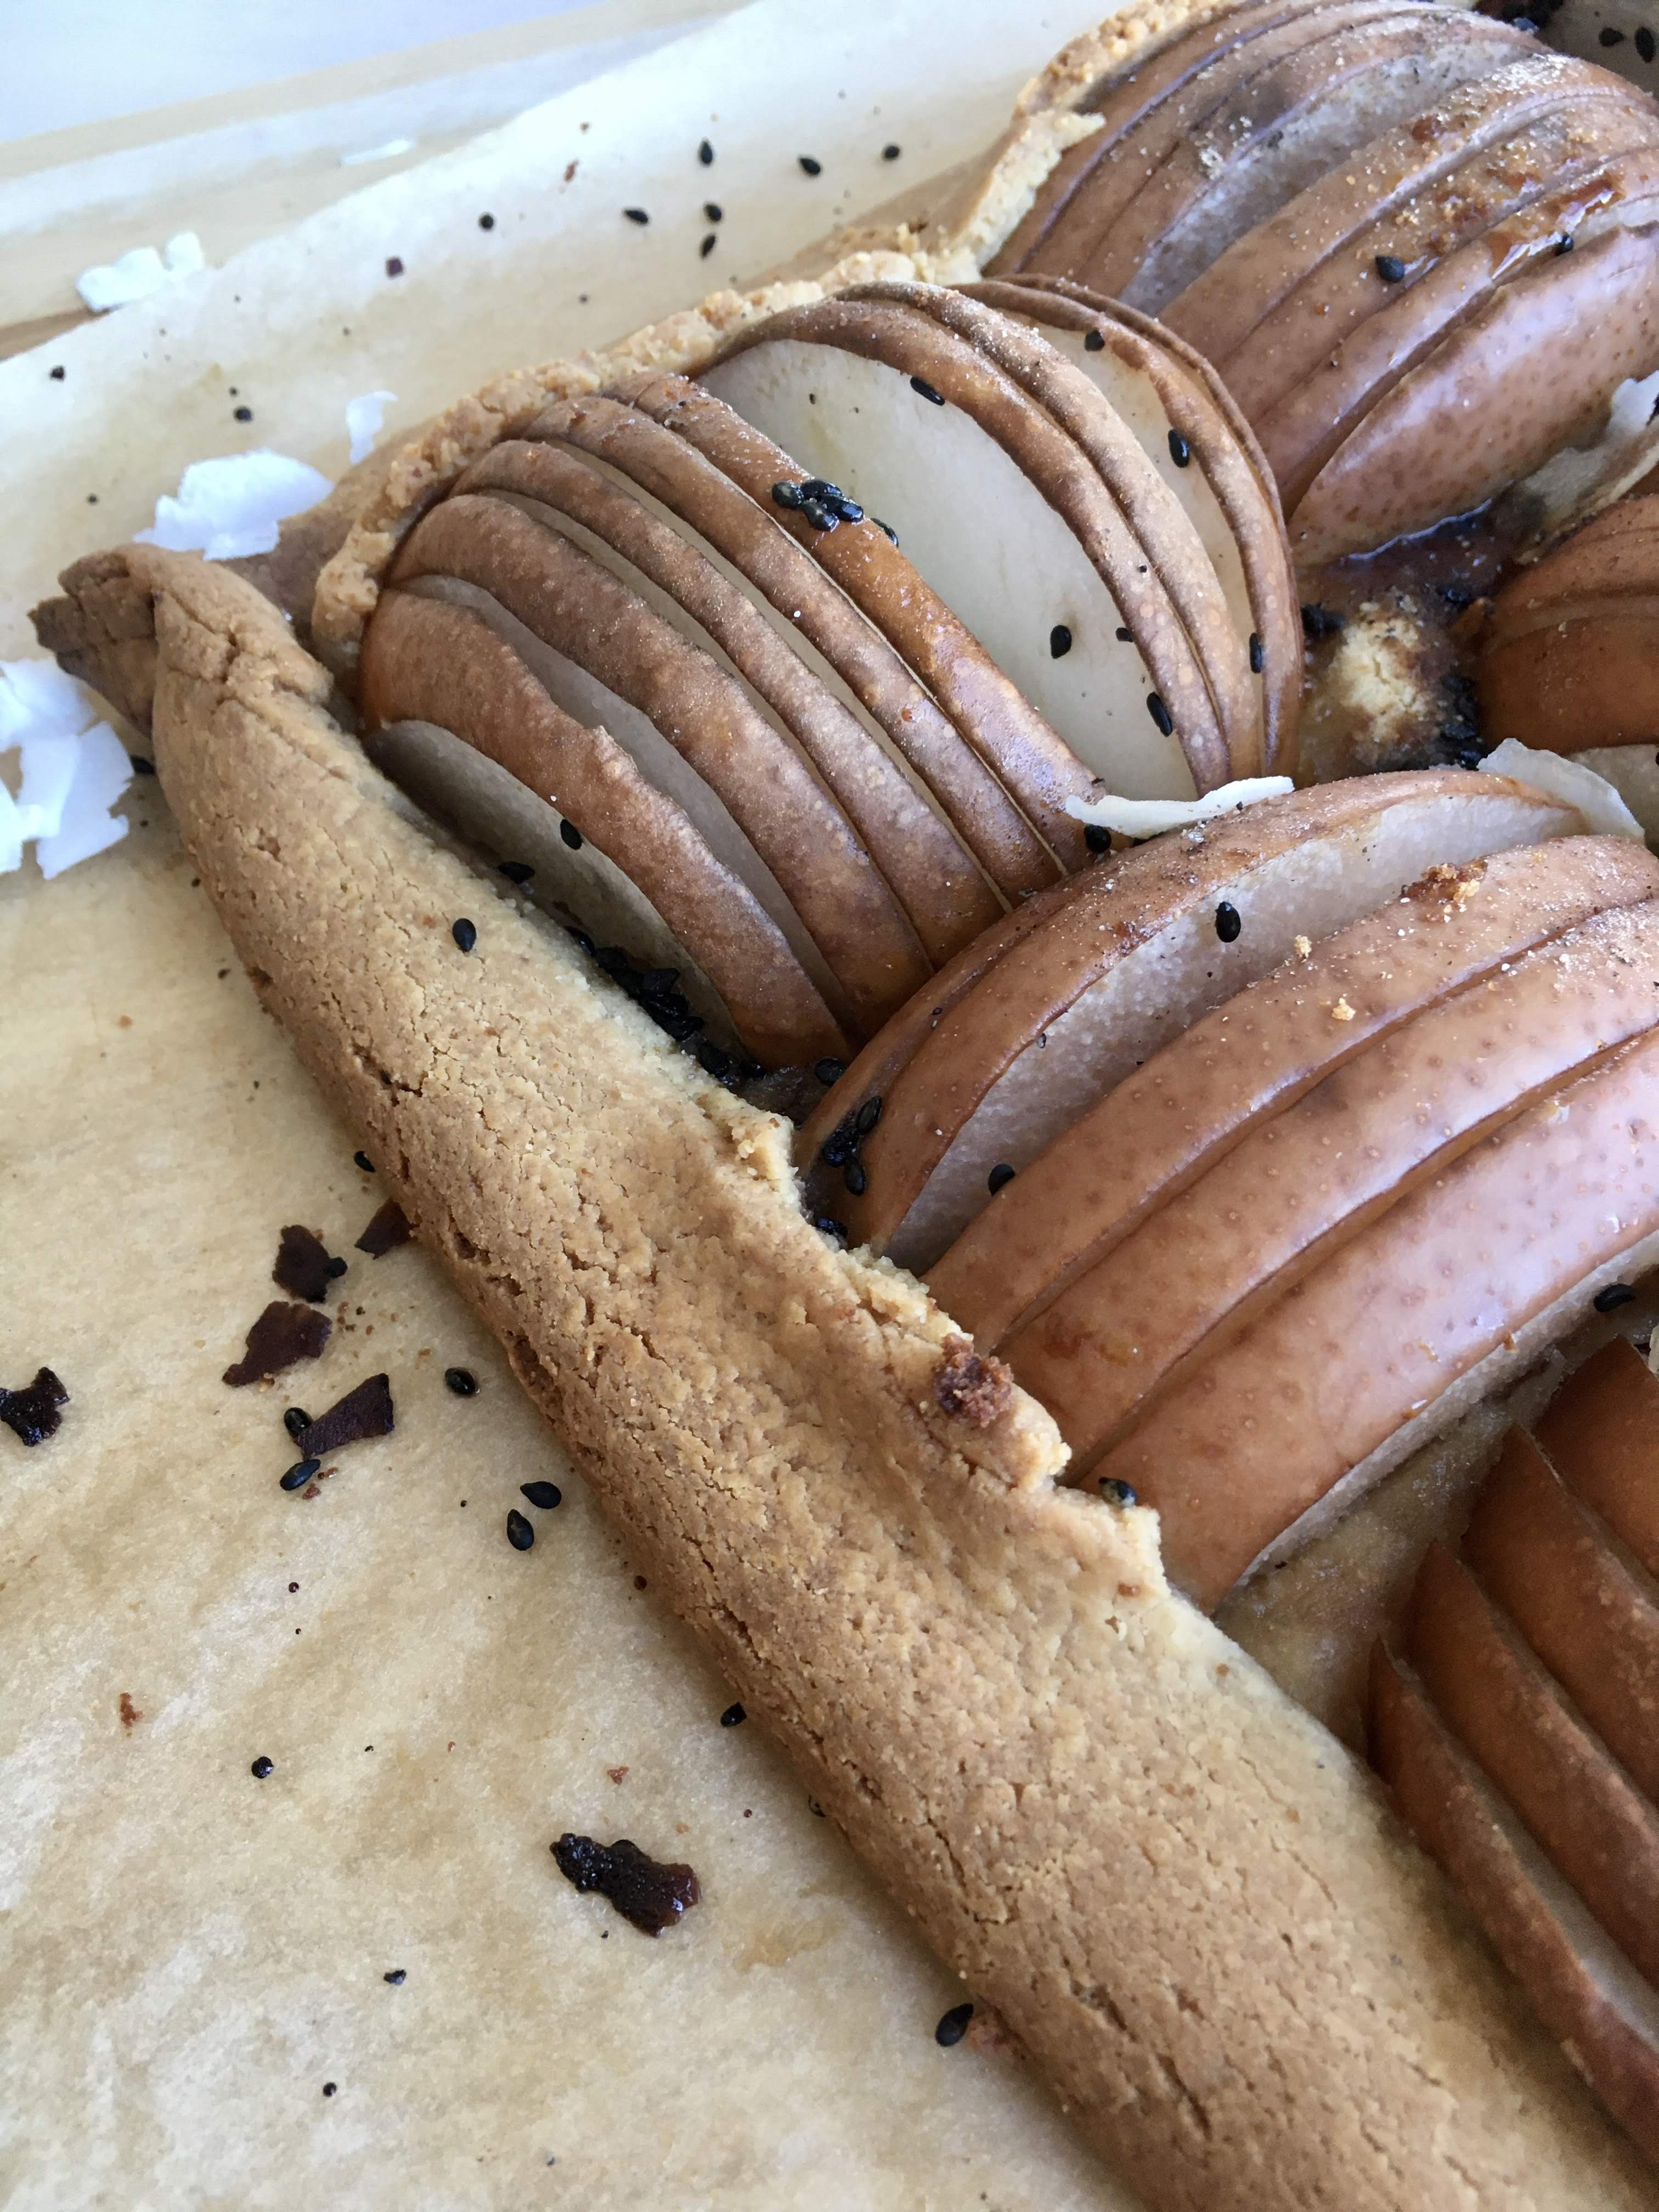
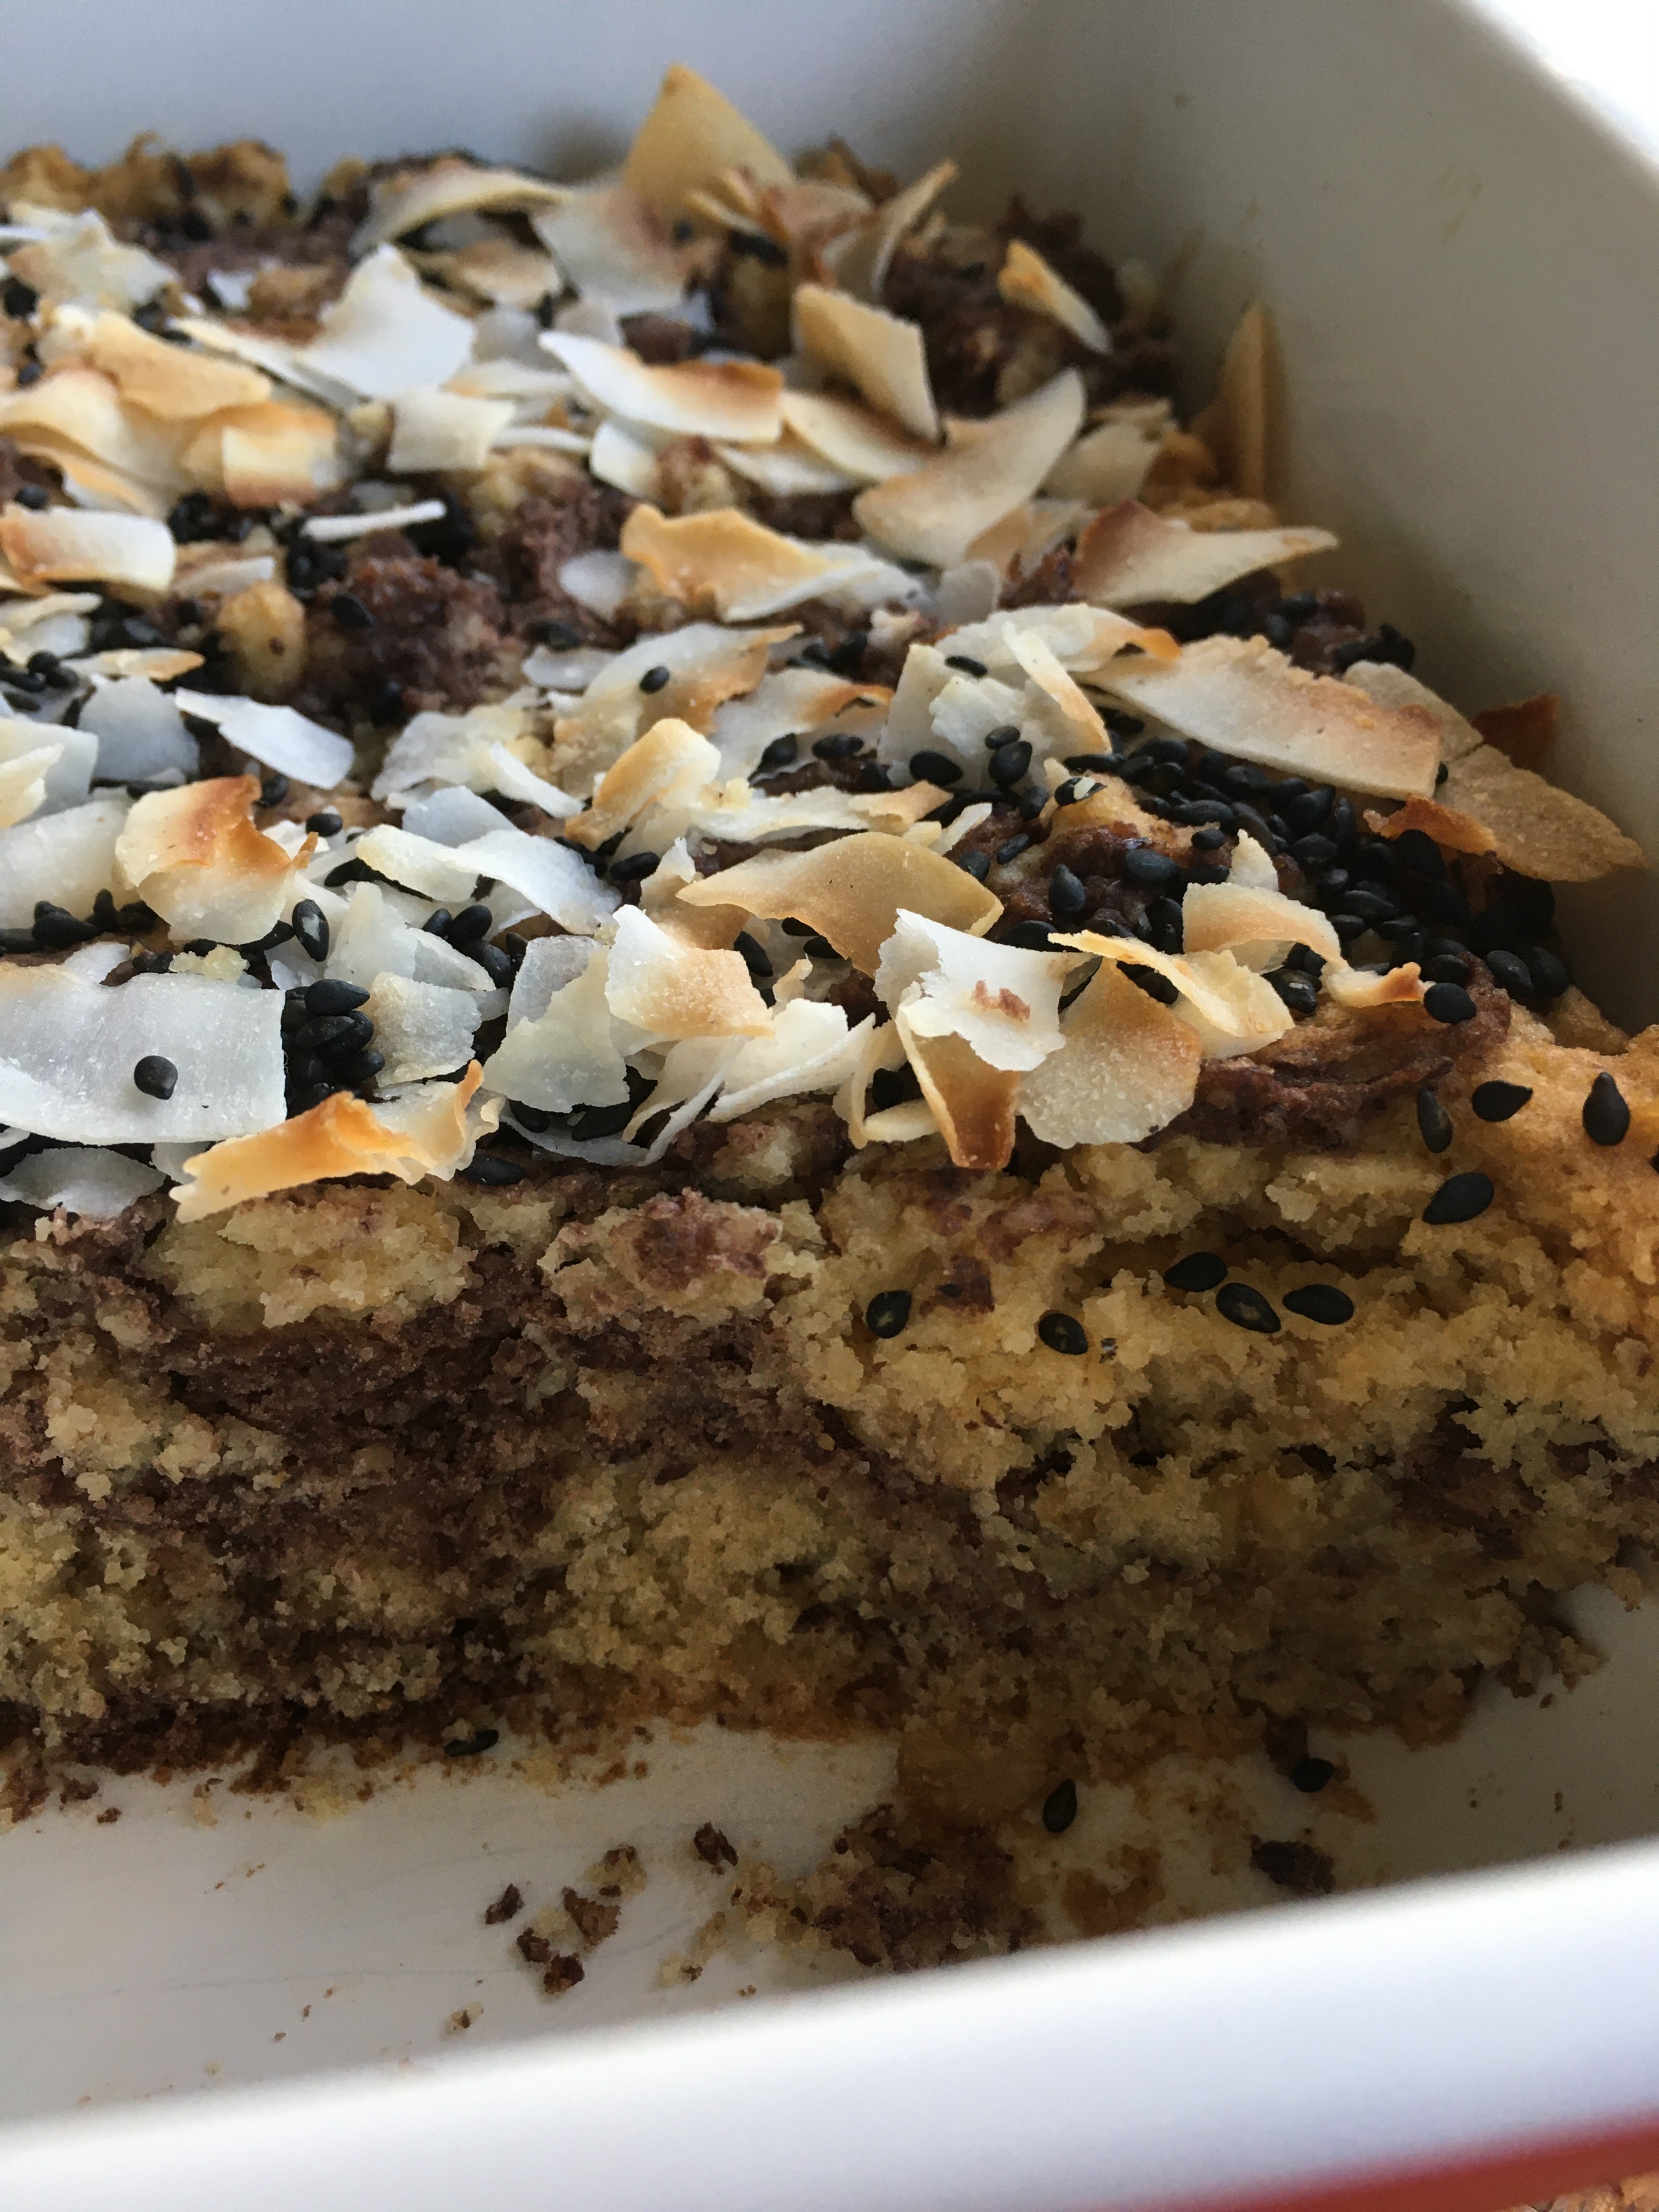
Preheat the oven to 350 and line some kind of 9” pan with parchment – this is the least fussy recipe ever, so square, round, tart pan, etc – whatever you have is fine! I used an 9” pie plate. In a large bowl, stir almond flour, vanilla, salt, maple, chopped walnuts and coconut oil together. Reserve a heaping half cup and stir in the sesame, coconut and ginger (this will be the top bit) – set aside. Press the rest of the dough into the base of the pan, and bake for 12-15 minutes until set. Remove from the oven and top evenly with blueberry chia jam. Crumble the rest of the reserved topping on the berries, and bake for another 23-25 minutes, until the top is lightly golden brown and the berries are bubbly. Remove and let cool completely before serving. It’s also fabulous cold – I made mine the night before serving, refrigerated overnight and served straight out of the fridge – highly recommended. Leftovers keep well covered in the fridge for a day or two but I dare you to have any ;)

This is my jam.

img_0068

Hi Friends!

I bring you the latest edition of baking your pantry! I haven’t actually shopped for baking specific things since the lockdown began in March, which is super fun – it’s giving me a nice excuse to use up the bits of things in my cabinets & also to get creative.

img_0090

For instance! I was gifted a jar of the most delicious apricot jam from a camp friend (hi, Doc!) and though I could have eaten it on toast, I wanted to use it in a dessert instead for fun. I’ve been saving it, and am so glad I had it around to use this weekend!

img_0077

These bars were actually supposed to be a galette. Funny how that happens… The dough wasn’t going to play nice to roll out – fine by me, since it made an excellent press-in crust for this instead, which is way less fussy. Jam tarts are maaaaybe the easiest thing on this planet, and infinitely adaptable. Out of the flours I suggested, or gluten free? No sweat, just swap in whatever blend of flours you like (highly recommend the cornmeal though, if you can do grains – the texture is phenomenal). Got a bunch of chia seeds and frozen fruit but no jam on hand? Make chia jam! Cook down the fruit for a bit with a bunch of chia seeds, let cool and boom – you’re on the way to jam bars.

Look at this flaky maldon sea salt goodness… it’s next level:

img_0072

Not quite sure if this is to be considered a tart, or bars. I’m kind of leaning toward bars since they slice up beautifully and would work well to serve at a – party? Ugh. Social distancing. Okay fine, they’d work well sliced to serve to those who you’re quarantining with! Highly recommend vanilla ice cream alongside, just saying – but they’re equally amazing as breakfast wedges, especially when you’ve just hiked 7 miles.

img_0089

img_0085

img_0084

C and I did our usual weekend hike today – 7 miles from his place, through the interior greenbelt and up Mount Sutro -> Twin Peaks -> home. It was fantastic, and such a beautiful day. My racerback tan is already aggressive and it’s only May…. I also have a fitbit tan, and a shorts tan, for those of you keeping score at home.

img_0091

img_0074

Want to see what this really looks like?

img_0080

Sorry for the feet, hope that doesn’t gross you out. Ha! I promise they’re clean.

I hope you and yours are well! The outdoors is amazing for mental health – fully recommend getting out there (masked when necessary, of course, and observing social distancing rules!) to brighten up your quarantined days. And when you come back in, make jam bars. From my kitchen to yours! <3

img_0067

Apricot, Rosemary & Cornmeal Jam Bars

Whole grain (three different kinds!), dairy free and vegan with a refined sugar free option (depends on what kind of jam you use). Super easy to adapt, and comes together extremely quickly when you’re in need of a quick dessert or fun breakfast. Kind of like eating cornbread with jam, a personal fave. Yield: 1 9″ pan of bars, serves several. A Wait are those Cookies original.

img_0076

For the crust:
2 cups of flour [I used 1c whole wheat pastry flour, 1/2 c oat flour, 1/2 c cornmeal]
⅓ cup extra virgin olive oil
⅓ cup cold water
pinch salt

For the crumble and filling:
1/4 c almond flour
3 tbsp oat flour
~1tbsp rosemary, finely chopped (a few sprigs)
pinch of sea salt
1 tsp maple syrup
1 tsp vanilla extract
1/2 tsp almond extract
~1/2 c apricot jam (I used the entirety of a smallish jar) – hopefully homemade but use what you got! Chia jam would be great here too.

maldon sea salt, for sprinkles after

Mix the flours and salt until well combined. Add olive oil and water. Mix and knead into a smooth dough – I used the food processor primarily for this, but easy to do by hand as well. Lightly grease a dish of choice – you could literally do this in anything. I used a 9″ stoneware pie dish, but feel free to use a tart pan w/ a removable bottom, springform, square pan, pyrex dish, you name it. Press the dough evenly across the bottom to form a crust, and set aside.

Preheat the oven to 375F. In a small bowl, stir together 1/4 c almond flour, 3 tbsp oat flour, a few springs of rosemary very finely chopped, and a pinch of sea salt. Add in a tsp each of maple syrup and vanilla extract, plus 1/2 tsp of almond extract. Stir until combined and crumbly.

Spread the apricot jam evenly over the prepared crust, followed by the oaty-almond rosemary crumble. Bake for 20-25 minutes, until jam is bubbly and crumble is lightly browned. Remove and let cool completely before serving. Sprinkle a little maldon sea salt over the whole thing to bring it up to the next level. Excellent with vanilla ice cream or in wedges on its own for breakfast. Store any leftovers (who are you?!) in the fridge, covered with foil.

img_0079

Leap Year! and gnomes

img_0094

Hello hello!

img_0088

Bonus – two recipes for the price of one today, since I am behind and have been too busy to actually keep to anything resembling a regular blogging schedule.

img_0059

Today’s primary recipe is an asian pear & miso cardamom galette (hey hey hey asian pear season!) – so delicious with the slightly savory miso hanging out in the crust, not to mention a little cardamom somethin’ somethin’.

img_0090

img_0092

The bonus recipe is these red bean & almond bars that I made last weekend to use up the last of my red bean paste. I’d frozen it, but I didn’t want to relegate it to the unrecoverable depths of the freezer, so into bars it went. Such a happy experiment in throwing things into a bowl and seeing what happened – the bars turned out dense and nutty with swirly pockets of red bean.

img_0061

img_0066

img_0067

In life news, there have been some fun finds on walks lately, as well as some beautiful sunsets – see following photo story! It’s currently super windy here in SF, and I’m sitting in my apartment listening to the wind howling all over the place – one of the many reasons I named my fourth/top floor apartment the Eryie (NO, not from game of thrones, but from 15th century Latin, thanks very much).

img_0080

img_0081

Every home needs a gnome, a wise friend told me once… and he’s NOT wrong. Inherited this little guy from my gram – he used to sit in her planter and now he hangs out in my little succulent forest.

img_0103

img_0054

I really, really, really love my rooftop & the fact that I’m the only apartment that has access… sneaky sneaky through a window. Not sorry.

img_0053

I highly recommend either or both of these desserts for your Leap Day weekend! Happy Leaping, and happy birthday to Frederic, for all of my fellow g&s nerdloves out there <3

img_0087

Asian Pear, Miso and Cardamom Galette

Grain and gluten free, refined sugar free. A Wait are those Cookies original. Yield: 1 galette, serves several.

For the galette dough:

1.5 c almond flour (not meal; you want the finer flour variety)
1/2 c tapioca flour
1/4 tsp fine sea salt
6 tbsp salted butter, chopped (or ghee)
1 egg*
1 tbsp vanilla extract
2 tbsp dark miso

*alternately you can use a flax egg with very similar results (3tbsp water + 1 tbsp ground flaxseed)

In a food processor or high-power blender (I used a food processor), pulse almond flour, tapioca starch, salt, and butter to combine until it looks like coarse meal. Add in egg, vanilla extract and miso and pulse just until combined. Turn out onto a piece of plastic wrap, shape into a disk and chill in the fridge for at least an hour, or up to overnight.

For the filling:
3 asian pears, sliced
1 tsp cardamom + 1 tbsp coconut sugar
1 tbsp butter, chopped

This might be the easiest thing ever. Once the dough has chilled, preheat the oven to 375. Roll out the dough between two pieces of parchment paper, keeping the circle to about 1/4″ thickness. Peel off the top piece of parchment, and slide the rolled out dough on its parchment onto a baking sheet. Top with sliced asian pears, and dust them with cardamom and coconut sugar. Begin folding up the sides, creasing them together as you go – if the dough rips, that’s okay (you can crimp the cracks back together; remember: galettes are forgiving and rustic!); you can use the bottom piece of parchment to help fold up the sides.

Dot the pears with butter. Bake for 35-40 minutes until edges are golden brown — mine came out just fine at 35 minutes, so check accordingly.

Let cool for a few minutes on the baking sheet, then carefully slide the whole galette onto a cooling rack to let it cool completely. Serve with your fave ice cream or whatever of choice! Keeps well covered in foil on the counter or in the fridge.

img_0060

Red Bean and Almond Bar Cookies

Gluten free, refined sugar free and dairy free. A Wait are those Cookies original. Yield: 1 8″ or 9″ pan; serves a few or two, your choice ;)

For the bars:

1 c almond flour
1 c oats
1/2 c shredded coconut
1 tsp baking powder
1/2 tsp baking soda
1/2 tsp fine sea salt
1/4 c maple
1/3 c coconut oil, melted
1 egg
1 c red bean paste (recipe below)
black sesame and coconut flakes for topping

Preheat the oven to 350, and lightly grease an 8×8 or 9×9 pan with coconut oil (alternatively, you can use an 8″ or 9″ round pan, this recipe is totally forgiving).

In a large bowl, stir together almond flour, oats, coconut, baking powder, baking soda, and sea salt. Add in maple, melted coconut oil and egg, and stir until combined. Spread the dough into the prepared pan, then drop spoonfuls of red bean paste onto it. Swirl red bean with a spoon or a knife until it’s mostly sorta evenly distributed through the dough. Top with black sesame and coconut flakes, and bake for ~15-20 minutes, until a tester comes out clean. Bake time will depend on the depth of your pan, so check early and often (psssh nobody has time for dry bars, ew).

Keep leftovers covered on the counter for a day or so; after that I’d store them in the fridge.

For the red bean paste:

1 c dried adzuki beans, soaked overnight, then drained and rinsed
1/4 c maple syrup
pinch of sea salt
1 tbsp miso (I used brown rice – medium)
1 tsp vanilla

Bring the soaked adzuki beans and 3 cups of water to a boil, then lower to a simmer and cook, covered, until you can easily mash beans with a fork – about 1 hour. Once the beans are cooked, drain off any residual water, and stir in maple, salt, miso, and vanilla. Let cool completely. Once cool, take it for a spin in a food processor or high powered blender until smooth (you can leave some chunky too if you like – it’s good either way!). You won’t use all of it for this recipe, so either refrigerate the rest and use within 3-4 days, or freeze it; it keeps for about 3 months in the freezer.

Berry bars for errryybody

fullsizeoutput_2890

Internet friends!

fullsizeoutput_288d

How goes it? Things here are pretty bueno – it feels like fall, with the snappy air and all the squash in the markets! I have yet to make any squash this season, but I’m sure it’ll happen SOON; we can just chalk it up to being super busy at work and opting for quick dinners (hello eggs & black beans, you’re the bomb) or meal prep that can turn into a quick dinner.

fullsizeoutput_2891

Weekends have been productive and lovely, with lots of urban hiking and pretty views of my beautiful city. The sunsets have been off the HOOK – this is the time of year for cotton candy skies in this part of the Bay, and I’m loving every minute.

Looking back down the hill; I never ever get tired of the views on my walk home from work:

IMG_0933

E1267A8D-6AD6-4385-ACBF-50B82FD3BC3E

IMG_1016

IMG_0972

IMG_0994

I love that I can get these amazing sunset panos from my roof!

fullsizeoutput_2861

fullsizeoutput_2864

And of course, there was dessert! A low-key one for this last weekend; C and I may or may not have eaten this all in two sittings. To be fair, there was a hike in there also that was nearly 6 miles and a lot of stairs, sooo…. ahem.

fullsizeoutput_2889

This is rapidly becoming one of my staple desserts, along with my go-to cookies. It’s SO easy and flexible, and super delicious. It reminds me a bit of a grown up pb&j – only with almond butter and a lack of cloying jammy sweetness. Not to mention that it’s great for so many dietary preferences or allergies! Gluten & grain free, refined sugar free (it’s nearly sweetener free; only 2 tbsp of maple in the whole thing), dairy free, vegan, paleo! Woooohoo for inclusive desserts!

I find that I love it best straight out of the fridge for maximum chewy coldness, but it’s still great at room temp. Of course for science research C and I had to eat it with ice cream – highly recommend. Its nutty base dough/crumble tastes very reminiscent of an almond cookie, and is complemented perfectly by the sweet-tart chia jam in the middle. Suffice it to say, we’re big fans over here, and I hope it brings you as much joy :)

fullsizeoutput_2883

I can feel myself starting to gravitate towards more involved baking projects as the nights come earlier and the days get shorter… it makes me turn inward and seek out cozy things like blankets, tea, and the oven. Not that I don’t usually seek out the oven, but you get the idea.

Happy October!

fullsizeoutput_288a

Berry & Almond Butter Crumble Bars

Gluten free, dairy free, refined sugar free, grain free / paleo, vegan! A direct riff off of the blueberry bars that I posted a few weeks ago, here, where were in turn inspired by the Roasted Root, here! Yield: 1 8″ pan of bars, round or square, your choice. Super simple; these come together in about five seconds and bake up in just over 30 min, so they make a perfect last minute snack, dessert, or breakfast ;)

For the berry filling:

1 raspberries (I used frozen)*
1 c blackberries (I used frozen)
splash of yuzu or lemon juice
1/4 tsp sea salt
2 tsp tapioca flour
1/4 c chia seeds
1 tbsp vanilla

*can be made with all raspberry (or all blackberry!) – I was just trying to use up what I had

In a small saucepan, heat berries, sea salt, and tapioca until just barely boiling, 5-8 minutes. Remove from the heat and stir in chia seeds & vanilla; let cool.

For the crust & crumble:

2 c almond flour
1 tbsp vanilla
1/4 tsp sea salt
2 tbsp maple
3 tbsp melted coconut oil
1/4 c almond butter
1/3 c chopped almonds
Black sesame seeds
Coconut flakes

Preheat the oven to 350 and line some kind of 8” pan with parchment – this is the least fussy recipe ever, so square, round, tart pan, etc – whatever you have is fine! I used an 8” round cake pan. In a large bowl, stir almond flour, vanilla, salt, maple, almond butter and coconut oil together. Reserve half a cup and stir in the almonds, sesame seeds & coconut (this will be the top bit) – set aside. Press the rest of the dough into the base of the pan, and bake for 12-15 minutes until set. Remove from the oven and top evenly with berry mixture. Crumble the rest of the reserved topping on the berries, and bake for another 23-25 minutes, until the top is lightly golden brown and the berries are bubbly. Remove and let cool completely before serving. It’s also fabulous cold – I made mine the night before serving, refrigerated overnight and served straight out of the fridge – highly recommended. Leftovers keep well covered in the fridge for a day or two but I dare you to have any ;)

fullsizeoutput_288e

Bellissimo Blood Oranges

fullsizeoutput_144d

What to do when your blood orange bars crack something fierce and turn out a weird, strange color but somehow are still so delicious?

fullsizeoutput_1453

Cover them with more blood oranges and chocolate drizzle!

fullsizeoutput_1443

Shhh. You know nothing.

fullsizeoutput_1449

Seriously though… these bars were delicious but omg the filling turned out the most bizarre color. I can’t explain it…. I am mystified. They also cracked like crazy (are they trying to emulate the fault lines on top of which I very nearly live? I would hope not) – I might have cooled them too fast – outside, at 6am – but… I had to go to work. Desperate times.

fullsizeoutput_1450

BUT, all’s well that ends well, since they’re delicious and I somehow juiced all the blood oranges without getting blood orange splatter all over my kitchen walls. I did get some on myself that I didn’t discover until I got to work, but that’s neither here nor there and no one noticed…

fullsizeoutput_144a

Thank heavens it’s the weekend! This has been a long couple of weeks (month? ugh).

fullsizeoutput_1454

This weekend though – no complaints! It’s been lovely so far, and it’s only Saturday. I took a long, coffee-fueled hike/walk in Golden Gate Park today, which was just perfect as it’s been a long time since I doodled around over there.

fullsizeoutput_145d

fullsizeoutput_145c

fullsizeoutput_146e

fullsizeoutput_1474

Here again we have a dessert-breakfast-breakfast-dessert situation that does duty for whatever time of day in which it finds itself.

fullsizeoutput_1455

We ate it with ice cream for dessert (it was bomb) and then again alongside eggs & caponata for breakfast (yes, it’s blurry – it’s not you!)

fullsizeoutput_1456

However you slice it, these bars are delicious, odd color notwithstanding. Blood orange season is short, so grab them while you can! Thinly sliced, I think they look like stained glass – they are one of my favorites.

fullsizeoutput_1449

Happy Saturday!

fullsizeoutput_1453

Blood Orange Bars on a Chocolate Coconut Crust

Gluten & grain free, refined sugar free, dairy free, pretty much paleo. Tart but sweet – it’s hard to argue with the iconic combination of orange and chocolate. Blood oranges take it up a notch, and are so beautiful! A Wait are Those Cookies original. Yield: 1 9″ pie dish; serves 2-8.

fullsizeoutput_1437

For the crust:

1.75 c almond flour
1/3 c unsweetened cacao powder
1/4 c unsweetened shredded coconut
heaping 1/4 tsp sea salt
1/2 tsp baking soda
2 tsp vanilla extract
2 tbsp pure maple syrup
3.5 tbsp coconut oil, melted

Preheat the oven to 350, and lightly grease a 9″, deep pie plate with coconut oil. Alternatively, you could use a tart ring with a removable bottom – I needed to transport mine so opted for just keeping it in a less fussy dish.

In a large bowl, stir together almond flour, cacao powder, coconut, sea salt, and baking soda. Add in vanilla, maple, and melted coconut oil and stir until completely combined. The dough will look crumbly, but you’ll be able to press it together with your fingers.

Press the crust into the plate and up the sides with a spoon or your fingers, creating a smooth edge (or not, your call!). Poke the bottom with a fork a few times, and bake for 17 minutes.

For the filling:

4 eggs
1/4 c pure maple syrup
zest of 3 blood oranges, roughly chopped
1/2 c fresh blood orange juice
pinch of sea salt
4 tbsp coconut flour
2 tsp vanilla extract

For the topping:
1 blood orange, thinly sliced
3 tbsp extra dark chocolate, chopped
1 tsp coconut oil

While the crust is baking, make the filling! In a large bowl, whisk together eggs, maple, orange zest and juice, sea salt, coconut flour (sifted if lumpy) and vanilla until smooth. Pour the filling into the par-baked crust.

Bake for 30-35 minutes. The top should be mostly firm and the filling set, with just a small amount of wiggle (it’ll firm up as it cools). Let cool completely and eat immediately or chill in the fridge for later (I like them cold!). Once cool, top with a thinly sliced blood orange. Combine the dark chocolate and coconut oil in a bowl and microwave on 30 second intervals until melted, stirring between intervals. Drizzle over finished tart.

Serve with vanilla ice cream :) Store any leftovers in the fridge.

fullsizeoutput_1434

Kitchen wisdom is sage advice

IMG_1526

Sending all the good vibes and healing thoughts to those caught in the terrible wildfires in the North Bay – I can’t even imagine the scale of destruction happening. I don’t even live in the thick of it, and I still can’t see the sky on account of smoke. My heart hurts for my state and for those in the middle of it all.

IMG_1500

These bars can bring a little sunshine to otherwise smoky, obscured days – the citrus is bright and fresh, and we all know I’m obsessed with herbs in dessert, so this is no exception. The sage in the crust is noticeable but not aggressive – just a hint of earthiness to play up the brightness of the meyer lemons (locally grown, of course!). Blueberries and almonds go with just about anything, so why not invite them to the party too?

IMG_1508

These do double duty as dessert and breakfast (that seems to be a theme around here, hmm) – makes some amount of sense, since my desserts are almost all whole-food and fruit focused.

IMG_1524

Besides, these have a hefty dose of eggs which basically makes them breakfast. See? Science!

IMG_1505

In other news, there are finally leaves on the ground, and of course I’m excited about a return to sweater, boot and scarf weather. I’m a little sad at the shortening days though, especially because I miss my good morning photography light! Sigh. It will be back!

IMG_1484

IMG_1496
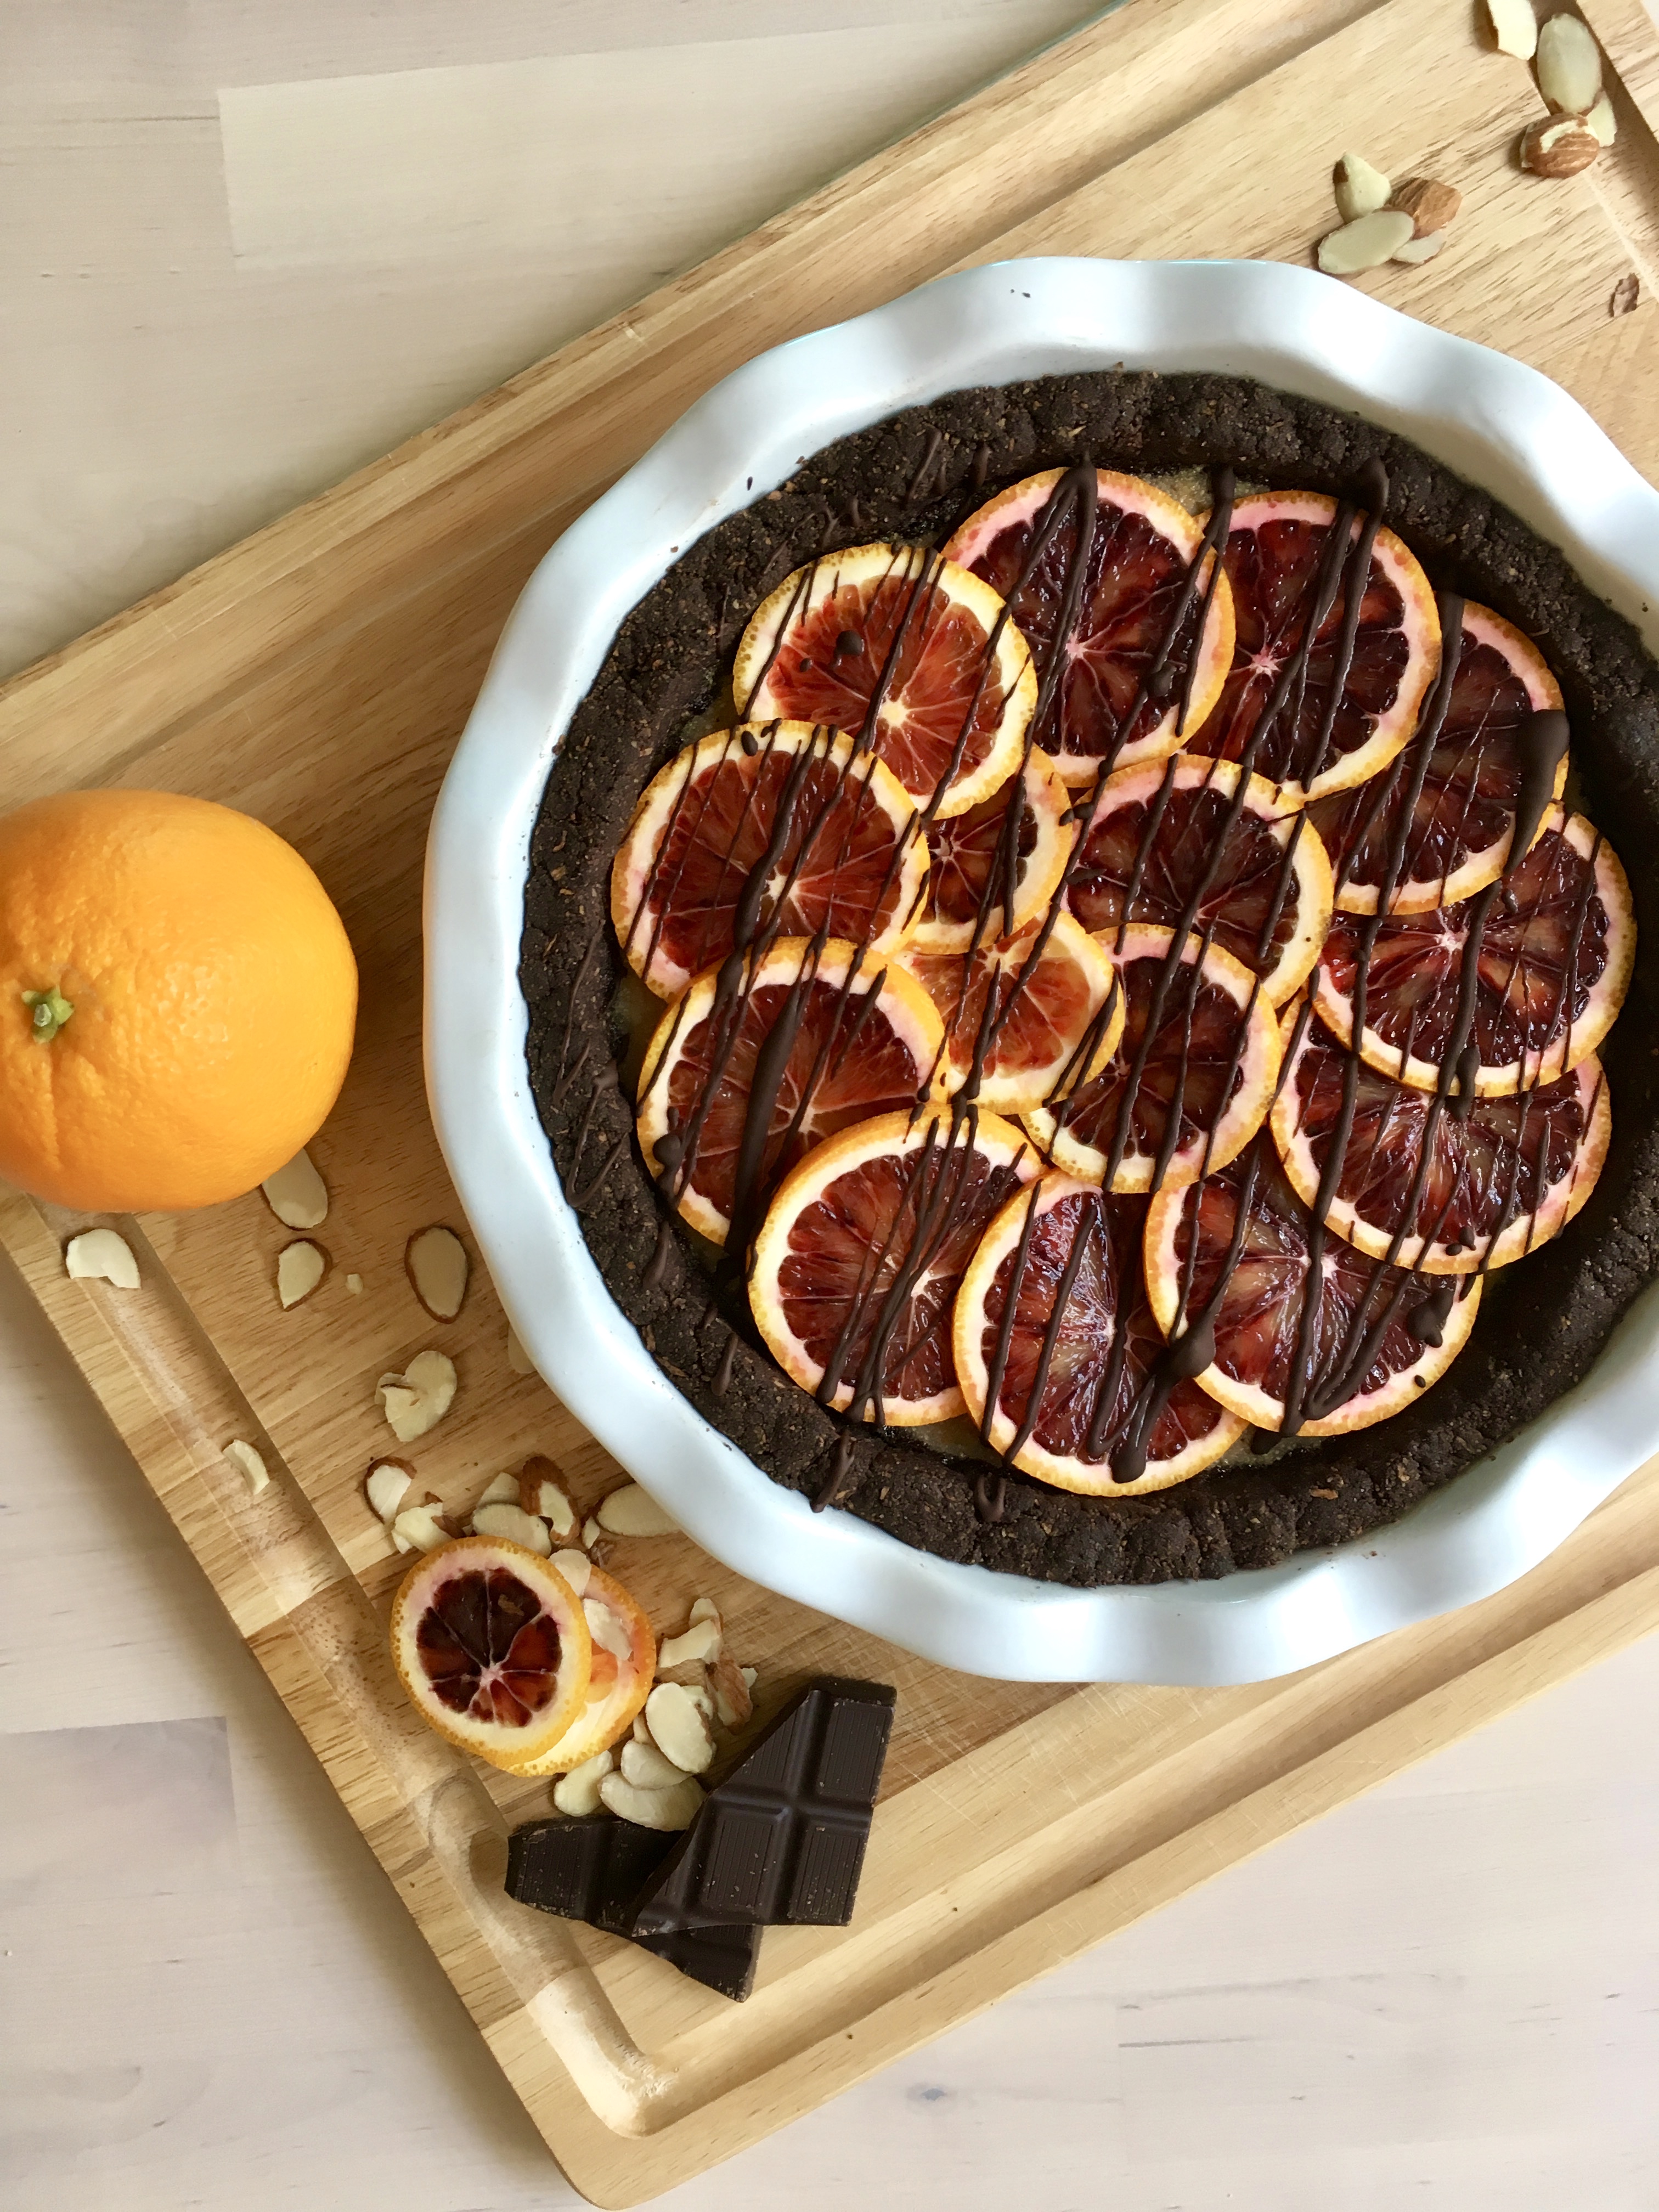
In the meantime, I’ll make bright, citrusy and quite probably herb-y desserts to bring some brightness to the shorter days. Happy Autumn!

IMG_1507

Meyer Lemon Blueberry Bars on an Almond Sage Crust

Lightly sweet, tangy, and perfect if you have a glut of meyer lemons (though regular lemons are fine too!). The sage adds such a nice earthy twist to the basic lemon bar – I love lemon with almond so these just hit all high points for me! Grain free, gluten free, refined sugar free, dairy free, arguably paleo. Yield: 1 9″ pie plate or 1 8 by 8 square pan, serves 2-8 (ha – I recommend dessert and then for breakfast the next day). Adapted from my orange creamsicle bars, here!

For the crust:

1.5 c almond flour
3/4 tsp baking soda
heaping 1/4 tsp fine sea salt
1/4 + 1/8 c unsalted almond butter
1.5 tbsp pure maple syrup
1.5 tbsp coconut oil, melted
2 tsp vanilla extract
1/4 tsp almond extract
1.5 tbsp chopped sage

Preheat the oven to 350, and grease an 9″ round pie dish (must be deep) or an 8 by 8 pan.

In a large bowl, stir together almond flour, baking soda, and sea salt. Add in almond butter, maple syrup, melted coconut oil, vanilla, and almond extract and stir until combined and crumbly. Stir in chopped sage. Press the crust dough evenly into the prepared pan, and poke with a fork a few times. Bake for 10 minutes. Remove and set aside when done.

For the filling:

4.5 eggs*
1/2 c pure maple syrup
zest of 3 meyer lemons, roughly chopped
1/4c + 1/8c fresh lemon juice
pinch of sea salt
4.5 tbsp coconut flour
2 tsp vanilla extract
* to achieve half an egg: crack an egg into a small bowl and whisk it; then either measure or eyeball half and use that. or just use a whole one as long as it’s small, I doubt it would affect the consistency of the bars all that much…

For the blueberry swirl:
1 c wild blueberries (preferably frozen, thawed)
1 tsp vanilla extract

While the crust is baking, make the filling! In a large bowl, whisk together eggs, maple, lemon zest and juice, sea salt, coconut flour (sifted if lumpy) and vanilla until smooth. Pour the filling into the par-baked crust. For the blueberry swirl, blend blueberries with their juice (some is released during thawing) and vanilla either with an immersion blender or a food processor. The sauce won’t be especially thick, but that’s fine. Pour the sauce into a ziplock bag (or use a piping bag, but be warned that blueberry stains!), carefully snip a really small triangle off of one corner, and pipe 5-6 lines across the lemon filling. Some will sink in, but most will stay on top (and no, the lines do NOT have to be perfect!). Take a table knife and swirl the lines gently into the filling.

Bake for 30-35 minutes. The top should be mostly firm and the filling set, with just a small amount of wiggle (it’ll firm up as it cools). Let cool completely and eat immediately or chill in the fridge for later (I like them cold!) — serve with vanilla ice cream :) Store any leftovers in the fridge.

IMG_1510

This tart is made of grapefruit. Therefore, BREAKFAST!

img_5259

It’s December! I doubt you need reminding, but there it is. Despite the slight annoyances of increased traffic, impacted post offices and whatnot, I do love this time of year, especially all the lighted buildings in the city and the excuse to have a giant tree in my living room.

img_5250

img_5242

AND the baking. Because holidays = baking & eggnog, a well known fact. I haven’t gotten to the eggnog (give it time) but at least I’ve got the baking on lock.

img_5248

I’m on a citrus run over here (scurvy? pshhhh no) — I’ve had requests and I’ve been loving fresh citrus taste. This makes two in a row, and there’s at least one more coming, probably lemon next time — can’t stop won’t stop!

img_5249

I debated calling these bars vs a tart… but tarts are fun I can call it whatever I want! Besides, this slices into wedges which makes me want to call it a tart. Bars are square. Right?! Right. We’ll go with tart. ALSO hahahaha grapefruits are kind of tart. You see what I did there?!

…. Moving on, terrible pun notwithstanding.

This tart is spectacular (and easy!) – if you love grapefruit, these are for you. In the course of my recipe brainstorming, I discovered that caramel is a flavor affinity for grapefruit, which seemed rather counter-intuitive, but I decided I was going to try it anyway. Good thing too because the grapefruit – caramel combination of these bars is SO GOOD IT MUST BE WRITTEN IN ALL CAPS. Not shouting… just for emphasis! ha. But seriously — if you like grapefruit, get on these. They will brighten up your day and make your kitchen smell amazing! The tart has the consistency of lemon bars, with the crust adding a great textural counterpoint. And then there’s caramel… of course.

img_5237

Besides that, it’s paleo, gluten & grain free, refined sugar free and dairy free – enjoy with abandon! ‘Tis the season :)

Jessie would like to say hello:

img_5196

The latest… plus fun at the tree lot:

img_5198

img_5200

Happy December!

img_5253

Side note, this tart is perfectly acceptable breakfast food. Because, grapefruit!

img_5238

Grapefruit Tart on a Coconut Cashew Crust with Coconut Caramel Sauce

A Wait are those Cookies original! Full of grapefruity flavor (if you love grapefruit, these are absolutely for you!) that is complemented by the coconut and cashew crust. Serve with vanilla ice cream of choice for maximum flavor happiness. Gluten & grain free, dairy free, refined sugar free, paleo depending on your definition. Yield: 1 9″ dish; serves as many as your discretion dictates (that could be 2. Or 8!)

For the crust:

  • 1.5 c cashew flour
  • 1/2 c unsweetened shredded coconut
  • 3/4 tsp baking soda
  • heaping 1/4 tsp fine sea salt
  • 1/3 c unsalted cashew butter
  • 1.5 tbsp pure maple syrup
  • 2 tbsp melted coconut oil
  • 2 tsp vanilla extract

For the bars:

  • 4.5 eggs*
  • scant 2/3 c runny honey
  • zest of 1 grapefruit
  • 1/4 + 1/8 c fresh grapefruit juice
  • pinch of sea salt
  • 4.75 tbsp coconut flour
  • 2 tsp vanilla extract

* to achieve half an egg: crack an egg into a small bowl and whisk it; then either measure or eyeball half and use that. or just use a whole one as long as it’s small, I doubt it would affect the consistency of the bars all that much…

For the caramel sauce:

  • 1 can full fat coconut milk
  • 1/3 c coconut sugar
  • 1/2 tsp sea salt
  • 1 tbsp coconut oil
  • 1 tbsp vanilla extract

For the caramel (best made at least one day ahead):

Combine coconut milk, coconut sugar, and sea salt in a small saucepan over medium-high heat. Leave uncovered and bring to a boil, then lower the temp and continue to let the sauce simmer for 40-45 minutes, stirring occasionally. Once the sauce has reduced, thickened and will coat the back of a spoon, remove from heat and stir in coconut oil and vanilla. The caramel will lighten in color and thicken slightly if you keep it overnight in the fridge (though it is still relatively runny caramel) — store in an airtight jar for up to two weeks if not using immediately.

Preheat the oven to 350, and grease a deep 9″ pie dish with coconut oil.

In a large bowl, stir together cashew flour, coconut, baking soda, and sea salt. Add in cashew butter, maple syrup, melted coconut oil, and vanilla, and stir until combined and crumbly. Press the crust dough evenly into the prepared pan and up the sides, and poke with a fork a few times. Bake for 15 minutes. Remove and set aside when done.

While the crust is baking, make the filling! In a large bowl, whisk together eggs, honey, grapefruit zest and juice, sea salt, coconut flour (sifted if lumpy) and vanilla until smooth. Pour into the parbaked crust, and bake for 30-35 minutes. The top should be mostly firm and the filling set, with just a small amount of wiggle (it’ll firm up as it cools). Let cool completely and eat immediately or chill in the fridge for later (I like it cold!) — serve with vanilla ice cream and caramel for maximum happiness. Store any leftovers in the fridge, though I challenge you to actually have any leftovers!

img_5245

Orange bars: like a creamsicle only WAY better

img_5192

Hello!! I have citrusy goodness for you today, because this time of year is all about the citrus and scurvy is bad news.

Besides that, I used to LOVE 50/50 bars when I was a kid (you know, those popsicle-looking things that were orange on the outside and vanilla on the inside? also known as a creamsicle?) and I wanted something that tasted sort of like that, only WAY better and not filled with all the junk. So I made these!

img_5182

Orange bars with a vanilla almond crust… pair them with vanilla ice cream and they are pretty much the perfect citrus dessert.

img_5179

img_5183

Let’s see, what else is new… more drawing, of course — still on the SF series, naturally.

img_5168

I think that’s about it, otherwise I’m business as usual over here — didn’t really bake diddly for Thanksgiving so I’ll have to make up for it at Christmas, which is (gasp) rapidly approaching.

img_5187

Citrus was requested and I was thinking of doing something along those lines anyway, but I really wanted to do something besides lemon. I LOVE lemon, but… it’s always the favored child when it comes to citrus desserts. Let’s let oranges have their time in the limelight, ya know? …. Limelight? Really?? That just happened. Let’s see how many citrus references can fit in one sentence…

img_5186

Anywayyyy. Make these! Eat them! Your neglected oranges will love you, and you’ll get a nice blast of creamsicle nostalgia.

img_5180

Orange Bars with Vanilla Almond Crust

(Otherwise known as Creamsicle bars but that’s probably trademarked…)

Gluten & grain free, refined sugar free, easy dairy free option, probs paleo depending on your definition… all around delicious. I was going for the creamsicle flavor profile here and I haven’t eaten a 50/50 bar in years, but I’m pretty sure this really close (and, frankly, better tasting… let’s be real). These bars are light and citrusy, easy, delicious, and free of all the junk!

Sorry for some of the strange measurements — I prefer this in an 8 by 8 pan and I like my layers a little thicker, which is why the measurements are a little weird. Don’t forget to zest your oranges and then juice them! Nothing like attempting to zest pre-juiced oranges, it might be one of the more annoying kitchen things I’ve inadvertently done.

img_5184

For the crust:

  • 1.5 c almond flour
  • 3/4 tsp baking soda
  • heaping 1/4 tsp fine sea salt
  • 1/4 + 1/8 c unsalted almond butter
  • 1.5 tbsp pure maple syrup
  • 1.5 tbsp salted butter, softened (or coconut oil for non dairy)
  • 2 tsp vanilla extract

For the filling:

  • 4.5 eggs*
  • scant 3/4 c pure maple syrup
  • zest of 3 oranges, roughly chopped
  • 1/4c + 1/8c fresh orange juice
  • pinch of sea salt
  • 4.75 tbsp coconut flour
  • 2 tsp vanilla extract

* to achieve half an egg: crack an egg into a small bowl and whisk it; then either measure or eyeball half and use that. or just use a whole one as long as it’s small, I doubt it would affect the consistency of the bars all that much…

Preheat the oven to 350, and grease an 8 by 8 pan.

In a large bowl, stir together almond flour, baking soda, and sea salt. Add in almond butter, maple syrup, softened butter, and vanilla, and stir until combined and crumbly. Press the crust dough evenly into the prepared pan, and poke with a fork a few times. Bake for 10 minutes. Remove and set aside when done.

While the crust is baking, make the filling! In a large bowl, whisk together eggs, maple, orange zest and juice, seal salt, coconut flour (sifted if lumpy) and vanilla until smooth. Pour into the parbaked crust, and bake for 30-35 minutes. The top should be mostly firm and the filling set, with just a small amount of wiggle (it’ll firm up as it cools). Let cool completely and eat immediately or chill in the fridge for later (I like them cold!) — serve with vanilla ice cream for maximum creamsicle flavor :) Store any leftovers in the fridge.

img_5178

Death by chocolate via skillet

IMG_4627

Hello!

This is a rather belated post / a compilation of a lot of things that have transpired out of my oven of late… I have no other excuse other than that I’ve just been lazy on the blogging front. And also it’s been HOT. So running the oven is the last thing I ever want to do when it’s a thousand degrees in the shade. Despite that, I’m sharing these brownies that require an oven because a) they’re amazing and you need them and b) I made lemon bars that got eaten so fast there was no picture to be had but they were AMAZING and if it cools down several degrees I’ll no doubt make them again soon and hopefully get in some pictures so you can see the deliciousness, in case you don’t believe the words (though you should).

Let’s see, what else has been shakin…

Occasionally I have fun with fans.

IMG_4625

I’ve been doing a lot of this, and it’s been glorious (btw; highly recommend this book; I couldn’t put it down).

IMG_4635

I got to see my favorite band ever ever ever in the beginning of June!! Caravan Palace is AMAZING.

IMG_4557

Summer means a glut of zucchini (at least in theory; I am [im]patiently waiting for the zucchini plant to really get going; at the moment am having to restrain myself from ripping the somewhat tiny zucchinis off the plant and eating them immediately. That being said, I did get to get out my spiralizer again after a long hiatus, and that was fun.

IMG_4588

But.

These brownies. Do you see that caramel sauce swirl going on down there?!

IMG_4626

Are pretty much death by chocolate in a skillet. In the best way. I took these brownies that are super dark, fudgy and dense and refined sugar free and dairy free and gluten free and DELICIOUS….

… and then I trashed them up with paleo caramel and coconut and more chocolate and they became a fairly evil dessert. I use evil in a complimentary way, of course.

IMG_4629

Topped with paleo gelato, they just about sent me over the edge (I was not eating these alone either, and I was not the only one accusing them of delicious death by chocolate). Good thing I was watching a movie on the floor so I didn’t really have to move very much after I finished them.

IMG_4630

But really. They’re amazing. Just pace yourself when eating, ha.

IMG_4619

Coconut Caramel Brownies

Gluten free, refined sugar free, dairy free. Fudgy, dark brownies with a deep dark chocolate taste — these are not for the faint of heart or for those who prefer a cakier brownie. No way man; eat these if you love dark chocolate in all its forms. The coconut caramel and coconut flakes take them over the top. Serves: a lot. Yield: 1 8″ cast iron skillet or an 8″ square baking pan.

Use the recipe below for the brownies: Deep Dark Flourless Brownies 

  • 6 tbsp coconut oil
  • 4 oz extra dark chocolate [mine was 77%]
  • 2 oz dark chocolate [mine was 63%]
  • 2 eggs
  • scant 1/4 c coconut sugar
  • 2 tsp vanilla extract
  • 1/4 c unsweetened cacao powder
  • 3 tbsp arrowroot starch
  • 1/4 tsp fine sea salt
  • a handful of extra dark chocolate chips

1 batch of paleo caramel (I used this one from Bakerita, here — it is DELICIOUS)

  • much easier to make this ahead of time and refrigerate until needed — I made it the day before. It will also thicken up in the fridge the longer it sits.

For toppings: flaked coconut, shredded coconut, melted chocolate if desired

Preheat the oven to 350, and grease an 8″ cast iron with coconut oil or line an 8 by 8 pan with foil.

In a saucepan over med-low, melt coconut oil+extra dark chocolate+dark chocolate until smooth, stirring occasionally (you can also do this in the microwave, stirring at 30 sec intervals if you are feeling supremely lazy). In a biggish bowl, use an electric mixer to beat the eggs, coconut sugar, and vanilla until pale and smooth, about 2 minutes. After that’s all good, beat in the coconut oil-chocolate goodness until incorporated. In a small bowl, combine cocoa powder, arrowroot powder, and sea salt; then slowly use the mixer to beat that into the rest of the mix. Don’t overmix, just make sure there aren’t any pockets of cocoa powder. The batter should be thick and smooth. Stir in the extra chocolate chips. Spread the batter into the prepared pan.

Drizzle about 1/3 to 1/2 of the cooled caramel onto the brownie batter, and use a knife to swirl it together. You’ll end up with streaks and pockets of caramel, which are delicious– don’t feel like you need to completely stir it into the batter.

Bake for 30 minutes in an 8″ skillet (it’s thicker, so test accordingly) or for just about 25 minutes in an 8 by 8 pan, until a tester comes out clean. Let cool completely before topping.

Once cool, drizzle remaining caramel sauce over the top and excessively top with all the coconut. Toast the flakes if you like, or toss them on un-toasted – I did half and half and both were delicious. Melted chocolate drizzle is also a nice touch!

Slice. Eat. Devour. Might I suggest eating them in delightful company, since good food is so much better that way?! Also because a chocolate coma is more fun when you’re in good company.

IMG_4631

One week…

IMG_4493

I did it!!!

IMG_4460

IMG_4470

IMG_4480

Well, almost. I walked this weekend, which means there is only one more advent calendar baked good between me and me officially having my masters. That and one presentation… as one of my cohort peeps so accurately said “It’s like going back to the Dursleys after spending a year at Hogwarts”. TRUER WORDS NEVER SPOKEN. Sheesh. Nothing like getting hooded and walking in your graduation to go right back to editing your slides for the looming presentation… but whatever. Almost there!

IMG_4476

One more week.

IMG_4499

And in the meantime, I have baked goods. Or rather, a no-bake treat since it’s bloody hot out and I’m not about to turn on the oven. But if I have to work on practicum stuff, you better believe I’m going to have something interesting to eat.

IMG_4498

Fast, easy, and delicious. These kind of remind me of a gourmet PB&J…. except better! And they’re cold. Which is bueno when it’s so hot outside, and you want a treat that feels more like real food (ie. me every day).

IMG_4500

So! Next time I blog I will be DONE DONE DONE DONE.

IMG_4501

Hayley Scott, Master of Public Health. Hmm… that has a nice ring to it :)

IMG_4471

Almond Butter Raspberry Chia Bars

Gluten free, vegan, refined sugar free. Healthy fats, antioxidants, and chocolate. YAY! All the good things. Yield: 1 loaf pan. Recipe lightly adapted from This Rawsome Vegan Life, here!

IMG_4496

  • 1 c rolled oats
  • 1/4 c ground flaxseed
  • 1/2 c almond butter (mine was salted)
  • 1 tbsp maple syrup
  • 1 tsp vanilla extract
  • 1/2 tsp cinnamon
  • 1 c frozen raspberries, thawed
  • 4 tbsp chia seeds
  • 1/3 c extra dark chocolate chips
  • 1 tbsp unrefined coconut oil
  • unsweetened shredded coconut, for garnish

In a smallish bowl, mash together thawed raspberries and chia seeds. Let sit while you make the rest of the bar crust.

Line a bread pan with parchment paper. In a vitamix or food processor, process the oats until they become flour. Toss into a bowl with the flaxseed, almond butter, maple, vanilla, and cinnamon. Stir (or use your hands, it’s more fun) everything together until it all comes together. Press all this goodness into the prepared pan. Set aside for a hot minute.

The raspberry-chia jam should have thickened by this point. Spread it on top of the almond butter-oat mixture in the prepared pan.

In another smallish bowl, melt chocolate chips and coconut oil until melty enough that you can stir it all together sans lumps. Spread this on top of the raspberry layer in the pan, then top with shredded coconut if that’s your thing. Toss it all into the fridge for about an hour before slicing and serving!

Store in the fridge.

IMG_4495