Rhubarb, irises & other pretty spring things

IMG_3014

Hello there!

fullsizeoutput_1586

More rhubarb today – we both love it so it’s an easy pick. I always grab it when I see it in the market – you can guarantee I always have some frozen around this time of year… the season is short enough that I get antsy! Ha.

fullsizeoutput_1566

fullsizeoutput_157f

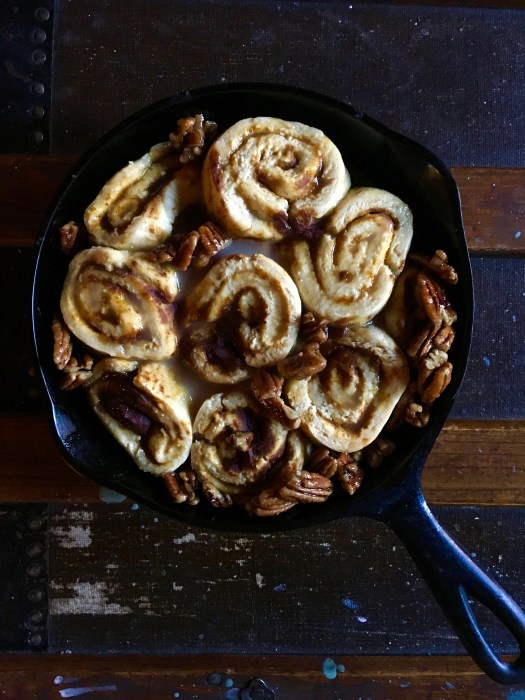
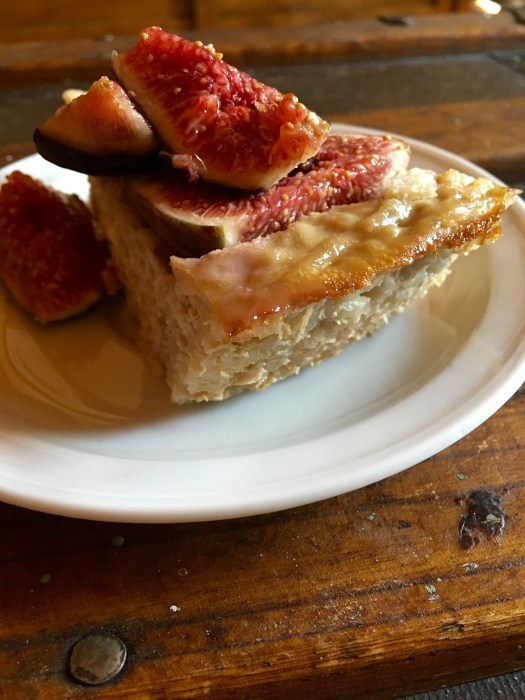
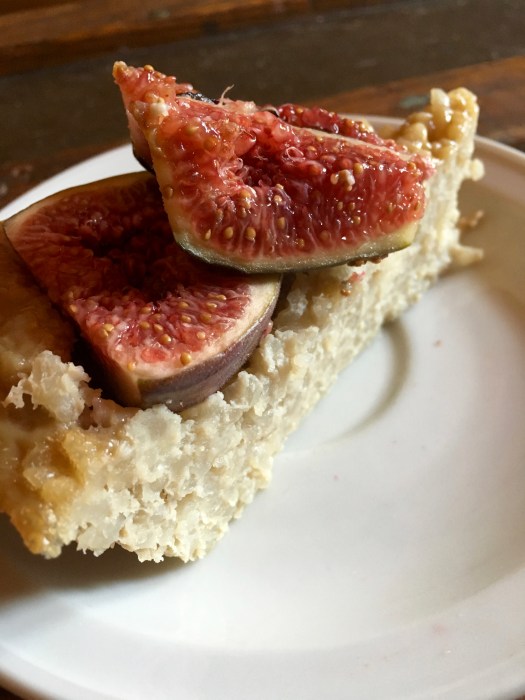
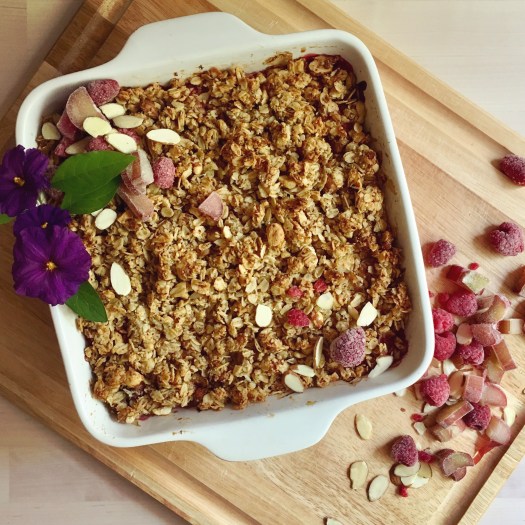
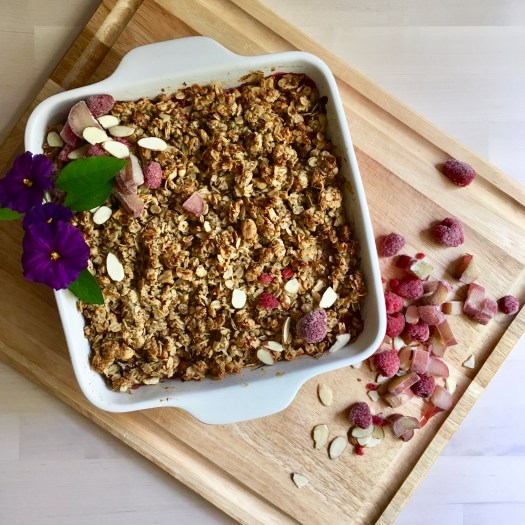
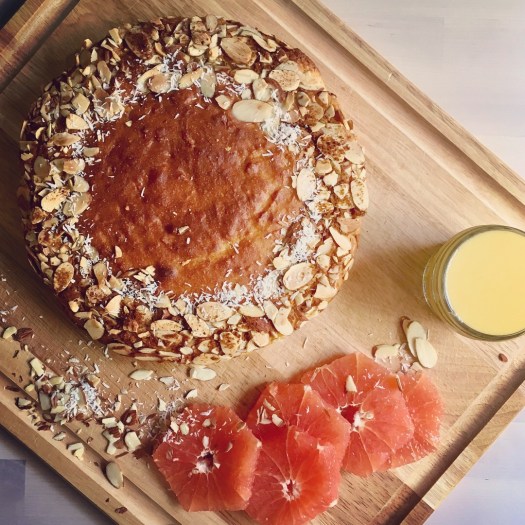
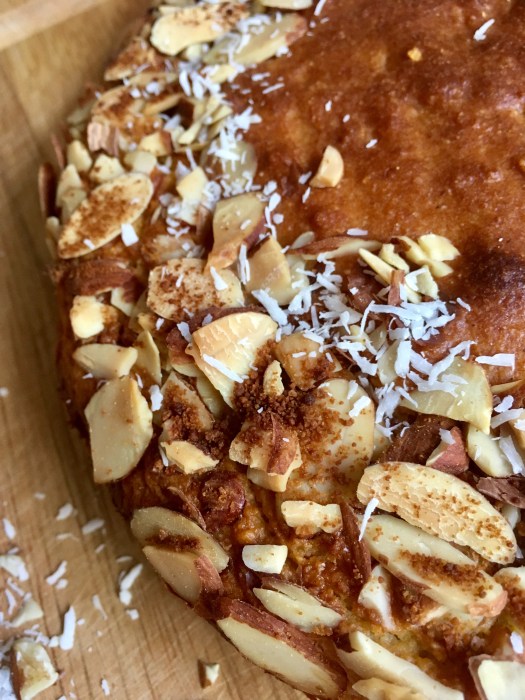
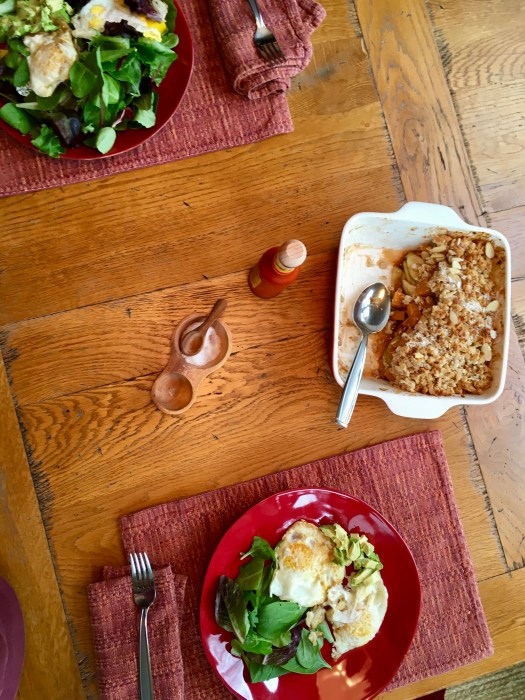
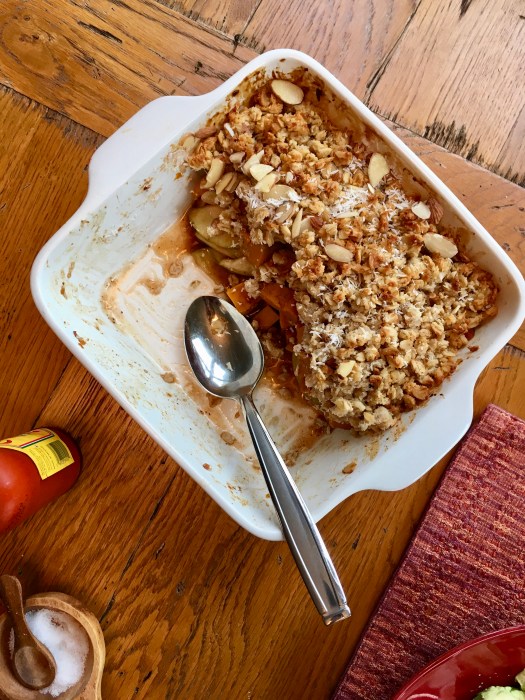
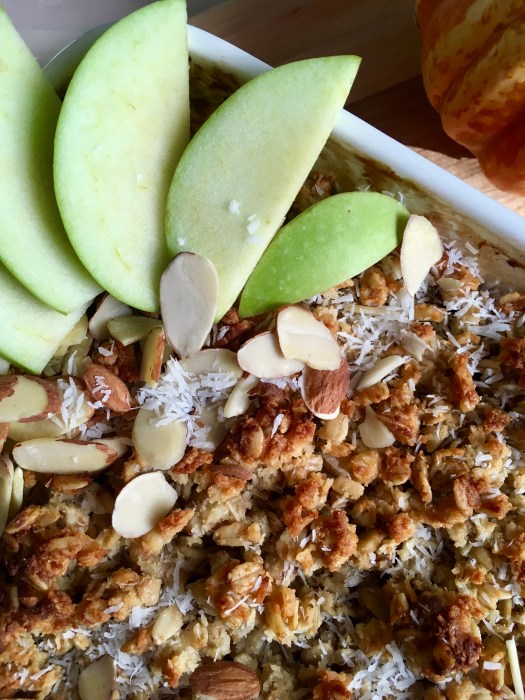
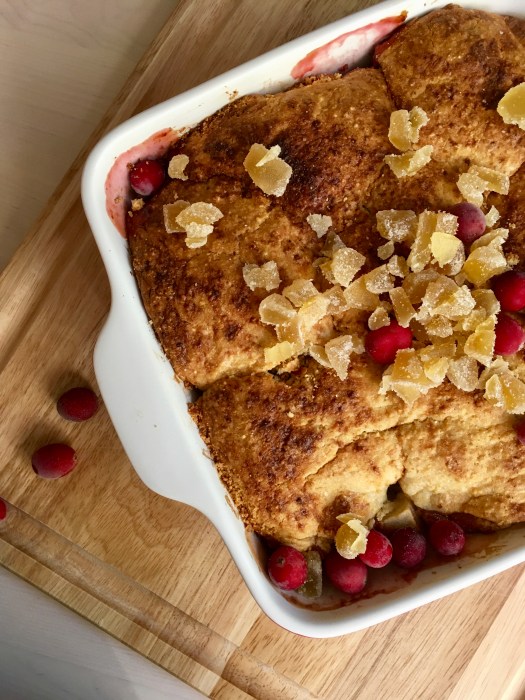
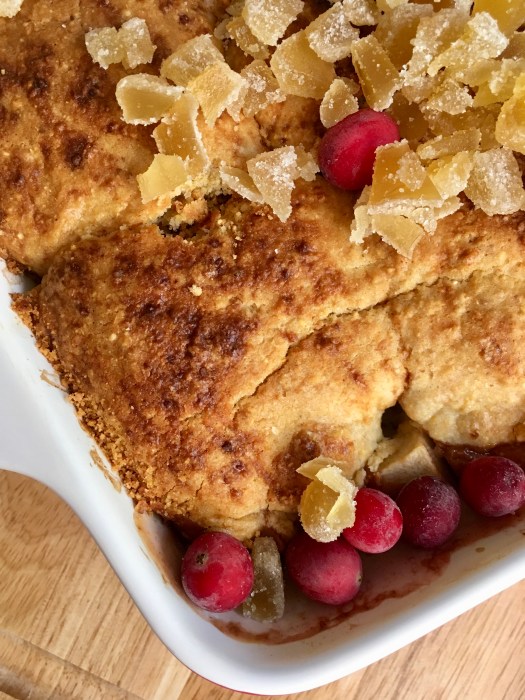
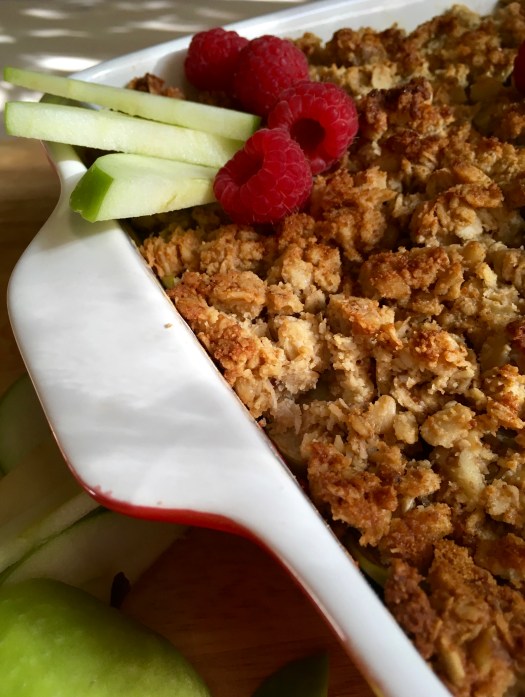
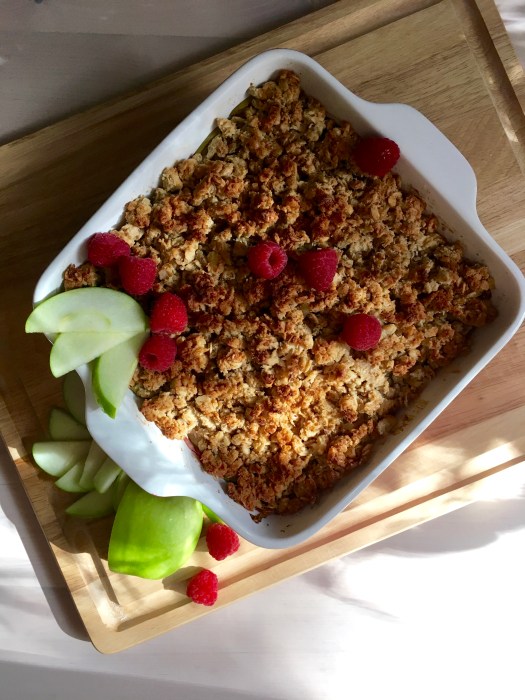
This crisp is jammy and delicious underneath but crispy and nutty up top – it comes together in a snap and is so delicious. As always, it works so well both for breakfast and dessert! I love it with ice cream for dessert, of course, but there is something extra delicious about having it for breakfast too.

fullsizeoutput_1574

fullsizeoutput_158b

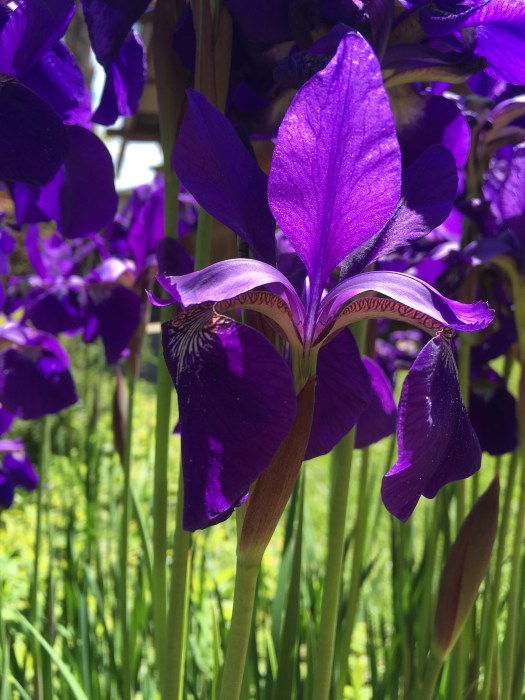
In other news, spring has definitely sprung – I love irises, they are one of my favorites.

IMG_3011

IMG_3008

Keeping it short and sweet today… happy baking!

fullsizeoutput_1584

fullsizeoutput_1588

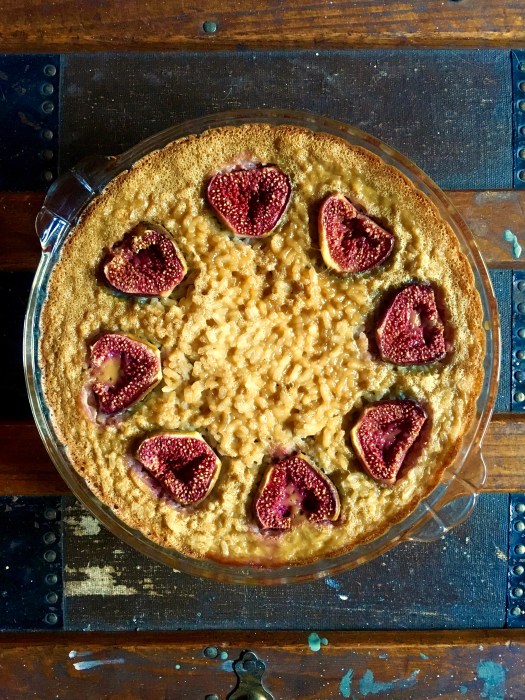
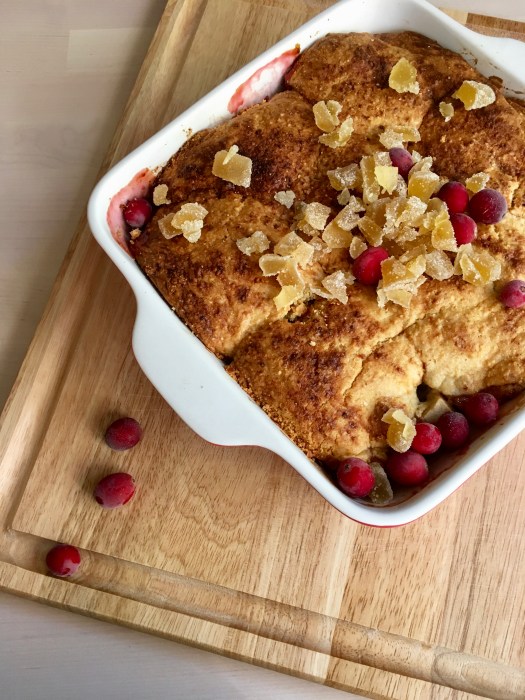
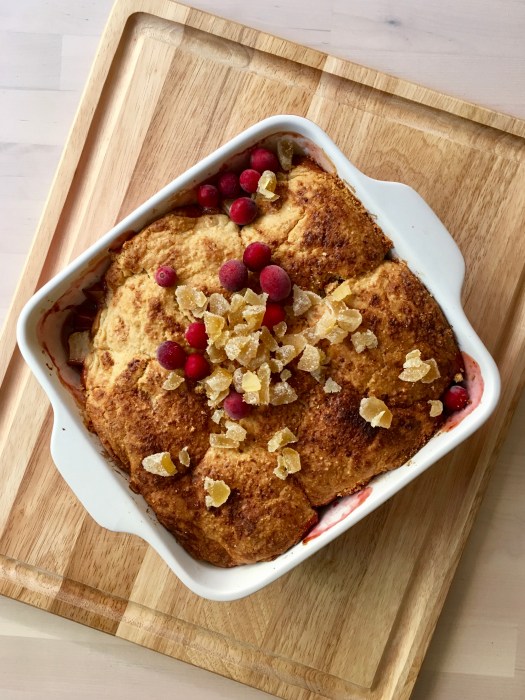
Hazelnut Crisp with Rhubarb, Raspberry and Ginger

Gluten free and refined sugar free. Perfect for the spring when rhubarb is at the peak of its season. This is fruity and light – great for both breakfast and dinner! I use my 2 quart square 8×8″ baking dish – could also use a deep 9″ pie dish or a casserole of your choice – whatever is deep enough to hold fruit and crispy topping! Serves: 2 for dessert and breakfast the next day or… less greedily… probably 4-7 :) A Wait are Those Cookies original.

fullsizeoutput_157d

For the filling: 

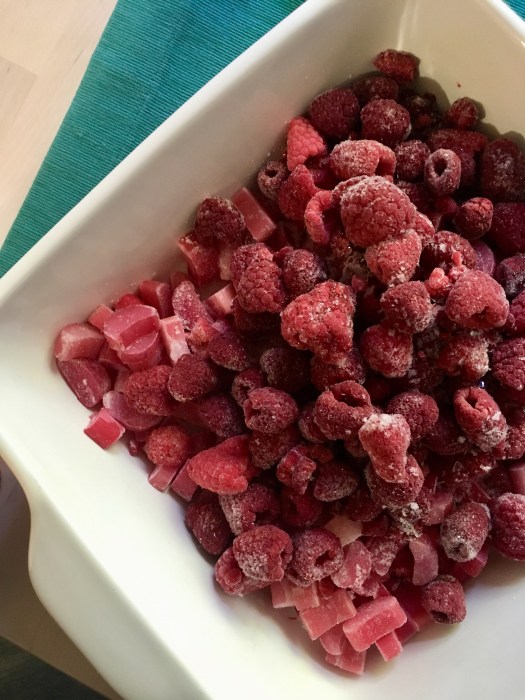
  • 4 c rhubarb, chopped*
  • 1 c raspberries*
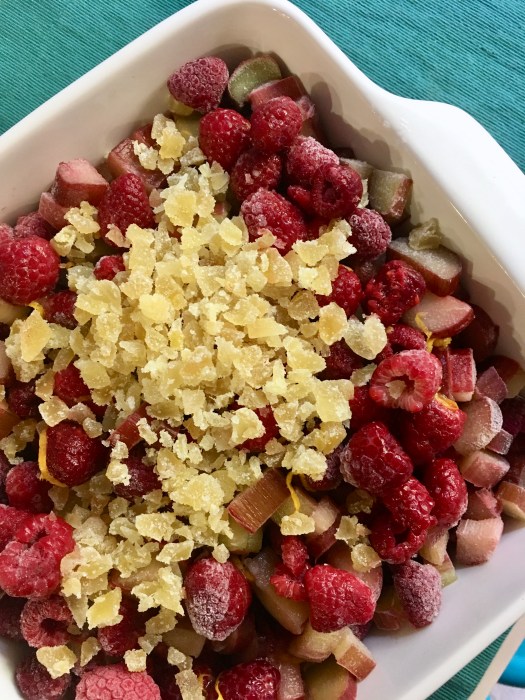
  • 1/4 c candied ginger, chopped
  • scant 1/4 c maple syrup
  • zest of 1 meyer lemon
  • juice of 1 meyer lemon (or regular)
  • ¼ cup port (or water)
  • 2 teaspoons arrowroot starch 

*I just approximate; I use however many it takes to fill my 2 quart, 8×8 baking dish
*I baked straight from frozen; fresh would also be fine

For the crisp: 

  • 1 cup old-fashioned oats (use certified gluten-free oats for a gluten-free crisp)
  • ½ cup firmly packed hazelnut meal
  • ½ cup chopped hazelnuts  
  • 1/4 c unsweetened shredded coconut 
  • scant 1/4 c maple (or coconut) sugar 
  • ¼ teaspoon fine sea salt
  • 2 tsp vanilla extract 
  • 4 tablespoons unsalted butter, melted
  • ¼ cup plain whole milk Greek yogurt 

Preheat the oven to 350. 

Toss chopped rhubarb, raspberries and ginger into your baking dish of choice (my dish is 8×8, 2 qt capacity; 9″ square or 9″ deep pie dish would also be fine). In a liquid measuring cup, whisk together the maple and water/port until combined. Add the lemon juice and zest, arrowroot, cinnamon and allspice, and whisk to combine. Pour the mixture over the fruit and toss to combine. Bake for 20 minutes.

While the filling is baking, make the crisp. In a mixing bowl, stir together the oats, hazelnut meal, chopped hazelnuts, shredded coconut, maple sugar and salt. Mix in the vanilla, melted butter and the yogurt. Stir until everything is mixed thoroughly. 

Once the filling has baked for 20 minutes, stir it and and redistribute evenly in the dish. Plop spoonfuls of the crisp topping evenly over the filling – no need to pack it down. Return the dish to the oven and bake for 25 to 30 more minutes, until the filling is bubbling around the edges and the top is golden.

Let the crisp rest for 5 to 10 minutes before serving. Serve with vanilla ice cream, obviously! Keep leftovers, covered, in the fridge for about 2-3 days (yeah right. It would take some kind of major feat to make it last that long) – the crisp will get softer the more days it sits but is definitely still crispy the next day. 

fullsizeoutput_158c

fullsizeoutput_156f

Can’t stop, won’t stop with the citrus!

IMG_2857

Can you tell we love citrus over here? I think the last… 3? or 5? (I think it’s five…) desserts have featured those beautiful hued little guys…

fullsizeoutput_14dd

I’d have to say it’s a three-way tie for my favorite citrus between grapefruit, meyer lemon and blood oranges…luckily, this cake covers two out of three!

fullsizeoutput_14e0

fullsizeoutput_14d7

Once again, it’s a dessert that easily does double duty for breakfast – just add some ice cream for dessert and you’re good to go. I love lemon curd on anything, so this is an easy sell for me. We loved it both ways – it’s almost scone-like when eaten alongside eggs & kale! (and coffee. let’s not leave that out)

fullsizeoutput_14e9

I’ve never used mace in my baking prior to this – apparently, it’s a relative of nutmeg, which I never knew. It plays really well against citrus, both grapefruit and meyer lemon, and adds a really interesting flavor profile. I love olive oil in cakes like this – it brings a rich fruitiness that isn’t otherwise found in butter or coconut oil.

fullsizeoutput_14ec

In other news, same ‘ol on the health issues front – I am still looking for answers and still frustrated. As I’ve said before, I try to keep it light in this space, but I have to admit this wasn’t a banner week for me. A little therapeutic baking and some quality time with fave human went a long way towards making the week seem not so overwhelming.

fullsizeoutput_14e5

Meyer lemons are perfect right now – and if anything is therapeutic, it is the scent of meyers! I love making curd with them – in fact, I had made and frozen a few batched not that long ago. Down to one now… which will probably get consumed next week, knowing how we roll around here.

fullsizeoutput_14f1

Happy almost-April! Go make yourself some citrusy goodness.

fullsizeoutput_14da

Grapefruit Polenta Cake with Meyer Lemon Curd

Gluten free and refined sugar free. Light, springtime dessert – or breakfast – this cake is fruity from the olive oil and grapefruit, and goes perfectly alongside a huge dollop of lemon curd or some ice cream, or better yet, both. We loved it both for dessert and breakfast – it’s almost reminiscent of a scone, so works well alongside eggs and kale. Yield: 1 9″ cake, serves 2-8. Cake adapted from Saveur magazine, here. Be careful with the bake time on this one – I was going by the recipe and it ended up slightly on the dry side b/c I didn’t pull it soon enough. I updated my bake times below to reflect that – otherwise, the flavor is stellar! And a large drizzle of lemon curd solves the dryness issue just fine ;)

fullsizeoutput_14d5

For the curd – my favorite recipe to date:

2 whole eggs
3 egg yolks
1/3 c meyer lemon juice
zest of 4 meyer lemons
pinch of sea salt
2.5 tbsp maple syrup
3.5 tbsp unsalted butter
1 tsp vanilla

I used a double boiler for this lemon curd, which literally is a game changer. Highly recommended! Heat water in the bottom of the double boiler until it’s at a high simmer. In the top of the double boiler, whisk together eggs, egg yolks, lemon zest and juice, sea salt, and maple syrup. Add in the butter one tbsp at a time, whisking continuously, not adding the next tbsp until the first is completely melted. Whisk in vanilla. Cook, stirring constantly, until the lemon curd thickens and coats the back of a spoon (or your whisk leaves tracks) – usually around 5 to 8 minutes. It’s a noticeable change when it happens, so just watch the cooking magic! Remove from heat and store in a glass container in the fridge until ready for use.

For the cake:

scant 1/4 c maple syrup
1/4 c grapefruit juice
zest of 2 grapefruits
2⁄3 cup full-fat plain Greek yogurt
1⁄3 cup olive oil
1 egg
1 tsp vanilla
2⁄3 cup brown rice flour
1⁄3 cup almond flour
1⁄3 cup coarsely ground yellow cornmeal, preferably Bob’s Red Mill
3 tbsp arrowroot starch
3 tbsp. tapioca starch
1 tbsp. baking powder
1 tsp. ground mace
1⁄2 tsp. kosher salt
1⁄4 cup sliced almonds

Preheat the oven to 350, and either use an 8″ springform pan OR do like I did and use a 9″ cake pan, well greased and lined with two thick strips of parchment paper so that you can lift the cake out onto a cooling rack easily.

Whisk maple, zest and juices, plus yogurt, oil, and egg in a bowl until combined. In a separate bowl, whisk rice and almond flours, cornmeal, arrowroot and tapioca starches, baking powder, mace, and salt until combined; make a well in the center. Whisk in yogurt mixture until a smooth batter forms. Pour into prepared pan and sprinkle with sliced almonds. Bake until cake is golden brown and a toothpick inserted in the center comes out with moist crumbs attached, 30-40 minutes. Let cool for at least 10 minutes, then lift out onto a cooling rack to cool completely, removing parchment from underneath if you used it. Let cool completely before serving.

Store any leftovers covered on the counter – this is a cake that dries out quickly, so I’d recommend eating it within a day or two of baking.

Serve with meyer lemon curd, more sliced grapefruit & ice cream for dessert, or just with lemon curd for breakfast!

fullsizeoutput_14ed

fullsizeoutput_14df

When life hands you lemons… make curd, of course!

IMG_2589

Hello hello!

fullsizeoutput_13c8

My car died on a freeway on-ramp today, isn’t that special? So thankful nothing worse happened – no one rear ended me, and it didn’t happen on the bridge. Could have been so much worse! Whew.

fullsizeoutput_13cd

But before that happened, at least I had cake with brunch! Poppy seed cake with Meyer lemon curd, to be exact. So so delicious & so awesome for brunch and dessert.

IMG_2582

I believe this cake is actually old world Austrian in origin (actually – I had to look it up! It’s an Austrian-Northern Italian Alps hybrid beauty), but it happens to be naturally grain and gluten free. Interestingly, it also contains no added fats like butter or oil, but is leavened with whipped egg whites. I adapted it to be much less sweet and refined sugar free, making it pretty much paleo. It’s also dairy free, as is the lemon curd – which is appropriately tart, as per our joint penchant for tart things!

fullsizeoutput_13c1

We loved this cake both with ice cream for dessert and alongside eggs and kale for breakfast – it really shines both ways. Don’t be fooled into thinking it’s a super rich layer cake – it’s actually airy, light and refreshing. I made extra lemon curd for drizzle because our general motto is that you can never have too much curd! Ha.

fullsizeoutput_13d2

fullsizeoutput_13bf

In other news, I’ve been doing a lot of ridgeline hiking to take my mind off some persistent and uncomfortable health issues. The views are awesome and it’s great to get outside (and outside my head). More on that later, maybe or maybe not – I try to keep this space light. It’s just not been my best month, and I and I’d rather not pretend everything is rosy when it isn’t.

fullsizeoutput_139a

IMG_2588

I can make cake though, and eat it with my favorite human. That makes life so much brighter, and I always find solace in baking and in the company of loved ones.

fullsizeoutput_13a4

fullsizeoutput_13bd

Bake, eat, love; surround yourself with those who make you feel loved and safe, and feed them. To me, this is one life’s best gifts.

Happy weekend!

fullsizeoutput_13b7

Lemon Poppy Seed Cake with Meyer Lemon Curd

Grain and gluten free, dairy free, refined sugar free, pretty much paleo. Lightly sweet and plenty tart, in the best way! Prepare to floss excessively – this is for those who love poppy seeds! Yield: 2 8” cake layers or one 10” cake. Serves 6-8 (or two, for two meals with leftovers ;) cake adapted from Food52, here; the lemon curd is one I’ve made a zillion times; you’ll find it elsewhere on the blog and it is my current reigning favorite.

fullsizeoutput_13b2

For the cake

  • 1 Meyer lemon
  • heaping 1/4 c maple sugar
  • 2 tbsp maple syrup
  • 1 tbsp vanilla extract
  • large pinch of salt
  • 5 eggs, separated
  • 1 Granny Smith apple, peeled & grated
  • 7 oz almond flour (~2c but weighing is better!)
  • 7 oz poppy seeds
  • 1.5 tsp baking powder

Heat oven to 350. Grease 2 8” cake pans (or one 10” pan) and line the bottoms with parchment paper.

Zest the lemon and place the zest along with the maple sugar in a large bowl. Rub the sugar and the zest together until the sugar is damp and fragrant. Separate the eggs and add the yolks to the bowl with the sugar and zest, and the whites to another large bowl. Beat the yolks with the zest and sugar until light in color and creamy. Juice the lemon and stir juice through the grated apple, then add to the bowl of yolks/sugar/zest along with maple syrup, vanilla, salt, almond flour, poppy seeds, and baking powder. Stir to combine – the batter will be thick. Wash the beaters thoroughly, and beat the egg whites until soft peaks form. Fold the egg whites into the rest of the batter, then pour it into the prepared pans.

Bake for 30 minutes (for 8” cakes; 40 minutes for a 10”), until the top is springy and golden brown. Let cool for a few minutes, then turn out onto cooling racks to cool completely.

Once cool, layer with lemon curd and store in the fridge until serving or serve immediately. Keeps well covered in the fridge for about 2-3 days.

For the Meyer lemon curd

  • 2 whole eggs
  • 2 egg yolks
  • 1/3 c Meyer lemon juice
  • zest of 4 Meyer lemons
  • pinch of sea salt
  • 2 tbsp maple syrup
  • 3.5 tbsp coconut oil
  • 1 tsp vanilla

I use a double boiler for this lemon curd, which definitely is a game changer. Highly recommended! Heat water in the bottom of the double boiler until it’s at a high simmer. In the top of the double boiler, whisk together eggs, egg yolks, lemon zest and juice, sea salt, and maple syrup. Add in the coconut oil one tbsp at a time, whisking continuously, not adding the next tbsp until the first is completely melted. Whisk in vanilla. Cook, stirring constantly, until the lemon curd thickens and will coat the back of a spoon (or your whisk leaves tracks) – usually around 5 to 8 minutes. It’s a noticeable change when it happens, so just watch the cooking magic! Remove from heat, strain to remove any solids (ie lemon zest) – I use a metal mesh strainer over my storage jar of choice – and store in a glass container in the fridge until ready for use. Keeps for a week in an airtight jar, and freezes well for later use.

fullsizeoutput_13d3

fullsizeoutput_13d7

Vegetables for dessert? Sure, why not.

fullsizeoutput_11a5

Happy 2018! I hope your new year got off to a good start – mine certainly did, absolutely no complaints over here!

fullsizeoutput_11a8

I’ve always been intrigued by the idea of using a squash other than pumpkin in a dessert.

fullsizeoutput_118f

Don’t be deceived by the cute little dumpling squash hanging out in these pictures – what really went in here is kabocha, one of these guys:

IMG_2199

I like the kabocha here – if you’ve never encountered one, they’re a bit of a cross between pumpkin and butternut squash. I really like it for the earthiness it brings here, which plays nicely against the apples. Side note: after some thought, we gave it mixed reviews – it feels a little vegetabley to be dessert – I almost wonder if it would work as a side dish. That being said, if you like not too sweet things / vegetables, go for it!

fullsizeoutput_117f

Besides, this is my absolute favorite crisp topping – it has a little extra protein from greek yogurt and almond flour, and is just so fun to eat. It stays crispy even after hanging out in the fridge overnight, which makes this excellent breakfast (see exhibit A).

fullsizeoutput_11ac

I also love it for dessert with ice cream (obviously) – the crisp ends up covered in melty ice cream, making it into slightly indulgent granola/muesli.

fullsizeoutput_11ad

fullsizeoutput_118e

In other news, I’ve been museuming and drawing again, which feels great. I let it lag a little too long I think!

fullsizeoutput_1168

IMG_2201

Of course coffee.

IMG_2198

Here’s hoping you’re enjoying the beginning of the new year! I have good feelings for this one. If you’re in the mood for a lightly sweet, perfectly healthy desserty-breakfast, I’ve got you covered! Happy baking :)

fullsizeoutput_1195

fullsizeoutput_11a9

Kabocha Squash and Apple Walnut Crisp

Gluten free, refined sugar free, and whole grain. Full of healthy fats AND fruits & veggies! Feel free to eat this as breakfast, I certainly did. Side note: we gave it mixed reviews – it feels a little vegetabley to be dessert – I almost wonder if it would work as a side dish. That being said, if you like not too sweet things / vegetables, go for it! Adapted from the Raz-Apple crisp I made around Thanksgiving, here. Yield: 1 2-quart baking dish (it’s about 8 by 8 and deep). Serves: 2 for dessert & then breakfast! Or… you know, a normal amount of people.

For the filling:

2-3 largish Granny Smith apples, cored and sliced into thin wedges*
1 small kabocha squash, peeled & cubed*
1/4 cup maple syrup
1/4 c port**
1 tablespoon lemon juice
2 teaspoons arrowroot starch
½ teaspoon ground cinnamon
¼ teaspoon ground allspice

*I just approximate as I slice; I use however many it takes to fill my 2 quart, 8×8 baking dish; for ease of cutting kabocha squash, I recommend slicing it in half, then in wedges and using a knife to carefully peel it. The peel is totally edible, but I didn’t want its texture in the crisp. You’ll still get an arm workout peeling these babies, believe me!

**the port is optional but amazing; if you don’t use it, use 1/4c water instead

For the crisp:

1 cup old-fashioned oats (use certified gluten-free oats for a gluten-free crisp)
½ cup firmly packed almond flour
½ cup chopped walnuts
1/4 c unsweetened shredded coconut
2 tbsp maple sugar
¼ teaspoon fine sea salt
2 tsp vanilla extract
4 tablespoons unsalted butter, melted
¼ cup plain whole milk Greek yogurt

Preheat the oven to 350.
In a veggie steamer (I use a metal steamer inside a pot), steam the kabocha squash for 10-15 minutes, until just barely fork tender.

Slice apples into a deep baking dish, and add steamed kabocha squash (my dish is 8×8, 2 qt capacity; 9″ square or 9″ deep pie dish would also be fine). In a liquid measuring cup, whisk together the maple and water/port until combined. Add the lemon juice, arrowroot, cinnamon and allspice, and whisk to combine. Pour the mixture over the squash and apples and toss to combine. Bake for 15 minutes.

While the filling is baking, make the crisp. In a mixing bowl, stir together the oats, almond meal, walnuts, shredded coconut, maple sugar and salt. Mix in the vanilla, melted butter and the yogurt. Stir until everything is mixed thoroughly.

Once the filling has baked for 15 minutes, stir to redistribute it evenly in the dish. Plop spoonfuls of the crisp topping evenly over the filling – no need to pack it down. Return the dish to the oven and bake for 25 to 30 more minutes, until the filling is bubbling around the edges and the top is golden.

Let the crisp rest at least 5 to 10 minutes before serving; or do like I did and make it earlier in the day, and have it later. Serve with vanilla ice cream, obviously! Keep leftovers, covered, in the fridge for about three days (yeah right. It would take some kind of major feat to make it last that long; ours was gone in just over 1!) Serve cold alongside breakfast because it’s extra awesome that way.

fullsizeoutput_11a5

Pears and cranberries: the perfect pair

IMG_1884

So normally, I would tell you that this makes great dessert but you should save some and eat it for breakfast, blah blah…

fullsizeoutput_e20

But really, this time, I’m going to throw that out the window and tell you to just straight up make this for breakfast. You really won’t be sorry – it’s mostly fruit anyway! Hiding under a whole grain, gluten free cream biscuit – what more do you want for breakfast?! I concede that we added eggs, kale, cholula & coffee, and it was a stellar combination, but you do you of course.

This is one of those homely-but-delicious desserts that doesn’t win any awards in the looks department but is undeniably amazing and should be made and loved immediately!

fullsizeoutput_e3c

I really love this for an autumn-winter breakfast-dessert: the cranberries and pears are a perfect pairing; the cornmeal cream biscuits are hands-down one of my favorite things on this planet (I am not alone in this, either); and the whole thing is just so seasonal!

fullsizeoutput_e24

I leave the skins on the pears, both because I enjoy when my fruit desserts have more texture & body, but also because fiber is good for you! The cranberries soften but still retain their shape and eating them is quite fun, since they pop when you bite them!

fullsizeoutput_e27

fullsizeoutput_e3a

Let’s see. Besides eating this for a stellar breakfast, other things of note lately…

Beautiful skies!

fullsizeoutput_e2d

The worst opera we’ve both ever seen, but in the best company with some awesome seats so it was worth it… as an excellent learning experience and unforgettable evening ;)

fullsizeoutput_e30

fullsizeoutput_e31

Can anyone else believe December starts tomorrow?! I can’t. Where did the fall months go?? Not that I’m particularly sorry, I do love festive holiday time and all the baking that goes along with it.

fullsizeoutput_e28

I highly recommend you throw the rule book out the window and make this for breakfast. I am behind you 100% on the wisdom of this action. Happy eating!

fullsizeoutput_e2b

fullsizeoutput_e29

Pear and Cranberry Cobbler with Cornmeal Cream Biscuits and Ginger

Gluten free, whole grain and refined sugar free! The fruit makes an amazing complement to the cornmeal cream biscuits, which are personally one of my absolute favorite things. Easy to make, the most time consuming bit of this is chopping up the pears. But you don’t even have to peel them, so that bit is even easier! Very lightly sweetened, this is perfect for those who love seasonal, fruity desserts. Adapted from both of my earlier cream biscuit cobblers, here & here.

For the filling:

4-7 Bartlett & Anjou pears (about 2 pounds), peeled, cored and sliced into small bite-sized pieces*
1 cup fresh cranberries
1/4 c maple
2 tbsp port
2 tablespoons arrowroot starch
juice of 1 lemon
1 tsp vanilla
½ teaspoon ground ginger
¼ teaspoon cinnamon

*I used about 6; shrinkage will happen to a point so don’t be afraid to use a little more than you would think

For the cobbler:

3/4 cup fine cornmeal
1/2 cup oat flour
1/3 cup brown rice flour, slightly heaping
1 tablespoons maple (or coconut) sugar
1 1/2 teaspoons baking powder
3/4 teaspoon kosher salt
1 tsp vanilla
1 1/2 cups heavy cream

Crystalized ginger, chopped; for topping – optional but delicious

Preheat the oven to 375°F. Grease a deep 9-inch square baking dish or deep 9-inch pie pan with butter (I prefer the deepness of the 9″ square – mine is a 2qt baker & it holds tons of fruit!). Cut up pears into large chunks and toss them into the buttered baking dish. Add cranberries and toss to combine. Whisk the maple, port, arrowroot, lemon juice, ginger, and cinnamon together, pour over the fruit, and toss to coat.

Combine cornmeal, oat flour, rice flour, sugar, baking powder, and salt in a medium bowl and whisk to combine. Pour in the cream and vanilla, stirring until just combined; the dough will be very wet. Scoop the dough into 8-ish blobs onto the fruit filling. Sprinkle with maple or coconut sugar if desired. Bake until the fruit bubbles and the juices thicken, and the topping is browned and cooked through, 45-55 minutes. Typically I test the biscuit done-ness by sticking a knife between two of them to see if the bottom is done – you’ll know if it isn’t, it will look raw. Stick it back in for about 10 minutes if you find that – mine is typically perfectly done at 55 minutes.

Serve with vanilla ice cream or more cream and chopped crystalized ginger; leftovers keep well, covered, in the fridge for a few days.

fullsizeoutput_e21

Breakfast disguised as dessert

IMG_1823

Ahh, the post-thanksgiving stupor….

IMG_1804

Just kidding! No such thing. First thing Friday morning was jazzercise, of course; I hate sitting still for too long. Thanksgiving itself was full of family and laughter & lots of croquet (ha!) – and of course, food. I was asked to bring the cornmeal apple & ginger cake that I made a few weeks ago; I made it with fresh ginger this time instead of crystallized, and I’m happy to report it’s amazing both ways.

IMG_1811

But for the days after Thanksgiving, a fruit-heavy, non-pie dessert was definitely required.

Perfect mornings look like this:

IMG_1807

Plus, I discovred a glut of late-season raspberries at the market a while back and pounced on them, knowing I’d want to pair them with apples strictly so I could go around saying RAZAPPLE! Ha.

IMG_1817

This crisp bakes up so well, you find yourselves eating bits of the crisp topping with your fingers.. not that we did that or anything…

It makes a stellar addition to breakfast alongside – what else? eggs and kale! – and I could argue that it’s even better the next day. We both liked that the apples retain their integrity – they don’t become a pile of mush, but they’re not crispy either – they’re somewhere in between & are absolutely delicious. This is one of my favorite things that I’ve made lately – simple, delicious, and seasonal. Happy baking!

IMG_1820

Raz-Apple Walnut Crisp

Gluten free & refined sugar free, with an easy dairy free/vegan option. Full of healthy fats and whole grains. Perfect for fall when there’s a glut of late summer berries at the market but apples are starting to be in season… for that matter, frozen raspberries work just fine too. Lightly sweet, tart and perfect for dessert and breakfast. Adapted from Cookie and Kate, here! Yield: 1 8×8 deep pan, serves 2 w/ leftovers for 1, haha…. kidding, only not really! Serves more like 6 normal humans.

  • For dairy free/vegan, sub coconut oil for the butter & non-dairy (coconut would be good!) yogurt for the dairy yogurt; bake as directed

For the filling:

5 largish (or 7 small) Granny Smith apples, cored and sliced into thin wedges*
2 c raspberries (frozen is fine)
scant ⅓ cup maple syrup
1/8 c port**
1 tablespoon lemon juice
2 teaspoons arrowroot starch
½ teaspoon ground cinnamon
¼ teaspoon ground allspice

*I just approximate as I slice; I use however many it takes to fill my 2 quart, 8×8 baking dish

**the port is optional but amazing; if you don’t use it, use 1/8c water instead

For the crisp:

1 cup old-fashioned oats (use certified gluten-free oats for a gluten-free crisp)
½ cup firmly packed almond flour
½ cup chopped walnuts
1/4 c unsweetened shredded coconut
1/4 c maple sugar
¼ teaspoon fine sea salt
2 tsp vanilla extract
4 tablespoons unsalted butter, melted
¼ cup plain whole milk Greek yogurt

Preheat the oven to 350.
Slice apples into a deep baking dish, and add raspberries (my dish is 8×8, 2 qt capacity; 9″ square or 9″ deep pie dish would also be fine). In a liquid measuring cup, whisk together the maple and water/port until combined. Add the lemon juice, arrowroot, cinnamon and allspice, and whisk to combine. Pour the mixture over the apples and toss to combine. Bake for 20 minutes.

While the filling is baking, make the crisp. In a mixing bowl, stir together the oats, almond meal, walnuts, shredded coconut, maple sugar and salt. Mix in the vanilla, melted butter and the yogurt. Stir until everything is mixed thoroughly.

Once the filling has baked for 20 minutes, stir it to redistribute evenly in the dish. Plop spoonfuls of the crisp topping evenly over the filling – no need to pack it down. Return the dish to the oven and bake for 25 to 30 more minutes, until the filling is bubbling around the edges and the top is golden.

Let the crisp rest at least 5 to 10 minutes before serving; or do like I did and make it earlier in the day, and have it later. Serve with vanilla ice cream, obviously! Keep leftovers, covered, in the fridge for about five days (yeah right. It would take some kind of major feat to make it last that long; ours was gone in 2 days!) Serve cold alongside breakfast because it’s extra awesome that way.

IMG_1819

Appropriately autumnal baking

IMG_1677

There is something so soothing about early morning baking. I don’t necessarily choose to bake at 6:30a, but when a workout and work have to happen before I can deliver & eat dessert, baking by necessity becomes an early morning activity. That being said, though, it’s a very meditative way to spend a morning, especially when it’s still dark outside.

IMG_3170

Of course, then of course there’s that moment when you go to put socks on and somehow find some crystallized ginger stuck to your foot… um… no comment.

IMG_1654

It also gives me a great sense of productivity to know I’ve created something before I even leave the house that day – and then add a workout and a highly productive work day and by 6p I feel extraordinary accomplished.

IMG_1656

IMG_3171

And THEN I get to eat cake! Ha. Win win, all around. Besides, coming back into my apartment after work, I’m greeted with a waft of OMG THIS CAKE SMELLS AMAZING – always a good sign.

IMG_3168

IMG_1663

This cake was well loved by both of us – it is definitely going on the to-make-again list – and I have high standards for that list! The cornmeal/polenta give it great texture – it’s a cross somewhere between cake and cornbread, in the best way possible. It’s amazing with ice cream for dessert, and equally so alongside eggs and kale for breakfast – see exhibit A below.

IMG_3173

Besides that, just in case you needed proof as to how loved this cake was, see exhibit B:

IMG_3177

No crumbs. One (large) slice left – that is after a stint of very productive yard work & leaf raking – that cake had NO chance.

IMG_1656

I can’t believe it’s already November. What happened to October?! Happy autumn!

IMG_1653

Apple Ginger Polenta Cake

Gluten free, refined sugar free, and dairy free. Lightly sweet, sort of like a cross between cake and cornbread – perfect for dessert (served with ice cream!) and breakfast alongside eggs and leafy green things. Yield: 1 8″ cake, serves… um… 2! Ha.

1 c almond meal
2/3 c yellow corn meal (I used medium grind)
1/3 c rice flour
2 tsp baking powder
Heaping 1/4 tsp sea salt
1/4 c extra virgin olive oil
2 eggs
1/6 c maple sugar
1/6 maple syrup
2 tsp vanilla
2 Granny Smith apples
1/3 c crystallized ginger chunks, chopped*

*I have also made this with fresh ginger and it’s equally amazing; finely mince peeled, fresh ginger root and add to the batter. The quantity is up to you – I love ginger, so I used a knob probably about 1.5″ long

Preheat the oven to 350, and line an 8″ cake pan with parchment paper, or do like I did and use strips of parchment paper for easy removal. Be sure to grease the pan first though to prevent any stickage.

In a large bowl, whisk the eggs with the maple sugar and maple syrup until soft and fluffy. Add in olive oil and vanilla. In a smaller bowl, whisk together almond flour, polenta, rice flour, and baking powder. Stir dry into wet. Cut one and a half apples into cubes and thinly slice remaining half. Add the apple cubes and chopped ginger and stir until just combined. Pour the cake batter into the prepared pan, and smooth it out a bit.

Arrange a few apple slices on top of the cake, sprinkle with a bit of maple (or coconut) sugar. Bake at 350F for 40 minutes. Check the cake after 35 minutes; mine was perfect at 40. If the top of the cake is browning too quickly during baking, you can always tent it with a sheet of tinfoil.

I stuck mine in the fridge for a few hours of storage, which didn’t hurt it at all. It keeps well on the counter overnight (covered with foil), and makes a ridiculously amazing addition to breakfast the next day!

IMG_1631

IMG_1632
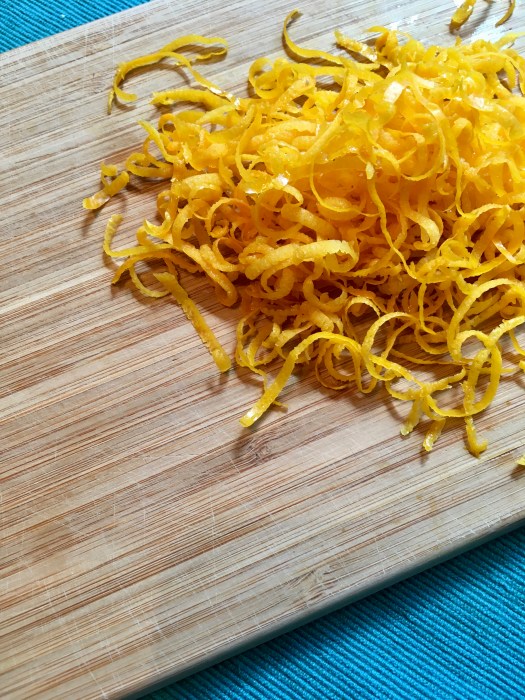
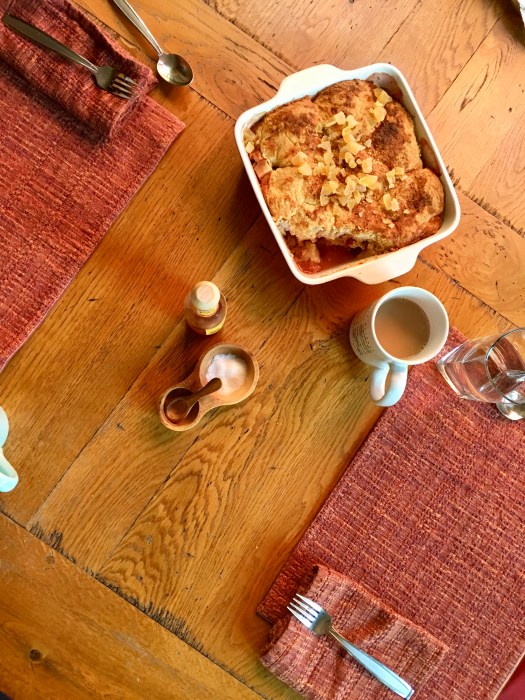
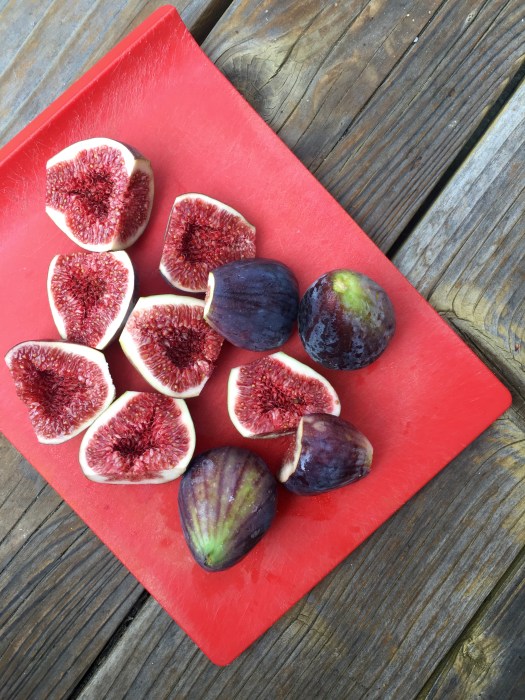
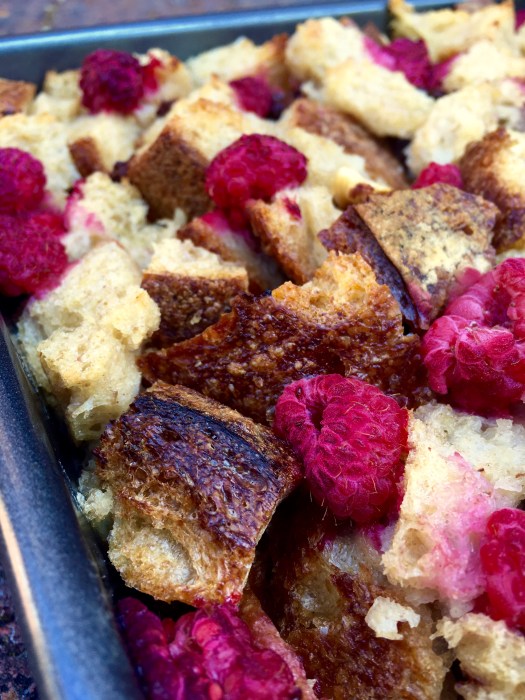
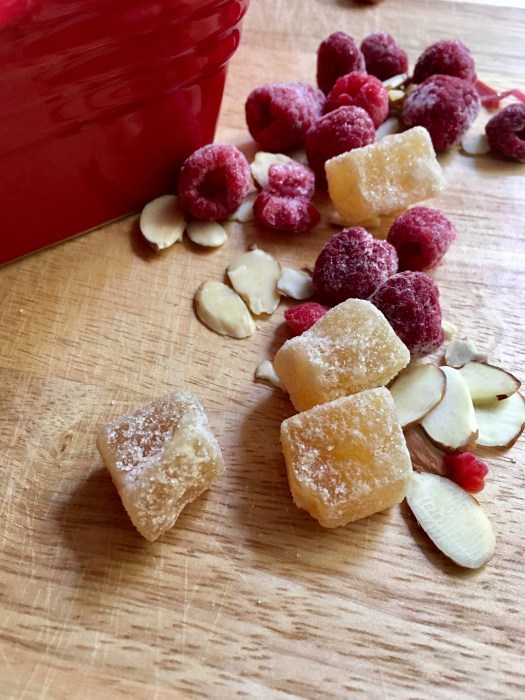
Early morning mis en place…

IMG_1637

Let’s roooollllllll

img_5165

This is how I roooolllllllllll.

img_5158

Or something like that! I roll with rolls for dessert and for breakfast, because I am all about the treats that do double duty. These are appropriately autumnal with pumpkin and warming spices and such, and glazed pecans just sort of scream HOLIDAY TIME!!!! to me. Do you hear that, or is it just me? … don’t answer that.

Anyway, moving on. Cinnamon rolls! A winner all around, especially when there is some kind of glaze or frosting involved (which is absolutely necessary…there is no question).

img_5160

These happen to be paleo, grain free, gluten free, dairy free, and refined sugar free (everything EXCEPT taste free), so if that’s how you roll (ha. pun intended), these are for you!

Let’s see, what else is new…

More drawing!

img_5125

More photography fun:

img_5130

img_5134

Succulents! Why not.

img_5120

I don’t have much anecdotal humor for you today, so you’ll just have to content yourself with some cinnamon rolls. I highly recommend making them to be eaten for dessert… and then for breakfast! You won’t be sorry, promise.

img_5159

Grain Free Pumpkin Cinnamon Rolls with Maple Coconut Glaze and Maple Pecans

These aren’t overwhelmingly pumpkin-y, more towards the cinnamon side, but are delicious regardless. Grain free, paleo, refined sugar free, and dairy free. Roll dough adapted from Eat Something Delicious, here! Yield: 1 8″ skillet-worth of rolls; I got about 8 large rolls.

img_5157

For the dough:

  • 2 c tapioca starch
  • 1 c almond flour
  • 1.5 tsp baking powder
  • 1/2 tsp fine sea salt
  • 3 eggs*
  • 2 tbsp coconut milk*
  • 1 tsp vanilla extract
  • 1 tbsp coconut sugar

*the eggs I used were small, so I needed a few tbsp of coconut milk to bring it together — you may not need this if your eggs are larger

For the filling (This makes extra; use it to top the rolls or eat separately!)

  • 1/2 c pumpkin puree
  • 1 tbsp maple syrup
  • 1/6 c coconut sugar
  • 2 tsp vanilla extract
  • 2 tsp cinnamon
  • 1/8 tsp nutmeg
  • 1/8 tsp allspice
  • 1 heaping tbsp almond butter

For the glaze:

  • 1/4 c coconut butter, melted
  • 2 tbsp maple syrup
  • 1 runneth-over tsp vanilla
  • pinch of sea salt

For the pecans (these are great to make ahead and store for when you need them):

  • 1 c pecans, roughly chopped
  • 1/4 c maple syrup
  • pinch of sea salt

If making the pecans ahead, do that now!

Heat a large sauce pan over medium heat. Once hot, add maple — it will foam a bit when it hits the pan. Add in pecans and sea salt, stirring to combine. Keep stirring and cooking for about 3-5 more minutes, until the maple has caramelized. Line a baking sheet with parchment for easy clean up and pour the pecans out, breaking up any large chunks. Let cool completely before storing in an airtight jar.

Preheat the oven to 350, and grease an 8″ cast iron skillet, or other pan of choice. I sprinkled the bottom with a little extra coconut sugar, just for fun.

For the dough: stir together tapioca starch, almond flour, baking powder, salt, and coconut sugar. Make a well in the center and add the eggs and vanilla. Use a fork to combine until you get lots of little pieces, then get in there with your hands and knead until the dough comes together (add coconut milk here if needed; by the tsp and just until the dough comes together to avoid sticky dough). The dough should come together nicely and be stiff enough to roll out; if it’s too sticky, add a bit more starch. Flour a clean work surface and a rolling pin (or do like I did and roll out between parchment paper), and roll the dough out into a rectangle, about 1/4″ thick.

In a small bowl, make the filling: stir together pumpkin, maple, coconut sugar, vanilla, cinnamon, nutmeg, allspice, and almond butter until smooth. Spread the filling onto the rolled out dough, leaving about a 1/2″ clear on the edge furthest from you (there will be leftover filling!). Roll up the dough starting on the long side (I always try to cram as much filling in there as possible and end up with it going everywhere, so you do you!). Once the log is rolled up neatly-ish, slice it into rolls. I like to start in the middle and slice outwards to get the most even slices. Place the rolls into the skillet, so that their sides are just touching. Bake for 20-30 minutes — sorry for the range; mine stayed in much closer to 30 so that the centers of the rolls that were touching would be done all the way through — the rolls should be firm to the touch and not goopy in the spaces between them.

Remove from the oven and let cool. Make the glaze while the rolls are cooling: stir together warmed/melted coconut butter (it’s solid at room temp), maple, vanilla, and sea salt together until smooth. Alternatively, store it in a jar and dance around to mix it up. It’s way more fun, I guarantee.

If you want a true glaze and less of a frosting, pour the melted coconut butter mix over the rolls and eat immediately. Let cool to room temp or overnight if you’d rather have a consistency closer to frosting. Either is delicious!

Before serving, drizzle glaze over the rolls and top with a few pecans for decorative shenanigans. Serve with more glaze, more pecans, and vanilla ice cream because you’d be missing out otherwise, and we can’t have that!

Leftovers keep well covered on the counter overnight; in the fridge for longer storage.

img_5162

Fig season is upon us!

img_4910

It’s fig season!!! Another reason to love fall, as if I didn’t have enough already.

img_4888

As much as I start missing the fresh summer berries, it’s so refreshing when the seasons start changing (ish. Emphasis on ish. It’s been in the upper 90s over here for the last few days…um okay I get it! We’re making up for lost time?! But seriously, enough). Figs are so fun with their little tiny seeds. I used to not be such a fig fan, but they’ve won their way into my heart. Especially when they hang out with goat cheese and hazelnuts and honey. But really, I’ll eat them in any form.

fullsizerender-2

Especially when rice pudding is involved… I never ever say no to rice pudding. EVER.

img_4914

This version is baked into a cake/tart type thing, and is sliceable and delicious and fantastic for breakfast as well as dessert. I could wax rhapsodic about this dessert but you really should just make one and thank me later. It’s delicious! It doesn’t use much sweetener either, which is a giant plus in my book and also makes it doubly acceptable for breakfast (also it’s excellent with coconut gelato… just looking out for you!)

fullsizerender-4

fullsizerender-6

Handily enough, it also comes together quickly and doesn’t require any wildly unusual pantry ingredients.

img_4913

I’m reminded of the Italian cake Torta di Riso (I did one years ago and it’s somewhere on the blog… I used blood oranges for that one) — basically a rice custard that is baked into a sliceable cake. This one is a little denser than the Italian version (definitely NOT a bad thing), and is infinitely adaptable to whatever fruit is in season (though I highly recommend figs).

img_4912

I’ve also had some time to draw again lately, which I love. Baking + drawing = happy days.

img_4871

img_4885

Enjoy fig season in all its glory and bask in some rice pudding. Happy Equinox!

fullsizerender-7

Baked Coconut Rice Pudding Cake with Honeyed Figs

Gluten free, dairy free, and refined sugar free! Densely textured, lightly sweet cake perfect for dessert and breakfast. If you love rice pudding, this cake is for you. Yield: 1 9″ pie pan (mine is the deep variety, about 2″ deep). Recipe lightly adapted from A Fork and a Pencil, here!

  • 1 c arborio rice, rinsed
  • 1 c water
  • 1 1/3 c light coconut milk, divided (should be exactly one standard 13.5 fl oz can)
  • 4 eggs
  • 1.5 tsp vanilla extract
  • 1/4 tsp sea salt
  • 4 tbsp pure maple syrup
  • 2.5 tbsp coconut sugar
  • figs to your heart’s content (I used 4), halved
  • enough small dollops of honey to drop into each fig half

In a saucepan, combine rice, water, and 2/3 c coconut milk. Heat over medium-high, stirring occasionally, until it just barely boils. Cover, Reduce heat to low and simmer until the rice has absorbed the liquid, no more than 10 minutes. Once rice is cooked (it should still have some chewy bite to it) and the liquid is absorbed, remove from heat and let cool briefly while assembling everything else.

Lightly grease your pie plate with coconut oil and preheat the oven to 350.

In a large bowl, whisk the eggs together, add vanilla, sea salt, maple, and coconut sugar. Pour the cooked and cooled rice into this bowl, and stir to combine. Pour the whole thing into the prepared pie dish (don’t freak if there’s some leftover liquid on the top of the dish, it will be fine! Promise). Halve the figs and press them into the rice, dropping small dollops of honey into the center of each fig half.

Bake for 50 minutes to an hour, until the top is firm when touched and the surface is golden brown. Mine came out perfectly at an hour. Let cool for a bit before slicing. I like it cold, so I refrigerated mine for a few hours before eating, but that’s your call! Store any leftovers covered in the fridge (foil over the pie plate works just fine). Enjoy for dessert with your fave ice cream or gelato (coconut is marvelous) or for breakfast alongside your eggs and kale!

fullsizerender-5

Some desserts are actually breakfast in disguise

fullsizerender-10

It’s September, my favorite month ever! I love fall. So even though the days start getting shorter again and that’s kind of a bummer, I do love the lead up to fall…. and boots! and scarves! and apples! and pumpkin!

But… before we get there! It’s still arguably berry season, and I see no reason to end that prematurely unless I have to (which I don’t!). Which means… raspberries! Which pair oh so well with hazelnuts and dark chocolate. And then…

BREAD.

img_4848

Because, sometimes you just need some bread pudding. Besides that, I am spoiled to live near Acme Baking, which makes some of the best bread around: all the more reason to get on the bread pudding train. Furthermore, bread pudding is one of those glorious things that only gets better and better the longer it sits, which means breakfast this morning was FANTASTIC. Eggs & cholula + kale + bread pudding? Sign me up. Oh. And obviously caramel. Because bread pudding should ALWAYS have a sauce, no matter if you eat it with ice cream anyway (also recommended; talenti coconut gelato was a spot-on choice). Enter the five second blender caramel with heavy hazelnut overtones… and so full of good things it’s practically a health food. Don’t get me started ;)

fullsizerender-7

Apologies for the lack of pictures; bread pudding isn’t the most photogenic of all the desserts and also it pretty much got annihilated before I could get in there with a camera for some in situ shots of plated dessert… Sorry not sorry.

Happy September, enjoy the beautiful days of Indian summer!

img_4851

Hazelnut, Dark Chocolate & Raspberry Bread Pudding with Hazelnut Caramel

This is neither gluten free, vegan, or paleo. Sorry not sorry! Sometimes, you just need some bread. It is, however, dairy free and refined sugar free. It is also extremely easy to throw together, using whatever you have on hand. Yield: one 9 by 9 pan. Like many things I’ve made lately, this does double duty as breakfast and is even better the next day, so the serving sizes are contingent on how hungry you happen to be… A Wait are those Cookies original!

Bread Pudding:

  • 1 loaf of (stale!*) bread, cubed (I used Acme Pain au Levain)
  • 5 eggs
  • 1 c coconut milk (mine happened to be light; use whatever you like)
  • 1/2 c pure maple syrup
  • 1 runneth-over shot of Fra Angelico
  • 2 tsp vanilla extract
  • 1 tsp sea salt
  • 1/3 c roasted hazelnuts, roughly chopped
  • 1/3 c extra dark chocolate chips
  • 1 c fresh raspberries (frozen is fine; thaw and drain first!)

Caramel:

  • 1/3 c roasted unsalted almond butter
  • 1/3 c maple syrup
  • 1/4 c coconut oil, melted
  • 2 tsp vanilla
  • 3 tbsp Fra Angelico
  • scant 1/4 tsp sea salt

* You can either cube it ahead of time and let it sit out, like I did, or slice and toast in the oven to stale it day of, if you’re short on time

You can make the caramel ahead of time, or while the pudding is baking (it comes together in about five seconds):

In a vitamix or a food processor, blend almond butter, maple, melted coconut oil, vanilla, Fra Anglico, and sea salt until smooth and incorporated. Adjust taste to suit your preferences!

Butter or use coconut oil to grease a 9 by 9 pan. Sprinkle coconut sugar over the inside of the pan if desired; this gives the bottom a little somethin’ extra…

Put the cubed bread into a large bowl. In a slightly smaller bowl, whisk together eggs, coconut milk, maple, Fra Angelica, vanilla, and sea salt. Pour this goodness over the bread cubes, using your hands to evenly distribute everything. Toss in hazelnuts, chocolate chips, and raspberries (reserve a few raspberries for topping if you’re feeling fancy). Let this sit for about a half hour so the bread can absorb the custard.

Preheat the oven to 350, and once the custard and bread have sat for a bit, bake for 30-40 minutes, until there is no visible liquid at the bottom when you separate it with a fork (you don’t want it dry though, so just look for pooling liquid). Mine was perfect at 40 minutes. Let cool completely, then refrigerate if you’re like me and like cold bread pudding! Or serve warm, it’s awesome either way. Store leftovers in the fridge and eat them for breakfast — highly recommended.

img_4849